microsoft dynamics crm - create a lead - … microsoft dynamics crm - create a lead functional area:...
TRANSCRIPT

Title: Microsoft Dynamics CRM - Create a LeadFunctional Area: Sales and Distribution
Sub Area:
Last changed on: 11/05/15 10:13 AM Version: ReleaseFile Name: Microsoft Dynamics CRM - Create a Lead-BPP.docx Last changed by: Mike Graham
Page: 1 of 13
Microsoft Dynamics CRM - Create a Lead
Trigger
Business Process Procedure OverviewHow to set up a lead in the Sales workspace of Microsoft Dynamics CRM.
1. Provide additional context to enhance the learner's experience
Tip: This is an example of one of the notes available in the “Insert Notes” feature. Epilogue has a library of notes that can be inserted with a click. Additional note templates can easily be created and added to the library at these are simply Microsoft Word DOT templates.
2. Simply use the Import Steps feature
Information: Here’s another example from the notes library. You can always insert hyperlinks, using MS Word’s native Hyperlink feature, if it’s relevant to reference another document (of any type) or URL. Additionally, using the “Link Step” feature of Epilogue Author, you can also create a link to another step in this document if it makes sense to jump to that step. If it’s a conditional (if/then) situation, then the IF/THEN note type in the notes library is best used. Look below for an example of that.

Title: Microsoft Dynamics CRM - Create a LeadFunctional Area: Sales and Distribution
Sub Area:
Last changed on: 11/05/15 10:13 AM Version: ReleaseFile Name: Microsoft Dynamics CRM - Create a Lead-BPP.docx Last changed by: Mike Graham
Page: 2 of 13
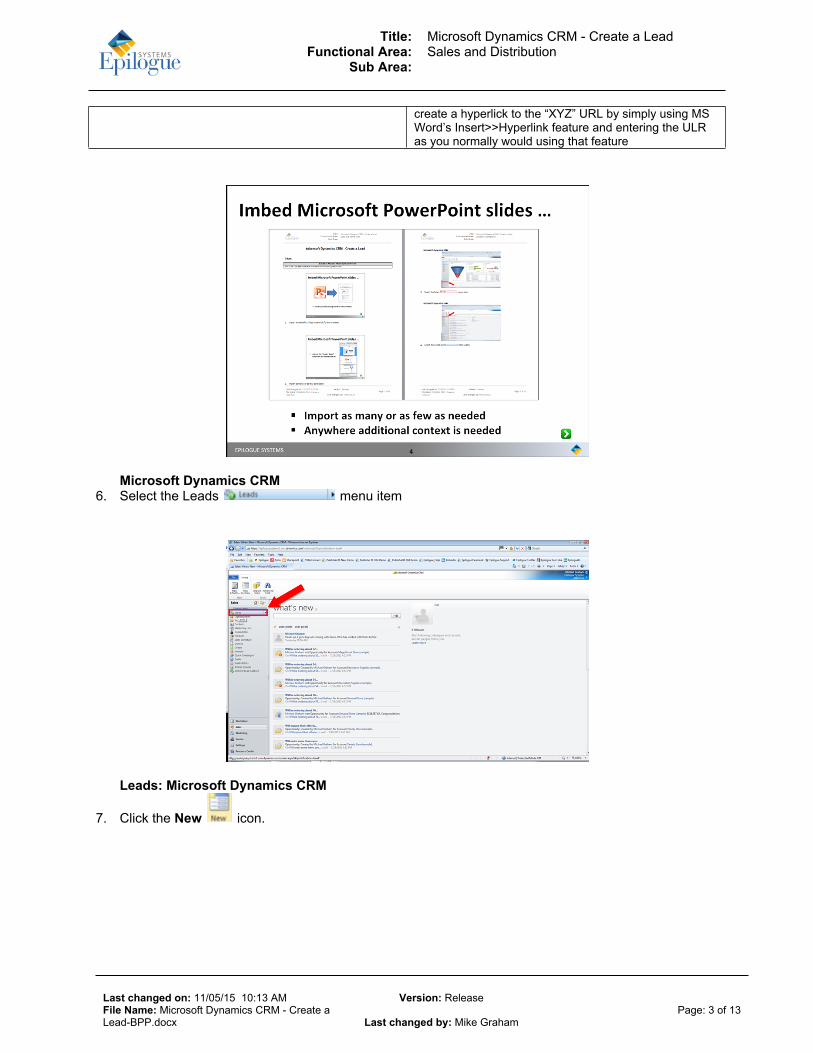
3. Simple use the Import Steps feature of Epilogue Author.
4. You control which slides you bring in and where you place them.
5. Select one of the following options:If Then
Here’s an example of an IF/THEN note, it’s used for conditional situations involved in a transaction or process that leads to different routes through the documentation or to other documentation, for example:If “condition A” exists Proceed to Step 10If “condition B” exists Refer to instructions contained in “Document X” (you
create a hyperlick to “Document X” by simply using MS Word’s Insert>>Hyperlink feature and selecting the location of the document and then the document as you normally would using that feature)
If “condition C” exists Go to the “XYZ” URL and complete the “ABC” form (you
Title: Microsoft Dynamics CRM - Create a LeadFunctional Area: Sales and Distribution
Sub Area:
Last changed on: 11/05/15 10:13 AM Version: ReleaseFile Name: Microsoft Dynamics CRM - Create a Lead-BPP.docx Last changed by: Mike Graham
Page: 3 of 13
create a hyperlick to the “XYZ” URL by simply using MS Word’s Insert>>Hyperlink feature and entering the ULR as you normally would using that feature
Microsoft Dynamics CRM6. Select the Leads menu item
Leads: Microsoft Dynamics CRM
7. Click the New icon.

Title: Microsoft Dynamics CRM - Create a LeadFunctional Area: Sales and Distribution
Sub Area:
Last changed on: 11/05/15 10:13 AM Version: ReleaseFile Name: Microsoft Dynamics CRM - Create a Lead-BPP.docx Last changed by: Mike Graham
Page: 4 of 13
Lead: New - Microsoft Dynamics CRM8. Complete the following fields:
Field Name Description ValuesTopic Enter value in Topic.
Example: A brief description of the lead
Salutation Enter value in Salutation.Example: the salutation for your primary contact
Last Name Enter value in Last Name.Example: your primary contact’s name
Job Title Enter value in Job Title.Example: your primary contact’s title

Title: Microsoft Dynamics CRM - Create a LeadFunctional Area: Sales and Distribution
Sub Area:
Last changed on: 11/05/15 10:13 AM Version: ReleaseFile Name: Microsoft Dynamics CRM - Create a Lead-BPP.docx Last changed by: Mike Graham
Page: 5 of 13
Lead: New - Microsoft Dynamics CRM9. Click the Industry dropdown.
Lead: New - Microsoft Dynamics CRM10. Select Transportation in the list box.

Title: Microsoft Dynamics CRM - Create a LeadFunctional Area: Sales and Distribution
Sub Area:
Last changed on: 11/05/15 10:13 AM Version: ReleaseFile Name: Microsoft Dynamics CRM - Create a Lead-BPP.docx Last changed by: Mike Graham
Page: 6 of 13
Lead: New - Microsoft Dynamics CRM11. Click on the Currency lookup

Title: Microsoft Dynamics CRM - Create a LeadFunctional Area: Sales and Distribution
Sub Area:
Last changed on: 11/05/15 10:13 AM Version: ReleaseFile Name: Microsoft Dynamics CRM - Create a Lead-BPP.docx Last changed by: Mike Graham
Page: 7 of 13
Look Up Record12. Complete the following fields:
Field Name Description ValuesSearch: Enter value in Search:.
Example: pounds
13. Click the Search button.
14. Click the Create a new record button.
Currency: New - Microsoft Dynamics CRM15. Click on the Currency Code field to search for the
currency

Title: Microsoft Dynamics CRM - Create a LeadFunctional Area: Sales and Distribution
Sub Area:
Last changed on: 11/05/15 10:13 AM Version: ReleaseFile Name: Microsoft Dynamics CRM - Create a Lead-BPP.docx Last changed by: Mike Graham
Page: 8 of 13
Look Up Record -- Webpage Dialog16. Click the United Kingdom checkbox.
17. Click the OK button.
Currency: New - Microsoft Dynamics CRM18. Complete the following fields:

Title: Microsoft Dynamics CRM - Create a LeadFunctional Area: Sales and Distribution
Sub Area:
Last changed on: 11/05/15 10:13 AM Version: ReleaseFile Name: Microsoft Dynamics CRM - Create a Lead-BPP.docx Last changed by: Mike Graham
Page: 9 of 13
Field Name Description ValuesCurrency Translation Enter value in Currency
Translation.Example: the appropriate translation factor
19. Click the Save and Close button.
Look Up Record -- Webpage Dialog
20. Click the OK button.

Title: Microsoft Dynamics CRM - Create a LeadFunctional Area: Sales and Distribution
Sub Area:
Last changed on: 11/05/15 10:13 AM Version: ReleaseFile Name: Microsoft Dynamics CRM - Create a Lead-BPP.docx Last changed by: Mike Graham
Page: 10 of 13
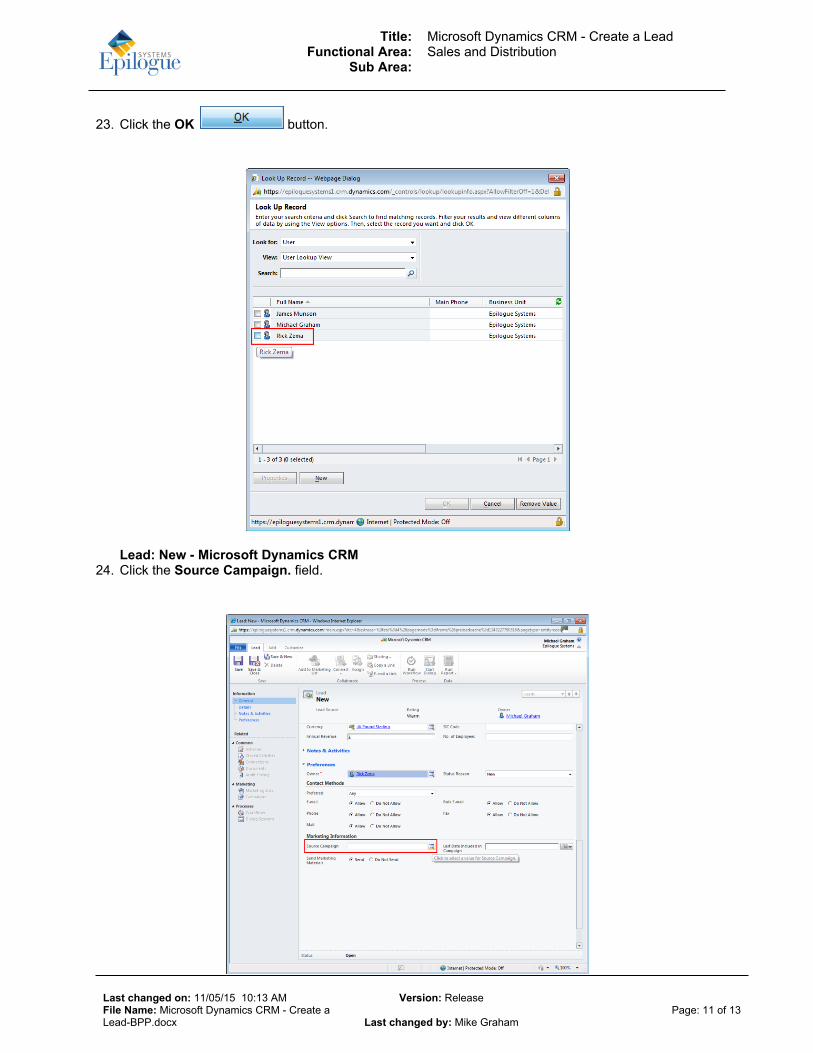
Lead: New - Microsoft Dynamics CRM21. Click on the Owner field to select the Lead Owner
Look Up Record -- Webpage Dialog22. Select the appropriate person's checkbox.
Title: Microsoft Dynamics CRM - Create a LeadFunctional Area: Sales and Distribution
Sub Area:
Last changed on: 11/05/15 10:13 AM Version: ReleaseFile Name: Microsoft Dynamics CRM - Create a Lead-BPP.docx Last changed by: Mike Graham
Page: 11 of 13
23. Click the OK button.
Lead: New - Microsoft Dynamics CRM24. Click the Source Campaign. field.
Title: Microsoft Dynamics CRM - Create a LeadFunctional Area: Sales and Distribution
Sub Area:
Last changed on: 11/05/15 10:13 AM Version: ReleaseFile Name: Microsoft Dynamics CRM - Create a Lead-BPP.docx Last changed by: Mike Graham
Page: 12 of 13
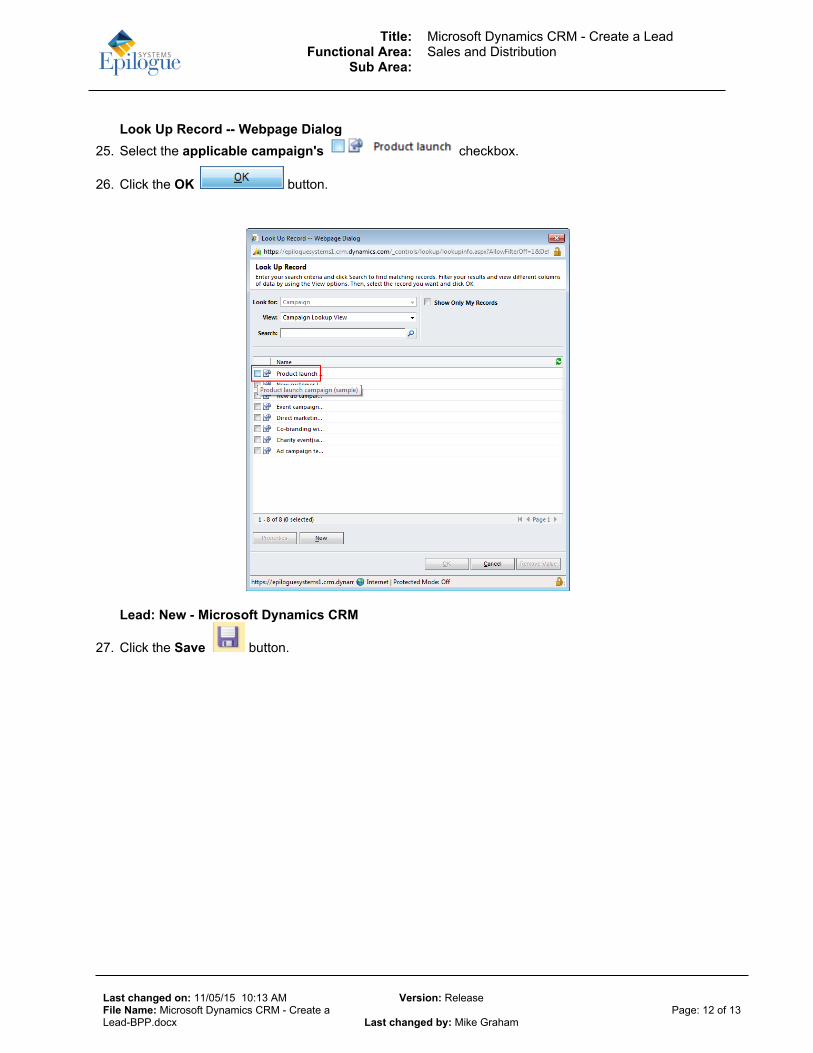
Look Up Record -- Webpage Dialog25. Select the applicable campaign's checkbox.
26. Click the OK button.
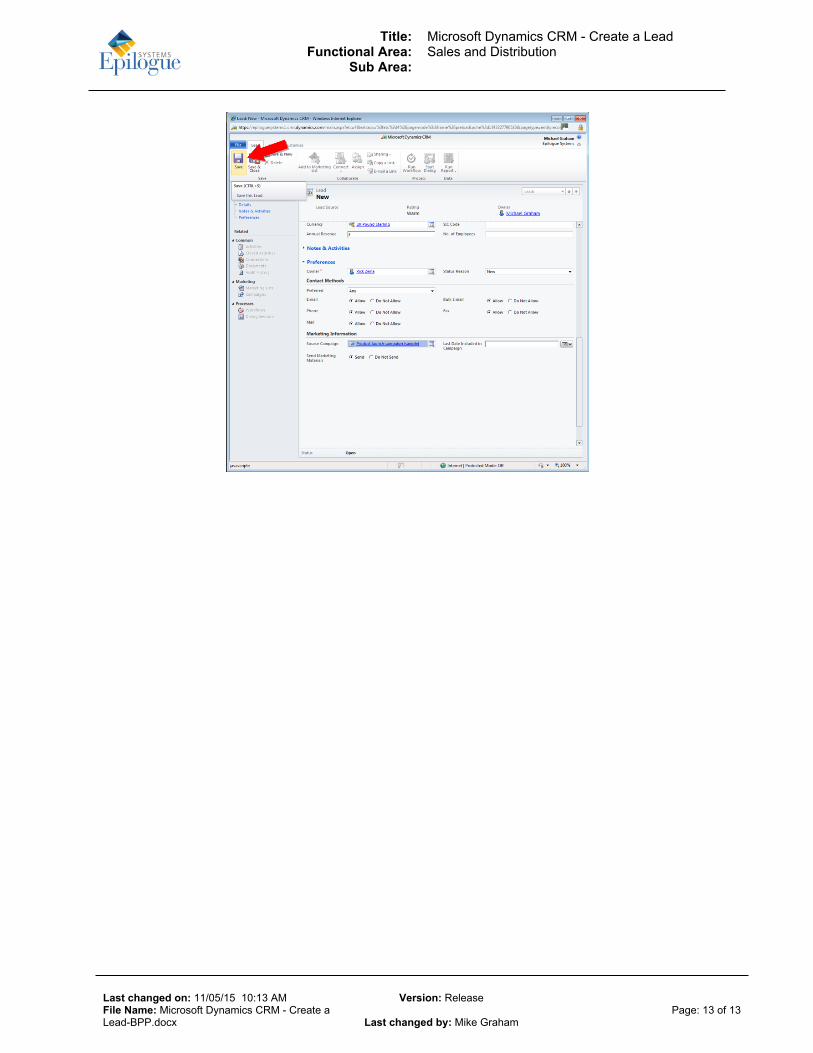
Lead: New - Microsoft Dynamics CRM
27. Click the Save button.
Title: Microsoft Dynamics CRM - Create a LeadFunctional Area: Sales and Distribution
Sub Area:
Last changed on: 11/05/15 10:13 AM Version: ReleaseFile Name: Microsoft Dynamics CRM - Create a Lead-BPP.docx Last changed by: Mike Graham
Page: 13 of 13