metering and exposure. basic exposure an exposure at its most basic level is a combination of your...
TRANSCRIPT
Metering and Exposure
Basic Exposure
• An exposure at its most basic level is a combination of your shutter speed and aperture.
• An example of an exposure is 1/125 @ f11• This means the shutter speed is 1/125th of a
second and your aperture is f11. When combined they make an exposure.
Shutter Speed
Standard shutter speeds:• 1/2• 1/4 • 1/8• 1/15• 1/30• 1/60 – This is the slowest shutter speed you shoot handheld. Any exposure
that requires a longer shutter speed than this should be shot on a tripod.• 1/125• 1/250• 1/500• 1/1000

Shutter Speed
• The shutter speed controls how you photograph motion.
• There are 4 ways to use shutter speed:1. Stop motion2. Subject motion blur3. Panning4. Static
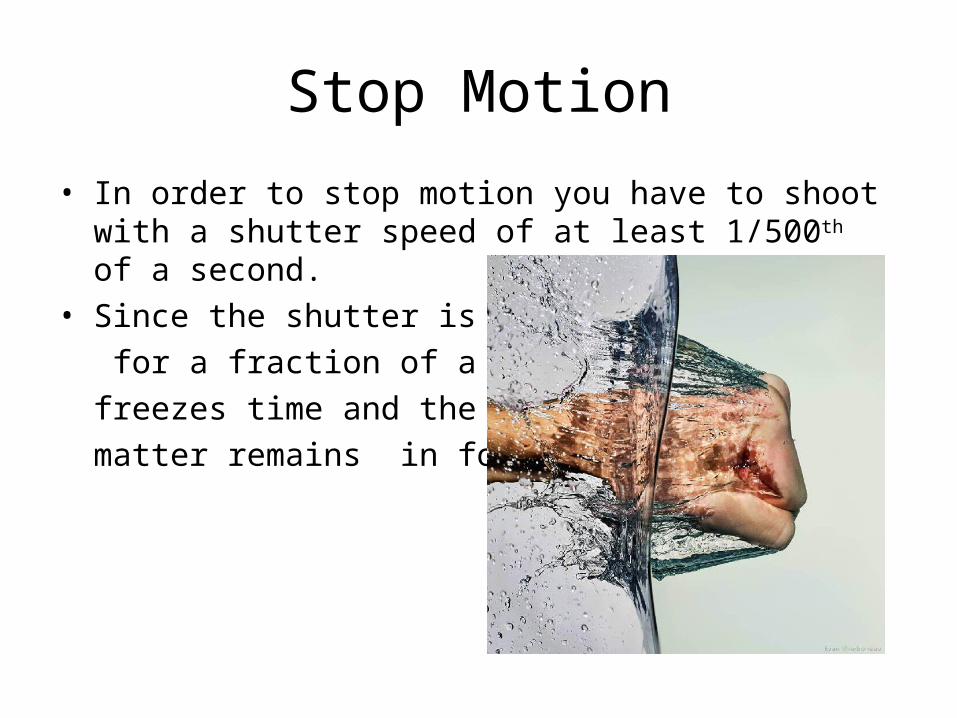
Stop Motion
• In order to stop motion you have to shoot with a shutter speed of at least 1/500th of a second.
• Since the shutter is only open for a fraction of a second, it freezes time and the subject matter remains in focus.
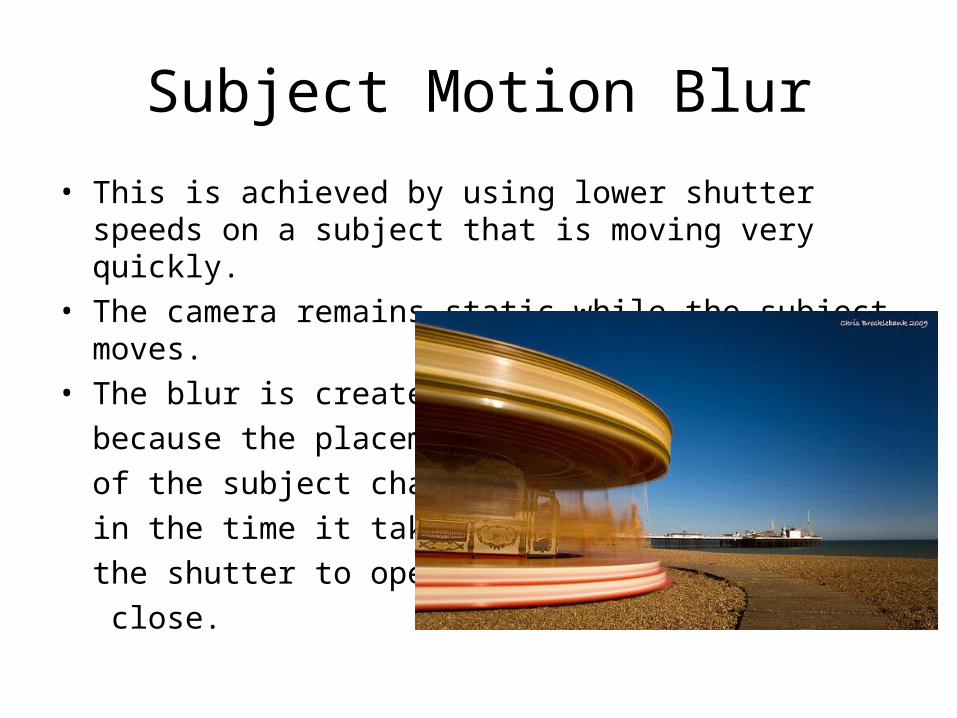
Subject Motion Blur
• This is achieved by using lower shutter speeds on a subject that is moving very quickly.
• The camera remains static while the subject moves. • The blur is created
because the placement of the subject changes in the time it takes for the shutter to open and close.
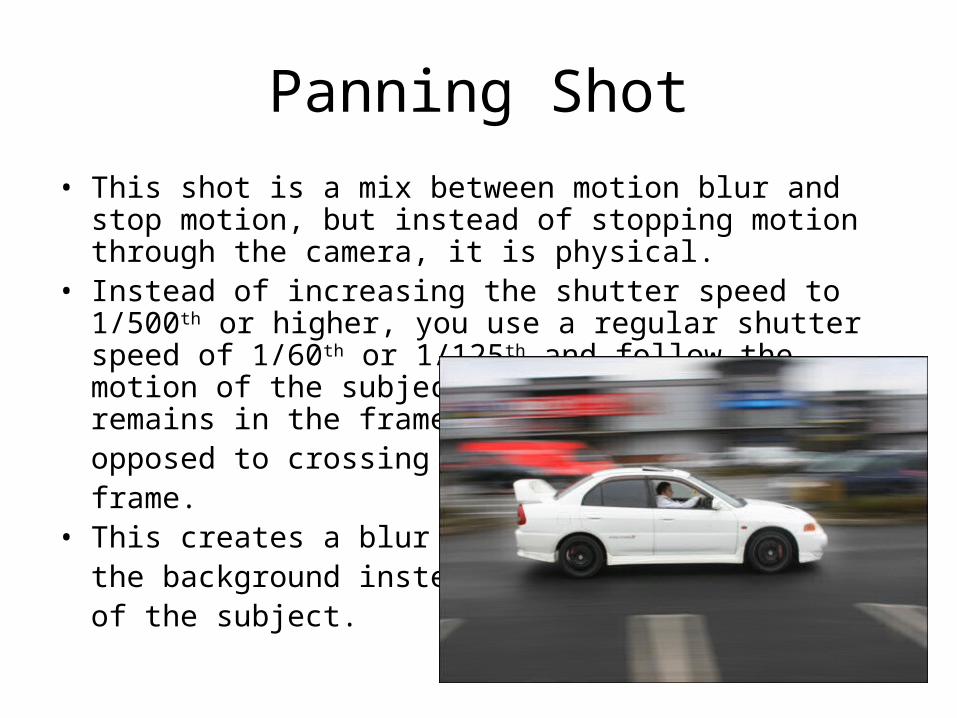
Panning Shot• This shot is a mix between motion blur and stop motion, but
instead of stopping motion through the camera, it is physical.• Instead of increasing the shutter speed to 1/500th or higher,
you use a regular shutter speed of 1/60th or 1/125th and follow the motion of the subject with your camera so it remains in the frame as opposed to crossing the frame.
• This creates a blur on the background insteadof the subject.
Static Shot
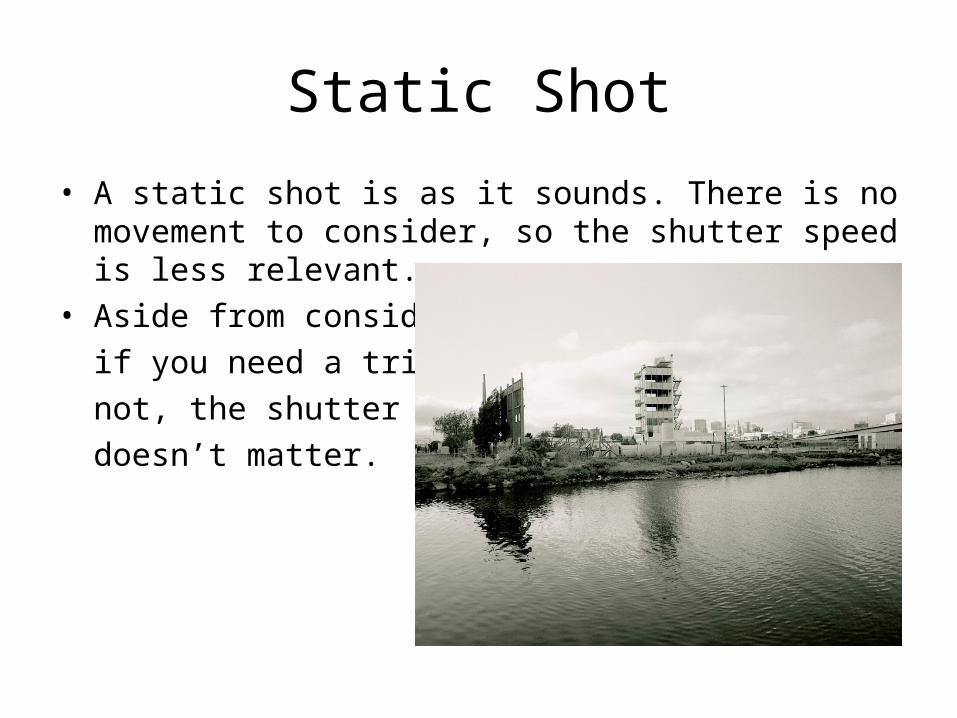
• A static shot is as it sounds. There is no movement to consider, so the shutter speed is less relevant.
• Aside from considering if you need a tripod or not, the shutter speed doesn’t matter.
Aperture
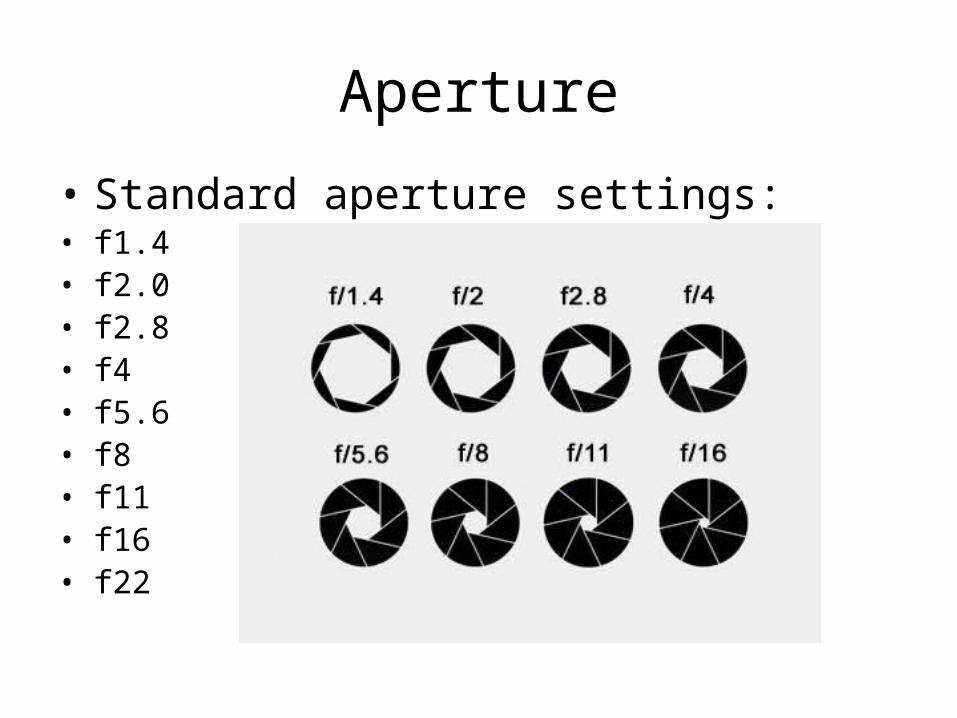
• Standard aperture settings:• f1.4• f2.0• f2.8• f4• f5.6• f8• f11• f16• f22
Aperture
• Your aperture works much like your eye. On a bright day, your iris will constrict to limit the amount of light it lets in. You consider this f22, or the smallest aperture.
• In a dark setting your iris will open wide to let in more light. You can consider this f2.0, or one of the widest apertures.
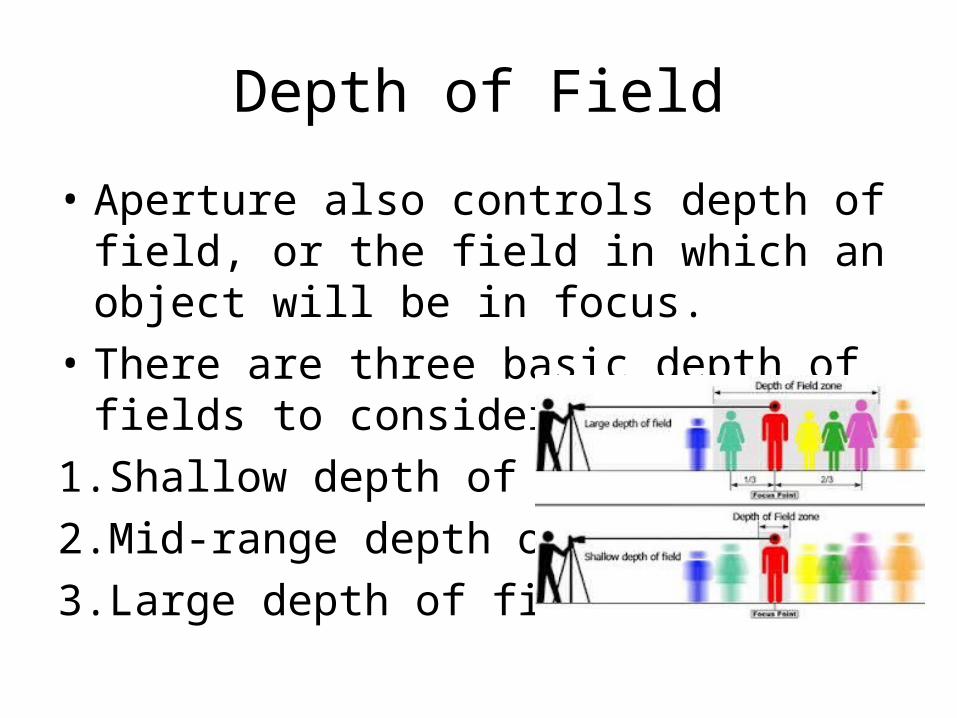
Depth of Field
• Aperture also controls depth of field, or the field in which an object will be in focus.
• There are three basic depth of fields to consider:
1.Shallow depth of field2.Mid-range depth of field3.Large depth of field
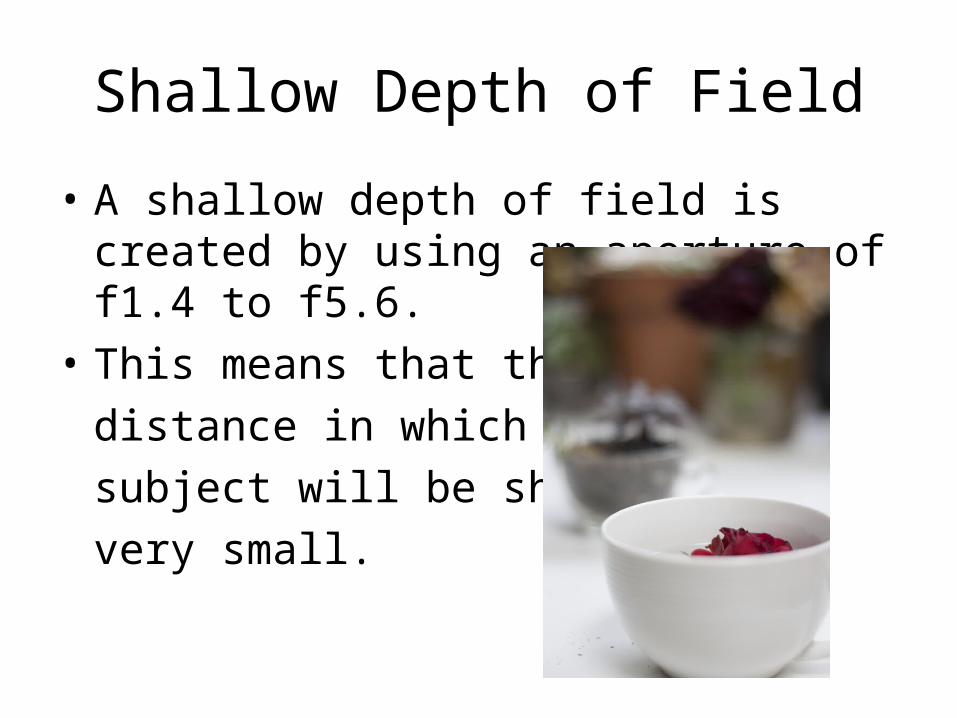
Shallow Depth of Field
• A shallow depth of field is created by using an aperture of f1.4 to f5.6.
• This means that the distance in which your subject will be sharp is very small.
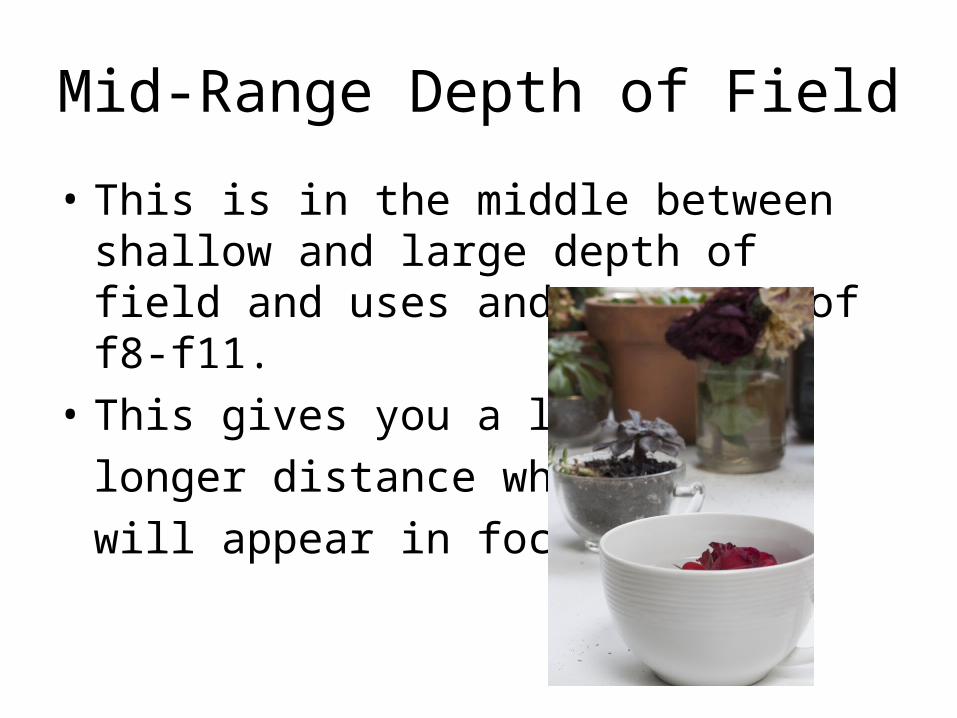
Mid-Range Depth of Field
• This is in the middle between shallow and large depth of field and uses and aperture of f8-f11.
• This gives you a little longer distance which will appear in focus.
Large Depth of Field
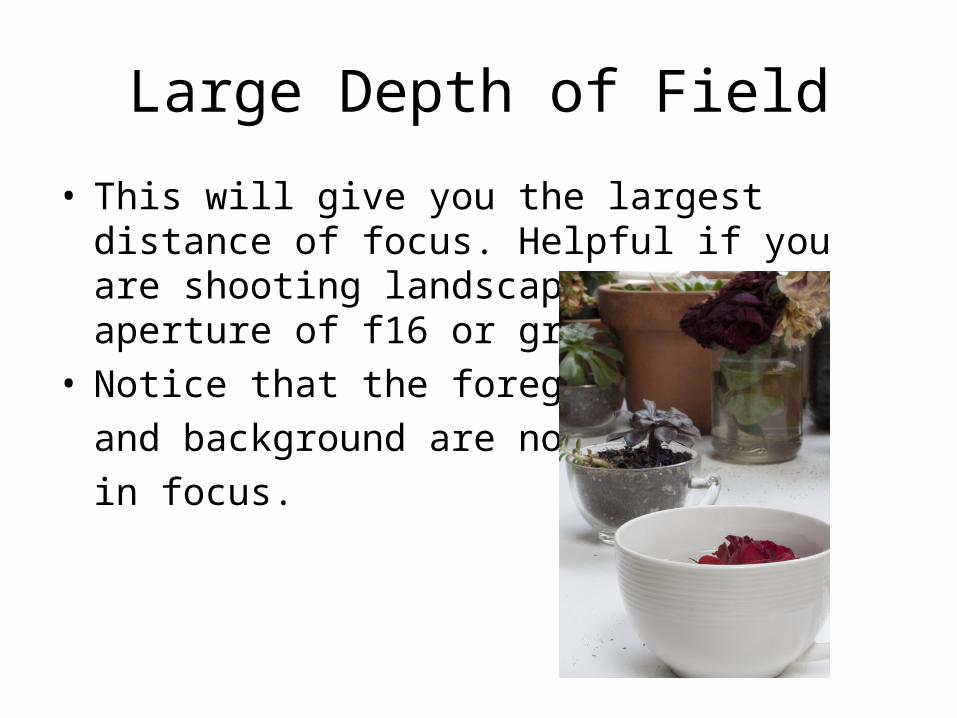
• This will give you the largest distance of focus. Helpful if you are shooting landscapes. Uses aperture of f16 or greater.
• Notice that the foreground and background are now in focus.
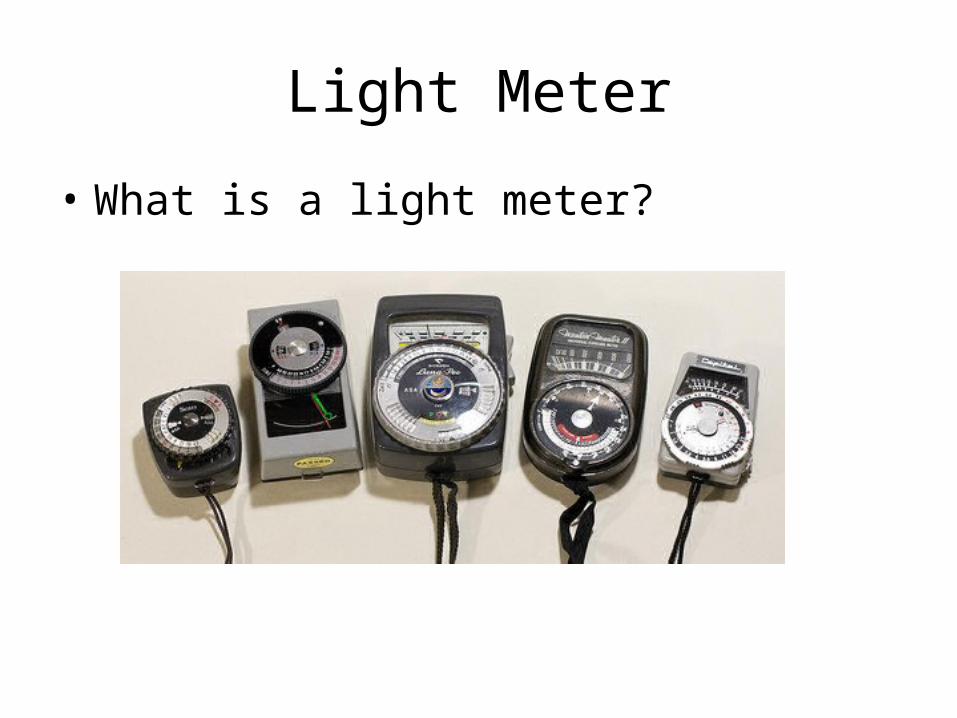
Light Meter
• What is a light meter?
Light Meter
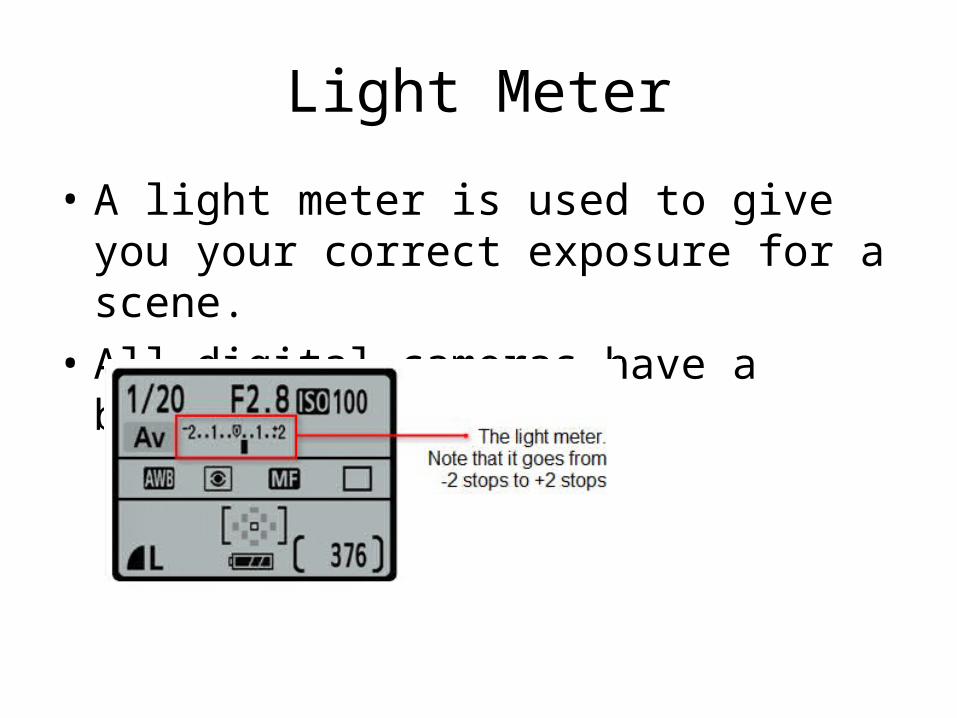
• A light meter is used to give you your correct exposure for a scene.
• All digital cameras have a built in light meter.
Light Meter
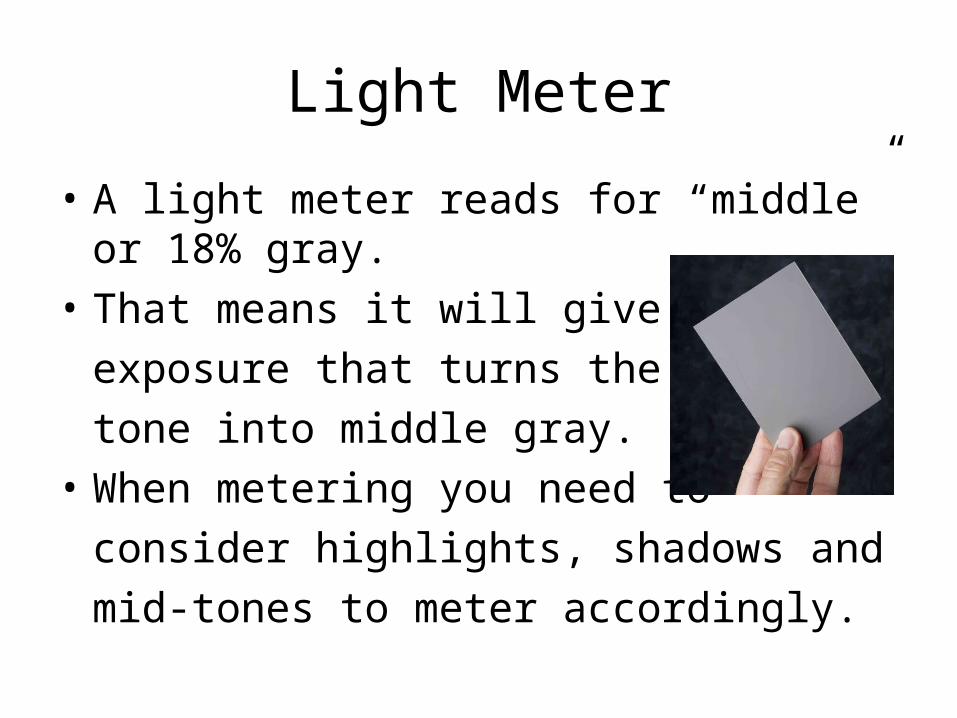
• A light meter reads for “middle” or 18% gray.• That means it will give you the
exposure that turns the meteredtone into middle gray.
• When metering you need toconsider highlights, shadows andmid-tones to meter accordingly.
Light Meter
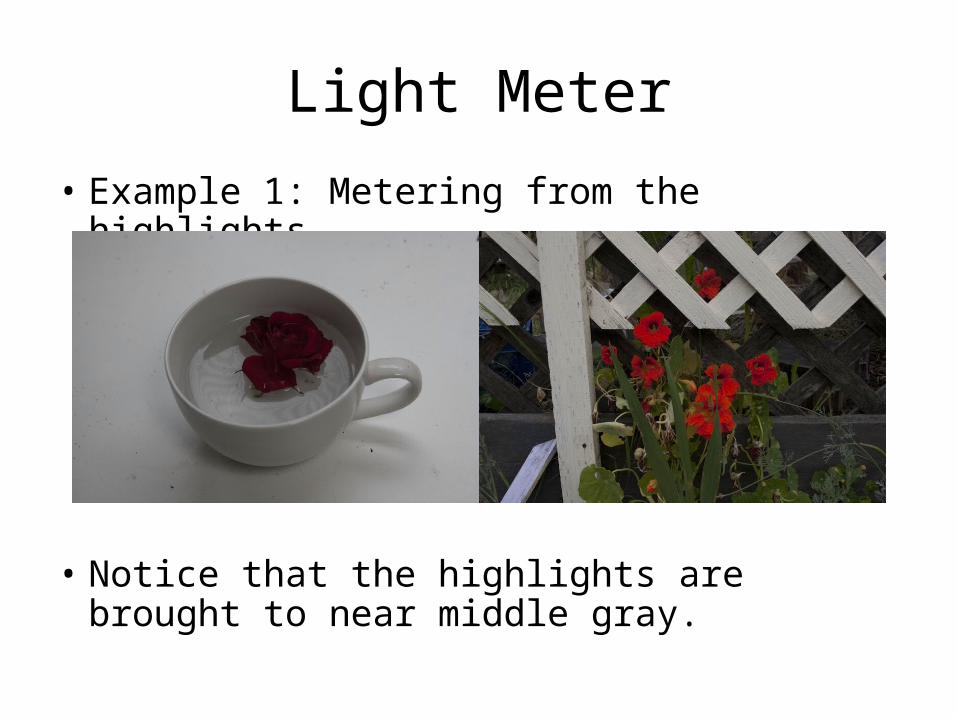
• Example 1: Metering from the highlights.
• Notice that the highlights are brought to near middle gray.
Light Meter
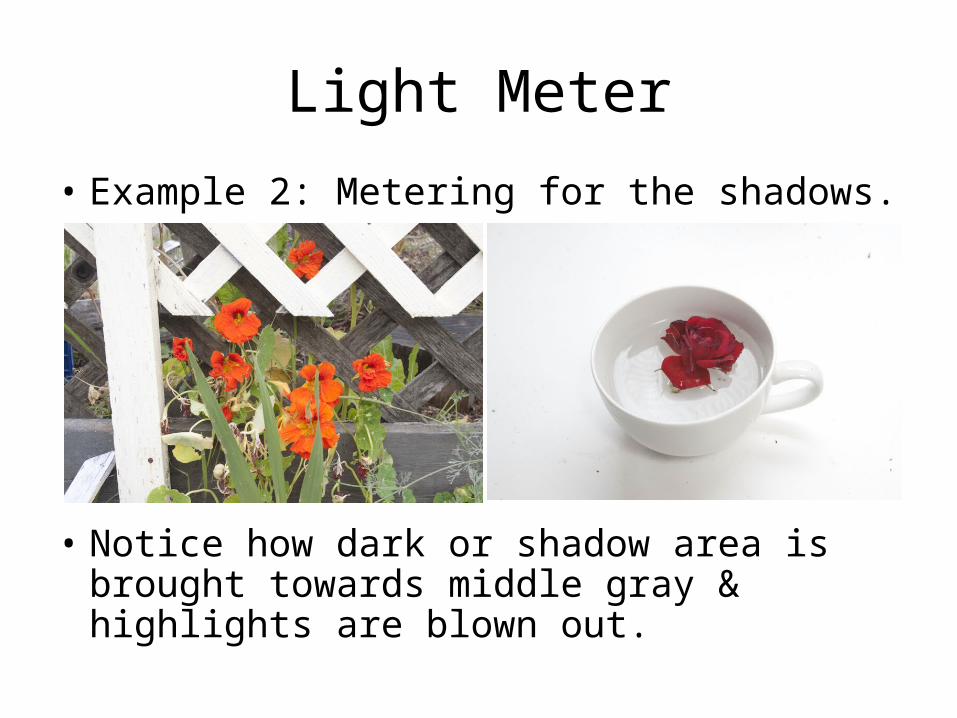
• Example 2: Metering for the shadows.
• Notice how dark or shadow area is brought towards middle gray & highlights are blown out.
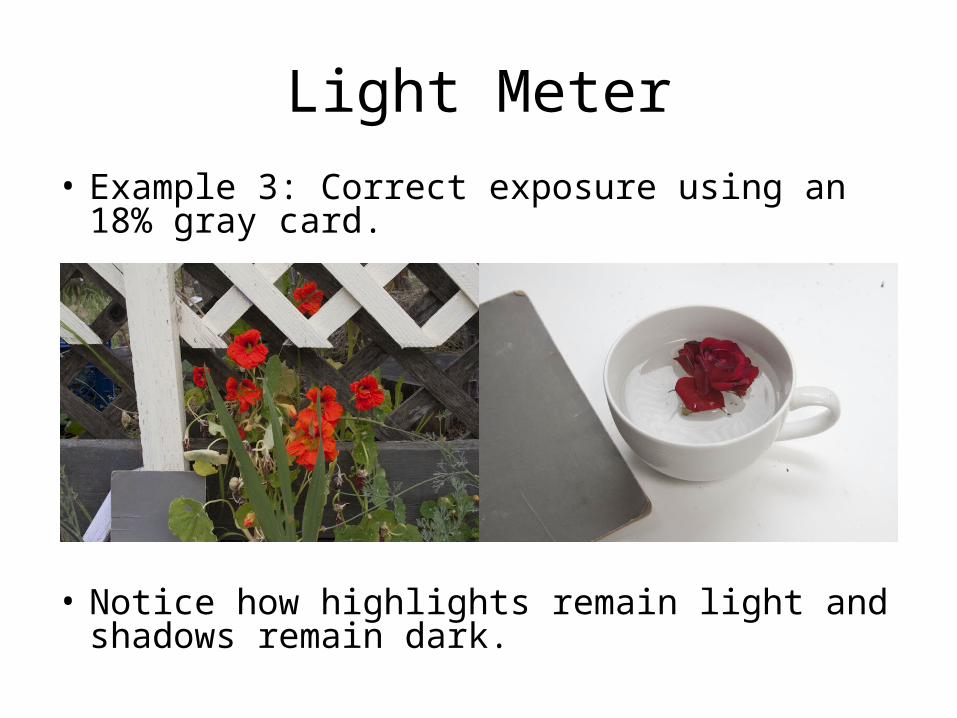
Light Meter• Example 3: Correct exposure using an 18% gray
card.
• Notice how highlights remain light and shadows remain dark.
Light Meter
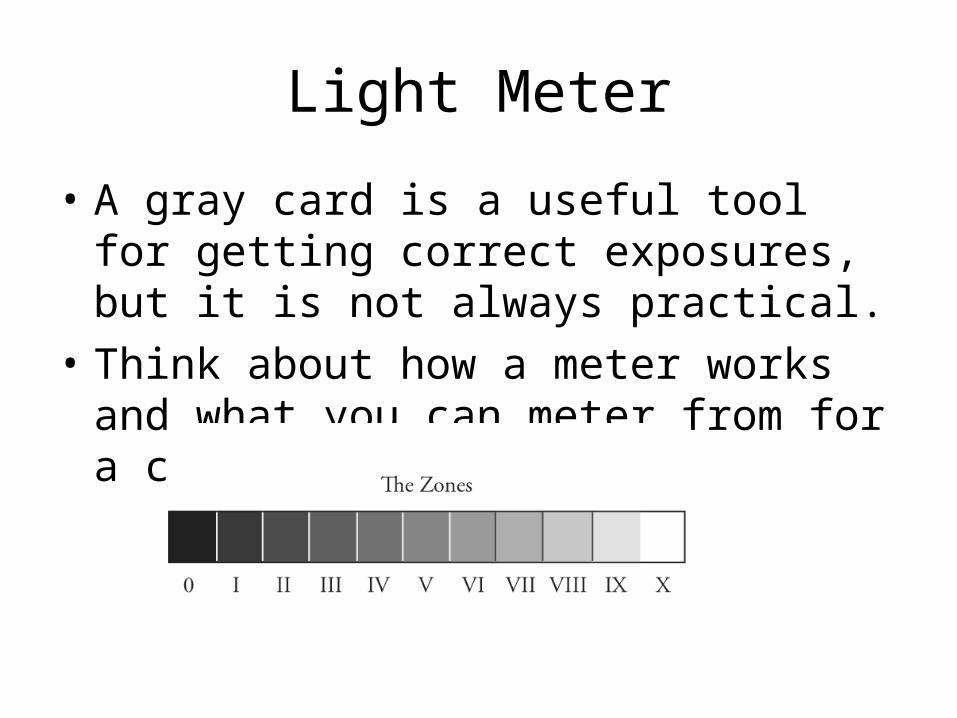
• A gray card is a useful tool for getting correct exposures, but it is not always practical.
• Think about how a meter works and what you can meter from for a correct exposure.
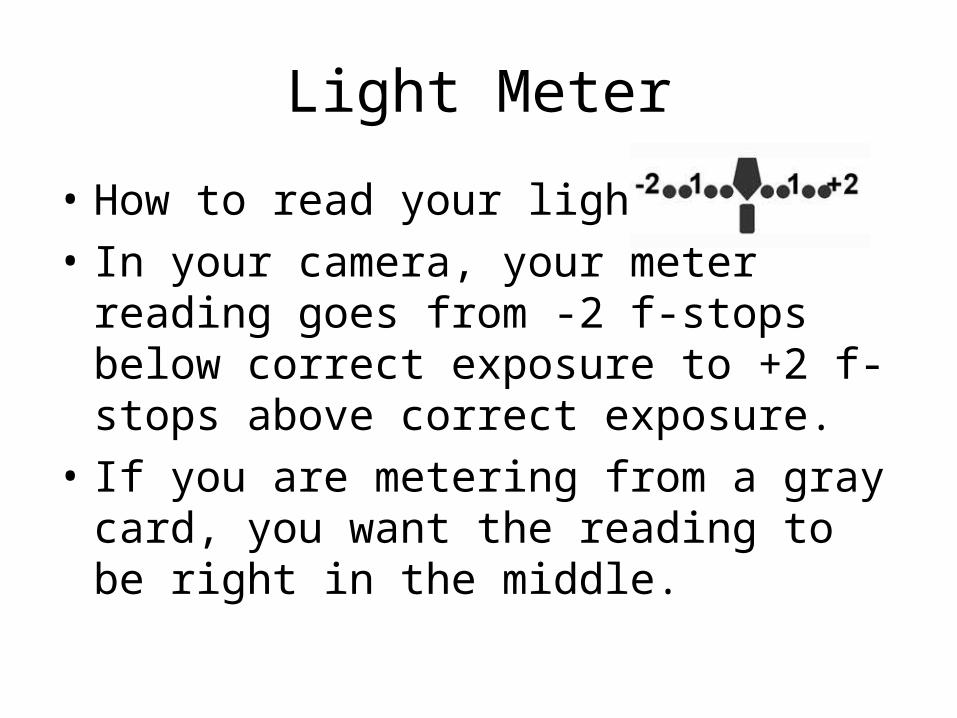
Light Meter
• How to read your light meter:• In your camera, your meter reading goes from
-2 f-stops below correct exposure to +2 f-stops above correct exposure.
• If you are metering from a gray card, you want the reading to be right in the middle.

Light Meter
• If your meter reading looks like this:
• You are 1 f-stop overexposed. If your settings are currently 1/60 @ f11, then you would change your settings to 1/60 @ f16.
• This will make your meter look like this:
Light Meter
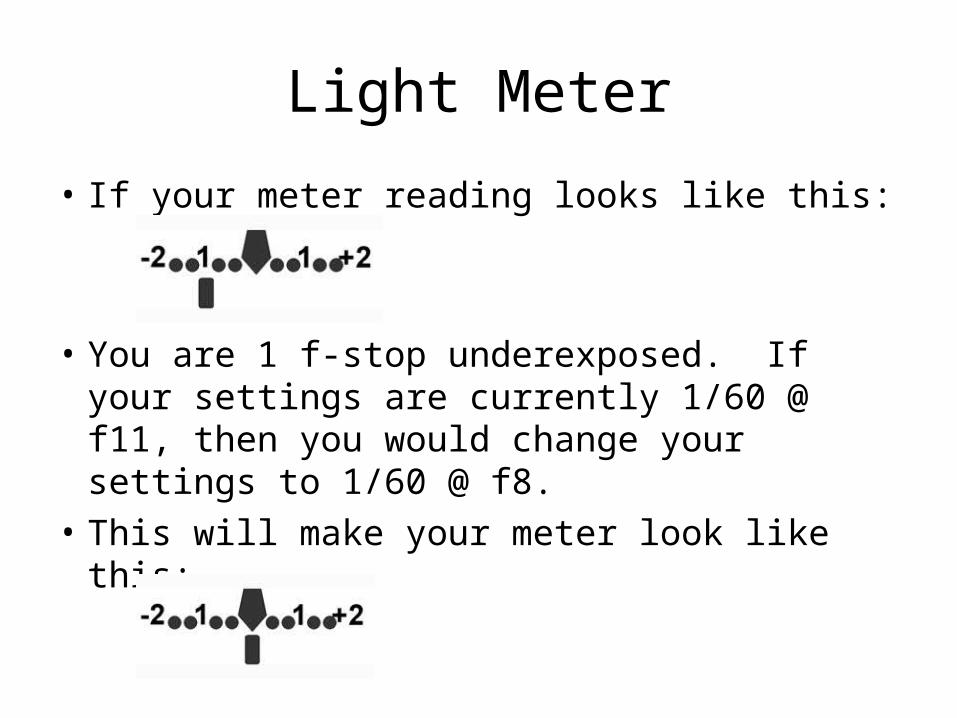
• If your meter reading looks like this:
• You are 1 f-stop underexposed. If your settings are currently 1/60 @ f11, then you would change your settings to 1/60 @ f8.
• This will make your meter look like this: