mecha spherical - dam.groupeseb.com
TRANSCRIPT
EN
MS
ZH
CN
www.tefal.com
Mecha Spherical
1.8LCUP
Rice
9108
COOK WARM
17
8
13
14
10
11
2
3
4
5
9
6
12b12a
12c
12
1.8LCUP
Rice
9108
1 2
COOK WARMWARM
8
Rice1.8L
1011
CUP
9 10 11
16
1.8LCUP
Rice
79
1086
4
2
5
3
Rice1.8L
109
11CUP
Rice1.8L
10
11CUP
10
13 14 15
12
1.8LCUP
Rice
79
1086
4
2
5
3
5 6
3 4
COOK WARM
7
COOKCOOK
Control box
1.8LCUP
Rice
9108
COOK WARM
17
8
13
14
10
11
2
3
4
5
9
6
12b12a
12c
12
1.8LCUP
Rice
9108
1 2
COOK WARMWARM
8
Rice1.8L
1011
CUP
9 10 11
16
1.8LCUP
Rice
79
1086
4
2
5
3
Rice1.8L
109
11CUP
Rice1.8L
10
11CUP
10
13 14 15
12
1.8LCUP
Rice
79
1086
4
2
5
3
5 6
3 4
COOK WARM
7
COOKCOOK

1
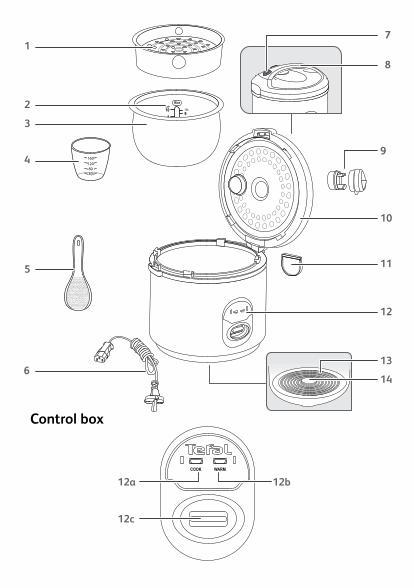
1 Steam basket2 Graduation for water and rice3 Removable Non Stick bowl4 Measuring cup5 Rice spoon6 Power cord7 Lid opening button8 Lid Handle9 Micro pressure valve
10 Lid11 Condensation collector12 Control panel
a Cooking indicator lightb Keep warm indicator lightc Control switch
13 Hotplate14 Sensor
DESCRIPTION
IMPORTANT SAFEGUARDSSAFETY INSTRUCTIONS
Read and follow the instructions for use. Keep them safe.• This appliance is not intended to be operated by
means of an external timer or a separate remote-control system.
• This appliance can be used by children aged from 8 years and above if they have been given supervision or instruction concerning use of the appliance in a safe way and if they understand the hazards involved.Cleaning and user maintenance shall not be made by children unless they are older than 8 years and supervised. Keep the appliance and its cord out of reach of children aged less than 8 years.
• Appliances can be used by persons with reduced physical, sensory or mental capabilities or lack
2
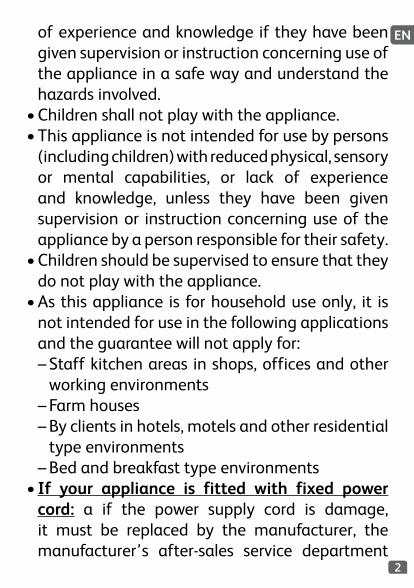
ENof experience and knowledge if they have been given supervision or instruction concerning use of the appliance in a safe way and understand the hazards involved.
• Children shall not play with the appliance.• This appliance is not intended for use by persons
(including children) with reduced physical, sensory or mental capabilities, or lack of experience and knowledge, unless they have been given supervision or instruction concerning use of the appliance by a person responsible for their safety.
• Children should be supervised to ensure that they do not play with the appliance.
• As this appliance is for household use only, it is not intended for use in the following applications and the guarantee will not apply for:
– Staff kitchen areas in shops, offices and other working environments – Farm houses – By clients in hotels, motels and other residential type environments – Bed and breakfast type environments
• If your appliance is fitted with fixed power cord: a if the power supply cord is damage, it must be replaced by the manufacturer, the manufacturer’s after-sales service department
3
or similarly qualified person in order to avoid any danger.
• The appliance must not be immersed in water or any other liquid.
• Use a damp cloth or sponge with washing up liquid to clean the accessories and parts in contact with food. Rinse with a damp cloth or sponge. Dry carefully.
• If the symbol is marked on the appliance, this symbol means “ Caution: surfaces may become hot during use ”.
• Caution: the surface of heating element is subject to residual heat after use.
• Caution: risk of injury due to improper use of the appliance.
• Caution: if your appliance has a removable power cord, do not spill liquid on the connector.
• Always unplug the appliance: – immediately after use – when moving it – prior to any cleaning or maintenance – if it fails to function correctly
• Burns can occur by touching the hot surface of the appliance, the hot water, steam or the food.
• During cooking, the appliance gives out heat and steam. Keep face and hands away.
4
EN• Do not obstruct the steam outlet.• For any problems or queries please contact our
Customer Relations Team or consult our web site.• The appliance can be used up to an altitude of
2000 m.
• For your safety, this appliance complies with the safety regulations and directives in effect at the time of manufacture (Low-voltage Directive, Electromagnetic Compatibility, Food Contact Materials Regulations, Environment…).
• Check that the power supply voltage corresponds to that shown on the appliance (alternating current).
• Given the diverse standards in effect, if the appliance is used in a country other than that in which it is purchased, have it checked by an approved service centre.
CONNECTING TO THE POWER SUPPLY
• Do not use the appliance if: – the appliance or the cord is damaged – the appliance has fallen or shows visible damage or does not work properly – In the event of the above, the appliance must be sent to an approved Service Centre. Do not take the appliance apart yourself
• Do not leave the cord hanging• Always plug the appliance into an earthed socket.• Do not use an extension lead. If you accept liability for doing so, only
use an extension lead which is in good condition, has an earthed plug and is suited to the power of the appliance.
• Do not unplug the appliance by pulling on the cord.
5
USING
• Use a flat, stable, heat-resistant work surface away from any water splashes.
• Do not allow the base of the appliance to come into contact with water• Never try to operate the appliance when the pot is empty or without
the pot.• The cooking function/knob must be allowed to operate freely. Do not
prevent or obstruct the function from automatically changing to the keep warm function.
• Do not remove the pot while the appliance is working.• Do not put the appliance directly onto a hot surface, or any other
source of heat or flame, as it will cause a failure or danger.• The pot and the heating plate should be in direct contact. Ensure that
no food or liquid is inserted between the pot and heating plate.• Do not place the appliance near a heat source or in a hot oven, as
serious damage could result.• Do not put any food or water into the appliance until the pot is in place.• Respect the levels indicated in the recipes.• Should any part of your appliance catch fire, do not attempt to put it
out with water. To smother the flames use a damp teatowel.• Any intervention should only be made by a service centre with original
spare parts.• Always disconnect the appliance from the supply if it is left unattended
and before assembling, disassembling or cleaning.
PROTECT THE ENVIRONMENT
• Your appliance has been designed to run for many years. However, when you decide to replace it, remember to think about how you can contribute to protecting the environment.
• Before discarding your appliance you should remove the battery from the timer and dispose of it at a local civic waste collection centre (according to model).
Environment protection first!
Your appliance contains valuable materials which can be recovered or recycled.Leave it at a local civic waste collection point.
6
EN
Unpack the appliance• Remove the appliance from the packaging and unpack all the
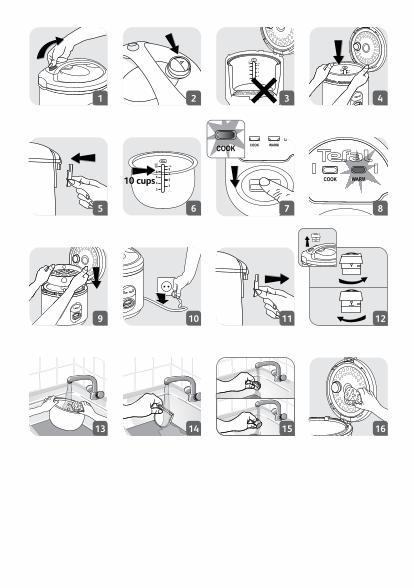
accessories and printed documents.• Open the lid by pressing the opening button located on the handle - fig. 1.• Install the spoon support: insert the plastic hook of the support in the
hole located under product ring, and slide it downwards - fig. 5.Read the instructions and carefully follow the operating method.
BEFORE THE FIRST USE
Clean the appliance• Remove the spherical pot and the micro pressure valve.• Clean the pot and the micro pressure valve with a sponge and washing-
up liquid. Wipe the outside of the appliance and the metal parts of the lid with a damp cloth.
• Dry carefully.• Make sure the micro pressure valve is correctly placed in position - fig. 2.
• Carefully wipe the outside of the bowl (especially the bottom). Make sure that there are no foreign residues or liquid underneath the bowl and on the hotplate - fig. 3.
• Place the bowl into the appliance - fig. 4, making sure that it is correctly positioned.
• Slightly rotate the bowl in both directions, so as to ensure good contact between the bottom of the bowl and the hotplate.
• Check that the condensation collector is correctly placed in position, if not, please install it by pushing firmly into the groove - fig. 5.
• Close and lock the lid.• Plug in the appliance.• Do not switch on the appliance until all of the above stages have been
completed.• Do not start the appliance with an empty cooking bowl. • Do not touch the heating plate when the product is plugged in.Never place your hand on the steam vent during cooking, as there is a danger of burns. Never use the lid handle to transport the product when it is full.Only use the inner pot provided with the appliance. Do not pour water or put ingredients in the appliance without the bowl inside.
USING YOUR RICE COOKER
7
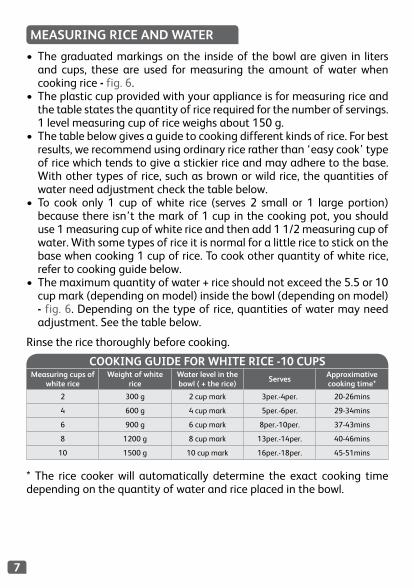
• The graduated markings on the inside of the bowl are given in liters and cups, these are used for measuring the amount of water when cooking rice - fig. 6.
• The plastic cup provided with your appliance is for measuring rice and the table states the quantity of rice required for the number of servings. 1 level measuring cup of rice weighs about 150 g.
• The table below gives a guide to cooking different kinds of rice. For best results, we recommend using ordinary rice rather than ‘easy cook’ type of rice which tends to give a stickier rice and may adhere to the base. With other types of rice, such as brown or wild rice, the quantities of water need adjustment check the table below.
• To cook only 1 cup of white rice (serves 2 small or 1 large portion) because there isn’t the mark of 1 cup in the cooking pot, you should use 1 measuring cup of white rice and then add 1 1/2 measuring cup of water. With some types of rice it is normal for a little rice to stick on the base when cooking 1 cup of rice. To cook other quantity of white rice, refer to cooking guide below.
• The maximum quantity of water + rice should not exceed the 5.5 or 10 cup mark (depending on model) inside the bowl (depending on model) - fig. 6. Depending on the type of rice, quantities of water may need adjustment. See the table below.
MEASURING RICE AND WATER
COOKING GUIDE FOR WHITE RICE -10 CUPSMeasuring cups of
white riceWeight of white
riceWater level in the bowl ( + the rice)
ServesApproximativecooking time*
2 300 g 2 cup mark 3per.-4per. 20-26mins
4 600 g 4 cup mark 5per.-6per. 29-34mins
6 900 g 6 cup mark 8per.-10per. 37-43mins
8 1200 g 8 cup mark 13per.-14per. 40-46mins
10 1500 g 10 cup mark 16per.-18per. 45-51mins
Rinse the rice thoroughly before cooking.
* The rice cooker will automatically determine the exact cooking time depending on the quantity of water and rice placed in the bowl.
8
EN
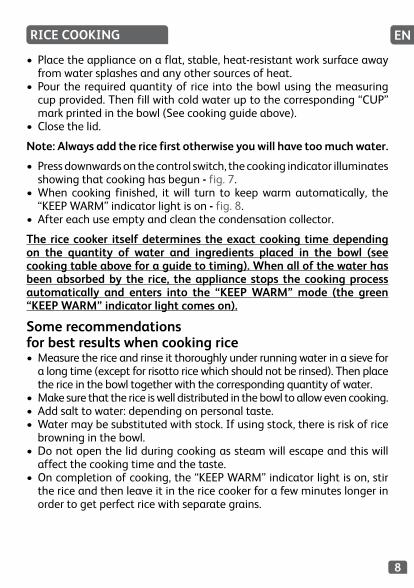
• Place the appliance on a flat, stable, heat-resistant work surface away from water splashes and any other sources of heat.
• Pour the required quantity of rice into the bowl using the measuring cup provided. Then fill with cold water up to the corresponding “CUP” mark printed in the bowl (See cooking guide above).
• Close the lid.
RICE COOKING
The rice cooker itself determines the exact cooking time depending on the quantity of water and ingredients placed in the bowl (see cooking table above for a guide to timing). When all of the water has been absorbed by the rice, the appliance stops the cooking process automatically and enters into the “KEEP WARM” mode (the green “KEEP WARM” indicator light comes on).
Note: Always add the rice first otherwise you will have too much water.
• Press downwards on the control switch, the cooking indicator illuminates showing that cooking has begun - fig. 7.
• When cooking finished, it will turn to keep warm automatically, the “KEEP WARM” indicator light is on - fig. 8.
• After each use empty and clean the condensation collector.
Some recommendations for best results when cooking rice• Measure the rice and rinse it thoroughly under running water in a sieve for
a long time (except for risotto rice which should not be rinsed). Then place the rice in the bowl together with the corresponding quantity of water.
• Make sure that the rice is well distributed in the bowl to allow even cooking.• Add salt to water: depending on personal taste.• Water may be substituted with stock. If using stock, there is risk of rice
browning in the bowl.• Do not open the lid during cooking as steam will escape and this will
affect the cooking time and the taste.• On completion of cooking, the “KEEP WARM” indicator light is on, stir
the rice and then leave it in the rice cooker for a few minutes longer in order to get perfect rice with separate grains.
9
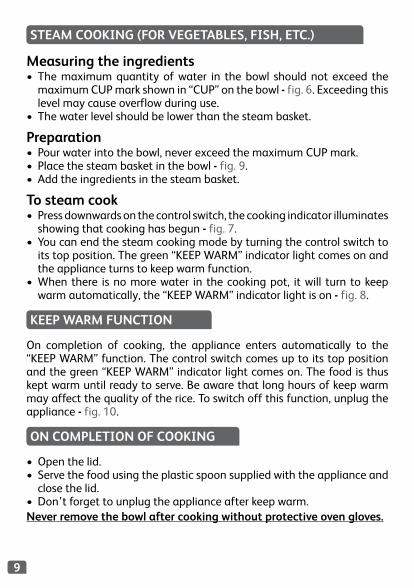
Measuring the ingredients• The maximum quantity of water in the bowl should not exceed the
maximum CUP mark shown in “CUP” on the bowl - fig. 6. Exceeding this level may cause overflow during use.
• The water level should be lower than the steam basket.
STEAM COOKING (FOR VEGETABLES, FISH, ETC.)
Preparation• Pour water into the bowl, never exceed the maximum CUP mark.• Place the steam basket in the bowl - fig. 9.• Add the ingredients in the steam basket.
To steam cook• Press downwards on the control switch, the cooking indicator illuminates
showing that cooking has begun - fig. 7.• You can end the steam cooking mode by turning the control switch to
its top position. The green “KEEP WARM” indicator light comes on and the appliance turns to keep warm function.
• When there is no more water in the cooking pot, it will turn to keep warm automatically, the “KEEP WARM” indicator light is on - fig. 8.
On completion of cooking, the appliance enters automatically to the “KEEP WARM” function. The control switch comes up to its top position and the green “KEEP WARM” indicator light comes on. The food is thus kept warm until ready to serve. Be aware that long hours of keep warm may affect the quality of the rice. To switch off this function, unplug the appliance - fig. 10.
KEEP WARM FUNCTION
Never remove the bowl after cooking without protective oven gloves.
• Open the lid.• Serve the food using the plastic spoon supplied with the appliance and
close the lid.• Don’t forget to unplug the appliance after keep warm.
ON COMPLETION OF COOKING
10
EN
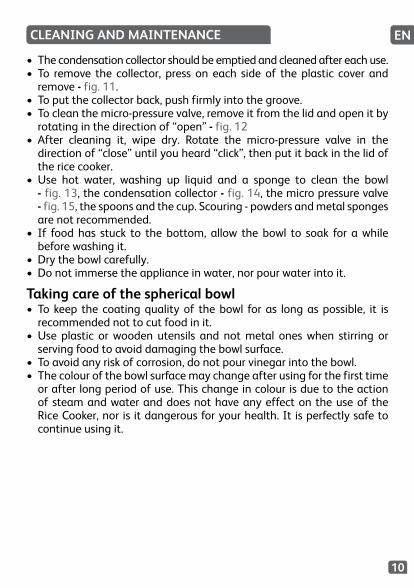
• The condensation collector should be emptied and cleaned after each use.• To remove the collector, press on each side of the plastic cover and
remove - fig. 11.• To put the collector back, push firmly into the groove.• To clean the micro-pressure valve, remove it from the lid and open it by
rotating in the direction of “open” - fig. 12• After cleaning it, wipe dry. Rotate the micro-pressure valve in the
direction of “close” until you heard “click”, then put it back in the lid of the rice cooker.
• Use hot water, washing up liquid and a sponge to clean the bowl - fig. 13, the condensation collector - fig. 14, the micro pressure valve - fig. 15, the spoons and the cup. Scouring - powders and metal sponges are not recommended.
• If food has stuck to the bottom, allow the bowl to soak for a while before washing it.
• Dry the bowl carefully.• Do not immerse the appliance in water, nor pour water into it.
CLEANING AND MAINTENANCE
Taking care of the spherical bowl• To keep the coating quality of the bowl for as long as possible, it is
recommended not to cut food in it.• Use plastic or wooden utensils and not metal ones when stirring or
serving food to avoid damaging the bowl surface.• To avoid any risk of corrosion, do not pour vinegar into the bowl.• The colour of the bowl surface may change after using for the first time
or after long period of use. This change in colour is due to the action of steam and water and does not have any effect on the use of the Rice Cooker, nor is it dangerous for your health. It is perfectly safe to continue using it.
11
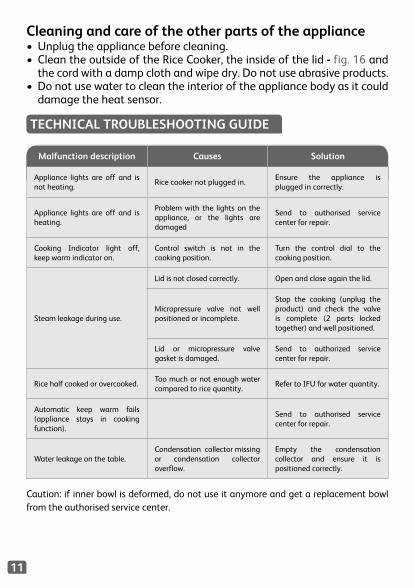
Malfunction description Causes Solution
Appliance lights are off and is not heating.
Rice cooker not plugged in.Ensure the appliance is plugged in correctly.
Appliance lights are off and is heating.
Problem with the lights on the appliance, or the lights are damaged
Send to authorised service center for repair.
Cooking Indicator light off, keep warm indicator on.
Control switch is not in the cooking position.
Turn the control dial to the cooking position.
Steam leakage during use.
Lid is not closed correctly. Open and close again the lid.
Micropressure valve not well positioned or incomplete.
Stop the cooking (unplug the product) and check the valve is complete (2 parts locked together) and well positioned.
Lid or micropressure valve gasket is damaged.
Send to authorized service center for repair.
Rice half cooked or overcooked.Too much or not enough water compared to rice quantity.
Refer to IFU for water quantity.
Automatic keep warm fails (appliance stays in cooking function).
Send to authorised service center for repair.
Water leakage on the table.Condensation collector missing or condensation collector overflow.
Empty the condensation collector and ensure it is positioned correctly.
TECHNICAL TROUBLESHOOTING GUIDE
Caution: if inner bowl is deformed, do not use it anymore and get a replacement bowl from the authorised service center.
Cleaning and care of the other parts of the appliance• Unplug the appliance before cleaning.• Clean the outside of the Rice Cooker, the inside of the lid - fig. 16 and
the cord with a damp cloth and wipe dry. Do not use abrasive products.• Do not use water to clean the interior of the appliance body as it could
damage the heat sensor.
13
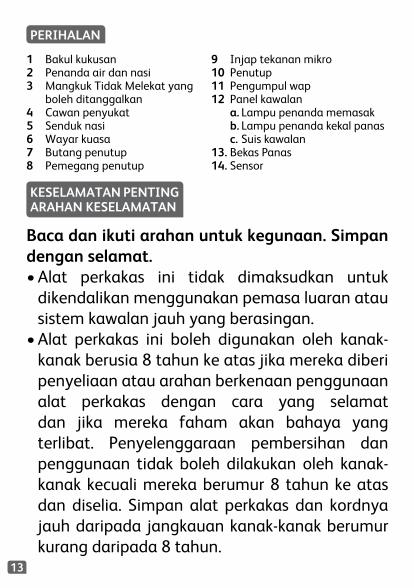
1 Bakul kukusan2 Penanda air dan nasi3 Mangkuk Tidak Melekat yang
boleh ditanggalkan4 Cawan penyukat5 Senduk nasi6 Wayar kuasa7 Butang penutup8 Pemegang penutup
9 Injap tekanan mikro10 Penutup11 Pengumpul wap12 Panel kawalan
a. Lampu penanda memasakb. Lampu penanda kekal panasc. Suis kawalan
13. Bekas Panas14. Sensor
PERIHALAN
Baca dan ikuti arahan untuk kegunaan. Simpan dengan selamat.• Alat perkakas ini tidak dimaksudkan untuk
dikendalikan menggunakan pemasa luaran atau sistem kawalan jauh yang berasingan.
• Alat perkakas ini boleh digunakan oleh kanak-kanak berusia 8 tahun ke atas jika mereka diberi penyeliaan atau arahan berkenaan penggunaan alat perkakas dengan cara yang selamat dan jika mereka faham akan bahaya yang terlibat. Penyelenggaraan pembersihan dan penggunaan tidak boleh dilakukan oleh kanak-kanak kecuali mereka berumur 8 tahun ke atas dan diselia. Simpan alat perkakas dan kordnya jauh daripada jangkauan kanak-kanak berumur kurang daripada 8 tahun.
KESELAMATAN PENTINGARAHAN KESELAMATAN

14
MS
• Alat perkakas boleh digunakan oleh seseorang yang kurang upaya secara fizikal, sensori atau keupayaan mental atau kurang berpengalaman jika mereka telah diberi pengawasan atau arahan berkenaan penggunaan alat perkakas dengan cara yang selamat dan jika mereka memahami bahaya yang mungkin berlaku.
• Kanak-kanak tidak patut bermain dengan alat perkakas.
• Alat perkakas ini tidak dimaksudkan untuk digunakan oleh orang (termasuk kanak-kanak) yang kurang upaya dari segi fizikal, deria atau mental, atau kurang berpengalaman dan pengetahuan, kecuali jika mereka telah diberi pengawasan atau arahan berkenaan penggunaan alat perkakas ini oleh orang yang bertanggungjawab atas keselamatan mereka.
• Kanak-kanak harus diselia bagi memastikan mereka tidak bermain dengan alat perkakas ini.
• Kerana alat perkakas ini hanya untuk digunakan dalam rumah sahaja, ia tidak bertujuan untuk digunakan dalam aplikasi berikut dan jaminan tidak diguna pakai:
– Kawasan dapur kakitangan di kedai, pejabat dan lain-lain persekitaran bekerja
15
– Rumah ladang – Oleh pelanggan di hotel, motel dan lain-lain jenis kediaman – Persekitaran untuk tempat menginap
• Jika alat perkakas anda dilengkapi kod kuasa tetap: jika kod bekalan kuasa rosak, ia mesti digantikan oleh pengilang, jabatan khidmat selepas jualan pengilang atau individu yang mempunyai kelayakan yang sama untuk mengelak sebarang bahaya.
• Alat perkakas tidak patut direndam dalam air atau sebarang cecair lain.
• Guna kain lembap atau span dengan sedikit cecair pembersih untuk membersihkan aksesori dan bahagian yang bersentuhan dengan makanan. Bilas dengan kain lembap atau span. Mengeringkan aksesori dan bahagian yang bersentuhan yang makan menggunakan kain kering.
• Jika terdapat simbol bertanda pada alat perkakas, simbol ini bermaksud “ Awas: permukaan mungkin panas ketika digunakan ”.
• Awas: permukaan elemen pemanasan tertakluk pada sisa haba selepas digunakan.
• Awas: terdapat risiko disebabkan oleh penggunaan alat perkakas.
16
MS
• Awas: jika alat perkakas anda mempunyai kord kuasa boleh tanggal, jangan tumpahkan cecair pada penyambung.
• Selalu cabut alat perkakas daripada soket: – selepas digunakan – apabila menggerakkannya – sebelum membasuh atau penyelenggaraan – jika ia gagal untuk berfungsi dengan betul
• Lecur mungkin berlaku dengan memegang permukaan panas pada alat perkakas, air panas, stim atau makanan.
• Ketika memasak, alat perkakas akan mengeluarkan haba dan wap. Jauhi dari muka dan tangan.
• Jangan menghalang saluran keluar wap.• Untuk sebarang masalah atau pertanyaan sila
hubungi Pasukan Hubungan Pelanggan atau rujuk kepada laman web kami.
• Alat perkakas boleh digunakan sehingga altitud 2000 m.
17
• Untuk keselamatan anda, alat perkakas ini mematuhi peraturan keselamatan dan arahan yang berkuatkuasa ketika dikilang (Arahan Voltan-rendah, Kesesuaian Elektromagnet, Peraturan Bahan Sentuhan Makanan, Persekitaran...).
• Pastikan bahawa voltan sumber kuasa adalah bersesuaian dengan yang tertera pada alat perkakas (arus ulang-alik).
• Disebabkan terdapat pelbagai tahap standard, jika alat perkakas digunakan di negara selain tempat ia dibeli, semak dengan pusat perkhidmatan yang diperakui.
• Jangan gunakan alat perkakas jika: – alat perkakas atau kord rosak – alat perkakas telah jatuh atau menunjukkan kerosakan atau tidak berfungsi dengan baik – Jika berlaku perkara di atas, alat perkakas harus dihantar ke Pusat Perkhidmatan yang diperakui. Jangan buka alat perkakas sendiri.
• Jangan biar kord tergantung• Selalu pasang alat perkakas ke dalam soket bumi.• Jangan gunakan wayar penyambung. Jika anda menerima
tanggungjawab untuk berbuat demikian, hanya gunakan wayar penyambung yang dalam keadaan berfungsi, mempunyai palam yang dibumikan dan sesuai dengan kuasa alat perkakas.
• Jangan cabut alat perkakas dengan menarik kord.• Sentiasa memutuskan sambungan alat daripada bekalan kuasa
jika ia ditinggalkan tidak berjaga dan sebelum pemasangan atau pembersihan.
SAMBUNG KEPADA SUMBER KUASA
• Guna permukaan yang rata, penebat haba yang jauh dari percikan air.• Jangan biarkan tapak alat perkakas bersentuhan dengan air• Jangan cuba menggunakan alat perkakas apabila periuk kosong atau
tanpa periuk.
PENGGUNAAN
18
MS
• Alat perkakas anda telah direka untuk penggunaan selama beberapa tahun. Tetapi, apabila anda ingin menggantinya, jangan lupa tentang cara anda boleh menyumbang dalam melindungi alam sekitar.
• Sebelum membuang alat perkakas anda keluarkan bateri daripada pemasa dan lupuskan di pusat pengumpulan buangan sivik tempatan (mengikut model).
Utamakan perlindungan alam sekitar!
Perkakas anda mengandungi bahan bernilai yang boleh didapatkan semula atau dikitar semula.Biarkan ia di pusat kutipan sivik tempatan.
LINDUNGI ALAM SEKITAR
• Fungsi/tombol memasak harus dibenarkan untuk beroperasi dengan bebas. Jangan mencegah atau menghalang fungsi daripada bertukar secara automatik kepada fungsi kekal panas.
• Jangan keluarkan periuk ketika alat perkakas sedang berfungsi.• Jangan letak alat perkakas terus kepada permukaan panas atau lain-
lain sumber haba atau api, ia boleh menyebabkan kegagalan atau bahaya.
• Periuk dan plat pemanasan sepatutnya bersentuhan secara langsung. Sebarang objek atau makanan disisipkan di antara dua bahagian ini boleh mengganggu operasi yang betul.
• Jangan letak alat perkakas berdekatan sumber haba atau di dalam ketuhar panas, kerana ia boleh menyebabkan kerosakan yang teruk.
• Jangan letak sebarang makanan atau air ke dalam alat perkakas sehingga periuk diletakkan dengan betul.
• Ikuti tahap yang ditunjukkan dalam resipi.• Jika sebarang bahagian alat perkakas anda terbakar, jangan cuba
padamkan dengan air. Untuk mengurangkan api gunakan tuala basah.• Sebarang campur tangan sepatutnya dibuat hanya oleh pusat
perkhidmatan dengan alat ganti asal.
19
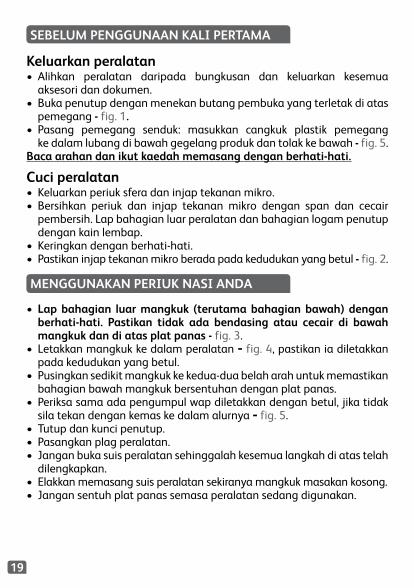
Keluarkan peralatan• Alihkan peralatan daripada bungkusan dan keluarkan kesemua
aksesori dan dokumen.• Buka penutup dengan menekan butang pembuka yang terletak di atas
pemegang - fig. 1.• Pasang pemegang senduk: masukkan cangkuk plastik pemegang
ke dalam lubang di bawah gegelang produk dan tolak ke bawah - fig. 5.Baca arahan dan ikut kaedah memasang dengan berhati-hati.
Cuci peralatan• Keluarkan periuk sfera dan injap tekanan mikro.• Bersihkan periuk dan injap tekanan mikro dengan span dan cecair
pembersih. Lap bahagian luar peralatan dan bahagian logam penutup dengan kain lembap.
• Keringkan dengan berhati-hati.• Pastikan injap tekanan mikro berada pada kedudukan yang betul - fig. 2.
SEBELUM PENGGUNAAN KALI PERTAMA
• Lap bahagian luar mangkuk (terutama bahagian bawah) dengan berhati-hati. Pastikan tidak ada bendasing atau cecair di bawah mangkuk dan di atas plat panas - fig. 3.
• Letakkan mangkuk ke dalam peralatan - fig. 4, pastikan ia diletakkan pada kedudukan yang betul.
• Pusingkan sedikit mangkuk ke kedua-dua belah arah untuk memastikan bahagian bawah mangkuk bersentuhan dengan plat panas.
• Periksa sama ada pengumpul wap diletakkan dengan betul, jika tidak sila tekan dengan kemas ke dalam alurnya - fig. 5.
• Tutup dan kunci penutup.• Pasangkan plag peralatan.• Jangan buka suis peralatan sehinggalah kesemua langkah di atas telah
dilengkapkan.• Elakkan memasang suis peralatan sekiranya mangkuk masakan kosong.• Jangan sentuh plat panas semasa peralatan sedang digunakan.
MENGGUNAKAN PERIUK NASI ANDA

20
MS
• Penanda bersenggat di dalam mangjuk diberikan dalam liter dan cawan, ia digunakan untuk mengukur jumlah air apabila memasak nasi - fig. 6.
• Cawan plastik yang disertakan adalah untuk menyukat beras dan jadual di bawah menyatakan kuantiti beras yang diperlukan untuk jumlah hidangan. 1 paras sukatan beras mempunyai berat lebih kurang 150g.
• Jadual di bawah memberi panduan untuk memasak pelbagai jenis beras. Untuk hasil yang terbaik, kami menyarankan penggunaan beras biasa berbanding jenis beras ‘senang masak’ yang biasanya lebih lembik dan mungkin melekat pada dasar mangkuk. Sekiranya menggunakan jenis beras yang lain seperti beras perang atau beras liar, kuantiti air perlu diubahsuai seperti jadual di bawah.
• Untuk memasak hanya 1 cawan nasi putih (untuk 2 hidangan kecil atau 1 hidangan besar) disebabkan tiada tanda 1 cawan di dalam mangkuk masakan, anda perlu menggunakan 1 cawan beras putih dan tambahkan 1 ½ cawan air. Bagi sesetengah jenis beras, adalah normal sekiranya sedikit nasi melekat pada dasar mangkuk semasa memasak 1 cawan nasi. Untuk memasak nasi putih dalam kuantiti yang lain, rujuk kepada panduan memasak di bawah.
• Sukatan maksimum air+beras tidak boleh melebihi tanda 5,5 atau 10 (bergantung kepada produk) di dalam mangkuk - fig. 6. Bergantung kepada jenis beras, kuantiti air perlu diubahsuaikan. Lihat jadual di bawah.
MENYUKAT BERAS DAN AIR
Jangan sesekali meletakkan tangan di atas corong wap ketika memasak untuk mengelakkan bahaya melecur. Jangan menggunakan pemegang penutup untuk mengangkut produk sewaktu ianya penuh.Pakai mangkuk nasi yang disediakan sahaja. Jangan masukkan air atau bahan makanan ke dalam periuk nasi tanpa mangkuk.
21
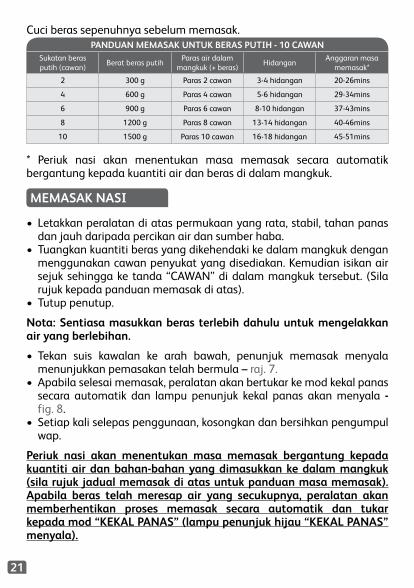
PANDUAN MEMASAK UNTUK BERAS PUTIH - 10 CAWANSukatan beras putih (cawan)
Berat beras putihParas air dalam
mangkuk (+ beras)Hidangan
Anggaran masa memasak*
2 300 g Paras 2 cawan 3-4 hidangan 20-26mins
4 600 g Paras 4 cawan 5-6 hidangan 29-34mins
6 900 g Paras 6 cawan 8-10 hidangan 37-43mins
8 1200 g Paras 8 cawan 13-14 hidangan 40-46mins
10 1500 g Paras 10 cawan 16-18 hidangan 45-51mins
Cuci beras sepenuhnya sebelum memasak.
* Periuk nasi akan menentukan masa memasak secara automatik bergantung kepada kuantiti air dan beras di dalam mangkuk.
Periuk nasi akan menentukan masa memasak bergantung kepada kuantiti air dan bahan-bahan yang dimasukkan ke dalam mangkuk (sila rujuk jadual memasak di atas untuk panduan masa memasak). Apabila beras telah meresap air yang secukupnya, peralatan akan memberhentikan proses memasak secara automatik dan tukar kepada mod “KEKAL PANAS” (lampu penunjuk hijau “KEKAL PANAS” menyala).
Nota: Sentiasa masukkan beras terlebih dahulu untuk mengelakkan air yang berlebihan.
• Letakkan peralatan di atas permukaan yang rata, stabil, tahan panas dan jauh daripada percikan air dan sumber haba.
• Tuangkan kuantiti beras yang dikehendaki ke dalam mangkuk dengan menggunakan cawan penyukat yang disediakan. Kemudian isikan air sejuk sehingga ke tanda “CAWAN” di dalam mangkuk tersebut. (Sila rujuk kepada panduan memasak di atas).
• Tutup penutup.
• Tekan suis kawalan ke arah bawah, penunjuk memasak menyala menunjukkan pemasakan telah bermula – raj. 7.
• Apabila selesai memasak, peralatan akan bertukar ke mod kekal panas secara automatik dan lampu penunjuk kekal panas akan menyala - fig. 8.
• Setiap kali selepas penggunaan, kosongkan dan bersihkan pengumpul wap.
MEMASAK NASI
22
MS
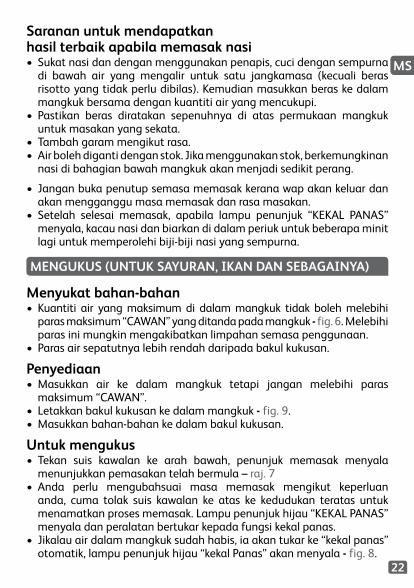
Saranan untuk mendapatkan hasil terbaik apabila memasak nasi• Sukat nasi dan dengan menggunakan penapis, cuci dengan sempurna
di bawah air yang mengalir untuk satu jangkamasa (kecuali beras risotto yang tidak perlu dibilas). Kemudian masukkan beras ke dalam mangkuk bersama dengan kuantiti air yang mencukupi.
• Pastikan beras diratakan sepenuhnya di atas permukaan mangkuk untuk masakan yang sekata.
• Tambah garam mengikut rasa.• Air boleh diganti dengan stok. Jika menggunakan stok, berkemungkinan
nasi di bahagian bawah mangkuk akan menjadi sedikit perang.
Menyukat bahan-bahan• Kuantiti air yang maksimum di dalam mangkuk tidak boleh melebihi
paras maksimum “CAWAN” yang ditanda pada mangkuk - fig. 6. Melebihi paras ini mungkin mengakibatkan limpahan semasa penggunaan.
• Paras air sepatutnya lebih rendah daripada bakul kukusan.
Penyediaan• Masukkan air ke dalam mangkuk tetapi jangan melebihi paras
maksimum “CAWAN”.• Letakkan bakul kukusan ke dalam mangkuk - fig. 9.• Masukkan bahan-bahan ke dalam bakul kukusan.
Untuk mengukus• Tekan suis kawalan ke arah bawah, penunjuk memasak menyala
menunjukkan pemasakan telah bermula – raj. 7• Anda perlu mengubahsuai masa memasak mengikut keperluan
anda, cuma tolak suis kawalan ke atas ke kedudukan teratas untuk menamatkan proses memasak. Lampu penunjuk hijau “KEKAL PANAS” menyala dan peralatan bertukar kepada fungsi kekal panas.
• Jikalau air dalam mangkuk sudah habis, ia akan tukar ke “kekal panas” otomatik, lampu penunjuk hijau “kekal Panas” akan menyala - fig. 8.
MENGUKUS (UNTUK SAYURAN, IKAN DAN SEBAGAINYA)
• Jangan buka penutup semasa memasak kerana wap akan keluar dan akan mengganggu masa memasak dan rasa masakan.
• Setelah selesai memasak, apabila lampu penunjuk “KEKAL PANAS” menyala, kacau nasi dan biarkan di dalam periuk untuk beberapa minit lagi untuk memperolehi biji-biji nasi yang sempurna.
23
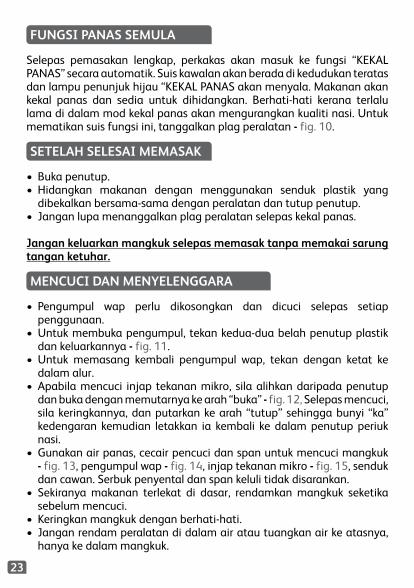
Selepas pemasakan lengkap, perkakas akan masuk ke fungsi “KEKAL PANAS” secara automatik. Suis kawalan akan berada di kedudukan teratas dan lampu penunjuk hijau “KEKAL PANAS akan menyala. Makanan akan kekal panas dan sedia untuk dihidangkan. Berhati-hati kerana terlalu lama di dalam mod kekal panas akan mengurangkan kualiti nasi. Untuk mematikan suis fungsi ini, tanggalkan plag peralatan - fig. 10.
FUNGSI PANAS SEMULA
• Buka penutup.• Hidangkan makanan dengan menggunakan senduk plastik yang
dibekalkan bersama-sama dengan peralatan dan tutup penutup.• Jangan lupa menanggalkan plag peralatan selepas kekal panas.
Jangan keluarkan mangkuk selepas memasak tanpa memakai sarungtangan ketuhar.
SETELAH SELESAI MEMASAK
• Pengumpul wap perlu dikosongkan dan dicuci selepas setiap penggunaan.
• Untuk membuka pengumpul, tekan kedua-dua belah penutup plastik dan keluarkannya - fig. 11.
• Untuk memasang kembali pengumpul wap, tekan dengan ketat ke dalam alur.
• Apabila mencuci injap tekanan mikro, sila alihkan daripada penutup dan buka dengan memutarnya ke arah “buka” - fig. 12, Selepas mencuci, sila keringkannya, dan putarkan ke arah “tutup” sehingga bunyi “ka” kedengaran kemudian letakkan ia kembali ke dalam penutup periuk nasi.
• Gunakan air panas, cecair pencuci dan span untuk mencuci mangkuk - fig. 13, pengumpul wap - fig. 14, injap tekanan mikro - fig. 15, senduk dan cawan. Serbuk penyental dan span keluli tidak disarankan.
• Sekiranya makanan terlekat di dasar, rendamkan mangkuk seketika sebelum mencuci.
• Keringkan mangkuk dengan berhati-hati.• Jangan rendam peralatan di dalam air atau tuangkan air ke atasnya,
hanya ke dalam mangkuk.
MENCUCI DAN MENYELENGGARA
24
MS
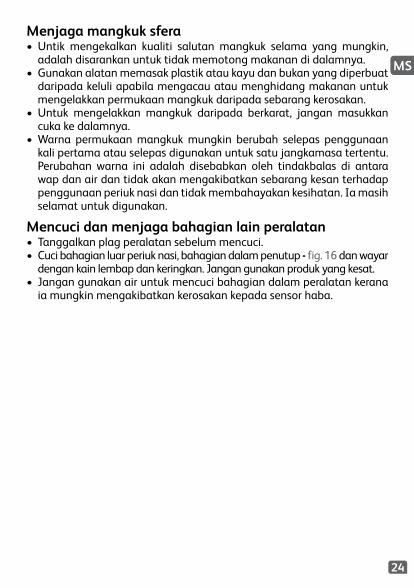
Menjaga mangkuk sfera• Untik mengekalkan kualiti salutan mangkuk selama yang mungkin,
adalah disarankan untuk tidak memotong makanan di dalamnya.• Gunakan alatan memasak plastik atau kayu dan bukan yang diperbuat
daripada keluli apabila mengacau atau menghidang makanan untuk mengelakkan permukaan mangkuk daripada sebarang kerosakan.
• Untuk mengelakkan mangkuk daripada berkarat, jangan masukkan cuka ke dalamnya.
• Warna permukaan mangkuk mungkin berubah selepas penggunaan kali pertama atau selepas digunakan untuk satu jangkamasa tertentu. Perubahan warna ini adalah disebabkan oleh tindakbalas di antara wap dan air dan tidak akan mengakibatkan sebarang kesan terhadap penggunaan periuk nasi dan tidak membahayakan kesihatan. Ia masih selamat untuk digunakan.
Mencuci dan menjaga bahagian lain peralatan• Tanggalkan plag peralatan sebelum mencuci.• Cuci bahagian luar periuk nasi, bahagian dalam penutup - fig. 16 dan wayar
dengan kain lembap dan keringkan. Jangan gunakan produk yang kesat.• Jangan gunakan air untuk mencuci bahagian dalam peralatan kerana
ia mungkin mengakibatkan kerosakan kepada sensor haba.
25
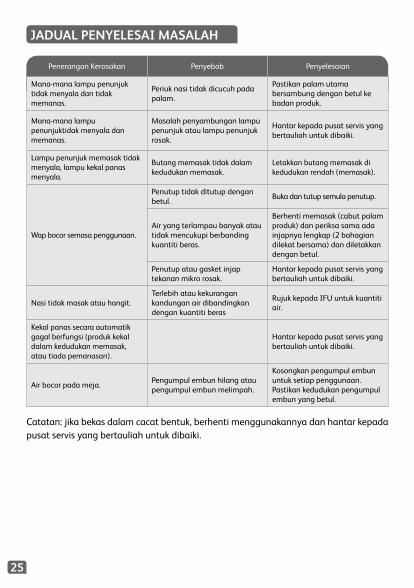
Penerangan Kerosakan Penyebab Penyelesaian
Mana-mana lampu penunjuk tidak menyala dan tidak memanas.
Periuk nasi tidak dicucuh pada palam.
Pastikan palam utama bersambung dengan betul ke badan produk.
Mana-mana lampu penunjuktidak menyala dan memanas.
Masalah penyambungan lampu penunjuk atau lampu penunjuk rosak.
Hantar kepada pusat servis yang bertauliah untuk dibaiki.
Lampu penunjuk memasak tidak menyala, lampu kekal panas menyala.
Butang memasak tidak dalam kedudukan memasak.
Letakkan butang memasak di kedudukan rendah (memasak).
Wap bocor semasa penggunaan.
Penutup tidak ditutup dengan betul.
Buka dan tutup semula penutup.
Air yang terlampau banyak atau tidak mencukupi berbanding kuantiti beras.
Berhenti memasak (cabut palam produk) dan periksa sama ada injapnya lengkap (2 bahagian dilekat bersama) dan diletakkan dengan betul.
Penutup atau gasket injap tekanan mikro rosak.
Hantar kepada pusat servis yang bertauliah untuk dibaiki.
Nasi tidak masak atau hangit.Terlebih atau kekurangan kandungan air dibandingkan dengan kuantiti beras
Rujuk kepada IFU untuk kuantiti air.
Kekal panas secara automatikgagal berfungsi (produk kekaldalam kedudukan memasak,atau tiada pemanasan).
Hantar kepada pusat servis yang bertauliah untuk dibaiki.
Air bocor pada meja.Pengumpul embun hilang atau pengumpul embun melimpah.
Kosongkan pengumpul embun untuk setiap penggunaan. Pastikan kedudukan pengumpul embun yang betul.
JADUAL PENYELESAI MASALAH
Catatan: jika bekas dalam cacat bentuk, berhenti menggunakannya dan hantar kepadapusat servis yang bertauliah untuk dibaiki.

27
1 蒸盤2 水量和米量刻度3 可拆式易潔內鍋4 量杯5 飯勺6 電源線7 開蓋按鈕8 煲蓋把手9 微壓閥
10 煲蓋11 水氣收集器12 操控面板
a 煮飯指示燈b 保溫指示燈c 控制開關
13 發熱板14 感應器
描述
重要建議安全指示
請閱讀並遵循本使用說明書,並妥善保存。• 請閱讀本說明書並妥善保存。• 本產品不得使用外部定時器或獨立遙控系統操
作。• 此電器用品可由8歲或以上兒童使用,但必須在
成人監督下,或兒童曾受指導,知道如何安全使 用本產品,亦明白當中所牽涉的風險。清潔及 保養工作不應由兒童進行,除非他們已年滿8歲 或以上,並有成人監督。請將本產品及相連電 線放置於8歲以下兒童不能觸及的地方。
• 此產品亦可由身體、感官或心智障礙,或經驗 及知識不足之人士使用,但必須在使用時獲指 導,確保他們知道如何安全使用本產品,並明白 當中的風險。
• 兒童不可將本產品當作玩具。• 該電器產品不適合以下人士使用(包括兒童):身

28
ZH
體、感官或心智障礙的人士,缺乏相關經驗或 知識的人士,除非他們在負責其安全的人士給予指導或監督下使用。
• 應照看好兒童, 確保他們不玩耍該電器產品。• 本產品設計僅供家庭使用,並非為以下用途而
設,且不會得到保養: – 商店,辦公室或其他工作環境的員工廚房範圍; – 農舍; – 酒店、汽車旅館及其他住宿性質環境的客戶使用; – 供住宿及早餐的旅館。
• 如果電器產品配備可拆卸電源線:如果電源線損壞,必須到授權服務中心更換其提供的電源線。
• 如果電器產品配備固定電源線:如果電器產品的電源線損壞,為了您的安全,必須由授權服務中心或合資格的人士進行更換。
• 切勿將產品浸入液體中。• 請使用微濕的抹布或海棉及洗潔精,清潔配件及
與食物有接觸的零件,再用濕布或海棉沖洗。用乾布抹乾配件及與食物有接觸的零件。
• 若電器上印有 標記, 表示「小心:使用時表面可能變熱」。
• 小心:產品表面在使用後可能仍然燙熱。• 小心:不正確使用產品可能導致損傷。
29
• 小心:若產品的電源線可拔除,切勿弄濕連接器。
• 以下情況下, 請務必斷開該電器產品的電源: – 使用後, – 移動時, – 保養或清潔前, – 不能正常運作時。
• 接觸產品的發熱部位、熱水、蒸汽及食物,可能會被燙傷。
• 在烹調期間,產品會產生高溫和蒸汽。請將手和臉部遠離蒸汽孔。請勿陼塞蒸汽出口。
• 如有任何問題,請聯繫售後服務部或瀏覽我們的網站。
• 此產品最高可於海拔 2000公尺使用。• 該電器產品符合所有相關的安全法規,包括低電壓指令、電磁相容性
法規、食品接觸材料立法及環境立法。• 檢查產品銘牌上的電壓與供電電壓相符(交流電)。• 如果您在購買地以外的國家使用本產品, 請先將產品送交到當地的
授權服務中心進行檢查。
接通電源
• 下列情況下請勿使用產品: – 產品或電源線受損。 – 產品意外墜落, 造成損傷或不正常運作。 – 在這些情況下,為了您的安全,必須將該電器產品送往授權服務中心。切勿自行拆除該電器產品。
• 請勿讓電源線隨意懸垂。• 務必確保該產品接在接地插座上。• 請勿使用延長線。如果您自己承擔責任, 請只使用完好的及與該產
品功率相符的接地延長線。• 不要拉扯電源線來拔取電源插頭。
30
ZH
保護環境
• 該電器產品能夠持續使用多年。但當您決定更換時, 請記住, 您可以幫助保護環境。
• 在丟棄電器產品前, 應拆除計時器的電池並將其棄置於廢物收集站或授權服務中心(根據型號)。
請關愛我們的環境! 您的電器產品包含可回收或可循環再用的寶貴材料。 請將其置於當地的廢物收集站。
使用時
• 請在平穩和耐熱的工作表面使用, 並避免被水濺濕。• 在內鍋未放入主機中或內鍋為空的時候, 請勿啟動操作。• 必須讓烹調功能/汽閥自由運作。請勿阻礙其切換至自動保溫功能。• 當電器運作時, 請勿拿出內鍋。• 請勿將產品直接放在燙熱的表面上、或其他熱源或火源上, 否則產
品會受到損壞或發生故障, 甚至發生危險。• 內鍋應與加熱盤直接接觸。若有任何異物放在該兩者之間都將可能
導致故障。• 請勿將產品放置於熱源附近或置於焗爐內, 以防對其造成嚴重損害。• 在內鍋未放入主機中前, 請勿放任何食物或水在主機裡。• 根據內鍋的刻度來調節米、水比例。• 一旦產品某部份著火, 請勿直接用水撲滅, 您可以用一塊濕布蓋住著
火部位來滅火。• 所有對產品作出之改動必須由授權服務中心進行, 並使用原裝配
件。• 本產品只能作為家用。任何專業性用途、不當使用或未遵照本說明
書使用引起的故障, 本公司均不負任何責任, 此等故障損壞不在保養範圍內。
31
拆開包裝• 拆開包裝,取出電飯煲,並取出所有配件及印刷品。• 按下把手上的開蓋按鈕,打開煲蓋 - 圖1。• 安裝飯勺架:將飯勺架的塑膠掛勾安裝在本產品邊框底部的孔內,
然後往下滑動 - 圖5。小心閱讀以下指引,並按照所示方法操作。
初次使用前
清洗電飯煲• 取出球釜內鍋及微壓閥。• 用海綿及洗潔精清洗內鍋及微壓閥。用濕布擦拭機身表面及煲蓋的
金屬部分。• 小心抺乾。• 確保微壓閥處於正確位置 - 圖2。
• 小心擦拭內鍋外面部分(特別是底部)。確保內鍋底下或發熱板上無任何殘餘食材或液體 - 圖3。
• 將內鍋放進電飯煲 - 圖4,確定位置妥當。• 將內鍋稍微向左右兩邊轉動,以確保內鍋底部與發熱板接觸良好。• 檢查水氣收集器的位置是否正確,如位置有誤,請將水氣收集器牢
牢按進凹槽內 - 圖5。• 蓋上煲蓋並鎖緊。• 插上電源。• 除非已完成以上程序,否則切勿開啟飯煲。• 如內鍋未加入任何食材,切勿啟動電飯煲。 • 插上電源後,請勿觸摸電飯煲的發熱板。切勿在烹調期間將手放近蒸汽排放口,以免燙傷。當電飯煲裝滿時,切勿用煲蓋把手移動電飯煲。只可使用隨電飯煲提供的內鍋。未裝置內鍋前,請勿將水或食材放進電飯煲內。
使用電飯煲

32
ZH
• 內鍋內的刻度以公升和杯為單位。刻度可幫助量度煮飯時的水量 - 圖6。
• 隨電飯煲提供的塑膠杯用於量度米量,而下表列明各份量所需要的米量。一平杯米約重150克。
• 下表提供不同米類的烹調指引。為達到最佳效果,我們建議使用普通米,不使用「快熟」米,因為快熟米的黏性較強,有可能黏底。至於其他米類,例如糙米或野米,所用水量需要隨之調整,詳情請參見下表。
• 要煮1量杯白飯(2小份或1大份)時,由於內鍋並無煮1量杯白米的刻度,所以請用1量杯白米,然後再加入1.5量杯的水量。某些米類在只煮一杯時會有少量黏底的情況,此乃正常。要烹煮其他份量的白米,請參考以下烹調建議。
• 米和水的總量最多不應超過內鍋內側的水位線,即5.5杯或10杯水 (視乎型號而定) - 圖6。須根據米類的不同調校水量。詳情請查閱下表。
量度米和水
烹調前徹底沖洗米粒。
白米的烹調指引 - 10量杯白米量杯數 白米重量 內鍋中的水位(
連米) 份量 大約烹調時間*
2 300克 2杯刻度 3至4人份量 20至26分鐘
4 600克 4杯刻度 5至6人份量 29至34分鐘
6 900克 6杯刻度 8至10人份量 37至43分鐘
8 1200克 8杯刻度 13至14人份量 40至46分鐘
10 1500克 10杯刻度 16至18人份量 45至51分鐘
*電飯煲會根據內鍋中的水量和米量,自行決定實際所需的烹調時間。
33
• 將產品放在穩固防熱的平坦工作面上,並遠離熱源及避免水濺。• 用電飯煲附送的量杯將所需的米倒入內鍋中。然後將凍水加入至內
鍋中相應的「CUP」(量杯)水位刻度(請參見上方的烹調指引)。• 蓋上煲蓋。
煮飯
電飯煲會根據內鍋中的水和食材份量,自行決定實際所需的烹調時間(請參見上表的烹調時間指引)。當所有水份都已被米吸收,電飯煲會自動停止烹調程序,然後進入「Keep Warm」保溫模式(綠色「Keep Warm」保溫指示燈會亮起)。
注意:煮飯時要先放米再放水,否則水量會太多。
• 按下控制開關,煮飯指示燈會亮起,表示已開始烹調 - 圖7。• 當飯煮熟後,便會自動跳至保溫模式,而「Keep Warm」保溫指
示燈會亮起 - 圖8。• 每次使用後,請清空並清洗水氣收集器。
達到最佳煮飯效果的建議• 米量好後,用筲箕在水龍頭下徹底沖洗一段長時間(不用沖洗的意
大利米除外)。然後將洗淨的米和相應份量的水加入內鍋中。• 將米均勻分佈在內鍋中,以確保烹調均勻。• 可將鹽加入水中,視乎個人口味而定。• 可用高湯代替水。如使用高湯,可能令米輕微燒焦。• 煮飯時請勿打開煲蓋,因為蒸氣溢出會影響烹調時間和米飯的味道。• 當飯煮好,「Keep Warm」保溫指示燈亮著時,攪拌米飯,然後
讓米飯留在鍋中數分鐘,可令米飯粒粒分明。
34
ZH
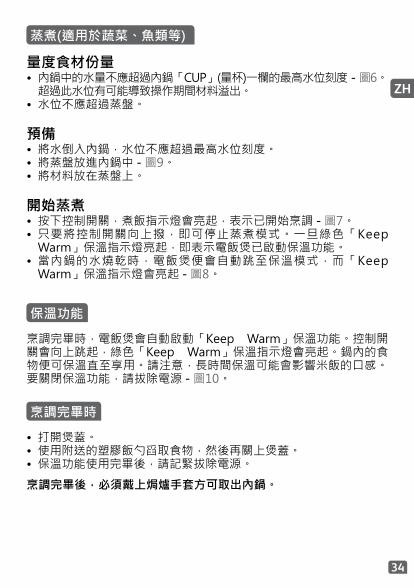
量度食材份量• 內鍋中的水量不應超過內鍋「CUP」(量杯)一欄的最高水位刻度 - 圖6。
超過此水位有可能導致操作期間材料溢出。• 水位不應超過蒸盤。
蒸煮(適用於蔬菜、魚類等)
預備• 將水倒入內鍋,水位不應超過最高水位刻度。• 將蒸盤放進內鍋中 - 圖9。• 將材料放在蒸盤上。
開始蒸煮• 按下控制開關,煮飯指示燈會亮起,表示已開始烹調 - 圖7。• 只要將控制開關向上撥,即可停止蒸煮模式。一旦綠色「Keep
Warm」保溫指示燈亮起,即表示電飯煲已啟動保溫功能。• 當內鍋的水燒乾時,電飯煲便會自動跳至保溫模式,而「Keep
Warm」保溫指示燈會亮起 - 圖8。
烹調完畢時,電飯煲會自動啟動「Keep Warm」保溫功能。控制開關會向上跳起,綠色「Keep Warm」保溫指示燈會亮起。鍋內的食物便可保溫直至享用。請注意,長時間保溫可能會影響米飯的口感。要關閉保溫功能,請拔除電源 - 圖10。
保溫功能
烹調完畢後,必須戴上焗爐手套方可取出內鍋。
• 打開煲蓋。• 使用附送的塑膠飯勺舀取食物,然後再關上煲蓋。• 保溫功能使用完畢後,請記緊拔除電源。
烹調完畢時
35
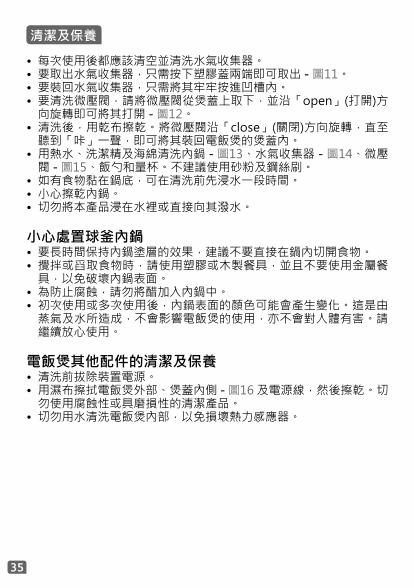
• 每次使用後都應該清空並清洗水氣收集器。• 要取出水氣收集器,只需按下塑膠蓋兩端即可取出 - 圖11。• 要裝回水氣收集器,只需將其牢牢按進凹槽內。• 要清洗微壓閥,請將微壓閥從煲蓋上取下,並沿「open」(打開)方
向旋轉即可將其打開 - 圖12。• 清洗後,用乾布擦乾。將微壓閥沿「close」(關閉)方向旋轉,直至
聽到「咔」一聲,即可將其裝回電飯煲的煲蓋內。• 用熱水、洗潔精及海綿清洗內鍋 - 圖13、水氣收集器 - 圖14、微壓
閥 - 圖15、飯勺和量杯。不建議使用砂粉及鋼絲刷。• 如有食物黏在鍋底,可在清洗前先浸水一段時間。• 小心擦乾內鍋。• 切勿將本產品浸在水裡或直接向其潑水。
清潔及保養
小心處置球釜內鍋• 要長時間保持內鍋塗層的效果,建議不要直接在鍋內切開食物。• 攪拌或舀取食物時,請使用塑膠或木製餐具,並且不要使用金屬餐
具,以免破壞內鍋表面。• 為防止腐蝕,請勿將醋加入內鍋中。• 初次使用或多次使用後,內鍋表面的顏色可能會產生變化。這是由
蒸氣及水所造成,不會影響電飯煲的使用,亦不會對人體有害。請繼續放心使用。
電飯煲其他配件的清潔及保養• 清洗前拔除裝置電源。• 用濕布擦拭電飯煲外部、煲蓋內側 - 圖16 及電源線,然後擦乾。切
勿使用腐蝕性或具磨損性的清潔產品。• 切勿用水清洗電飯煲內部,以免損壞熱力感應器。
36
ZH
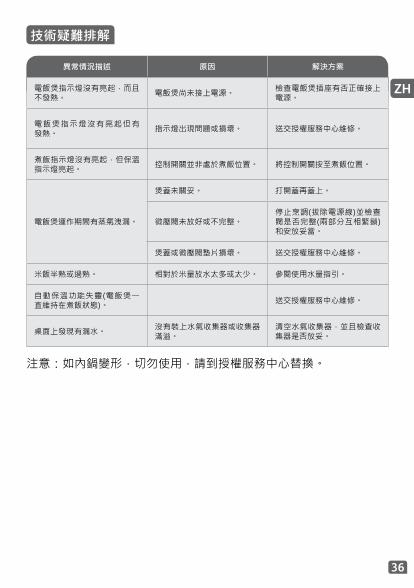
異常情況描述 原因 解決方案
電飯煲指示燈沒有亮起,而且不發熱。 電飯煲尚未接上電源。 檢查電飯煲插座有否正確接上
電源。
電飯煲指示燈沒有亮起但有發熱。 指示燈出現問題或損壞。 送交授權服務中心維修。
煮飯指示燈沒有亮起,但保溫指示燈亮起。 控制開關並非處於煮飯位置。 將控制開關按至煮飯位置。
電飯煲運作期間有蒸氣洩漏。
煲蓋未關妥。 打開蓋再蓋上。
微壓閥未放好或不完整。停止烹調(拔除電源線)並檢查閥是否完整(兩部分互相緊鎖)和安放妥當。
煲蓋或微壓閥墊片損壞。 送交授權服務中心維修。
米飯半熟或過熟。 相對於米量放水太多或太少。 參閱使用水量指引。
自動保溫功能失靈(電飯煲一直維持在煮飯狀態)。 送交授權服務中心維修。
桌面上發現有漏水。 沒有裝上水氣收集器或收集器滿溢。
清空水氣收集器,並且檢查收集器是否放妥。
技術疑難排解
注意:如內鍋變形,切勿使用,請到授權服務中心替換。
38
CN
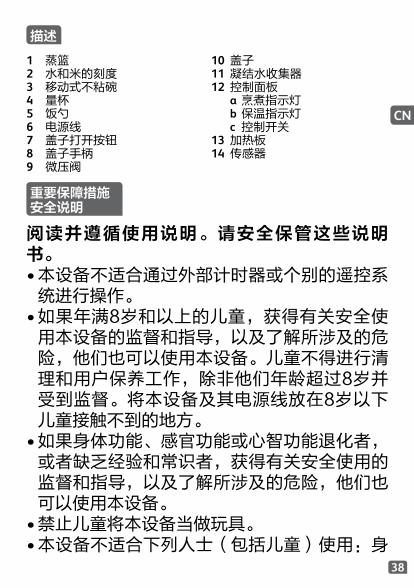
1 蒸篮2 水和米的刻度3 移动式不粘碗4 量杯5 饭勺6 电源线7 盖子打开按钮8 盖子手柄9 微压阀
10 盖子11 凝结水收集器12 控制面板
a 烹煮指示灯b 保温指示灯c 控制开关
13 加热板14 传感器
描述
重要保障措施安全说明
阅读并遵循使用说明。请安全保管这些说明书。• 本设备不适合通过外部计时器或个别的遥控系
统进行操作。• 如果年满8岁和以上的儿童,获得有关安全使
用本设备的监督和指导,以及了解所涉及的危险,他们也可以使用本设备。儿童不得进行清理和用户保养工作,除非他们年龄超过8岁并受到监督。将本设备及其电源线放在8岁以下儿童接触不到的地方。
• 如果身体功能、感官功能或心智功能退化者,或者缺乏经验和常识者,获得有关安全使用的监督和指导,以及了解所涉及的危险,他们也可以使用本设备。
• 禁止儿童将本设备当做玩具。• 本设备不适合下列人士(包括儿童)使用:身
39
体功能、感官功能或心智功能退化者,或者缺乏经验和常识者。他们只能在负责其安全的人员监督或指导如何使用本设备的情况下使用。
• 应对儿童进行监督,确保他们不将本设备当做玩具。
• 由于本设备仅供家庭使用,因此它不适用于以下应用范围,否则,将导致保证无效: – 商店、办公室和其他工作环境中的职员厨房区 – 农舍 – 酒店、汽车旅馆和其他住宅类型环境的客户 – 民宿类型的环境
• 若您的设备配有固定的电源线: a 如果电源线损坏,必须由制造商、制造商的售后服务部门,或类似的合格人员更换以避免发生任何危险情况。
• 不得将本设备浸入水中或任何其他液体中。• 用湿布或海绵和洗涤液,清理配件和接触食物
的部分。用湿布或海绵冲洗。小心擦干。• 若设备上标有 符号,该符号表示“注意:
使用过程中表面可能会变热”。• 小心:加热产品的表面会在使用后产生余热。• 小心:不正确使用本设备可能会导致受伤。• 小心:若您的设备配有可卸下的电源线,请勿
让液体溅到接头上。• 请务必在下列情况拔下设备电源插头:
– 使用后立即拔下
40
CN
– 移动设备时 – 执行任何清理或保养工作之前 – 如果设备无法正常运作
• 触碰设备的热表面、热水、蒸汽或食物会导致灼伤。
• 在烹煮过程中,设备会散发热量和蒸汽。请勿让脸部和手靠近。
• 不要妨碍蒸汽出口。• 若有任何问题或疑问,请联系我们的客户关系
团队或参阅我们的网站。• 本设备可以在高达2000米处使用。
• 为了您的安全,本设备符合制造时有效的安全法规和指令(低压指令、电磁兼容性、食品接触材料法规、环境…)。
• 检查电源电压是否与设备上显示的电压相符(交流电)。• 鉴于各国实施的标准有所不同,因此,如果是在购买设备的国家之
外的地方使用该设备,请让认可的服务中心进行检查。
连接电源
• 若出现下列情况,请勿使用本设备: – 设备或电源线损坏 – 设备掉落或出现明显损坏或无法正常工作 – 若发生上述情况,必须将设备送往认可的服务中心。请勿自行拆开设备
• 请勿让电源线悬挂。• 务必将设备插入接地插座。• 请勿使用延长线。若您承担使用延长线的责任,请仅使用状况良
好、具有接地插头并且适合设备功率的延长线。• 请勿通过拉扯电源线来拔下设备电源插头。
41
使用
• 使用平坦、稳定、耐热的工作表面上,并远离任何溅水处。• 请勿让设备的底座接触水。• 切勿尝试在空锅或没有锅的情况下操作本设备。• 烹煮功能/旋钮必须能自由操作。请勿阻止或阻碍自动切换到保温
功能的功能。• 当设备正在工作时,请勿将锅取出。• 请勿将本设备直接放在高温表面或任何其他热源或火焰上,否则会
导致故障或危险。• 锅和加热板应直接接触。确保锅和加热板之间没有任何食物或液体。• 请勿将本设备放在热源附近或热烤箱内,否则可能会导致严重损坏。• 必须先将锅安置妥当,才可将任何食物或水放入设备中。• 遵循食谱中规定的量。• 若设备的任何部分着火,请勿尝试用水将它熄灭。若要熄灭火焰,
请使用湿茶巾。• 任何介入设备的检修工作只能由服务中心使用原装备件执行。• 如果设备无人看管,以及在组装、拆卸或清理设备之前,请务必断
开设备与电源的连接。
保护环境
• 您的设备设计为运行多年。但是,当您决定换掉它时,请记得考虑如何帮助保护环境。
• 丢弃您的设备之前,应取出计时器内的电池并将它弃置在当地的城市垃圾收集中心(根据型号)。
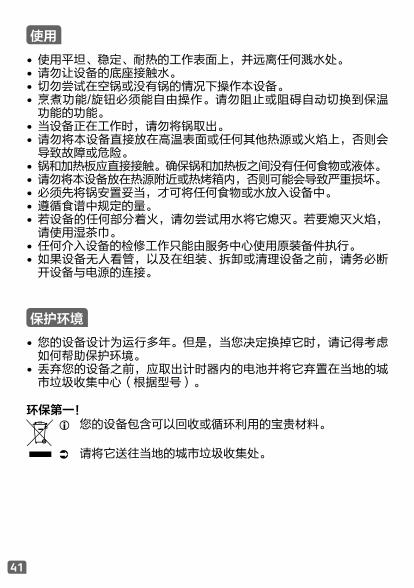
环保第一!
您的设备包含可以回收或循环利用的宝贵材料。
请将它送往当地的城市垃圾收集处。
42
CN
打开设备包装• 从包装中取出设备,然后打开所有配件和印刷文件的包装。• 按下位于手柄上的打开按钮将盖子打开 - 图1。• 安装勺子支架:将支架的塑料钩插入设备环下方的孔,然后向下滑
动 - 图5。阅读说明并谨慎遵循操作方法。
第一次使用之前
清理设备• 取出球形锅和微压阀。• 用海绵和洗涤液清理锅和微压阀。用湿布擦拭设备外部和盖子的金
属部分。• 小心擦干。• 确保微压阀正确放置到位 - 图2。
• 小心擦拭碗的外部(尤其是底部)。确保碗的下面和加热板上没有异物残留或液体 - 图3。
• 将碗放入设备 - 图4,确保它正确放置。• 将碗稍微左右转动,确保碗的底部和加热板之间良好接触。• 检查凝结水收集器是否正确在位,如果没有,请将它牢固推入槽中
以妥善安装 - 图5。• 关上并锁定盖子。• 插接设备电源。• 完成上述所有阶段之前,请勿开启设备电源。• 如果煮锅是空的,请勿启动设备。 • 插接设备的电源后,请勿触碰加热板。在烹煮过程中,切勿将手放在蒸汽孔上,否则会有灼伤的危险。切勿使用盖子手柄来搬动装满的设备。只能使用设备随附的内锅。必须先将碗放入设备,才可倒入水或放入食材。
使用您的电饭锅
43
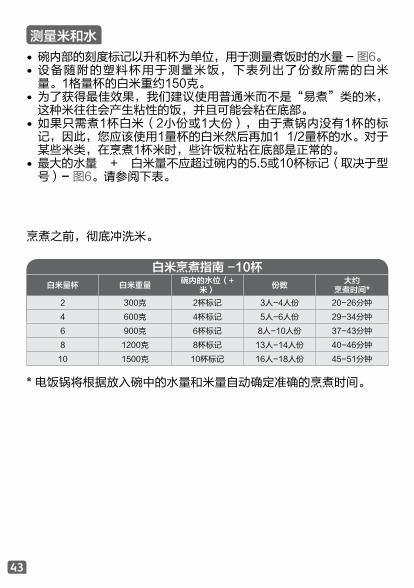
• 碗内部的刻度标记以升和杯为单位,用于测量煮饭时的水量 - 图6。• 设备随附的塑料杯用于测量米饭,下表列出了份数所需的白米
量。1格量杯的白米重约150克。• 为了获得最佳效果,我们建议使用普通米而不是“易煮”类的米,
这种米往往会产生粘性的饭,并且可能会粘在底部。• 如果只需煮1杯白米(2小份或1大份),由于煮锅内没有1杯的标
记,因此,您应该使用1量杯的白米然后再加1 1/2量杯的水。对于某些米类,在烹煮1杯米时,些许饭粒粘在底部是正常的。
• 最大的水量 + 白米量不应超过碗内的5.5或10杯标记(取决于型号)- 图6。请参阅下表。
测量米和水
烹煮之前,彻底冲洗米。
白米烹煮指南 -10杯白米量杯 白米重量
碗内的水位(+ 米)
份数大约
烹煮时间*
2 300克 2杯标记 3人-4人份 20-26分钟
4 600克 4杯标记 5人-6人份 29-34分钟
6 900克 6杯标记 8人-10人份 37-43分钟
8 1200克 8杯标记 13人-14人份 40-46分钟
10 1500克 10杯标记 16人-18人份 45-51分钟
* 电饭锅将根据放入碗中的水量和米量自动确定准确的烹煮时间。
44
CN
• 将设备放在平坦、稳定、耐热的工作表面上,并远离溅水处和任何其他热源。
• 使用随附的量杯,将所需的米量倒入碗。然后,加入冷水到碗内刻印的相应“CUP标记(请参阅上述烹煮指南)。
• 关上盖子。
煮饭
电饭锅将根据放入碗中的水量和食材量自行确定准确的烹煮时间(请参阅上述烹煮指南了解有关烹煮时间的信息)。当米吸收所有的水后,设备将会自动停止烹煮过程并进入“KEEP WARM”(保温)模式(绿色的“KEEP WARM”[保温]指示灯亮起)。
备注:始终先加入米,否则会有太多的水。
• 向下按控制开关,烹煮指示灯将会亮起,表示已开始烹煮 - 图7。• 完成烹煮后,它将会自动切换到保温功能,“KEEP WARM”(保
温)指示灯将会亮起 - 图8。• 每次使用后,清空并清理凝结水收集器。
最佳煮饭效果的一些建议• 测量米并在流动的自来水下用筛子彻底冲洗(除了不应冲洗的意大
利米)。然后将米和相应的水量一起放入碗内。• 确保米在碗内均匀分布,以便均匀烹煮。• 加入盐水:根据个人口味。• 可以用高汤来取代水。若使用高汤,可能会出现碗内的米变成褐色
的风险。• 在烹饪过程中请勿打开盖子,因为蒸汽会逸出,从而影响烹煮时间
和味道。• 完成烹煮后,“KEEP WARM”(保温)指示灯将会亮起,搅拌
米饭,然后将它留在电饭锅内几分钟,如此即可获得粒粒分明的完美米饭。
45
测量食材• 碗内的最大水量不应超过碗上的“CUP”所显示的最大CUP标记
- 图6。超过此水量可能会在使用过程中溢流。• 水量应该低于蒸篮。
蒸煮(用于蔬菜、鱼等)
准备• 将水倒入碗,切勿超过最大CUP标记。• 将蒸篮放入碗 - 图9。• 将食材放入蒸篮。
若要蒸煮• 向下按控制开关,烹煮指示灯将会亮起,表示已开始烹煮 - 图7。• 您可以通过将控制开关转到最高位置来结束蒸煮模式。绿色
的“KEEP WARM”(保温)指示灯将会亮起,设备将切换到保温功能。
• 当煮锅内已没有水,它将会自动切换到保温功能,“KEEP WARM”(保温)指示灯将会亮起 - 图8。
完成烹煮后,设备将自动进入“KEEP WARM”(保温)功能。控制开关将向上弹到最高位置,绿色的“KEEP WARM”(保温)指示灯将会亮起。如此,食物将保温直到您准备好享用。请注意,长时间保温可能会影响米饭的质量。若要关闭此功能,请拔下设备电源插头 - 图10。
保温功能
烹饪后切勿在没有戴上耐热保护手套的情况下将碗取出。
• 打开盖子。• 使用随附的塑料勺拿取食物并关上盖子。• 保温后,不要忘了拔下设备电源插头。
完成烹煮时
46
CN
清理和保养设备的其他部分• 清理之前,请拔下设备电源插头。• 用湿布清理电饭锅的外部、盖子的内部 - 图16 和电源线然后擦干。
请勿使用研磨性的产品。• 请勿用水清洗设备主体内部,否则可能会损坏热传感器。
• 每次使用后,应清空并清理凝结水收集器。• 若要取下收集器,请按压塑料盖的两侧并将它取下 - 图11。• 若要放回收集器,请将它牢固推入槽中。• 若要清理微压阀,请将它从盖子上取下,然后沿着“打开”方向旋
转将它打开 - 图12。• 清理后,将它擦干。沿着“关闭”方向旋转微压阀直至听到“咔
哒”声,然后将它放回电饭锅的盖子中。• 用热水、洗涤液和海绵清理碗 - 图13、凝结水收集器 - 图14、微
压阀 - 图15、勺子和杯。不建议使用去污剂 - 粉末和金属海绵。• 若食物粘在底部,请浸泡碗一会儿然后再清洗碗。• 小心擦干碗。• 请勿将设备浸入水中,也不要将水倒入其中。
清理和保养
保养球形碗• 为了尽可能长时间保持碗的涂层质量,建议不要在碗内切食物。• 在搅拌或拿取食物时,请使用塑料或木制器具而不是金属器具,以
避免损坏碗表面。• 为了避免任何腐蚀风险,请勿将醋倒入碗中。• 第一次使用后或长时间使用后,碗表面的颜色可能会发生变化。这
种颜色的变化是由于蒸汽和水的作用,对电饭锅的使用没有任何影响,也不会危害您的健康。继续使用它是完全安全的。
47
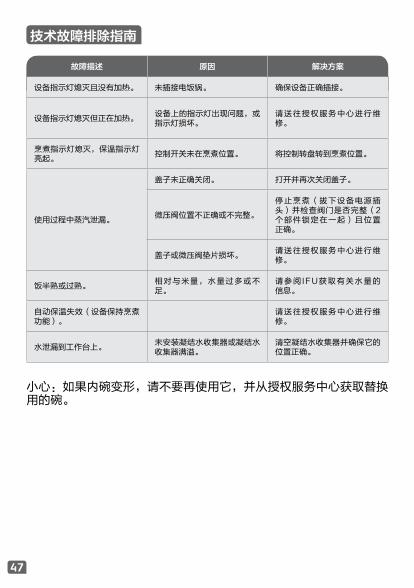
故障描述 原因 解决方案
设备指示灯熄灭且没有加热。 未插接电饭锅。 确保设备正确插接。
设备指示灯熄灭但正在加热。设备上的指示灯出现问题,或指示灯损坏。
请送往授权服务中心进行维修。
烹煮指示灯熄灭,保温指示灯亮起。
控制开关未在烹煮位置。 将控制转盘转到烹煮位置。
使用过程中蒸汽泄漏。
盖子未正确关闭。 打开并再次关闭盖子。
微压阀位置不正确或不完整。
停止烹煮(拔下设备电源插头)并检查阀门是否完整(2个部件锁定在一起)且位置正确。
盖子或微压阀垫片损坏。请送往授权服务中心进行维修。
饭半熟或过熟。相对与米量,水量过多或不足。
请参阅IFU获取有关水量的信息。
自动保温失效(设备保持烹煮功能)。
请送往授权服务中心进行维修。
水泄漏到工作台上。未安装凝结水收集器或凝结水收集器满溢。
清空凝结水收集器并确保它的位置正确。
技术故障排除指南
小心:如果内碗变形,请不要再使用它,并从授权服务中心获取替换用的碗。
EN p. 1 – 12
MS p. 13 – 26
ZH p. 27 – 37
CN p. 38 – 48
9100034275-03
EN
MS
ZH
CN