mastering the convection steam oven - subzerodocuments.subzero.com/answeradvisor/cso cookbook.pdfon...
TRANSCRIPT
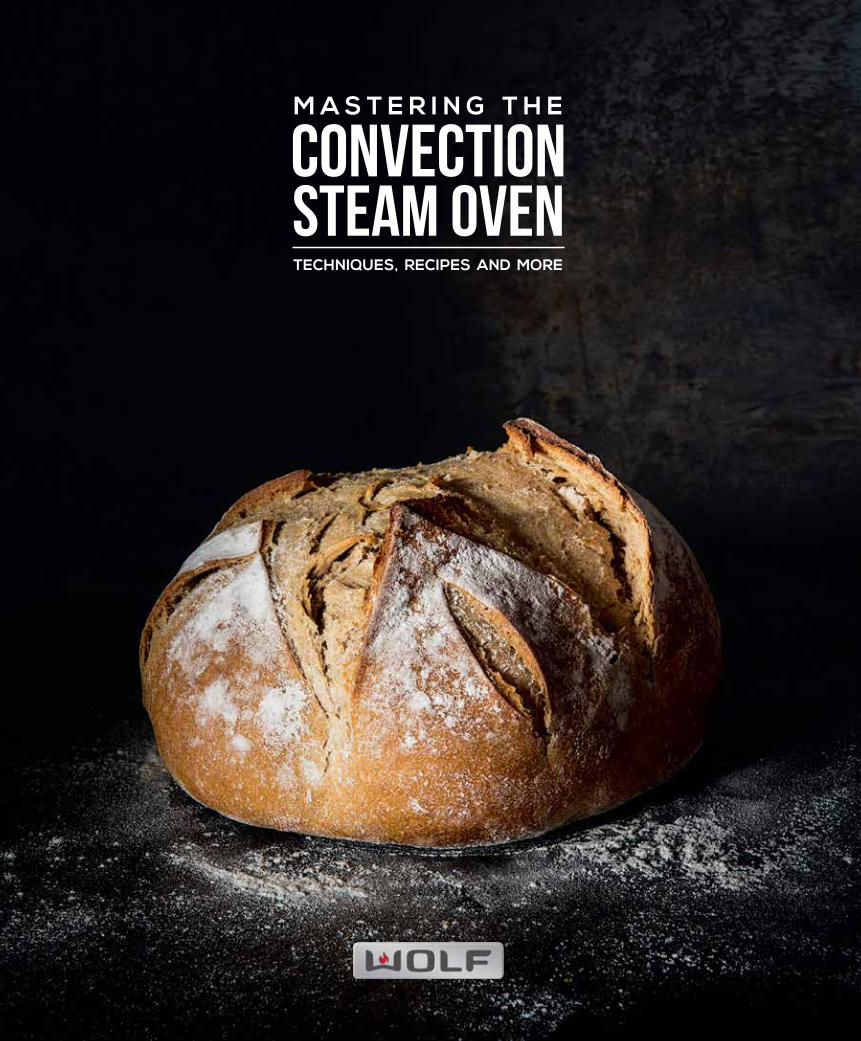
TECHNIQUES, RECIPES AND MORE
ConvectionSteam oven
M A S T E R I N G T H E

Juicy, golden roast turkey. Vibrant steamed asparagus. Bubbly, crisp-crusted casseroles. Breads worthy of a boulangerie. A succulent
standing rib roast. Is there anything our
Convection Steam Oven can’t do? It bakes,
roasts, steams, braises, blanches, poaches
and more. It locks in vitamins, nutrients,
moisture, flavor. It cooks food faster, and saves
energy. No wonder combi (short for combination)
ovens like ours have been a standby in the
restaurants, bakeries and home kitchens of
Europe for decades.
You can do amazing things with the Wolf convection steam oven in your own kitchen –
in fact, you can open up a whole new world of
delicious tastes and healthier eating. But first you
have to learn how it works, and understand the
proper techniques for using it. Once you’ve done
that, you can delve into the dozens of recipes that
we’ve perfected for you.
We’re not exaggerating when we say we LOVE
cooking with the convection steam oven, and
we’re sure you will too. It can be the greatest
culinary adventure of your life.
2 INTRODUCTION
4 PROPER TECHNIQUES = RECIPE SUCCESS
6 Steam Mode 10 Steamed Vegetables 11 Poached Fish 12 Steamed Shrimp 13 Potato Salad 14 Steam Buns 16 Hard-Boiled Eggs 17 Defrosting
18 Reheat Mode 20 Leftovers 21 Plates of Food 22 Stale or Freezer-Burned Bread 23 Full Casseroles
24 Auto Steam Bake Mode 28 Apple Crisp 29 Apple Pie 30 Dinner Rolls 31 Honey Wheat Sandwich Bread
32 Convection Mode 34 Roast Chicken 35 Chocolate Soufflé 36 Cinnamon Puffs 37 Granola 38 Beef Jerky 40 Caramel Squares 41 Chocolate Chip Cookies
42 Convection Humid Mode 44 Lasagna 46 Blueberry Muffins 47 Zucchini Bread 48 Meatloaf 49 Scalloped Potatoes
50 Convection Steam Mode 54 Pretzel Buns 55 Italian Beef 56 Bacon 57 Bread Pudding 58 Cheesecake 60 Pita Bread 62 Pork Shoulder 63 Ribs
64 Wolf Gourmet Mode 66 Artisan Bread 68 Twice Baked Potatoes 69 Frozen Pizza 70 Fresh Pizza
72 Slow Roast Mode 74 Beef Tenderloin
T A B L E O F C O N T E N T S
2
3

Techniques are the building blocks for all recipes.
Learning a core set of techniques instead of just
reading through a collection of recipes, or picking
up a random cookbook, will yield a far deeper
knowledge of what’s happening in the oven, and
more delicious results as well. Many attempts at
recipes fail because the techniques used to prepare
them are not done properly.
We’ll teach you those techniques, and along the
way, also help you understand the main modes that
the convection steam oven can operate in – what
makes them unique and some of the foods they’re
suited to prepare. At the end of each mode section,
we’ll take you through recipes that utilize the
techniques of the mode you’ve just read about.
We encourage you to make notes as you go.
Read a recipe from beginning to end before
you start to prepare the dish. Be adventurous –
tangents are how exciting discoveries are made.
Above all, have fun!
P R O P E R T E C H N I Q U E S = R E C I P E S U C C E S S
This isn’t just a recipe book.
It’s much more. It’s a technique-
focused approach to really understanding
and mastering the Wolf convection
steam oven.
4
5

PREPARE A NEARLY ENDLESS ARRAY OF FOODS THE HEALTHY NATURAL WAY.
“Why do I need an oven that can do nothing more than
make broccoli?” That’s the common misconception
about steam cooking – that it’s for cooking vegetables,
period. Nothing could be further from the truth. Even if
you only used the Steam Mode of our convection steam
oven, you could do far more than just cook vegetables.
Combine steam with other modes, and you can cook
literally anything.
Steam provides a simple and effective way of preparing
a nearly endless array of foods – more deliciously, more
nutritiously. Key to the Steam Mode’s versatility is the
ability to adjust temperature. While water
reaches its boiling point at 212°F, steam
can be captured and held inside the oven
at temperatures far below 212°F – in fact,
all the way down to 85°F.
With this variable temperature range, the Steam Mode
provides the perfect environment for defrosting frozen foods
for dinner or steaming vegetables as an accompaniment
to the meal. The Steam Mode can hard-boil eggs,
soft-poach delicate fillets of fish, steam shrimp or even
make removing the skins of tomatoes easy for canning.
Of course it can steam rice, but also delicate puddings
and sauces. It’s an invaluable mode, but combined with
other modes, it becomes downright amazing.
S T E A M
P R E S E R V I N G N U T R I E N T S , F L AV O R , C O L O R
S T E A M M O D E
Combine steam with other modes,
and you can cook literally anything.
ST
EA
M M
OD
E
6
7
The Steam Mode allows for a wide range of foods to be
prepared using a variety of different temperatures.
The creation of appetizers, entrées and even desserts
is achievable using the Steam Mode. The easiest way
to make sense of the Steam Mode is to break down the
temperature range into three tiers. Any temperature (in
five-degree increments) can be selected between 85°F
and 210°F, but for a more basic understanding, we will
stick to three basic tiers.
210 DEGREES
The first tier of full steam or 210°F can be thought of as a
pot of water on the stove. Anything you would normally
put into a pot of water on the stove you can place in the
steam oven at 210°F. Of course, placing vegetables in
the steam oven is a given, but so are things like eggs,
which can be easily “hard-boiled,” ears of corn in the
husk, tomatoes (making the skins easy to peel for
canning) or sausages (to par-cook prior to grilling).
190 DEGREES
This is the perfect temperature for soft-poaching delicate
fillets of fish, mollusks, shrimp, eggs or fruits like pears.
The ability to create a steam environment at a lower
temperature than the boiling point of water keeps foods
soft which normally would toughen up while cooking.
85 DEGREES
Defrosting is quick and easy in the steam oven. Using
other methods, like a microwave, ends up drying out
and partially cooking the food being defrosted. By using
the Steam Mode set to 85°F along with the large oven
interior, it’s easy to defrost enough chicken breasts for
a full meal or all the steaks and pork chops you could
possibly need to grill out.
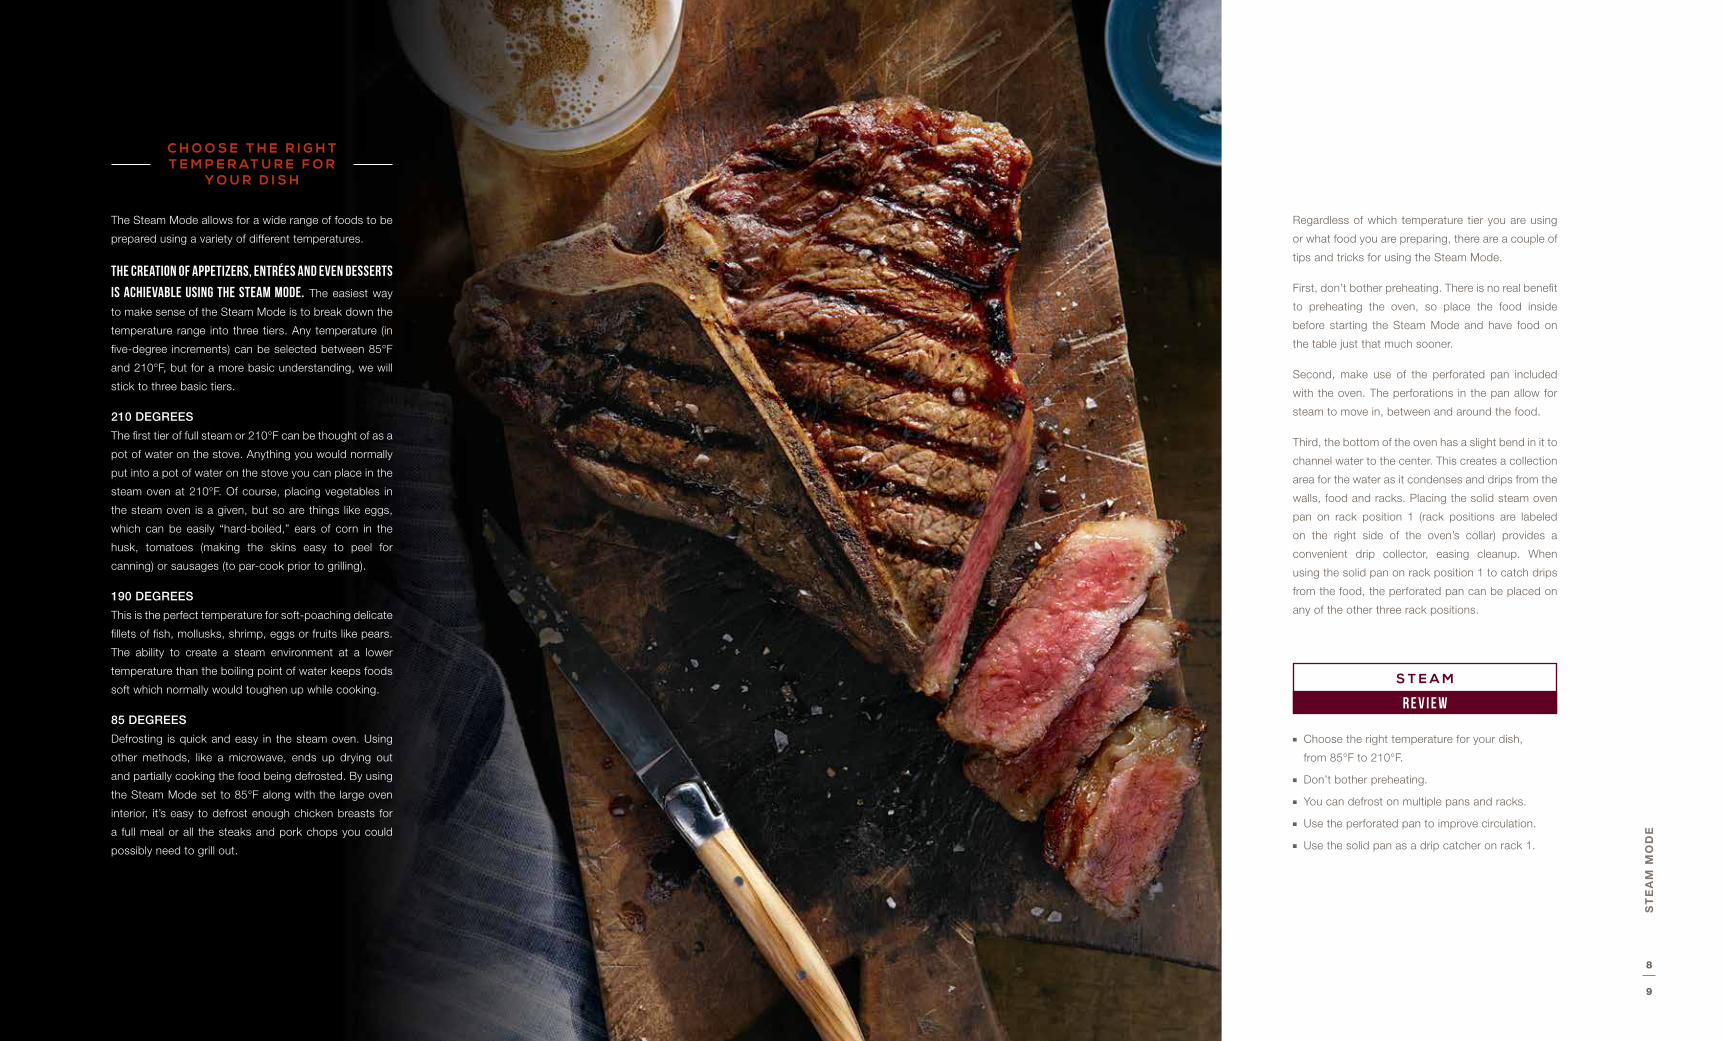
C H O O S E T H E R I G H T T E M P E R AT U R E F O R
Y O U R D I S H
Regardless of which temperature tier you are using
or what food you are preparing, there are a couple of
tips and tricks for using the Steam Mode.
First, don’t bother preheating. There is no real benefit
to preheating the oven, so place the food inside
before starting the Steam Mode and have food on
the table just that much sooner.
Second, make use of the perforated pan included
with the oven. The perforations in the pan allow for
steam to move in, between and around the food.
Third, the bottom of the oven has a slight bend in it to
channel water to the center. This creates a collection
area for the water as it condenses and drips from the
walls, food and racks. Placing the solid steam oven
pan on rack position 1 (rack positions are labeled
on the right side of the oven’s collar) provides a
convenient drip collector, easing cleanup. When
using the solid pan on rack position 1 to catch drips
from the food, the perforated pan can be placed on
any of the other three rack positions.
n Choose the right temperature for your dish,
from 85°F to 210°F.
n Don’t bother preheating.
n You can defrost on multiple pans and racks.
n Use the perforated pan to improve circulation.
n Use the solid pan as a drip catcher on rack 1.
S T E A M
R E V I E W
ST
EA
M M
OD
E
8
9
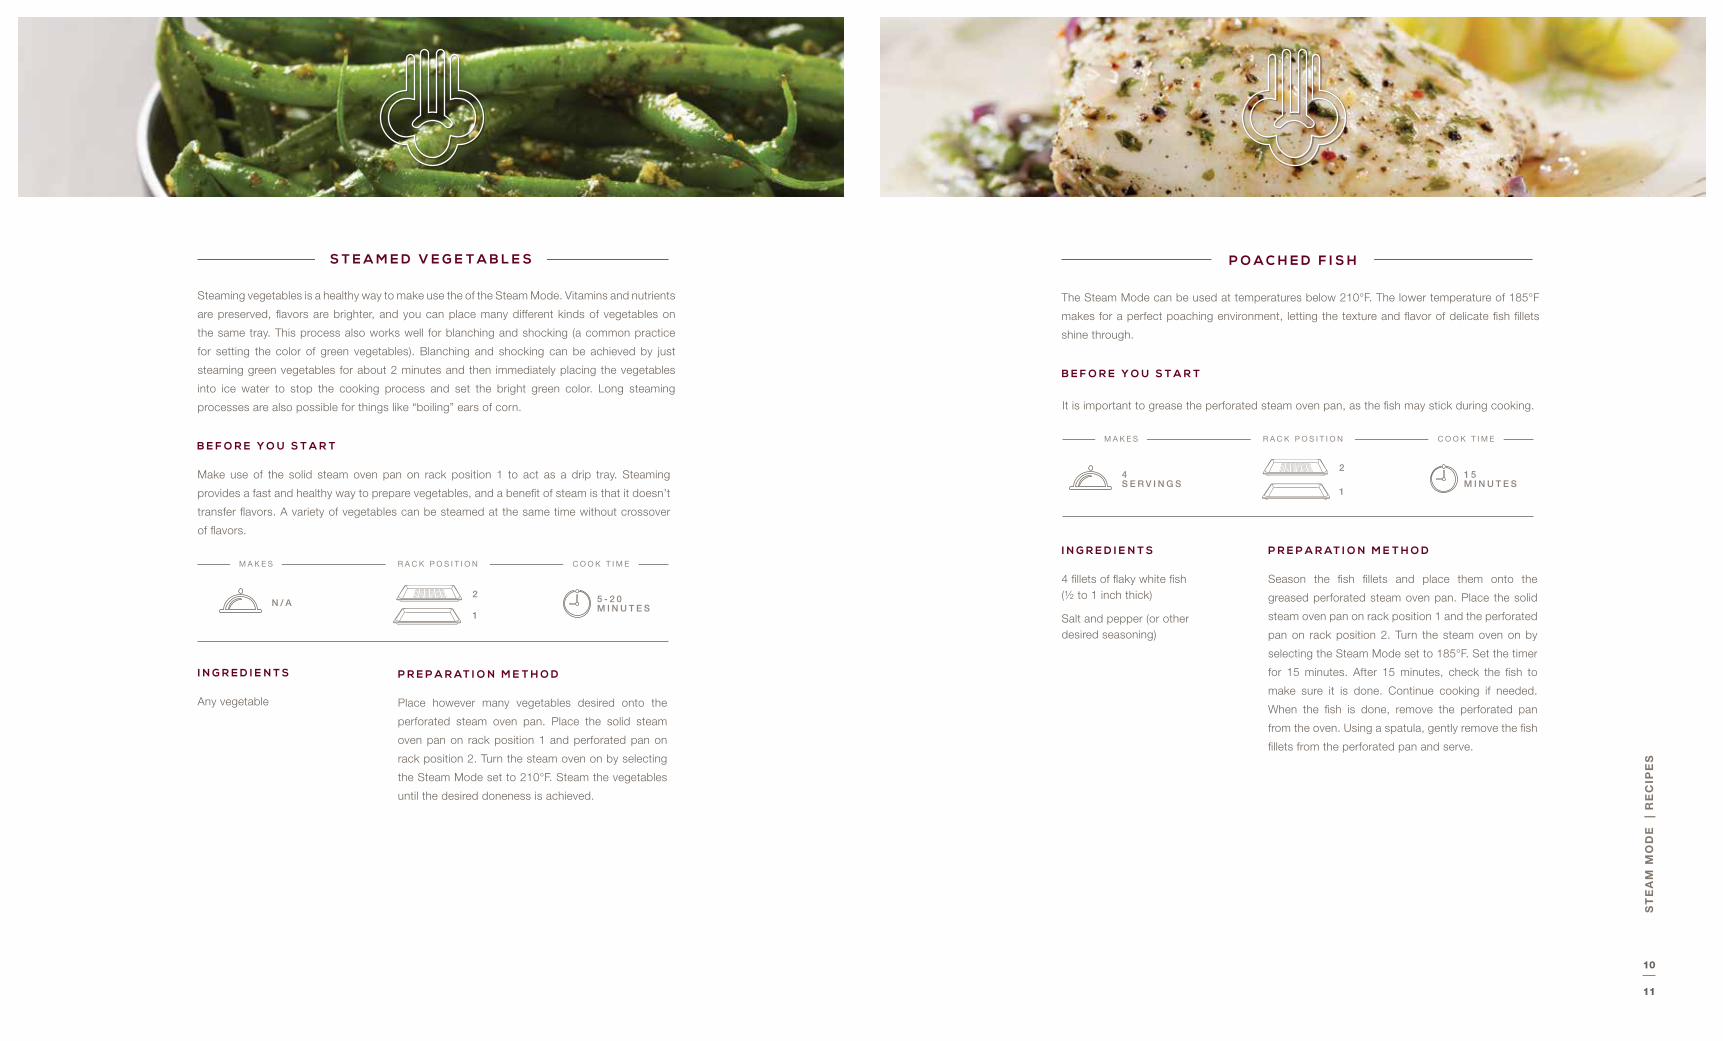
The Steam Mode can be used at temperatures below 210°F. The lower temperature of 185°F
makes for a perfect poaching environment, letting the texture and flavor of delicate fish fillets
shine through.
4 fillets of flaky white fish (½ to 1 inch thick)
Salt and pepper (or other desired seasoning)
Season the fish fillets and place them onto the
greased perforated steam oven pan. Place the solid
steam oven pan on rack position 1 and the perforated
pan on rack position 2. Turn the steam oven on by
selecting the Steam Mode set to 185°F. Set the timer
for 15 minutes. After 15 minutes, check the fish to
make sure it is done. Continue cooking if needed.
When the fish is done, remove the perforated pan
from the oven. Using a spatula, gently remove the fish
fillets from the perforated pan and serve.
I N G R E D I E N T S P R E P A R AT I O N M E T H O D
4 S E R V I N G S
1 5 M I N U T E S
P O A C H E D F I S H
It is important to grease the perforated steam oven pan, as the fish may stick during cooking.
2
1
B E F O R E Y O U S T A R T
ST
EA
M M
OD
E
| R
EC
IPE
S
Steaming vegetables is a healthy way to make use the of the Steam Mode. Vitamins and nutrients
are preserved, flavors are brighter, and you can place many different kinds of vegetables on
the same tray. This process also works well for blanching and shocking (a common practice
for setting the color of green vegetables). Blanching and shocking can be achieved by just
steaming green vegetables for about 2 minutes and then immediately placing the vegetables
into ice water to stop the cooking process and set the bright green color. Long steaming
processes are also possible for things like “boiling” ears of corn.
Any vegetable Place however many vegetables desired onto the
perforated steam oven pan. Place the solid steam
oven pan on rack position 1 and perforated pan on
rack position 2. Turn the steam oven on by selecting
the Steam Mode set to 210°F. Steam the vegetables
until the desired doneness is achieved.
I N G R E D I E N T S P R E P A R AT I O N M E T H O D
S T E A M E D V E G E T A B L E S
Make use of the solid steam oven pan on rack position 1 to act as a drip tray. Steaming
provides a fast and healthy way to prepare vegetables, and a benefit of steam is that it doesn’t
transfer flavors. A variety of vegetables can be steamed at the same time without crossover
of flavors.
B E F O R E Y O U S T A R T
N / A 5 - 2 0 M I N U T E S
1
2
M A K E S R A C K P O S I T I O N C O O K T I M E
M A K E S R A C K P O S I T I O N C O O K T I M E
10
11

This recipe showcases the power of using the Steam Mode at a temperature below 210°F.
The ability to create a gentler environment to steam the shrimp in by reducing the temperature
to 200°F allows shrimp to steam perfectly without becoming tough.
1 pound (16-20 count) raw shrimp, unpeeled, deveined
1 lemon, cut into 6 wedges
1 lemon, juiced
1 tablespoon Old Bay Seasoning
Small bunch parsley sprigs
Combine all ingredients in large bowl. Toss the
ingredients until fully combined. Place the perforated
steam oven pan on top of the solid steam oven pan.
This will act as a drip tray to carry the pan over to
the steam oven. Pour shrimp mixture evenly onto
perforated pan. Carry the pans over to the oven
together. Place the solid steam oven pan on rack
position 1 and perforated pan on rack position 2.
Turn the steam oven on by selecting the Steam
Mode set to 200°F. Steam for 9 minutes or until
shrimp are slightly pink. Remove from the oven and
serve immediately.
I N G R E D I E N T S P R E P A R AT I O N M E T H O D
S T E A M E D S H R I M P
Whenever you are steaming, it is advantageous to use the solid steam oven pan as a drip tray
placed on rack position 1. While not necessary, it significantly eases cleanup. Make sure the
shrimp are fully thawed before you begin this recipe.
B E F O R E Y O U S T A R T
This recipe is a great summer barbecue side dish. It is quick and easy to put together using the
Steam Mode, allowing you to prepare multiple ingredients at the same time.
3 pounds small baby red potatoes, washed and diced into ¾-inch cubes
4 eggs
Dressing:
3⁄4 cup mayonnaise
1⁄2 cup buttermilk
½ cup finely diced celery
1⁄3 cup sliced scallions
1⁄3 cup diced radish
3 tablespoons whole grain mustard
2 tablespoons fresh lemon juice
2 tablespoons sweet pickle relish
11⁄2 tablespoons Dijon mustard
2 teaspoons apple cider vinegar
¼ teaspoon celery seed
¼ teaspoon black pepper
Place the diced potatoes onto the perforated
steam oven pan and spread out into a single layer.
Place the solid steam oven pan on rack position
1. Place the perforated steam oven pan on rack
position 2. Place the 4 eggs on the wire rack set
on position 4. Turn the steam oven on by selecting
the Steam Mode set to 210°F. Set the timer for
22 minutes. While the potatoes and eggs are
steaming, place the remaining ingredients in a
large bowl and mix to combine. After the timer
goes off, remove the eggs from the oven and
place into a bowl of ice water to cool. Remove
the pan of potatoes and allow to partially cool.
When the eggs are cool, peel and chop the eggs.
Add the eggs and potatoes to the large bowl
with the dressing and stir to combine. Cover and
refrigerate overnight. The next day, check for
seasoning, adding salt and pepper if necessary.
I N G R E D I E N T S P R E P A R AT I O N M E T H O D
P O T AT O S A L A D
This recipe tastes best the next day, so be sure to make it at least a day ahead of time. Other
ingredients can be added to the potato salad as well: chopped cooked bacon, shredded
cheese, etc.
B E F O R E Y O U S T A R T
ST
EA
M M
OD
E
| R
EC
IPE
S
2 2 M I N U T E S
1 0 S E R V I N G S
M A K E S R A C K P O S I T I O N C O O K T I M E
1
2
4
4 - 5 S E R V I N G S
9 M I N U T E S
M A K E S R A C K P O S I T I O N C O O K T I M E
1
2
12
13

Steam buns are a fun way to bake bread using the Steam Mode, as these delicate fluffy pillows
can be used for a variety of other recipes. For example, they pair perfectly with braised pork,
creating a báhn mì sandwich. Easy to prepare and quick to bake, this steam bun recipe is a
great way to experience a normally unthought-of way to bake bread.
11⁄3 cups all-purpose flour
11⁄3 cups cake flour
6 tablespoons warm water
6 tablespoons whole milk
3 tablespoons sugar
1 tablespoon olive oil
2 teaspoons instant yeast
½ teaspoon baking powder
I N G R E D I E N T S
2 0 B U N S8 - 1 0 M I N U T E S
S T E A M B U N S
Combine all ingredients into the bowl of a
stand mixer. With the dough hook in place,
mix on low until the dough begins to come
together. Increase the speed to medium-low
and continue mixing for 7 minutes. It may
be necessary to add a teaspoon or two of
water or flour, depending on the season. If
the dough seems too dry, add one or two
teaspoons of water. Conversely, if the dough
seems too moist and is not pulling away
from the sides of the mixing bowl, then add
one or two teaspoons of all-purpose flour.
Remove the dough from the mixing bowl
and place inside an oiled or sprayed, rigid
container. Cover with plastic wrap or a
wet towel and allow the dough to rise until
doubled in size.
Remove the dough from the proofing
container and place on the counter. Divide
the dough into two equal pieces. Shape
each piece into a log. Divide each log into
10 pieces. You should now have 20 equal
pieces of dough. Roll each piece of dough
into a ball and place on the counter (after
lightly dusting with flour). Cover with plastic
wrap or warm wet towels and allow to proof
for 15 minutes.
One at a time, roll out 10 three-inch flat
circles. Reserve the remaining 10 pieces of
dough. Place the 10 rolled-out disks onto
the perforated steam oven pan, which has
been greased with cooking spray. Cover
with a warm towel and allow to proof for
15 minutes. While the dough is proofing,
roll out the remaining 10 pieces of dough
and place them on the counter. Cover with
a warm towel and allow to proof while you
steam the first tray. Place the perforated pan
on rack position 2. Turn the steam oven on
by selecting the Steam Mode set to 210°F.
Set a timer for 10 minutes. After the timer
goes off, remove the pan from the oven, but
leave the steam oven on. Place the pan on
a heatproof surface and remove the steam
buns. Respray the perforated pan and place
the second batch of proofed buns onto the
pan. Return the pan to the steam oven on
rack position 2 and set a timer for 8 minutes
(the steam oven is already preheated so we
don’t need to steam the buns as long this
time). After the timer goes off, remove the
pan from the oven and turn the steam oven
off. Place the pan on a heatproof surface
and remove the steam buns. Use them
immediately, or save them for later use.
Like any bread, you will need to proof this
dough. It is helpful to have a rigid, oiled (or
sprayed) container which the dough can be
moved to for proofing. You will also need
the perforated steam oven pan to bake the
buns on. Be sure to spray the perforated
steam oven pan prior to placing the steam
buns on it. Because of the perforations,
it is a good idea to spray the pan over a
sink, as some spray will make its way
through the perforations.
B E F O R E Y O U S T A R T
2
P R E P A R AT I O N M E T H O D
ST
EA
M M
OD
E
| R
EC
IPE
S
M A K E S R A C K P O S I T I O N C O O K T I M E
14
15

You can make use of both wire racks if needed. Be sure to use the solid pan on rack position
1 to catch any drips from the foods as they defrost.
The Steam Mode is great for defrosting frozen foods, especially cuts of meat such as chicken
breasts, pork chops or steaks. Using a low steam temperature of 85°F, the steam mode
provides the ideal way to defrost foods quickly, easily and with better results than a microwave.
Frozen foods Place the frozen foods on the wire racks set on
position 2 and 3. Place the solid steam oven pan on
rack position 1. Turn the steam oven on by selecting
the Steam Mode set to 85°F. Check foods after 15
minutes. Continue defrosting if necessary.
I N G R E D I E N T S P R E P A R AT I O N M E T H O D
D E F R O S T I N G
B E F O R E Y O U S T A R T
One egg or three dozen, 21 minutes is all you need. Everyone has their own secret hard-boiled
egg process when using a pot on the stove. Do you start the timer after the water starts to
boil? Keep the lid on or off? Take the pot off the heat after it starts to boil? Regardless of what
steps you take, results are never quite the desired outcome. Using the steam oven makes it
easy to have perfect hard-boiled eggs.
At least one egg Place the desired number of eggs onto the perforated
steam oven pan. Place the solid steam oven pan
on rack position 1 and the perforated pan on rack
position 2. Turn the steam oven on by selecting
the Steam Mode set to 210°F. Set the timer for 21
minutes. After 21 minutes, remove the perforated pan
from the oven and place the eggs immediately into
the bowl of ice water. Allow the eggs to completely
cool. Peel and enjoy.
I N G R E D I E N T S P R E P A R AT I O N M E T H O D
H A R D - B O I L E D E G G S
Make sure to have a bowl of ice water available to place the eggs into after steaming.
It is important to stop the cooking process quickly, once they are done.
B E F O R E Y O U S T A R T
2 1 M I N U T E SN / A
1
2
M A K E S R A C K P O S I T I O N C O O K T I M E 1 5 - 2 0 M I N U T E SN / A
1
2
3
M A K E S R A C K P O S I T I O N C O O K T I M E
ST
EA
M M
OD
E
| R
EC
IPE
S
16
17

R E H E AT
B R I N G I N G L E F T O V E R S B A C K T O L I F E
R E H E AT M O D E
STEAM AND CONVECTION HEAT GENTLY REHYDRATE
YOUR FOOD, INSTEAD OF DRYING IT OUT.
When it’s time to heat up last night’s dinner, we typically
do it the easy way – in the microwave. With uninspiring
results. Maybe that’s why people often wrinkle their noses
at the thought of eating leftovers. A microwave removes
moisture from the food as it heats, so it can be dry and
tasteless – nothing like the night before.
Our Convection Steam Oven takes a different approach
in the Reheat Mode. It starts out with a combination of
steam and convection heat – a warm, moist heat that
gently rehydrates foods and brings them back to moist,
flavorful life. After about 5 minutes,
the steam functionality turns off, and
a vent opens in the top of the oven.
Excess moisture dissipates so that
the food is not served soggy. This
blend of steam and heat provides the
ideal reheating environment for food.
Some owners of our Convection Steam Oven have
actually told us that using this method, the food tastes
better reheated than when it was originally served! Even
if you’re not quite that enthusiastic, your family will no
longer groan at the notion of eating leftovers.
a blend of steam and heat provides the ideal reheating environment for food.
RE
HE
AT
MO
DE
18
19

Using the Reheat Mode makes it easy to bring new life to
leftover, freezer-burned or stale foods. Seven to nine minutes
is all that is usually necessary to be sitting down to perfectly
reheated meals. By using a combination of steam and heat,
the Reheat Mode creates the ideal environment for reheating
almost any food. For the first half of the reheating process,
both steam and heat are used, while during the second half
no steam is used so the food is not served soggy. In summary,
a warm, moist heat brings foods up to temperature, and a dry
heat removes any moisture on the outside of the food.
Of course, there are a few tips to achieve the best results.
First, think individual portions of food. Example: a couple of
pieces of lasagna on a plate, not an entire pan. Reheating a
full pan such as a casserole is easy; however, we will make
use of the Convection Steam Mode instead, because it will
allow you to maintain the moist environment for a longer
period of time.
Second, don’t cover the food. It is important for the
steam during the beginning to be able to move in and
around the food.
n You can make up a full plate of food; think chicken breast, broccoli and rice, all on the same plate.
n Make sure to put the food into the oven before you start. Do not preheat. Do not cover the food.
n Large amounts of food or a full dish should be reheated using the Convection Steam Mode.
n Pizza should be reheated using the Convection Steam Mode.
R E V I E W
R E H E AT I N G
RE
HE
AT
MO
DE
The Reheat Mode is perfect for reheating a variety
of different foods and leftovers from the day before.
Plates of leftover food
I N G R E D I E N T S
Place the plates of food on the wire racks set
on rack positions 2 and 3. Turn the steam oven
on by selecting the Reheat Mode set to 250°F.
Check foods after 8 minutes. Continue reheating
if necessary.
P R E P A R AT I O N M E T H O D
Entire plates of food can be reheated using the
Reheat Mode. This allows for fully composed
plates of food to be reheated and served, without
the need for additional dishes. Be sure the plates
being used are oven-safe.
B E F O R E Y O U S T A R T
8 - 1 2 M I N U T E S
R A C K P O S I T I O N C O O K T I M E
R E H E AT I N G P L AT E S O F F O O D
2
3
B R I N G I N G L E F T O V E R S
B A C K T O L I F E
20
21

Full casserole dish Place the casserole dish on the wire rack set on
position 2. Turn the steam oven on by selecting the
Convection Steam Mode set to 250°F. Plug the probe
into the steam oven and set the alert temperature
to 170°F. When the temperature probe reaches
approximately 150°F, press the Mode button to turn
the steam function off. Allow the oven to continue
until the probe temperature of 170°F is reached.
I N G R E D I E N T S P R E P A R AT I O N M E T H O D
N / A N / A
R E H E AT I N G F U L L C A S S E R O L E D I S H E S O F F O O D
Place the probe into the center of the casserole, taking care to leave the tip off the bottom of
the dish. Try to place the probe in at an angle, in order to try and cover as much of the probe’s
shaft as possible.
B E F O R E Y O U S T A R T
2
The Convection Steam Mode is great at reheating full casserole dishes of food. Combined
with the temperature probe, this foolproof way of reheating large amounts of leftovers makes
it easy to prepare foods a few days ahead of time and reheat them when needed, without
compromising quality.
RE
HE
AT
MO
DE
| R
EC
IPE
S
Stale or freezer-burned bread Place the stale or freezer-burned bread on the wire
racks set on position 2. Turn the steam oven on
by selecting the Reheat Mode set to 300°F. Set
the timer for 7 minutes. After 7 minutes, remove
the bread from the oven, enjoy warm or allow to
cool slightly.
I N G R E D I E N T S P R E P A R AT I O N M E T H O D
7 M I N U T E S
R E H E AT I N G S T A L E O R F R E E Z E R - B U R N E D B R E A D
The Reheat Mode is perfect for reheating a variety of breads, whether slightly stale baguettes
or freezer-burned bagels. The Reheat Mode is wonderful for bringing bread back to “fresh
from the bakery goodness.”
Bread can be placed directly on the wire racks; no pans are needed.
B E F O R E Y O U S T A R T
2N / A M A K E S R A C K P O S I T I O N C O O K T I M E
M A K E S R A C K P O S I T I O N C O O K T I M E
22
23

A U T O S T E A M B A K E M O D E
THIS IS HOW AR TISAN BAKER S GE T THAT C RAC KLY, SHINY C RUST.
Harness the power of a professional deck oven, like the ones
used in artisan bread bakeries, in your home kitchen. The
glossy, crackled and crazed finish to great breads, the sheen
on perfectly fluffy pastry – these are hard if not impossible
to achieve in a standard oven. Many home bakers strive for
these delicious results, only to fall short with drab loaves of
bread and dull pastries.
Steam is the critical element in the baking process of breads
and pastries. Flooding the oven cavity with steam at the
beginning of the baking process provides the opportunity
for a pair of critical reactions to take place. The first is
slowing down the baking process by lowering the surface
temperature of the bread being baked, as water condenses
on the raw loaf. This moisture
keeps the crust from forming
during the “oven spring” period
of baking and allows the bread
to rapidly expand as the yeast
goes through a final burst of
fermentation. Keeping the
dough’s surface flexible, for as long as possible, allows the
dough to expand, resulting in an airy texture.
The second reaction is what delivers the great sheen and
crazed finish on beautifully baked breads. The gelatinization
(the moist, gummy layer) on the exterior of the bread begins
to bake out, yielding a rich, shiny finish.
Baking bread without steam produces loaves of bread that
do not spring as high and crusts that underwhelm with drab
exteriors and lack depth of flavor. Baking bread with steam
will produce the kind of loaves, rolls and pastries that you’ve
always dreamed of.
AUTO STEAM BAKE
BREAD, ROLLS, PASTRIES TO DIE FOR
AU
TO
ST
EA
M B
AK
E M
OD
E
Baking bread with steam will produce the kind
of loaves, rolls and pastries that you’ve
always dreamed of.
24
25

Whether you like baguettes, bâtards, boules,
croissants, turnovers or pies, the Wolf convection
steam oven allows even the most novice baker to turn
out baked goods worthy of a seasoned professional.
Take baking bread, for example. Simply combining
nothing more than flour, water, salt and yeast will
allow for the creation of a nearly endless assortment
of breads. By barely adjusting the amounts of each
ingredient, or the way they are combined, vastly
different breads can be created.
Baking great bread is an art, one that takes
practice, time and trial. However, there are a few
tips and tricks you can use to help ensure success.
First, make sure to properly measure all ingredients.
“Pretty close” is NOT close enough for baking bread.
Second, seek out quality ingredients. With so few
ingredients involved (sometimes as few as four), the
quality of the ingredients used will have a direct effect
on the final outcome.
Third, combine the ingredients properly. Regardless
of whether you are kneading by hand or by machine,
developing gluten in the bread is critical to the final
product. Bypassing this step, or shortening the mixing
time, will have a dramatic effect on the final product.
Fourth, patience. Bread takes time. The proofing process
is one that can’t be rushed. A long, slow proofing time
is required to develop the flavors necessary to provide
complexity and structure to the bread.
Fifth, shape and proof again. Once the dough has
risen, it is hard to not immediately bake it. Continue
being patient by taking the time to shape the loaves of
bread and allow them to proof again.
Sixth, score. Scoring the loaves of bread just moments
prior to baking is done not only for aesthetic reasons.
The deep slashes made in bread dough allow for
the expansion or “oven spring” that the dough goes
through after being placed inside the oven.
When using the Auto Steam Bake Mode, it is important
to not preheat the oven. The final risen bread or pastry
must be placed inside the oven cavity while the oven
is still off.
B A K E L I K E A P R O I N T H E
C O N V E C T I O N S T E A M O V E N
n Properly and precisely measure ingredients.
n Seek out quality ingredients.
n Combine ingredients properly.
n Be patient.
n Shape and wait.
n Score the bread.
n Do not bother to egg wash or brush pastries.
n Make sure to put the food into the oven before you start. Do not preheat.
R E V I E W
A U T O S T E A M B A K E
AU
TO
ST
EA
M B
AK
E M
OD
E
26
27

The perfect fall day is best spent with a warm bowl of apple crisp. The streusel recipe used here
is a wonderful universal streusel for a variety of other desserts or pies.
Streusel topping:
½ lb of butter, softened, cubed
2 cups brown sugar, firmly packed
2 cups rolled oats
1¼ cups all-purpose flour
1½ teaspoons cinnamon
½ teaspoon nutmeg
Apple mixture:
6 medium apples, peeled, quartered and sliced ¼ inch thick
1⁄3 cup sugar
¼ cup all-purpose flour
2 tablespoons water
¾ teaspoon cinnamon
¼ teaspoon nutmeg
¼ teaspoon salt
In a large bowl, combine all the streusel ingredients.
Crumble together until well combined. Set aside.
For the apple crisp, in another bowl combine apple
mixture ingredients. Pour the apple mixture into a
greased 8” square baking dish. Top with a generous
amount of the streusel topping. Place on the wire rack
set on position 2. Turn the steam oven on by selecting
the Auto Steam Bake Mode set to 345°F. Bake until
golden brown and bubbly. Approximately 45 minutes.
I N G R E D I E N T S P R E P A R AT I O N M E T H O D
6 S E R V I N G S
4 5 M I N U T E S
A P P L E C R I S P
The streusel can be made up ahead of time and frozen. It will make more than you need for
this recipe. Another great idea is to use a couple of different kinds of baking apples, as they
will each lend their own flavors and nuances to the dish.
B E F O R E Y O U S T A R T
This apple pie recipe takes advantage of the Auto Steam Bake Mode’s ability to make a beautiful
glossy top crust. The streusel recipe from the apple crisp can also be used as a topping for this
recipe instead of the second piece of pie dough.
Pie crust:
22⁄3 cups flour
1 teaspoon salt
1 cup plus 2 tablespoons shortening
7 tablespoons cold water
Apple mixture:
7 medium apples, peeled, quartered and sliced ¼ inch thick
1½ cups sugar
¼ cup all-purpose flour
1 tablespoon corn starch
2 teaspoons lemon juice water
1 teaspoon cinnamon
¼ teaspoon nutmeg
2 tablespoons butter
In a large bowl, combine all the pie crust ingredients.
Crumble lightly together until well combined. Mix in the
cold water and bring the dough together with a fork.
Divide the dough into two pieces and set one back in the
bowl covered with a damp towel. Roll out the first piece of
dough on a generously floured surface until about ¼ inch
thick, or large enough to cover the bottom and side of a
pie pan. Place the rolled-out dough in a pie plate or dish.
For the apple mixture, in another bowl combine apple
mixture ingredients. Pour the apple mixture into the
prepared pie dish. Place the 2 tablespoons of butter
around the top of the apple mixture, in small pieces. Roll
out the remaining dough into a top crust and place on
top of the pie. Crimp the edges of the pie and cut off
any excess dough. Cut a few small vent slots in the top
of the crust. Place on the wire rack set on position 2.
Turn the steam oven on by selecting the Auto Steam Bake
Mode set to 445°F. Set the timer for 30 minutes. After 30
minutes, open the oven and rotate the pie. Reduce the
temperature to 410°F and set the timer for 20 minutes.
After 20 minutes, remove the pie and place on a cooling
rack. Allow to cool for 45 minutes before serving.
I N G R E D I E N T S P R E P A R AT I O N M E T H O D
It is best to use a couple of different kinds of baking apples, as they will each lend their own flavors
and nuances to the dish. It is important to rotate the pan and change the temperature partway
through the baking process.
B E F O R E Y O U S T A R T
2 6 S E R V I N G S
5 0 M I N U T E S2
AU
TO
ST
EA
M B
AK
E M
OD
E |
RE
CIP
ES
M A K E S R A C K P O S I T I O N C O O K T I M E M A K E S R A C K P O S I T I O N C O O K T I M E
A P P L E P I E
28
29

Both whole wheat and white bread flour are used in this recipe. You may use all whole wheat
flour, but if you do so, additional water may need to be added.
A light and fluffy dinner roll goes well with any meal. This recipe can easily be doubled if needed
for a larger gathering.
2½ cups bread flour
½ cup milk
¼ cup water
2 tablespoons butter
2 tablespoons sugar
2 teaspoons instant yeast
1 teaspoon salt
In a small pan, heat the milk and butter until warm
and the butter has melted. Pour the warm milk and
butter mixture, along with the remaining ingredients,
into the bowl of a stand mixer fitted with a dough
hook. Knead the dough on medium low speed for 8
minutes. Place the dough in a greased container large
enough to allow for the dough to double in size as
it rises. Cover with plastic wrap or a damp kitchen
towel. After the dough has doubled in size, divide
the dough into 12 equal pieces. Round each piece of
dough into a ball and place on a greased solid steam
oven pan, leaving about 2 inches between each ball
of dough. Cover with plastic wrap and allow to double
in size again. Place the solid pan in the steam oven on
rack position 2. Turn the steam oven on by selecting
the Auto Steam Bake Mode set to 345°F. Bake for 18
minutes or until golden brown.
I N G R E D I E N T S P R E P A R AT I O N M E T H O D
1 6 S E R V I N G S
1 8 M I N U T E S
D I N N E R R O L L S
Active dry yeast can be substituted in this recipe. If used, place the yeast and warm water in
the mixing bowl and allow to sit for 5 minutes prior to adding any ingredients.
B E F O R E Y O U S T A R T
2
Make loaves of honey wheat bread quickly and easily at home. The hint of sweetness from the
honey brings a nice rounded flavor to the bread. Perfect for sandwiches as well as toasting, this
healthy wheat bread will become a favorite to always have around.
2½ cups whole wheat flour
1½ cups white bread flour
1½ cups warm water
3 tablespoons honey
2 tablespoons butter, melted
2 teaspoons instant yeast
2 teaspoons salt
Place all ingredients into the bowl of a stand mixer
fitted with a dough hook. Knead the dough on
medium low speed for 5 minutes. Turn the mixer
off and cover the bowl with a clean dish towel or
plastic wrap. Allow to stand for 10 minutes. Remove
the covering on the bowl and continue to knead on
medium low speed for an additional 5 minutes. Place
the dough in a greased container large enough to
allow for the dough to double in size as it rises. Cover
with plastic wrap or a damp kitchen towel. After the
dough has doubled in size, divide the dough into two
equal pieces. Form each piece into a short log, about
8 inches long. Place the dough into two greased
81⁄2" x 41⁄2" loaf pans. Cover with plastic wrap and
allow to double in size again. Lightly score the top
of the loaf, making one long slash with a sharp knife.
Place the loaves into the oven on the wire rack set at
position 2. Turn the steam oven on by selecting the
Auto Steam Bake Mode set to 350°F. Bake for 35
minutes or until golden brown.
I N G R E D I E N T S P R E P A R AT I O N M E T H O D
1 6 S E R V I N G S
H O N E Y W H E AT S A N D W I C H B R E A D
B E F O R E Y O U S T A R T
AU
TO
ST
EA
M B
AK
E M
OD
E |
RE
CIP
ES
M A K E S R A C K P O S I T I O N C O O K T I M E
M A K E S R A C K P O S I T I O N C O O K T I M E
3 5 M I N U T E S2
30
31

C O N V E C T I O N M O D E
THE DRY C OOKING WAY TO FIX ALMOST ANYTHING.
Obviously, the convection process is an essential part
of our Convection Steam Oven. So let’s make sure
you understand how convection works, and why it’s
such a popular cooking mode.
In convection, heat doesn’t just come up from the
bottom of the oven, like it does in an ordinary oven –
it circulates throughout the oven cavity with the help
of fans in the back of the oven.
Food cooks more evenly and more quickly – up to
25% faster than in a conventional oven. Pie crusts
and croissants get flakier. Chicken stays juicier, with
“crackle” in the skin. Vegetables and potatoes are
more quickly caramelized. And if you’re baking using
multiple racks – say with chocolate chip cookies –
each rack gets evenly browned.
Convection is a dry cooking method – it does not
produce steam, and excess moisture given off by
the food is vented out of
the appliance. This mode
works well for food you
are inherently trying to
keep dry, or that would not benefit from the addition
of steam. A few of these are cookies, granola, roast
chicken, beefy jerky or soufflés.
The Convection Mode in the steam oven is unique in
that excess moisture given off by the food is vented
out of the appliance. This mode works well for food
you are inherently trying to keep dry, or that would not
benefit from the addition of steam. Using convection
also allows for baking on multiple rack positions at
the same time.
T H E B E N E F I T S O F C O N V E C T I O N
n Cook on multiple levels.
n Excess moisture is vented off.
n Oven door can be left open at lower temperatures to dehydrate.
n Don’t bother preheating.
C O N V E C T I O N
R E V I E W
C ONVEC TI ON
CONSISTENT HEAT, DELICIOUS RESULTS
CO
NV
EC
TIO
N M
OD
E
Food cooks more evenly and more quickly.
32
33

Roasted chicken. A simple dish that can standalone as a meal or be the first step towards
a great soup or casserole. The convection steam oven makes it easy to roast a chicken,
quickly and beautifully. The use of the included temperature probe ensures that the chicken is
cooked exactly to the temperature desired. The oven will shut off automatically after the alert
temperature is reached.
1 (31⁄2 to 4-pound) whole chicken
1 bunch fresh parsley
2 sprigs fresh rosemary
7 sprigs fresh thyme
½ lemon, cut into wedges
2 cloves garlic, smashed
1 tablespoon olive oil
Kosher or sea salt
Freshly ground black pepper
Place the parsley, rosemary, thyme, lemon and garlic
inside the chicken. Truss the chicken closed with
cotton kitchen twine. Rub the outside of the chicken
with one tablespoon of olive oil. Season the chicken
liberally with salt and pepper.
Line the solid steam oven pan with parchment paper.
Place chicken on the solid pan and slide the pan into
the oven on rack position 1. Turn the steam oven on by
selecting the Convection Mode set to 400°F. Insert the
temperature probe into the thickest part of the thigh
and select an alert temperature of 180°F. When the
alert temperature is reached, remove the pan from the
oven and place on a cooling rack. Tent the chicken
with aluminum foil and allow it to rest for 15 minutes
before serving.
I N G R E D I E N T S P R E P A R AT I O N M E T H O D
R O A S T C H I C K E N
One of the best “tools” a kitchen can have is parchment paper. It provides seemingly endless
solutions to a variety of problems. Place it under granola to ease removal, cover your countertop
to cool cookies after baking or wrap fish fillets in it to cook them “en papillote.” The use of
parchment paper in this recipe prevents drippings from the chicken from burning to the pan.
Parchment paper that comes on a roll will work; however, take the time to seek out precut “half
sheet pan” sheets of parchment paper from a local restaurant supply store. The flat precut
sheets are much easier to use than the rolls.
B E F O R E Y O U S T A R T
4 S E R V I N G S N / A1
CO
NV
EC
TIO
N M
OD
E |
RE
CIP
ES
Yes, you can make chocolate soufflés at home in your own kitchen. These soufflés are improved
with the addition of caramel sauce at the end for an extra level of decadence.
Batter:
6 tablespoons butter
9 ounces dark chocolate
2 teaspoons vanilla extract
6 egg yokes
6 egg whites
6 tablespoons sugar
½ teaspoon salt
½ teaspoon cream of tartar
Soufflés:
4 tablespoons butter, melted
¼ cup sugar
3⁄4 cup caramel sauce (jarred or homemade)
Preheat the steam oven on the Convection Mode at
375°F. Using a medium bowl set over a pot of simmering
water, melt the chocolate and butter. Remove from
the heat and add the vanilla. Whisk in one egg yolk at
a time. Set aside. In the mixing bowl of a stand mixer,
combine the egg whites, sugar, salt and cream of tartar.
Using the wire whip, mix on medium high speed until
stiff peaks. Gently fold the whipped egg whites into
the melted chocolate. Melt 4 tablespoons of butter.
Brush 10 six-fluid-ounce ramekins with melted butter.
Sprinkle each ramekin’s bottom and sides with
sugar. You will likely not need all the sugar. Turn each
ramekin over a sink or bowl, to pour out sugar that
did not stick. Divide the soufflé batter evenly between
the 10 ramekins.
Place the ramekins on the solid steam oven pan. Place
the solid pan in the preheated oven on rack position 2.
Bake for 15 minutes or until set. Carefully remove the
tray from the oven and gently tap the top of each soufflé
with a spoon to break a small hole. Pour 1 tablespoon
of caramel into each soufflé and serve.
I N G R E D I E N T S P R E P A R AT I O N M E T H O D
C H O C O L AT E S O U F F L É
A variety of other sauces could be used in place of the caramel sauce – warm chocolate fudge,
raspberry puree or even vanilla crème anglaise.
B E F O R E Y O U S T A R T
1 0 S E R V I N G S
1 5 M I N U T E S2
M A K E S R A C K P O S I T I O N C O O K T I M E
M A K E S R A C K P O S I T I O N C O O K T I M E
34
35
It’s not a muffin, it’s not a cupcake. It’s a cinnamon puff. Light and sweet, this is a breakfast
favorite that will easily find its way into your repertoire.
1½ cups all-purpose flour
¾ cup sugar
2 teaspoons baking powder
¼ teaspoon salt
¼ teaspoon nutmeg
1 egg, lightly beaten
½ cup milk
2 teaspoons vanilla extract
5 tablespoons butter, melted
Topping:
½ cup sugar
1¼ teaspoons cinnamon
6 tablespoons butter, melted
Combine flour, sugar, baking powder, salt and nutmeg
in a mixing bowl. In a separate bowl, mix the egg,
milk, vanilla extract and melted butter together. Stir
egg mixture into dry ingredients to combine. Spoon
the batter evenly into a greased muffin tin. Place the
muffin tin on the wire rack set on rack position 2.
Turn the steam oven on by selecting the Convection
Mode set to 335°F. Set the timer for 15 minutes.
After 15 minutes, check by inserting a toothpick into
the center and see if it comes out clean. If needed,
continue baking for an additional 2 minutes. When
done, remove the muffin tin from the oven and place
on a cooling rack. While the cinnamon puffs are
still warm, mix the sugar and cinnamon together in
a small bowl. Remove one of the cinnamon puffs
from the muffin tin and dip the top into the melted
butter. Roll the entire cinnamon puff in the bowl of
sugar-cinnamon mixture. Set on the cooling rack and
repeat with remaining cinnamon puffs.
I N G R E D I E N T S P R E P A R AT I O N M E T H O D
C I N N A M O N P U F F S
Make sure to grease the muffin tin, as the cinnamon puff can be hard to remove if this step
is skipped. It is important to work with the cinnamon puffs while they are still hot, as you dip
them in butter and roll them in sugar and cinnamon.
B E F O R E Y O U S T A R T
Granola is wonderful on its own or as an accompaniment to many foods. Have it with milk, sprinkled
over yogurt or tossed with cut-up fresh fruits. This granola is straightforward and simple to make,
providing a great base for additional ingredients to be added if desired. Shredded coconut, sunflower
seeds, almonds or dried fruits are just a few examples of ingredients that can easily be added to this
base granola.
2¼ cups rolled oats (do not use quick oats)
¾ cup chopped pecans
¼ cup plus 1 teaspoon maple syrup
¼ cup plus 1 teaspoon firmly packed brown sugar
3 tablespoons vegetable oil
½ teaspoon kosher salt
In a large mixing bowl, combine the oats and nuts. In
another bowl, whisk together the maple syrup, brown
sugar, oil and salt. Pour the wet mixture into the bowl
with the oats and nuts. Stir well to evenly coat. Pour
onto a solid steam oven pan lined with parchment paper
or a Silpat®. Place in oven on rack position 2. Turn the
steam oven on by selecting the Convection Mode set to
250°F. Set the timer for 40 minutes. After 40 minutes,
pull the pan out and turn the granola over with a spatula.
Slide the granola off the parchment/Silpat and back onto
the pan. You can discard the parchment at this point.
Put the pan back into the oven and set the timer for
30 minutes. Remove the pan and turn again. Place the
pan back in the oven and set the timer for another 30
minutes. Remove the pan from oven, cool completely.
Store in a rigid sealed container.
I N G R E D I E N T S P R E P A R AT I O N M E T H O D
G R A N O L A
The flavor of the maple syrup really shines through in the finished product, and it is important to use
a pure, quality maple syrup. The use of rolled oats is critical, as using quick oats in this recipe will
not turn out.
B E F O R E Y O U S T A R T
N / A1 H O U R 4 0 M I N U T E S2
CO
NV
EC
TIO
N M
OD
E |
RE
CIP
ES
M A K E S R A C K P O S I T I O N C O O K T I M E
1 2 S E R V I N G S
1 5 - 1 7 M I N U T E S2
M A K E S R A C K P O S I T I O N C O O K T I M E
36
37

Dehydrating is a simple process and easy to achieve at home. Liberty can also be taken with
the ingredients if desired. Prefer spicier foods? Add one or two teaspoons of red chili flake, or
Sriracha sauce. You could also substitute maple syrup for the brown sugar to add a different
dimension. The barbecue sauce listed in the recipe can also be fit to your personal tastes.
Whether sweet or smoky, Kansas City or Carolina, any barbecue sauce will work just fine.
Cutting the strips of meat across the grain is a critical step in the process of making the jerky.
The best way to achieve this is with a long thin knife.
¼ cup soy sauce
¼ cup barbecue sauce
2 tablespoons Worcestershire sauce
2 tablespoons liquid smoke
2 tablespoons water
2 tablespoons apple cider
1 teaspoon onion powder
1 teaspoon salt
1 teaspoon brown sugar
¼ teaspoon black pepper
¼ teaspoon garlic powder
¼ teaspoon celery salt
2-2½ pounds flank steak
I N G R E D I E N T S
B E E F J E R K Y
The day before:
Whisk all ingredients together, except meat, into a large mixing bowl
until they are fully combined. Using a long thin knife cut the flank steak
into 1⁄8-inch thick strips across the grain. The best way to achieve
this is to lay the full flank steak down on a cutting board so that the
grain of the meat is horizontal (left to right). Carefully slice off thin
strips across the grain. Continue slicing and add all the strips to the
marinade. Mix well. Pour the entire contents of the bowl into a large
one-gallon resealable zip-top bag. Place the zip-top bag in a ridged
container, just in case it leaks, and refrigerate overnight.
The day of:
Drain the marinated meat in a colander to remove any excess liquid.
Place the solid steam oven pan down on the counter and set one
of the wire racks over it. Lay the strips of meat one at a time across
the rack. Cover the wire rack without overlapping the strips of meat.
Repeat with the second wire rack and remaining strips of meat.
Carry the solid pan and two wire racks over to the steam oven.
Place the first wire rack on position 3. Place the second wire rack on
position 2 and place the solid steam oven pan on position 1. Turn the
steam oven on by selecting the Convection Mode set to 150°F. Leave
the door open in the “at rest” position (about 1 inch open). Make sure
to turn off the interior light. Check the jerky after 2 hours. Rotate the
wire racks. You can also remove the solid steam oven pan at this
point. Continue dehydrating for an additional 2 hours or as necessary
until the jerky is dehydrated.
On the day you dehydrate the jerky, you will
need both of the wire racks that came with
the steam oven. It is also helpful to have the
solid steam oven pan to catch drips as you
begin laying out the strips of meat across the
racks. The other tool that might not seems
as though it has a place in this recipe is a
colander. You will use the colander to drain
off the excess marinade. This provides a
much cleaner way of handling the strips of
meat instead of just removing them one at
a time from the zip-top bag.
B E F O R E Y O U S T A R T
N / A 4 H O U R S
P R E P A R AT I O N M E T H O D
CO
NV
EC
TIO
N M
OD
E |
RE
CIP
ES
M A K E S R A C K P O S I T I O N C O O K T I M E
1
2
3
38
39

A great dessert to serve for the holidays, these caramel squares are simple and quick to make.
These bars also freeze wonderfully and can simply be thawed when needed, freeing up the time
of making them in advance.
1 cup flour
¼ teaspoon salt
¼ teaspoon baking soda
¾ cup rolled oats
½ cup brown sugar
30 wrapped caramel cubes
½ cup margarine
3 tablespoons milk
2 tablespoons flour
½ cup chocolate chips
In a medium bowl, combine the flour, salt, baking
soda, oatmeal and brown sugar. Cut in the ½ cup of
margarine until crumbly. Remove 1 cup of this mixture
and reserve for use later. Press the remaining mixture
into an ungreased 9 x 13 pan. Place the 9 x 13 pan
on the wire rack in the steam oven on position 2.
Turn the steam oven on by selecting the Convection
Mode set to 340°F. Bake 8 to 10 minutes, or until just
bubbly. When done, remove from the oven and place
on a cooling rack. In a small saucepan, combine the
caramels and milk. Melt over low heat. When melted
mix in 2 tablespoons of flour. Spread carefully over
the crust. Sprinkle the chocolate chips and reserved
crumb mixture evenly over the pan. Return the pan
to the steam oven and bake until lightly browned,
approximately 12 minutes. The bars are easiest to cut
when cool.
I N G R E D I E N T S P R E P A R AT I O N M E T H O D
C A R A M E L S Q U A R E S
Be sure to unwrap all the individual caramels before starting the recipe.
B E F O R E Y O U S T A R T
These chewy and gooey chocolate chip cookies will quickly become favorites as the addition
of coffee makes for an interesting (and addictive) depth of flavor.
1 cup unsalted butter, softened
1 cup firmly packed brown sugar
½ cup sugar
2 large eggs
1 tablespoon brewed coffee, cooled
1 teaspoon vanilla
23⁄4 cups all-purpose flour
1 teaspoon baking soda
1⁄2 teaspoon baking powder
1 teaspoon salt
1½ cups semi-sweet chocolate chips
In the bowl of a stand mixer cream the butter with the sugars
on medium speed for 2 minutes or until smooth. Add eggs,
one at a time, scraping bowl after each egg is added. Add
the coffee and vanilla. Continue to mix on medium high
speed until mixture is light and fluffy – about a minute. Sift
together flour, baking soda, baking powder and salt. Slowly
add mixture to the bowl and mix just until combined. Stir in
chocolate chips on low speed for 10 seconds.
Line the solid steam oven pan with parchment paper. Place
12 portions of dough, about 2 tablespoons each, onto the
pan, evenly spaced. Place the pan into the steam oven on
rack position 2. Turn the steam oven on by selecting the
Convection Mode set to 335°F. Bake the first pan 14 to 15
minutes or until done. Remove the pan from oven. Slide
the sheet of parchment paper with the cookies off the solid
pan and onto a cooling rack and allow to completely cool.
Place a new sheet of parchment paper onto the solid steam
oven pan and place another 12 portions of dough evenly
spaced onto the pan. Return the solid steam oven pan to
the oven. Successive pans will require slightly less time,
approximately 12 to 13 minutes.
I N G R E D I E N T S P R E P A R AT I O N M E T H O D
The use of parchment paper in this recipe makes it easy to remove the cookies after baking by
simply sliding the entire sheet of parchment (with the cookies) off the pan and onto a cooling rack.
Parchment paper that comes on a roll will work; however, take the time to seek out precut “half
sheet pan” sheets of parchment paper from a local restaurant supply store. The flat precut sheets
are much easier to use than the rolls.
B E F O R E Y O U S T A R T
2 1 ⁄ 2 D O Z E N C O O K I E S
1 2 - 1 5 M I N U T E S
2
C H O C O L AT E C H I P C O O K I E S
CO
NV
EC
TIO
N M
OD
E |
RE
CIP
ES
M A K E S R A C K P O S I T I O N C O O K T I M E2 4 S E R V I N G S
2 0 M I N U T E S2
M A K E S R A C K P O S I T I O N C O O K T I M E
40
41

THE BEST WAY TO C OOK CASSEROLES, LASAGNA, QUIC K BREA DS AND MORE.
This mode produces no steam, but instead retains the natural
moisture in the foods you’re cooking. The heating element and
convection fan produce moving air, while oven ventilation is
sealed so moisture remains in the oven. The result? Your juiciest
meatloaf or most mouthwatering fruit-and-nut muffins ever.
The Convection Humid Mode is ideal for foods that have
enough of their own moisture or do not require the addition of
steam; for instance, lasagna and casseroles, quick breads like
zucchini, banana or pumpkin, and as we mentioned, muffins
or meatloaf.
C O N V E C T I O N H U M I D M O D E
When using the Convection Humid Mode, no steam is
produced; however, the Convection Humid Mode retains the
moisture given off by the food being baked. This “humidity” is
ideal for things that have enough of their own moisture. Foods
such as lasagna, casseroles or meatloaf, or quick breads like
zucchini, banana or muffins all turn out wonderfully taking
advantage of the oven’s unique ability to maintain a humid
cooking environment.
T H E B E N E F I T S O F C O N V E C T I O N H U M I D
C ONVEC TI ON HUMID
FOR FOODS THAT ARE NATURALLY MOIST
n Cook on multiple levels.
n Excess moisture is maintained in the oven.
n No steam is produced.
n Don’t bother preheating.
n Perfect casserole mode.
C O N V E C T I O N H U M I D
R E V I E W
CO
NV
EC
TIO
N H
UM
ID M
OD
E
42
43
Lasagna is a great, feel-good meal that can easily feed 8 to 10 people. This recipe can be made up to the
point of baking and then refrigerated for baking the next day. If you choose to do that, take the lasagna out
of the refrigerator one hour prior to baking. Follow the instructions for using the probe, and be sure to set the
alert temperature to 170°F.
1 pound ground Italian sausage
1 pound ground beef
3 cups crushed tomatoes (or 24-oz. jar of marinara/pasta sauce)
6 oz. of tomato paste
1 tablespoon dried parsley flakes
¼ teaspoon garlic powder
Sugar to taste
1 box of lasagna noodles (can be parboiled, but don’t have to be)
3 cups small curd cottage cheese
2 eggs, beaten
½ teaspoon salt
2 tablespoons parsley flakes
½ cup grated Parmesan cheese
1½ pounds shredded mozzarella cheese
In a large pan or pot on the stove, brown the ground meats and
drain off the fat. Return the browned meats to the pan and add
the next five ingredients. Simmer for 15-20 minutes. While sauce is
simmering, combine the eggs, cottage cheese, salt, parsley flakes,
Parmesan cheese and half the mozzarella cheese in a mixing bowl.
Stir to combine. Spray the bottom of a 9 x 13 cake pan with pan
spray. Spread a small amount of sauce onto the bottom of the pan,
about ½ cup. Layer the noodles in a double layer on the bottom of the
pan. Spread 1⁄3 of the cottage cheese mixture on top of the noodles.
Spread evenly to cover the noodles as much as possible. Top that
with 1⁄3 of the meat sauce. Add a single layer of noodles and repeat.
Repeat the process a third time ending with the meat sauce as the
last layer. Sprinkle the remaining mozzarella cheese evenly over the
top. Place the lasagna in the steam oven on rack position 2. Turn the
steam oven on by selecting the Convection Humid Mode set to 355°F.
Place the temperature probe into the lasagna, taking care to try and
fully cover the entire metal shaft of the probe, while still having the tip
of the probe in the center of the lasagna. Plug the probe into the oven
and set the alert temperature to 170°F.
I N G R E D I E N T S P R E P A R AT I O N M E T H O D
If desired, the lasagna noodles can be parboiled. To do this, bring a large stockpot of water to boil. Place the lasagna
noodles into the stockpot and boil until cooked halfway. Remove the noodles and rinse them under cool water to
stop the cooking process. Lay the par-cooked noodles out flat in another 9 x 13 pan and cover the noodles with
water. Leave them in the pan until needed in the recipe.
B E F O R E Y O U S T A R T
L A S A G N A
8 - 1 0 S E R V I N G S
4 5 - 6 0 M I N U T E S2
CO
NV
EC
TIO
N H
UM
ID M
OD
E |
RE
CIP
ES
M A K E S R A C K P O S I T I O N C O O K T I M E
44
45
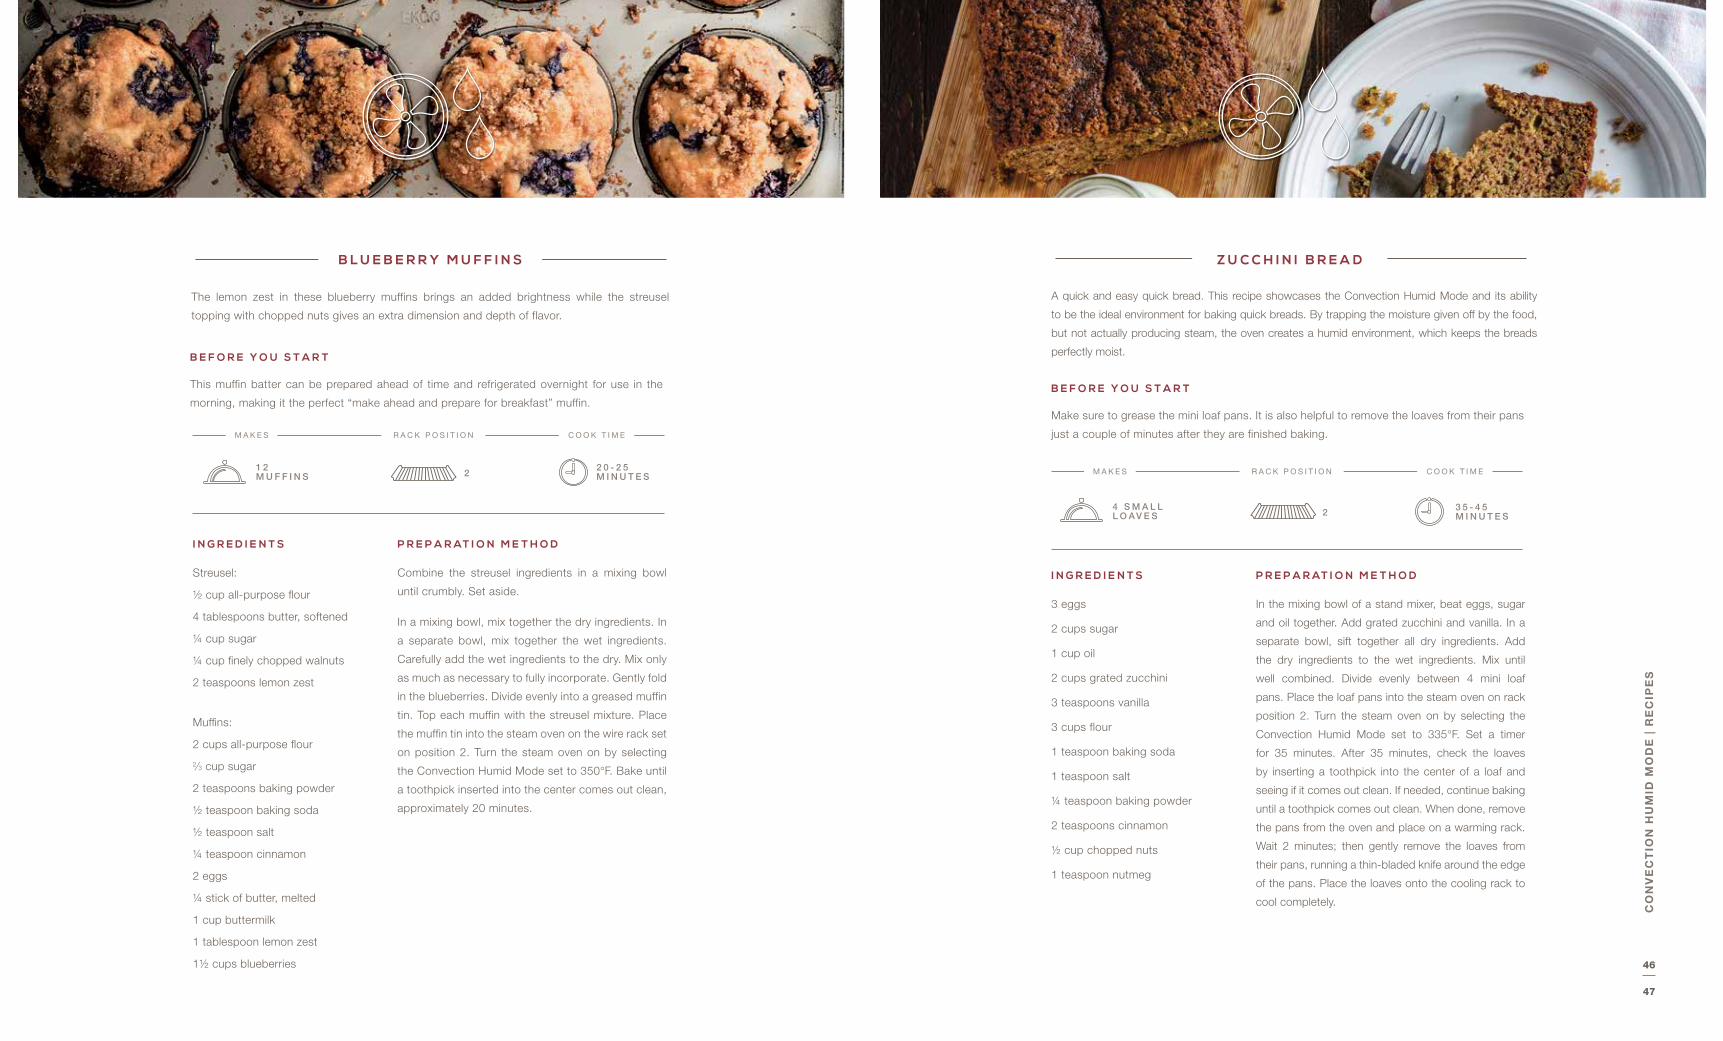
A quick and easy quick bread. This recipe showcases the Convection Humid Mode and its ability
to be the ideal environment for baking quick breads. By trapping the moisture given off by the food,
but not actually producing steam, the oven creates a humid environment, which keeps the breads
perfectly moist.
3 eggs
2 cups sugar
1 cup oil
2 cups grated zucchini
3 teaspoons vanilla
3 cups flour
1 teaspoon baking soda
1 teaspoon salt
¼ teaspoon baking powder
2 teaspoons cinnamon
½ cup chopped nuts
1 teaspoon nutmeg
In the mixing bowl of a stand mixer, beat eggs, sugar
and oil together. Add grated zucchini and vanilla. In a
separate bowl, sift together all dry ingredients. Add
the dry ingredients to the wet ingredients. Mix until
well combined. Divide evenly between 4 mini loaf
pans. Place the loaf pans into the steam oven on rack
position 2. Turn the steam oven on by selecting the
Convection Humid Mode set to 335°F. Set a timer
for 35 minutes. After 35 minutes, check the loaves
by inserting a toothpick into the center of a loaf and
seeing if it comes out clean. If needed, continue baking
until a toothpick comes out clean. When done, remove
the pans from the oven and place on a warming rack.
Wait 2 minutes; then gently remove the loaves from
their pans, running a thin-bladed knife around the edge
of the pans. Place the loaves onto the cooling rack to
cool completely.
I N G R E D I E N T S P R E P A R AT I O N M E T H O D
Z U C C H I N I B R E A D
Make sure to grease the mini loaf pans. It is also helpful to remove the loaves from their pans
just a couple of minutes after they are finished baking.
B E F O R E Y O U S T A R T
4 S M A L L L O AV E S
3 5 - 4 5 M I N U T E S2
The lemon zest in these blueberry muffins brings an added brightness while the streusel
topping with chopped nuts gives an extra dimension and depth of flavor.
Streusel:
½ cup all-purpose flour
4 tablespoons butter, softened
¼ cup sugar
¼ cup finely chopped walnuts
2 teaspoons lemon zest
Muffins:
2 cups all-purpose flour
2⁄3 cup sugar
2 teaspoons baking powder
½ teaspoon baking soda
½ teaspoon salt
¼ teaspoon cinnamon
2 eggs
¼ stick of butter, melted
1 cup buttermilk
1 tablespoon lemon zest
1½ cups blueberries
Combine the streusel ingredients in a mixing bowl
until crumbly. Set aside.
In a mixing bowl, mix together the dry ingredients. In
a separate bowl, mix together the wet ingredients.
Carefully add the wet ingredients to the dry. Mix only
as much as necessary to fully incorporate. Gently fold
in the blueberries. Divide evenly into a greased muffin
tin. Top each muffin with the streusel mixture. Place
the muffin tin into the steam oven on the wire rack set
on position 2. Turn the steam oven on by selecting
the Convection Humid Mode set to 350°F. Bake until
a toothpick inserted into the center comes out clean,
approximately 20 minutes.
I N G R E D I E N T S P R E P A R AT I O N M E T H O D
B L U E B E R R Y M U F F I N S
This muffin batter can be prepared ahead of time and refrigerated overnight for use in the
morning, making it the perfect “make ahead and prepare for breakfast” muffin.
B E F O R E Y O U S T A R T
1 2 M U F F I N S
2 0 - 2 5 M I N U T E S2
CO
NV
EC
TIO
N H
UM
ID M
OD
E |
RE
CIP
ES
M A K E S R A C K P O S I T I O N C O O K T I M E
M A K E S R A C K P O S I T I O N C O O K T I M E
46
47

The Convection Humid Mode provides the ideal environment for preparing a casserole. No steam
is produced; however, moisture given off by the food remains inside the oven cavity. This scalloped
potato recipe can easily be doubled (and placed in a larger dish) in order to feed more people.
It makes a great side dish, or even a full meal on its own. This dish is a great way to use up leftover
holiday ham.
6 medium red potatoes, peeled, quartered, sliced ¼-inch thick (2 pounds)
1 cup diced ham
1⁄3 cup diced onion
1½ cups milk
6 tablespoons butter
2 tablespoons cornstarch
½ teaspoon kosher salt
¼ teaspoon freshly ground black pepper
Mix potatoes, ham and onion in a greased 2½-quart
casserole dish and set aside.
In a 2-quart saucepan over medium heat, combine
milk, butter, cornstarch, salt and pepper. Continuously
stir the mixture with a spatula and cook for 5 minutes
or until smooth and thickened.
Pour the sauce over potato mixture. Place the wire
rack into the oven on position 2. Place the casserole
on the rack. Turn the steam oven on by selecting the
Convection Humid Mode set to 345°F. Bake for 1
hour or until golden brown and bubbly. Remove the
casserole dish from oven and allow it to rest for 15
minutes before serving.
I N G R E D I E N T S P R E P A R AT I O N M E T H O D
S C A L L O P E D P O T AT O E S
The key to this recipe is the sauce. It is important to continuously stir the sauce with a rubber
scraper throughout the entire process. Make sure to get into the corners of the pan.
B E F O R E Y O U S T A R T
4 S E R V I N G S
1 H O U R2
This meatloaf recipe is baked outside of a dish and can be formed into two smaller loaves.
1 pound ground beef
½ pound Italian sausage
2 cups fresh bread crumbs
1 egg, beaten
¼ cup ketchup
¼ cup finely diced onion
¼ cup finely diced carrot
2 teaspoons Worcestershire sauce
¼ teaspoon black pepper
½ teaspoon garlic powder
½ teaspoon kosher salt
In a large bowl combine all ingredients. Mix thoroughly
by hand to fully combine. Form into two individual oval
loaves. Place on a greased perforated steam oven
pan. Insert the temperature probe into one of the
meatloaves. Place the solid steam oven pan into the
oven on rack position 1. Place the perforated pan with
the meatloaves into the oven on rack position 2. Plug
the probe into the oven. Turn the steam oven on by
selecting the Convection Humid Mode set to 345°F.
Set the temperature probe to alert at 170°F. Allow
the meatloaves to cook until the temperature probe
reaches 170°F. If desired, when the temperature probe
shows approximately 150°F, ketchup can be brushed
on top of the meatloaves. After cooking, remove the
perforated pan from the oven and place on a cooling
rack. Using a spatula, remove the meatloaves from
the steam oven pan, slice and serve.
I N G R E D I E N T S P R E P A R AT I O N M E T H O D
M E AT L O A F
A great tip to help drain excess fat off the meatloaf is to bake the meatloaf on the perforated steam
oven pan placed above the solid steam oven pan. The solid pan will act as a drip tray, which
eases cleanup and helps reduce any burning. It’s also a great idea to place a couple of sheets of
parchment paper on the solid steam oven pan to help keep the dripping fat from splattering.
Prepare fresh bread crumbs by placing 2 or 3 fresh rolls or buns into the work bowl of a food
processor. Process until loose crumbs are produced and no large pieces of bread remain.
The carrots and onion can also be pulsed in the food processor instead of being diced.
B E F O R E Y O U S T A R T
4 S E R V I N G S
4 5 M I N U T E S
2
1
CO
NV
EC
TIO
N H
UM
ID M
OD
E |
RE
CIP
ES
M A K E S R A C K P O S I T I O N C O O K T I M E
M A K E S R A C K P O S I T I O N C O O K T I M E
48
49

C O N V E C T I O N S T E A M M O D E
STEAM KEEPS YOUR DISH MOIST, C ONVECTION BROWNS OR C RISPS I T JUST RIGHT.
This is the ultimate “crisp on the outside,
moist and juicy on the inside” mode – just
think of the wide range of dishes you’d want
to turn out that way. Roast turkey. Bubbly
casseroles. Bacon. Mac and cheese.
Panko-crusted fish. Chicken Parmesan.
And so on.
It perfectly combines
steam and convection
cooking. Steam is
produced throughout
the cooking process,
intelligently controlled
by the oven to provide
the proper temperature,
sealing in moisture,
flavor, nutrients. The moving air of the
convection system finishes off the dish with
just the right amount of browning or crisping.
One of our favorite dishes is slow-cooked
pork ribs. In a conventional oven, you might
cook them in foil packets or a covered dish.
C ONVEC TI ON STEAM
“CRISPY OUTSIDE, MOIST INSIDE” PERFECTION
It would take hours, and there would be
none of the nice browning you would want.
The same ribs can be cooked uncovered
in the Convection Steam Mode, and in
just an hour and a half, they’re fall-off-
the-bone tender, with beautiful color and
a crusty exterior.
At lower temperatures like 265°F, you can
do “open air braising” in the Convection
Steam Mode, which works
wonders on cuts of meat like
pork shoulder or a beef chuck
roast. They will come out
moist, flavorful and beautifully
browned. Cooked covered
in a conventional oven, they
would take much longer and
lack both the flavor and color.
You get the idea – this is the signature
mode of the convection steam oven,
capable of producing delicious results with
almost any dish. And probably the first
mode you should start working with, to get
a full appreciation of what this oven can do.
The moving air of the convection system finishes off the dish with just the right amount of browning or crisping.
CO
NV
EC
TIO
N S
TE
AM
MO
DE
| R
EC
IPE
S
50
51

By making use of a combination of steam and moving air, the
Convection Steam Mode allows for a wide range of foods to
be prepared. From “frying” to “braising” and from “roasting” to
“searing,” the use of different temperatures can create vastly
different results. In the case of braising, setting the convection
steam oven to 265°F works wonders on cuts of meat like pork
shoulder, ribs or a beef chuck roast. By setting the temperature
as high as it can go, 445°F, you can achieve results similar
to frying. Using the Convection Steam Mode creates crispy
exteriors and moist interiors.
With such a wide variety of foods that can be prepared in the
steam oven, here are a few tips to ensure success.
First, make sure to evenly place food on the pans being used.
This will help prevent the pans from warping in the oven.
Second, only preheat when necessary. Similar to the other
modes, the Convection Steam Mode can provide “fast-to-
the-table” results, and many times there is no real benefit to
preheating the oven.
Third, when “braising,” be sure not to cover the food. Also,
cut back on the amount of liquid being added to the recipe.
Some steam will condense on the food and add a bit of water
to the dish.
T H E B E N E F I T S O F C O N V E C T I O N S T E A M
n Place food evenly on pans.
n Don’t bother preheating.
n Don’t add too much liquid.
n Watch foods being cooked at high temperatures, as they will brown very quickly.
C O N V E C T I O N S T E A M
R E V I E W
CO
NV
EC
TIO
N S
TE
AM
MO
DE
| R
EC
IPE
S
52
53
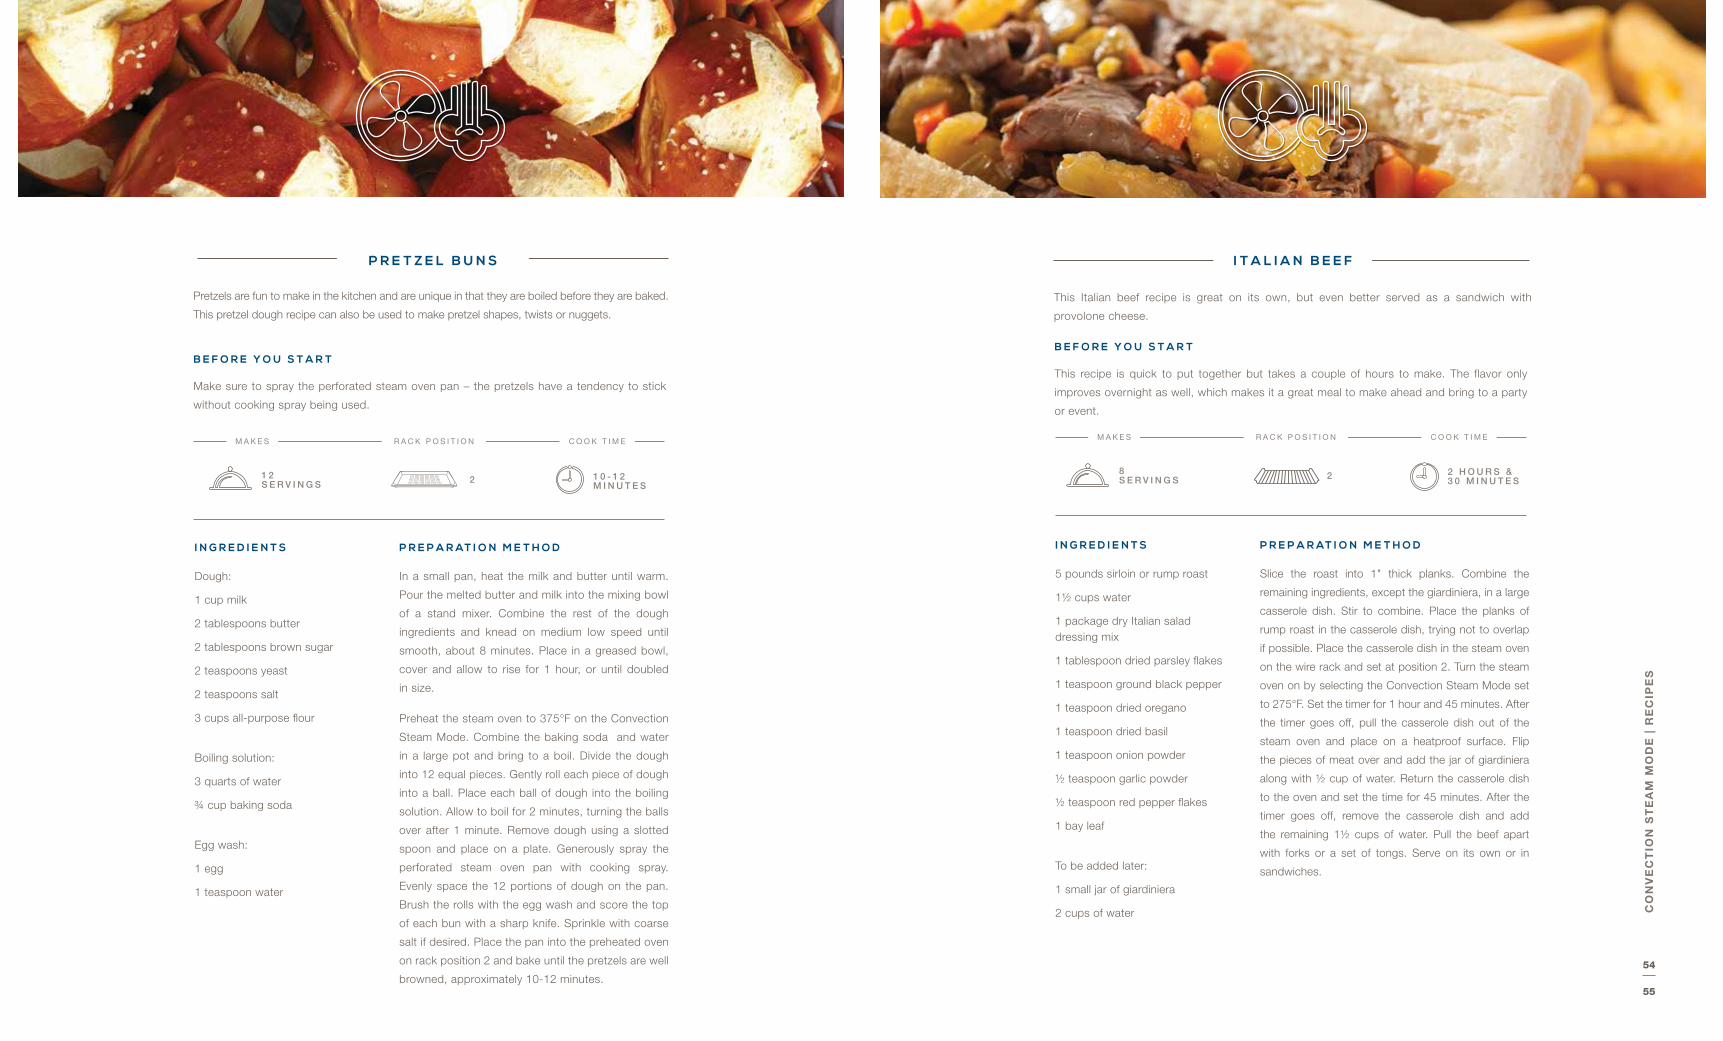
Pretzels are fun to make in the kitchen and are unique in that they are boiled before they are baked.
This pretzel dough recipe can also be used to make pretzel shapes, twists or nuggets.
Dough:
1 cup milk
2 tablespoons butter
2 tablespoons brown sugar
2 teaspoons yeast
2 teaspoons salt
3 cups all-purpose flour
Boiling solution:
3 quarts of water
¾ cup baking soda
Egg wash:
1 egg
1 teaspoon water
In a small pan, heat the milk and butter until warm.
Pour the melted butter and milk into the mixing bowl
of a stand mixer. Combine the rest of the dough
ingredients and knead on medium low speed until
smooth, about 8 minutes. Place in a greased bowl,
cover and allow to rise for 1 hour, or until doubled
in size.
Preheat the steam oven to 375°F on the Convection
Steam Mode. Combine the baking soda and water
in a large pot and bring to a boil. Divide the dough
into 12 equal pieces. Gently roll each piece of dough
into a ball. Place each ball of dough into the boiling
solution. Allow to boil for 2 minutes, turning the balls
over after 1 minute. Remove dough using a slotted
spoon and place on a plate. Generously spray the
perforated steam oven pan with cooking spray.
Evenly space the 12 portions of dough on the pan.
Brush the rolls with the egg wash and score the top
of each bun with a sharp knife. Sprinkle with coarse
salt if desired. Place the pan into the preheated oven
on rack position 2 and bake until the pretzels are well
browned, approximately 10-12 minutes.
I N G R E D I E N T S P R E P A R AT I O N M E T H O D
1 2 S E R V I N G S
1 0 - 1 2 M I N U T E S
P R E T Z E L B U N S
Make sure to spray the perforated steam oven pan – the pretzels have a tendency to stick
without cooking spray being used.
B E F O R E Y O U S T A R T
2
CO
NV
EC
TIO
N S
TE
AM
MO
DE
| R
EC
IPE
S
This Italian beef recipe is great on its own, but even better served as a sandwich with
provolone cheese.
5 pounds sirloin or rump roast
1½ cups water
1 package dry Italian salad dressing mix
1 tablespoon dried parsley flakes
1 teaspoon ground black pepper
1 teaspoon dried oregano
1 teaspoon dried basil
1 teaspoon onion powder
½ teaspoon garlic powder
½ teaspoon red pepper flakes
1 bay leaf
To be added later:
1 small jar of giardiniera
2 cups of water
Slice the roast into 1" thick planks. Combine the
remaining ingredients, except the giardiniera, in a large
casserole dish. Stir to combine. Place the planks of
rump roast in the casserole dish, trying not to overlap
if possible. Place the casserole dish in the steam oven
on the wire rack and set at position 2. Turn the steam
oven on by selecting the Convection Steam Mode set
to 275°F. Set the timer for 1 hour and 45 minutes. After
the timer goes off, pull the casserole dish out of the
steam oven and place on a heatproof surface. Flip
the pieces of meat over and add the jar of giardiniera
along with ½ cup of water. Return the casserole dish
to the oven and set the time for 45 minutes. After the
timer goes off, remove the casserole dish and add
the remaining 1½ cups of water. Pull the beef apart
with forks or a set of tongs. Serve on its own or in
sandwiches.
I N G R E D I E N T S P R E P A R AT I O N M E T H O D
I T A L I A N B E E F
This recipe is quick to put together but takes a couple of hours to make. The flavor only
improves overnight as well, which makes it a great meal to make ahead and bring to a party
or event.
B E F O R E Y O U S T A R T
2 H O U R S & 3 0 M I N U T E S
8 S E R V I N G S 2
M A K E S R A C K P O S I T I O N C O O K T I M EM A K E S R A C K P O S I T I O N C O O K T I M E
54
55

This is the easiest way to make bacon that cooks evenly and won’t curl up.
Bacon Line the solid steam oven pan with one or two sheets
of parchment paper. Lay out as many strips of bacon
as will fit on the steam oven pan. A slight amount of
overlapping is okay, as the bacon will shrink while it
cooks. Place the solid pan in the steam oven on
rack position 2. Turn the steam oven on by selecting
the Convection Steam Mode set to 445°F. A good
indication of when to start checking the bacon is when
you hear the single beep that means the steam oven
has reached the preset temperature, about 7 or 8
minutes. The amount of time the bacon needs to cook
depends greatly on how crisp you would like the bacon
to be and how thick the slices of bacon are. When the
bacon is done to the desired crispness, remove the
pan from the oven and place on a cooling rack. Using
tongs, remove the bacon from the solid pan and serve.
I N G R E D I E N T S P R E P A R AT I O N M E T H O D
B A C O N
Parchment paper is a must for this recipe. Make sure to line the solid steam oven pan with at
least one if not two sheets of parchment paper. This will significantly aid in clean-up, as the
sheets of parchment can be peeled off after cooling, removing much of the fat and burnt-on
grease. It’s also important to not preheat the oven, as it helps the bacon remain flat.
B E F O R E Y O U S T A R T
This recipe takes two days, but your patience will be rewarded. Okay, don’t worry, it’s not really
two full days of effort. However, it is important for the bread cubes to have time to stale out
(one day) and the mixture to sit overnight. So this could be achieved in two days by cutting the
cinnamon bread into cubes the morning of day 1, and in the evening of day 1, making the bread
pudding mixture so it can sit in the refrigerator overnight. Then bake the bread pudding in the
morning on day 2.
7 eggs
3½ cups heavy cream
½ cup sugar
1 cup maple syrup
2 teaspoons vanilla extract
Pinch of salt
2 loaves of bread, 16 oz. each (cubed and stale)
In a large mixing bowl, whisk together the eggs,
heavy cream, sugar, maple syrup, vanilla and salt.
Continue whisking until fully combined. Fold in the
stale bread cubes. Gently fold the mixture together
until fully incorporated. Cover the bowl with plastic
wrap and place in the refrigerator overnight.
The next day, spray or grease a large casserole dish.
Pour the bread pudding mixture into the casserole
dish and smooth out the top. Place the casserole
dish in the steam oven on rack position 2. Turn the
steam oven on by selecting the Convection Humid
Mode set to 350°F. Check the bread pudding after 45
minutes. Continue baking until it is fully set and deep
golden brown on top.
I N G R E D I E N T S P R E P A R AT I O N M E T H O D
B R E A D P U D D I N G
Make sure the bread cubes are stale. If fresh bread is used, the bread will not be able to absorb
the custard mixture.
B E F O R E Y O U S T A R T
1 0 - 1 5 M I N U T E S2N / A
4 5 - 5 5 M I N U T E S
8 - 1 0 S E R V I N G S 2
CO
NV
EC
TIO
N S
TE
AM
MO
DE
| R
EC
IPE
S
M A K E S R A C K P O S I T I O N C O O K T I M E
M A K E S R A C K P O S I T I O N C O O K T I M E
56
57

This cheesecake is a departure from the traditional cheesecake in its use of mascarpone cheese. This adds a layer
of flavor and smoothness in texture to the cheesecake.
Crust:
1¾ cups graham cracker crumbs
¼ cup sugar
5 tablespoons butter, melted
Filling:
2 (8-ounce) packages cream cheese, room temperature
2 (8-ounce) containers mascarpone cheese, room temperature
11⁄4 cups sugar
2 teaspoons fresh lemon juice
1 teaspoon vanilla extract
4 large eggs, room temperature
I N G R E D I E N T S
C H E E S E C A K E
In a medium bowl, combine the sugar and graham cracker crumbs and
stir well. Add the melted butter and stir well to combine. Firmly press the
graham cracker crumb mixture into the bottom of a 9-inch springform pan
(not on the sides of the pan). Place the pan into the oven on the wire rack
set on position 2. Turn the steam oven on by selecting the Convection Mode
set to 335°F. Set the timer for 12 minutes. After 12 minutes, remove the pan
and set aside to cool. Turn the oven off and leave the door open to cool. Be
sure to turn off the interior light.
For the filling: In the bowl of a stand mixer, beat the cream cheese,
mascarpone cheese and sugar until smooth, occasionally scraping down
the sides of the bowl with a rubber spatula. Beat in the lemon juice and
vanilla. Add the eggs, 1 at a time. Continue mixing until all ingredients are
well combined.
Pour the cheesecake mixture over the crust in the spring-form pan. Smooth
out the top with a spoon. Cover the springform pan completely by wrapping
two layers of plastic wrap over the pan and all the way to the bottom.
Make sure the plastic wrap ends underneath the pan. Take the wrapped
springform pan and place it on a sheet of aluminum foil. Wrap the aluminum
foil up around the edges of the pan to help secure the plastic wrap (however,
do not cover the top of the pan with aluminum foil). Place the pan into the
oven on the wire rack set on position 2. Turn the steam oven on by selecting
the Convection Steam Mode set to 225°F. Bake for 1 hour and 45 minutes
or until the center of the cheesecake moves slightly when the pan is gently
shaken. The plastic wrap may balloon up on top while baking. Transfer the
cake to a cooling rack. Gently cut away the plastic wrap covering the top,
being careful, as steam may escape. Allow the cake to cool for 1 hour. Re-
cover the cheesecake with plastic wrap and refrigerate until the cheesecake
is cold. Cut with a warm knife, wiping the knife off between each cut.
Be sure to have the cream cheese and mascarpone cheese at room temperature. Do not rush the mixing – and be sure
to fully cream the mixture so no lumps are present. You will need plastic wrap and tinfoil for baking this cheesecake.
While covering the cheesecake completely with plastic wrap and the lack of a water bath may be a departure from the
way cheesecakes are normally baked, this method will produce a wonderfully smooth, no-crack cheesecake.
B E F O R E Y O U S T A R T
P R E P A R AT I O N M E T H O D
CO
NV
EC
TIO
N S
TE
AM
MO
DE
| R
EC
IPE
S
FPO
8 S E R V I N G S
1 H O U R & 4 5 M I N U T E S2
M A K E S R A C K P O S I T I O N C O O K T I M E
CO
NV
EC
TIO
N S
TE
AM
MO
DE
| R
EC
IPE
S
58
59

CO
NV
EC
TIO
N S
TE
AM
MO
DE
| R
EC
IPE
S
8 S E R V I N G S
3 M I N U T E S1
Pita bread is fun and easy to make at home. The pita bread will balloon up into almost a ball while inside the
oven, making it a fun recipe to bake with children. While the cooking time for each pita is only three minutes,
the dough will need to rise, which may take 1 to 1½ hours, depending on the temperature in the room.
2½ cups all-purpose flour
1 cup warm water
2 tablespoons olive oil
1 tablespoon salt
1 tablespoon sugar
2 teaspoons instant yeast
In the mixing bowl of a stand mixer, add all the ingredients. Using the
dough hook, knead the dough for 5 minutes. Remove the dough from the
mixing bowl and place into a greased container large enough to allow the
dough to double in size. Cover with plastic wrap and let the dough rise until
doubled in size. Place the solid pan in the steam oven on rack position 1.
Turn the steam oven on by selecting the Convection Steam Mode set to
445°F. Divide the dough into 8 equal pieces and gently flatten each piece
into a thick disk. Cover with plastic wrap or a dishcloth. Using a rolling
pin, roll one piece of dough into a 7- to 8-inch circle. Dust the dough and
countertop with flour to ensure that the pita bread does not stick.
After the oven is preheated, slide the rolled-out pita bread onto a floured
pizza peel. Open the steam oven door and slide the pita dough off the pizza
peel onto the solid steam oven pan. Work quickly and shut the door. Set a
timer for 3 minutes. While the first pita bread is baking, roll out the next pita.
The pita bread should inflate into almost a ball. After 3 minutes, remove the
baked pita from the oven and place in a large bowl. Cover the bowl with
foil to allow the pita bread to soften. Repeat with the remaining pita dough,
each time adding the baked pita bread to the bowl and covering again.
Deflate the pita bread if necessary.
Active dry yeast can be substituted in this recipe. If used, place the yeast and warm water in the mixing bowl and
allow to sit for 5 minutes prior to adding any ingredients.
I N G R E D I E N T S
B E F O R E Y O U S T A R T
P R E P A R AT I O N M E T H O D
P I T A B R E A D
M A K E S R A C K P O S I T I O N C O O K T I M E
60
61

This pork shoulder recipe is great on its own, but even better pulled and served with barbecue
sauce as sandwiches. This is a great example of what makes the Convection Steam Mode
so powerful. The ability to “open air braise” foods to tender juicy perfection in a fairly short
amount of time is what makes the Convection Steam Mode perfection for pork shoulder, ribs
or beef roasts.
Pork shoulder cut into 3 smaller pieces
Preferred dry rub, from recipe or store-bought
Place the pork shoulder pieces on the solid steam
oven pan or a large plate. Season liberally with the
preferred dry rub. Cover with plastic wrap and place
in the refrigerator overnight or for at least 2 hours.
Remove from the refrigerator and place the pieces of
pork shoulder onto the wire rack, evenly spaced. Place
the wire rack with the meat into the steam oven on rack
position 2 and place the solid steam oven pan on rack
position 1. Make sure to cover the solid steam oven
pan with parchment paper. Turn the steam oven on by
selecting the Convection Steam Mode set to 265°F. Set
the timer for 1 hour, 30 minutes. After 1 hour and 30
minutes, check the pork shoulder to see if it is tender; if
it is, remove and allow to cool slightly before serving. If
continued cooking is needed, return the pork shoulder
to the oven and cook for an additional 15 minutes or
until tender.
I N G R E D I E N T S P R E P A R AT I O N M E T H O D
P O R K S H O U L D E R
Any dry rub recipe will work just fine, whether it is your own or purchased from the store. It
is also important to cut the pork shoulder into a couple of smaller pieces, or slabs, prior to
coating with the dry rub mixture. The dry rub can be placed on the meat a day in advance if
desired, but at least 2 hours is necessary.
B E F O R E Y O U S T A R T
This pork rib recipe is an easy way to make fall-off-the-bone ribs without all the fuss of foil packets
or many hours of slow cooking. This is a great example of what makes the Convection Steam Mode
so powerful. The ability to “open air braise” foods to tender juicy perfection in a fairly short amount
of time is what makes the Convection Steam Mode perfect for pork shoulder, ribs or beef roasts.
3 racks of baby back ribs
Preferred dry rub, from recipe or store-bought
Place the racks of ribs on the solid steam oven pan or a
large plate. Season liberally with the preferred dry rub.
Cover with plastic wrap and place in the refrigerator
overnight or for at least 2 hours. Remove from the
refrigerator and place the racks of ribs, meat side up,
onto the solid steam oven pan lined with 2 sheets of
parchment paper. Place the solid pan into the steam
oven on rack position 2. Turn the steam oven on by
selecting the Convection Steam Mode set to 265°F.
Set the timer for 1 hour, 15 minutes. After 1 hour and
15 minutes, check the ribs to see if they are tender;
if they are, remove and serve. If continued cooking is
needed, return the ribs to the oven and cook for an
additional 15 minutes or until tender.
I N G R E D I E N T S P R E P A R AT I O N M E T H O D
R I B S
Any dry rub recipe will work just fine, whether it is your own or purchased from the store.
Make sure to score along each bone on the bottom of the ribs with a knife. The dry rub can
be placed on the racks of ribs a day in advance if desired, but at least 2 hours is necessary.
B E F O R E Y O U S T A R T
1 H O U R & 3 0 M I N U T E S
5 - 6 S E R V I N G S
1 H O U R & 4 5 M I N U T E S
8S E R V I N G S
2
1
1
CO
NV
EC
TIO
N S
TE
AM
MO
DE
| R
EC
IPE
S
M A K E S R A C K P O S I T I O N C O O K T I M E
M A K E S R A C K P O S I T I O N C O O K T I M E
62
63
Fresh Appetizers A1
Frozen Appetizers A2
Baked Dish A3
Soufflé A4
Baked Potatoes A5
Frozen Potato Products A6
Braising Meat A7
Fresh Pizza A8
Frozen Pizza A9
Custard A10
Bread A11
Yeast Pastry with Filling A12
Cake A13
Torte A14
YOU SELECT THE DISH, AND GOURME T DOES THE REST.
This is the “it takes over and magic happens”
mode. Simply tell it the type of food you are
putting in the oven – anything from a soufflé
to a freshly made pizza to a few sweet
potato wedges. After you make your choice
from fourteen categories of food, the climate
sensor detects the volume, shape and
consistency and adjusts time, temperature
and humidity for guesswork-free, delicious
results. The Gourmet Mode is perfect for
nearly any food. Need a quick snack? Enjoy
frozen egg rolls, perfectly crisp, just as though
they came from the
deep fryer using the
“Frozen Appetizers”
option. Like to make
homemade pizza?
Choose “Fresh Pizza”
and simply decide how well browned you
would like it, all the while never fussing with
modes, temperatures or times. Maybe you
need a side dish of roasted fingerling potatoes
to go with some steaks out on the grill. The
Gourmet Mode has you covered there as
well. Choose “Baked Potatoes,” and just
season the fingerling potatoes lightly with
oil, salt and pepper. The Gourmet Mode is
an intelligent resource, giving you access to
G O U R M E T M O D E
GOURME T MODE
AUTOMATIC COOKING OF ALMOST ANY DISH
Guesswork-free delicious results,
every time
GO
UR
ME
T M
OD
E
a wealth of programmed options both fresh
and frozen. The oven takes care of the time,
the cooking temperature and the humidity,
making adjustments for the specific foods you
are preparing. All that is required is for you to
sit back, relax and let the oven do the work.
Use Gourmet to prepare any of the foods listed
below: fresh, refrigerated or frozen. Select the
food and desired doneness, and the sensor
adjusts time, temperature and humidity so no
baking instructions are required.
G O U R M E T M O D E
F O O D C O D E
64
65

This recipe is very manageable and represents a great starting point to learn the art of baking great bread. You will
notice a few additional steps throughout the process which you may not be used to. These steps are important
and, in general, can be applied to most bread baking recipes. A very important step in making the dough is the
rest period between the first and second mixing times. Baking great bread is an art, but one that is fun and can
become an addictive pursuit.
3½ cups unbleached all-purpose flour
¾ cup whole-wheat flour
1½ cups warm water
2 teaspoons salt
2 teaspoons instant yeast
I N G R E D I E N T S
1 L O A F
5 0 M I N U T E S
A R T I S A N B R E A D
Place all the ingredients into the bowl of a stand
mixer fitted with a dough hook. Knead the dough
on medium low speed for 5 minutes. The dough will
be slightly sticky. Turn the mixer off and cover the
mixing bowl with a damp kitchen towel or plastic
wrap. Allow to stand for 15 minutes.
Remove the plastic wrap and continue kneading on
medium low speed for 5 minutes. Remove the bowl
from the mixer. Cover the bowl with plastic wrap
and allow to proof until doubled in size. Gently
transfer the risen dough from the mixing bowl onto
a floured counter.
Carefully form the proofed dough gently into
a round loaf and place on the solid steam oven
pan lined with a sheet of parchment paper that
has been dusted with flour. Cover the dough with
plastic wrap and allow to proof again for 30 to
45 minutes.
Removed the plastic wrap and make a pair of
two-inch-deep slashes (that cross) in the top of
the loaf. Use the sharpest knife you have to make
the cuts.
Immediately place in the convection steam oven on
rack position 2. Choose the Wolf gourmet setting
A11 – Bread. Choose “well browned” for a nice
deep crust (or “medium browned” for a lighter
crust). Bake until the oven shuts off automatically.
Remove the pan from the oven and place the bread
on a wire rack to cool completely.
It is important to remember that great bread takes
time. The actual “active” time spent making bread is
fairly minimal; however, the waiting periods between
the proofings are quite long. The temperature in
your home will directly affect the time needed for
the bread to rise properly. This process cannot be
rushed and is important for the proper flavor and
structure of the bread.
B E F O R E Y O U S T A R T
P R E P A R AT I O N M E T H O D
2
GO
UR
ME
T M
OD
E |
RE
CIP
ES
M A K E S R A C K P O S I T I O N C O O K T I M E
66
67

The Gourmet Mode of the steam oven has a variety of categories of food to choose from.
A1 – Fresh Appetizers intelligently provides the ideal environment for preparing nearly any
fresh appetizer. The only selection to make when using the fresh appetizers option is the
level of “brownness.” Three choices are available – lightly browned, medium browned and
well browned.
2 dozen small baby red or Yukon gold potatoes, freshly steamed or cooked and still warm
½ cup sour cream
½ cup shredded Gouda cheese
1⁄3 cup crumbled cooked bacon pieces
1⁄3 cup thinly sliced scallions
2 tablespoons butter, melted
½ teaspoon garlic powder
½ teaspoon paprika
Kosher salt to taste
Freshly ground black pepper to taste
While the cooked potatoes are still warm, use a small
paring knife to carefully cut the top off of each potato.
Scoop out the middle of each potato and place in
a medium size mixing bowl. Add the remaining
ingredients and mash until well combined. Fill the
scooped out potatoes with the mashed filling. Place
the potatoes onto a solid steam oven pan lined with
parchment paper. Place into the steam oven on rack
position 3. Press the center knob. Press the center
knob again to select the Gourmet Mode. Press the
center knob to select Fresh Appetizers. Scroll to Well
Browned and press the center knob to select. Press
the center knob to start.
I N G R E D I E N T S P R E P A R AT I O N M E T H O D
T W I C E - B A K E D P O T AT O E S
A great way of par-cooking the potatoes is to use the Steam Mode set to 210°F. Steam the
potatoes until an inserted knife comes out easily. Boiling or baking the potatoes is fine as well.
Be sure not to overcook the potatoes.
B E F O R E Y O U S T A R T
1 2S E R V I N G S
The Gourmet Mode of the steam oven has a variety of categories of food to choose from.
A9 – Frozen Pizza intelligently provides the ideal environment for preparing any frozen pizza.
Frozen pizza Place the frozen pizza on the wire rack in the steam
oven on position 2. Press the center knob twice to
select the gourmet menu. Scroll the knob to the right
to select A9 – Frozen Pizza. Press the center knob to
make the selection. Scroll the center knob left or right
to select from the three ranges of time available. They
are 8-12, 13-20 or 21-35. Select the range of time
on the oven that matches the range indicated on the
pizza’s package. Press the center knob to make that
selection. The oven will start and adjust the cooking
time automatically. If the pizza’s package time is at
the top of one of the first two ranges, for example 12
minutes, it is best to select the next range higher and
watch the pizza for your desired doneness.
I N G R E D I E N T S P R E P A R AT I O N M E T H O D
F R O Z E N P I Z Z A
Make sure to note the time suggested on the label of your frozen pizza. This will be used to
choose the range of time when selecting the frozen pizza Gourmet Mode. It is also fine to bake
two similar pizzas in the oven at the same time. If doing so, place one of the wire racks on rack
position 2 and the other on rack position 3.
B E F O R E Y O U S T A R T
1 2 - 3 0 M I N U T E S
2S E R V I N G S 2
3
GO
UR
ME
T M
OD
E |
RE
CIP
ES
3 0 M I N U T E S
M A K E S R A C K P O S I T I O N C O O K T I M E
M A K E S R A C K P O S I T I O N C O O K T I M E
68
69

GO
UR
ME
T M
OD
E |
RE
CIP
ES
The Gourmet Mode of the steam oven has a variety of categories of food to choose from. A8 – Fresh Pizza
intelligently provides the ideal environment for preparing any fresh pizza.
Pizza dough (makes enough dough for 2 large pizzas):
3¾ cups all-purpose flour
11⁄3 cups warm water
1 tablespoon honey
2½ teaspoons kosher salt
¾ teaspoon instant yeast
Pizza:
Prepared pizza dough
Preferred pizza sauce
Preferred pizza toppings
I N G R E D I E N T S
F R E S H P I Z Z A
Place all the ingredients in the bowl of a stand
mixer fitted with a dough hook. Knead the dough
on medium low speed for 7 minutes. Cover the
mixing bowl with a clean dish towel or plastic wrap
and allow to stand for 10 minutes. Remove the
cover on the mixing bowl and continue kneading
for 7 minutes. Place the dough in a rigid, greased
container. Cover and refrigerate for 2 days. On the
day of use, portion the dough into 2 equal pieces.
The second piece of dough can be frozen for later
use if desired. Gently roll the dough into a ball, cover
and allow to come to room temperature.
To prepare the pizza, first flour the solid steam oven
pan. Roll out the pizza dough into a 12-inch circle
and place on the floured solid pan. Top the pizza
dough with desired sauce and toppings. Place the
pan into the steam oven on position 2. Press the
center knob twice to select the gourmet menu.
Scroll the knob to the right to select A8 – Fresh
Pizza. Press the center knob to make the selection.
Scroll the center knob left or right to select from
the three brownness levels of time available. Select
the brownness level you prefer. Press the center
knob to make that selection. The oven will start
and adjust the cooking time automatically. After the
pizza is done, remove the solid pan from the oven
and place on a cooling rack. Slide the pizza off the
pan and onto a cutting board. Cut and serve.
Make sure to allow 2 to 3 days for the pizza dough
to sit in the refrigerator. This time is necessary to
develop the depth of flavor that gives pizza dough
its unique character.
B E F O R E Y O U S T A R T
N / A
P R E P A R AT I O N M E T H O D
2
M A K E S R A C K P O S I T I O N C O O K T I M E
3 0 - 4 0 M I N U T E S
70
71

PERFECTLY ROASTED MEATS, DONE EXACTLY WHEN
YOU WANT THEM.
Here’s the scenario: you want to serve beef tenderloin cooked
perfectly to a ruby medium for a dinner party this evening
at seven. Where would you begin? There are a multitude of
details you need to know in order to pull off
this meal. What internal temperature is beef
tenderloin cooked to medium? What oven
mode should I use? What temperature should
I set the oven to? How long will it take to cook? What time
should I put it in, so that I can have a rest period as well after
I remove it from the oven?
You can try and find the answers to those questions, or
you can simply use the Slow Roast mode of the convection
steam oven and select beef tenderloin, cooked to medium,
and served at 7 p.m. The oven takes over and does the rest,
ensuring that you look like a professional chef as you serve
your perfectly roasted beef tenderloin promptly at seven, to
the “oohs” and “ahhs” of your admiring guests.
A total of fourteen cuts of beef, veal, pork and lamb can be selected. When you use the
probe, the oven can monitor the progress of the roasting meat,
making adjustment on the fly during the cooking process and
ensuring perfect results every time.
SLOW ROAST
TENDERNESS L IKE YOU’VE NEVER TASTED
S L O W R O A S T M O D E
The oven takes over
SL
OW
RO
AS
T M
OD
E
72
73

The Slow Roast Mode is perfect for large, expensive cuts of meat that are difficult to prepare. The efforts of trying
to find the internal temperatures, cooking times and oven modes needed to prepare these roasts are no longer
needed, as the Slow Roast Mode takes care of all the work. Allowing you to choose the exact doneness level you
desire and proving the flexibility of choosing exactly when to serve the meal, the Slow Roast Mode takes the stress
out of preparing even the most complicated cuts of meat.
Beef tenderloin between 3 and 6 pounds, trimmed
Kosher salt
Freshly ground black pepper
I N G R E D I E N T S
B E E F T E N D E R L O I N
For the following preparation, an example of starting
the oven at 3:15 p.m. and serving the meal at 7 p.m.
will be used.
Place the beef tenderloin on the solid steam oven
pan. Season liberally with salt and pepper. Place the
solid pan into the steam oven on rack position 2.
Insert the temperature probe into the center of the
meat, taking care to try and cover as much of the
shaft of the probe as possible. Plug the temperature
probe into the steam oven. Close the door. Press
the center knob and scroll to Slow Roast. Press
the center knob to select. Scroll to beef tenderloin
and press to select. Scroll to medium and press to
select. Press the TEMP button and scroll to 142°F
(this will provide a nice medium, though any desired
temperature can be used). Press the center knob
to select. Press the TIME button twice. Scroll the
time to 7 p.m. and press the center knob to select.
Press the center knob again to start. The oven will
shut off and the screen will go blank. The steam
oven will turn itself back on at 3:30 and cook the
beef tenderloin to 142°F, finishing at exactly 7 p.m.
This will include a rest period factored in, so at
7 p.m. remove the pan from the oven, cut and serve
the tenderloin.
A beef tenderloin between 3 and 6 pounds works
best. If desired, though not necessary, the beef
tenderloin could be seared on the grill or in a large
roasting pan, for added color and flavor.
It is important to note that while the Slow Roast
Mode will allow to you “delay start” the process for
as long as you would like, food safety can become
an issue. It is not recommended to delay start the
process more than a couple of hours.
B E F O R E Y O U S T A R T
P R E P A R AT I O N M E T H O D
SL
OW
RO
AS
T M
OD
E
| R
EC
IPE
8 S E R V I N G S
3 H O U R S & 3 0 M I N U T E S2
M A K E S R A C K P O S I T I O N C O O K T I M E
74
75
D I S C O V E R T H E D E L I C I O U S W O R L D O F
S T E A M C O O K I N G The Chinese have been cooking with steam for
over 3,000 years. And the combi oven (steam and
convection combined) is a fixture in the finest European
restaurants, bakeries and home kitchens. Now it’s your
turn to try this more nutritious and delicious way of
cooking, with the Wolf convection steam oven. You
get exactly the right mix of heat and humidity for any
dish – crispy or flaky on the outside, moist and tender
inside – just what you’ve always craved. We give you
the tips, techniques and recipes to master this exciting
new way of cooking.
T H E A B I L I T Y T O U T I L I Z E S T E A M T H R O U G H O U T T H E C O O K I N G P R O C E S S, O R I N C E R TA I N M O D E S O N LY W H E N N E C E S S A RY, I S T H E K E Y T O W H AT M A K E S T H E W O L F C O N V E C T I O N S T E A M O V E N S U C H A N A M A Z I N G A P P L I A N C E .