manual de avaya
TRANSCRIPT

Avaya Site Administration Reference
14-300610 Issue 2 February 2006

i
Table of Contents Using Avaya Site Administration ........................................................................................................................................ 1 What's New in this Release ............................................................................................................................................... 1 Overview of the main screen.............................................................................................................................................. 3 Overview of wizards........................................................................................................................................................... 4 Setting up this product ....................................................................................................................................................... 7 Saving changes to Avaya Site Administration properties.................................................................................................... 7 Adding a voice system....................................................................................................................................................... 7 Connecting to a voice system via SSH through an ASG Guard II....................................................................................... 7 Adding a messaging system .............................................................................................................................................. 9 Adding a Modular Messaging system .............................................................................................................................. 10 Deleting a voice system or messaging system................................................................................................................. 11 Renaming a voice or messaging system.......................................................................................................................... 12 Viewing or changing a system's properties ...................................................................................................................... 13 Creating command shortcuts ........................................................................................................................................... 13 Creating a shared system file........................................................................................................................................... 14 Using a shared system file............................................................................................................................................... 15 Scheduling tasks.............................................................................................................................................................. 16 Scheduling a task to run .................................................................................................................................................. 16
Prerequisites ................................................................................................................................................................ 16 Access ......................................................................................................................................................................... 16 Use .............................................................................................................................................................................. 16
Using the Schedule tab.................................................................................................................................................... 17 Running, Scheduling, Aborting, Changing properties, or Deleting a task ...................................................................... 17 Understanding the columns.......................................................................................................................................... 18 Understanding the State column .................................................................................................................................. 18
Checking status ............................................................................................................................................................... 19 Using the Status pane...................................................................................................................................................... 19
Controlling the Status pane .......................................................................................................................................... 19 Using the Status pane.................................................................................................................................................. 19
Using the Schedule tab.................................................................................................................................................... 20 Running, Scheduling, Aborting, Changing properties, or Deleting a task ...................................................................... 20 Understanding the columns.......................................................................................................................................... 20 Understanding the State column .................................................................................................................................. 21
Using the Connection Status tab...................................................................................................................................... 22 Disconnecting from a System....................................................................................................................................... 22 Understanding the columns.......................................................................................................................................... 22
Using the History tab ....................................................................................................................................................... 23 Exporting, Printing, or Deleting the History Log ............................................................................................................ 23 Understanding the columns.......................................................................................................................................... 23
Managing performance.................................................................................................................................................... 24 Improving Grade of Service ............................................................................................................................................. 24 Synchronizing the voice system and PC time................................................................................................................... 24 Plotting Processor Occupancy or Call Traffic data ........................................................................................................... 25 Viewing voice system hardware configuration.................................................................................................................. 25 Viewing system capacity using Avaya Site Administration ............................................................................................... 26 Administering voice systems............................................................................................................................................ 27

Avaya Site Administration Reference
ii
Starting GEDI .................................................................................................................................................................. 27 Starting GEDI from the Task tab................................................................................................................................... 27 Starting GEDI from the Tree tab................................................................................................................................... 27
Starting Terminal Emulation............................................................................................................................................. 28 Disconnecting from a voice or messaging system............................................................................................................ 28 New Administrator's Guide Book...................................................................................................................................... 29 Voice system components ............................................................................................................................................... 29 Role of the administrator.................................................................................................................................................. 29 Simplifying end-user management................................................................................................................................... 31
Create a system to stay abreast of employee changes................................................................................................. 31 Require end-user training............................................................................................................................................. 31 Standardize telephone feature configurations............................................................................................................... 31 Involve end-users in planning for new system and departmental changes.................................................................... 32
Daily administrator tasks.................................................................................................................................................. 32 Key fields ..................................................................................................................................................................... 33
Weekly administrator tasks .............................................................................................................................................. 33 Monthly administrator tasks ............................................................................................................................................. 34 Other tasks ...................................................................................................................................................................... 34 Command language and syntax....................................................................................................................................... 34
Command components ................................................................................................................................................ 34 Command types ........................................................................................................................................................... 34 Command abbreviations .............................................................................................................................................. 35
Working with end users.................................................................................................................................................... 36 Assessing end-user training needs .................................................................................................................................. 36
Preventing future training problems.............................................................................................................................. 36 Preparing end-user training.............................................................................................................................................. 37 Delivering end-user training ............................................................................................................................................. 39 Communicating with end users ........................................................................................................................................ 40
Establish standard communication procedures............................................................................................................. 40 Identify important information and distribute it to company employees ......................................................................... 40
Planning your Communication Manager system .............................................................................................................. 42 Voice system components ............................................................................................................................................... 42 System add ons............................................................................................................................................................... 42 Understanding the dial plan ............................................................................................................................................. 43
Communication Manager dial plans.............................................................................................................................. 43 R10 or earlier dial plans ............................................................................................................................................... 43
Displaying your dial plan.................................................................................................................................................. 44 Displaying your dial plan .............................................................................................................................................. 44 Displaying your MultiVantage R10 or earlier dial plan................................................................................................... 44
Modifying your dial plan ................................................................................................................................................... 44 Modifying your dial plan................................................................................................................................................ 44 Modifying your R10 or earlier dial plan ......................................................................................................................... 44
Adding extension ranges ................................................................................................................................................. 45 Adding extension ranges to your dial plan .................................................................................................................... 45 Adding extension ranges to your R10 or earlier dial plan.............................................................................................. 45
Adding feature access codes ........................................................................................................................................... 46 Adding feature access codes to your dial plan.............................................................................................................. 46 Adding feature access codes to your R10 or earlier systems........................................................................................ 46

Avaya Site Administration Reference
iii
Changing feature access codes....................................................................................................................................... 47 Changing feature access codes for R10 and earlier systems ....................................................................................... 47
Setting up phones............................................................................................................................................................ 48 Adding new phones ......................................................................................................................................................... 48 Adding a phone and messaging subscriber...................................................................................................................... 48
Confirming that the phone and mailbox were added ..................................................................................................... 48 Entering Native Names.................................................................................................................................................... 49 Adding feature buttons to a phone ................................................................................................................................... 51
Adding feature buttons to a new phone ........................................................................................................................ 51 Adding feature buttons to an existing phone................................................................................................................. 51
Adding a fax or modem.................................................................................................................................................... 52 Adding an extension without hardware............................................................................................................................. 52
Adding the extension.................................................................................................................................................... 52 Setting Up a Voice Mailbox .......................................................................................................................................... 53
Changing a phone user's information............................................................................................................................... 53 Changing a phone user's information............................................................................................................................... 53 Using an alias .................................................................................................................................................................. 54 Customizing your phone .................................................................................................................................................. 54 Upgrading phones ........................................................................................................................................................... 55 Swapping phones using a wizard..................................................................................................................................... 55 Removing a phone or subscriber ..................................................................................................................................... 56 Understanding attendant consoles................................................................................................................................... 56
Changing attendant consoles ....................................................................................................................................... 56 Changing COR values ..................................................................................................................................................... 57 Changing COS values ..................................................................................................................................................... 57 Managing phone features ................................................................................................................................................ 58 Changing feature parameters .......................................................................................................................................... 58 Creating pickup groups.................................................................................................................................................... 58 Creating coverage paths.................................................................................................................................................. 59 Setting up bridged call appearances ................................................................................................................................ 60 Routing outgoing calls...................................................................................................................................................... 62 World class routing .......................................................................................................................................................... 62 Adding a new area code or prefix..................................................................................................................................... 62 Using ARS to restrict outgoing calls ................................................................................................................................. 63 Overriding call restrictions................................................................................................................................................ 64 ARS Partitioning .............................................................................................................................................................. 65 Advanced voice system administration ............................................................................................................................ 66 Globally changing voice system data ............................................................................................................................... 66 Entering Native Names.................................................................................................................................................... 66 Trunks ............................................................................................................................................................................. 68 Understanding trunks....................................................................................................................................................... 68 Preparing to add a trunk .................................................................................................................................................. 68 Adding trunk groups......................................................................................................................................................... 69 Night Service ................................................................................................................................................................... 71 Setting up night service.................................................................................................................................................... 71 How do night service types interact?................................................................................................................................ 71 Announcements............................................................................................................................................................... 72 What is an announcement? ............................................................................................................................................. 72

Avaya Site Administration Reference
iv
Adding announcements ................................................................................................................................................... 72 Voice Announcement over LAN (VAL).......................................................................................................................... 72
Recording announcements .............................................................................................................................................. 73 Professional or computer recordings ............................................................................................................................ 74 Recording new announcements at a computer............................................................................................................. 74
Deleting announcements ................................................................................................................................................. 74 Backing up your announcements ..................................................................................................................................... 75 Hunt groups..................................................................................................................................................................... 76 What are hunt groups? .................................................................................................................................................... 76 Setting up hunt groups..................................................................................................................................................... 76 Setting up a queue........................................................................................................................................................... 77 Adding hunt group announcements ................................................................................................................................. 78 Call distribution methods.................................................................................................................................................. 79 Vectors and Vector Directory Numbers (VDNs) ............................................................................................................... 80 What are vectors?............................................................................................................................................................ 80 Writing vectors................................................................................................................................................................. 80 Allowing callers to leave a message ................................................................................................................................ 81 Inserting a step into a vector ............................................................................................................................................ 81 Entering a variable to a vector ......................................................................................................................................... 82 Deleting a step from a vector ........................................................................................................................................... 82 Diagnosing a vector problem ........................................................................................................................................... 83 Voice system reports ....................................................................................................................................................... 84 Using report scheduler..................................................................................................................................................... 84 Analyzing report data....................................................................................................................................................... 84 Using attendant reports.................................................................................................................................................... 84 Using trunk group reports ................................................................................................................................................ 84 Measuring call center performance .................................................................................................................................. 85
What should I measure? .............................................................................................................................................. 85 How many people can use voice system reports? ........................................................................................................ 85
Viewing Hunt Group Measurements reports..................................................................................................................... 86 Viewing Hunt Group Performance reports........................................................................................................................ 86 Call centers...................................................................................................................................................................... 87 What is a call center?....................................................................................................................................................... 87 Planning a call center....................................................................................................................................................... 87 Setting up the call flow..................................................................................................................................................... 87 Testing the system........................................................................................................................................................... 88 Monitoring your call center............................................................................................................................................... 88 Viewing system capacity.................................................................................................................................................. 89 Understanding Automatic Call Distribution ....................................................................................................................... 89 Enhancing an ACD system .............................................................................................................................................. 89 Selecting a Call Management System.............................................................................................................................. 90
Where to get more information ..................................................................................................................................... 91 Printing button labels ....................................................................................................................................................... 92 Understanding the Button Label text template.................................................................................................................. 92
What the $ signs mean................................................................................................................................................. 92 How Avaya Site Administration creates button labels ................................................................................................... 93
Printing button labels ....................................................................................................................................................... 94 Frequently Asked Question .......................................................................................................................................... 94

Avaya Site Administration Reference
v
Creating, changing, or viewing button label text ............................................................................................................... 95 To create button labels................................................................................................................................................. 95 To change button labels ............................................................................................................................................... 95 To view button labels.................................................................................................................................................... 95
Importing and exporting voice system data ...................................................................................................................... 96 Setting the import and export defaults.............................................................................................................................. 96 Exporting data from a voice system ................................................................................................................................. 96 Exporting Call Accounting data into a file ......................................................................................................................... 97 Exporting unused port data.............................................................................................................................................. 98 Exporting data to an LDAP directory ................................................................................................................................ 99
Name ........................................................................................................................................................................... 99 Exporting Native Names ................................................................................................................................................ 102 Importing data into a voice system................................................................................................................................. 102 Importing Native Names ................................................................................................................................................ 103 Messaging Systems....................................................................................................................................................... 104 Adding a phone and messaging subscriber.................................................................................................................... 104
Confirming that the phone and mailbox were added ................................................................................................... 104 All other voice mail administration.................................................................................................................................. 105 Security ......................................................................................................................................................................... 105 ASG............................................................................................................................................................................... 105 Assigning and changing administrators.......................................................................................................................... 105 Top 11 tips to help prevent toll fraud .............................................................................................................................. 106
For more information.................................................................................................................................................. 106 Using Call Detail Recording reports to detect problems ................................................................................................. 107 Using Security Violations Notification to detect problems ............................................................................................... 108 About system security.................................................................................................................................................... 108 Using Native Names ...................................................................................................................................................... 109 Using Native Name........................................................................................................................................................ 109 Using the Avaya Bulk Import Tool (ABIT)....................................................................................................................... 109
Requirement .............................................................................................................................................................. 109 Getting ABIT .............................................................................................................................................................. 109 Starting ABIT.............................................................................................................................................................. 109 Importing Data............................................................................................................................................................ 109 Editing Data ............................................................................................................................................................... 110 Saving Station Data.................................................................................................................................................... 110
Entering Native Names.................................................................................................................................................. 110 Importing Native Names ................................................................................................................................................ 112 Exporting Native Names ................................................................................................................................................ 112 Troubleshooting............................................................................................................................................................. 113
ASA connection errors ............................................................................................................................................... 113 Access denied ............................................................................................................................................................... 113 ASG is enabled.............................................................................................................................................................. 113 ASG is not enabled........................................................................................................................................................ 113 Busy .............................................................................................................................................................................. 113 Cannot initialize serial port ............................................................................................................................................. 114 Cannot open serial port.................................................................................................................................................. 114 Command Timed Out..................................................................................................................................................... 115 Connection lost.............................................................................................................................................................. 117 Corrupt data received .................................................................................................................................................... 118

Avaya Site Administration Reference
vi
Data is locked................................................................................................................................................................ 118 Device does not exist..................................................................................................................................................... 118 General communications error....................................................................................................................................... 119 Incorrect device ............................................................................................................................................................. 119 Incorrect login ................................................................................................................................................................ 119 Invalid password............................................................................................................................................................ 119 Modem initialization error............................................................................................................................................... 120 Network connection failed.............................................................................................................................................. 120 No carrier....................................................................................................................................................................... 121 No dial tone ................................................................................................................................................................... 122 No Ports available.......................................................................................................................................................... 122 Password has expired.................................................................................................................................................... 122 Serial port does not exist ............................................................................................................................................... 123 Remote reset ................................................................................................................................................................. 123 Serial port error.............................................................................................................................................................. 124
Increasing COM port reliability.................................................................................................................................... 124 Decreasing maximum modem connect speed ............................................................................................................ 124
Serial port is in use ........................................................................................................................................................ 124 Serial port settings could not be found ........................................................................................................................... 125 Too many users logged in.............................................................................................................................................. 125 Unexpected response from device................................................................................................................................. 126 Unknown response from device..................................................................................................................................... 126 Voice system problems.................................................................................................................................................. 127 Keeping baseline information......................................................................................................................................... 127 Retrieving baseline information...................................................................................................................................... 128 Backing up voice system data........................................................................................................................................ 129 Checking voice system status........................................................................................................................................ 130 Viewing the system status ............................................................................................................................................. 130 Viewing general system operations................................................................................................................................ 130 Viewing the status of a station ....................................................................................................................................... 130 Viewing the status of your cabinets................................................................................................................................ 130 Viewing changes to the system (history report).............................................................................................................. 131 Solving common voice system problems ....................................................................................................................... 132 Learning to think like a voice system.............................................................................................................................. 132 Diagnosing a problem.................................................................................................................................................... 133 Solving common phone problems.................................................................................................................................. 133 Diagnosing general trunk problems................................................................................................................................ 134 Diagnosing modem problems ........................................................................................................................................ 134 Diagnosing printer troubles ............................................................................................................................................ 134 Diagnosing password, login, and terminal access problems........................................................................................... 135 Solving call center problems .......................................................................................................................................... 135 Working with alarms and errors ..................................................................................................................................... 136 Viewing error logs .......................................................................................................................................................... 136 Error report field descriptions ......................................................................................................................................... 137 Clearing an error............................................................................................................................................................ 138 Alarm logs ..................................................................................................................................................................... 139 Reading the alarm log.................................................................................................................................................... 140 Clearing alarm logs........................................................................................................................................................ 140 Assigning alarm buttons................................................................................................................................................. 140

Avaya Site Administration Reference
vii
Understanding common error types ............................................................................................................................... 140 Error type 1 — circuit pack removed........................................................................................................................... 140 Error type 18 — busied out......................................................................................................................................... 141 Error type 513 — equipment "missing" ....................................................................................................................... 141
Preventing alarms and errors......................................................................................................................................... 142 Turn off maintenance ................................................................................................................................................. 142 Remove unused circuit packs..................................................................................................................................... 143 DS1 administration..................................................................................................................................................... 143
Using voice system features to troubleshoot .................................................................................................................. 144 Using features to troubleshoot ....................................................................................................................................... 144 Using ACA to identify faulty trunks ................................................................................................................................. 144
To use ACA on a G3V2 or older voice system............................................................................................................ 144 To use ACA on a G3V3 or newer voice system.......................................................................................................... 144
Busy Verify .................................................................................................................................................................... 145 To busy-verify a hunt group........................................................................................................................................ 146 To busy-verify a trunk................................................................................................................................................. 147
Facility Busy Indication .................................................................................................................................................. 148 Facility Test Calls........................................................................................................................................................... 148 Trunk Identification ........................................................................................................................................................ 149 Glossary ........................................................................................................................................................................ 150 Adjunct switch application interface (ASAI) .................................................................................................................... 150 Basic Call Management System (BCMS)....................................................................................................................... 150 Cabinet .......................................................................................................................................................................... 150 Call Accounting system.................................................................................................................................................. 150 Call Detail Recorder....................................................................................................................................................... 150 Call Management System (CMS)................................................................................................................................... 151 Carriers.......................................................................................................................................................................... 151 Circuit pack.................................................................................................................................................................... 151 Conversant .................................................................................................................................................................... 151 Data module .................................................................................................................................................................. 152 Intuity AUDIX................................................................................................................................................................. 152 local exchange carrier (LEC).......................................................................................................................................... 152 System Administration Terminal (SAT) .......................................................................................................................... 152 System administrator ..................................................................................................................................................... 152 Terminal emulation software .......................................................................................................................................... 152 Understanding trunks..................................................................................................................................................... 153 Contacting Us ................................................................................................................................................................ 154 General Contact Information.......................................................................................................................................... 154 Before you call............................................................................................................................................................... 154 Technical Support.......................................................................................................................................................... 155 Contacting us about training .......................................................................................................................................... 156 Contacting us for documentation.................................................................................................................................... 156 Giving us your feedback ................................................................................................................................................ 157 Index ............................................................................................................................................................................. 159

Avaya Site Administration Reference
viii

1
Using Avaya Site Administration
What's New in this Release
Avaya Site Administration Release 3.1 introduces the following enhancements:
Support for the following media servers:
o S8400
o S8720
Support for the following media modules and boards:
o G250-DCP media module
o G250-DS1 media module
o HDMM 40-port Power over Ethernet media module
Enhanced integration with Modular Messaging
Support for the following new set types:
o 4601+
o 4602+
Support for increased Class of Restriction from 96 to 996.
Support for increased IP trunks for signaling
Support for increased text fields for feature buttons
Support for the Call Center feature Forced Agent Logout
Support for additional fields in the VDN object in the Import wizard and Export wizard
Support for multi-instance fids objects in the Import wizard and Export wizard for the following objects:
o Feature buttons, softkey buttons, and expansion module buttons and their associated data subfields for stations
o Vector steps and their associated data subfields for vectors
Ability to enter a user-specified vector variable in the Edit Vector screen of the GEDI.
Ability to bulk import and export NAME1 and NAME2 fields for stations
MultiLingual Name Wizard that enables you to enter a Name and Native Name in Unicode for the following objects:
o Hunt Group
o Trunk Group
o Station
o VDN
Support for the following new objects in the Import wizard and Export wizard:
o Public-Unknown-Numbering
o Incoming-Call-Handling-Treatment
Enhancements requested by the INAUU:

Avaya Site Administration Reference
2
o The ability to resize the Port Usage dialog box
o The ability to export the port usage data
o The ability to print the port usage data
o The ability to resize the Unused Port dialog box
o The ability to minimize the Unused Port dialog box and keep it open while you perform other tasks.
o The ability to define the default delimiters that will be used in the Import wizard and the Export wizard. You specify these default delimiters in the Options screen.
o The ability to define the default directory that will be used by the Import wizard, the Export wizard, and other import and export tasks such as export from GEDI and export from the Browse Unused Port wizard.
o ASA prints the required date range that is specified in the Trunk Analyzer wizard at the top of the page when you generate the report
o ASA displays system names that consist of up to 50 characters.
o The ability to restore the column order in the import grid to the original default order.
Updated hardware descriptions for the Hardware Manager

Avaya Site Administration Reference
3
Overview of the main screen
Click an area of the Avaya Site Administration screen to learn more about it.

Avaya Site Administration Reference
4
Overview of wizards
Avaya Site Administration offers several wizards to help simplify day-to-day voice system administration tasks. All Avaya Site Administration wizards apply to the voice system that has been selected in the Target System list on the toolbar. If you can’t find a wizard for the task you want to perform, you can access your voice system, by clicking Start GEDI or Start Emulation.
Three of the wizards also affect messaging systems: Add User, Change User Name, and Remove User. The messaging system that is affected by these wizards is the one that you select on the first page of the wizard.
This topic describes what each wizard is for. To learn how to use a wizard, see Using Wizards.
General
This opens a GEDI (Graphically Enhanced DEFINITY Interface) window. Click this icon when you want to administer your voice system and can’t find a wizard to help you.
This helps you create a new extension on your voice system, or a new mailbox on your messaging system.
This lets you change information associated with a particular extension on your voice system (or mailbox on your messaging system).
This helps you delete a person from your voice system and messaging system. It automates the process of removing that person from all the groups they may be a part of.
This automates the process of adding a bridged appearance to a phone. You might want to add a bridged appearance so someone can pick up calls that are going to a different phone, with the press of a button.
This enables you to see the dial ranges that have been set up in the dial plan for the selected voice system. You might want to use this wizard before adding an object to the voice system, so you don’t accidentally assign the new object an extension that has been saved for a different use.
This displays a list of the stations that have been defined on your voice system, based on the selection criteria (extension range and/or set type) that you specify.
This finds the next unused port. You need this information before you can add certain objects (like new phones) to your voice system.
This finds the next unused extension, once you give it the extension range you want to look in. You might want to use this wizard before adding an object to the voice system, so you don’t accidentally assign the new object an extension that has already been used.

Avaya Site Administration Reference
5
This enables you to print labels for the buttons on your phones, using a button label template that you set up beforehand.
This lets you "swap stations," or move a station to the other station’s port and vice versa.
Advanced
This enables you to create template copies from the most common objects that you add to your voice system (like phones, hunt groups, and so on). Templates save you from entering the same information in many places, and can help increase the consistency of settings from one object to another.
This enables you to use the templates you created with the "Create New Template" wizard to add new objects to your voice system.
This enables you to export data from your voice system to a file that your call accounting software can use.
This enables you to generate and schedule a DEFINTY command report that can be printed, exported, or e-mailed.
This enables you to export data from your voice system to a file that other software applications (like spreadsheets or databases) can use.
This enables you to import data from a spreadsheet or database application into your voice system.
This enables you to search your voice system for certain settings or information and optionally replace the old information with new information.
This enables you to start a terminal emulation session to your voice system. Terminal emulation gives you access to screens you can use to administer your system.
Fault & Performance
This displays a screen that shows a schedule and status of all data polling tasks for a particular voice system. From that screen you can set up polling tasks.
This enables you to set up Avaya Site Administration to automatically notify you of any unresolved alarms on the system.
This enables you to set Avaya Site Administration up to automatically check for trunks that are out of service and notify you when it finds one.
This enables you to gather trunk data, from which you can create a report that gives recommendations on achieving a specified grade of service
This enables you to measure and assess the performance of your voice system over a period of time under different loads. After the data is collected,

Avaya Site Administration Reference
6
you can then plot that data on a graph
This enables you to monitor the volume, type, and distribution of call traffic in order to measure how a voice system is performing. After the data is collected, you can then plot that data on a graph
This enables you to view the maximum capacities of your system and your current level of usage.
This enables you to look for redundant or unused data on your voice system. It can help you clean up your voice system quickly without having to manually look through a large number of screens
This enables you to set up the voice system time to match the clock on your PC, or set an offset between the voice system time and your PC time in the event they are in different time zones
This enables you to see a representation of your voice system configuration in a tabular and carrier layout. Included in this representation are all of the voice system’s boards and carriers, and any alarms or errors for that hardware.

Avaya Site Administration Reference
7
Setting up this product
Saving changes to Avaya Site Administration properties
If you have been making configuration changes to Avaya Site Administration, such as creating command shortcuts, creating folders, changing system properties, etc., your changes are not saved until you do one of the following:
Shut down (exit) Avaya Site Administration.
Click on the toolbar.
Select File>Save Configuration from the menu bar.
It is recommended that you save your configuration after making any such changes, so that any changes are not lost unexpectedly due to a power outage, system crash, etc.
Adding a voice system
To set up Avaya Site Administration so it has the information it needs to connect to a voice system, complete the following steps:
1 From the toolbar at the top of the screen, click , or select File>New>Voice System.
2 Complete the wizard screens. If you need help with a wizard screen, click Help on that screen.
3 You can confirm that the voice system was added by clicking the Tree tab and seeing that it appears in the Tree.
You can add as many systems as you want. Doing so provides Avaya Site Administration with setup information only. If you add several systems, it doesn’t necessarily mean you can connect to them all simultaneously. The number of simultaneous connections you can have depends on your hardware configuration. For example, if you are connecting to systems using serial ports, you can connect to as many voice systems at once as you have COM ports.
Connecting to a voice system via SSH through an ASG Guard II
This procedure describes how to configure Avaya Site Administration to establish an SSH connection to a Linux-based media server (such as an S8700) through an ASG Guard II.
Complete the following steps:
1 From the toolbar at the top of the screen, click , or select File>New>Voice System.
The Add Voice System dialog box appears.
2 In the Voice System Name box, enter a name for the media server to which you want to connect.
3 Click the Next button.
The next Add Voice System dialog box appears.
4 Specify how you will connect to this media server.
5 Click the Connect via ASG Guard check box.

Avaya Site Administration Reference
8
6 Click the Next button.
The Connect via an ASG Guard dialog box appears.
7 In the FQDN or IP address box, enter either the fully-qualified domain name or the IP address of the ASG Guard.
8 Click the Next button.
The next Connect via an ASG Guard dialog box appears.
9 Make sure the SSH option button is selected.
10 Click the Next button.
The next Connect via an ASG Guard dialog box appears.
11 In the Host Name box, enter the host name for the media server that is configured on the ASG Guard.
12 Click the Next button.
The next Connect via an ASG Guard dialog box appears.
13 In the Timeout for establishing connection box, enter the maximum number of seconds that Avaya Site Administration will try to connect to the media server. .
14 In the Timeout for sustaining an idle connection box, enter a value other than 0 to make sure the connection to the media server is not active permanently.
15 Click the Next button.
16 Specify whether you want to log into the media server automatically or manually.
17 Click the Next button.
18 Perform one of the following steps:
If you are logging into the media server automatically:
a. From the Authentication Methods drop-down list box, select whether ASG Key or a password is the authentication method for your login on the ASG Guard.
b. In the Login box, enter your Avaya user ID.
c. Perform one of the following steps:
o If you selected Password in Step A, enter your password for the ASG Guard in both Password boxes.
o If you selected ASG Key in Step A, enter your 20-digit, secret ASG key in the Secret Key box. Avaya Site Administration will encrypt your key using 3DES encryption and store this encrypted key on the PC.
d. From the Use Bulk Cipher drop-down list box, select the encryption algorithm you want to use when transferring data between Avaya Site Administration and the media server when using SSH.
e. From the Compression drop-down list box, select the compression level you want to use when transferring data between Avaya Site Administration and the media server when using SSH. Available choices are 1 to 9 (1 for lowest compression and 9 for highest compression). If you do not want to use compression, set this parameter to 0. A compression level of 6 is recommended for optimum performance.
f. Go to Step 19.

Avaya Site Administration Reference
9
If you are logging into the media server manually:
a. From the Authentication Methods drop-down list box, select whether ASG Key or a password is the authentication method for your login on the ASG Guard.
b. From the Use Bulk Cipher drop-down list box, select the encryption algorithm you want to use when transferring data between Avaya Site Administration and the media server when using SSH.
c. From the Compression drop-down list box, select the compression level you want to use when transferring data between Avaya Site Administration and the media server when using SSH. Available choices are 1 to 9 (1 for lowest compression and 9 for highest compression). If you do not want to use compression, set this parameter to 0. A compression level of 6 is recommended for optimum performance.
d. Go to Step 21.
19 Click the Next button.
20 In the Login ID box, enter the media server login ID that the ASG Guard will use to log into the media server. The credentials for this login are configured on the ASG Guard.
21 Click the Next button.
22 Click the Next button.
23 Click the Finish button.
Adding a messaging system
To set up Avaya Site Administration so it has the information it needs to connect to a messaging system, complete the following steps:
1 From the toolbar at the top of the screen, click , or select File>New>Messaging System.
2 Complete the wizard screens. If you need help with a wizard screen, click Help on that screen.
3 You can confirm that the new messaging system was added by clicking the Tree tab and seeing that it appears in the Tree.
You can add as many systems as you want. Doing so provides Avaya Site Administration with setup information only. If you add several systems, it doesn’t necessarily mean you can connect to them all simultaneously. The number of simultaneous connections you can have depends on your hardware configuration. For example, if you are connecting to systems using serial ports, you can connect to as many voice systems at once as you have COM ports. If you are connecting to systems over a network, you can connect to as many systems as you need to at once.

Avaya Site Administration Reference
10
Adding a Modular Messaging system
This procedure describes how to configure Avaya Site Administration to connect to a Modular Messaging system. Before you can connect to a Modular Messaging system via Avaya Site Administration, you must administer the Modular Messaging system.
To configure Avaya Site Administration to connect to a Modular Messaging system, complete the following steps:
1 From the toolbar at the top of the screen, click , or select File>New>Messaging System.
The Add Messaging System dialog box appears.
2 In the Messaging System Name box, enter a name for this connection.
3 Click the Modular Messaging System check box.
4 In the Shared Systems area, specify whether this Modular Messaging system is a local system or a shared system.
5 Click the Next button.
The next Add Messaging System dialog box appears.
6 Click the Next button.
The Network Connection dialog box appears.
7 Enter either the fully-qualified domain name of the Modular Messaging system or the IP address of the Modular Messaging system.
8 Click the Next button.
The TCP/IP Port Number box displays the default setting (389).
9 Click the Next button.
10 In the Timeout for sustaining an idle connection box, enter a value other than 0 to make sure the connection to the Modular Messaging system is not active permanently.
11 Click the Next button.
12 Click the Next button.
13 In the Login ID box, enter the trusted-server name you configured in Modular Messaging.
14 In the Base DN box, enter the Base DN for all subscriber entries.
15 Click the Next button.
16 In the Password box, enter the password you configured for the trusted server in Modular Messaging.
17 In the Password (again) box, re-enter the password you configured for the trusted server in Modular Messaging.
18 Click the Next button.
19 Click the Finish button.

Avaya Site Administration Reference
11
Deleting a voice system or messaging system
You cannot delete a folder, voice system, or messaging system if there are any tasks listed in the Schedule for that system. Be sure that you have moved any items you want to keep elsewhere before you remove folders, voice systems or messaging systems from the Tree tab.
To delete a voice system or messaging system:
1 Click the Connection Status tab.
2 Confirm that Avaya Site Administration is not currently connected to the voice system or messaging system you want to delete.
If Avaya Site Administration is connected to the voice system you want to delete:
a) Select the voice system you want to delete in the Target System list.
b) Click to close the GEDI or terminal emulation window for that voice system.
c) Disconnect from the voice system.
3 Confirm that there are no tasks in the schedule that refer to the voice system or messaging system, as follows:
a) Click the Schedule tab.
b) In the Schedule Tab window, click the System column heading. This will group all of the tasks together by system.
c) Scroll down to the system you want to delete.
d) Delete all of the tasks for the system you want to delete, even those tasks that are complete or failed, by right-clicking on each task to be deleted and selecting Delete, or by clicking on the task and pressing the DELETE key on your keyboard.
4 On the browser pane, click the Tree tab.
5 Right-click the voice system or messaging system that you want to delete.
6 Select Delete. Note that the Delete option only appears if all tasks are deleted from the Schedule tab.
7 Click Yes to confirm the deletion.

Avaya Site Administration Reference
12
Renaming a voice or messaging system
Renaming a voice system or messaging system will not change the name of the system referred to by the tasks scheduled for that system until the task is run.
1 On the browser pane, click the Tree tab.
2 Right-click the voice system or messaging system that you want to rename and select Rename.
3 Edit the name or type the new name over the old one.
4 Press the ENTER key.

Avaya Site Administration Reference
13
Viewing or changing a system's properties 1 On the browser pane, click the Tree tab.
2 Right-click on the voice system or messaging system you want to view or change.
3 Select Properties.
4 On the System Properties screen, change any fields you want.
To change the name of the voice system or messaging system that appears in Avaya Site Administration screens, type a new name in the System Name field.
To change the default terminal emulation type, click the down arrow in the Default Emulator field and select the one you want.
To make Avaya Site Administration log into the system manually, select the Log in manually check box.
To make Avaya Site Administration log in to the system automatically, make sure the Log in manually check box is clear, and complete the Password or Secret Key fields.
To add a connection, click Add and fill out the subsequent screens.
To view or change a connection, select the connection and click Properties.
To remove a connection, select the connection and click Remove.
If you added multiple connections for a voice system, you can set the order in which Avaya Site Administration will use these connections. When you select Connect, Avaya Site Administration, will try to connect to the voice system via the connection to which you assigned the highest priority (that is, the connection to which you assigned the lowest number, such as 1, in the Default Connection Id box). If Avaya Site Administration is unable to establish a connection, it will use the next connection in your list (for example, the connection you specify as 2 in the Default Connection Id box.) To set the default connection order for your connections, select a connection and enter its connection ID in the Default Connection Id box. For example, if you want the selected connection to be the connection that Avaya Site Administration uses by default when you select Connect, enter 1 in the Default Connection Id box. Repeat this step for each connection. (Be sure to assign a unique connection ID to each connection.)
5 Click OK when you are finished.
Creating command shortcuts
Use command shortcuts to go directly to the appropriate GEDI screen for common voice system administration tasks. To create new command shortcuts:
1 On the browser pane, click the Tree tab.
2 Double-click the voice system you want to administer.
3 Right-click on the folder where you want to put the new command shortcut, or on the voice system if you want to put the shortcut in the level underneath the voice system (you can always drag it somewhere else later).
4 Select General>Create New Shortcut.
5 Complete the Command Shortcut Properties screen, using the online help as needed.

Avaya Site Administration Reference
14
Creating a shared system file
A shared system file enables you to define all of the connection information for multiple voice systems and messaging systems in a single file. Other PCs in your company that are running Avaya Site Administration can then use this file to connect to the defined systems. A shared system file eliminates the need for you to define connectivity information for every device in every installation of Avaya Site Administration in your company.
To create a shared system file, perform the following steps:
1 From the Tools menu, select Options.
The Options dialog box appears.
2 In the Shared Systems area on the General tab, make sure the Share System File check box is enabled.
3 In the File box, enter the name of the shared system file you want to create. Click to specify the location for this file. Be sure to save this file to a location that other Avaya Site Administration users can access.
4 Click OK to save your changes and close the Options dialog box.
5 Perform one of the following steps:
If you want to add a new voice system, click on the toolbar, or select File>New>Voice System.
If you want to add a new messaging system, click on the toolbar, or select File>New>Messaging System.
If you want to add a new generic device, click on the toolbar, or select File>New>Generic Device.
The Add System dialog box appears.
6 In the System Name box, enter the name for this system.
7 In the Shared Systems area, click the Shared System option button.
8 Complete this dialog box, and then click Next.
9 Complete the subsequent wizard dialog boxes to add the device information to the shared system file. If you need help with a dialog box, click Help on that dialog box.
When you are finished adding the device information to the shared system file, the shared device appears in the Tree tab and the Target System drop-down list box with a
sharing hand icon (for example, ).
NOTE: The shared system file can contain the connection information for multiple devices. If you want to add other devices to the shared system file, repeat steps 5 through 9.

Avaya Site Administration Reference
15
Using a shared system file
Use this procedure to access an existing shared system file. Before performing this procedure, you must know the location and name of the shared system file you want use.
To use a shared system file, perform the following steps:
1 From the Tools menu, select Options.
The Options dialog box appears.
2 In the Shared Systems area on the General tab, make sure the Share System File check box is enabled.
3 In the File box, enter the location and name of the shared system file you want to
use. Click to find this file.
4 Click OK to save your changes and close the Options dialog box.
The shared devices configured in that shared system file appear in the Tree tab and the
Target System drop-down list box with a sharing hand icon (for example, ).
NOTE: Keep in mind the following information:
If anyone updates the shared system file with new information, the other users
can load this updated file by clicking on the toolbar or restarting Avaya Site Administration.
If you unselect the Share System File check box in the Options dialog box, a message box appears, warning you that all of the shared devices in the shared system file will be removed from Avaya Site Administration.

Avaya Site Administration Reference
16
Scheduling tasks
Scheduling a task to run
Prerequisites
You can schedule tasks to run on a voice system if you set up Avaya Site Administration to log in automatically on that voice system. If you set up Avaya Site Administration to log in manually, then it will not be able to execute the tasks at the scheduled time because it does not have the login and security information it needs to access the voice system. Therefore, if you want to schedule tasks, be sure you set up Avaya Site Administration to log in automatically. If you are unable to set up an automatic login, you can manually log in to Avaya Site Administration in order to establish a connection so that a scheduled task can run at the designated time.
In addition, be aware that if you schedule the job, any open Terminal Emulation windows can delay the job or cause it to fail.
Access
You can access the scheduler in several ways:
By clicking the Schedule option in a task wizard.
By clicking Schedule on the GEDI window. If clicking Schedule doesn’t display the Schedule pane, it’s because GEDI is still waiting for some required information. Generally, the cursor will blink in the field that must be completed. Look at the bottom of the GEDI window for help.
By right-clicking the task in the Tree tab and selecting Schedule.
By right-clicking the task in the Schedule pane or the Data Polling Schedule screen and selecting Schedule.
Use
1 In the scheduler’s Date field, type the day, month, and year you want the task to run for the first time, or click the down arrow and, on the calendar that appears, click on the date you want the task to run.
2 In the Time field, type the time that you want the task to run for the first time, or select the hour, minutes, or seconds and click the up and down arrows.
3 In the Recurrence Pattern box, select the frequency at which you want the task to run.
Pattern Description
Once To run the task once, as specified in the Date and Time fields.
Frequent To run the task at the date and time specified, and to repeat running the task as specified in the hours and minutes fields.
Weekly To run the task on the specified days of the week, starting from the specified date and time above.
Monthly To run the task on the specified day of the month. Note that if you specify more days than days that are in that month, the task will run on the last day of the month.

Avaya Site Administration Reference
17
4 Specify whether you want Avaya Site Administration to disconnect from the voice system when it has finished running the task.
Note If you are scheduling a task that will run on the voice system and messaging system, and if both systems are using the same modem or COM port, make sure that you select "Disconnect from system." If you do not do this, the voice system will remain connected after running the task on the voice system, and Avaya Site Administration will not be able to connect to and run the task on the messaging system.
5 Click OK.
Using the Schedule tab
The Schedule tab displays tasks that have run, are running, or are scheduled to run in the future. It also shows whether a task succeeded or failed. If the task failed, the Schedule tab displays the error message. The Schedule tab is dynamic, meaning that as a task passes through different stages of execution (such as from "Connecting" to "Running"), that change is immediately shown on this tab.
You can run, reschedule, view and change task properties, and abort scheduled tasks from this location.
If you do not see the Schedule tab on your screen, click on the toolbar. You can move and resize the Status pane (which contains the Schedule tab). To learn how, see Using the Status Pane.
Running, Scheduling, Aborting, Changing properties, or Deleting a task
To… Do this…
View or change task properties
Right-click the task and select Properties.
Run a task Right-click the task in the Schedule tab and select Run now. If you run the task now and it has a recurrence schedule as shown in the Recurrence column, the task will run now and still retain the schedule.
Schedule or reschedule a task
Right-click and select Schedule.
Stop the task Right-click and select Abort.
Delete the task from the schedule
Right-click and select Delete.
The options available when you right-click a task depend upon the value displayed in the State column.

Avaya Site Administration Reference
18
Understanding the columns
Column Description
State This column tells you whether the task is waiting to run, running, or complete.
Date/Time This column tells you when the task is (or was) scheduled to run.
System This column tells you which system the task will occur (or has occurred) on.
Type This column tells you the type of task.
Name This column tells you the name you gave the task when you created it.
Status This column tells you whether the task ran successfully or failed. If the task failed, the Status column gives a brief explanation of why.
Recurrence This column tells you the frequency at which the task is scheduled to run.
Understanding the State column
State Description
Aborted A task is aborted if you have stopped it from running or from waiting to run by right-clicking it and selecting Abort.
Blocked A task is blocked if it cannot access the voice system because another task or window (such as GEDI or the terminal emulator) is already using the connection. The task will start running when the other window or task frees the connection.
Connecting or Running
A task is connecting when it tries to start a connection to a voice system. It is running when it is performing the task.
Failed The task could not complete due to errors.
Retry The task has been unable to run and the system is retrying the task. The task will run again when the retry delay has expired as defined in the Options screen.
Complete A task is complete when it has finished running.
Waiting A task is waiting if it has been scheduled to run at a certain time, but not has yet reached the scheduled time.

Avaya Site Administration Reference
19
Checking status
Using the Status pane
The status pane allows you to view the status of the tasks you create in Avaya Site Administration, feedback from Communication Manager software and messaging systems, and the status of your connections to Communication Manager software and messaging systems.
Controlling the Status pane
To… Do this…
Hide or display the browser
Click {bmc status.bmp} on the toolbar, or select View>Status.
Resize the browser pane
Move your cursor over the edge of the pane until your cursor turns into a double-sided arrow. Hold down your left mouse button, and pull the edge of the window to the desired size.
Move the browser
Click the top border of the pane, hold down your left mouse button, and drag the entire pane window to another location on the screen. If you hold down the Shift key while moving the pane, the pane will float above the main window instead of attaching to it. You can also right-click in the gray border of the pane and select Undock to move the pane to any previous custom location you may have set.
Using the Status pane
To… Do this…
View a history of tasks
Click the History tab.
Check the status of a task
Click the Schedule tab.
Check the status of a connection
Click the Connection Status tab.

Avaya Site Administration Reference
20
Using the Schedule tab
The Schedule tab displays tasks that have run, are running, or are scheduled to run in the future. It also shows whether a task succeeded or failed. If the task failed, the Schedule tab displays the error message. The Schedule tab is dynamic, meaning that as a task passes through different stages of execution (such as from "Connecting" to "Running"), that change is immediately shown on this tab.
You can run, reschedule, view and change task properties, and abort scheduled tasks from this location.
If you do not see the Schedule tab on your screen, click on the toolbar. You can move and resize the Status pane (which contains the Schedule tab). To learn how, see Using the Status Pane.
Running, Scheduling, Aborting, Changing properties, or Deleting a task
To… Do this…
View or change task properties
Right-click the task and select Properties.
Run a task Right-click the task in the Schedule tab and select Run now. If you run the task now and it has a recurrence schedule as shown in the Recurrence column, the task will run now and still retain the schedule.
Schedule or reschedule a task
Right-click and select Schedule.
Stop the task Right-click and select Abort.
Delete the task from the schedule
Right-click and select Delete.
The options available when you right-click a task depend upon the value displayed in the State column.
Understanding the columns
Column Description
State This column tells you whether the task is waiting to run, running, or complete.
Date/Time This column tells you when the task is (or was) scheduled to run.
System This column tells you which system the task will occur (or has occurred) on.
Type This column tells you the type of task.
Name This column tells you the name you gave the task when you created it.
Status This column tells you whether the task ran successfully or failed. If the task failed, the Status column gives a brief explanation of why.
Recurrence This column tells you the frequency at which the task is scheduled to run.

Avaya Site Administration Reference
21
Understanding the State column
State Description
Aborted A task is aborted if you have stopped it from running or from waiting to run by right-clicking it and selecting Abort.
Blocked A task is blocked if it cannot access the voice system because another task or window (such as GEDI or the terminal emulator) is already using the connection. The task will start running when the other window or task frees the connection.
Connecting or Running
A task is connecting when it tries to start a connection to a voice system. It is running when it is performing the task.
Failed The task could not complete due to errors.
Retry The task has been unable to run and the system is retrying the task. The task will run again when the retry delay has expired as defined in the Options screen.
Complete A task is complete when it has finished running.
Waiting A task is waiting if it has been scheduled to run at a certain time, but not has yet reached the scheduled time.

Avaya Site Administration Reference
22
Using the Connection Status tab
The Connection Status tab shows the status of connections between Avaya Site Administration and voice system and messaging systems.
Note While you may have set up connections to multiple systems, the Connection Status tab shows only those connections that are currently active.
If you do not see the Connection Status tab on your screen, click on the toolbar. You can move and resize the Status pane (which contains the History tab). To learn how, see Using the Status Pane.
Disconnecting from a System
To end your connection to a voice system or messaging system, right-click on the connection and select Disconnect. If any GEDI or Emulation connections exist, or scheduled tasks are running, a warning message box will appear.
Understanding the columns
Column Description
Status This column tells you if a connection is busy or idle, or if Avaya Site Administration is attempting to connect. A busy connection means that Avaya Site Administration is connected and is currently sending data to the voice system, messaging system, generic device, or a GEDI or emulation window is open. An idle connection means Avaya Site Administration is connected, but no data is being sent to or from the voice system or messaging system.
System This column tells you which system Avaya Site Administration is connected to.
Type This column tells you whether Avaya Site Administration is connecting to the system via a direct hardware connection, over a network, or with a serial modem.
Dial String/Host
This column tells you the dial string (for a modem) or host name (for a network connection) that Avaya Site Administration uses to connect to the system.
Port This column tells which communication port Avaya Site Administration is using to maintain the connection.
Release This column tells you what type of system (voice or messaging) Avaya Site Administration is connected to.
Version This column tells you the version number of your voice system or messaging system.
Date/Time This column shows the time that the connection was established.
Serial Device
This column shows the connection device type used when a voice system is being accessed. Examples include an analog modem or data module.

Avaya Site Administration Reference
23
Using the History tab
The History tab displays feedback from a system about tasks that Avaya Site Administration has run, or has attempted to run. It essentially shows a log of past occurrences (a history of events). Entries on the History tab are static; that is, as the system status changes, new entries are added to the History tab, but existing entries on the tab do not change.
If you do not see the History tab on your screen, click on the toolbar. You can move and resize the Status pane (which contains the History tab). To learn how, see Using the Status Pane.
Exporting, Printing, or Deleting the History Log
To… Do this…
Delete all events on the History tab
Right-click the entry and select Clear History.
Export the log to a file Right-click the entry and select Export History.
Print the log Right-click the entry and select Print.
Preview the log printout Right-click the entry and select Print Preview.
Understanding the columns
Column Description
Severity This column tells you whether an event is routine or an error. Tasks that run without error result in an "Info" event in this column. Tasks that fail result in an "Error" in this column.
Date/Time This column tells you when the task ran, or attempted to run.
System This column tells you which system the task ran on.
Description This column summarizes the task, and if applicable, the error that occurred.
You can control the number of events displayed on the History tab by changing the number in the Maximum History size field.

Avaya Site Administration Reference
24
Managing performance
Improving Grade of Service
By using the Trunk Analyzer and gathering trunk data, you can create a report that gives recommendations on achieving a specified grade of service.
To improve the grade of service, complete the following steps:
1 Collect trunk data for a particular voice system.
2 Run the Trunk Analyzer Report.
3 Look in the Recommendation column on the far right of the report and see the recommendations based on your desired grade of service.
4 Make the suggested changes to your voice system.
Synchronizing the voice system and PC time
There may be times when you need to adjust the time on your voice system (and voice systems in a multi-site configuration) in relation to your PC. For example: when the voice system’s built-in clock drifts over time and can not be maintained via manual setting of the clock. This is particularly useful in a multi-site Call Center configuration when the voice systems are in different time zones than your PC.
Note
Time Synchronization using this wizard can only be applied to legacy DEFINITY voice systems (CSI, SI or R). The S8700, S8300 and S8100 servers accomplish time synchronization through the voice system operating system.
Using the Time Synchronization wizard, you can correct these situations. You can either set up the voice system time to match the clock on your PC, or you can set an offset between the voice system time and your PC time in the event they are in different time zones. The PC can then be synchronized to a standard time source using a dial-up or LAN-based SNTP client obtained locally or available with the PC Operating System. See http://www.ntp.org/software/index.html, http://www.ubr.com/clocks/timesw/timesw.html, or http://tycho.usno.navy.mil/ for details.
Note Changing the date or time may affect BCMS, CDR, scheduled events and measurements. There are other limitations to be aware of before you use this screen.
To synchronize or adjust the time for legacy DEFINITY voice systems (CSI, SI or R), complete the following steps:
1 In the Target System box on the toolbar, select the voice system you want to administer.
2 On the browser pane, click the Tasks tab.
3 On the Tasks tab, click Fault and Performance.
4 Click Time Synchronization.
5 Complete the Time Synchronization Properties screen. If you need help with the screen, click Help on that screen. If you schedule the job, remember that open Terminal Emulation windows can delay the job or cause it to fail.

Avaya Site Administration Reference
25
Plotting Processor Occupancy or Call Traffic data
To plot processor occupancy or call traffic data on a graph:
1 In the Target System box on the toolbar, select the voice system you want to measure.
2 On the browser pane, click the Tasks tab.
3 On the Tasks tab, click Fault and Performance.
4 Click Processor Occupancy.
5 Do one of the following:
If data has not been collected for the voice system yet, you will be prompted to set up the polling task. Click Yes at the "set up task" prompt and complete the wizard screens.
If data has been collected, complete the Graph Properties screen to set up and run the report. If you need help with the Graph Properties screen, click Help on that screen.
Viewing voice system hardware configuration
The Hardware Manager feature provides a representation of voice system configuration in a tabular and carrier layout. Included in this representation are all of the voice system’s boards and carriers, and any alarms or errors for that hardware. You can also drill down to view the properties (board type, circuit, etc.) for a specific board, and you can show port usage.
To display the voice system hardware, complete the following steps:
1 In the Target System box on the toolbar, select the voice system you want to administer.
2 On the browser pane, click the Tasks tab.
3 On the Tasks tab, click Fault and Performance.
4 Click Hardware Manager. The Hardware Manager window appears.

Avaya Site Administration Reference
26
Viewing system capacity using Avaya Site Administration
The capacities of your system depend on the type of voice system you have, the software you’re using, and your contract with Avaya, if you have one. Use the System Capacity feature to view the maximum capacities of your system and your current level of usage. Remember, however, that the capacities you’ve purchased from Avaya may be lower than the maximums shown on the voice system.
This feature provides the same information, although in a tabular format, as using GEDI and performing the "display capacity" command. The information is displayed in an easy-to-read format. You can sort and classify capacities in percentages to easily determine the level of usage for various features on the voice system
To view system capacity, complete the following steps:
1 In the Target System box on the toolbar, select the voice system you want to report on.
2 On the browser pane, click the Tasks tab.
3 On the Tasks tab, click Fault and Performance.
4 Click System Capacity.
5 To close the report, click in the "X" in the upper right corner of the report.
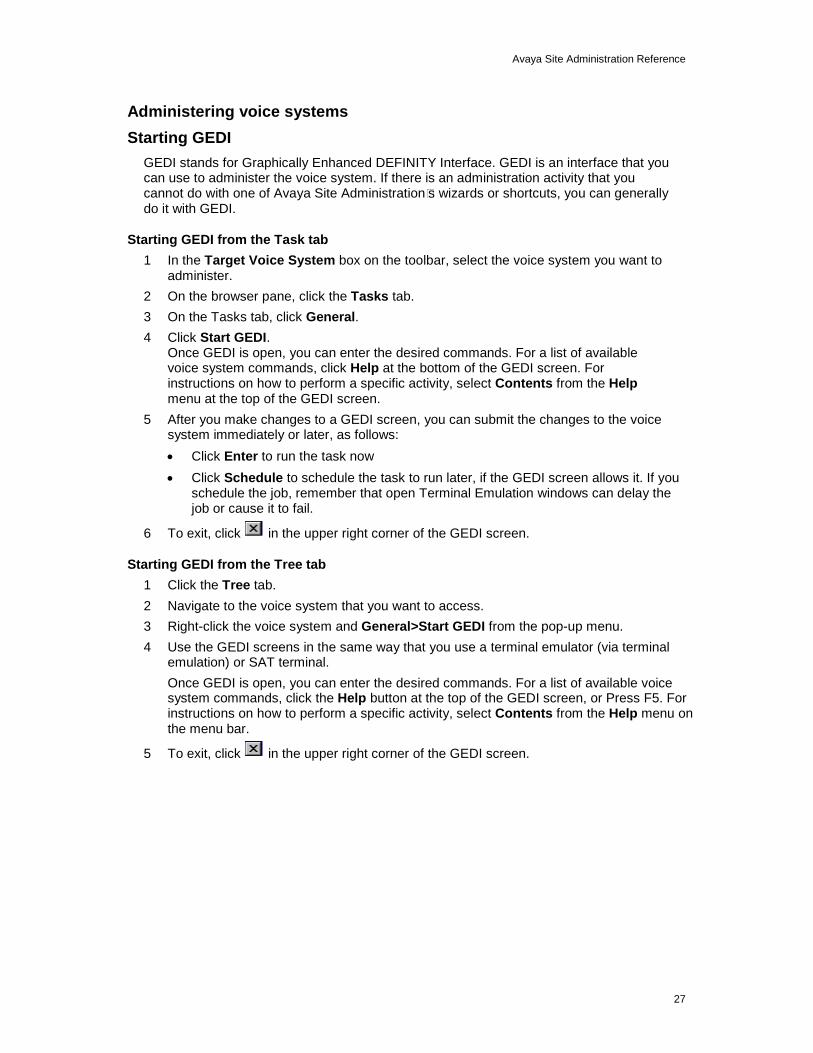
Avaya Site Administration Reference
27
Administering voice systems
Starting GEDI
GEDI stands for Graphically Enhanced DEFINITY Interface. GEDI is an interface that you can use to administer the voice system. If there is an administration activity that you cannot do with one of Avaya Site Administration’s wizards or shortcuts, you can generally do it with GEDI.
Starting GEDI from the Task tab
1 In the Target Voice System box on the toolbar, select the voice system you want to administer.
2 On the browser pane, click the Tasks tab.
3 On the Tasks tab, click General.
4 Click Start GEDI. Once GEDI is open, you can enter the desired commands. For a list of available voice system commands, click Help at the bottom of the GEDI screen. For instructions on how to perform a specific activity, select Contents from the Help menu at the top of the GEDI screen.
5 After you make changes to a GEDI screen, you can submit the changes to the voice system immediately or later, as follows:
Click Enter to run the task now
Click Schedule to schedule the task to run later, if the GEDI screen allows it. If you schedule the job, remember that open Terminal Emulation windows can delay the job or cause it to fail.
6 To exit, click in the upper right corner of the GEDI screen.
Starting GEDI from the Tree tab
1 Click the Tree tab.
2 Navigate to the voice system that you want to access.
3 Right-click the voice system and General>Start GEDI from the pop-up menu.
4 Use the GEDI screens in the same way that you use a terminal emulator (via terminal emulation) or SAT terminal.
Once GEDI is open, you can enter the desired commands. For a list of available voice system commands, click the Help button at the top of the GEDI screen, or Press F5. For instructions on how to perform a specific activity, select Contents from the Help menu on the menu bar.
5 To exit, click in the upper right corner of the GEDI screen.

Avaya Site Administration Reference
28
Starting Terminal Emulation
You can use terminal emulation (cut-thru) to administer a device that is not supported by GEDI. When you use terminal emulation, you are making changes directly to the device. Remember that open Terminal Emulation windows can delay scheduled jobs or cause them to fail.
To use terminal emulation:
1 In the Tree tab, right-click the device you want to administer and select Advanced>Emulation.
2 Enter your login name and password to access this device.
3 Press Enter.
4 To close terminal cut-thru, click in the upper-right corner of the window.
Disconnecting from a voice or messaging system 1 Close any GEDI, wizard, or emulation windows that are connected to the voice
system or messaging system.
2 Disconnect in any of the following ways:
Click the Disconnect button in the toolbar.
On the Tree tab, right-click the voice system you want to disconnect and select Disconnect.
On the Connection Status tab, right-click the voice system you want to disconnect and select Disconnect.

Avaya Site Administration Reference
29
New Administrator's Guide Book
Voice system components
It is important that you be able to identify the different components of a Communication Manager system. Below are the basic components with which all administrators should be familiar.
Role of the administrator
Your role as a system administrator is directly related to the success of your organization. When employees, vendors and customers are able to communicate quickly and easily, it helps the organization increase productivity and performance by keeping costs down and ensuring customer satisfaction.
As an administrator, you have three basic responsibilities:
Making sure the employees in your organization have the phones and features they need and helping them make the best possible use of the telephone system.
Managing and administering access to private and public, local and long-distance services. In other words, maintaining the connections between your organization and the outside world.
Monitoring the security and performance of the telephone system. As a system administrator, you are responsible for preventing toll fraud by seeing that hackers and thieves cannot penetrate your telephone system and steal services for which your organization will have to pay. You are also responsible for keeping both electronic and paper records of your system configuration so you are prepared in the event of a disaster.
Of course, the role of an administrator is much more than just being the "phone person" or simply making changes to the telephone system. An important part of the role is to solve communication problems and reinforce business policies related to telecommunications that keep your organization running at peak efficiency.
As the administrator, you can help your organization gain a competitive edge if you understand your phone users' needs. When you understand your phone users' communication needs, you can apply the appropriate technology and create effective

Avaya Site Administration Reference
30
solutions. So, build relationships with your phone users to encourage clear communication about their needs and problems.
When you build relationships within your organization, you are able to work with others to solve problems and create better solutions. It is essential that you work with management and department heads within your organization to improve business performance and support the goals, needs and strategies of your organization. Work closely with upper management and others to learn about your organization's future directions. This is critical for long-range planning, equipment purchases, wiring, and upgrades.
Develop strategies to increase the efficient use of your Communication Manager system/
Publicize your role.
Meet regularly with management and department heads to find out how they work.
Establish a system to educate new users and provide refresher training for others.
Set up a communications channel, such as e-mail, messaging system mailbox, or a web site for employees to make suggestions, ask questions, or make requests. Keep your end-users well-trained and up-to-date to ensure that the system is being used effectively and efficiently.
To provide your organization with appropriate communication solutions, it is important to know your Communication Manager system. Because there are a variety of system configurations, you should know the capabilities and limitations of your system. This is critical in order to be prepared for any contingency. In the event of a disaster, you will need to know exactly what configuration you have, so that it can be restored properly. You will also want to know if your system has the capacity for growth (cables, ports, wiring, etc.), so that you can be proactive in planning for your organization's business needs. One of the best ways to maintain your knowledge is to keep printed records related to all elements of your organization's communication system and services.
You should also build relationships with your telecommunication vendors. This will keep you up to date on new products and current offerings from your vendors. For example, if you discover that a number of trunks are not being used by your organization, you can work with your vendors to analyze your situation and come up with a more effective trunking plan.
Another reason to build relationships with your vendors is to keep them familiar with your system. If you frequently experience a particular problem with a piece of equipment or a service, your vendor will be aware of the problem and better able to help you find a solution.

Avaya Site Administration Reference
31
Simplifying end-user management
As a system administrator you have myriad responsibilities and multiple constituencies to whom you must answer, so it's important for you to streamline your job however you can. There are several proven methods for doing this:
Create a system to stay abreast of employee changes
Employee-related changes are one of the greatest challenges that you will face as a system administrator. Existing employees depart or change departments or positions, and new employees are hired. All of these changes have implications for you as a system administrator.
Keeping track of employee information is too big a job for a Communication Manager software administrator alone. You need to establish a partnership with the Human Resources department. In concert with HR, you should work out a system to keep abreast of these changes.
Require end-user training
To ensure that end-users acquire a common body of information about the voice system, you may want to require end-user training in some instances. In the long run it is easier and more efficient for you to train groups of employees than to respond to individual requests for assistance with Communication Manager features. To guarantee employee follow-through, many organizations make end-users' voicemail access contingent on completion of training. Of course, instituting such a policy requires Management's approval.
Standardize telephone feature configurations
Use standard button configurations for initial phone set up While the Communication Manager software allows easy customization of buttons to satisfy individuals' needs, starting from a common base can simplify end-user training and troubleshooting. Also, having a standard button configuration means that employees will feel more comfortable using phones other than their own.
Set up consistent abbreviated dial lists on each station Any way that you can standardize procedures or features on end-users' phones will ease your workload. One way to standardize is to set up consistent abbreviated dial lists on each station. Consider assigning the lists as follows: List 1: primary personal list List 2: group list or secondary personal list List 3: system list Consistent lists will make administering the Abbreviated Dialing feature much easier for you.
Establish station templates for different types of end-users Station templates are lists of features designed to accommodate the needs of particular categories of end-users. The templates should match end-users' work tasks, and be consistent for all end-users within a given category. Such templates help you establish consistency in phone use and set-up in your organization, and save you time. Templates help you troubleshoot problems and manage change in your voice system.

Avaya Site Administration Reference
32
Involve end-users in planning for new system and departmental changes
No one has more experience with your phone system than the end-users themselves. They can be an invaluable resource when you are contemplating Communication Manager software upgrades or other phone system changes. Involving end-users in the planning process will promote their loyalty and make your job easier in the long run.
Daily administrator tasks Verify that the nightly unattended backup was successful.
Use list configuration software-versions, and check the date that the last translation was saved to ensure backup was successful. If the date is not for last night, the backup was NOT successful.
Change the nightly backup tape/disk memory or flash memory card.
Monitor system alarms and take corrective action.
Use display alarms to view errors that exceed thresholds for alarming.
Use display errors to view low frequency errors that do not exceed thresholds for alarming.
Communicate with other administrators in your organization.
Consider maintaining a log of system changes to keep all staff aware of changes made to the system. This log will also be helpful in identifying a system change that may correspond to an increase in system problems.
Consider using display bulletin-board to leave messages for other administrators.
Use list history to determine if other login id's have made changes to the system, as well as the date and time the changes were made. The report shows the last 500 changes made to the system and who made them.
Check security violation reports for login, remote access and ACA violations.
Use list measurements security-violations summary to get a snapshot view of all security violations.
If the summary report reveals potential problems, use list measurements security-violations detail to see if there were invalid attempts to enter barrier codes, station security codes, authorization codes or logins.
Respond to end-user requests or Help Desk activities. For example, you may need to add and move phones, troubleshoot phone problems, or change the system to accommodate a new business need. See Communicating with end users.
Run daily and hourly traffic reports.
Note These reports only contain 1 day's worth of data. If you do not run these reports daily, you will miss data.
You can schedule reports so you do not have to run them every day. Here are some of the reports you may want to access:
list measurements attendant (followed by group or position)—shows speed of answer and total number of calls answered during the measured hour.
list measurements outage-trunk (followed by yesterday, today, or last-hour and optionally followed by schedule)—shows the trunk group number and the trunk group member along with the number of outages it had. If a trunk has a questionable number of outages, use the status trunk x (where x is the trunk group

Avaya Site Administration Reference
33
number) command to show the service state of the trunk members. Use this report for troubleshooting when you think you have a trunking issue.
list measurements blockage pn (followed by yesterday-peak, today-peak, or last-hour and optionally followed by schedule)—shows where service is degraded, resulting in no dial tone and incomplete calls. This report helps the administrator monitor trends in time-slot usage. When blockage begins to occur they can take steps to load balance the system and alleviate a potential problem. This is particularly useful for companies with several port networks (cabinets).
list measurements trunk-group summary (followed by yesterday-peak, today-peak, or last-hour and optionally followed by schedule)—shows if outgoing calls are blocked. It may be necessary to run hourly reports for the periods of time showing blockage. For example, you might pull hourly reports to determine peak usage times. This report has one line for each trunk group translated in the voice system.
Key fields
%ATB (all trunks busy)—the total percent of time in the measured hour that all trunks in a trunk group were busy.
GRP OVFL (group overflow)—how many calls possibly overflowed to another trunk if the measured hours ATB was 100%.
GRP DIR (group direction)—if outgoing trunks have 100 % blockage, investigate the following:
Ensure Automatic Route Selection (ARS) is set-up to manage overflow so that 100% ATB for one trunk automatically sends calls to another trunk. ARS overflow selection can be viewed on the route-pattern screen using display route-pattern x.
Check Out Srv field on the Trunk Outage Report.
Check if there is a trunk maintenance problem using the Blockage Study Report.
If an incoming trunk has 100% ATB, contact the network provider to determine how many calls are being blocked at the Central Office (CO) (incoming calls that are not reaching the voice system because your company does not have enough incoming trunks - lines). For example, 5 trunks with 10 incoming calls = 5 busy trunks and 5 blocked or missed calls. The voice system will not see the blockage because the calls never reach the voice system, but the CO can do a traffic study and recommend adding additional trunks.
If you cannot locate the problem using these methods, you may need to add additional trunks or add more trunks to the group.
Weekly administrator tasks Check system capacity levels and number of ports in service. Use the display capacity
command.
Archive backup tapes or flash memory cards and rotate out the tape/flash memory card for the week.

Avaya Site Administration Reference
34
Monthly administrator tasks Make a system backup. Schedule a time when you can be present for the entire backup
to ensure successful completion.
Store backup tapes off-site.
Other tasks
Here are some other important administrator tasks.
Purchase and format new backup tapes.
Add, remove, and move employee phones.
Set up features on phones.
Record and save new system announcements when changes are made.
Save changes made to the system.
Clean fan filters.
Update the system time/date for daylight savings.
Update paper records and store documents securely.
Command language and syntax
Commands are the language you use to communicate with the voice system. Commands are used to make changes to the voice system, to monitor voice system performance, and to perform troubleshooting. As an example, let's look at the command, change station 4444.
Command components
Communication Manager software commands can require up to three components for the system to understand what you want to do. These three components are:
Action—The first word in a command is always the action. It specifies the operation you want to perform. In the example, change station 4444, "change" is the action.
Object—The second word in a command is the object. It indicates the specific object to be operated on. In the example, change station 4444, "station" is the object.
Qualifier—The third word in a command is the qualifier. A qualifier is one or more words or numbers used to further identify the object. In the example, change station 4444, "4444" is the qualifier which indicates the extension number of the station being changed.
Tip: If you are uncertain about what action, object, or qualifier terms you should use to perform a specific operation, use <HELP> or F5 to determine the word the voice system requires.
Command types
Commands can be classified into types. Each command type has a purpose that you should understand. Using the wrong command type at the wrong time can cause a change in the system that you do not want.

Avaya Site Administration Reference
35
Commands that modify settings (a.k.a. translations) are used when you have decided that a setting in the system needs to be changed. These commands require all three components—Action, Object and Qualifier.
For example, add station next, change station 4444, and remove report-scheduler x (where x can be any number from 1 - 50)
Add—lets you enter new information about a single object.
Change—lets you make changes to an existing screen.
Remove—lets you remove objects such as stations and trunks from the system.
Note: It is important that you use the appropriate command for what you are trying to accomplish. For example if you only want to view the settings on a screen and make no changes, use a command for viewing information like a display command. This prevents you from accidentally making changes to the screen without knowing it. Only use the change command after you have decided that a specific change should be made.
Commands that show settings are used to see what settings have been administered and to gather information. These commands require two components—Action and Object, but can be made more specific with an optional qualifier such as a range of objects.
For example, list station 4444 count 200, display dialplan, status station 4444, monitor system view1
List—lets you view information about multiple objects.
Display—lets you view information about a single object.
Status—lets you view static (snapshot) information about a object.
Monitor—lets you view dynamic reports which automatically refresh as the system processes calls.
In the example, list station 4444 count 200, the "count 200" is a qualifier. When this command is entered, the list command would execute starting with extension 4444 and list the next 200 administered station numbers.
Command abbreviations
It is not necessary to type the entire command. You need to type only as many characters as are required to make the command unique. For example, you can type disp instead of display.
If you use too short of an abbreviation, (like dis), the system responds with the error message "dis is an ambiguous entry" and displays as suggestion like "Please choose from one of the following 'disable' or 'display.'" Once the correct abbreviated command is entered, the screen displays the entire command in the upper left corner and the page number in the upper right corner.
Avaya Site Administration Reference
36
Working with end users
As the system administrator, you are like a legislator with a "constituency" to satisfy. Your constituency is your end-users and your job is to support them in using your Avaya voice systems and messaging systems. With adequate support, end-users will find the phone system a powerful tool for carrying out their organizational responsibilities. In turn, the end-users have constituents to whom they must answer: the organization's clients. Clients' first contact with your organization is often through the telephone. Employees' facility with your voice system can directly affect clients' first impressions of your organization, and perhaps their subsequent loyalty.
Of course, employees have many other responsibilities besides customer service. Administrative tasks are an important component of many workers' jobs; one which entails considerable reliance on the phone system. Here again, the impact of employee facility with the phone system is clear.
Note For help in creating telephone instruction booklets for end-users, try Guide Builder™ Software for DEFINITY® ECS Telephones. For help in creating telephone instruction booklets for end-users, try Guide Builder™ Software for AUDIX® Systems.
Assessing end-user training needs
The phone system is a critical communications device in your organization. Telephone contacts provide lasting impressions of the organization to the outside world, and allow for important internal exchanges of information. Training end-users is an important element in your organization's success and employees' job satisfaction.
Before training end-users it's important to ascertain the areas in which they need support. As you assess training needs and formulate plans, be sure to keep Management . The success of any training regimen depends on "buy-in" from top Management.
Preventing future training problems
Training end-users requires a considerable commitment of time and organizational resources. You want to ensure that end-users retain the content of their training over the long term. Two effective methods for doing this are:
providing job aids and station end-user guides where appropriate
You may want to consider job aids in the following areas:
using the messaging system
Feature Access Codes
how to report problems with stations
providing sources for information on upgrades, new features, and Best Practices
Ways to disseminate such information may include:
publishing a regular newsletter or informational e-mail
referring administrators to an internal Communication Manager software users' web site

Avaya Site Administration Reference
37
Preparing end-user training
Advance organization and preparation are key to effective training. Adequate preparation will enhance your effectiveness as an instructor and enhance end-users' skills and satisfaction. Follow these guidelines when preparing for a training session:
1. Gather information.
It is important to know your end-users and the particulars of their voice system. Thus, you should collect some data prior to the training session. Collect data that will help you answer such questions as:
What training will help end-users to do their jobs most effectively?
On what features do end-users need training? (You should only train end-users on features programmed on their phones.)
In the case of a system upgrade, what new features should be covered in training? What features should be reviewed?
Can end-users be grouped according to common training needs?
What information should you provide—or not provide—to ease your administration of the voice system?
2. Prepare an outline.
An outline can serve as a "roadmap" for your training session. The structure an outline provides can enhance your students', and your own, confidence in the training. While there are many elements that you might choose to include in an outline, key elements to include are:
introduction: How will you introduce the training topic?
objectives: What are your goals for this training session?
Communication Manager software features to review
items to demonstrate and/or provide for student practice: Examples of business problems that end-users may confront are often effective for this purpose.
handouts to distribute
security and policy information to review
courtesy training
question and answer period
training evaluation: How and when will students evaluate the success of the training session?
3. Prepare notes to refer to during training.
When used to supplement an outline, notes can focus your presentation. Notes are especially helpful when you are dealing with content that is particularly complex or unfamiliar to you.
4. Practice your presentation.
Like an actor in a play, an instructor is "on stage" working to hold an "audience's" attention. However, as an instructor, your responsibility is even greater than the actor's, for you are presenting content which may be critical to the end-users' job performance. The more practiced your presentation is, the more polished your "act" will be.

Avaya Site Administration Reference
38
5. Practice using the features on which you'll train end-users.
Knowing their lines is but one key to actors' success; they must also be comfortable using the props that punctuate the lines. Similarly, as an instructor, you must be proficient with the Avaya products which serve as your "props." Be sure you are thoroughly familiar with the features on which you'll be training end-users.
6. Choose an appropriate training environment.
Selecting an appropriate training environment is nearly as important as organizing the content of the training. You should train end-users away from their "normal" work area to highlight the importance of the training, and to prevent interruption. Be sure to choose a comfortable training room that is large enough to accommodate the participants, well-ventilated, and appropriately equipped. Select a training room where sample phone types are available, if possible.
7. Prepare the training venue.
Much as you have organized the instructional content for your training session, you must also prepare the training venue. Be sure to consider the following aspects of this preparation:
arrange the layout of the room so that everyone can participate
provide appropriate training materials
gather writing materials
obtain projection equipment
gather flip charts and white boards
duplicate system reference material
obtain phones for demonstration and/or practice: Be sure to get phone types that correspond with types that end-users are used to working with.
test all equipment for proper functionality
8. Meet with the Avaya instructor, if applicable.
If Avaya will be providing end-user training, you should meet with the Avaya instructor prior to the week of the training to discuss how the training should be customized to meet the needs of the end-users. Your discussions with the Avaya instructor should encompass the following issues:
choice of training content
special needs of different groups of end-users
strategies for facilitating the transition from using older phone models and features to the new ones
key security issues
particulars of the "Help Desk" plan: What information should be given out about it?

Avaya Site Administration Reference
39
Delivering end-user training
Once you have prepared for training, the next step is to conduct the training. Effective training is high interest, systematic, and appropriately paced. When conducting a training session you must consider the range of experience, skill levels, and learning styles which your students represent. Follow these proven steps for conducting a productive training session:
1. Gain the attention of the class and promote interest.
It is important to gain—and hold—participants' attention from the outset of the training. To this end, you should maximize students' participation. Consider beginning the training with a "go-around" to allow participants to introduce themselves, and share concerns they may have with the phone system. This will pique participants' interest, set the stage for cooperative learning, and help you tailor the training to the participants' needs.
2. Share the objectives for the session with the class.
Be explicit about the purpose of the session and its goals. You may want to give examples of how the information that you'll present will help them do their jobs more effectively. Ask if there are any additional topics or features that participants would like to cover.
3. Review past training.
If appropriate, briefly review the last training session. Get feedback on any trouble that participants are having with material they learned in previous sessions.
4. Introduce the new concept.
Briefly explain the feature or outline the procedure you are presenting. Provide step by step visual aids to reinforce the concept.
5. Demonstrate the proper performance.
Set up a representative number of phones for various set-types. Demonstrate the steps participants are learning with the phone set up in the classroom. Involve participants in role plays to demonstrate proper phone etiquette.
6. Divide end-users into smaller groups.
Large groups of students can be unwieldy for interactive activities. Divide training participants into smaller groups according to some commonality such as their departments, phone types, or common training needs.
7. Allow end-users to practice.
If possible, have end-users practice the tasks and procedures discussed. If the class size is too unwieldy for all participants to practice, or time is limited, select a representative subgroup to do so.
8. Provide feedback.
Give appropriate praise and helpful suggestions. Encourage participants to do the same for one and other.

Avaya Site Administration Reference
40
9. Provide post-training reinforcement.
Without a means of reinforcing their learning, end-users will not retain training concepts. It's important to provide handouts and job aids to which participants may refer after returning to their jobs. Wallet-size guides work well for this purpose. Ideally, these handouts should be customized to cover only the features that are on the end-users' phones.
Communicating with end users
Efficient communication is key to the success of your organization, and the phone system may be the single most important communications vehicle. Effective communication with end-users has two main components:
Establish standard communication procedures
Standardized communication procedures can save employees and system administrators time and effort. Use standard screens for end-users to report problems and change requests. Use preprinted or commonly accessible electronic screens to the extent possible.
Provide end-users with a checklist of information that is required to complete the different types of request and report screens.
You should also set up a communication channel (for example, e-mail, a network connection, Help Line, messaging system mailbox, or document sharing) to handle end-user questions and problems. Follow these guidelines when setting up a Help Line or messaging system mailbox:
make the number easy to remember publicize the number determine staffing required provide suitable coverage, if applicable predict and track the volume of traffic regularly evaluate service success
Identify important information and distribute it to company employees
Well-informed employees are more productive and efficient. Therefore it is important to keep your employees informed about organizational news and policies. The information of which employees should be apprised includes:
organizational policy regarding personal phone use
efficient ways to make outside calls
identity of the system administrator
instructions for requesting help and reporting problems
security reminders
emergency instructions in case of fire or bomb threat

Avaya Site Administration Reference
41
Job aids and tip sheets can provide quick and easy training to end-users and eliminate some of the future support that they will need. Common topics for these handouts include:
instructions for using the messaging system
instructions for using feature access codes
a list of all assigned feature access codes that end users might need (for example, DO NOT publish the facility test access code)
the procedure for reporting problems with one's station
security information
Individual or group terminal operating guides (end-user instructions) are also useful communication tools. You can create such guides using Guide Builder™ Software for DEFINITY® ECS Telephones and Guide Builder™ Software for AUDIX®.
For security reasons, you should mark all handouts "COMPANY CONFIDENTIAL" and provide employees with guidelines for their proper disposal.

Avaya Site Administration Reference
42
Planning your Communication Manager system
Voice system components
It is important that you be able to identify the different components of a Communication Manager system. Below are the basic components with which all administrators should be familiar.
System add ons

Avaya Site Administration Reference
43
Understanding the dial plan
Your dial plan tells your system how to interpret dialed digits. For example, if you dial 9 on your system to access an outside line, it is actually the dial plan that tells the system to find an external trunk when a dialed string begins with a 9.
The dial plan also tells the system how many digits to expect for certain calls. For example, the dial plan may indicate that all internal extensions are 4-digit numbers that start with 1 or 2.
Communication Manager dial plans
The Communication Manager system allows you to create your dial plan using from three to seven digits. If you have a MultiVantage R10 or earlier system, see R10 or earlier dial plans.
The set of three columns on your dialplan indicate how long the dialed string will be for each type of call. For example, when users dial a 7-digit number that starts with 4, they are dialing an extension.
The third column may have any of the following codes:
Attendant (attd) — Defines how users call an attendant. Attd access numbers can be any number from 0 to 9 and contain 1 or more digits.
Dial access codes (dac) — Allows you to use trunk access codes (tac) and feature access codes (fac) in the same range. For example, you could define the group 100–199 for dacs, which would allow both facs and tacs in that range. Dial access codes can start with any number from 1 to 9 and contain up to 4 digits. In recent releases, * and # also can be the first digit.
Extensions (ext) — Defines extension ranges that can be used on your system.
Feature access codes (fac) only — facs can be any number from 1 to 9 and contain up to 4 digits. You can use * or #, but only as a first digit. In our example, this company can use *21 to activate a feature and use #21 to deactivate the same feature.
R10 or earlier dial plans
If you display your dialplan and look at the lower half of the Dial Plan Record screen, you see the First Digit Table. This table defines the dialing plan for your system.
The rows in the First Digit Table indicate what the system does when the row’s first digit is dialed. The columns indicate how long the dialed string will be for each type of call. For example, when users dial a 4-digit number that starts with 2, they are dialing an extension.
The first digit table may have any of the following codes:
Attendant (attd) — Defines how users call an attendant. Attd access numbers can be any number from 0 to 9 and contain 1 or more digits.
Dial access codes (dac) — Allows you to use trunk access codes (tac) and feature access codes (fac) in the same range. For example, you could define the group 300–399 for dacs, which would allow both facs and tacs in that range. Dial access codes can start with any number from 1 to 9 and contain up to 4 digits. In recent releases, * and # also can be the first digit.
Extensions (ext) — Defines extension ranges that can be used on your system.
Feature access codes (fac) only — facs can be any number from 1 to 9 and contain up to 4 digits. You can use * or #, but only as a first digit. In our example, this company can use *21 to activate a feature and use #21 to deactivate the same feature.

Avaya Site Administration Reference
44
Miscellaneous code (misc) — these codes are used if you want to have more than one kind of code start with the same digit and be the same length. Using a misc code requires that you also define a second digit table. Refer to the Administrator’s Guide for Avaya Communication Manager Software for information about the second digit table.
Displaying your dial plan
Displaying your dial plan
To display your system’s dial plan:
1 Open a GEDI window for the voice system you want to administer.
2 Type display dialplan analysis and press the ENTER key.
3 Click to close the GEDI window.
Displaying your MultiVantage R10 or earlier dial plan
To display your system’s dial plan:
1 Open a GEDI window for the voice system you want to administer.
2 Type display dialplan and press the ENTER key.
3 Click to close the GEDI window.
Modifying your dial plan
Modifying your dial plan
It is easy to make changes to your dial plan. For example, let’s add a new range of dial access codes to the dial plan. We want to be able to assign both facs and tacs in the 700–799 range.
1 Open a GEDI window for the voice system you want to administer.
2 Type change dialplan analysis and press the ENTER key. The Dial Plan Analysis Table screen appears.
3 Move the cursor to the next available row.
For a description of fields in this table, go to Dial Plan Record Fields.
4 Type 7 in the first column.
5 Type 3 in the second column.
6 Type dac in the third column.
7 Click the Enter button in the GEDI window to save your changes.
8 Click to close the GEDI window.
Modifying your R10 or earlier dial plan
It is easy to make changes to your dial plan. For example, let’s add a new range of dial access codes to the dial plan. We want to be able to assign both facs and tacs in the 700–799 range.
1 Open a GEDI window for the voice system you want to administer.
2 Type change dialplan and press the ENTER key. The Dial Plan Record screen appears.

Avaya Site Administration Reference
45
3 Move the cursor to the appropriate field in the First Digit table. For example, if you want to change how the voice system interprets dial strings that start with a 1 and have four digits, move the cursor to the first row in the table, fourth column.
4 For a description of fields in this table, go to Dial Plan Record Fields.
5 Type the abbreviation that indicates how the voice system should interpret dial strings of this type. For example, type attd, dac, ext, fac, or misc.
6 Click the Enter button in the GEDI window to save your changes.
7 Click to close the GEDI window.
Adding extension ranges
Adding extension ranges to your dial plan
You may find that as your needs grow you want a new set of extensions. Before you can assign a station to an extension, the extension must belong to a range that is defined in the dial plan. For example, let’s add a new set of extensions that start with 8 and are 6 digits long (3000–3999).
To add this set of extensions to the dial plan:
1 Open a GEDI window for the voice system you want to administer.
2 Type change dialplan analysis and press the ENTER key. The Dial Plan Analysis Table screen appears.
3 Move the cursor to the next available row.
4 Type 8 in the first column.
5 Type 6 in the second column.
6 Type ext in the third column.
7 Click the Enter button in the GEDI window to save your changes.
8 Click to close the GEDI window.
Adding extension ranges to your R10 or earlier dial plan
You may find that as your needs grow you want a new set of extensions. Before you can assign a station to an extension, the extension must belong to a range that is defined in the dial plan. For example, let’s add a new set of extensions that start with 3 and are 4 digits long (3000–3999).
To add this set of extensions to the dial plan:
1 Open a GEDI window for the voice system you want to administer.
2 Type change dialplan and press the ENTER key. The Dial Plan Record screen appears.
3 Move the cursor to the 3rd row in the 4th column.
4 Type ext in the selected field.
5 Click the Enter button in the GEDI window to save your changes.
6 Click to close the GEDI window.

Avaya Site Administration Reference
46
Adding feature access codes
Adding feature access codes to your dial plan
Feature access codes (FAC) allow users to activate and deactivate features from their phones. As your needs change, you may want to add a new set of feature access codes for your system. Before you can assign a fac on the Feature Access Code screen, it must conform to your dial plan.
For example, if you want to assign a feature access code of 33 to Last Number Dialed, first you need to add a new fac range to the dial plan. To add a fac range from 30–39:
1 Open a GEDI window for the voice system you want to administer.
2 Type change dialplan analysis and press the ENTER key. The Dial Plan Analysis Table screen appears.
3 Move the cursor to the next available row.
4 Type 3 in the first column.
5 Type 2 in the second column.
6 Type fac in the third column.
7 Click the Enter button in the GEDI window to save your changes.
8 Click to close the GEDI window.
Adding feature access codes to your R10 or earlier systems
If you want to assign a feature access code of 33 to Last Number Dialed, first you need to add a new fac range to the dial plan. To add a fac range from 30–39:
1 Open a GEDI window for the voice system you want to administer.
2 Type change dialplan and press the ENTER key. The Dial Plan Record screen appears.
3 Move the cursor to the 3rd row and the 2nd column.
4 Type fac in the selected field.
5 Click the Enter button in the GEDI window to save your changes.
6 Click to close the GEDI window.

Avaya Site Administration Reference
47
Changing feature access codes
Changing feature access codes for R10 and earlier systems
Feature access codes (FAC) allow users to activate and deactivate features from their phones. A user who knows the fac for a feature does not need a programmed button to use the feature. For example, if you tell your users that the fac for the Last Number Dialed is *33, then users can redial a phone number by entering the fac, rather than requiring a Last Number Dialed button.
Many features already have factory-set feature access codes. You can use these default codes or you can change them to codes that make more sense to you. However, every fac must conform to your dial plan and must be unique. For more information about the dial plan, refer to ‘‘Understanding the dial plan’’ on page 11.
For example, if you want to change the feature access code for Call Park to *72:
1 Open a GEDI window for the voice system you want to administer.
2 Type change feature-access-codes and press the ENTER key. The feature access code (fac) screen appears.
3 Move the cursor to the Call Park Access Code field.
4 Type *72 in the access code field over the old code.
5 Click the Enter button in the GEDI window to save your changes. If you try to enter a code that is assigned to a feature, the system warns you of the duplicate code and does not allow you to proceed until you change one of them.
6 Click to close the GEDI window.
Tip: To remove any feature access code, delete the existing fac and leave the field blank.

Avaya Site Administration Reference
48
Setting up phones
Adding new phones
When you are asked to add a new phone to the phone system, what do you do first? To connect a new phone you need to do three things:
find an available port
wire the port to the cross-connect field or termination closet
tell the telephone system what you’re doing
Before you can determine which port to use for the new phone, you need to determine what type of phone you are installing, what ports are available, and where you want to install the phone.
Adding a phone and messaging subscriber
Use the Add User wizard to add a new phone, add a new messaging account, or add a new phone and new messaging account, all at the same time. As an option, you can also use a GEDI window to add a new phone or use terminal emulation to add a new messaging account to the messaging system.
1 In the Target System box on the toolbar, select the voice system you want to add the new phone to.
2 On the browser pane, click the Tasks tab.
3 On the Tasks tab, click General.
4 Click Add User.
5 Complete the wizard screens.
If you need help with a wizard screen, click Help on that screen. If you schedule the job, remember that open Terminal Emulation windows can delay the job or cause it to fail.
Note If you are adding both a phone and messaging account at once, and if both systems are using the same modem or COM port, make sure that you select "Disconnect from system" on the Scheduler screen that appears when you use the Add User task wizard. If you do not do this, the voice system will remain connected after adding the new phone, and Avaya Site Administration will not be able to connect to the messaging system to add the new messaging account. If a connection requires a COM port and the connection using that port is idle, Avaya Site Administration will disconnect the idle connection to free up the port.
Confirming that the phone and mailbox were added
1 To confirm that the new phone was added, complete the following steps:
a) On the browser pane, click the Tasks tab.
b) On the Tasks tab, click General.
c) Click Browse Stations.
d) In the From extension and To extension fields, enter the extension number that you created when you added the phone to the voice system.
e) Click OK.
f) Confirm that the new phone user appears in the list.

Avaya Site Administration Reference
49
2 To confirm that the new messaging account was added, complete the following steps:
a) On the browser pane, click the Tree tab.
b) Open a terminal emulation window for the messaging system you added the account to by right-clicking on the messaging system name, selecting Advanced>Emulation, and logging into the system. If you log into an INTUITY AUDIX system as sa, select AUDIX Administration from the INTUITY main menu to access the administration screens.
c) At the command prompt, type list subscriber.
d) Confirm that the new messaging account appears in the list.
Entering Native Names
Use this procedure to add or edit the name of a system object in native language. You can specify the native name for the following system objects:
Station
Hunt Group
Trunk Group
VDN
NOTE: The object must exist already on the voice system. You cannot add a new object to the voice system via this procedure.
To add or edit the name of a system object in native language:
1 In the Target System box on the toolbar, select the appropriate voice system.
2 On the browser pane, click the Tasks tab.
3 On the Tasks tab, click General.
4 Click MultiLingual Name Wizard.
The MultiLingual Wizard Task – Select Object dialog box appears.
5 From the drop-down list box, select the appropriate system object.
6 From the Specify Max Rows for this Object box, select the number of entries you want to add or change for this object.
7 Click Next.
The Display Grid dialog box appears.
8 Perform one of the following steps:
If you selected hunt-group, perform one of the following steps:
o Enter the number in the group number box, enter the name in the Group Name box, and then enter the native language name in the Native Name box.
o Click View Available Objects, select the hunt group(s) you want to change from the Hunt-Group Browser dialog box, click OK, and then enter the native language name in the Native Name box.

Avaya Site Administration Reference
50
If you selected station, perform one of the following steps:
o Enter the name in the Name box, and then enter the native language name in the Native Name box.
o Click View Available Objects, select the station(s) you want to change from the Hunt Group Browser dialog box, click OK, and then enter the native language name in the Native Name box.
If you selected trunk-group, perform one of the following steps:
o Enter the number in the group number box, enter the name in the Group Name box, and then enter the native language name in the Native Name box.
o Click View Available Objects, select the trunk group(s) you want to change from the Trunk-Group Browser dialog box, click OK, and then enter the native language name in the Native Name box.
If you selected vdn, perform one of the following steps:
o Enter the name in the Name box, and then enter the native language name in the Native Name box.
o Click View Available Objects, select the VDN(s) you want to change from the VDN Browser dialog box, click OK, and then enter the native language name in the Native Name box.
9 When finished, click Next.
The MultiLingual Wizard Task – Schedule dialog box appears.
10 In the Name box, enter a short description of this task.
11 Perform one of the following steps:
If you want to run this task now, click the Run Now check box. If you also want to save this task so you can modify it and/or run it later, click the Save information in tree check box.
If you want to schedule this task to run later, click the Schedule this task to run check box, and either accept the default run time and date, or click Schedule and set the appropriate date, time, and frequency.
If you want to save this task so you can modify it and/or run it later, click the Save information in tree check box.
12 Click Next.
The MultiLingual Wizard Task – Summary dialog box appears.
13 Click Finish.
Note: The following topic is taken from the DEFINITY Little Instruction Book for Basic Administration. It explains how to duplication stations using DEFINITY features. However, you can also use a system administration application (DNA, Avaya Site Administration, and so on) to create a template. Doing so allows you to use the template in the Add User wizard. However, the following process does not.
A quick way to add phones in GEDI is to copy the information from an existing phone and modify it for each new phone. For example, you can configure one phone as a template for an entire work group. Then, you merely duplicate the template station screen to add all the other extensions in the group.

Avaya Site Administration Reference
51
Note that only phones of the same model can be duplicated. The duplicate command copies all the feature settings from the template phone to the new phones.
To duplicate an existing phone:
1 Open a GEDI window for the voice system you want to administer.
2 Type display station nnnn where nnnn is the extension you want to use as a template. Then press the ENTER key. Verify that this extension is the one you want to duplicate.
3 Click Cancel to return to the command prompt.
4 Type duplicate station nnnn where nnnn is the extension you want to duplicate. Then press the ENTER key. The system displays a blank Duplicate Station screen.
5 Type in the extension field, port field and phone name for each new phone you want to add. The rest of the fields are optional. You can complete them at any time.
6 Click the Enter button on the GEDI window to save your changes to system memory.
7 Click to close the GEDI window.
To make changes to these phones, such as assigning coverage paths or feature buttons, type change station nnnn where nnnn is the extension of the phone that you want to modify. Then press the ENTER key.
Adding feature buttons to a phone
You can decide which features you want to assign to each button on a phone. The process is slightly different if you are adding buttons to a new phone (using the Add User wizard) or to an existing phone (using GEDI).
Adding feature buttons to a new phone
To add feature buttons to a new phone, start the Add User wizard. Then complete the following steps:
1 In the Add User wizard – Station Information screen, click Buttons. Avaya Site Administration displays a picture of the phone, based on the model number you entered in the Set Type field of the wizard.
2 On the picture of the phone, click the button you want to assign a feature to.
3 Click the down arrow and select the feature you want to assign to that button.
4 Complete any feature-related fields that appear on the Button Properties screen.
5 Repeat Steps 2-4 until you are finished assigning buttons.
6 Click OK.
Then complete the remainder of the wizard as you would normally. If you need help with a wizard screen, click Help on that screen. If you schedule the job, remember that open Terminal Emulation windows can delay the job or cause it to fail.
Adding feature buttons to an existing phone
Once you have added a phone, you must use GEDI to make any additions or changes to the feature buttons.
1 Open a GEDI window for the voice system you want to administer.
2 Type change station nnnn and press the ENTER key, where nnnn is the extension for the phone you want to modify.

Avaya Site Administration Reference
52
3 Click the tabs on the screen until you locate the Feature Button Assignment fields.
4 Right-click the field that corresponds to the button you want to assign the feature to.
5 Select the feature you want to assign.
6 Complete any feature-related fields that appear next to the button field.
7 Repeat Steps 4-6 until you are finished assigning buttons.
8 When you are finished, do one of the following:
To submit the change immediately, click Enter (F3) on the GEDI window.
To schedule the change, click Schedule (F9) on the GEDI window.
If you schedule the job, remember that open Terminal Emulation windows can delay the job or cause it to fail.
Adding a fax or modem
A fax machine or modem is set up similarly to any other station with a few important exceptions that you will need to consider.
Follow these steps to add a fax or modem:
1 Open a GEDI window for the voice system you want to administer.
2 Type add station nnnn and press the ENTER key, where nnnn is the extension you want to give to the modem.
3 In the Type field, type 2500 (the generic analog phone type) or, if you have created an alias called Fax and/or Modem, enter the alias name (for help, see Using an alias).
4 In the Port field, type the port address.
5 In the Name field, type a name to associate with this phone.
6 Click the second tab on the GEDI screen.
7 In the Data Restriction field, type y to prevent all calls from being interrupted by tone signals (like a call waiting tone).
8 Click the Enter button on the GEDI window to save the changes to system memory.
Adding an extension without hardware
You may want to set up phone extensions that are not connected to actual telephone hardware. For example, you may have employees that work off-site so they need a messaging system mailbox but not a phone at work.
Adding the extension
1 Open a GEDI window for the voice system you want to administer.
2 Type add station nnnn and press the ENTER key, where nnnn is the extension you want to view.
3 Next to Port, enter X (to indicate that there is no port associated with this station).
4 Click the Enter button on the GEDI window to save the changes to system memory.

Avaya Site Administration Reference
53
Setting Up a Voice Mailbox
To set up a messaging subscriber mailbox for an employee that does not need a phone (that is someone that works off-site):
1 Set up extension number using AWOH.
2 Change the station coverage path to go to the voice messaging hunt group.
Note Voice messaging is always set up in a hunt group. Use list hunt-group to locate the hunt group used for the messaging system.
Changing a phone user's information
You can make changes to an existing phone, such as change the set type, location, or assign coverage paths or feature buttons, by following this procedure.
1 Open a GEDI window for the voice system you want to administer.
2 Type change station nnnn where nnnn is the extension of the new phone. Then press the ENTER key.
3 Make changes to the GEDI screen.
Remember that you can right-click on a field to see options for that field.
4 When you are finished, do one of the following:
To submit the change immediately, click Enter (F3) on the GEDI window.
To schedule the change, click Schedule (F9) on the GEDI window.
If you schedule the job, remember that open Terminal Emulation windows can delay the job or cause it to fail.

Avaya Site Administration Reference
54
Using an alias
Not every phone model has a unique station screen in the system. You might have to use an available model number as an "alias" for another. If you need to enter a phone type that the system does not recognize or support, use an alias.
For example, you may purchase a phone model that is newer than your system. In this case, you can use an available model type that best matches the features of your new phone. You can refer to your phone’s manual to determine which alias to use. If your manual does not have this information, you can contact the Avaya helpline for an appropriate alias.
For example, let’s use an alias to add a new 8403B phone to a DEFINITY G3V2 or earlier system.
1 Open a GEDI window for the voice system you want to administer.
2 Refer to your new phone’s manual to find the correct alias. In our example, we find that the 8403B is administered on a G3V2 or earlier system as a 7405D phone.
3 Type change alias station and press the ENTER key. The Alias Station screen appears.
4 Enter 8403B in the Alias Set Type field. Enter the model of the unsupported phone in this field.
5 Enter 7405D in the Supported Set Type field. Enter the alias (supported model) in this field.
6 Click the Enter button on the GEDI window to save your changes.
7 Click to close the GEDI window.
Now follow the instructions for adding a new phone. Your voice system now recognizes the new type you enter in the Type field.
Be sure to refer to your phone’s manual for instructions on how to set feature buttons and call appearance buttons. Note that if you need to use an alias for a phone, you may not be able to take advantage of all the features of the new phone.
Customizing your phone
This section provides recommendations for setting up or enhancing your personal phone. You need a phone that is powerful enough to allow you to use all the features you may give to other employees. You may want to add feature buttons that allow you to monitor or test the system, so that you can troubleshoot the system from your phone.
It will be much easier to monitor and test your system if you have a phone with:
a large multi-button display (such as 8434D or 8410D)
a class of service (COS) that has console permissions
the following feature buttons
ACA and Security Violations (assign to lamp buttons)
Busy verify
Cover message retrieval button
Avaya Site Administration Reference
55
Major/minor alarm buttons
Trunk ID buttons
Verify button
Once you select a phone, you’ll want to determine if you want to place this phone at your desk or in the voice system room. If the phone is in the voice system room (near the system administration terminal), you can quickly add or remove feature buttons to test features and facilities. You may decide that you want a phone at both your desk and in the voice system room — it’s up to you.
You may also find it handy to set up multiple phones for testing applications and features before you provide them to users. You may want to have a phone that mimics each type of user phone in your organization. For example, if you have four basic phone templates, one for executives, one for marketing, one for technicians, and one for other employees, you may want to have examples of each of these phones so you can test new features or options. Once you are satisfied that a change works on the test phone, you can make the change for all the users in that group.
Upgrading phones
If you want to change phone types for a user and do not need to change locations, you can just access the station screen for that extension and enter the new model number.
Tip: This method can be used only if the new phone type matches the existing port type (such as digital phone with a digital port).
For example, if a user at extension 4556 currently has a 7410+ phone and you want to replace it with a new 8411D phone:
1 Open a GEDI window for the voice system you want to administer.
2 Type change station 4556 and press the ENTER key. The station screen for 4556 appears.
3 Overwrite 7410+ with 8411D in the Type field. Now you can access the functions and feature buttons that correspond to an 8411D phone.
4 Click to close the GEDI window.
Swapping phones using a wizard
Avaya Site Administration Release 1.10 introduced a new wizard for swapping phones. To swap phones using the new wizard, complete the following steps:
1 In the Target System box on the toolbar, select the voice system that contains the phones that you want to swap.
2 On the browser pane, click the Tasks tab.
3 On the Tasks tab, click General.
4 Click Swap Stations.
Avaya Site Administration displays the Swap Stations wizard - Choose Stations screen.
5 Complete the wizard screens.
If you need help with a wizard screen, click Help on that screen.

Avaya Site Administration Reference
56
6 Click Finish.
If you schedule the job, remember that open Terminal Emulation windows can delay the job or cause it to fail.
Removing a phone or subscriber
Use the Remove User wizard to remove an existing phone on a voice system, to remove an existing account from a messaging system, or to remove both at the same time.
1 In the Target System box on the toolbar, select the voice system you want to remove the phone from.
2 On the browser pane, click the Tasks tab.
3 Click General.
4 Click Remove User.
5 Complete the wizard screens.
If you need help with a wizard screen, click Help on that screen. If you schedule the job, remember that open Terminal Emulation windows can delay the job or cause it to fail.
Understanding attendant consoles
The attendant console is the main answering position for your organization. The console operator is responsible for answering incoming calls and for efficiently directing or "extending" calls to the appropriate phone.
The attendant console can also allow the operator to monitor:
system problems
toll fraud abuse
traffic patterns
Attendant consoles are generally programmed for you at cutover. However, you may find that it is necessary to change or move the existing consoles, or even add additional consoles.
Changing attendant consoles
As a Communication Manager software administrator, you should be aware of how to display and change key console settings. When you are making changes to your consoles, keep these in mind.
Some settings are system-wide and apply to all consoles in your organization; these are specified on the Console Parameters screen. To view the screen, type display console-parameters.
Other settings apply to individual consoles and are specified on the Attendant screen. To view the screen, type display attendant x. Some of the settings on this screen override system-wide settings.
The number of consoles you can have in your organization varies depending on your voice system. Your System Description Pocket Reference, 555-230-211, gives more details about your specific system capacity.

Avaya Site Administration Reference
57
Note: The system does not allow you to duplicate a console. You should print a copy of all console screens and retain them in your archives. When adding a new console, choose the console you want to duplicate and set up the feature buttons, display buttons, and alarm settings as shown in the print-out. To print a console screen (in this example, for attendant console 1): Follow the instructions in the topic Scheduling and Printing Reports and use the command display attendant 1 print.
Changing COR values 1 Open a GEDI window for the voice system you want to administer.
2 Type change cor n where n is the COR you want to change (for example, type change cor 3).
3 Click Send on the GEDI window.
4 Change any COR values you want to. To add a description to the COR, complete the COR description field.
5 When you are finished, do one of the following:
To submit the change immediately, click Enter (F3) on the GEDI window.
To schedule the change, click Schedule (F9) on the GEDI window.
If you schedule the job, remember that open Terminal Emulation windows can delay the job or cause it to fail.
6 Click in the upper right corner of the gray GEDI window to close the GEDI window.
Do not click the X in the title bar at the top of the screen or you will close Avaya Site Administration.
Changing COS values 1 Open a GEDI window for the voice system you want to administer.
2 Type change cos.
3 Click Send on the GEDI window.
4 Change any COS values you want to. To add a description to the COS, complete the COS description field.
5 When you are finished, do one of the following:
To submit the change immediately, click Enter (F3) on the GEDI window.
To schedule the change, click Schedule (F9) on the GEDI window.
If you schedule the job, remember that open Terminal Emulation windows can delay the job or cause it to fail.
6 Click in the upper right corner of the gray GEDI window to close the GEDI window.
Do not click the X in the title bar at the top of the screen or you will close Avaya Site Administration.

Avaya Site Administration Reference
58
Managing phone features
Changing feature parameters
You can modify the system parameters that are associated with some of the system features. For example, you can use the system parameters to allow music to play if callers are on hold or to allow trunk-to-trunk transfers on the system.
Note You can find most of the system-wide parameters on the Feature-Related System Parameters screen. However, if you have DEFINITY ECS R6.3.1 or later, some parameters have moved to new screens, such as the System Parameters Call Coverage/Call Forwarding screen.
Generally, Avaya sets your system parameters when your system is installed. However, you can change these parameters as your organization’s needs change. For example, let’s say that your company uses call park, where a call can be put on hold and picked up from any other telephone within the system. You need to change the time limit for parked calls from 10 to 5 minutes.
To change the time limit for parked calls:
1 Open a GEDI window for the voice system you want to administer.
2 Type change system-parameters features and press the ENTER key. The Feature-Related System Parameters screen appears.
3 Type 5 in the Call Park Timeout Interval field and click the Enter button on the GEDI window to save the change. If a parked call is not answered within 5 minutes, the call returns to an attendant or to the user who put the call in park.
4 Click to close the GEDI window.
Refer to the Administrator’s Guide for Avaya Communication Manager Software for details about changing other feature-related system parameters.
Creating pickup groups
A pickup group is a list of phones where each member of the group can answer another member’s calls. For example, if you want everyone in the payroll department to be able to answer calls to any payroll extension (in case someone is away from their desk), create a pickup group that contains all of the payroll extensions. Members of a pickup group should be located in the same area so that they can hear when the other extensions in the group ring.
Note that each extension may belong to only one pickup group. Also, the maximum number of pickup groups may be limited by your system configuration.
To create a pickup group:
1 Open a GEDI window for the voice system you want to administer.
2 Type add pickup-group next and press the ENTER key. The Pickup Group screen appears. The system selects the next Group Number for the new pickup group.
3 Enter the extension of each group member. Up to 50 extensions can belong to one group.

Avaya Site Administration Reference
59
4 Click the Enter button on the GEDI window to save your new group list. The system automatically completes the name field when you click the Enter button to save your changes.
5 Click to close the GEDI window.
Once you define a pickup group, you can assign call-pickup buttons for each phone in the group or you can give each member the call-pickup feature-access code. Use the Station screen to assign call-pickup buttons.
To allow users to answer calls that are not in their pickup group, you may be able to use Directed Call Pickup. To allow members of one pickup group to answer calls directed to another pickup group, you may be able to add an extended pickup group. For information, refer to the Administrator’s Guide for Avaya Communication Manager Sotware.
Creating coverage paths
This topic explains how to administer various types of call coverage. In general, call coverage refers to what happens to incoming calls. You can administer paths to cover all incoming calls, or define paths for certain types of calls, such as calls to busy phones. You can define where incoming calls go if they are not answered and in what order they reroute to other locations. For example, you can define coverage to ring the called phone, then move to a receptionist if the call is not answered, and finally access a voice mailbox if the receptionist is not available.
With call coverage, the system redirects a call to alternate answering extensions when no one answers at the first extension. An extension can have up to 6 alternate answering points. (If you have an older system, you may have only 3 answering positions.) The system checks each extension in sequence until the call connects. This sequence of alternate extensions is called a coverage path.
The system redirects calls based on certain criteria. For example, you can have a call redirect to coverage without ever ringing on the principal set, or after a certain number of rings, or when one or all call appearances (lines) are busy. You can set coverage differently for internal (inside) and external (outside) calls, and you can define coverage individually for different criteria. For example, you can decide that external calls to busy phones can use the same coverage as internal calls to phones with Do Not Disturb active.
To create a coverage path:
1 Open a GEDI window for the voice system you want to administer.
2 Type add coverage path next and press the ENTER key. The system displays the next undefined coverage path in the sequence of coverage paths. Our example shows coverage path number
3 Type a coverage path number in the Next Path Number field. The next path is optional. It is the coverage path to which calls are redirected if the current path’s coverage criteria does not match the call status. If the next path’s criteria matches the call status, it is used to redirect the call; no other path is searched.

Avaya Site Administration Reference
60
4 Fill in the Coverage Criteria fields. You can see that the default sets identical criteria for inside and outside calls. The system sets coverage to take place for a busy phone, if there is no answer after a certain number of rings, or if the DND (do not disturb), SAC (send all calls), or Go to Cover buttons are pressed or feature-access codes are dialed.
5 Fill in the Point fields with the extensions you want for coverage points. Each coverage point can be an extension, hunt group, coverage answer group, remote number, vdn, or attendant.
6 Click the Enter button on the GEDI window to save your changes.
Now assign the new coverage path to a user. For example, let’s assign this new coverage path to extension 2054:
1 Type change station 2054 and press the ENTER key. The station screen for extension 2054 appears.
2 Type 2 in the Coverage Path 1 field. To give extension 2054 another coverage path, you can type a coverage path number in the Coverage Path 2 field.
3 Click the Enter button on the GEDI window to save your changes.
4 Click to close the GEDI window.
Tip: If you want to see which extensions or groups use a specific coverage path, type display coverage sender group n, where n is the coverage path number. For example, you should determine which extensions use a coverage path before you make any changes to it.
Setting up bridged call appearances
The easiest way to set up a bridged appearance is with the DNA Add Bridged Appearance wizard. The following steps tell how to add a bridged appearance to the system using GEDI.
Bridged call appearances have to be assigned to phones with double-lamp buttons, or lights. The phone types do not need to match, but as much consistency as possible is recommended for all phones in a bridged group. When a call comes in on bridged phones, the buttons assigned to the bridged appearances flash. You can assign as many bridged appearances as there are line appearances on the primary phone, and you can assign ringing (alerting) to one or more of the phones.
To create a bridged call appearance:
1 Note the extension of the primary phone. A call to this phone lights the button and, if activated, rings at the bridged-to appearance on the secondary phone.
2 If you want to use a new phone for the bridged-to extension, duplicate a station.
3 Open a GEDI window for the voice system you want to administer.

Avaya Site Administration Reference
61
4 Type change station and the bridged-to extension and press the ENTER key. The station screen appears.
5 Click the numbered screen tabs until Per Button Ring Control appears (digital sets only).
6 If you want to assign ringing separately to each bridged appearance, type y.
7 If you want all bridged appearances to either ring or not ring, leave the default n.
8 Move to Bridge Call Alerting. If you want the bridged appearance to ring when a call arrives at the primary phone, type y. Otherwise, leave the default n.
9 Complete the appropriate field for your phone type.
If… Then…
your primary phone is analog
move to the Line Appearance field and enter abrdg-appr
your primary phone is digital
move to the Button Assignments field and enter brdg-appr
10 Press the ENTER key. Btn and Ext fields appear. If Per Button Ring Control is set to y on the digital screen, Btn, Ext, and Ring fields appear.
11 Enter the primary phone’s button number that you want to assign as the bridged call appearance. This button flashes when a call arrives at the primary phone.
12 Enter the primary phone extension.
13 If the Ring field appears:
If you want the bridged appearance to ring when a call arrives at the primary phone, type y.
If you do not want the bridged appearance to ring, leave the default n.
14 Click the Enter button on the GEDI window to save your changes.
15 Click to close the GEDI window.
To see if an extension has any bridged call appearances assigned, type list bridge and the extension, and press the ENTER key.

Avaya Site Administration Reference
62
Routing outgoing calls
World class routing
Your system uses world class routing to direct an outgoing call. There are two types of routing:
Automatic Alternate Routing (AAR) is used for calls within your company over your own private network.
Automatic Route Selection (ARS) is used for calls that go outside your company over public networks. ARS is also used to route calls to remote company locations if you do not have a private network.
Adding a new area code or prefix
A common task for system administrators is to configure their system to recognize new area codes or prefixes.
Tip: If your local area code is changing or splitting, call the Avaya helpline and have them walk you through all the changes needed to have your system recognize the new area code.
When you want to add a new area code or prefix, you look up the settings for the old area code or prefix and enter the same information for the new one.
Let’s add a new area code. When the California area code, 415, splits and portions change to 650, you’ll need to add this new area code to your system.
Tip: If you do not need to use 1 for area code calls, omit the 1 in Steps 2, 4, and 6 in our example. Also, enter 10 in the Total Min and Total Max fields (instead of 11) in Step 8.
To add this non-local area code:
1 Open a GEDI window for the voice system you want to administer.
2 Type list ars route-chosen 14152223333 and press the ENTER key. You can use any 7-digit number after 1 and the old area code (415). We used 222-3333. The ARS Route Chosen Report screen appears.
3 Write down the Total Min, Total Max, Route Pat, Call Type, and Node number from this screen. In this example, the Total Min is 11, Total Max is 11, Route pattern is 30, and the Call Type is fnpa.
4 Type change ars analysis 1650 and press the ENTER key. Enter 1 and the new area code (650). The ARS Digit Analysis Table screen appears.
5 Use the arrow keys to move to a blank Dialed String field. If the dialed string is already defined in your system, the cursor appears in the appropriate Dialed String field, where you can make changes.
6 Enter 1650 in the Dialed String field.

Avaya Site Administration Reference
63
7 Enter the minimum and maximum values from Step 3 in the Total Mn and Total Mx fields. In our example, enter 11 in each field.
8 Enter the route pattern from Step 3 in the Rte Pat field. In our example, enter 30.
9 Enter fnpa in the Call Type field.
10 Enter the node number from Step 3 in the Nd Num field. For our example, you would leave the node number blank.
11 Click the Enter button on the GEDI window to save your changes.
12 Click to close the GEDI window.
To add a new prefix, follow the same directions, except use a shorter dial string (such as list ars route-chosen 2223333, where 222 is the old prefix) and a dial type of hnpa.
Using ARS to restrict outgoing calls
ARS allows you to block outgoing calls to specific dialed strings. For example, administrators in the United States may want to restrict users from making calls to 900 and 976 pay-per-call numbers or calls to countries where they do not do business.
SSEECCUURRIITTYY AALLEERRTT!! To prevent toll fraud, deny calls to countries where you do not do business. The following countries are currently concerns for fraudulent calling.
Country Code
Colombia 57
Ivory Coast 225
Mali 23
Nigeria 234
Pakistan 92
Peru 51
Senegal 221
Yemen 967
To prevent callers from placing calls to Colombia (57):
1 Open a GEDI window for the voice system you want to administer.
2 Type change ars analysis 01157 and press the ENTER key. You enter 011 (international access) and the country code (57). The ARS Digit Analysis Table screen appears.
3 Use the arrow keys to move to a blank Dialed String field on the right of the screen. If the dialed string is already defined in your system, the cursor appears in the appropriate Dialed String field. Skip to Step 5 to deny calls to this dialed string.
4 Enter 01157 in the Dialed String field.
5 Enter 10 in the Total Mn and 23 in Total Mx fields.
Avaya Site Administration Reference
64
6 Enter den (denied) in the Rte Pat field.
7 Enter intl in the Call Type field.
8 Click the Enter button on the GEDI window to save your changes.
9 Click to close the GEDI window.
Overriding call restrictions
You can use authorization codes to enable callers to override a station’s calling privileges. For example, you can give a supervisor an authorization code so they can makes calls from a phone that is usually restricted for these calls. Since each authorization code has its own COR, the system uses the COR assigned to the authorization code (and FRL assigned to the COR) to override the privileges associated with the employee’s phone.
Note that authorization codes do not override route patterns that are denied. For example, if your ARS tables restrict users from placing calls to Columbia, a caller cannot override the restriction with an authorization code.
Tip: Authorization codes are optional. To see if authorization codes are enabled on your system, use display system-parameters customer-options.
Security Alert: You should make authorization codes as long as possible to increase the level of security. Set the length of authorization codes on the Feature-Related System Parameters screen.
Let’s create an authorization code 4395721with a COR of 2.
1 Open a GEDI window for the voice system you want to administer.
2 Type change authorization-code 4395721 and press the ENTER key. The Authorization Code - COR Mapping screen appears.
3 In the AC field, type 4395721.
4 In the COR field, enter 2.
5 Click the Enter button on the GEDI window to save your changes.
6 Click to close the GEDI window.

Avaya Site Administration Reference
65
ARS Partitioning
Most companies want all their users to be able to make the same calls and follow the same route patterns. However, you may find it helpful to provide special calling permissions or restrictions to a group of users or to particular phones.
ARS partitioning allows you to provide different call routing for a group of users or for specific phones.
Note: If you used partitioning on a release prior to R7 and you want to continue to use partitioning, please read this section carefully. The process for setting up partitioning has changed significantly.
Tip: Partitioning is an optional feature. Use display system-parameters customer-options to see if Partitioning is set to y and Time of Day Routing is set to n. If Time of Day Routing is y on System Parameters Customer Options, you specify the partition group number (PGN) on the Time of Day Routing Plan screen. Refer to the Administrator’s Guide for Avaya Communication Manager Software for more information.
You can use ARS partitioning to change the call routing plan for up to 8 different user groups within a single voice system. You assign a partition group number (pgn) to each user group and identify different call routing treatments for each pgn.

Avaya Site Administration Reference
66
Advanced voice system administration
Globally changing voice system data 1 In the Target System box on the toolbar, select the voice system on which you want
to globally change data.
2 On the browser pane, click the Tasks tab.
3 On the Tasks tab, click Advanced.
4 Click Find and Replace.
5 Complete the wizard screens.
If you need help with a wizard screen, click Help on that screen. If you schedule the job, remember that open Terminal Emulation windows can delay the job or cause it to fail.
Entering Native Names
Use this procedure to add or edit the name of a system object in native language. You can specify the native name for the following system objects:
Station
Hunt Group
Trunk Group
VDN
NOTE: The object must exist already on the voice system. You cannot add a new object to the voice system via this procedure.
To add or edit the name of a system object in native language:
1 In the Target System box on the toolbar, select the appropriate voice system.
2 On the browser pane, click the Tasks tab.
3 On the Tasks tab, click General.
4 Click MultiLingual Name Wizard.
The MultiLingual Wizard Task – Select Object dialog box appears.
5 From the drop-down list box, select the appropriate system object.
6 From the Specify Max Rows for this Object box, select the number of entries you want to add or change for this object.
7 Click Next.
The Display Grid dialog box appears.
8 Perform one of the following steps:
If you selected hunt-group, perform one of the following steps:
o Enter the number in the group number box, enter the name in the Group Name box, and then enter the native language name in the Native Name box.
o Click View Available Objects, select the hunt group(s) you want to change from the Hunt-Group Browser dialog box, click OK, and then enter the native language name in the Native Name box.

Avaya Site Administration Reference
67
If you selected station, perform one of the following steps:
o Enter the name in the Name box, and then enter the native language name in the Native Name box.
o Click View Available Objects, select the station(s) you want to change from the Hunt Group Browser dialog box, click OK, and then enter the native language name in the Native Name box.
If you selected trunk-group, perform one of the following steps:
o Enter the number in the group number box, enter the name in the Group Name box, and then enter the native language name in the Native Name box.
o Click View Available Objects, select the trunk group(s) you want to change from the Trunk-Group Browser dialog box, click OK, and then enter the native language name in the Native Name box.
If you selected vdn, perform one of the following steps:
o Enter the name in the Name box, and then enter the native language name in the Native Name box.
o Click View Available Objects, select the VDN(s) you want to change from the VDN Browser dialog box, click OK, and then enter the native language name in the Native Name box.
9 When finished, click Next.
The MultiLingual Wizard Task – Schedule dialog box appears.
10 In the Name box, enter a short description of this task.
11 Perform one of the following steps:
If you want to run this task now, click the Run Now check box. If you also want to save this task so you can modify it and/or run it later, click the Save information in tree check box.
If you want to schedule this task to run later, click the Schedule this task to run check box, and either accept the default run time and date, or click Schedule and set the appropriate date, time, and frequency.
If you want to save this task so you can modify it and/or run it later, click the Save information in tree check box.
12 Click Next.
The MultiLingual Wizard Task – Summary dialog box appears.
13 Click Finish.

Avaya Site Administration Reference
68
Trunks
Understanding trunks
Trunks are communication lines that carry voice or data transmissions between two communications systems or central offices. There are a variety of trunk types, each with different capabilities.
Trunks can be characterized by:
Signal type (analog or digital)
Transmission media or wiring type (copper or fiber optic)
Direction (one-way in, one-way out, or two-way)
Connection type:
Central Office to voice system (Public Access Trunks)
Switch to voice system (Tie Trunks)
Switch to long distance provider (Public Access Trunks)
Preparing to add a trunk
When installing a new trunk, provide the vendor with the following information:
The type of trunk you want to install (for a table with a list of trunk types see the Trunk Classification Table.)
For a Central Office (CO) trunk, provide the following information:
Quantity (number of trunks)
Trunk direction (1-way in, 1-way out, two-way)
Signaling method (ground start or loop)
Tip Given a choice, always use ground start trunks. Ground start trunks send a signal to the Central Office that clears the line before you make a call. This prevents outside calls from coming in on the trunk you are using to dial out, also known as glaring.
For a Direct Inward Dial (DID) trunk, provide the following information:
The extension number range that is currently established on the dial plan. Advise your vendor which extension ranges you want to be called via the DID service.
Quantity (number of trunks)
Signaling method (DID, wink, or immediate - we recommend wink)
For a tie trunk, provide the following information:
Quantity (number of trunks or channels)
Trunk direction (2-way, 1-way in, or 1-way out)
Signaling method (wink, immediate, delay dial, or auto)
Note Regardless of what type of signaling method is assigned, the voice system and network vendor must match.

Avaya Site Administration Reference
69
Service Codes such as:
Registration Number of the voice system
Facility Interface Code (FIC). A FIC is a five character code (for the USA only) that provides the technical information needed to order a specific port circuit pack. These codes are dependent on the type of trunks you are ordering. Click the following links for the facility interface codes for these lines types:
Analog private lines
Digital lines
MTS lines and WATS lines
If you are adding an individual trunk to an existing trunk group that you already have, follow these steps to gather information to provide to the vendor:
1 Type list trunk-group to view the Trunk Groups screen.
2 Find the trunk group you are going to add more trunks to.
3 Type display trunk-group xxx where xxx is the trunk group number, to view the Trunk Group screen.
4 You can locate necessary information here such as the type of trunk group, signaling type and direction.
Adding trunk groups
Occasionally, your company’s phone requirements change and you need to add new trunk groups to your system. For example, maybe your company is expanding and you must have additional two-way access between your voice system and your local phone company or central office (CO). After doing some research, you decide that you need to add another CO trunk.
Once you decide that you want to add a new trunk, contact your vendor. Depending on the type of trunk you want to add, the vendor may be your local phone company, a long distance provider, or some other service provider.
When you talk to your vendor, they’ll want to know what kind of service you want to add.
The vendor should confirm the type of signal you want and provide you with a circuit-identification number for the new trunk. Be sure to record any vendor-specific ID numbers or specifications in case you ever have any problems with this trunk.
Tip: Remember to keep records of any changes you make to the system for future reference.
Once you’ve ordered your new service and have gathered all the information associated with the new trunk, you need to configure the system to recognize the new trunk group.
To add a new trunk-group:
1 Open a GEDI window for the voice system you want to administer.
2 Type add trunk-group next and press the ENTER key. The Trunk Group screen appears.
3 In the Group Type field, enter the type of trunk you want to add. If you select a different trunk type, such as DID, the system changes the screen to show only those fields that apply to the type of trunk-group you are adding.

Avaya Site Administration Reference
70
4 Type a name to identify this trunk group in the Group Name field.
5 In the TAC field, type the code you want to use to access the new trunk group.
6 In the Direction field, indicate the call-flow direction. If you want to direct calls to a night extension, type the extension number in the Night Service field.
7 In the Comm Type field, enter the type of communication that you want the new trunk to use.
8 In the Trunk Type field, type loop start. This field tells the system how the calls on this trunk will be sent or received. Your vendor should know what trunk type you can use to complete this field.
9 Use NEXT PAGE to go to the Group Member Assignments page.
Different fields appear on this screen depending on the configuration of your voice system.
10 In the Port field, type the port number of the physical connection for each member you are adding to the trunk group.
11 In the Name field, type the circuit ID or telephone number for each member. This information is very helpful for tracking your system or troubleshooting problems, but the fields need to be updated whenever the information changes.
12 Click the Enter button on the GEDI window to save your changes.
13 Click to close the GEDI window.

Avaya Site Administration Reference
71
Night Service
Setting up night service
You can use night service to direct calls to an alternate location when the primary answering group is not available. For example, you can administer night service so that anyone in your marketing department can answer incoming calls when the attendant is at lunch or has left for the day.
Once you administer night service to route calls, your end-users merely press a button on the console or a feature button on their phones to toggle between normal coverage and night service.
There are five types of night service:
Hunt group night service — directs hunt group calls to a night service destination
Night station night service — directs all incoming trunk calls to a night service destination
Night console night service — directs all attendant calls to a Night or Day/Night console
Trunk group night service — directs incoming calls to individual trunk groups to a night service destination
Trunk answer from any station (TAAS) — directs incoming attendant calls and signals a bell or buzzer to alert other employees that they can answer the calls
How do night service types interact?
Let’s look at an example of how several types of night service might be used in one company.
Assume that you already administered the following night service settings:
night station night service redirects to extension 3000 and DID-LDN only to LDN Night Ext is set to n
EXT Alert Port (TAAS) field is not defined
Trunk group 4 redirects to extension 2000
Let’s look at how calls for this company are directed after hours:
Call type Directs to
An LDN call on a DID trunk
extension 3000
A call on trunk group 4
extension 2000
An internal call to ‘0’
extension 3000
A call that redirects to the attendant through a coverage path.
the attendant queue

Avaya Site Administration Reference
72
Announcements
What is an announcement?
An announcement is the recorded message a caller hears while the call is in a queue. An announcement is often used in conjunction with music. Announcements are recorded on special circuit packs (TN750, TN750B,TN750C, or TN2501AP) on your Communication Manager system.
Three types of announcements are:
delay announcement — explains the reason for the delay and encourages the caller to wait
forced announcement — explains an emergency or service problem. Use when you anticipate a large number of calls about a specific issue
information announcement — gives the caller instructions on how to proceed, information about the number called, or information that the caller wants
Announcements are most effective when they are:
short, courteous, and to-the-point
spaced close together when a caller on hold hears silence
spaced farther apart when music or ringing is played on hold
played for calls waiting in queue
Magic on Hold is a package of professionally-recorded music available from Avaya. Contact your Avaya representative for more information.
Adding announcements
You need to tell the voice system you want an announcement before you can record it on a special announcement circuit pack. You assign an extension for the announcement so the voice system can identify the announcement. This extension cannot be in use and must conform to your dial plan.
Tip: Use change announcement to administer an announcement extension. See the Administrator’s Guide for Avaya Communication Manager Software for more information.
Voice Announcement over LAN (VAL)
You can record announcements on a downloadable Voice Announcement over LAN (VAL) circuit pack (TN2501AP), which allows you to share, backup, and restore announcement files over your local area network.
You can also use TN750, TN750B, and TN750C announcement circuit packs to record announcements on your voice system. You can have only one TN750 or TN750B per system, but you can use one TN750B with many TN750C and/or TN2501AP (VAL) circuit packs. The TN750Cs each have built-in memory. This means you can don’t have to save from the TN750C to backup tape or system memory, but you can copy the announcements to another circuit pack.
Let’s say we have calls coming into unassigned DID extensions. Let’s record a general message to tell these callers to dial the company’s main number. We’ll assign the announcement to extension 1234, and use the integrated announcement circuit pack located on 01B18.

Avaya Site Administration Reference
73
Tip: Use display integrated-annc-boards to find the cabinet, carrier, and slot addresses of your announcement circuit packs. The Integrated Announcement Board screen lists the location and the type, as well as showing the number of recordings and number of seconds (at the administered rate) left on each circuit pack.
Our example explains how to add an integrated announcement, but other types of announcements are available. See the Administrator’s Guide for Avaya Communication Manager Software for more information about other announcement types.
To add an announcement extension 1234:
1 Open a GEDI window for the voice system you want to administer.
2 Type change announcements and press the ENTER key. The Announcements/Audio Sources screen appears.
3 In the Ext field, type 1234.
4 In the Type field, type integrated.
5 In the Name field, type unassigned DID.
6 In the Pro (protected) field, type n. If you enter n, users with console permissions can change the announcement. If you enter y, the announcement cannot be changed.
7 In the Rate field, type 32 for TN750 circuit packs, or 64 for TN2501AP circuit packs.
8 In the Port field, type 01B18.
9 Click the Enter button on the GEDI window to save your work.
10 Click to close the GEDI window.
Recording announcements
You can record announcements using any phone or console whose COS (class of service) provides console permissions. You can use display cos to review COS permissions.
You also need the announcement feature access code for your system. Use display feature-access-codes to find the announcement access code.
The announcement extension must be set up before you record. Use list station data-module to determine the announcement extension.
In our example, use your 8410D phone to record the announcement for the unassigned DIDs to extension 1234. Our announcement access code is *56.
To record the announcement:
1 Open a GEDI window for the voice system you want to administer.
2 Dial the announcement access code. For example, dial *56. You hear dial tone.
3 Dial the announcement extension. For example, we’ll dial 1234. You hear dial tone.
4 Dial 1 to begin recording.

Avaya Site Administration Reference
74
5 Record the message.
6 Hang up the phone to end recording.
7 Click to close the GEDI window.
Tip: The announcement records the sound of the receiver returning to the phone. Hang up gently, press the drop button, or press the switch hook with your finger.
You have to wait 15 seconds before you can dial the extension 1234 to listen to your announcement.
If you record an announcement and later you want to re-record your announcement, you have to first delete the original message.
Professional or computer recordings
If you are using the VAL (TN2501AP) announcement circuit pack, you can record announcements at a computer, rather than at a system phone. You can also record announcements at an off-site location and transfer them to the board using VAL Manager or File Transfer Protocol (FTP).
To be compatible with the TN2501AP circuit pack and the voice system, announcement recordings must have the following parameters:
CCITT A-Law or CCITT -Law companding format (do not use PCM)
8KHz sample rate
8-bit resolution (bits per sample)
Mono (channels = 1)
Recording new announcements at a computer
To record an announcement at a computer:
1 At the computer, open the application that you use to record .wav files.
2 Set the recording parameters.
3 Record the announcement by speaking into a microphone connected to the computer.
4 Play the announcement back at the computer before transferring the file to the VAL (TN2501AP) circuit pack.
Deleting announcements
Let’s delete the unassigned DID announcement assigned to extension 1234.
We know that the announcement access code is *56. Use any console or phone with console permissions to delete the announcement from the announcement circuit pack.
To delete the announcement, use a phone with console permissions to complete the following steps:
1 Open a GEDI window for the voice system you want to administer.
2 Dial the announcement access code. In our example, we’ll dial *56. You hear dial tone.
3 Dial the announcement extension. In our example, we’ll dial 1234. You hear dial tone.

Avaya Site Administration Reference
75
4 Dial 3 to delete the announcement from the circuit pack.
5 Hang up the phone.
6 Click to close the GEDI window.
You also need to remove the information from the system. To remove the information, use your system administration terminal to complete the following steps:
1 Open a GEDI window for the voice system you want to administer.
2 Type change announcements and press the ENTER key. The Announcements/Audio Sources form appears.
3 Delete the information in the Ext and Type fields.
4 Click the Enter button on the GEDI window to save your work.
5 Click to close the GEDI window.
If you use a TN750C circuit pack, the announcement remains on the circuit pack until you re-record.
Backing up your announcements
Note: To back up announcements from a TN2501AP circuit pack, you need to use either FTP or VAL Manager. See the Administrator’s Guide for Avaya Communication Manager Software or your Avaya representative for more information about these tools.
Make sure you back up your announcements recorded on TN750 and TN750B circuit packs. The system loses announcements stored on these circuit packs if power is shut down or the circuit pack is removed.
The TN750C circuit pack has on-board FLASH memory so you do not have to back it up. However, you may want to back up the TN750C to another TN750C circuit pack or tape for extra security. You need to administer the data module that is built into the TN750 circuit pack before you save your announcements. See the Administrator’s Guide for Avaya Communication Manager Software for more information.
{bmc CAUTION1.BMP} CAUTION!
Do not copy, save, or restore announcements from a TN750C to a TN750 or TN750B. It may corrupt the announcement.
To backup announcements on TN750 or TN750B circuit packs:
1 Open a GEDI window for the voice system you want to administer.
2 Type save announcements and press the ENTER key to save the changes.
If you have both TN750B and TN750C circuit packs, save the announcements from the TN750B slot.
3 Click to close the GEDI window.
The save announcement process can take up to 40 minutes. You cannot administer your system while it is saving announcements.

Avaya Site Administration Reference
76
Hunt groups
What are hunt groups?
A hunt group is a group of extensions that receive calls according to the call distribution method you choose. When a call is made to a certain phone number, the system connects the call to an extension in the group.
Use hunt groups when you want more than one person to be able to answer calls to the same number. For example, set up a hunt group for:
a benefits department within your company
a travel reservations service
Setting up hunt groups
Let’s set up a hunt group for an internal helpline. Before making changes to the voice system, we’ll decide:
the phone number for the hunt group
the number of people answering calls
the way calls are answered
Our dial plan allows 4-digit internal numbers that begin with 1. The number 1200 is not in use. So, we’ll set up a helpline hunt group so anyone within the company can call extension 1200 for help with a phone.
We will assign 3 people (agents) and their extensions to our helpline. We want calls to go to the first available person.
To set up our helpline hunt group:
1 Open a GEDI window for the voice system you want to administer.
2 Type add hunt-group next and press the ENTER key. The Hunt Group screen appears. The Group Number field is automatically filled in with the next hunt group number.
3 In the Group Name field, type the name of the group. In our example, type internal helpline.
4 In the Group Extension field, type the phone number. We’ll type 1200.
5 In the Group Type field, type the code for the call distribution method you choose. We’ll type ucd-loa so a call goes to the agent with the lowest percentage of work time since login. Note: The COS for all hunt groups defaults to 1. Therefore, any changes to COS 1 on the Class of Service screen changes the COS for all your hunt groups. A COS field does not appear on the Hunt Group screen.
6 Press NEXT PAGE to find the Group Member Assignments page.

Avaya Site Administration Reference
77
7 In the Ext field, type the extensions of the agents you want in the hunt group. We’ll type 1011, 1012, and 1013.
Tip: For a ddc group type (also known as "hot seat" selection), the call is sent to the extension listed in the first Ext field. The system uses this form to determine the hunting sequence. See Call distribution methods for more information.
8 Click the Enter button on the GEDI window to save your work.
9 Click to close the GEDI window.
The Name fields are display-only and do not appear until the next time you access this hunt group.
To make changes to a hunt group:
1 Open a GEDI window for the voice system you want to administer.
2 Type change hunt-group n and press the ENTER key, where n is the number of the hunt group.
3 Change the necessary fields.
4 Click the Enter button on the GEDI window to save your changes.
5 Click to close the GEDI window.
Tip: Type list member hunt group to see a list of logged-in members of a hunt group by group number. For splits and skills, the login ID, name, and different fields for EAS and Advocate appear on the list.
Setting up a queue
You can tell your voice system how to handle a hunt-group call when it cannot be answered right away. The call waits in a "queue."
Let’s tell the voice system that up to 10 calls can wait in the queue, but that you want to be notified if a call waits for more than 30 seconds.
You also want the voice system to send a warning when 5 or more calls are waiting in the queue. This warning flashes queue-status buttons on phones that have a status button for this hunt group. When the buttons flash, everyone answering these calls can see that the helpline calls need more attention.
To set up our helpline queue:
1 Open a GEDI window for the voice system you want to administer.
2 Type change hunt-group n and press the ENTER key, where n is the number of the hunt group to change. In our example, type change hunt-group 5. The Hunt Group form appears.
3 In the Queue field, type y.
Avaya Site Administration Reference
78
4 In the Queue Length field, type the maximum number of calls that you want to wait in the queue. In our example, type 10.
5 In the Calls Warning Threshold field, type the maximum number of calls that can be in the queue before the system flashes the queue status buttons. In our example, type 5.
6 In the Time Warning Threshold fields, type the maximum number of seconds you want a call to wait in the queue before the system flashes the queue status buttons. In our example, type 30.
7 Click the Enter button on the GEDI window to save your changes.
8 Click to close the GEDI window.
Adding hunt group announcements
You can add recorded announcements to your hunt group queue. Use announcements to encourage callers to stay on the line or to provide callers with information. You can define how long a call remains in the queue before the caller hears an announcement.
See recording announcements for information on how to record an announcement.
Let’s add an announcement to our internal helpline. We want the caller to hear an announcement after 20 seconds in the queue, after approximately 4 or 5 rings. Our announcement is already recorded and assigned to extension 1234.
Tip: You can use display announcements to find the extensions of your recorded announcements.
To add an announcement to our helpline queue:
1 Open a GEDI window for the voice system you want to administer.
2 Type change hunt-group n and press the ENTER key, where n is the number of the hunt group to change. In our example, type change hunt-group 5. The Hunt Group form appears.
3 Press NEXT PAGE to find the First Announcement Extension field.
4 In the First Announcement Extension field, type the extension of the announcement you want callers to hear. In our example, type 1234.
5 In the First Announcement Delay (sec) field, type the number of seconds you want the caller to wait before hearing the first announcement. In our example, type 20. Tip: If you set the delay announcement interval to 0, calls automatically connect to the announcement before they are queued, follow coverage, or connect to an available agent. This is called a "forced first announcement."
6 Click the Enter button on the GEDI window to save your work.

Avaya Site Administration Reference
79
7 Click to close the GEDI window.
You can use the same announcement for more than one hunt group. See the Administrator’s Guide for Avaya Communication Manager Software for more information on announcements and hunt groups.
Call distribution methods
You have more call distribution choices if your company acquires ACD (Automatic Call Distribution) or EAS (Expert Agent Selection).
ACD and EAS allow you to distribute calls according to the work loads and skill levels of your agents in each hunt group. You can track call handling and monitor the efficiency of your agents. When you assign ACD to a hunt group, the group is called a "split." When you assign EAS, the group is called a "skill."
The following table shows 6 types of call distribution methods and the software required for each method.
Method The system hunts for... I need...
Direct Department Calling- (DDC)
the first agent administered in the hunt group. If the first agent is busy, it goes to the second agent, and so forth. This "hot seat" method puts a heavy call load on the first few agents.
no extra software (you cannot use this method if you have EAS enabled)
Circular (circ) the next available agent in a chain no extra software
Uniform Call Distribution- Most Idle Agent (UCD-MIA)
the available agent who has been idle the longest since their last call.
no extra software
Uniform Call Distribution- Least Occupied Agent (UCD-LOA)
the available agent with the lowest percentage of work time since login.
ACD, EAS, and CentreVu Advocate
Expert Agent Distribution- Most Idle Agent (EAD-MIA)
the available agent with the highest skill level who has been idle the longest since their last call.
EAS
Expert Agent Distribution- Least Occupied Agent (EAD-LOA)
the available agent with the highest skill level and the lowest percentage of work time since login.
EAS and CentreVu Advocate

Avaya Site Administration Reference
80
Vectors and Vector Directory Numbers (VDNs)
What are vectors?
A vector is a series of commands that you design to tell the system how to handle incoming calls. A vector can contain up to 32 steps and allows customized and personalized call routing and treatment. Use call vectoring to:
play multiple announcements
route calls to internal and external destinations
collect and respond to dialed information
Tip: The vector follows the commands in each step in order. The vector "reads" the step and follows the command if the conditions are correct. If the command cannot be followed, the vector skips the step and reads the next step.
Your system can handle calls based on a number of conditions, including the number of calls in a queue, how long a call has been waiting, the time of day, day of the week, and changes in call traffic or staffing conditions.
WARNING: Vector fraud is one of the most common types of toll fraud because vectors route calls based on the class of restriction (COR) assigned to the VDN. Refer to the Avaya Security Handbook, 555-025-600, or your Avaya representative, for more information.
Writing vectors
Writing vectors is easy, but we recommend that you set up and test your vectors before you use them across the system.
In the steps below, we’ll write a vector to handle calls to our main number. It is the first vector so we’ll use number 1.
Tip: Type list vector to see a list of existing vectors. Type list usage vector to see where each vector is used throughout the voice system. Type list usage digit string to see all the vectors, vector tables and Best Service Routing (BSR) plans that use a specific dial string.
To write a vector:
1 Start terminal emulation for the voice system you want to administer.
2 Type change vector 1 and press the ENTER key. The Call Vector screen appears. The vector number field on the left side of the screen is filled in automatically.
3 Type a description for the vector in the Name field. In our example, type main number calls. The information in the heading of the Call Vector screen is display only. Use display system-parameters customer-options to see the features that are turned on in your voice system.

Avaya Site Administration Reference
81
4 Type your vector steps in the numbered column on the left of the screen. Tip: When you type in your vector steps, the voice system automatically completes some of the vector step information for you. For example, if you type "q" in a vector step field, the voice system fills in "queue-to." Also, additional fields appear when you complete a field and press TAB. This makes it very easy to type in your vector steps.
5 Click to close the window.
Once you set up a vector, you can add vector steps to tell the voice system how to handle calls.
Allowing callers to leave a message
You can write a vector that allows callers to leave messages. This type of vector uses a hunt group called a messaging split. For this example, we send after-hours calls to the voice mailbox at extension 2000 and use messaging split 99. Once the vector routes a call to the mailbox, the caller hears a greeting (that was recorded with the voice mail for mailbox 2000) that tells then they can leave a message.
To let callers leave messages, write this vector (Step 7):
(Note: Several of the steps in the following vector were created as part of other examples. If you do not understand the non-bold steps in this vector, you may want to read the following help topics. In the example, Putting a call in a queue, we created step 2. In the example, Playing an announcement, we created steps 3-5. In the example, Routing based on time of day, we created steps 1 and 6. In the example, Allowing callers to leave a message, we created step 7.)
Example
1 goto step 7 if time-of-day is all 17:00 to all 8:00
2 queue-to main split 47 pri l
3 announcement 4001 (All agents are busy, please wait...)
4 wait-time 60 secs hearing music
5 goto step 2 if unconditionally
6 stop
7 messaging split 99 for extension 2000
Inserting a step into a vector
It is easy to add a vector step and not have to retype the entire vector. This example adds announcement 4005 between Step 3 and Step 4 in vector 20.
To insert a new vector step in vector 20:
1 Start GEDI for the voice system you want to administer.
2 Type change vector 20 and press the ENTER key. The call vector screen appears.
3 Press F6 on your keyboard.
4 Click the Insert before option button, and type the number of the line before which you want to add the new line.
5 Click OK.

Avaya Site Administration Reference
82
6 Type the new vector step. We’ll type announcement 4005 (Please wait...).
7 Press Enter.
8 Click to close the window.
Tip: When you insert a new vector step, the system automatically renumbers the rest of the vector steps and all references to the vector steps. The voice system inserts a "*" when the numbering needs more attention.
Entering a variable to a vector
Use this procedure to enter a variable to a vector.
To enter a variable to a vector:
1 Start GEDI for the voice system you want to administer.
2 Type change vector xx (where xx is the vector you want to change), and press the ENTER key. The call vector screen appears.
3 Press F6 on your keyboard.
4 Click the Variable option button, and enter the variable you want to add.
5 Click OK.
6 Press Enter.
7 Click to close the window.
Deleting a step from a vector
It is easy to delete a vector step and not have to retype the entire vector. For example, let’s delete vector Step 5 from vector 20:
1 Start GEDI for the voice system you want to administer.
2 Type change vector 20 and press the ENTER key. The call vector screen appears.
3 Place the cursor on the line that you want to delete.
4 Press F6 on your keyboard.
5 Click the Delete line option button, and type the number of the line before which you want to add the new line.
6 Click OK.
7 Press Enter.
8 Click to close the window.
Tip: When you delete a vector step, the system automatically renumbers the rest of the vector steps and all references to the vector steps. The voice system inserts a * when the numbering needs more attention.

Avaya Site Administration Reference
83
Diagnosing a vector problem
If there is a problem with a vector, the voice system records the error as a vector event. Vector events occur for a number of reasons including problems with a trunk, full queue slots, or the vector reaching the maximum 1000 steps allowed.
Use display events to access the Event Report screen and see the event record. Use the event record to see why the vector failed.
To view the Event Report:
1 Open a GEDI window for the voice system you want to administer.
2 Type display events and press the ENTER key. The Event Report screen appears.
3 To see all current vector events, press the ENTER key OR Indicate the events that you want to see by completing the Report Period and Search Option fields. See the Avaya MultiVantage Call Center Software Release 11 Call Vectoring and Expert Agent Selection (EAS) Guide for more information.
4 Press the ENTER key to view the report. The Event Report (detail) screen appears. Look at the information in the Event Data field to diagnose the vector event.
5 Click to close the GEDI window.

Avaya Site Administration Reference
84
Voice system reports
Using report scheduler
Note This feature is distinct and separate from the scheduling feature offered in Avaya Site Administration. You cannot access the Communication Manager Report Scheduler using GEDI. You can access it only by starting terminal emulation.
The report scheduler is a feature of your voice system that you can use to print certain reports automatically. When you print reports using the voice system’s report scheduler, the voice system sends the report to a system printer (which is connected to the voice system). Generating and printing the report uses significant voice system processor resources. For this reason, it is a good idea to print reports during off-peak hours.
Analyzing report data
Most of the information displayed by the report scheduler is measured in CCS (centum call seconds). CCS equals the amount of call traffic it takes to keep one piece of traffic-sensitive equipment busy for 0.6 minutes. To convert CCS to minutes, use the following equation:
minutes = the number of CCS/0.6
For more information, refer to DEFINITY ECS Reports, 555-230-511.
Using attendant reports
Attendant group reports enable you to assess the quality of service provided to anyone who calls your attendant. Monitor these reports to ensure that attendant groups are adequately staffed. There are three attendant reports:
Attendant group measurements report — measures attendant group traffic
Attendant positions report — measures individual attendant performance
Attendant group performance report — measures attendant group performance
The system automatically gathers the information for these reports, so you can use them to view attendant information at any time.
Using trunk group reports
Trunk Group Reports can help you detect traffic flow problems such as out-of-service trunks, load balance, or peak-hour blocking.
Tip: If a trunk appears to have intermittent service, use list testcalls summary to determine whether a specific trunk member is not functioning.
If you suspect a trunk is having problems, use Automatic Circuit Assurance (ACA) to monitor the trunk group.

Avaya Site Administration Reference
85
Measuring call center performance
Standard voice system reports on DEFINITY ECS provide valuable data about your center’s operation.
What should I measure?
Focus on three things:
How many calls are answered?
How fast are calls answered?
How cost-effective is the system?
DEFINITY ECS has three hunt group reports that give you information about agents, hunt groups, trunks, and trunk groups to help you answer these questions. The reports are:
Hunt Group Measurements
Hunt Group Performance
Hunt Group Status
The table below shows you how to monitor the performance of your call center by using these reports. To use the table, pick what you want to measure from the column headings. As you read down the column, each row shows the fields on a particular hunt group report — if any — that measure that aspect of call center performance.
Reports
How many calls are answered?
How fast?
Cost-effective?
Hunt Group Measurements
Calls Ans/Aban. Speed Ans (sec) Total Usage
Time Available
Hunt Group Performance
Speed Ans (sec)
Hunt Group Status
LCIQ
For detailed information on these reports, see DEFINITY ECS Reports, 555-230-511.
How many people can use voice system reports?
The number of voice system administrators and super-users who can log in simultaneously to view voice system reports varies with the type of voice system you have
vs csi s si si+m
r
1 1 3 3 5 7
A scheduled report counts as a login. Therefore, you should schedule reports to print during off-hours.

Avaya Site Administration Reference
86
Viewing Hunt Group Measurements reports
The Hunt Group Measurements report displays call data for each hunt group in your system. You can print this report for yesterday’s peak, today’s peak, or the last hour.
A peak hour is the hour during which the greatest usage of agent time occurred. Use this report to determine the time of day with the most traffic or to measure traffic during the previous hour.
For example, let’s print the Hunt Group Measurements report for today’s peak:
1 Open a GEDI window for the voice system you want to administer.
2 Type list measurements hunt-group today-peak and press the ENTER key.
3 To print the report, choose File>Print.
4 Click to close the GEDI window.
Viewing Hunt Group Performance reports
The Hunt Group Performance report gives both the slowest hourly average speed of answer for each hunt group and the daily average. You can run the report for today or yesterday. This report can help you quickly find times during the day when your staffing is too low.
To display a Hunt Group Performance report for yesterday:
1 Open a GEDI window for the voice system you want to administer.
2 Type list performance hunt-group yesterday and press the ENTER key.
3 To print the report, choose File>Print.
4 Click to close the GEDI window.

Avaya Site Administration Reference
87
Call centers
What is a call center?
A call center is a way of organizing people and equipment to achieve particular business goals. For example, you can use a call center to make several people accessible through one number or to handle multiple calls simultaneously. Call centers work by organizing staff (called agents) with specific functions or expertise into hunt groups.
Call centers use some of the features covered in other chapters of this book: hunt groups, announcements, vectors, and VDNs. In this section, we’ll show you how these features work together in a call center.
Planning a call center
Good planning is crucial to setting up an effective call center. Before you administer any part of your call center on DEFINITY ECS, you should have a plan that is thorough and specific. Your call center plan should identify:
the purpose of the call center — what the call center has to do to be successful
expected call volume — the number of calls you expect per day, per week, and per month
type of calls — whether the call center should answer internal or external calls or both
agent functions — the major agent functions
necessary resources — the resources you must add to the system, such as trunk groups and phones
Once you develop a plan for the call center, organize agents according to their functions. These agent groups will be your hunt groups.
Setting up the call flow
One step in setting up a call center is deciding how you want your system to handle calls and what you want callers to experience. You may find it helpful to list the possible situations a call may encounter. Set up the call flow by adding hunt groups, setting up queues, adding announcements, and writing vectors. Refer to earlier sections of this book for details on completing these tasks.
Let’s set up an example call flow. We’ll set up a hunt group so that the work load is evenly distributed and up to 2 calls wait in a queue.
1 Open a GEDI window for the voice system you want to administer.
2 Type add hunt-group next and press the ENTER key. The Hunt Group screen appears. In our example, the next available hunt group is number 2.
3 In the Group Type field, type ucd-mia. This directs the call to the most idle agent — the agent who has waited the longest since handling a call to the hunt group.
4 In the Queue field, type y.
5 In the Queue Length field, type 2.
6 In the Vector field, type y.

Avaya Site Administration Reference
88
7 Complete the rest of the Hunt Group screen.
8 Click the Enter button on the GEDI window to save your changes.
Now that we’ve created a hunt group, let’s write a simple vector that plays announcement 2340. This announcement asks callers to stay on the line. If a call isn’t answered in 1 minute, the vector sends the call to voice mail (extension 2000).
1 queue-to split 2 pri m
2 announcement 2340 ("You have reached...")
3 wait-time 60 sec hearing music
4 messaging split 99 for extension 2000
Tip: Vectors are an optional feature. To see if your company has vectoring, use display system-parameters customer-options.
To make this vector work correctly, you need to create the announcement at extension 2340 and assign a voice mailbox to extension 2000.
Testing the system
Before your new call center goes live, test the system to make sure it works the way you expect it to work.
With agents available, call each outside number you’ve created for the call center. Does an agent in the appropriate hunt group answer?
With only one agent available in a hunt group, make several calls at once to that hunt group. Now that several calls are in queue, call again and listen to the treatment your call receives in queue. If you’ve administered an announcement, do you hear it? Does it play when it’s supposed to? If there’s a music source, does it play when it’s supposed to? Do queue warning lamps flash when they’re supposed do?
With all agents in Aux Work, call the hunt group. Does the call follow the intended path?
Monitoring your call center
Monitoring your call center never ends. Monitor your call center’s performance regularly so you can solve problems quickly and adjust to changing conditions.
It’s critical that you monitor a new call center very closely for the first month. Use hunt group reports and trunk reports to track your system. If you underestimated call volume and trunk capacity, or overestimated agent productivity, you need to change your system immediately.
In addition, perform a traffic analysis when your call center begins operation. Work with your Avaya representative and your local network provider. A traffic analysis gives you a comprehensive picture of the demands on your system and how well the system is performing.
For example, trunk reports tell you how often your trunks reach 100% occupancy. Your network provider may be able to tell you how many callers are getting a busy signal from the CO when all of your incoming trunks are in use. You need both pieces of information to determine the total demand that your system needs to meet.
If your business is growing, regular traffic analysis is crucial. Use traffic analysis to project future demands on your system and plan expansions accordingly.

Avaya Site Administration Reference
89
Viewing system capacity
The capacities of your system depend on the type of voice system you have, the software you’re using, and your contract with Avaya. Use the System Capacity screen to view the maximum capacities of your system and your current level of usage. Remember, however, that the capacities you’ve purchased from Avaya may be lower than the maximums shown on the voice system.
For example, to find out how many hunt groups your DEFINITY ECS can support:
1 Open a GEDI window for the voice system you want to administer.
2 Type display capacity and press the ENTER key. The System Capacity screen appears.
3 Go to the page that shows capacities for Hunt Groups, Splits, or Skills. This screen shows the system limits for hunt groups and how much of this capacity is currently used.
4 Click to close the GEDI window.
Understanding Automatic Call Distribution
Automatic Call Distribution (ACD) is a DEFINITY feature used in many call centers. ACD gives you greater flexibility to control call flow and to measure the performance of agents.
ACD systems operate differently from non-ACD systems, and they can be much more complex. ACD systems can also be more powerful because they allow you to use features and products that are not available in non-ACD systems.
Enhancing an ACD system
All call center management systems (such as Avaya’s Basic Call Management System (BCMS), BCMS Vu, and the sophisticated CentreVu® Call Management System) require ACD. These management systems give you the ability to measure more aspects of your center’s operation, and in more detail, than is possible with standard DEFINITY reports. For a comparison of these systems, see selecting a call management system.
Call vectoring greatly enhances the flexibility of a call center, and most vectoring functions require ACD. Vectoring is a simple programming language that allows you to custom design every aspect of call processing.
Together, ACD and vectoring allow you to use Expert Agent Selection (EAS). For a variety of reasons, you may want certain agents to handle specific types of calls. For example, you may want only your most experienced agents to handle your most important customers. You may have multilingual agents who can serve callers in a variety of languages.
EAS allows you to classify agents according to their specific skills and then to rank them by ability or experience within each skill. DEFINITY ECS uses these classifications to match each call with the best available agent. For more information on call vectoring and EAS, see DEFINITY ECS Administrator’s Guide and DEFINITY ECS Call Vectoring/Expert Agent Selection (EAS) Guide, 555-230-521.

Avaya Site Administration Reference
90
Selecting a Call Management System
Avaya provides management systems for the call centers that need more detailed and flexible reporting. These applications are optional. Contact your Avaya representative for more information.
Basic Call Management System (BCMS)
BCMS runs on the voice system. With BCMS, you can print reports to a printer connected to your terminal, or schedule reports to print on the system printer.
BCMS Vu
BCMS Vu software runs on a PC with Windows 95 or Windows NT. BCMS Vu takes BCMS data and stores it on a PC. Users can run real-time and historical reports and export data to other applications such as spreadsheets.
VuStats
VuStats runs on the voice system. An administrator, split supervisor, or agent uses VuStats to view BCMS data on a display telephone.
CentreVu CMS
CentreVu CMS is a large, multi-faceted reporting system that runs on a Sun SPARC server or Sun Enterprise workstation. CentreVu CMS can measure more aspects of voice system performance and produce a greater variety of reports than any of the other 3 products. CMS also allows streamlined ACD administration.
Use the following criteria to help you choose a call management system.
How many people need to monitor splits simultaneously?
more than 3
use CentreVu CMS, VuStats, or BCMS Vu
3 or fewer
use standard voice system reports or BCMS
How long do you need to store report data?
more than 7 days
use CentreVu CMS or BCMS Vu
7 days
use BCMS (summary report)
1 day
use standard voice system reports (up to 24 hours), VuStats, or BCMS (24-hour detail)

Avaya Site Administration Reference
91
What ACD elements do you need to monitor?
work code or stroke count data, individual trunks, vectors
use CentreVu CMS
agents, trunk groups, splits/skills, VDNs
use CentreVu CMS, BCMS Vu, BCMS, or VuStats
trunk group or hunt group data only
use standard voice system reports
Use the following criteria to help you choose a reporting system. If the following scenarios do not describe your needs, standard voice system reports or BCMS are probably adequate.
Do small inefficiencies or lapses in service cause big loss of profits?
Use CentreVu CMS or BCMS Vu. Both systems have exception alerting to notify you of problems immediately.
Do you frequently generate special reports for clients or senior management?
Use CentreVu CMS or BCMS Vu. Both systems allow custom report development, though CentreVu CMS allows maximum flexibility in those reports. In addition, CentreVu CMS allows you to create forecasts of call volume and needed staffing.
Do you need an electronic wallboard to display status for your center?
Use CentreVu CMS or BCMS Vu. Both systems allow wallboard display of report data.
Where to get more information
The Administrator’s Guide for Avaya Communication Manager Software has more details about BCMS, BCMS Vu, VuStats, and CentreVu CMS. For more complete information, see the following manuals:
DEFINITY ECS Basic Call Management System Operations, 555-230-706
BCMS Vu Software User Guide, 585-217-100
CentreVu Call Management System Administration
for R3V4: 585-215-800
for R3V5: 585-215-820
for R3V6: 585-215-850

Avaya Site Administration Reference
92
Printing button labels
Understanding the Button Label text template
To understand the Button Label text template, it will help to open a Button Label text file and view it as you read this topic.
Button Label text files have two columns:
Column Name Contents
Button Feature This column lists the code name for each feature that you can assign to a phone button. Avaya Site Administration uses this column to match any button features you selected (when you added feature buttons to a phone) to the text that you want on the label.
Label Text This column contains the text that you want to appear on the button label. Some of the information in this column will print exactly as it appears in this column. However, $ signs are replaced by data that you entered into the specified field number when you assigned feature buttons for the given phone. For example, $2 will be replaced by whatever data you entered into the second field that the voice system displayed when you assigned the given feature button to the phone.
What the $ signs mean
When you assign certain feature buttons, the voice system requests additional information. The information you specify in these additional, feature-related fields gets substituted for the $ codes when you print the labels. For example, if you chose the "abrv-dial" code name (for the Abbreviated Dial feature) when you assigned a feature button to a phone, the voice system asked for two more pieces of information: List and Dialcode. The first field (corresponding to $1) is "abrv-dial". The second field (corresponding to $2) is List. The third field (corresponding to $3) is Dialcode.
Code: What Avaya Site Administration substitutes:
EXT Extension of the station
$1 The first button data field, which is the code-name for the feature button. For example, abrv-dial.
$2 The second button data field. For the abrv-dial example, this correlates to the List field.
$3 The third button data field. For the abrv-dial example, this correlates to the Dialcode field.

Avaya Site Administration Reference
93
For example, assume the Button Label text file contains the following entries:
Button Feature
Label Text
call-appr 9079-$EXT
abrv-dial AD $2 $3
abrv-dial 1 998 Login
abrv-dial 1 999 Logoff
Avaya Site Administration would print the following button labels:
For a call-appr button on station 1000, Avaya Site Administration would print a label of 9079-1000.
For an abrv-dial button with List=2 and Dialcode=123, Avaya Site Administration would print a label of AD 2 123, since "abrv-dial 2 123" does not match any of the entries.
For an abrv-dial button with list=1 and Dialcode=999, Avaya Site Administration would print a label of Logoff, since that matches the entry of "abrv-dial 1 999" in the Button Feature column.
How Avaya Site Administration creates button labels
Once you assign feature buttons to your phone, create a Button Label text file, tell Avaya Site Administration which phones you want to print button labels for and which Button Label text file to use, set up the button label layout, and click Print, then Avaya Site Administration merges information from the voice system into the format that you specified in the Button Label text file, and prints the labels.
To merge the information, Avaya Site Administration uses roughly the following procedure. For the purpose of illustration, we explain the process for only one feature button (the "abrv-dial" button, with List=1 and Dialcode=998), but Avaya Site Administration performs this operation for all buttons assigned to a given phone.
1 Avaya Site Administration looks in the Button Feature column for an entry that matches all of the button fields, concatenated as a single string and separated by spaces.
2 When Avaya Site Administration finds the appropriate entry in the Button Feature column, it looks in the Label Text column and if it sees any of the following codes, it substitutes the feature-related data for them.
In the above example, Avaya Site Administration would first look for abrv-dial 1 998. If it finds this entry, it will use the Label Text that is specified in the right column of that row. For example, Login.
If it doesn’t find abrv-dial 1 998, it will search for abrv-dial. If this entry exists, Avaya Site Administration uses the entry specified in the right column of that row, substituting data for $ signs. For example, AD 1 998.
If it doesn’t find abrv-dial, Avaya Site Administration will use the value in the Button Feature column as the label text. For example, abrv-dial 1 998.

Avaya Site Administration Reference
94
Printing button labels 1 In the Target System box on the toolbar, select the voice system from which you
want to print button labels.
2 On the browser pane, click the Tasks tab.
3 On the Tasks tab, click General.
4 Click Print Button Labels.
5 If you have not created any button labels yet, the system will ask you if you want to create a button label text file. To do so, complete the following steps:
a) Click Yes.
b) Change the text in of the button labels as needed.
c) When finished, click to close the button label text file.
d) At the Save changes prompt, click Yes.
e) Click Print Button Labels again.
6 In the Print Button Labels screen, specify:
which set type you want to print button labels for.
which range of extensions you want to print labels for.
Avaya Site Administration will search the selected voice system for all extensions in the range you specified that match the set type you specified, and then present the results in the Button Label Printing screen.
7 Test print and adjust a sample label before attempting to print a large number of labels.
Note Button labels print on the default printer configured for your computer, not a printer connected to the voice system.
8 After you have aligned the printing of one label correctly, print the rest of the button labels as described by clicking Help (F1) on the Button Label Printing screen.
Frequently Asked Question
Q. I want to print button labels for a phone that has a "spare" button label at the top. I can’t see a way to enter text for this "spare" label.
A. Correct. Some phones (like the 6400 series) have a button label at the top that, when you generate labels using information from the voice system, is reserved for the extension number of that phone. Some customers occasionally use button label templates without pulling information from the voice system, manually entering text for the labels. However, it is not possible to specify other content for the label that is reserved for the extension number.

Avaya Site Administration Reference
95
Creating, changing, or viewing button label text
Avaya Site Administration uses button label text files to decide what text to print on button labels for a given phone. By default, button label text files are stored in the Button Labels folder on the Tree tab.
You can use the default button label text file without modification, or you can change it to suit your needs. You may need to create several different button label text files; for example, one for each type of phone in your company, or one for each group in your company.
To create button labels
(If you click Print Button Labels in the Tasks tab, and you have not yet created a button label text file, Avaya Site Administration asks if you want to create one. After that, you can create additional button label text files as follows.)
1 On the browser pane, click the Tree tab.
2 Right-click the Button Labels folder.
3 Select New>Label Text, or double click on an existing text template you want to copy.
4 Change the text in any of the label columns as needed.
5 Select File>Save.
6 Click to close the Label Text window.
To change button labels
1 On the browser pane, click the Tree tab.
2 Right-click the Button Labels folder.
3 Double-click the Button Label text file you want to modify.
4 Change the text in any of the label columns as needed.
5 Select File>Save.
6 Click to close the Label Text window.
To view button labels
1 On the browser pane, click the Tree tab.
2 Right-click the Button Labels folder.
3 Double-click the Button Label text file you want to view.
4 Click to close the Label Text window.

Avaya Site Administration Reference
96
Importing and exporting voice system data
Setting the import and export defaults
Use this procedure to set the default settings for the following import/export settings:
the default delimiters for the Import wizard and the Export wizard
the default directory for the Import wizard, the Export wizard, and other import and export tasks such as export from GEDI and export from the Browse Unused Port wizard
Note If you are exporting to a Microsoft® Excel spreadsheet or similar spreadsheet, statistical or database application, you’ll get the best results by using commas as separators, double-quote delimiters, and to name the export file with a .csv extension when defining the format of the exported file.
To set the default settings for importing and exporting, perform the following steps:
1 From the Tools menu, select Options.
The Options dialog box appears.
2 Click the Export tab.
3 From the Field Delimiter box, select the default delimiter you want the Import wizard and the Export wizard to use for fields. Choices are comma (,), semi-colon (;), space, and tab.
4 From the Text Qualifier box, select the default qualifier you want the Import wizard and the Export wizard to use for text. Choices are double quote ("), single quotes (‘), and none.
5 In the Default Directory box, enter the default directory for importing and exporting. This directory will be the default directory for the Import wizard, the Export wizard, and other import and export tasks such as export from GEDI and export from the
Browse Unused Port wizard. Click to select the appropriate directory.
6 Click OK to save your changes and close the Options dialog box.
Exporting data from a voice system
You can retrieve data from a voice system and save it to a file to be exported to another application, such as a spreadsheet.
Note If you are exporting to a Microsoft® Excel spreadsheet or similar spreadsheet, statistical or database application, you’ll get the best results by using commas as separators, double-quote delimiters, and to name the export file with a .csv extension when defining the format of the exported file.
1 In the Target System box on the toolbar, select the voice system from which you want to retrieve data.
2 On the browser pane, click the Tasks tab.
3 Click Advanced.
4 Click Export Data.

Avaya Site Administration Reference
97
5 Complete the wizard screens.
If you need help with a wizard screen, click Help on that screen. If you schedule the job, remember that open Terminal Emulation windows can delay the job or cause it to fail.
6 When finished, click the History tab or Schedule tab at the bottom of your screen to see the status of the task.
7 Open the file from the location that you specified, using a standard text editor.
Exporting Call Accounting data into a file
You can export data from selected objects into a file.
1 In the Target System box on the toolbar, select the voice system whose data you want to export.
2 On the browser pane, click the Tasks tab.
3 On the Tasks tab, click Advanced.
4 Click Generate Call Accounting.
5 Complete the wizard screens.
If you need help with a wizard screen, click Help on that screen. If you schedule the job, remember that open Terminal Emulation windows can delay the job or cause it to fail.
6 When finished, open up the file on your desktop using a text editor.

Avaya Site Administration Reference
98
Exporting unused port data
You can create a file listing unused ports, and that file can be exported to another application, such as a spreadsheet program.
1 From the Unused Ports screen, click Export.
2 Specify the export settings:
For this value
Do this
Export File View the path and name of the exported file. To change it, click {bmc three dot.bmp} and complete the browse screens to specify the path. If you want to export your file to a spreadsheet like Microsoft® Excel, then name the file with a ".csv" extension. This indicates that the file contains comma-separated values.
Field delimiter
Click the down arrow and select a delimiter from the list. This is a symbol used in the file to indicate separation between different fields. If you are exporting for Microsoft® Excel, and the fields contain the comma character, then use a comma character as the Field Delimiter and double-quote characters as the Text Qualifier.
Text qualifier
Click the down arrow and select a qualifier from the list. This symbol surrounds each field so that when you open the file in a spreadsheet, the spreadsheet will know where a field starts and ends even if the field contains characters like commas.
3 Do you want to show the column titles of the data on the first row of the file?
If yes, click Export column titles on first row so there is a checkmark.
If no, leave the box unchecked.
4 Click OK.
5 At the confirmation screen, click OK.

Avaya Site Administration Reference
99
Exporting data to an LDAP directory
The following example helps describe how to export data to an LDAP directory.
Suppose the following stations are present on a voice system:
Extension Type Port Name Room
3000 6408D+ X Jim Gomes A
3001 6408D+ X William Jones A
3101 6408D+ 01A0301 Tom Peterson C
You want to export these stations to an LDAP server. (The IP address of the LDAP server is 135.122.55.42.) The Directory Information Tree of this LDAP server has the following structure:
You must specify where you want to add the stations in this Directory Information Tree. Suppose you want to add the stations under "people" (that is, the bottom, right-most node in the Directory Information Tree). You must specify the DN for this node in the Base box in the Format tab of the Export Data screen. In this example, you would enter "ou=people,dc=democenter,dc=avaya,dc=com" in the Base box in the Format tab of the Export Data screen. The following sample screen shows this information in the Base box.

Avaya Site Administration Reference
100
When you perform the export, all of the stations will be added under "ou=people,dc=democenter,dc=avaya,dc=com". However, you must enter a distinguishing name for each of these station entries. (This distinguishing name will uniquely identify each station entry.) You must enter this distinguishing name in the DN box in the Format tab of the Export Data screen. In the sample screen, the DN box contains "cn=$FIRSTNAME $LASTNAME", which will be used as the DN for the station entries.
You must specify the objectClass (that is, the schema) that has to be used when creating these entries in the Directory Information Tree. Each objectClass defines a set of attributes. In the sample screen, the objectClass "inetOrgPerson" is used.
Next, you must create a "mapping" between the attributes present in the specified objectClass and the station fields on the voice system. This mapping is done in the "Attribute-Values" table in the sample screen. The Attribute column represents the LDAP attribute, and the Values column represents the associated value of the voice system station field. For each station field you select in the Fields tab of the Export Data screen, there is a corresponding $VALUE. So, in the following sample screen, $EXTENSION maps to the Extension field. The only exceptions are $FIRSTNAME and $LASTNAME, which both map to the Name field. Since the Name field is composed of both a first name and a last name, $FIRSTNAME maps to the first part of the name field (until the space), and $LASTNAME maps to the second part of the name field.

Avaya Site Administration Reference
101
After you export the data to the LDAP directory, the Directory Information Tree will have the following structure:

Avaya Site Administration Reference
102
Exporting Native Names
Using the Export wizard, you can export Native Name (Name2) and script tag data for the following objects:
stations
hunt groups
trunk groups
VDNs
Native Name cannot exceed 27 UTF-8 encoded characters.
The script tag must be a binary value representing an OR of the scripts used.
NOTE: You cannot enter or view Unicode characters in the Name field of the Export grid for the following objects:
stations
hunt groups
trunk groups
VDNs
To enter Unicode characters for these objects, you must use the MultiLingual Name wizard or the Avaya Bulk Import Tool (ABIT).
Importing data into a voice system
You can do bulk voice system administration by importing data (in spreadsheet-like fashion) from another application into Avaya Site Administration, and then sending that data to a voice system. For example, if you are adding a large number of phones at one time, you might want to enter the phone data into a spreadsheet such as Microsoft® Excel. Then, you can copy (import) that data from the Microsoft Excel spreadsheet into a station spreadsheet in Avaya Site Administration.
Importing data is particularly useful for duplicating a station from one voice system onto another. Simply save a template of the station you want to duplicate from the "source" voice system and then use the template to add new stations to the "destination" voice system. You can also move objects, like trunk groups, from one voice system to another using templates and the Import Data feature.
1 In the Target System box on the toolbar, select the voice system where you want to send data.
2 On the browser pane, click the Tasks tab.
3 On the Tasks tab, click Advanced.
4 Click Import Data.
5 Complete the wizard screens.
If you need help with a wizard screen, click Help on that screen. If you schedule the job, remember that open Terminal Emulation windows can delay the job or cause it to fail.

Avaya Site Administration Reference
103
Importing Native Names
Using the Import wizard, you can import Native Name (Name2) and script tag data for the following objects:
stations
hunt groups
trunk groups
VDNs
Native Name cannot exceed 27 UTF-8 encoded characters.
The script tag must be a binary value representing an OR of the scripts used.
NOTE: You cannot enter or view Unicode characters in the Native Name field and Name field of the Import grid for the following objects:
stations
hunt groups
trunk groups
VDNs
To enter Unicode characters for these objects, you must use the MultiLingual Name wizard or the Avaya Bulk Import Tool (ABIT).

Avaya Site Administration Reference
104
Messaging Systems
Adding a phone and messaging subscriber
Use the Add User wizard to add a new phone, add a new messaging account, or add a new phone and new messaging account, all at the same time. As an option, you can also use a GEDI window to add a new phone or use terminal emulation to add a new messaging account to the messaging system.
1 In the Target System box on the toolbar, select the voice system you want to add the new phone to.
2 On the browser pane, click the Tasks tab.
3 On the Tasks tab, click General.
4 Click Add User.
5 Complete the wizard screens.
If you need help with a wizard screen, click Help on that screen. If you schedule the job, remember that open Terminal Emulation windows can delay the job or cause it to fail.
Note If you are adding both a phone and messaging account at once, and if both systems are using the same modem or COM port, make sure that you select "Disconnect from system" on the Scheduler screen that appears when you use the Add User task wizard. If you do not do this, the voice system will remain connected after adding the new phone, and Avaya Site Administration will not be able to connect to the messaging system to add the new messaging account. If a connection requires a COM port and the connection using that port is idle, Avaya Site Administration will disconnect the idle connection to free up the port.
Confirming that the phone and mailbox were added
1 To confirm that the new phone was added, complete the following steps:
a) On the browser pane, click the Tasks tab.
b) On the Tasks tab, click General.
c) Click Browse Stations.
d) In the From extension and To extension fields, enter the extension number that you created when you added the phone to the voice system.
e) Click OK.
f) Confirm that the new phone user appears in the list.
2 To confirm that the new messaging account was added, complete the following steps:
a) On the browser pane, click the Tree tab.
b) Open a terminal emulation window for the messaging system you added the account to by right-clicking on the messaging system name, selecting Advanced>Emulation, and logging into the system. If you log into an INTUITY AUDIX system as sa, select AUDIX Administration from the INTUITY main menu to access the administration screens.
c) At the command prompt, type list subscriber.
d) Confirm that the new messaging account appears in the list.

Avaya Site Administration Reference
105
All other voice mail administration
For instructions on performing all other types of administration on your messaging system, please refer to the documentation that came with your messaging system, or visit www.avaya.com/support.
Security
ASG
Access Security Gateway (ASG) is an optional security feature set up for certain users whereby they must complete a challenge and response sequence before they can access either a voice system or Avaya Site Administration. ASG security for specific logins to a voice system must first be set up on the voice system as described in the Administrator’s Guide for Communication Manager Software. Then, those logins must be set up in Avaya Site Administration for voice system access using ASG.
The challenge and response sequence only occurs when you try to connect to a device (voice system or messaging system) that requires a manual login, or when ASG security is turned on for accessing Avaya Site Administration. In those situations, you must have an ASG Key or equivalent product. IF you set up Avaya Site Administration so it logs you into the voice system automatically, you will not see the challenge and response sequence. See you Avaya representative for more ASG information.
Note that the Avaya ASG Guard product is not the same as ASG described here. ASG Guard uses ASG technology to provide authentication services to legacy systems that do not support ASG inherently. Avaya Site Administration can automatically log in to most Avaya products protected by ASG, but not ASG Guard. You must log in manually to connect to a system through ASG Guard.
Assigning and changing administrators
The system allows you to add or change user logins as needed. When you want to add or change a login, remember the following system security requirements:
a login must be 3 to 6 alphanumeric characters in length
a password must be from 4 to 11 alphanumeric characters in length and contain at least one non-alphabetic character
Note that to create or change logins for G3V3 and later releases, you must login as a superuser with administrative permissions.

Avaya Site Administration Reference
106
Top 11 tips to help prevent toll fraud
An important role for every administrator is to manage the security of their phone system. You need to make every effort to ensure that your phone system is not open to toll fraud. Toll fraud is the unauthorized use of telephone features and services and the theft of long distance service. When toll fraud occurs, your company is responsible for charges.
For more information
For more information on system security and preventing toll fraud, we recommend you obtain the BCS Products Security Handbook and use it often.
Security Alert: If you are located in the USA and you suspect toll fraud, call the Toll Fraud Helpline at 1-800-643-2353.
Tip: If your organization has not yet completed the Service Agreement Indemnity Enhancement Certification, we highly recommend that you call the Security Hotline at the World-class Customer Service Center (1 800 643-2353) and ask how to become certified. When you complete this certification and administer your DEFINITY system according to Avaya’s fraud prevention requirements, Avaya will indemnify your organization for charges associated with toll fraud.
You can reduce your company’s risk of toll fraud by following a few important guidelines.
1 Protect system administration from unauthorized access. Make sure all system administration and maintenance logins are secure. Change your passwords frequently.
2 Deny unauthorized remote access. If you do not use remote access, disable all its related features. If you use remote access, require barrier codes and set your authorization codes, if applicable, at the maximum length. Also, change these codes frequently.
3 Restrict individual ability to make international calls. Set up class of restriction groups to allow only certain people to call international numbers required for your business.
4 Protect access to information stored in voice mail. Require passwords for access to voice mailboxes. Use complicated passwords and change the passwords regularly.
5 Deny any transfer from a voice mail system to a dial tone. Place restrictions on the ports that allow access to and from your voice mail system. Activate "secure transfer" features in voice mail systems.
6 Use system software to intelligently control call routing. Set up your system to control how each call is handled or routed. If possible, use time-of-day routing to limit the use of your system during off hours.
7 Place protection on systems that ask callers to dial digits. Restrict certain users’ access to dial tone. Restrict the digit combinations dialed at prompts.

Avaya Site Administration Reference
107
8 Monitor traffic and system activity for suspicious call patterns. Use your traffic reports and call detail records to monitor call activity. Activate features that deny access to your system when unauthorized attempts are detected.
9 Provide physical security for telecommunications assets. Restrict unauthorized access to equipment rooms and wire connection closets. Keep translation backups, system manuals, and reports in a safe place.
10 Educate system users to recognize toll fraud activity and react appropriately. Train your users how to protect themselves from inadvertent compromises to system security.
11 Monitor call traffic over vectors. Vector fraud is one of the most common types of toll fraud because vectors route calls based on the class of restriction (COR) assigned to the VDN. Refer to BCS Products Security Handbook or your Avaya representative for more information. If you do not have a copy, you can order one from the Publications Center.
Using Call Detail Recording reports to detect problems
Call Detail Recording (CDR) collects detailed information about calls handled by your system. This CDR information can be sent directly to a printer or into call accounting software. You can use the printed CDR output or call accounting reports to monitor calls on your system and look for possible toll fraud problems.
Review your call accounting reports or CDR output each day to help detect possible toll fraud. When reviewing these records, look for:
unusual calling patterns
numerous calls to the same number
calls outside of normal business hours
long calls
calls to suspicious destinations, including international calls not typical for your business
patterns of authorization code usage (same code used simultaneously or high activity)
high numbers of "ineffective call attempts" indicating attempts at entering invalid codes
undefined account codes
attempts to change the access code or to use an invalide access code when using conferencing feature
If you are unfamiliar with reading CDR printed output, you’ll want to refer to the description of CDR in the Administrator’s Guide for Avaya Communication Manager Software.
If your organization uses call accounting software to analyze your CDR output, you probably receive formatted reports that list the information you need to detect possible toll fraud. If you have questions about reading your call accounting reports, refer to your call accounting software manuals.

Avaya Site Administration Reference
108
Using Security Violations Notification to detect problems
You can administer Security Violations Notification so that the system notifies you and provides reports when users enter invalid information. You want to know about the following types of violations, which may indicate an attempt to breach your security:
login violations
remote access barrier code violations
authorization code violations
station security code violations
For example, let’s have the system notify us at extension 8000 when someone tries to enter more than 3 invalid authorization codes within a 1-minute time span.
To set up Security Violations Notification for our example:
1 Open a GEDI window for the voice system you want to administer.
2 Type change system-parameters security and press the ENTER key. The Security-Related System Parameters screen appears.
3 In the SVN Authorization Code Violation Notification Enabled field, type y and press the ENTER key. Additional fields now display on the screen.
4 In the Originating Extension field, type the extension you want the system to use to originate the call. Use the extension of an unused non-dial station.
5 Enter 8000 in the Referral Destination field. Use the extension you want the system to notify.
6 If the referral destination is on a different system or is a non-display phone, fill in the Announcement Extension field.
7 Enter 3 in the Authorization Code Threshold field. Enter the maximum number of invalid entry attempts you want to allow.
8 Enter 0:01 (1 minute) in the Time Interval field. Use an hour:minute format for the amount of time you want the system to use for the monitor interval.
9 Click the Enter button on the GEDI window to save your changes.
10 Click to close the GEDI window.
About system security
Customers are solely responsible for the security of their system, network, and access to hardware and software.
Avaya strongly recommends that customers use passwords to prohibit access to their systems and to routinely change those passwords to maintain security.
Customers should always change passwords immediately after external vendors have completed installation, maintenance, troubleshooting, or other tasks on their system.

Avaya Site Administration Reference
109
Using Native Names
Using Native Name
To enter the native name, you must use the Input Method Editor (IME) application. The IME application provides the ability to enter Japanese, Korean, and Chinese characters without requiring a special keyboard. However, you must enable the IME application manually. Otherwise, the keyboard input will remain in the default language.
The IME icon appears in the Windows system tray and indicates the language you are currently using. For example, if you are using English, the IME icon in the system tray will display EN. If you are using French, the IME icon in the system tray will display FR.
To enter the native name, perform the following steps:
1 Click on the IME icon in the Windows system tray.
A menu appears displaying the languages installed on your PC.
2 Select the language you want to use.
3 Type the native name in Avaya Site Administration.
Using the Avaya Bulk Import Tool (ABIT)
The Avaya Bulk Import Tool (ABIT) enables you to edit station administration data via a user-friendly interface and prepare a formatted text file. You can then import this file into Avaya Communication Manager via Avaya Site Administration. ABIT provides the platform for editing the station data that might use Avaya Eurofont/Optrex (Kanafont) in Name1 or Native Name (Unicode). ABIT then converts Avaya Eurofont/Optrex or Native Name to the format required by Avaya Communication Manager.
With ABIT, you can directly enter Name1 and Name2 names associated with an extension. For Name1, ABIT uses Avaya Eurofont/Optrex. For Name2, ABIT uses Unicode.
Requirement
ABIT uses Microsoft Excel 2000 or later.
Getting ABIT
You can download ABIT from http://avaya.com/support.
Starting ABIT
To start ABIT, open the ABIT file. You must enable macros in order to use ABIT.
Importing Data
You can import a formatted text file into ABIT. During the import, you are prompted to enter:
the place in ABIT where you want to put the data
the import file name
the delimiter
It is highly recommended that you perform a backup before you import the file. An import is irreversible. All existing data in ABIT is overwritten.

Avaya Site Administration Reference
110
Editing Data
You may directly enter or change data in ABIT. ABIT will verify data accuracy in the extension, Name1, and Native Name. For example, an extension should be one to 10 digits in length. The Name1 and Name2 values must be less than 27 characters. ABIT checks the characters in a Name1 value to verify that those characters are in the Avaya Eurofont or Optrex (Kanafont) character set.
When using extended ASCII in a Name1 value, you may be unable to use all 27 characters because of data conversion. The Name2 value can include any characters supported by the Windows platform, but a user may not "mix" any two distinct writing scripts. (ASCII is excluded.) For example, you cannot include Hebrew and Japanese characters in a Name2 value.
Saving Station Data
After entering all the data in ABIT, you may save the file by clicking on the Save Station Data button. The Name1 and Name2 data are saved in the appropriate character sets. Because Name1 uses the Avaya Eurofont/Optrex character set, the Name1 data, together with the Name2 data, will not display properly in any other editor.
Entering Native Names
Use this procedure to add or edit the name of a system object in native language. You can specify the native name for the following system objects:
Station
Hunt Group
Trunk Group
VDN
NOTE: The object must exist already on the voice system. You cannot add a new object to the voice system via this procedure.
To add or edit the name of a system object in native language:
1 In the Target System box on the toolbar, select the appropriate voice system.
2 On the browser pane, click the Tasks tab.
3 On the Tasks tab, click General.
4 Click MultiLingual Name Wizard.
The MultiLingual Wizard Task – Select Object dialog box appears.
5 From the drop-down list box, select the appropriate system object.
6 From the Specify Max Rows for this Object box, select the number of entries you want to add or change for this object.
7 Click Next.
The Display Grid dialog box appears.

Avaya Site Administration Reference
111
8 Perform one of the following steps:
If you selected hunt-group, perform one of the following steps:
o Enter the number in the group number box, enter the name in the Group Name box, and then enter the native language name in the Native Name box.
o Click View Available Objects, select the hunt group(s) you want to change from the Hunt-Group Browser dialog box, click OK, and then enter the native language name in the Native Name box.
If you selected station, perform one of the following steps:
o Enter the name in the Name box, and then enter the native language name in the Native Name box.
o Click View Available Objects, select the station(s) you want to change from the Hunt Group Browser dialog box, click OK, and then enter the native language name in the Native Name box.
If you selected trunk-group, perform one of the following steps:
o Enter the number in the group number box, enter the name in the Group Name box, and then enter the native language name in the Native Name box.
o Click View Available Objects, select the trunk group(s) you want to change from the Trunk-Group Browser dialog box, click OK, and then enter the native language name in the Native Name box.
If you selected vdn, perform one of the following steps:
o Enter the name in the Name box, and then enter the native language name in the Native Name box.
o Click View Available Objects, select the VDN(s) you want to change from the VDN Browser dialog box, click OK, and then enter the native language name in the Native Name box.
9 When finished, click Next.
The MultiLingual Wizard Task – Schedule dialog box appears.
10 In the Name box, enter a short description of this task.
11 Perform one of the following steps:
If you want to run this task now, click the Run Now check box. If you also want to save this task so you can modify it and/or run it later, click the Save information in tree check box.
If you want to schedule this task to run later, click the Schedule this task to run check box, and either accept the default run time and date, or click Schedule and set the appropriate date, time, and frequency.
If you want to save this task so you can modify it and/or run it later, click the Save information in tree check box.
12 Click Next.
The MultiLingual Wizard Task – Summary dialog box appears.
13 Click Finish.

Avaya Site Administration Reference
112
Importing Native Names
Using the Import wizard, you can import Native Name (Name2) and script tag data for the following objects:
stations
hunt groups
trunk groups
VDNs
Native Name cannot exceed 27 UTF-8 encoded characters.
The script tag must be a binary value representing an OR of the scripts used.
NOTE: You cannot enter or view Unicode characters in the Native Name field and Name field of the Import grid for the following objects:
stations
hunt groups
trunk groups
VDNs
To enter Unicode characters for these objects, you must use the MultiLingual Name wizard or the Avaya Bulk Import Tool (ABIT).
Exporting Native Names
Using the Export wizard, you can export Native Name (Name2) and script tag data for the following objects:
stations
hunt groups
trunk groups
VDNs
Native Name cannot exceed 27 UTF-8 encoded characters.
The script tag must be a binary value representing an OR of the scripts used.
NOTE: You cannot enter or view Unicode characters in the Name field of the Export grid for the following objects:
stations
hunt groups
trunk groups
VDNs
To enter Unicode characters for these objects, you must use the MultiLingual Name wizard or the Avaya Bulk Import Tool (ABIT).

Avaya Site Administration Reference
113
Troubleshooting
ASA connection errors
Access denied
The voice system or messaging system you are trying to reach has denied you access. Check the login name and password or secret key for this connection, or use the manual connect feature.
For security reasons, the system that you are trying to connect to has not given a specific reason why your access has been denied. If you are sure that your login and password (or login and ASG Secret Key) are correct, then you should contact the administrator of the system you are connecting to for help.
ASG is enabled
The voice system or messaging system indicates that ASG not enabled for this login, but you have specified in the System Properties screen that it is not enabled.
Check the login parameters that you set in the System Properties screen.
Avaya Site Administration will display this error message if, in the System Properties screen, you entered a login name that has ASG enabled and then incorrectly specified that Avaya Site Administration should supply the system with a password. To fix the problem, either:
Specify a login that does not use ASG, or
Leave the login name as is, and check the ASG option instead of the password option. Then enter the appropriate 20-digit octal key for that system and login.
ASG is not enabled
The voice system or messaging system indicates that ASG is not enabled for this login, but you have specified in the System Properties screen that it is enabled.
Check the login parameters that you set in the System Properties screen.
Avaya Site Administration will display this error message if, in the System Properties screen, you entered a login name that does not have ASG enabled and then incorrectly specified that ASG was enabled for this login. To fix the problem, either:
Specify a login that uses ASG, or
Leave the login name as is, and check the Password option instead of the ASG option. Then enter the appropriate password.
Busy
Your modem or data module has received a busy signal for the number you are dialing.
1 Confirm that you are dialing the correct number, as follows:
a) Verify the number that Avaya Site Administration is having the modem dial, by looking in the Connection Properties screen for that connection.
b) Write down the phone number and try calling it yourself, using a regular phone.
If the phone number is incorrect, fix it in the Connection Properties screen.

Avaya Site Administration Reference
114
2 If the phone number is busy:
If you are dialing a voice system via netcon channels:
The netcon hunt group may be fully occupied.
The voice system may not be properly configured with netcon channels. This is unlikely, however.
If you are dialing a voice system via the INADS port:
The INADS port is probably in use by someone else. You may want to call the people most likely to be using it, or if you are certain that no one else is using it, reset the INADS modem. Do not consider this option lightly! Your system uses the INADS port to send out trouble reports!
If you are dialing a voice system that is set up with a modem pool:
The modem pool may be fully occupied with calls.
Cannot initialize serial port
Avaya Site Administration experienced a problem initializing your serial port.
Avaya Site Administration encountered a problem while setting parameters that control the serial port connection.
1 Try rebooting your computer.
2 If the problem persists, see if you can access the serial port using Hyperterminal.
3 If you can’t access the serial port using Hyperterminal, consult your system administrator and diagnose the computer for hardware problems.
Cannot open serial port
Avaya Site Administration experienced a problem opening your serial port.
1 Try rebooting your computer.
2 If the problem persists, see if you can access the serial port using Hyperterminal.
3 If you can’t access the serial port using Hyperterminal, consult your system administrator and diagnose the computer for hardware problems.

Avaya Site Administration Reference
115
Command Timed Out
Avaya Site Administration did not receive an expected response from the system within the timeout period specified in the Connection Properties screen.
1 Are you trying to connect to a system using a manual login?
If yes,
You may be making a common manual login mistake.
If you are starting terminal emulation on the messaging system, after you click Continue or press F7 on the manual login screen, does the terminal emulation window display a prompt (for example, a percent sign (%))? If yes, Avaya Site Administration will not work. Have your messaging system administrator assign you a "vm" or "sa" login, and use only those logins when you access the messaging system using Avaya Site Administration.
If no, see the questions below.
2 Are you trying to connect to a system using a modem or data module? If yes,
Have you successfully used this modem (or data module) to connect to this voice system or messaging system in the past?
If yes, then either someone has changed the setup of your modem (or data module) or something has changed on the remote end.
Determine whether any connection settings have changed in Avaya Site Administration by accessing the Connection Properties screen for that connection.
Ask the people in charge of the modem (or data module) on the remote end if anything has changed.
If you have not successfully used this modem (or data module) to connect to this voice system or messaging system in the past, see the questions below.
Can you use the modem (or data module) to dial other locations?
If yes, the modem (or data module) is working, and so is the serial cable and the phone cord. However,
Something may be wrong in your connection setup to the voice system or messaging system. The problem could be with any of the following:
an incorrect phone number
an incorrect Login timeout
If you are dialing long distance, you may have to increase the Login timeout substantially to allow for the delays inherent in connecting long distance. To increase the timeout value, access the connection properties screen.
(For data modules only:) If you are accessing a Prologix voice system, you may need to increase the Login timeout value to 3000 milliseconds (3 seconds) because Prologix voice systems require slightly more time to respond than other devices. To increase the timeout value, access the Connection Properties screen.
an incorrect COM port
an incorrect initialization string
You may be experiencing line noise.
Line noise can corrupt the messages being sent from the voice system or messaging system. Because Avaya Site Administration will not connect to a

Avaya Site Administration Reference
116
system until it hears the correct response, if line noise is corrupting the responses, then Avaya Site Administration may wait for the correct response until the Login timeout value is exceeded.
If you suspect you are experiencing line noise, try placing the call again to get a different line. If the problem continues, you may want to talk to your telecommunications manager or the telephone company about line quality.
If your modem (or data module) and the remote modem (or data module) both support error correction (a feature that is designed to mitigate line noise), then make sure it is turned on. (See Choosing the correct initialization string.)
If you can’t use the modem (or data module) to dial other locations, or if you don’t know, see the questions below.
(For data modules only:)
Is the data module a 7400A? If yes, troubleshoot here.
Is the data module a 7400B Plus? If yes, troubleshoot here.
Is the data module an 8400B Plus? If yes, troubleshoot here.
Can you connect to the modem (or data module) using Hyperterminal?
To find out, start a Hyperterminal session, using the same COM port as you specified in the Connection Properties screen.
If you can’t connect to modem (or data module) using Hyperterminal, the problem could be any of the following:
The modem (or data module) is not powered on.
The serial cable connecting the computer to the modem (or data module) is not plugged in securely.
You are using the wrong COM port.
The serial cable is defective
The COM port is defective.
If possible, try moving the modem (or data module) to another COM port, choose the new COM port from the Connection Properties screen, and retest the connection.
The modem (or data module) is defective.
You can try replacing the modem (or data module) with another one, but because these peripherals are generally reliable, and because setting up a new modem or data module is time-consuming and may require significant troubleshooting and configuration effort, you may want to resort to this only as a last measure.
If you can connect to the modem (or data module) using Hyperterminal, and it responds, but you were not able to place calls using it, see the questions below.
Is your phone cord faulty? (This connects the modem or data module to the phone jack.)
To find out, replace the current phone cord with another one that you know works, and then retest the connection. For analog modems only, you might want to try connecting an analog phone to the cord and listening for dial tone.
3 Are you trying to connect to a system using a direct serial cable connection?
If you don’t know, view the Connection Properties screen for the problematic connection.
If yes, is the serial cable connected correctly?
If no, see the questions below.

Avaya Site Administration Reference
117
4 Are you trying to connect to a system over a computer network?
If you don’t know, view the Connection Properties screen for the problematic connection.
If yes, the problem could be any of the following:
The FQDN or IP Address may be incorrect.
To find out, ping the computer using the FQDN or IP Address you specified in the Connection Properties screen.
The IP Port Number may be incorrect.
The computer network may be set up incorrectly.
If you are connecting through a terminal server, the terminal server may be set up incorrectly.
5 Is your voice system or messaging system overloaded or responding slowly? (Check last because not common.)
Log into the system manually to get an idea of how slow the login process is and whether the system appears to be behaving normally.
If yes, If the system is slow to respond, increase the Login timeout option by accessing the Connection Properties screen.
If system response times are normal, the problem must be in one of the items mentioned earlier in this topic.
Connection lost
Your modem or data modules indicates that the connection was unexpectedly broken.
Connections can be lost due to line noise (static on the line, crossed lines, telephone receiver lifted on the same line, call waiting etc.) or due to a physical connection break (cables, sockets & plugs).
1 Restart the connection. The problem may only be temporary.
2 If that doesn’t fix the problem, make sure that the cables and phone cords to and from your modem or data module are plugged in securely.
3 Confirm that the modem or data module you are dialing is still working. To do so, manually dial the phone number that is listed in the Connection Properties screen for this connection.
4 Confirm that the phone cord is functioning by replacing it with one that you know works.
5 Confirm that the serial cable is functioning properly.
6 If your modem or data module is using a phone line that you can administer, check the status of the analog or digital port that it is connected to.
7 Confirm that your modem or data module and the device you are connecting to are both set up with complete configurations. This message often occurs if your modem negotiates a slower connection than the other modem (or vice versa); the modems will drop the connection rather than sustain a slow connection.

Avaya Site Administration Reference
118
Corrupt data received
Avaya Site Administration has received data that is corrupt or unexpected.
This error occurs when noise is experienced on a connection. To avoid this problem, consider using an error-resistant connection such as a data module or network connection. If you are connecting to a system with an external modem that is capable of error correction, consider turning error correction on, on both your modem and the remote one. To do so, consult the documentation that came with your modem to design and insert a new initialization string that has the desired effect. (You may have to work with someone at the remote location to reconfigure the remote modem.)
Data is locked
Avaya Site Administration can not perform the requested action because someone else is performing an activity that takes exclusive control of resources on the voice system or messaging system that you are connected to.
Wait for the command that is holding the resource to complete.
Device does not exist
Avaya Site Administration could not find the information it needs in order to communicate with the COM port on your computer. This may have happened because someone deleted a COM port from the Ports screen, which Avaya Site Administration had been using for this connection. (To check, you can access the Ports screen by choosing Ports from the Tools menu.) To fix the problem, answer the following questions:
1 Is the correct COM port selected in the Connection Properties screen?
To find out, determine which COM port you are using and see if it matches the COM Port setting specified in the Connection Properties screen.
If the COM Port you are using doesn’t match the setting in the Connection Properties screen, then change the setting.
If the COM Port does match the setting in the Connection Properties screen, read the next question.
2 Is the COM Port set up in the Ports screen?
Just because you specify a COM port in the Connection Properties screen doesn’t mean it is actually set up for use. The Ports screen shows what COM Ports have been set up. By default, Avaya Site Administration sets up only COM1 and COM2 for use. If you are using a different COM port, or if your settings need to be different than the defaults that Avaya Site Administration provides for COM1 and COM2, you need to use the Ports screen.
To find out if the COM port has been set up, access the Ports screen (choose Ports from the Tools menu) and see if the COM Port you are using is listed there.
If the COM Port you are using is not listed, you can either:
Add a COM Port
Use one of the COM Ports that are listed in this screen, making sure you change the setting in the Connection Properties screen and that you physically reconnect the peripheral to the COM Port you choose (consult your computer’s manual and the peripheral’s manual for details on how to do this).
If the COM Port you are using is listed, check to see that the settings are correct.

Avaya Site Administration Reference
119
General communications error
A communications-related error has been detected and reported by your computer.
An unrecoverable error has occurred. The message displayed has been reported by the operating System or Avaya Site Administration.
Incorrect device
Avaya Site Administration has determined that the system you are trying to reach has probably been configured in Avaya Site Administration as a voice system, when it is a messaging system, or vice versa.
For example, this error occurs if you have accidentally configured a voice system as an Intuity AUDIX or vice versa.
To correct the problem, check the information in the System Properties screen or the Connection Properties screen for this system. Ensure that it matches the type of the device you have configured.
Incorrect login
The voice system or messaging system you are contacting indicates that the login ID you have specified is not recognized.
You may want to:
Check the spelling of the login ID you are using. If Avaya Site Administration is logging you in automatically, you can find the login ID in the System Properties screen.
Check that your login exists and is enabled on the system you want to connect to.
To do so, log in with a different login ID and password (if you know one) that has permission to view the login information.
Invalid password
The voice system or messaging system has informed Avaya Site Administration that the password you supplied is invalid.
If you are logging in manually, check the spelling of your password. Re-enter the password for the system and try again.
If Avaya Site Administration is logging you in automatically, check the spelling of the password you entered on the System Properties screen.

Avaya Site Administration Reference
120
Modem initialization error
Your modem or data module has reported an error pertaining to the phone number or initialization string that Avaya Site Administration is sending it.
1 Have you successfully used this modem (or data module) to connect to this voice system or messaging system in the past?
If yes, then someone or something has changed the setup of your modem (or data module).
Determine whether any connection settings have changed in Avaya Site Administration by accessing the Connection Properties screen for that connection.
If you have not successfully used this modem (or data module) to connect to this voice system or messaging system in the past, see the questions below.
2 Can you use the modem (or data module) to dial other locations?
If yes, the modem (or data module) is working, and so is the serial cable and the phone cord. However,
Something may wrong in your connection setup to the voice system or messaging system. The problem could be with any of the following:
An incorrect phone number
An incorrect initialization string
Network connection failed
Avaya Site Administration has encountered a problem initiating a network connection to the voice system or messaging system. Avaya Site Administration cannot reach the system, or can not find the system with the details you have provided in the Connection Properties screen.
1 You may want to re-try the connection. There may be a temporary problem with your computer network.
2 If Windows Networking is set up on you computer, do you have access to your normal network services (like e-mail or the web)?
If you do, and they are working as you expect them to, then your Windows Networking is probably OK. If you do not have access, then you may want to troubleshoot your Windows Networking setup.
3 Check that the host system you are trying to connect to exists on your network and is operating.
Check the spelling of the host and port number in the Connection Properties screen for the system you are trying to connect to.
Check that the system you are trying to connect to can be reached from your computer by pinging it. If the system does not respond to the ping, then:
that the system you are trying to connect to is working. Check its power and use the manufacturer’s instructions to check the health of the system.
If the system is okay, check your network cable.
If the network cable is okay, try to ping another well-known system (like your department server). If the system does not respond, then troubleshoot your Windows Networking setup.

Avaya Site Administration Reference
121
If you are operating in an environment without a Domain Name Server (DNS) or in an environment where your DNS is untrustworthy, then you should use the IP address of the system you wish to connect to instead of the host name in the Connection Properties screen (i.e. Use 123.192.10.17 instead of mysystem or mysystem.mycompanyname.com).
4 Check that the port number you are using is correct in the Connection Properties screen for the system you are trying to connect to.
Check with your system administrator or the system’s manual to determine what the correct port number is. A common port number is 23. 23 is the "well-known" port number for telnet, a network text terminal utility and is also the standard port number for INTUITY AUDIX.
If you are connecting through a terminal server, then the port number is configured through the terminal server. Ask your administrator, or use your terminal server documentation to determine what the correct port number is.
5 Check how many network connections the system that you are trying to reach supports.
The system you are connecting to may only support a limited number of network connections. If the system has reached the maximum number of connections, then it will refuse connections and display this error message. The documentation for the system you are connecting to will indicate the connection limitations of that system. In this situation, you will be able to connect if another user disconnects.
If you have defined several network connections to the same system, then you may be the person who is holding a connection open. If a system only supports one network connection, and you define two network connections, your second connection will fail. Check Avaya Site Administration’s Connection Status tab to see if you already have a connection open to this system.
No carrier
Your modem or data module was not able to make a connection with the remote modem or data module.
Possible causes:
Your modem may not have had enough time to make the connection. To fix the problem:
1 Give your modem more time to make a connection with the remote modem by increasing your modem’s timeout value (see Designing new initialization strings or refer to the documentation that came with your modem or data module). If you do, then also:
2 Give Avaya Site Administration more time to make the initial connection with the remote voice system or messaging system, by increasing the Login timeout value in the Connection Properties screen.
Your modem settings may be incompatible with those of the remote modem (the modems could not negotiate a common protocol to communicate with). To fix the problem, make sure you are using the correct initialization string.
You may be experiencing line noise.
Line noise can corrupt the messages being sent from the voice system or messaging system. Because Avaya Site Administration will not connect to a system until it hears the correct response, if line noise is corrupting the responses, then Avaya Site Administration may wait for the correct response until the Login timeout value is exceeded.

Avaya Site Administration Reference
122
If you suspect you are experiencing line noise, try placing the call again to get a different line. If the problem continues, you may want to talk to your telecommunications manager or the telephone company about line quality.
If your modem (or data module) and the remote modem (or data module) both support error correction (a feature that is designed to mitigate line noise), then make sure it is turned on. (See Choosing the correct initialization string.)
No dial tone
Before attempting to dial, your modem or data module checked for dial tone and found none.
Check your phone cable. To do so, replace it with one that you know works.
Confirm that the extension number that the modem (or data module) is dialing from is properly configured on your voice system (if the extension number is part of the public telephone system, then work with your telephone company).
Does your modem have a setup option for detecting different types of dial tone or ignoring dial tone? Check the documentation that came with your modem or data module.
Have you inserted a wait for dial tone character (such as "W") in your dial string? If yes, make sure you are using this character correctly by checking the documentation that came with your modem or data module.
No Ports available
No ports are available on the selected voice system or messaging system.
Consult the system’s administration and maintenance guides.
Password has expired
The password for the account you are using has expired.
You may want to:
Log in manually and respond to the change-password prompts. When you have entered your new password, and the system prompts you for the terminal type – press the continue (F7) button on the manual login box, and then go to Avaya Site Administration’s System Properties screen and change the password to the one you just created.
Alternately, ask your administrator to change your password. After you get the new password, make sure that you enter the new one in Avaya Site Administration’s System Properties screen.

Avaya Site Administration Reference
123
Serial port does not exist
Avaya Site Administration could not find the COM Port that you have selected (in the Connection Properties screen) to use for this connection. To fix the problem, answer the following questions:
1 Is the correct COM port selected in the Connection Properties screen?
To find out, determine which COM port you are using and see if it matches the COM Port setting specified in the Connection Properties screen.
If the COM Port you are using doesn’t match the setting in the Connection Properties screen, then change the setting.
If the COM Port does match the setting in the Connection Properties screen, read the next question.
2 Is the COM Port set up in the Ports screen?
Just because you specify a COM port in the Connection Properties screen doesn’t mean it is actually set up for use. The Ports screen shows what COM Ports have been set up. By default, Avaya Site Administration sets up only COM1 and COM2 for use. If you are using a different COM port, or if your settings need to be different than the defaults that Avaya Site Administration provides for COM1 and COM2, you need to use the Ports screen.
To find out if the COM port has been set up, access the Ports screen (choose Ports from the Tools menu) and see if the COM Port you are using is listed there.
If the COM Port you are using is not listed, you can either:
Add a COM Port
Use one of the COM Ports that are listed in this screen, making sure you change the setting in the Connection Properties screen and that you physically reconnect the peripheral to the COM Port you choose (consult your computer’s manual and the peripheral’s manual for details on how to do this).
If the COM Port you are using is listed, check to see that the settings are correct.
Remote reset
Avaya Site Administration has been unexpectedly disconnected by the remote system. This is generally a TCP/IP communications problem in which some component of the computer network, or the voice system (or messaging system), loses power or malfunctions.
1 Try re-connecting to the system. The problem may be temporary.
2 If you can, check that the voice system or messaging system is powered up and functioning properly.
3 Check that your computer network is functioning properly by pinging the voice system or messaging system using ping.
a) If the voice system or messaging system responds to the ping, you might want to retry the connection.
b) If the system does not respond, or the ping requests time out, then either:
make sure your cable connection to the computer network is secure and is functioning properly.
contact the person responsible for your computer network.
4 In the worst case, you may have to reset the system you are connecting to.

Avaya Site Administration Reference
124
Use the manufacturer’s instructions to find out how to diagnose system health. If you are connecting through a terminal server, then you may have to reset the terminal server (and not the system you are trying to connect to).
Serial port error
Avaya Site Administration has encountered an error with the serial port on your computer. Data has been lost due to a serial port performance problem or error.
Increasing COM port reliability
If you are getting persistent tx or rx problems, then you should consider changing your COM port settings.
From the Tools menu, select the Ports option. Ensure that the COM port has the correct speed and data settings for the type of peripheral (modem, data module, and so on) or system you are connecting to. Incorrect speed settings will often cause this error.
Decreasing maximum modem connect speed
Sometimes a modem will connect at a higher speed than your computer is capable of keeping up with. On most modems you can change the initialization string of your modem to control the maximum rate that it will connect with. You might consider dropping modem connection speeds back to 9600bps or less to determine the level at which problems occur. On a US robotics Sportster modem, the command to set your modem to a maximum connect speed of 9600bps is AT&N6. Check your modem manual before setting your maximum connect speed.
Serial port is in use
Another application on your computer is using the serial port you are trying to use.
To resolve the problem, you may want to:
Identify the competing application and close it down.
Connect your modem (or data module) to another serial port (consult your computer’s manual and your peripheral's manual for details on how to do this). Then fix the COM Port setting in the Connection Properties screen to reflect the new port, and (if necessary) configure the new COM Port settings using the Ports screen. (To access the Ports screen, choose Ports from the Tools menu.)
Reboot your computer.
Some Windows applications do not clean up effectively when they are shut down. This can make your Windows operating system lock a serial port needlessly until you reboot your computer. In addition, on some computers, power-saving options (if you turn them on) can cause serial ports to appear to be in use.
If you are using Windows NT, it may give you a message when it starts (after rebooting, for example) indicating a conflict with the serial port. Use the Windows NT online help system to resolve these types of conflict.
If you are using Windows 95 and 98 (not NT), there is a Device Manager in the Control Panel that may show a conflict with a serial device. To use it, complete the following steps:
1 From the Windows Start menu, choose Settings->Control Panel.
2 In the Control Panel screen, double-click the System icon.
3 Click the tab called "Device Manager."

Avaya Site Administration Reference
125
4 In the tree, right-click the "Ports (COM and LPT)" to view the properties of each of the COM ports.
Windows 95 or 98 will determine if the COM ports are functioning correctly. If they are not, the screen will display potential solutions.
Serial port settings could not be found
Avaya Site Administration could not find the information it needs in order to communicate with the COM port on your computer. To fix the problem, answer the following questions:
1 Is the correct COM port selected in the Connection Properties screen?
To find out, determine which COM port you are using and see if it matches the COM Port setting specified in the Connection Properties screen.
If the COM Port you are using doesn’t match the setting in the Connection Properties screen, then change the setting.
If the COM Port does match the setting in the Connection Properties screen, read the next question.
2 Is the COM Port set up in the Ports screen?
Just because you specify a COM port in the Connection Properties screen doesn’t mean it is actually set up for use. The Ports screen shows what COM Ports have been set up. By default, Avaya Site Administration sets up only COM1 and COM2 for use. If you are using a different COM port, or if your settings need to be different than the defaults that Avaya Site Administration provides for COM1 and COM2, you need to use the Ports screen.
To find out if the COM port has been set up, access the Ports screen (choose Ports from the Tools menu) and see if the COM Port you are using is listed there.
If the COM Port you are using is not listed, you can either:
Add a COM Port
Use one of the COM Ports that are listed in this screen, making sure you change the setting in the Connection Properties screen and that you physically reconnect the peripheral to the COM Port you choose (consult your computer’s manual and the peripheral’s manual for details on how to do this).
If the COM Port you are using is listed, check to see that the settings are correct.
Too many users logged in
There is a restriction on the number of administrators that can be logged in to the system you are trying to reach and this limit has been reached. Avaya Site Administration has received a message from the system indicating that the limit was reached prior to your login attempt.
You may want to:
Ask other administrators to drop their connection to the system that you want to connect to.
(For voice systems:) Consult the system’s administration and maintenance guides for help with clearing administrator connections.
(For messaging systems:) If all else fails, have your administrator reset your messaging system.

Avaya Site Administration Reference
126
Unexpected response from device
When logging into a system, Avaya Site Administration encountered a response that it was not expecting.
Try logging in manually to diagnose the login problem. It may be that you are connecting to the wrong system, or the system you are connecting to is behaving strangely.
Unknown response from device
After your modem or data module dialed your voice system or messaging system, your modem or data module sent Avaya Site Administration a response that Avaya Site Administration does not understand.
Avaya Site Administration expects your modem to respond with a message such as "ERROR", "CONNECT", "BUSY" or "NO DIALTONE". Your modem or data module may not be configured to generate text error messages. Read the documentation that came with your modem or data module to find out what commands you should use in the initialization string to make the device generate text error messages. Then, design a new initialization string (or, if you already designed a custom initialization string, modify it) that uses the appropriate commands.

Avaya Site Administration Reference
127
Voice system problems
Keeping baseline information
Baseline information consists of:
the original voice system configuration
any upgrades and changes
voice system capabilities (for example, if your company uses a call center or telecommuting)
The very best set of records starts with information on the original set up of your voice system. Most companies keep at least one paper copy of baseline information, with duplicate paper or electronic copies kept off site. Update this information any time you make changes to your voice system.
Use baseline information to help you diagnose problems with your phone system. Also, this information is crucial in the event you need to reconstruct the information on your voice system, such as in a disaster recovery.
Note: Avaya Warranty and Service Agreement customers are automatically enrolled in the Emergency Service Plan. The plan provides coverage for disasters such as fire, flood, and storms. Under this plan, Avaya restores basic telephone service on a priority basis. We can also lease an Avaya Communication Manager system to Warranty and Service Agreement customers or can ship a replacement Communication Manager system, if necessary.

Avaya Site Administration Reference
128
Retrieving baseline information
You can retrieve much of the hardware and configuration information you need right from the Avaya Site Administration GEDI screens.
Use display commands to see individual records.
Use list commands to view a group of records.
After display or list commands, choose File>Print to create paper copies of the records.
Keep track of the equipment and settings listed in the following table. Use the commands in this table to access the appropriate screens.
voice system component
information
group records
individual records
voice system configuration
the features your company purchased
di spl ay syst em par amet er s cust omer
voice system capacity
capacities enabled on your voice system
di spl ay capaci t y
cabinets and carriers
number of cabinets and carriers
l i s t cabi net
circuit packs board type and vintage
l i s t conf i gur at i on al l
di spl ay c i r cui t - packs
trunks type of service l i s t t r unk-gr oup
di spl ay t r unk-gr oup n
phones model number, extension number, name, location, cable, and jack
l i s t s t at i on l i s t ext ensi on- t ype
di spl ay st at i on n di spl ay ext ensi on n
Class of restriction (COR)
calling privileges
l i s t cor di spl ay cor n
Class of service (COS)
di spl ay cos
feature access codes
di spl ay f eat ur e-access- codes
feature parameters
di spl ay syst em-par amet er s f eat ur es
dial plan di spl ay di al pl an
coverage paths l i s t cover age pat h
di spl ay cover age pat h n

Avaya Site Administration Reference
129
announcements
extension, type, name, port
di spl ay announcement s
vectors Vector Directory Number (VDN), vector number
l i s t vect or l i s t VDN
di spl ay vect or n di spl ay VDN n
hunt groups l i s t hunt -gr oup
di spl ay hunt -gr oup n
Backing up voice system data
Backup your system regularly to keep your records up to date.
Use save translations to backup changes to your voice system.
Use save announcements to backup changes to announcements.
To verify that a backup was successful, review the Command Completion Status field.
If the status field says Success, then the backup of the translations or the announcements was successful.
If the status field does not say Success, record the Error Code and use the following list to determine what happened:
1 = unable to save to active-spe device
2 = unable to save to standby-spe device

Avaya Site Administration Reference
130
Checking voice system status
Viewing the system status
Use system status screens to monitor various parts of your system. To be prepared for problems, you’ll want to become familiar with what these reports look like when your system is operating well.
To view a list of the types of status reports you can run:
1 Open a GEDI window for the voice system you want to administer.
2 Type status and click the Help button. The Help screen appears.
3 After the word status, type the item from the help screen that you want to check the status of. For example, to check the status of a station, type status station nnnn, where nnnn is the station you want to check.
4 Click to close the GEDI window.
Viewing general system operations
Use the status health screen to determine whether everything is operating smoothly and to see a summary of your system status. You can use this report to look at alarms, see if anything is busied out, or check for any major problems.
To view the status health screen:
1 Open a GEDI window for the voice system you want to administer.
2 Type status health and press the ENTER key.
3 Click to close GEDI.
Viewing the status of a station
Use status station to view the setup of each individual station. This command is often the first place to gather information when a user reports a problem with a phone.
For example, if a user tells you that the phone rings a short ring and the call goes directly to coverage, use status station to see if SAC is activated on the user’s extension.
To view the status of extension 7236:
1 Open a GEDI window for the voice system you want to administer.
2 Type status station 7236 and press the ENTER key.
3 Click to close GEDI.
Viewing the status of your cabinets
Use the system status cabinet screen to become familiar with the service state of your individual cabinets. This screen also reports any alarms against your cabinets.
To view the status of your system cabinets:
1 Open a GEDI window for the voice system you want to administer.
2 Type status system all-cabinets and press the ENTER key.
3 Click to close GEDI.

Avaya Site Administration Reference
131
Viewing changes to the system (history report)
Use the history report to see what kind of changes have been made to your system. For example, if users report that the coverage on their phones is not working, check the history report to see if any changes have been made to a coverage path.
The history report lists the date, time, port, login, action taken, and the screen for any change to your system. The history report does not show you exactly what data or field was changed.
To view the history report and review the recent changes to your system:
1 Open a GEDI window for the voice system you want to administer.
2 Type list history and press the ENTER key.
3 Click to close GEDI.

Avaya Site Administration Reference
132
Solving common voice system problems
Learning to think like a voice system
"Thinking like a voice system" means that you use your knowledge of how call routing works to generate an overview of the problem situation. When trying to troubleshoot a problem, identify the beginning and ending points of the attempted connection and trace the route that the call should follow to isolate where the call is breaking down.
When attempting to solve problems, try to "think like a voice system." This approach to problem solving:
provides a starting point and a plan for troubleshooting
makes isolating the location of the problem easier
adds to the understanding of why a problem occurred, which may help prevent problems in the future
helps establish relationships between related problems so that the problems can be solved together rather than separately
As an administrator, the most frequently reported trouble you're likely to receive from your end-users is "My phone is broken." Obviously, you need to gather more information to proceed with troubleshooting. By asking a few key questions you can start to "think like a voice system." Here are some examples:
End-User: "My phone is broken."
Administrator: "What number did you dial?"
End-User: "Someone was calling me."
Administrator: "What number did they call?"
End-User: "My number, 555-1212."
With these answers, you can begin to isolate the problem. You can begin to follow the call's path in the same manner that the voice system processes the call. In this example, the call was going to a station's DID number, so you know it originated from a DID trunk group. Given this information, you can check several possible sources of the trouble.
To effectively "think like a voice system," it helps to understand modern telecommunications, how one phone connects to another, and how calls are routed. The Voice system components and System add ons topics provide information on what parts of the system route and manage calls.
There are other things that you can do to help with troubleshooting. Here are some other suggestions to help you troubleshoot:
Maintain up-to-date call flow documentation. Call flow documentation:
provides data that is difficult to remember, therefore eliminating the need to access the system and gather that data repeatedly, especially for complicated features
allows for easier isolation of problems
provides documentation that is easy to pass from a former administrator to a new administrator
Print out the original station, trunk or appropriate screen BEFORE making any programming changes. This allows you to reset the original settings should a problem result from the change.
Document the steps taken to solve a problem. This is useful when you are talking to the Avaya Helpline or in the event that the problem occurs again.

Avaya Site Administration Reference
133
Be open to alternative solutions, rather than prematurely committing to any one solution to a problem.
Clues can be overlooked when they don't fit into the predetermined solution.
Better or long-term solutions may be overlooked for a short-term convenient solution.
Diagnosing a problem
As a system administrator, an important part of your job is to respond to trouble calls from users. You can identify some of the most common of these problems by following a few simple steps, asking the right questions, and trying to recreate the problem.
Use a set of questions to determine if:
The equipment or process has worked before and is now broken, or if this is a new set-up that you need to correct
The problem comes from your company’s own equipment, or if the problem comes from your vendor
The problem originates within your voice system, or if the source of the problem is outside of your own facility
Ask the following basic questions of yourself, your users, and other voice system administrators who work with you:
Is this a new feature or piece of equipment, or did it work before but does not work now?
Does the trouble arise when dialing outside the voice system, dialing into the voice system, or dialing inside the voice system?
Can we duplicate the problem?
Solving common phone problems
If you have a problem with a phone, try the following:
ask for the exact symptoms
try to duplicate the problem or have the user show you the problem
look at the phone
find out if the phone was swapped out
check the physical connections (for example, see if the phone is plugged in)
check that the phone is where it is supposed to be
try the phone at another location
ask if the cord or handset was changed
check status station
use display station to look at the station forms page-by-page
check the station screens for SAC, coverage paths
look at printed voice system records for discrepancies
check the alarms and errors logs
clear any alarms and errors
test the boards

Avaya Site Administration Reference
134
Here are some common problems phone users report to their system administrators:
The user cannot dial out
Incoming calls ring but do not reach the user
The message lamp on the phone does not go out
Diagnosing general trunk problems
The following questions help you determine the cause of a problem with a trunk.
Is the trouble on every call or is the trouble intermittent?
Are you getting any sort of recordings when you try to dial out on this trunk?
Can you identify the trunk in question? Use a trunk access code (tac) to identify the trunk, especially if the console has a trunk ID button.
Is there static on the call? This is likely a problem with the trunk external to the voice system.
Have you notified your vendor of this problem?
Diagnosing modem problems
The following questions help you determine the cause of a problem with a modem.
What is the extension of the modem?
Is the modem connected through the voice system?
What is the modem connected to? For example, computer, fax, or CMS?
Have the setup options been changed or checked recently?
What company manufactures the modem?
What is the model number?
Diagnosing printer troubles
The following questions help you determine the cause of a problem with a printer.
What is the problem with the printer?
What is the printer used for? For example, is it connected to the voice system, CMS, CAS, or maybe the messaging system?
Who manufactures the printer?
What is the model number?

Avaya Site Administration Reference
135
Diagnosing password, login, and terminal access problems
If the problem is with remote dial-in access, ask:
How do you dial in?
What type of software or dialing program do you use?
What error messages do you see when you try to dial in?
If your password expired, is not working, or is incorrect, call Avaya for assistance in getting the issue resolved.
Solving call center problems
Can't record an announcement on Integrated Announcement Boards
Callers don't hear announcement
A device in an Auto Answer hunt group doesn't respond
Too many abandoned calls
Customers complain they get a busy signal

Avaya Site Administration Reference
136
Working with alarms and errors
Viewing error logs
The Avaya Communication Manager error log displays a detailed report of components that fail or perform at an unacceptable level. It is a good idea to run and inspect the Communication Manager error logs on a regular basis. You can view all active system errors on the error log. You can also specify a particular component of your system or a certain time period to be reported on the error log.
To view the error log:
1 Open a GEDI window for the voice system you want to administer.
2 Type display errors and press the ENTER key. The Error Report screen appears.
3 To see all current errors, click the Enter button on the GEDI window. OR Indicate the errors that you want to see by entering the information requested in each field.
4 Select File>Print to print the report. Make special note of the information in these fields:
The Port field contains information in several formats:
circuit pack address (UUCSS)
port address (UUCSSss)
2-digit signaling number
administered port number
Mtce Name (the name of the Maintenance Object)
Alt Name (the extension with the error) In this example, Attd1 is the digital port with the errors.
Err Type (represents the error condition category)
Aux Data (represents a detail of the Error Type)
First Occur (indicates the date/time of the first occurrence)
Err Cnt (lists how many occurrences since the first one)

Avaya Site Administration Reference
137
Error report field descriptions
The DEFINITY Error Report screen contains the following fields. See Viewing Error Logs for instructions on how to access this DEFINITY screen.
Field What to enter
Error type Error type
Error list Active-alarms, errors, or cleared-errors
Interval H(our), d(ay), w(eek), m(onth), a(ll)
From/To Time interval by date and time
Cabinet Cabinet number (1-44)
Port Network
Port network number (1-44)
Board Number
5-character board number in UUCSS format: UU=cabinet, C=carrier (A-E), SS=slot (1-20)
Port 7-character port address in UUCSSss format: UU=cabinet, C=carrier (A-E), SS=slot (1-20), ss=circuit
Category Category name (choose from the list below):
adm-conn
detector
generatr
mbus
modem
pncmaint
spe
sys-prt
trkcrk
wireless
announce
dup-spe
inads-link
memory
mssnet
pnc-peer
stabd
tape
trunks
bri/asai
environ
infc
misc
pkt
procr
stacrk
tdm
vc
crd
exp-intf
maint
mmi
pms-jrnl
quick-st
stations
tone
vsp
data-mod
ext-dev
mass-st
mnt-test
pnc
s-syn
sys-link
trkbd
wideband
Extension assigned extension, or blank
Trunk Group
group number between 1-666
Member group member between 1-255, or blank

Avaya Site Administration Reference
138
Clearing an error
If an important component in your DEFINITY system fails, the DEFINITY software records that "event" with code numbers in the DEFINITY error or alarm log. To interpret the error codes and clear the error:
1 Look up the Maintenance Object (MO) (for example, DIG-LINE or PI-LINK) in the DEFINITY ECS Maintenance books for your voice system.
2 Find the error type in the Hardware Error Type table for that MO. To display the Hardware Error Table, see Viewing error logs.
3 Find the note associated with that error type for an explanation of the conditions that generated the error.
4 Perform the recommended procedure to clear the error. The recommended procedure may require you to test alarmed components. Be sure to have test permissions enabled. If any tests fail or abort, you will get an error code for the test.
5 Look up the test error code by MO in your DEFINITY ECS Maintenance books.
6 Find the numbered test listed in the test results.
7 Look for the correct combination of error code and test result in the numbered-test tables.

Avaya Site Administration Reference
139
Alarm logs
Alarms are classified as major, minor, or warning, depending the degree of severity and the effect on the voice system.
warning level and description
reported in INADS?
reported to console?
take this action
major
Critical service degradation
Y Y
(occurs after 4 attempts to call INADS)
Immediate attention
Minor
Some service degradation, but system is operable, usually limited to a few trunks or stations or a single feature
Y Y
(occurs after 4 attempts to call INADS)
Check to see what service is affected
Warning
Failure that causes no significant service degradation
Note:
DS1 off board faults (error type 138) generate warning alarms only, indicating a customer network problem. In this case, warning alarms can cause critical service degradation
N
(INADS can receive some downgraded warning alarms)
N Monitor the situation; check for service or equipment interruption or failure outside the voice system
Alarms are further classified as:
on-board problems originate within the circuitry of the alarmed circuit pack
off-board problems originate in a process or component that is external to the circuit pack

Avaya Site Administration Reference
140
Reading the alarm log 1 Open a GEDI window for the voice system you want to administer.
2 Type display alarms and press the ENTER key.
3 Indicate which alarms you want to view by entering y and ENTER after each alarm type.
Note: Unless you can restrict the trouble to a particular time period, press the ENTER key to see all active alarms. If you choose n for major alarms and y for minor and warning alarms, you will not see the high-level information that you may need to determine what is wrong with your system.
4 Press ENTER to view the alarm report.
5 Click to close GEDI.
Clearing alarm logs 1 Investigate or fix the first major alarm in the log.
2 See if other alarms are retired by fixing the most severe problem first.
Assigning alarm buttons
You can create feature button lamps on any phone to act as alarm indicators, similar to the alarm lamp on the attendant console. The following table describes the meaning of the green light associated with an alarm button.
status of light meaning
flashing green an alarm occurs
steady green INADS notified and acknowledges alarm
light goes off an alarm is resolved
Understanding common error types
This topic discusses frequently-encountered DEFINITY error types, explains why they occur, and what to do about them. For comprehensive lists of DEFINITY error types, see the maintenance manual for the DEFINITY system you have.
Error type 1 — circuit pack removed
Error Type 1 often indicates that an administered circuit pack has been removed.
To correct the problem and clear Error type 1:
1 Replace and latch the circuit pack in its administered slot.
The next time the system runs its routine maintenance program, it should be able to "see" the circuit pack and the error will not appear.

Avaya Site Administration Reference
141
Error type 18 — busied out
Error type 18 is a reminder from the voice system that a component has been busied out. The busyout command is used to temporarily disable a component and is usually used before you test or replace a component.
Use the release command (permissions enabled) to restore a component to its normal operating mode.
For example, you receive a complaint that a phone does not work. As part of your diagnosis, you:
use status station
OR
view the hardware error report for error 18
To view a hardware error report for error 18:
1 Open a GEDI window for the voice system you want to administer.
2 Type display errors and press the ENTER key. The Hardware Error Report screen appears.
3 To view the report for error type 18, type 18 in the Error Type field and press the ENTER key. The Hardware Error Report for error 18 appears. The log entry displays the busied-out line(s).
4 Click to close GEDI.
Use the release command (permissions enabled) to remove the busyout status from the station. In our example:
1 Open a GEDI window for the voice system you want to administer.
2 Type release port UUCSSss where UUCSSss is the port address of the busied-out station, and press the ENTER key. The station is no longer busied-out.
3 Click to close GEDI.
Error type 513 — equipment "missing"
Error type 513 notifies you that equipment such as phones, data modules, or circuit packs, are administered but not physically connected to the voice system.
For example, view a hardware error report for error 513:
1 Open a GEDI window for the voice system you want to administer.
2 Type display errors and press the ENTER key. The Hardware Error Report screen appears.

Avaya Site Administration Reference
142
3 To view the report for error type 513, type 513 in the Error Type field and press the ENTER key. The Hardware Error Report for error 513 appears. The log entry shows which equipment is not connected to the voice system.
4 Click to close GEDI.
To fix error 513 for a phone:
1 Open a GEDI window for the voice system you want to administer.
2 Plug the phone into the jack assigned to the port in the log entry.
3 Type test station nnnn where nnnn is the station you just plugged in (permissions enabled) and press the ENTER key to test the phone. The system will clear the error only after the system runs its administered checks and diagnostics.
4 Click to close GEDI.
Preventing alarms and errors
This topic lists a few common causes of unnecessary DEFINITY alarms and how to prevent these alarms.
Turn off maintenance
The Remote Loop-Around Test sends a burst of current to activate a phone’s ringer. If the ringer responds, the test detects the ENTER key. Data modules, fax machines and modems do not have ringers and do not respond to this test. This generates an error on that port.
You should turn off this test for data modules, fax machines and modems. Turning off the test does not affect the performance of any of these devices.
To turn off the maintenance test:
1 Open a GEDI window for the voice system you want to administer.
2 Type change data-module nnnn and press the ENTER key, where nnnn is the extension of the data module for which you want to turn off the Remote Loop-Around test. The Data module screen appears.
3 Change the Remote Loop-Around Test field to n.
4 Press ENTER to save your changes.
5 Click to close GEDI.

Avaya Site Administration Reference
143
Remove unused circuit packs
Occasionally, a company upgrades phones from the 7000-series analog model to the 8400-series digital phones. The upgrade process is to:
1 Remove the analog line and trunk administration
2 Remove the old analog equipment
3 Rewire the workplace for the new digital phones and jacks
4 Administer the new digital phones and circuit packs
If the analog circuit packs remain physically plugged into the system and are still administered as circuit packs (even though the administration is removed in Step 1above), the system generates errors. This stops when you remove the administration (change circuit-pack UUCSS) for this unused circuit pack.
DS1 administration
Depending on whether a DS1 circuit pack is present and whether its ports are assigned or not, the system reports faults according to the following table:
circuit pack present?
circuit pack administered?
ports administered?
alarm level
action
N Y N warning
Replace and latch the board in its assigned slot.
Remove the trunk and DS1 administration (change circuit-pack UUCSS), leaving the circuit pack in its assigned slot.
N Y Y minor
Replace and latch the board in its assigned slot.
Administer one or more ports (change circuit-pack UUCSS), leaving the circuit pack in its assigned slot.
Y N N varies
Remove the circuit pack from the carrier.

Avaya Site Administration Reference
144
Using voice system features to troubleshoot
Using features to troubleshoot
You can use some DEFINITY features to help you identify if your system is having problems or to help you diagnose problems you know are occurring. The table below shows you which features to use for various kinds of system problems. Click a feature to learn how to use it.
Feature Problem area
Trunks
Phones
Hunt groups
Paging groups
Automatic Circuit Assurance
X
Busy Verify X X X
Facility Busy Indication
X X X
Facility Test Calls X X
Trunk Identification X
Using ACA to identify faulty trunks
You can use Automatic Circuit Assurance (ACA) to help identify faulty trunks. If activated (change system-parameters features), your system notifies you with a referral call when it detects unusual trunk usage like very short or very long calls. It needs to be turned on for each individual trunk group.
The referral call arrives on an idle call appearance. If you answer the call, your display shows:
that the call is an ACA call
the trunk-group access code
the trunk-group member number
the reason for the call (short or long holding time)
To use ACA on a G3V2 or older voice system
1 Assign an ACA button to your phone.
2 Press the ACA button to activate your phone for referrals.
3 When you receive an ACA referral call, answer the call.
4 Record the information listed on your display to use for further troubleshooting.
To use ACA on a G3V3 or newer voice system
1 Assign an ACA-Halt button to your phone.
2 Leave the ACA-Halt button OFF to keep your phone active for referrals.
3 When you receive an ACA referral call, answer the call.
4 Record the information listed on your display to use for further troubleshooting.

Avaya Site Administration Reference
145
Busy Verify
You can use Busy Verify to place test calls to check the busy condition of trunks, phones, or hunt groups. This test helps you determine if the trunk, phone, or hunt group is busy because of heavy use or appears busy because of a problem.
To use Busy Verify, you should administer a Busy Verify button on your phone.
To busy-verify a phone
1 Press the Busy Verify button on your phone. The busy verify light turns green.
2 Dial the extension of the phone you want to test. You hear a tone and see a display. The following table describes what the tone and display indicate and how to respond.
display tone frequency
pattern (seconds)
status of extension
next step
Invalid intercept
440 Hz alternating 620 Hz
.25 on
.25 on
repeated
invalid number cancel and try again
Terminated
ringback
combined
440 Hz +
480 Hz
1 on
3 off
repeated
idle and ringing
(working properly)
release the call
Bridged none bridged onto active call
(working properly)
release the call
Out of
service
reorder combined
480 Hz +
620 Hz
.25 on
.25 off
repeated
trouble condition
or
station administered
without hardware and
no coverage path
cancel;
use status station nnnn where nnnn is the extension number, for more information

Avaya Site Administration Reference
146
To busy-verify a hunt group
1 Press the Busy Verify button on your phone. The busy verify light turns green.
2 Dial the extension for the hunt group you want to test. You hear a tone and see a display. The following table describes what the tone and display indicate and how to respond.
display tone frequency pattern (seconds)
status of extension
next step
Invalid intercept
440 Hz alternating 620 Hz
.25 on
.25 on
repeated
invalid number cancel and try again
Terminated
ringback combined
440 Hz +480 Hz
1 on
3 off
repeated
idle and ringing release the call
All made busy
reorder combined
480 Hz +620 Hz
.25 on
.25 off
repeated
made busy is active
release the call and try again later
Denied reorder combined
480 Hz + 620 Hz
.25 on
.25 off
repeated
active on a call release the call and try again later
Out of
service
reorder combined
480 Hz + 620 Hz
.25 on
.25 off
repeated
trouble condition
or
station administered
without hardware
cancel;
report an out-of-service condition

Avaya Site Administration Reference
147
To busy-verify a trunk
1 Press the Busy Verify button on your phone. The busy verify light turns green.
2 Dial the trunk access code for the trunk you want to test. Your display should be blank and you should hear dial tone. If your display shows "DENIED" and you hear intercept tone, repeat Steps 1 and 2. If you have trunk group select buttons on your phone, you can also press the Busy Verify button and then press the Trunk Group Select button for the appropriate trunk.
3 Dial the trunk-group member number you want to verify. You hear a tone and see a display. The following table describes what the tone and display indicate and how to respond.
display tone frequency pattern (seconds)
status of extension
next step
Invalid intercept 440 Hz alternating 620 Hz
.25 on
.25 on
repeated
invalid cancel and try again
Verified confirmation
release the call
none ringback combined
440 Hz +480 Hz
1 s on
3 s off
repeated
release the call
none Dial tone combined
350 Hz +440 Hz
continuous
idle (working properly)
release the call
Bridged none Bridged onto active call (working properly)
release the call
Out of
service
reorder combined
480 Hz + 620 Hz
.25 on
.25 off
repeated
trouble condition cancel;
report an out-of-service condition

Avaya Site Administration Reference
148
Facility Busy Indication
You can use Facility Busy Indication to display the idle or busy condition of phones, trunks, or paging zones.
To use this feature you need to add facility busy indication buttons to your phone. Label the facility busy buttons as "Busy" followed by the number or name of the facility being monitored.
If the green light associated with the Facility Busy Indication button stays lit for a long time, the facility may have a problem.
Facility Test Calls
You can use Facility Test Calls to place test calls to specific trunks or phones. Because this feature bypasses the regular system traffic, it is very helpful in finding noisy lines and other problems. However, this feature can be easily misused by outside parties. Disable this feature when you are not using it.
Security Alert: Whenever you use this feature, enable the feature access code only for the tests you want to make. Be sure to immediately remove the access code when you are through testing because leaving this feature enabled can leave you open to security breaches.
To place a test call to a trunk or touch-tone phone:
1 Using GEDI, enable a feature access code for Facility Test Call.
2 At your phone, dial the feature access code for Facility Test Call. Listen for dial tone.
3 Dial the 6- or 7-digit port address.
Tip If you have problems with this step, try dialing the port address without the first zero in the cabinet number.
You hear a tone and see a display. The following table describes what the tone and display indicate and how to respond.
tone
frequency
pattern (seconds)
status of extension
next step
dial combined
350 Hz +440 Hz
continuous
connected Go to Step 4
reorder
combined
480 Hz +620 Hz
.25 on
.25 off
repeated
busy release the call
intercept
440 Hz alternating 620 Hz
.25 on
.25 on
repeated
No access release the call

Avaya Site Administration Reference
149
4 If you are testing a trunk, place the call.
Or
If you are testing a touch-tone receiver, dial the number.
If you receive a dial tone, the test passed.
Or
If you receive an intercept tone, the test failed.
Security Alert At the system terminal, BE SURE to disable the Facility Test Call feature access code.
Trunk Identification
You can identify a faulty or noisy trunk with Trunk Identification. You can use Trunk Identification:
on an active call
while accessing a trunk
To identify the specific trunk used on a call:
1 Press the Trunk ID button. Trunk access code and trunk group member number appears on the display. If 2 trunks are used on the call, the identification of the last trunk added to the call displays. If more than 2 trunks are on a call, Trunk Identification is denied.
2 See if there are any on-board alarms against a trunk circuit pack. If no, report the trunk problem to the appropriate vendor. If yes, report the trunk problem and the identification information to Avaya.

Avaya Site Administration Reference
150
Glossary
Adjunct switch application interface (ASAI)
ASAI allows integration between adjunct computers and your voice system.
Basic Call Management System (BCMS)
BCMS helps you monitor the operations of your call center. BCMS collects data regarding the calls on the voice system and organizes the data into reports that help you manage facilities and personnel. The BCMS reports allow you to manage the hourly and daily operations of the call center by:
monitoring trunk group usage
monitoring the calling volume for each split
monitoring VDNs
monitoring the work load of each agent
comparing agents' performances
These reports can be displayed on a video display terminal in real time, printed immediately, scheduled to print at a later time, or scheduled to print periodically at times you specify.
Cabinet
The cabinet houses:
1 to 5 carriers
storage media (tape or flashcard) for software translations
cooling fans
backup power supply
Call Accounting system
The system add-on makes it easy for you to generate a wide variety of accounting and system reports. For example, the Facility Grade of Service Report helps identify the number of trunk lines needed to respond efficiently to incoming calls. You can also generate toll fraud reports and alarms that identify excessive personal calls, unauthorized calls, and calls to expensive dial-up recordings. Several options are available to you for call accounting, depending on what type of system administration tools you are using.
Call Detail Recorder
Allows you to monitor and analyze call patterns and usage in your system. It is most often used to monitor or record outgoing calls, but internal and incoming calls can also be tracked. The ability to collect, store, filter, and print records on calls handled by your system helps with the management and control of call costs. You can also use this information to allocate charges, analyze calling patterns, and detect unauthorized calls.

Avaya Site Administration Reference
151
Call Management System (CMS)
Avaya Call Management System collects call traffic data, formats management reports, and provides an administration interface for automatic call distribution on your system. It helps you manage the people, traffic load, and equipment in an ACD environment by answering such questions as:
How many calls are we handling?
How many callers abandon their calls before talking with an agent?
Are all agents handling a fair share of the calling load?
Are our lines busy often enough to warrant adding additional ones?
How has traffic changed in a given ACD hunt group over the past year?
Avaya CMS is a software product used primarily by organizations with call centers or telemarketing groups. This database will generate standard or custom reports and also enables you monitor call activities to determine the most efficient service possible for the calling customers.
Carriers
Enclosed shelves containing vertical slots that hold circuit packs. Also called voice system carriers.
Circuit pack
A card on which electrical circuits are printed, and integrated (IC) chips and electrical components are installed. A circuit pack is installed in a voice system carrier.
There are two main types of Circuit Packs:
Port circuit packs—contain from four to 24 ports, to which phones, trunks, and other hardware components are connected. The following are a few different types of port circuit packs:
Analog—supports basic phones.
Digital—supports digital phones.
Hybrid—supports specialized communications such as wireless telephones.
ISDN/BRI—supports Integrated Services Digital Network (ISDN) phones.
Control circuit packs—"the brains of the system," include processor, memory, network control, disk control, tape control, port network interface, duplication, and maintenance packs.
Conversant
An interactive voice-response system that automates phone-call transactions from simple tasks, like routing to the right department, to complex tasks, such as registering college students or providing bank balances. It communicates with customers in natural-sounding, digitally recorded speech, and it performs 24 hours a day without the services of an operator.

Avaya Site Administration Reference
152
Data module
A device that enables your PC to communicate with your voice system or messaging system, similar to a modem. Data modules are used commonly for Basic Call Management System terminals (BCMS), Call Accounting packages or remote System Administration Terminals.
Intuity AUDIX
A fully integrated messaging system developed by Avaya. Can be used with a variety of communications systems to provide call-history data, such as subscriber identification and reason for redirection. Also called AUDIX and Audio Information Exchange.
local exchange carrier (LEC)
Also called a local telephone company. A company franchised to provide public intra-LATA (local access and transport area) telephone service to subscribers within a defined geographical area.
System Administration Terminal (SAT)
A dumb terminal that voice system administrators can use (instead of DNA, terminal emulators, or other system administration software packages) to make changes to the voice system through a direct connection. From the SAT you can add, change or display the system's translations and components.
System administrator
The person who maintains overall responsibility for administering a voice system. Generally, administration functions are performed from the System Administration Terminal (or from a system management application like Avaya Site Administration). The voice system requires a special login, referred to as the system administration login, to gain access to system-administration capabilities.
Terminal emulation software
Allows remote system administration from a personal computer.

Avaya Site Administration Reference
153
Understanding trunks
Trunks are communication lines that carry voice or data transmissions between two communications systems or central offices. There are a variety of trunk types, each with different capabilities.
Trunks can be characterized by:
Signal type (analog or digital)
Transmission media or wiring type (copper or fiber optic)
Direction (one-way in, one-way out, or two-way)
Connection type:
Central Office to voice system (Public Access Trunks)
Switch to voice system (Tie Trunks)
Switch to long distance provider (Public Access Trunks)

Avaya Site Administration Reference
154
Contacting Us
General Contact Information For… Contact…
Avaya’s Home Page www.avaya.com
Avaya products www.avaya.com click Solutions & Products
Online product catalog www.avayadirect.com
Security products and services
wwwdb.avaya.com/bcs/solutions.main?p_id=14&p_keyword="
International Alliance of Avaya Users
www.inaau.org
Before you call
Before you call, please have the following information available:
your name and number (in case we need to call you back)
your installation location (IL) number
your company’s main phone number
the type of your voice system
the number of trunks on your system
the number of stations on your system
Remember, if the problem is with equipment or service outside of your own equipment, you need to call your vendor or service provider. If you determine that the problem is with your own equipment, such as on your own stations, voice system, or trunks, give Avaya a call.
Be ready to talk about:
the problem you want to solve
a log of the steps you took and the information you gathered while performing your diagnosis of the problem.
if the problem is with a new component or feature
if something that used to work now does not work
any numbers involved with the problem (for example, extensions or phone numbers, trunk group numbers, phone types, or report types)
the contents of any recorded messages received
error messages from the voice system
type of ringback tones received on phones
the names and numbers of your vendors
any other pertinent information

Avaya Site Administration Reference
155
Technical Support
Before you call, prepare the information that the helpline needs.
For customers located in the US:
For help with… Contact this resource:
Contact Information
Avaya Site Administration
Avaya’s National Customer Care Center
1 800 242 2121
Avaya Communication Manager software features and administration
Avaya’s Communication Manager Helpline
1 800 225 7585
Avaya Communication Manager software maintenance and repair
Avaya’s National Customer Care Center
1 800 242 2121
Messaging systems
Avaya National Customer Care Center
1 800 242 2121
Toll fraud Avaya’s National Customer Care Center (Toll Fraud Helpline)
1 800 643 2353
web-based technical support
Avaya’s Customer Support web site
http://www.avaya.com/support
For customers located outside the US
Contact your local distributor or Avaya representative.

Avaya Site Administration Reference
156
Contacting us about training
For customers located in the US:
To… Use this resource: Contact Information
Order a catalog of classes, videotapes, and computer-based training
Avaya University 1 800 288 5327
Ask general training questions
Avaya University 1 800 288 5327
Search an online catalog of classes, videotapes, and computer-based training
Avaya training web site
http://learning2.avaya.com/
Register for classes Avaya University Registration Center
1 800 255 8988
Order videotapes and computer-based training
Avaya Direct www.avaya.com/direct
For customers located outside the US:
Contact your local distributor or Avaya representative.
Contacting us for documentation
To… Use this resource: Contact Information
View documentation online
Recent documents http://www.avaya.com/support Then click Online Services. Then click Documentation. Then click Recent Documents.
Order documentation by mail
Globalware Solutions
Globalware Solutions 200 Ward Hill Avenue Haverhill, MA 01835 USA USA
Order documentation by phone or fax
Globalware Solutions
1 800 457-1235 (phone) 1 800 457-1764 (fax)
If you are calling from somewhere that can not access US 1-800 numbers, then call:
+1 410 568 3680 (phone) +1 410 891 0207 (fax)

Avaya Site Administration Reference
157
Giving us your feedback
To… Contact…
Ask questions not answered in the help
by phone
Technical Support
Offer comments on the online help
by email
DO NOT SEND PRODUCT OR TECHNICAL QUESTIONS TO THIS EMAIL ADDRESS:
[email protected] Subject line: Avaya Site Administration Help Topic "<Name of topic>" feedback.
by fax + 1 732 852 2469
Attention: Avaya Site Administration Documentation
by mail
Avaya Site Administration Documentation Team Room 3C-313 307 Middletown Lincroft Road Lincroft, NJ 07738-1526 USA
Share information with other Avaya product users
over the web
www.inaau.org

Avaya Site Administration Reference
158

159
Index A
ABIT 196
aborting
aborting a task 22, 25
blocking a task 22, 25
changing 22, 25
date or time of a scheduled task 22, 25
checking
Checking the status of a task 22, 25
schedule 22, 25
viewing 22, 25
scheduling 22, 25
tasks 22, 25
tasks 22, 25
aborting 22, 25
rescheduling 22, 25
running 22, 25
viewing 22, 25
using 22, 25
Schedule tab 22, 25
viewing 22, 25
schedule 22, 25
tasks 22, 25
about 193
about system security 193
access 83
controlling 83
denied 203
accessing 35
ACD 117, 137, 138
defined 117
enhancing with vectors 138
understanding 137
action 48
adding
announcements 106, 116
area code, new 92
extension ranges 63
extension without hardware 74
fax 73
feature access codes 64
feature buttons 72
hunt group announcements 116
mailboxes 67, 183
messaging system 11
modem 73
new area code or prefix 92
phones 65, 67, 74, 183
prefix, new 92
switches to Avaya Site Administration 8
trunk groups 102
trunks 100
adjunct 269
voice system application interface 269
administering
messaging 185
administration 35, 283
administrator 45
daily tasks 43
defined 282
duties 39
monthly tasks 46
tasks 47
weekly tasks 45
administrators 188
assigning and changing 188
alarm 259
logs 253, 254, 255, 256
alarms 32
alias 77
allow
allow callers to leave message 120
announcements 104, 235
adding 106
adding hunt group announcements 116
backing up 111
deleting 110
printing 235
recording 108
area codes 92
adding 92
ARS 94, 96
ASAI 269
ASG 187
ASG is enabled 204
ASG is not enabled 205
defined 187
ASG Guard 187
ASG Guard II 9
ASG Key 187
attendant 127
attendant consoles 82
understanding 82

Avaya Site Administration Reference
160
AUDIX 11, 279
adding to Avaya Site Administration 11
automatic
Automatic Call Distribution 137
Automatic Circuit Assurance 261
Avaya
National Customer Care Center 287
Toll Fraud Helpline 287
training 288
Avaya Bulk Import Tool 196
AWOH 74
B
backup 46, 111, 237
Basic call management system (BCMS) 270
BCMS 270
boards 32
bulk import tool 196
busy 120, 206
button labels 141, 143, 144
changing label text 144
creating label text 144
printing 143
text template, understanding 141
viewing label text 144
buttons 72, 174
adding to a phone 72
assigning alarm buttons 256
changing 72
feature buttons by name 165
listed by feature code 174
C
cabinet 235, 271
call 95, 273
Call Detail Recorder 273
distribution methods 117
flow 133
handling 117, 137
restrictions, overriding 95
Call Accounting 147, 272
exporting data into a file 147
system 272
call centers 129
and ACD 137
measuring performance 129
planning 132
setting up call flow 133
using vectors and ACD in 138
Call Management System (CMS) 138, 139
calls 56, 83, 94, 129, 135, 248, 249, 270
answered/abandoned 129
data regarding 270
prohibiting 83
restricting outgoing 94
capacity 33, 136
viewing 33
carriers 32, 275
CCS 126
CDR 273
changes 35
changing
administrators 188
button label text 144
connectivity info 7
COR values 83
COS values 84
dial plan 62
feature access codes 65
feature buttons 72
feature parameters 84
messaging system properties in Avaya Site Administration 17
phone user's information 75, 76
vectors 119, 121, 123
voice system data globally 96
voice system properties in Avaya Site Administration 17
choosing
a Call Management System 139
circuit pack 235, 276
clearing 255
alarm logs 255
errors 252
CMS 274
command
language and syntax 48
timed out 209
commands 18, 35, 48
shortcuts 18
Communication Manager 18, 163, 164, 165, 174, 257
command shortcuts, creating 18
errors 257
feature buttons 165
feature buttons by code 174
field descriptions by field name 163
field descriptions by screen 164
help line 287
support 287
components 37, 57

Avaya Site Administration Reference
161
connections 17, 23, 27
viewing or changing properties in Avaya Site Administration 17
viewing status of 23, 27
connectivity 7
saving changes to 7
consoles 82
understanding 82
Conversant 277
COR 83, 235
changing 83
COR printing 235
COS 84, 235
changing 84
printing 235
coverage 103, 104
paths 235
creating 18, 144
button label text 144
command shortcuts 18
coverage paths 88
new button label 144
pickup groups 87
customizing 78
cut-thru 36
starting 36
D
daily 43
data 146, 147, 153, 270, 278
call data 270
export 146
exporting for Call Accounting 147
importing 153
module - defined 278
Data locked 214
definitions 58
ACD 137
ACD & EAS 117
announcement 104
ASG 187
attendant console 82
Basic Call Management System (BCMS) 270
Busy Verify 262
cabinet 271
Call Accounting system 272
call center 131
Call Detail Recorder 273
Call Management System (CMS) 274
carrier 275
circuit pack 276
Conversant 277
data module 278
dial plan 59
Facility Busy Indication 265
Facility Test Calls 266
hunt group 111
Intuity AUDIX 279
LEC 280
system administrator 282
terminal emulation 283
trunk 98, 284
vectors 117
voice system add-ons 58
World Class Routing 91
deleting 14, 15, 81, 110, 123
announcements 110
messaging subscribers 81
messaging system 14, 15
phones 81
vector steps 123
voice system 14, 15
demonstrations 52
device 215, 233, 234
does not exist 215
unexpected response from 233
unknown response from 234
diagnosing
AUDIX 247
CAS 247
changing 246
CMS 246, 247
Diagnosing a problem 243
Diagnosing a vector problem 124
Diagnosing general trunk problems 245
Diagnosing modem problems 246
Diagnosing password login and terminal access problems 248
Diagnosing printer troubles 247
extensions 246
help 246, 247
modems 246
printer
troubleshooting 247
problems 124, 243, 245, 246, 247
with vectors 124
reports
vector 124
switches 246, 247

Avaya Site Administration Reference
162
TAC 245
using to troubleshoot 245
troubleshooting 124, 243, 245, 246, 247
vector problems 124
trunks 245
vectors
troubleshooting 124
dial 224, 248
no dial tone 224
Dial Plan 59, 62, 235
modifying 62
printing 235
understanding 59
Disconnected 212, 228
disconnecting 37
from a messaging system 37
from a voice system 37
display 32, 270
displaying 28
dial plan 61
event history 28
hardware configuration 32
distribution 117
call distribution methods 117
documentation 289, 290
E
EAS 117, 138
defined 117
Electronic Library Material Online 289
Employee-related changes 41
end users 41, 50, 51, 52, 54, 56
end-user training 41, 51
error
alarm 257
clearing 252
error log 244, 249, 252
error type 1 257
error type 18 257
error type 513 257
field descriptions 251
reports 249
types 257
viewing 249
errors 215
events 23, 28
viewing history of 28
viewing status of 23
export 144
defaults 144
exporting 146, 147
Call Accounting data to a file 147
data 146
unused port data 148
Exporting data to an LDAP directory 149
extension 63
ranges, adding 63
F
facility
Facility Busy Indication 265
Facility Test Calls 266
fax 73
adding 73
feature
printing feature access codes 235
printing feature parameters 235
feature access codes 64
adding 64
feature buttons 72, 165, 174
adding 72
by code 174
by feature name 165
changing 72
features 1, 56, 91, 137, 138, 262, 265, 266, 269
ACD 137
adding to a phone 78
Adjunct Switch Application Interface (ASAI) 269
Busy Verify 262
call vectoring 138
changing 65, 78, 84
Facility Busy Indication 265
Facility Test Calls 266
World Class Routing 91
feedback 290
field descriptions 163, 164, 165
Alias Station screen, for 164
by field name 163
by screen 164
feature buttons 165
Site Data User Definition screen, for 164
Station screen, for 164
fraud 117

Avaya Site Administration Reference
163
G
GEDI 35
starting 35
globally changing voice system data 96
grade 28
of service, improving 28
groups 56, 102, 111, 133, 270
hunt, defined 111
trunk 102
Guide Builder 50, 56
H
hardware 32
configuration, viewing 32
help 290
help line 56
history 28
viewing Avaya Site Administration History 28
Human Resources 41
hunt groups 129, 133, 136, 235
announcements, adding 116
defined 111
measurements 130
setting up 113
troubleshooting 260
I
import 144, 196
defaults 144
importing
data into a voice system 153
improving 28
grade of service 28
Incorrect device 217
Incorrect login 218
INDUG 285
information 41, 56
initializing 207
inserting 121
steps into vectors 121
interactions 104
between night service types 104
Intuity
Intuity AUDIX 279
L
labels 37, 57, 141, 143, 144
creating, changing, viewing 144
printing 143
understanding label templates 141
languages 48
LDAP 149
local
Local Exchange Carrier (LEC), defined 280
logged in 232
too many users 232
login 248
troubleshooting 248
M
mailbox 120
maintenance 254, 255, 256, 259, 290
management 41
measuring 127, 129, 135, 136
call center performance 129
message 248
messages 120
allowing callers to leave 120
messaging 11, 17, 37, 67, 183
adding subscribers 67, 183
administration 185
connection properties, viewing or changing 17
disconnecting from 37
messaging system 14, 15
adding 11
deleting 14, 15
messaging systems 16
renaming in Avaya Site Administration 16
modems
adding 73
initialization error 220
Modular Messaging system 12
monitor trunks 270
monitoring 129, 135
call center 135
MultiLingual Name Wizard 69, 97, 198
N
native name 69, 97, 152, 154, 195, 198, 200, 201
Network connection failed 221
night service 103, 104
defined 103
interactions 104
setting up 103
no carrier 223
no dial tone 224
O
object 48
overriding 95
call restrictions 95
overview
of the main screen 3
of wizards 5

Avaya Site Administration Reference
164
P
paging groups 260
troubleshooting 260
partitioning 96
password 248
passwords 219
expired 226
phone
Phone feature buttons (by code) 174
Phone feature buttons (by feature name) 165
phones 65, 72, 80, 81, 235, 260
adding 65
adding buttons to 72
adding to voice system 67, 183
deleting 81
feature buttons (by code) 174
feature buttons (by feature name) 165
printing a list of 235
swapping using a wizard 80
troubleshooting 244, 260
upgrading 79
planning 132
call centers 132
port
data, exporting to a file 148
ports 207, 208, 227, 229, 230
No Ports available 225
prefixes 92
adding 92
preventing
toll fraud 189
printing
button labels 143
reports from the switch 124
using DEFINITY Report Scheduler 124
problems 41, 232, 241, 248, 249, 253, 286
with vectors 124
properties 17
connection, viewing or changing in Avaya Site Administration 17
Publications Catalog 289
Publications Center 289
Q
qualifier 48
queue 115, 120, 133
defined 115
setting up a 115
R
recording 108
records 234, 235
Retrieving baseline information 235
remote
Reset 228
removing 14, 15, 81
messaging subscriber 81
messaging system 14, 15
phone 81
voice system 14, 15
renaming 16
a messaging system in Avaya Site Administration 16
a voice system in Avaya Site Administration 16
reports 31, 191, 234
analyzing 126
attendant 127
Call Center 129, 135
CDR and troubleshooting 191
printing from switch 124
Processor Occupancy / Call Traffic report 31
scheduling 124
system capacity 136
responsibilities of administrator 39, 41, 50, 51
restricting 94
outgoing calls 94
restrictions 95
overriding 95
routing 91, 103, 104
World Class Routing 91
S
saving 7, 237
changes to connectivity info 7
schedule 46, 270
scheduling 20, 124
reports to print from switch 124
tasks 20
screens 3, 30, 164
main 3
security 51, 56, 95, 117, 187, 193
about system security 193
ASG defined 187
serial ports 207, 208
Serial port does not exist 227
Serial port error 229
Serial port is in use 230
Serial port settings could not be found 231
service 28
improving Grade of 28

Avaya Site Administration Reference
165
setting up 103, 113, 115, 133
bridged call appearances 90
call flow in a call center 133
hunt groups 113
night service 103
queue 115
shared system file 19, 20
shortcuts 18
creating 18
SSH connection 9
starting 35, 36
GEDI 35
terminal emulation 36
stations 80
change 75, 76
swapping using a wizard 80
status 27
of connections, viewing 27
Status pane, using 23
support 50, 51, 56, 285, 287, 290
swapping 80
phones using a wizard 80
switch
capacity, printing 235
switches 17, 37, 57, 146, 153, 241, 270, 275
accessing 35
connection properties, viewing or changing 17
disconnecting from 37
export data from 146
importing data into 153
understanding 241
synchronizing 30
voice system and PC time 30
syntax 48
system 37, 39, 46, 57, 270, 282
add ons 58
administration 281
administrator, defined 282
administrator, role of 39
changing 281
components 58, 281
display 281
feature-related system parameters 154
field descriptions 154
SAT 281
system 281
System Administration Terminal 281
system parameters 154
systems 33, 193
about system security 193
viewing capacity 33
T
tasks 20, 23, 46
scheduling 20
viewing status of 23
technical support 285, 287
templates 41, 141
button label 141
terminal access 248
terminal emulation 36, 283
starting 36
testing 134, 262
the system 134
time 30
synchronizing btn voice system and PC 30
toll fraud 189
preventing 189
tone 224
no dial tone 224
traffic 31
Processor Occupancy / Call Traffic report 31
training 51, 52, 54, 288
troubleshooting 191
command timed out 209
vector problems 124
trunk 100
adding 100
help 128
problems 128
reports 128
Testcalls 128
troubleshooting 267
Trunk Identification 267
Trunk Identification feature 267
trunk group
reports 128, 129
trunk groups 102
adding 102
trunks 28, 98, 129, 235, 284
improving grade of service 28
printing 235
troubleshooting 260
understanding 98, 284

Avaya Site Administration Reference
166
U
understanding 137, 141, 241, 265, 266
ACD 137
attendant consoles 82
button label templates 141
common DEFINITY errors 257
dial plan 59
Facility Busy Indication 265
Facility Test Calls 266
switches 241
trunks 98, 284
upgrading phones 79
users 67, 183, 232
adding to messaging 67, 183
adding to voice system 67, 183
too many logged in 232
using 27, 28, 31, 260
ACA to troubleshoot 260
alias 77
ARS to restrict outgoing calls 94
attendant reports 127
Avaya Site Administration History tab 28
Busy Verify to troubleshoot 260
CDR reports to detect problems 191
Connection Status tab 27
DEFINITY Report Scheduler 124
Facility Busy Indication to troubleshoot 260
features to troubleshoot 260
History tab 28
Processor Occupancy report 31
Security Violations Notification 192
Status pane 23
templates 71
trunk group reports 128
Trunk Identification to troubleshoot 260
V
VDN 117, 270
vectors 122
defined 117
deleting a step from 123
enhancing ACD with 138
examples 120, 133
inserting a step into 121
listing 235
printing 235
troubleshooting 124
writing 119
viewing 17, 23, 27, 28, 32, 33, 136, 144
alarm 238, 240
Avaya Site Administration History Log 28
button label text 144
cabinet 240
calls 130
changes to the system (history report) 241
connection properties 17
connection status 27
data 130
error logs 249
extensions 48, 239
history 241
hunt group reports 130, 131
message 74
phones 48, 239
ports 48
problems 238, 239
reports 130, 131, 238
schedule 124
security violations 192
status 23, 237, 238, 239, 240
switches 238, 239, 240
system capacity 33, 136
system operations 238
system's properties 17
trunk groups 48
trunks 48, 100
voice system hardware configuration 32
voice system 8, 35, 37, 57, 188
add ons 58
adding 8
administrators, assigning and changing 188
components 37, 57
components 37
components 57
deleting 14, 15
export data from 146
importing data into 153
voice systems 16, 96
changing data globally 96
hardware, viewing 32
renaming in Avaya Site Administration 16
time 30

Avaya Site Administration Reference
167
W
wizards 5
Add User wizard 67, 183
Add Voice Mail System wizard 11
Export Data wizard 146
Find and Replace wizard 96
Generate Call Accounting wizard 147
Hardware Manager wizard 32
Import Data wizard 153
overview 5
Remove User wizard 81
Swap Stations 80
System Capacity 33
Time Synchronization wizard 30
World Class Routing 91
defined 91
writing 119
vectors 119

Avaya Site Administration Reference
168