managing database objects with object browser
TRANSCRIPT
7/31/2019 Managing Database Objects With Object Browser
http://slidepdf.com/reader/full/managing-database-objects-with-object-browser 1/20
Managing Database Objects with Object Browser
Object Browser enables developers to browse, create, and edit objects in a database.Oracle Application Express has many views defined to make it easier for you to work with the underlying table structures. The views combine multiple base tables and use
meaningful column names to minimize complexity and to be more intuitive to use.See Oracle Application Express API Reference for details of the views defined.
Topics:
Accessing Object Browser About Object Browser
Searching for and Browsing Database Objects
About Creating Database Objects Managing Tables
Managing Views
Managing Indexes Managing Sequences
Managing Types
Managing Packages Managing Procedures
Managing Functions
Managing Triggers
Managing Database Links Managing Materialized Views
Managing Synonyms
See Also:Oracle Database SQL Language Reference
Accessing Object Browser
To access Object Browser:
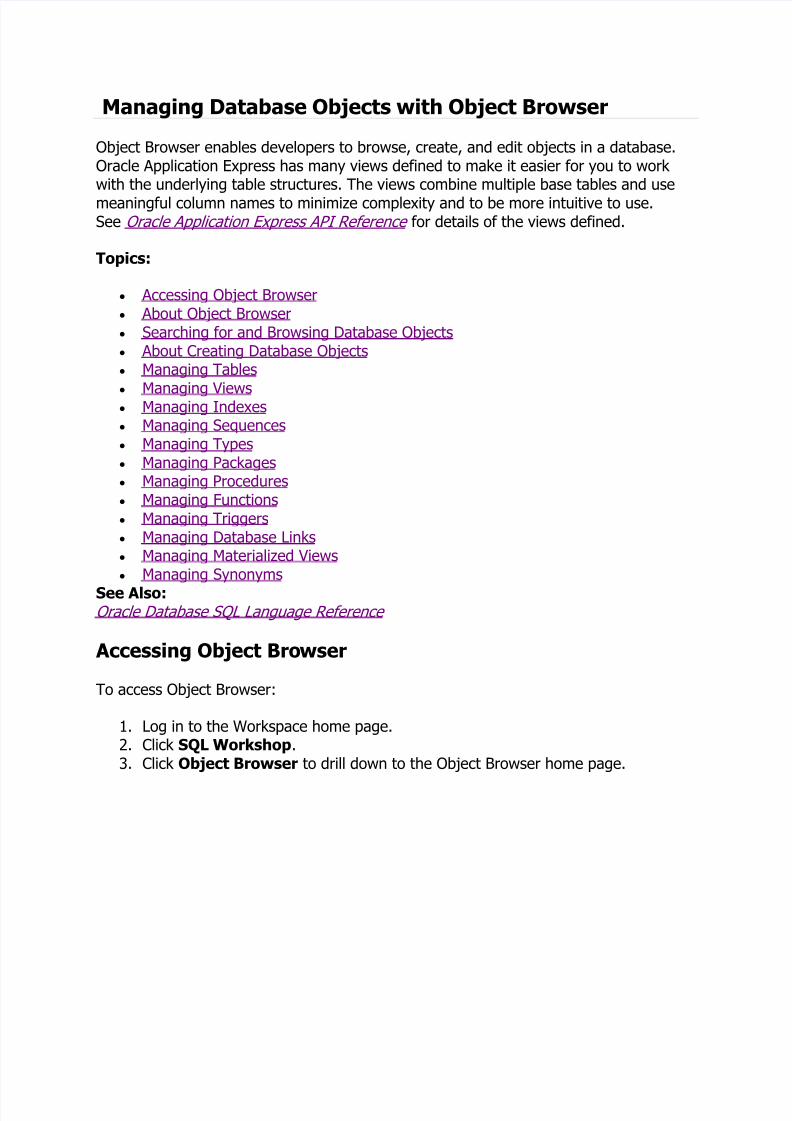
1. Log in to the Workspace home page.2. Click SQL Workshop.3. Click Object Browser to drill down to the Object Browser home page.
7/31/2019 Managing Database Objects With Object Browser
http://slidepdf.com/reader/full/managing-database-objects-with-object-browser 2/20
Description of the illustration o_browser.gif
About Object Browser
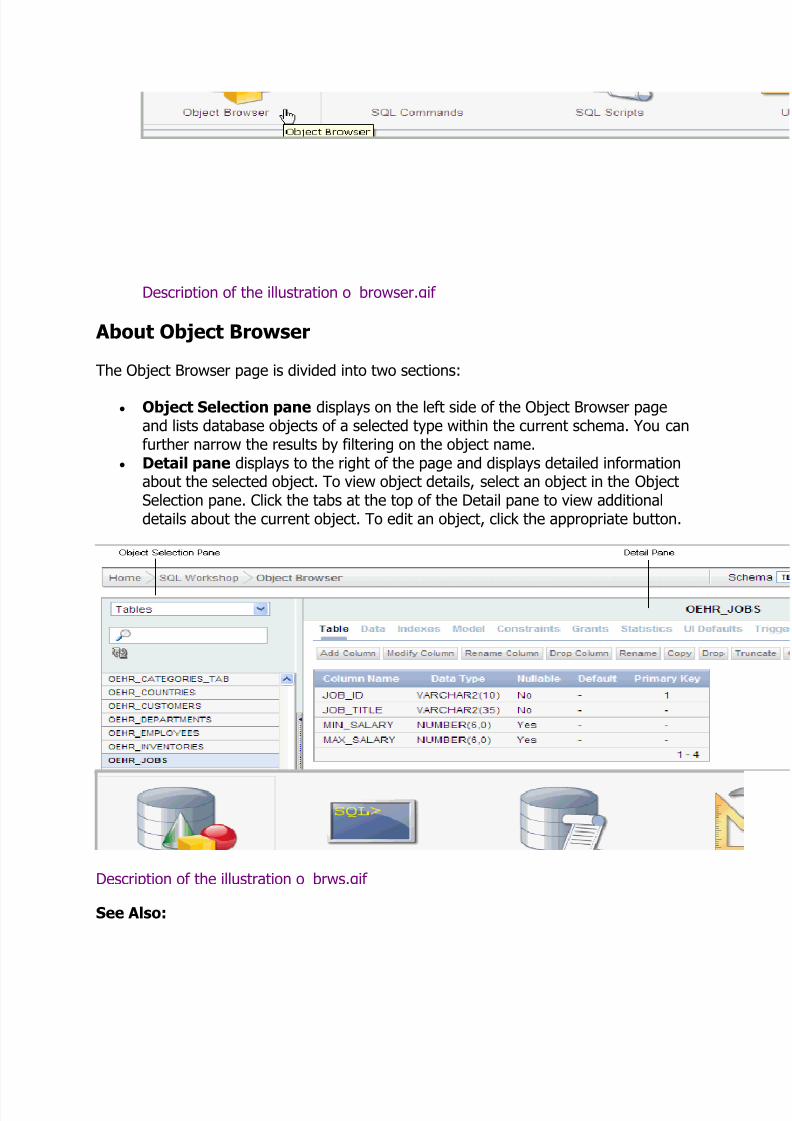
The Object Browser page is divided into two sections:
Object Selection pane displays on the left side of the Object Browser pageand lists database objects of a selected type within the current schema. You canfurther narrow the results by filtering on the object name.
Detail pane displays to the right of the page and displays detailed informationabout the selected object. To view object details, select an object in the ObjectSelection pane. Click the tabs at the top of the Detail pane to view additionaldetails about the current object. To edit an object, click the appropriate button.
Description of the illustration o_brws.gif
See Also:

7/31/2019 Managing Database Objects With Object Browser
http://slidepdf.com/reader/full/managing-database-objects-with-object-browser 3/20
"Searching for and Browsing Database Objects" and "About Creating Database Objects"
Selecting a Schema
A schema is a logical container for database objects. To access objects in another
schema, make a selection from the Schema list in the upper right side of the page. Onlyschemas assigned to your workspace are listed.
Switching to Another SQL Workshop Component
You can navigate to another SQL Workshop component by selecting the correspondingicon located on the upper right side of the page.
Description of the illustration o_brws_icons.gif
Available icons include:
Object Browser. See "Managing Database Objects with Object Browser". SQL Commands. See "Using SQL Commands". SQL Scripts. See "Using SQL Scripts". Query Builder. See "Building SQL Queries with Query Builder".
Utilities. See "Using Oracle Application Express Utilities".
Searching for and Browsing Database Objects
The Object Selection pane displays on the left side of the Object Browser page and listsdatabase objects by type with the current schema. You can filter the view by selectingan object type or entering a case insensitive search term.
Topics:
Searching For and Selecting Database Objects Hiding the Object Selection Pane
Searching For and Selecting Database Objects
To search for a database object in the Object Selection pane:
1. On the Workspace home page, click SQL Workshop and then ObjectBrowser.
Object Browser appears.
7/31/2019 Managing Database Objects With Object Browser
http://slidepdf.com/reader/full/managing-database-objects-with-object-browser 4/20
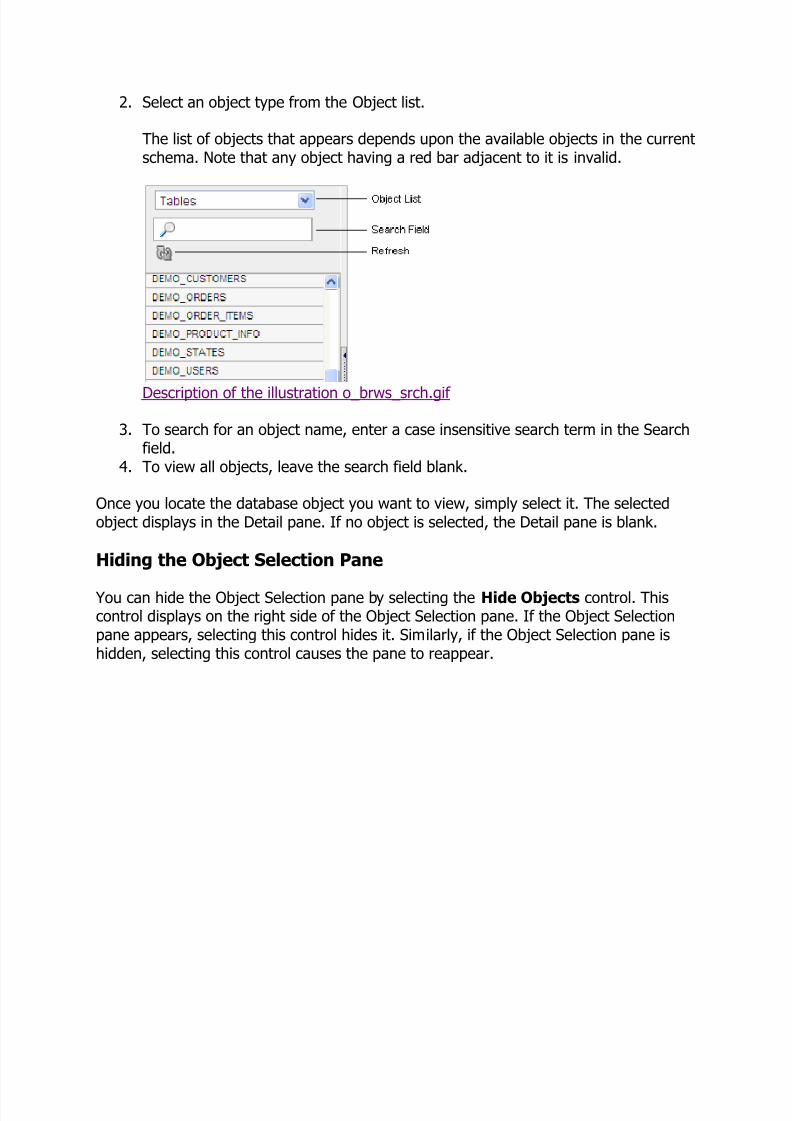
2. Select an object type from the Object list.
The list of objects that appears depends upon the available objects in the currentschema. Note that any object having a red bar adjacent to it is invalid.
Description of the illustration o_brws_srch.gif
3. To search for an object name, enter a case insensitive search term in the Searchfield.
4. To view all objects, leave the search field blank.
Once you locate the database object you want to view, simply select it. The selectedobject displays in the Detail pane. If no object is selected, the Detail pane is blank.
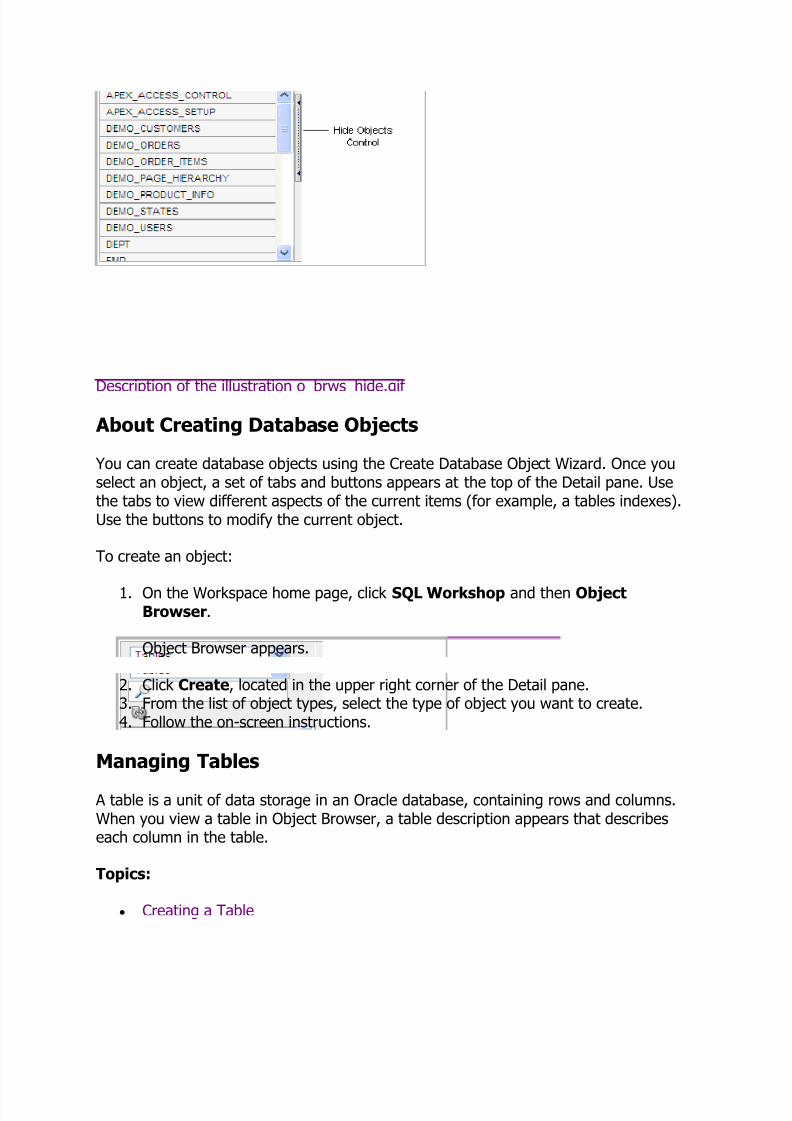
Hiding the Object Selection Pane
You can hide the Object Selection pane by selecting the Hide Objects control. Thiscontrol displays on the right side of the Object Selection pane. If the Object Selectionpane appears, selecting this control hides it. Similarly, if the Object Selection pane ishidden, selecting this control causes the pane to reappear.
7/31/2019 Managing Database Objects With Object Browser
http://slidepdf.com/reader/full/managing-database-objects-with-object-browser 5/20
Description of the illustration o_brws_hide.gif
About Creating Database Objects
You can create database objects using the Create Database Object Wizard. Once youselect an object, a set of tabs and buttons appears at the top of the Detail pane. Usethe tabs to view different aspects of the current items (for example, a tables indexes).Use the buttons to modify the current object.
To create an object:
1. On the Workspace home page, click SQL Workshop and then ObjectBrowser.
Object Browser appears.
2. Click Create, located in the upper right corner of the Detail pane.3. From the list of object types, select the type of object you want to create.4. Follow the on-screen instructions.
Managing Tables
A table is a unit of data storage in an Oracle database, containing rows and columns.When you view a table in Object Browser, a table description appears that describeseach column in the table.
Topics:
Creating a Table
7/31/2019 Managing Database Objects With Object Browser
http://slidepdf.com/reader/full/managing-database-objects-with-object-browser 6/20
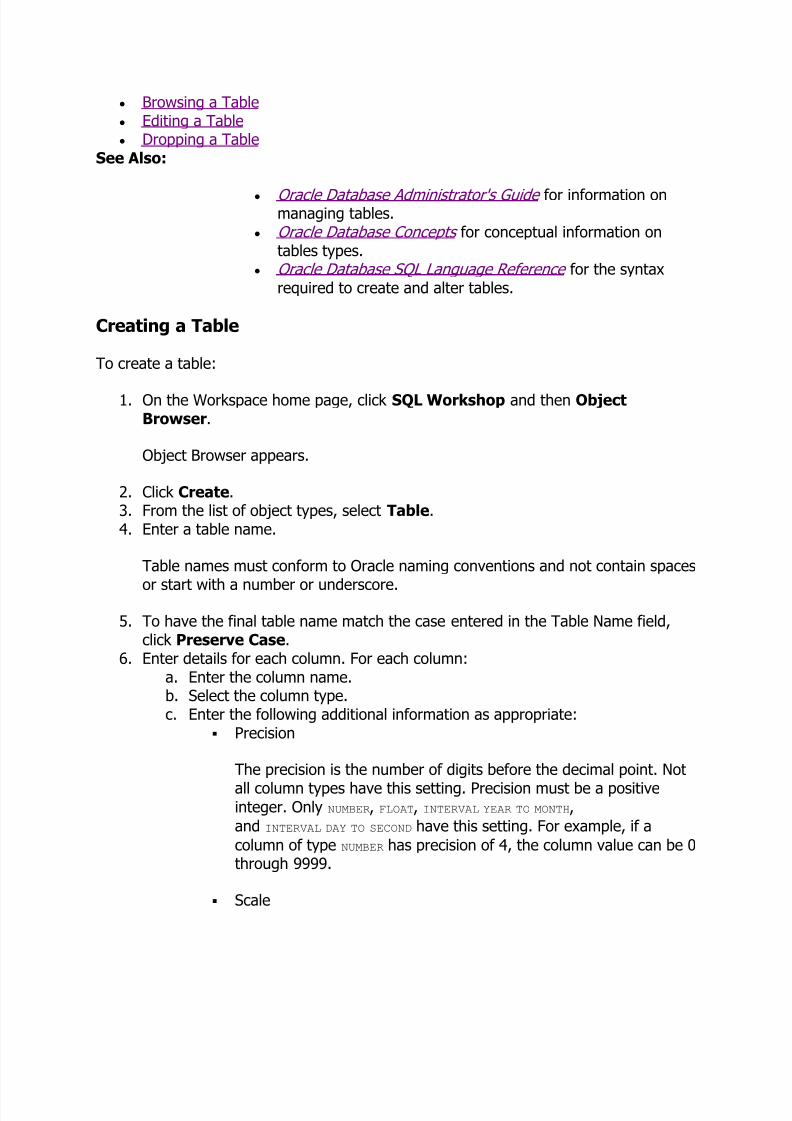
Browsing a Table
Editing a Table Dropping a Table
See Also:
Oracle Database Administrator's Guide for information onmanaging tables.
Oracle Database Concepts for conceptual information ontables types.
Oracle Database SQL Language Reference for the syntaxrequired to create and alter tables.
Creating a Table
To create a table:
1. On the Workspace home page, click SQL Workshop and then ObjectBrowser.
Object Browser appears.
2. Click Create.3. From the list of object types, select Table.4. Enter a table name.
Table names must conform to Oracle naming conventions and not contain spaces
or start with a number or underscore.
5. To have the final table name match the case entered in the Table Name field,click Preserve Case.
6. Enter details for each column. For each column:a. Enter the column name.b. Select the column type.c. Enter the following additional information as appropriate:
Precision
The precision is the number of digits before the decimal point. Not
all column types have this setting. Precision must be a positiveinteger. Only NUMBER, FLOAT, INTERVAL YEAR TO MONTH,
and INTERVAL DAY TO SECOND have this setting. For example, if a
column of type NUMBER has precision of 4, the column value can be 0through 9999.
Scale
7/31/2019 Managing Database Objects With Object Browser
http://slidepdf.com/reader/full/managing-database-objects-with-object-browser 7/20
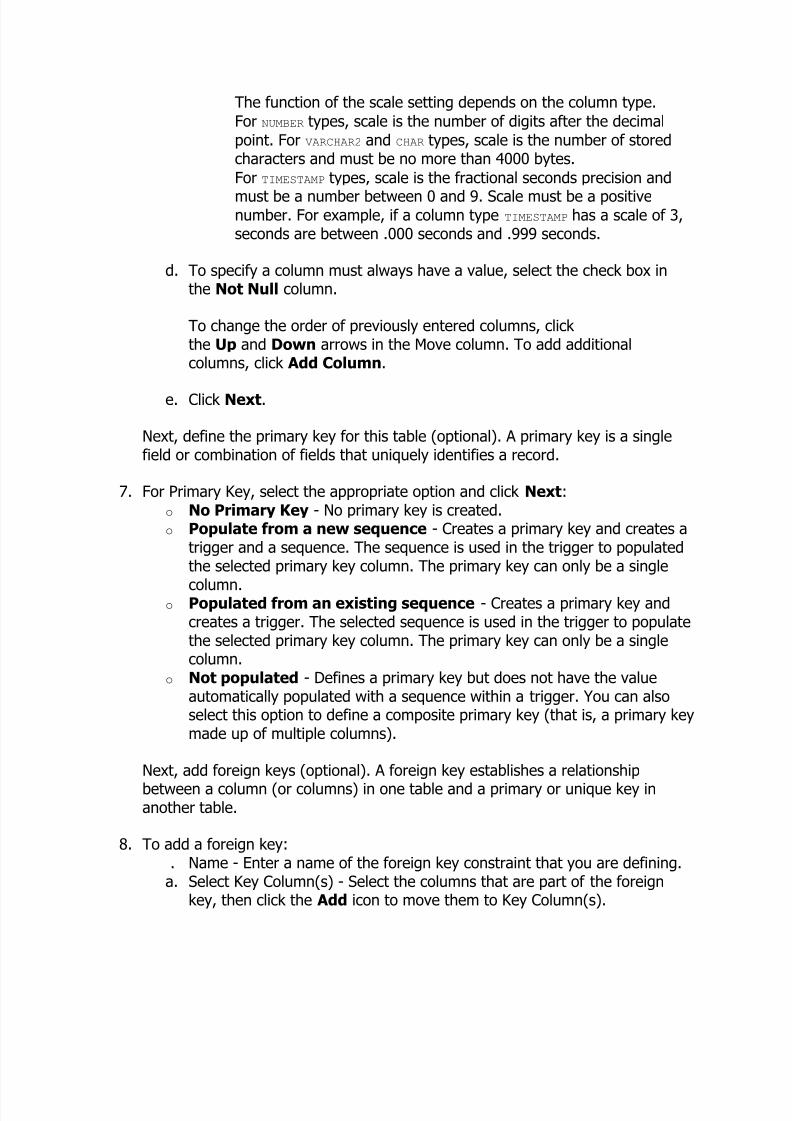
The function of the scale setting depends on the column type.
For NUMBER types, scale is the number of digits after the decimal
point. For VARCHAR2 and CHAR types, scale is the number of storedcharacters and must be no more than 4000 bytes.
For TIMESTAMP types, scale is the fractional seconds precision and
must be a number between 0 and 9. Scale must be a positivenumber. For example, if a column type TIMESTAMP has a scale of 3,seconds are between .000 seconds and .999 seconds.
d. To specify a column must always have a value, select the check box inthe Not Null column.
To change the order of previously entered columns, click the Up and Down arrows in the Move column. To add additionalcolumns, click Add Column.
e. Click Next.
Next, define the primary key for this table (optional). A primary key is a singlefield or combination of fields that uniquely identifies a record.
7. For Primary Key, select the appropriate option and click Next:o No Primary Key - No primary key is created.o Populate from a new sequence - Creates a primary key and creates a
trigger and a sequence. The sequence is used in the trigger to populatedthe selected primary key column. The primary key can only be a single
column.o Populated from an existing sequence - Creates a primary key and
creates a trigger. The selected sequence is used in the trigger to populatethe selected primary key column. The primary key can only be a singlecolumn.
o Not populated - Defines a primary key but does not have the valueautomatically populated with a sequence within a trigger. You can alsoselect this option to define a composite primary key (that is, a primary keymade up of multiple columns).
Next, add foreign keys (optional). A foreign key establishes a relationship
between a column (or columns) in one table and a primary or unique key inanother table.
8. To add a foreign key:. Name - Enter a name of the foreign key constraint that you are defining.
a. Select Key Column(s) - Select the columns that are part of the foreignkey, then click the Add icon to move them to Key Column(s).
7/31/2019 Managing Database Objects With Object Browser
http://slidepdf.com/reader/full/managing-database-objects-with-object-browser 8/20
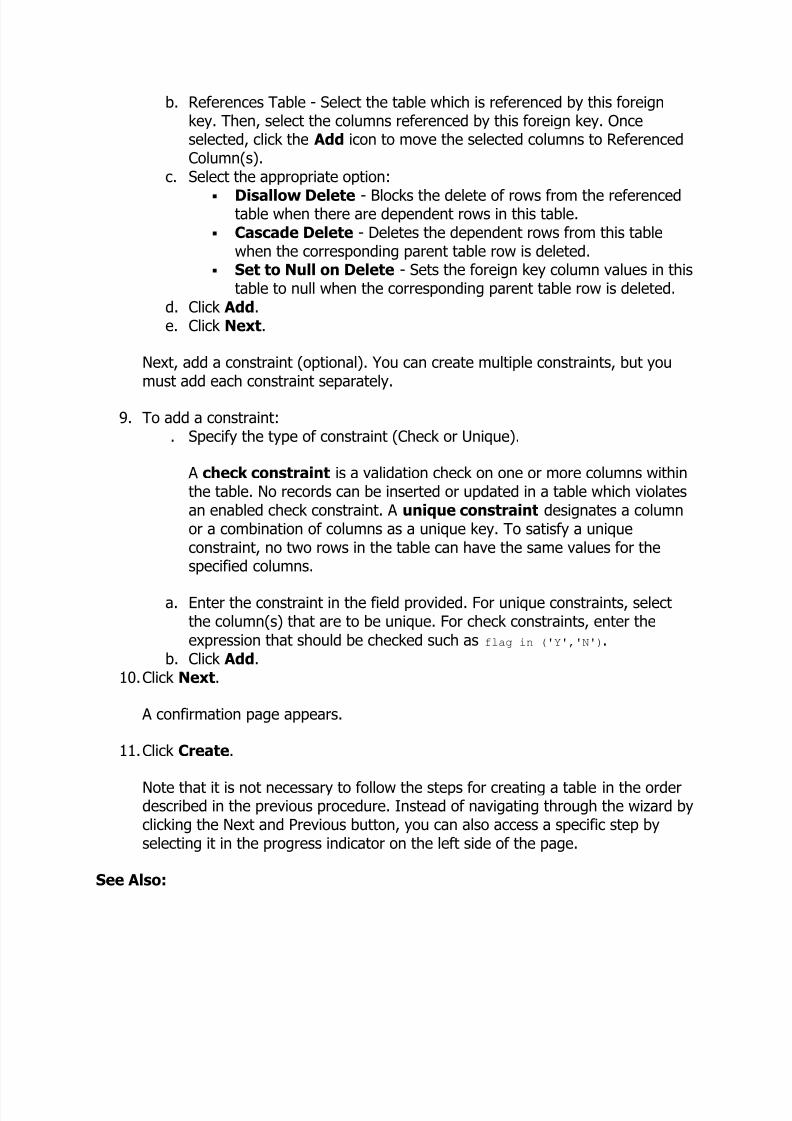
b. References Table - Select the table which is referenced by this foreignkey. Then, select the columns referenced by this foreign key. Onceselected, click the Add icon to move the selected columns to ReferencedColumn(s).
c. Select the appropriate option:
Disallow Delete - Blocks the delete of rows from the referencedtable when there are dependent rows in this table.
Cascade Delete - Deletes the dependent rows from this tablewhen the corresponding parent table row is deleted.
Set to Null on Delete - Sets the foreign key column values in thistable to null when the corresponding parent table row is deleted.
d. Click Add.e. Click Next.
Next, add a constraint (optional). You can create multiple constraints, but youmust add each constraint separately.
9. To add a constraint:. Specify the type of constraint (Check or Unique).
A check constraint is a validation check on one or more columns withinthe table. No records can be inserted or updated in a table which violatesan enabled check constraint. A unique constraint designates a columnor a combination of columns as a unique key. To satisfy a uniqueconstraint, no two rows in the table can have the same values for thespecified columns.
a. Enter the constraint in the field provided. For unique constraints, selectthe column(s) that are to be unique. For check constraints, enter the
expression that should be checked such as flag in ('Y','N').b. Click Add.
10. Click Next.
A confirmation page appears.
11. Click Create.
Note that it is not necessary to follow the steps for creating a table in the orderdescribed in the previous procedure. Instead of navigating through the wizard byclicking the Next and Previous button, you can also access a specific step byselecting it in the progress indicator on the left side of the page.
See Also:
7/31/2019 Managing Database Objects With Object Browser
http://slidepdf.com/reader/full/managing-database-objects-with-object-browser 9/20
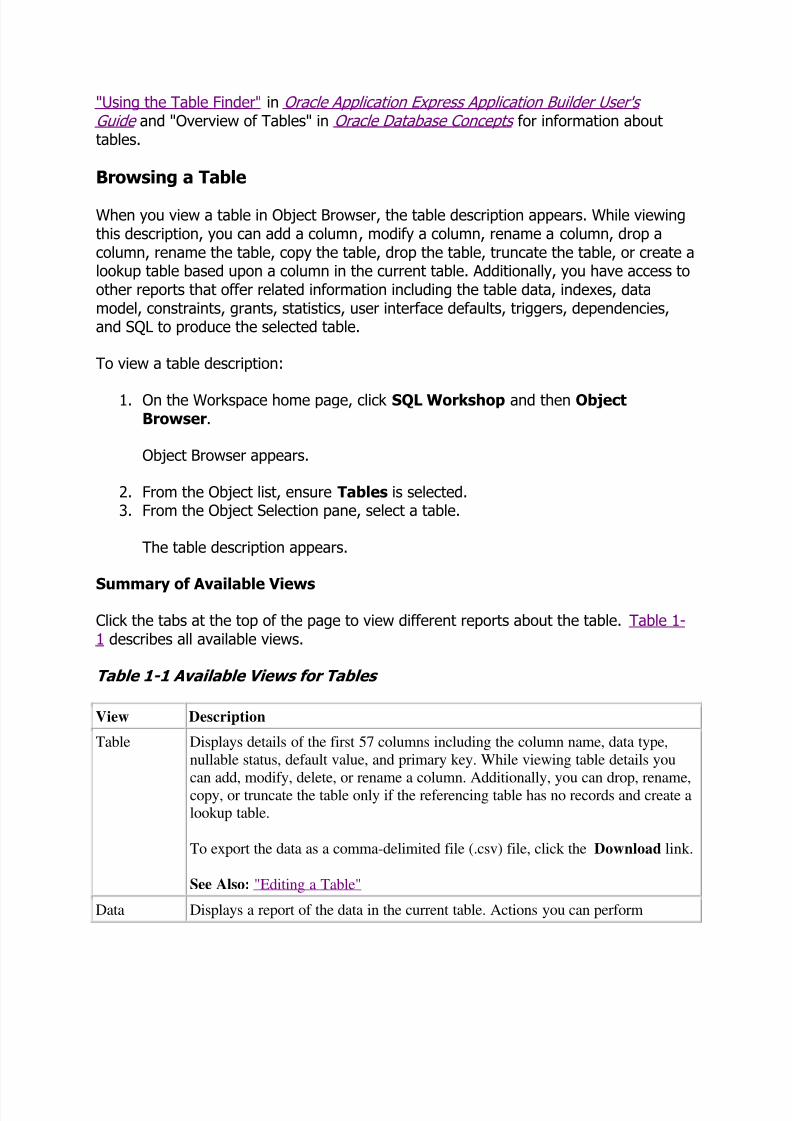
"Using the Table Finder" in Oracle Application Express Application Builder User's Guide and "Overview of Tables" in Oracle Database Concepts for information abouttables.
Browsing a Table
When you view a table in Object Browser, the table description appears. While viewingthis description, you can add a column, modify a column, rename a column, drop acolumn, rename the table, copy the table, drop the table, truncate the table, or create alookup table based upon a column in the current table. Additionally, you have access toother reports that offer related information including the table data, indexes, datamodel, constraints, grants, statistics, user interface defaults, triggers, dependencies,and SQL to produce the selected table.
To view a table description:
1. On the Workspace home page, click SQL Workshop and then ObjectBrowser.
Object Browser appears.
2. From the Object list, ensure Tables is selected.3. From the Object Selection pane, select a table.
The table description appears.
Summary of Available Views
Click the tabs at the top of the page to view different reports about the table. Table 1-1 describes all available views.
Table 1-1 Available Views for Tables
View Description
Table Displays details of the first 57 columns including the column name, data type,
nullable status, default value, and primary key. While viewing table details you
can add, modify, delete, or rename a column. Additionally, you can drop, rename,
copy, or truncate the table only if the referencing table has no records and create alookup table.
To export the data as a comma-delimited file (.csv) file, click the Download link.
See Also: "Editing a Table"
Data Displays a report of the data in the current table. Actions you can perform

7/31/2019 Managing Database Objects With Object Browser
http://slidepdf.com/reader/full/managing-database-objects-with-object-browser 10/20
View Description
include:
Query - Enables you to sort by column. To restrict specific rows, enter a
condition in the Column Condition field. Use the percent sign (%) forwildcards. From Order by, select the columns you want to review and
click Query.
Count Rows - Displays a report of the number of rows in the currenttable.
Insert Row - Enables you to insert a row into the table.
Download - Exports all data in the table to a spreadsheet. Click the
download link at the bottom of the page to export all data in the selectedtable.
Indexes Displays indexes associated with this table. Actions you can perform
include Create and Drop.
See Also: "Managing Indexes" Model Displays a graphical representation of the selected table along with all related
tables. Related tables are those that reference the current table in a foreign key
and those tables referenced by foreign keys within the current table.
You can position the cursor over an underlined table name to view therelationship between that table and the current table. Click an underlined tablename to view the model of the related table.
Constraints Displays a list of constraints for the current table. Actions you can perform
include Create, Drop, Enable, and Disable.
Grants Displays a list of grants on the current table, including the grantee, the privilege,and grant options. Actions you can perform in this viewinclude Grant and Revoke.
Statistics Displays collected statistics about the current table, including the number of rows
and blocks, the average row length, sample size, when the data was last analyzed,
and the compression status (enabled or disabled). Click Analyze to access theAnalyze Table Wizard.
UI Defaults Displays user interface defaults for forms and reports. User interface defaults
enable developers to assign default user interface properties to a table, column, or
view within a specified schema.
Click Edit to edit defined user interface defaults. Click Create Defaults to
initialize user interface defaults for tables that do not currently have user interfacedefaults defined.
See Also: "Managing User Interface Defaults"
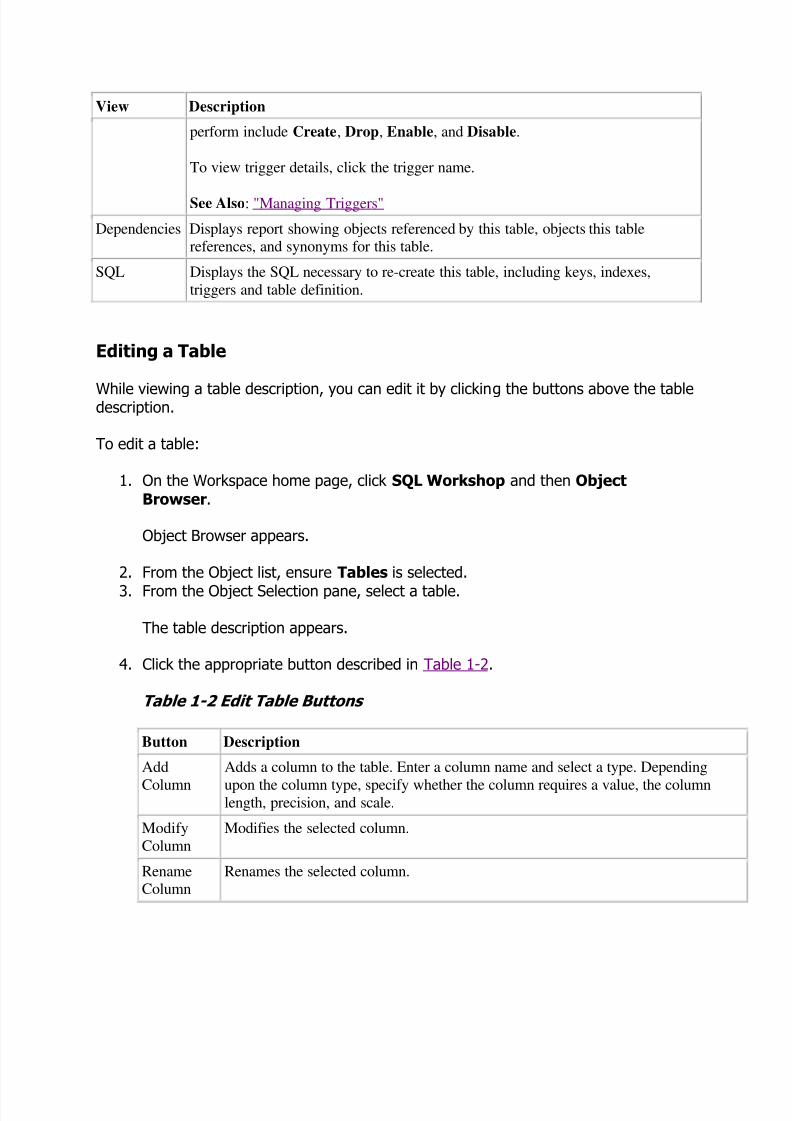
Triggers Displays a list of triggers associated with the current table. Actions you can
7/31/2019 Managing Database Objects With Object Browser
http://slidepdf.com/reader/full/managing-database-objects-with-object-browser 11/20
View Description
perform include Create, Drop, Enable, and Disable.
To view trigger details, click the trigger name.
See Also: "Managing Triggers"
Dependencies Displays report showing objects referenced by this table, objects this tablereferences, and synonyms for this table.
SQL Displays the SQL necessary to re-create this table, including keys, indexes,
triggers and table definition.
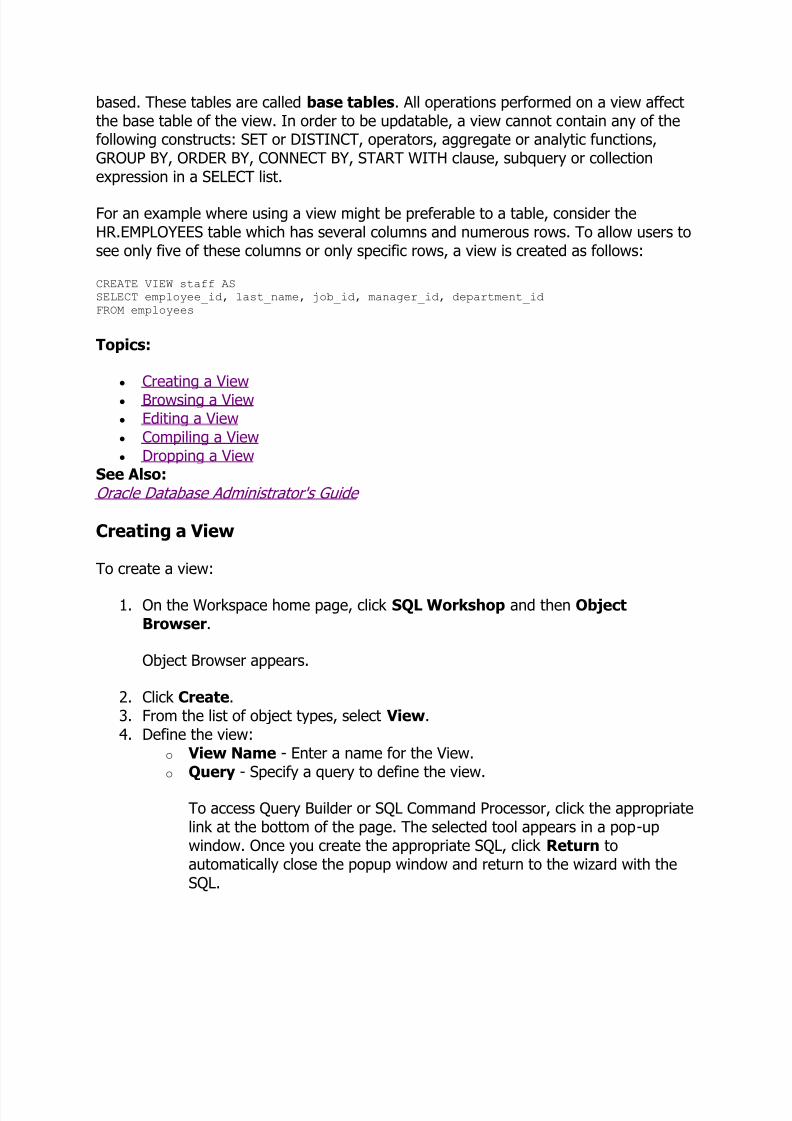
Editing a Table
While viewing a table description, you can edit it by clicking the buttons above the tabledescription.
To edit a table:
1. On the Workspace home page, click SQL Workshop and then ObjectBrowser.
Object Browser appears.
2. From the Object list, ensure Tables is selected.
3. From the Object Selection pane, select a table.
The table description appears.
4. Click the appropriate button described in Table 1-2.
Table 1-2 Edit Table Buttons
Button Description
Add
Column
Adds a column to the table. Enter a column name and select a type. Depending
upon the column type, specify whether the column requires a value, the columnlength, precision, and scale.
Modify
Column
Modifies the selected column.
RenameColumn
Renames the selected column.

7/31/2019 Managing Database Objects With Object Browser
http://slidepdf.com/reader/full/managing-database-objects-with-object-browser 12/20
Button Description
Drop
Column
Drops the selected column.
Rename Renames the selected table.
Copy Copies the selected table.
Drop Drops the selected table.
See Also: "Using the Recycle Bin to View and Restore Dropped Objects"
Truncate Removes all rows from the selected table. Truncating a table can be more efficientthan dropping and re-creating a table. Dropping and re-creating a table may
invalidate dependent objects, requiring you to regrant object privileges or re-create
indexes, integrity constraints, and triggers.
Create
LookupTable
Creates a lookup table based on the column you select. That column becomes a
foreign key to the lookup table.
Dropping a Table
To drop a table:
1. On the Workspace home page, click SQL Workshop and then ObjectBrowser.
Object Browser appears.
2. From the Object list, ensure Tables is selected.3. From the Object Selection pane, select a table.
The table description appears.
4. Click Drop.5. To confirm, click Finish.
See Also:
"Using the Recycle Bin to View and Restore Dropped Objects"
Managing Views
A view is a logical representation of another table or combination of tables. A view doesnot contain or store data but derives its data from the views or tables on which it is
7/31/2019 Managing Database Objects With Object Browser
http://slidepdf.com/reader/full/managing-database-objects-with-object-browser 13/20
based. These tables are called base tables. All operations performed on a view affectthe base table of the view. In order to be updatable, a view cannot contain any of thefollowing constructs: SET or DISTINCT, operators, aggregate or analytic functions,GROUP BY, ORDER BY, CONNECT BY, START WITH clause, subquery or collectionexpression in a SELECT list.
For an example where using a view might be preferable to a table, consider theHR.EMPLOYEES table which has several columns and numerous rows. To allow users tosee only five of these columns or only specific rows, a view is created as follows:
CREATE VIEW staff ASSELECT employee_id, last_name, job_id, manager_id, department_idFROM employees
Topics:
Creating a View
Browsing a View Editing a View
Compiling a View
Dropping a View See Also:
Oracle Database Administrator's Guide
Creating a View
To create a view:
1. On the Workspace home page, click SQL Workshop and then ObjectBrowser.
Object Browser appears.
2. Click Create.3. From the list of object types, select View.4. Define the view:
o View Name - Enter a name for the View.o Query - Specify a query to define the view.
To access Query Builder or SQL Command Processor, click the appropriatelink at the bottom of the page. The selected tool appears in a pop-upwindow. Once you create the appropriate SQL, click Return toautomatically close the popup window and return to the wizard with theSQL.
7/31/2019 Managing Database Objects With Object Browser
http://slidepdf.com/reader/full/managing-database-objects-with-object-browser 14/20
5. Click Next.
A confirmation page appears.
6. Click Create.
See Also:
"Building SQL Queries with Query Builder" and "Using SQL Commands"
Browsing a View
When you access a view in Object Browser, the Detail pane displays a report listing thecolumns in that view.
To browse a view:
1. On the Workspace home page, click SQL Workshop and then ObjectBrowser.
Object Browser appears.
2. From the Object list, select Views.3. From the Object Selection pane, select a view.
The view definition appears displaying the appropriate columns.
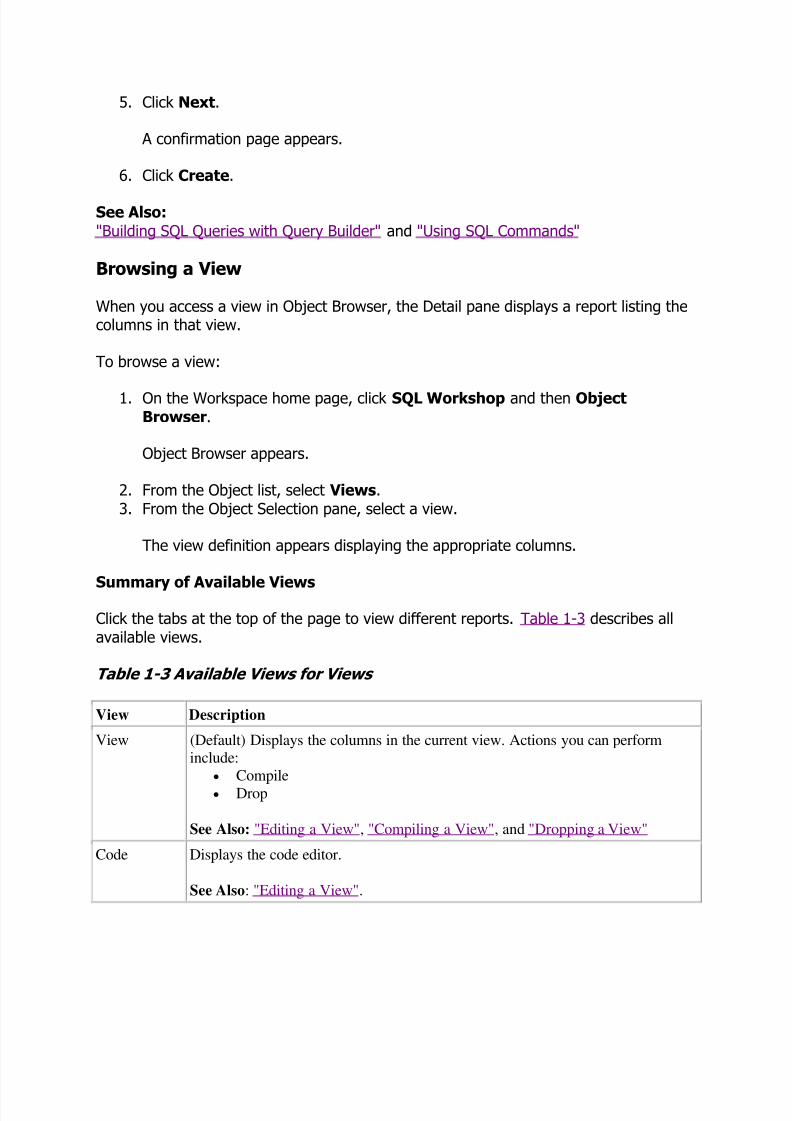
Summary of Available Views
Click the tabs at the top of the page to view different reports. Table 1-3 describes allavailable views.
Table 1-3 Available Views for Views
View Description
View (Default) Displays the columns in the current view. Actions you can performinclude:
Compile
Drop
See Also: "Editing a View", "Compiling a View", and "Dropping a View"
Code Displays the code editor.
See Also: "Editing a View".
7/31/2019 Managing Database Objects With Object Browser
http://slidepdf.com/reader/full/managing-database-objects-with-object-browser 15/20
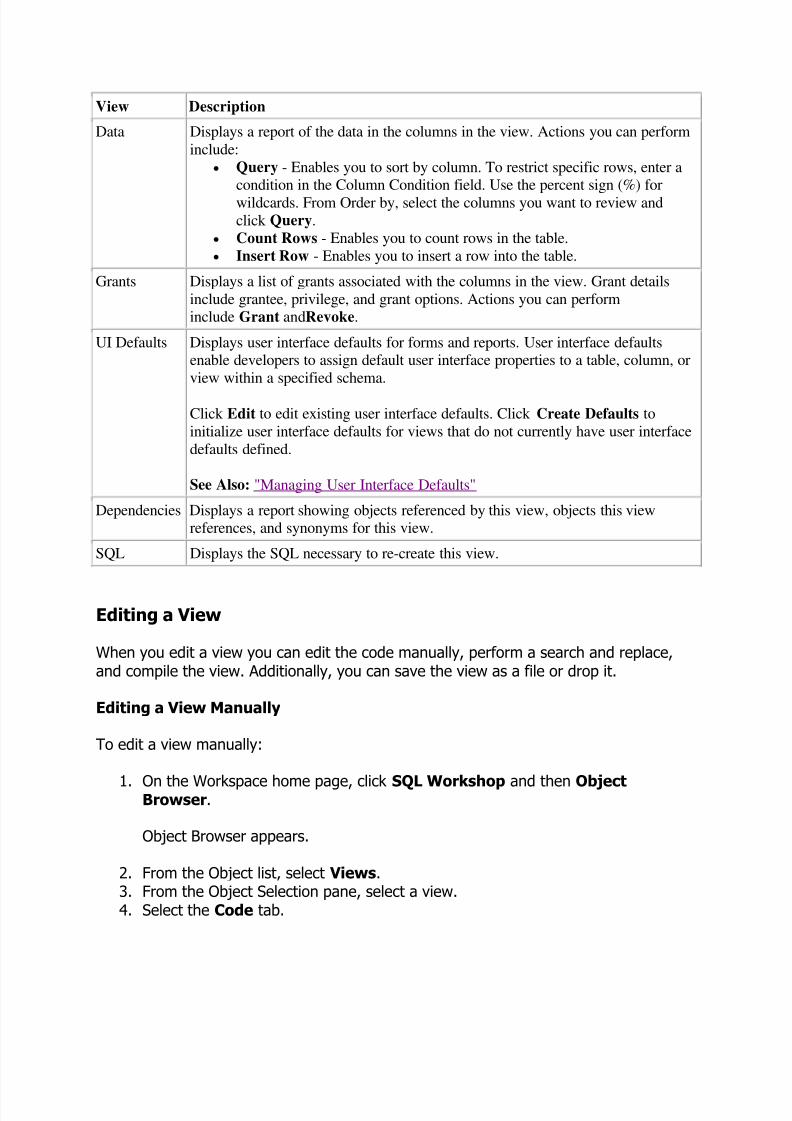
View Description
Data Displays a report of the data in the columns in the view. Actions you can perform
include:
Query - Enables you to sort by column. To restrict specific rows, enter acondition in the Column Condition field. Use the percent sign (%) for
wildcards. From Order by, select the columns you want to review and
click Query.
Count Rows - Enables you to count rows in the table.
Insert Row - Enables you to insert a row into the table.
Grants Displays a list of grants associated with the columns in the view. Grant details
include grantee, privilege, and grant options. Actions you can performinclude Grant andRevoke.
UI Defaults Displays user interface defaults for forms and reports. User interface defaultsenable developers to assign default user interface properties to a table, column, or
view within a specified schema.
Click Edit to edit existing user interface defaults. Click Create Defaults to
initialize user interface defaults for views that do not currently have user interface
defaults defined.
See Also: "Managing User Interface Defaults"
Dependencies Displays a report showing objects referenced by this view, objects this viewreferences, and synonyms for this view.
SQL Displays the SQL necessary to re-create this view.
Editing a View
When you edit a view you can edit the code manually, perform a search and replace,and compile the view. Additionally, you can save the view as a file or drop it.
Editing a View Manually
To edit a view manually:
1. On the Workspace home page, click SQL Workshop and then ObjectBrowser.
Object Browser appears.
2. From the Object list, select Views.3. From the Object Selection pane, select a view.4. Select the Code tab.
7/31/2019 Managing Database Objects With Object Browser
http://slidepdf.com/reader/full/managing-database-objects-with-object-browser 16/20
The code editor appears.
If you edit and make changes to a view, you must compile. See "Compiling a View".
Using Find and Replace
Click Find & Replace to perform a basic search and replace.
Downloading a View
Click Download Source to save the current view as a file.
Compiling a View
If you edit and make changes to a view, you must compile to save your changes. Note
that there is no save function since this is just a view of the object within the database.
Click Save & Compile to re-create the current view.
Dropping a View
To drop a view:
1. On the Workspace home page, click SQL Workshop and then ObjectBrowser.
Object Browser appears.
2. From the Object list, select Views.3. From the Object Selection pane, select a view.4. Select the View tab or the Code tab.5. Click Drop.6. To confirm, click Finish.
Managing Indexes
An index is an optional structure associated with tables and clusters. You can createindexes on one or more columns of a table to speed access to data on those columns.
When you view an index in Object Browser, the Detail pane displays a report containingthe index name, index type, table owner, table type, uniqueness, compression, prefixlength, tablespace name, status, last analyzed and a listing of the indexed columns.
7/31/2019 Managing Database Objects With Object Browser
http://slidepdf.com/reader/full/managing-database-objects-with-object-browser 17/20
Topics:
Creating an Index
Browsing an Index
Dropping an Index
Creating an Index
To create an index:
1. On the Workspace home page, click SQL Workshop and then ObjectBrowser.
Object Browser appears.
2. Click Create.
3. From the list of object types, select Index.4. Select a table and select the type of index you want to create. Available index
types include:o Normal - Indexes one or more scalar typed object attributes of a tableo Text - Creates a text index (Oracle Text)
5. Click Next.6. Create the index definition. Specify an index name, select one or more columns
to be indexed, and click Next.7. To confirm, click Finish.
Browsing an Index
To browse an index:
1. On the Workspace home page, click SQL Workshop and then ObjectBrowser.
Object Browser appears.
2. From the Object list, select Indexes.3. From the Object Selection pane, select an index.
The index appears displaying the index name, type, table owner, table type anda listing of indexed columns.
Summary of Available Views
7/31/2019 Managing Database Objects With Object Browser
http://slidepdf.com/reader/full/managing-database-objects-with-object-browser 18/20
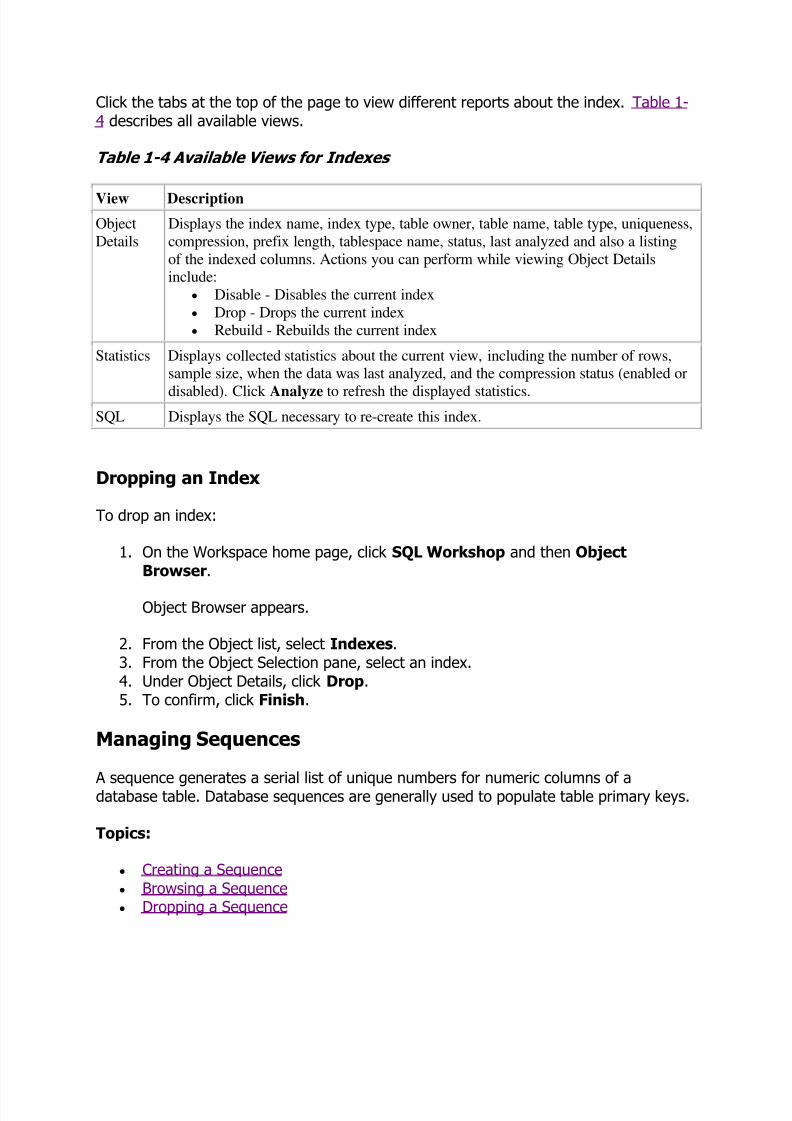
Click the tabs at the top of the page to view different reports about the index. Table 1-4 describes all available views.
Table 1-4 Available Views for Indexes
View Description
Object
Details
Displays the index name, index type, table owner, table name, table type, uniqueness,
compression, prefix length, tablespace name, status, last analyzed and also a listing
of the indexed columns. Actions you can perform while viewing Object Detailsinclude:
Disable - Disables the current index
Drop - Drops the current index
Rebuild - Rebuilds the current index
Statistics Displays collected statistics about the current view, including the number of rows,sample size, when the data was last analyzed, and the compression status (enabled or
disabled). Click Analyze to refresh the displayed statistics.
SQL Displays the SQL necessary to re-create this index.
Dropping an Index
To drop an index:
1. On the Workspace home page, click SQL Workshop and then ObjectBrowser.
Object Browser appears.
2. From the Object list, select Indexes.3. From the Object Selection pane, select an index.4. Under Object Details, click Drop.5. To confirm, click Finish.
Managing Sequences
A sequence generates a serial list of unique numbers for numeric columns of adatabase table. Database sequences are generally used to populate table primary keys.
Topics:
Creating a Sequence
Browsing a Sequence Dropping a Sequence
7/31/2019 Managing Database Objects With Object Browser
http://slidepdf.com/reader/full/managing-database-objects-with-object-browser 19/20
Creating a Sequence
To create a sequence:
1. On the Workspace home page, click SQL Workshop and then Object
Browser.
Object Browser appears.
2. Click Create.3. From the list of object types, select Sequence.4. Specify the following and click Next:
o Sequence Name - Enter the name of the sequence.o Preserve Case - To have the final sequence name match the case entered
in the Sequence Name field, click Preserve Case.o Start With - Enter the number of the first sequence. The first reference
to sequence_name.nextval returns this number.o Minimum Value - Enter the minimum value this sequence can return.o Maximum Value - Enter the maximum value this sequence can return.
o Increment By - Each call to sequence_name.nextval will return a valuegreater than the last, until the maximum value is reached. Enter the valueused to increment to the next sequence number.
o Cycle - Select this option to restart the sequence number to the minimumvalue when the maximum value is reached. This is not recommended if using the sequence for primary key creation.
o Number to Cache - For faster access, specify how many sequence values
are stored in memory.o Order - Specify ORDER to guarantee that sequence numbers are
generated in order of request. This option is necessary if using Real Application Clusters (Oracle RAC).
A confirmation page appears.
5. Click Create.
Browsing a Sequence
To browse a sequence:
1. On the Workspace home page, click SQL Workshop and then ObjectBrowser.
Object Browser appears.
7/31/2019 Managing Database Objects With Object Browser
http://slidepdf.com/reader/full/managing-database-objects-with-object-browser 20/20
2. From the Object list, select Sequences.3. From the Object Selection pane, select a sequence.
The Object Details view appears.
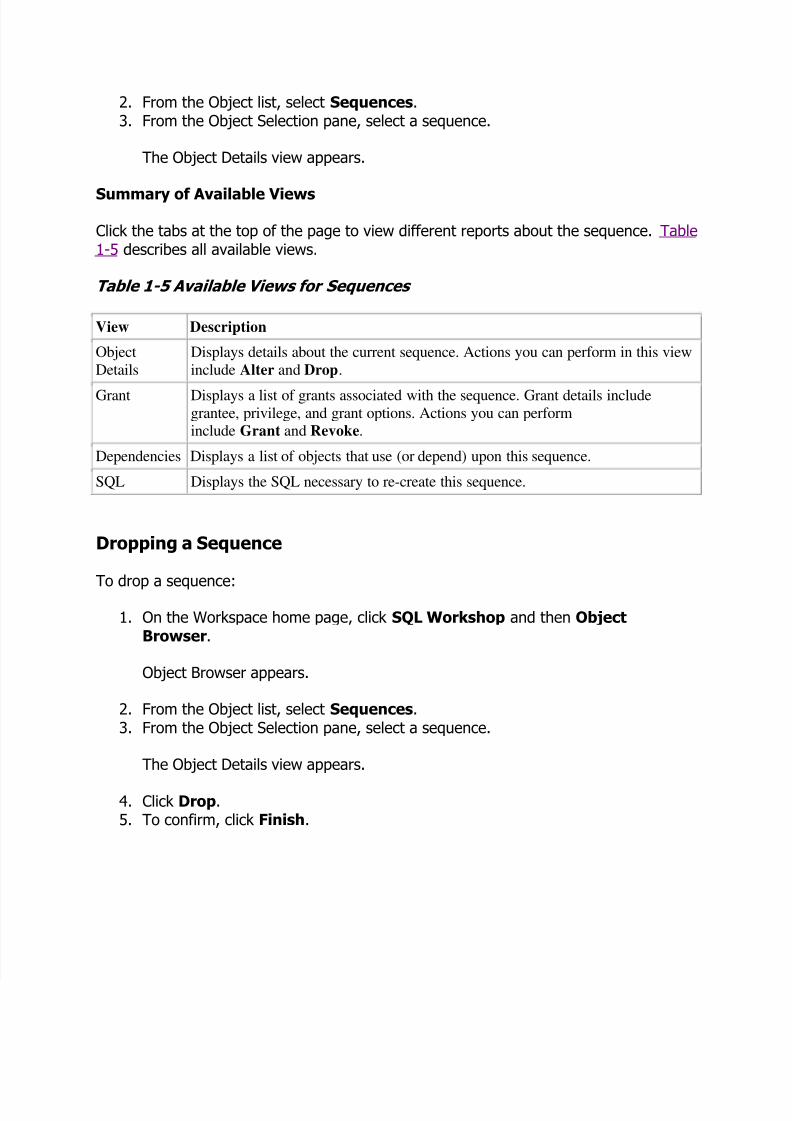
Summary of Available Views
Click the tabs at the top of the page to view different reports about the sequence. Table1-5 describes all available views.
Table 1-5 Available Views for Sequences
View Description
Object
Details
Displays details about the current sequence. Actions you can perform in this view
include Alter and Drop.
Grant Displays a list of grants associated with the sequence. Grant details includegrantee, privilege, and grant options. Actions you can performinclude Grant and Revoke.
Dependencies Displays a list of objects that use (or depend) upon this sequence.
SQL Displays the SQL necessary to re-create this sequence.
Dropping a Sequence
To drop a sequence:
1. On the Workspace home page, click SQL Workshop and then ObjectBrowser.
Object Browser appears.
2. From the Object list, select Sequences.3. From the Object Selection pane, select a sequence.
The Object Details view appears.
4. Click Drop.5. To confirm, click Finish.