making wargame terrain - wordpress.com · making wargame terrain by bill owen. 2 1 vacuum old...
TRANSCRIPT
1
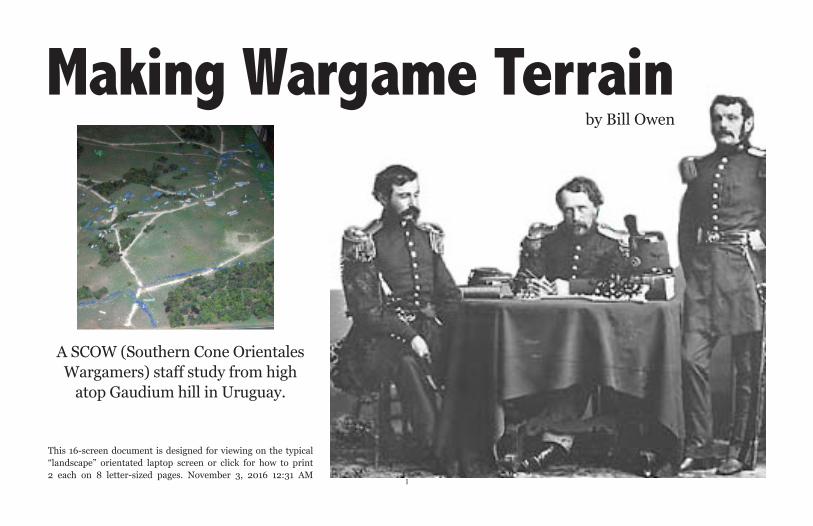
A SCOW (Southern Cone Orientales Wargamers) staff study from high
atop Gaudium hill in Uruguay.
This 16-screen document is designed for viewing on the typical “landscape” orientated laptop screen or click for how to print 2 each on 8 letter-sized pages. November 3, 2016 12:31 AM
Making Wargame Terrainby Bill Owen

2
1 Vacuum old roads/rivers
Remove the forests & houses; vacuum the fine materials (roads, rivers, random bushes) with a dust buster (recycle all). The camera and flash makes the terrain look more harsh than it does to the eye; for example, it detects the old roads but you can’t see them otherwise.

3
2 Remove Felt & Hills
After setting aside the felt, unpin the old hills and put them back into holes in your styrofoam (reusable). Notice that I painted the styrofoam green (with latex paint not enamel! Enamel will melt the foam). That’s because I used ordinary felt that’s thin and the pink or blue foam show through will change the felt’s color to pinkish or blueish. It doesn’t matter if it’s scuffed or scruffy--just generally green or earthtone.

4
3 Recycling Hills Back Into Styrofoam
Stick the old hills back into the styrofoam. You are seeing the underneath side. Note that gouges and gaps really won’t matter.

5
4 Duct Tape Hills Before Cutting New
To make it easier to cut the styrofoam and keep pieces from falling out, I duct-taped the hills in place; any tape might work.

6
5 Flip To Green-painted Side & Sketch on Grid (like map)
First, does your foam have a grid that matches the map you are using? The map was done in 12” grid but I play V&B in 2/3 scale so I used a giant t-square to grid the foam every 8” instead. Then comparing the 2 grids, I drew on foam the shape of the hills (with a magic marker) AND numbered each hill so I could keep them straight.
7
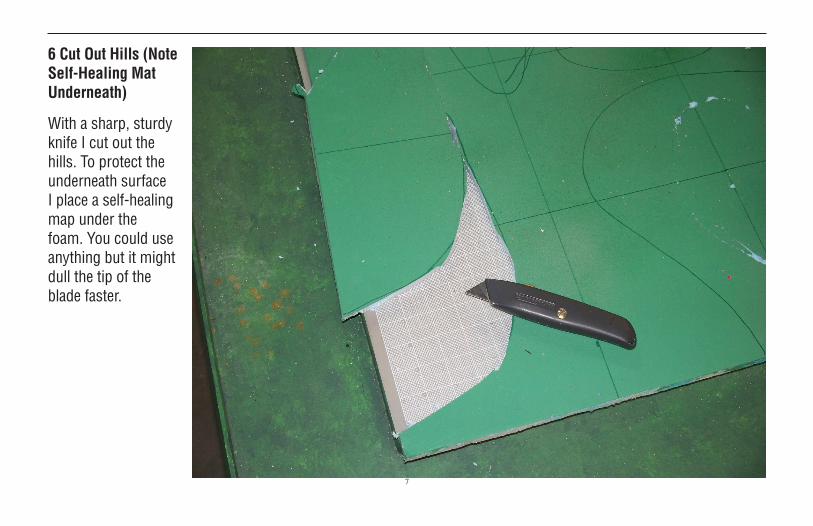
6 Cut Out Hills (Note Self-Healing Mat Underneath)
With a sharp, sturdy knife I cut out the hills. To protect the underneath surface I place a self-healing map under the foam. You could use anything but it might dull the tip of the blade faster.

8
7 Pin Hills Into Place
Pin the hills into place with 2-3 big-head pins. The green foam headed pins are for pinning the felt down in a later step.

9
8 Some Hills Need A Little Duct Tape Too!
Sometimes on the edge of the table duct tape can be used to hold hills in place better. (My table was built as a sand table originally and now I run the game out to the edge.)

10
9 Pin Down Felt Around Hills
Using some big-head pins with dark colored heads stuck into green foam, I pin down the edges of the hills to give them more definition and allow narrow valleys to be obviously lower. Then bush clumps/pins look harsh now but once you add more terrain and random bushes, they won’t be so noticeable.

11
10 Add Blue Glitter For Rivers...
The cheapest, easiest way to make natural-looking free-form rivers is to lightly sprinkle fine blue glitter just where you need them. I say lightly because a heavy carpet of glitter is hard to control the consistency and doesn’t look so good.

12
11 ...Fine RR Ballast For Roads With Tool
The roads are made with fine hobby railroad ballast (can have different grades of road with different colors of ballast!). To make straight roads, I made a tool out of 2 u-shaped brass pieces separated by about 1/4” open space (a bead taped at each end). Then just sprinkle the road material between and the channels catch most of the excess ballast. I don’t think it needs to be perfect because most olden roads weren’t built with auto-bahn regularity. Even a complex road net can be sprinkled on quickly.

13
12 Finish With Forest ‘Blocks
I make Forest in 4 shapes 2x2”, half (diagonal) 2x2”, 1x2” & .5x2” using 2mm brown craft foam, with green dyed pillow stuffings white glued on & sprinkled green flocking held with diluted white glue (woodland scenics for last 2 items)....and you’re done!

14
The Result
A naturalistic set up that might look nicer than expensive store-bought (or scratch-built terrain). Or at least less expensive and easier. This terrain system works best when setting up game tables at home or a semi-permanent location. The road/river material obviously could not survive tilting the board sideways to carry out a door way, to a car and to a convention. The felt and hills could be pre-made and then carried to a convention and adding the roads, rivers and forests won’t take too long to set up. Don’t forget your dustbuster to recycle roads & rivers at the end of the game.
Examples
On the next page, you will see this terrain with the troops in battle.
Along the edge of the table I added a shelf for clutter, drinks, reinforcements, rulers etc. Something that is out of the ordinary is each division’s “camp” where casualties are placed. In Volley & Bayonet each strength point lost is either tracked on a roster or if your troops are removable each SP can be placed in the camp to track when Morale Collapse occurs. My troops are actually foam blocks on magnets that adhere to steel stands. Each block is roughly a regiment.

15

16