maintenance scheduling for microsoft® access and …€¦ · next steps ... chapter 8: running...
TRANSCRIPT

Maintenance Scheduling for
Microsoft® Access and Visual Basic 6.0
Supports Microsoft® Access
and Visual Basic 6.0
www.fmsinc.com


Total Visual Agent License Agreement i
License Agreement
PLEASE READ THE FMS SOFTWARE LICENSE AGREEMENT. YOU MUST AGREE
TO BE BOUND BY THE TERMS OF THIS AGREEMENT BEFORE YOU CAN
INSTALL OR USE THE SOFTWARE.
IF YOU DO NOT ACCEPT THE TERMS OF THE LICENSE AGREEMENT FOR THIS
OR ANY FMS SOFTWARE PRODUCT, YOU MAY NOT INSTALL OR USE THE
SOFTWARE. YOU SHOULD PROMPTLY RETURN ANY FMS SOFTWARE
PRODUCT FOR WHICH YOU ARE UNWILLING OR UNABLE TO AGREE TO THE
TERMS OF THE FMS SOFTWARE LICENSE AGREEMENT FOR A REFUND OF
THE PURCHASE PRICE.
Ownership of the Software
The enclosed software program (“SOFTWARE”) and the accompanying
written materials are owned by FMS, Inc. or its suppliers and are protected
by United States copyright laws, by laws of other nations, and by
international treaties. You must treat the SOFTWARE like any other
copyrighted material except that you may make one copy of the SOFTWARE
solely for backup or archival purpose, and you may transfer the SOFTWARE
to a permanent storage device.
Grant of License
The SOFTWARE is available on a per license basis. Licenses are granted on a
PER INSTALLATION basis. For each license, one designated person can use
the SOFTWARE on one computer at a time.
Other Limitations
Under no circumstances may you attempt to reverse engineer this product.
The SOFTWARE is licensed as a single product and may not be separated by
use for more than one user at a time. You may not rent or lease the
SOFTWARE.
You may not transfer any of your rights under the FMS Software License
Agreement to other individuals or entities. Without prejudice to any other
rights, FMS may terminate this FMS Software License Agreement at any
time if you fail to comply with any of its terms. In such an event of
termination, you must destroy and stop using all affected SOFTWARE
copies.

ii License Agreement Total Visual Agent
Transfer of License
If your SOFTWARE is marked “NOT FOR RESALE,” you may not sell or resell
the SOFTWARE, nor may you transfer the FMS Software license.
If your SOFTWARE is not marked “NOT FOR RESALE,” you may transfer your
license of the SOFTWARE to another user or entity provided that:
1. the recipient agrees to all terms of the FMS Software License Agreement;
2. you provide all original materials including software disks or compact disks, and any other part of the SOFTWARE’s physical distribution to the recipient;
3. you remove all installations of the SOFTWARE;
4. you notify FMS, in writing, of the ownership transfer.
Limited Warranty
If you discover physical defects in the media on which this SOFTWARE is
distributed, or in the related manual, FMS, Inc. will replace the media or
manual at no charge to you, provided you return the item(s) within 60 days
after purchase.
ALL IMPLIED WARRANTIES ON THE MEDIA AND MANUAL, INCLUDING
IMPLIED WARRANTIES OF MERCHANTABILITY AND FITNESS FOR A
PARTICULAR PURPOSE ARE LIMITED TO SIXTY (60) DAYS FROM THE DATE OF
PURCHASE OF THIS PRODUCT.
Although FMS, Inc. has tested this program and reviewed the
documentation, FMS, Inc. makes no warranty or representation, either
expressed or implied, with respect to this software, its quality, performance,
merchantability, or fitness for a particular purpose. As a result, this software
is licensed “AS-IS,” and you are assuming the entire risk as to its quality and
performance. IN NO EVENT WILL FMS, INC. BE LIABLE FOR DIRECT,
INDIRECT, SPECIAL, INCIDENTAL, OR CONSEQUENTIAL DAMAGES RESULTING
FROM THE USE, OR INABILITY TO USE THIS SOFTWARE OR ITS
DOCUMENTATION.
THE WARRANTY AND REMEDIES SET FORTH IN THIS LIMITED WARRANTY
ARE EXCLUSIVE AND IN LIEU OF ALL OTHERS, ORAL OR WRITTEN, EXPRESSED
OR IMPLIED.
Some states do not allow the exclusion or limitation of implied warranties or
liability for incidental or consequential damages, so the above limitations or
exclusions may not apply to you. This warranty gives you specific legal
rights; you may also have other rights that vary from state to state.

Total Visual Agent License Agreement iii
U.S. Government Restricted Rights
The SOFTWARE and documentation are provided with RESTRICTED RIGHTS.
Use, duplication, or disclosure by the Government is subject to restrictions
as set forth in subparagraph (c) (1) (ii) of the Rights in Technical Data and
Computer Software clause at DFARS 252.227-7013 or subparagraphs (c) (1)
and (2) of the Commercial Computer Software - Restricted Rights at 48 CFR
52.227-19, as applicable.
Manufacturer is FMS Inc., Vienna, Virginia.
Printed in the USA.
Total Visual Agent is copyright by FMS, Inc. All rights reserved.
Microsoft, Access, Excel, Word, Windows, and Visual Basic are registered trademarks of Microsoft
Corporation. All other trademarks are trademarks of their respective owners.


Acknowledgments
We would like to thank everyone who contributed to make Total Visual
Agent a reality. In particular, we would like to thank our many existing Total
Visual Agent customers who offered feedback and suggestions for
improvement. Many of their suggestions are incorporated in this version.
Thanks also go to all our beta testers for their diligence and feedback.
At Microsoft, we would like to thank all those on the Access and Jet Engine
team who helped with technical support.
Many people at FMS, Inc. contributed to the creation of Total Visual Agent.
They include:
Design and Development: Luke Chung, Scott Ellis, and Jim Ferguson
Quality Assurance: Molly Pell, Aparna Pophale, and Madhuja Nair
Technical Support: John Litchfield
Documentation: Luke Chung, Molly Pell, and Katie Bredahl

vi Table of Contents Total Visual Agent
Table of Contents
Chapter 1: Introduction ........................................................................ 3
About Total Visual Agent ......................................................................... 4
How Total Visual Agent Works ................................................................ 5
New Features in This Version: Total Visual Agent 2016 .......................... 6
Enhancements in Total Visual Agent 2013 ............................................ 10
Enhancements in Total Visual Agent 2007 ............................................ 16
Visit Our Web Site ................................................................................. 17
Chapter 2: Installation ........................................................................ 21
System Requirements ........................................................................... 22
Installing Total Visual Agent .................................................................. 22
Uninstalling Total Visual Agent.............................................................. 23
Chapter 3: Startup and Configuration ................................................. 25
Launching Total Visual Agent ................................................................ 26
Starting Total Visual Agent for the First Time ....................................... 26
Using the Total Visual Agent Manager .................................................. 27
Configuring the Options ........................................................................ 32
Importing Settings from a Previous Version.......................................... 38
Chapter 4: Scheduling Events ............................................................. 41
Event Schedule Overview ...................................................................... 42
Creating an Event Group ....................................................................... 42
Event Schedule Cycles ........................................................................... 43
Hourly Schedules ................................................................................... 44
Daily Schedules ...................................................................................... 46
Weekly Schedules .................................................................................. 47
Monthly Schedules ................................................................................ 47
One Time Events.................................................................................... 48
Managing Events ................................................................................... 48
Next Steps ............................................................................................. 51
Chapter 5: Adding Items to Events ...................................................... 53
Event Item Overview ............................................................................. 54
Adding an Access Jet Database Item ..................................................... 55
Adding an Access Data Project Item ...................................................... 59
Adding a Task Group Item ..................................................................... 61
Adding a Directory Item ........................................................................ 63
Moving Items to a Different Event ........................................................ 66
Next Steps ............................................................................................. 66

Total Visual Agent Table of Contents vii
Chapter 6: Adding Actions to Event Items ........................................... 67
Action Overview ..................................................................................... 68
Archive Database Action ........................................................................ 69
Table Data Extract Action ....................................................................... 74
Compact Database Action ...................................................................... 78
Custom Command Action ...................................................................... 82
Database Statistics Action ...................................................................... 86
Execute Named Macro Action ................................................................ 88
Testing a Scheduled Action .................................................................... 91
Chapter 7: Other Management Features ............................................. 95
Managed Databases ............................................................................... 96
Monitor and Service Status .................................................................... 97
Activity History Log................................................................................. 99
Database Statistics ............................................................................... 102
Chapter 8: Running Scheduled Events ............................................... 107
Running Scheduled Events ................................................................... 108
Using the Total Visual Agent Monitor .................................................. 108
Using the Total Visual Agent Service .................................................... 112
Chapter 9: Product Support .............................................................. 121
Support Resources ............................................................................... 122
Web Site Support ................................................................................. 122
Technical Support Options ................................................................... 123
Contacting Technical Support .............................................................. 125
Index ............................................................................................... 127


Welcome to Total Visual Agent!
Thank you for selecting Total Visual Agent. This is the seventh major version
of the product since its debut with Access 2.0 in 1996.
Total Visual Agent is developed by FMS, the world’s leading developer of
products for Microsoft Access and Visual Basic. In addition to Total Visual
Agent, we offer a wide range of products for Microsoft Access and VB
developers, administrators, and users:
Total Access Analyzer (database documentation)
Total Access Admin (database maintenance control)
Total Access Components (ActiveX controls)
Total Access Detective (difference detector)
Total Access Emailer (email blaster)
Total Access Memo (rich text format memo fields)
Total Access Speller (spell checker)
Total Access Statistics (statistical analysis program)
Total Access Startup (version launcher)
Total Visual Agent (maintenance and scheduling)
Total Visual CodeTools (code builders and managers)
Total Visual SourceBook (code library)
Total Zip Code Database (city and state lookup lists)
EzUpData (share your data, reports, and files over the internet
Visit our web site, www.fmsinc.com, for more information. We also offer
Sentinel Visualizer, an advanced data visualization program that identifies
relationships among people, places and events through link charts,
geospatial mapping, timelines, social network analysis, etc. Visit our
Advanced Systems Group at www.fmsasg.com for details.
Please make sure you sign up for our free email newsletter. This guarantees
that you will be contacted in the event of news, upgrades, and beta
invitations. Once again, thank you for selecting Total Visual Agent.
Luke Chung President


Total Visual Agent Chapter 1: Introduction 3
Chapter 1: Introduction
Total Visual Agent offers a practical and professional solution to ensure that your Access/Jet
databases perform optimally and are administered properly. Simply schedule it to perform
all your database chores—repair/compact, backup, extract data, run macros, collect
statistics, run custom commands—and you never have to worry about them again. This
chapter introduces the product, and explains how it can help you manage and maintain your
databases automatically.
Topics in this Chapter
About Total Visual Agent
How Total Visual Agent Works
New Features in This Version
Visit Our Web Site

4 Chapter 1: Introduction Total Visual Agent
About Total Visual Agent
People and computers run on different schedules. The best time to perform
routine maintenance tasks on your databases—compacting, repairing, and
backing them up—is when nobody is actively using the databases. For most
organizations, this means the middle of the night or the weekend, but
nobody wants to stay behind to compact and repair the databases.
Total Visual Agent solves this problem by automating your most tedious
maintenance chores. Total Visual Agent works with a combination of Events,
Items, and Actions:
Events are your schedules—an Event handles everything you need
to do at a particular time. Create Events to run tasks every X
minutes, hourly, daily, weekly, monthly, or one time.
Events consist of any number of Items. An item can be a specific
database or project, a set of databases organized into a Task Group,
or all of the databases or files in a selected directory.
Items have one or more Actions to perform. Actions are the tasks
that you want to perform on the Item:
o Compact and repair your database
o Create rolling archive versions (copies) of your databases
o Extract data from selected tables and write them into another
database while users are in the database
o Run macros and command lines
o Track statistics on the objects and records in your databases

Total Visual Agent Chapter 1: Introduction 5
Sample Event Group
The Total Visual Agent Manager lets you configure and schedule your Event
Groups interactively, and the Monitor and Service execute them.
How Total Visual Agent Works
Total Visual Agent includes four separate components that work together to
help you manage administrative tasks:
Total Visual Agent Manager
The Total Visual Agent Manager is where you configure your Events, Items,
and Actions. Additionally, the Manager is where you view log files and other
administrative reports showing the results of previous activity. You can also
start and stop the Total Visual Agent Monitor and Service from the
Manager.
Once you define your Event Groups in the Manager, determine whether to
use the Monitor or the Service to run the scheduled Events.
Total Visual Agent Monitor
The Total Visual Agent Monitor runs in the background, waiting for the time
to process the next scheduled Event. For each Item in the Event Group, the
Monitor dispatches the Total Visual Agent Engine to perform the Action.

6 Chapter 1: Introduction Total Visual Agent
For the Monitor program to run, a user must be logged onto the computer
that is running Total Visual Agent. If a user will not be logged on, consider
using the Service instead of the Monitor.
Total Visual Agent Service
The Total Visual Agent Service executes Event Groups as a Windows Service.
The Service runs more securely than the Monitor, since it doesn’t require a
user to be logged on. Additionally, the Service can be configured to start
automatically with Windows, so you can be confident that it’s running.
Note, however, that using the Service to launch external programs (such as
macros, custom commands, and compacting ADPs) is potentially dangerous.
If the external program fails for any reason, the program may remain open
in memory with no feedback shown on screen. This can cause your
computer to stop responding, and may potentially cause database
corruption.
See Chapter 8: Running Scheduled Events for details about the differences
between the Monitor and the Service, and the limitations of each.
Total Visual Agent Engine
The Total Visual Agent Engine is the part of Total Visual Agent that performs
the Actions (compact and repair, archive, etc.). The Total Visual Agent
Engine performs its work behind the scenes, and you do not interact with
this component directly.
New Features in This Version: Total Visual Agent 2016
Total Access Agent was first introduced in 1996, then evolved to support the
Visual Basic 6 community. Total Visual Agent 2016 is its 9th major version.
This version of Total Visual Agent includes the following new features and
enhancements:
Support for Microsoft Access 2016
Total Visual Agent 2016 supports databases created in Microsoft Access
2016 and earlier versions of Access. It includes the ability to launch Access
macros with Access 2016.

Total Visual Agent Chapter 1: Introduction 7
No Need for Microsoft Access on Your PC
Total Visual Agent no longer requires Microsoft Access to be installed on
your PC to perform tasks such as database compact, backups, database
statistics, table data extracts, etc.
Previously, Access 2007 or the 32-bit version of Access 2010 or later was
required on your PC. The new version makes it easy to run Total Visual
Agent on a server that does not have Office/Access installed and avoids
conflicts if you have the 64-bit version of Access installed.
However, if you want to run an Access database macro or manage ADPs,
you still need to install the retail or runtime version of Access to run it.
Database Lock Error Identifies Offending Machines
If a compact task fails due to the database locked by another user, the email
notification now lists the machine(s) that are locking the database.
Activity Log Database Separated from Settings Database
Previously, the settings database contained the event and task
specifications, plus the activity log and database snapshot statistics. The
latter caused the database to grow over time. In this version, the settings
database (TVAGENT16.MDB) uses a separate database (TVAGENT-
Data.MDB) for the three activity log and statistics tables. The settings
database links to those tables and its reports still use them without any
changes.
Activity Log Shows Duration of Each Activity
A new Minutes column shows the number of minutes each activity took.

8 Chapter 1: Introduction Total Visual Agent
Activity History Log with New Minutes Column
Tasks are Not Run at the End of an Event Interval
Events can be defined with start and end times such as 9 AM to 5 PM.
Previously, if an event was scheduled to run at the end of the time range,
Total Visual Agent would start the tasks, then stop when it noticed the time
period expired and issue an error/warning message that the tasks couldn’t
be completed.
Now if the event is scheduled at the end of the time range, it’s skipped. If
you want the top of the hour event to run, set your time range to end at
5:01 rather than 5:00.
Enabled/Disabled Status Shown on the Event Form
To make it easier to see whether an event is running, the event’s form
shows “Enabled” or “Disabled”. You still change this status from the right
click menu on the treeview.
Enabled or Disabled Status for the Event

Total Visual Agent Chapter 1: Introduction 9
Email Notifications Support TLS and Office365 SMTP Server
Total Visual Agent can send an email when a problem arises. In addition to
SMTP and SSL, it now supports ESMTP and Transport Layer Security (TLS)
connection protocols:
TLS is necessary to connect with smtp.office365.com from Microsoft
Office365’s Exchange Server.
Improved Monitor Options Tab
The tab for setting monitor options better explains the choices:
Monitor Settings under Tools, Options
Import Settings from Previous Versions of Total Visual Agent
Import schedules created in other versions of Total Visual Agent. Under the
File menu, Import Manager Settings lets you add specifications from
multiple instances without eliminating your existing settings. It
automatically uses the existing database specifications if the managed
database is already defined.

10 Chapter 1: Introduction Total Visual Agent
More Robust Windows Service Feature
Total Visual Agent can run as a Windows Service which lets it automatically
restart if the machine reboots and doesn't require a user to be logged in to
keep it running. The service processes are hidden from the user interface.
Enhancements make this more robust and better able to handle unexpected
situations.
Default Location of Archive and Extract Folders Moved
Default location of archive and extract folders are now in the data folder
rather than the folder where Total Visual Agent is installed. This allows Total
Visual Agent to be installed in a folder that’s readonly separate from the
files it creates.
Improved Setup Program
Enhanced Installation for Windows 8 and 10
The Total Visual Agent setup program supports Windows 8 and 10, and
installs itself on the modern interface under “T” Total Visual Agent. This
differs from Windows 7 and older O/S where the program installs itself in
the Total Visual Agent subfolder in our FMS folder.
Simplified Installation of the .NET Framework
Total Visual Agent uses the .NET Framework 3.51. This is on all PCs since
Windows 7, but may be deactivated. The new setup detects this and turns it
on without having to install it from scratch.
New User Manual and Help File
Total Visual Agent includes a new user manual and online help file to
support the new features.
Enhancements in Total Visual Agent 2013
Support for Microsoft Access 2010 and 2013
Total Visual Agent supports databases created in Microsoft Access 2013,
2010 and earlier versions of Access. Your machine must have a copy of
Microsoft Access 2007 or the 32-bit version of Access 2010 or 2013. If it’s
managing databases across a network, other users of the databases could
be using the 64-bit version of Access 2010 or 2013.

Total Visual Agent Chapter 1: Introduction 11
Support for 64-bit Operating Systems
Total Visual Agent can run on 32 and 64-bit operating systems. It supports
all versions of Windows from NT through Windows 8.
Improved User Interface
More modern fonts and graphics, and other enhancements make Total
Visual Agent easier to use and understand. For instance, the new icons
make it very easy to see which events are enabled or disabled. All the
relevant forms can be resized and maximized, more menu items have
shortcut keys, etc.
Simplified Startup
When Total Visual Agent runs for the first time, you immediately enter the
Options form to setup your environment. The form has been redesigned to
simplify the entering of the installed Access versions, directory locations,
and SMTP email settings.
Easily Manage Multiple Access Versions
The new design makes it much easier to manage multiple versions of Access
in a list. Total Visual Agent automatically loads the system with the location
of the Access versions it detects on your machine. A check box is added to
filter the list to the Access versions installed.

12 Chapter 1: Introduction Total Visual Agent
Import and Append Settings from Multiple Versions of Total
Visual Agent
Previously, it was all or none. You could import the schedules created in an
older version of Total Visual Agent or another instance of it, but it would
replace any existing settings. By definition, you could only do it once.
Under the File menu, Import Manager Settings lets you add specifications
from multiple instances without eliminating your existing settings. It
automatically uses the existing database specifications if the managed
database is already defined.
Test Events, Databases, Directories and Task Groups
Previously, only individual actions could be tested. You can now test all the
actions related to every level. This makes it easy to test multiple actions
across multiple objects to see if they work as expected.
Create Events that Run Every X Minutes
In addition to specifying the number of minutes an event can run within an
hour, you can now specify events that run for any number of minutes.

Total Visual Agent Chapter 1: Introduction 13
This lets you specify periods that are don’t divide evenly within an hour or
for more than an hour. For instance, an event repeating every 17 minutes,
or 90 minutes, or 360 minutes (4 hours).
Create Events that are Limited to Periods Spanning Midnight
Previously, you could limit tasks that ran during the day (e.g. 2 AM to 6 AM,
or 9 AM to 5 PM). Now you can specify a period that runs over midnight
such as 10 PM to 2 AM:
Process Directories with Different Security Settings
When you select a directory, all databases within it are processed with the
same workgroup settings and password. Now, if any databases in the folder
are already defined in your list of databases, they are processed with those
database settings. This allows you to manage databases with different
security settings and passwords in your directory.
Data Extract Tables are Keyed
For the Data Extract feature, the tables created in the database have
indexes similar to your original tables. Other properties such as the
database tabbed document display are also replicated in the new database.
Certain properties such as a table or fields validation rule are not copied
because that may prevent the ability to save your data since data in your
table may violate your current validation rules.
Run Macros for Database Password Protected Databases
A macro can now run on databases with a database password (not a
workgroup system file with user name and password). Previously, these
databases would require a user to enter the password which prevented
unattended automation.

14 Chapter 1: Introduction Total Visual Agent
Pause for a Fractional Minute
For running Command Lines and Macros, your event can pause for a certain
number of minutes while your process completes. Previously, only whole
minutes could be specified. You can now enter fractional minutes so 0.1 is
six seconds:
Simplified Addition of New Actions
Rather than opening a form to select a new action to add to an existing
database (or task group or directory), the right click menu lets you select the
new action to add and immediately set the options.
This is also available on the Schedule menu.
Compressed Archive File Names Support Multiple Extensions
Previously, when creating compressed files from Archives or Data Extract,
the archive file was the name of the original file with a .ZIP extension. To
support multiple databases with the same name (e.g. Sample.mdb,
Sample.accdb, Sample.adp), the zip file contains the extension and then .ZIP
such as Sample.mdb.zip, Sample.accdb.zip, and Sample.adp.zip
Add Comments to Events, Directories, and Actions
Add your own description to better remember and manage your events,
directories, and actions.
See List of Selected Files for Directory Specifications
When managing a folder, a View Matches button lets you see the names
and numbers of files currently matching your file specifications and
exclusions in the specified directory and subdirectories.

Total Visual Agent Chapter 1: Introduction 15
More Detailed Activity History Log
The View, Activity History Log form show more information on the tasks
that were performed and is displayed better.
Activity History Log
Enhanced Comments for Database Compact
The comments field now shows the original size, final size, difference and
percent of space saved for each database that’s compacted.
Database Compact Error Messages with Offending Machines
If a database compact fails because users have the database open, the list of
machines linked to the database are listed in the comments.
Duration of Each Event
In addition to the start and end times, the duration in minutes is displayed.
Delete the Activity History Log
Previously, you had to go into the Total Visual Agent database to delete
records from the Activity Log. Now you can do it from the form by filtering
the list and press the [Delete] button.
More Detailed Database Statistics
The View, Database Statistics form shows the total number of records in the
database, table counts with counts for local, linked, and system tables, and
improves formatting to better see and compare the database contents over
time.

16 Chapter 1: Introduction Total Visual Agent
Database Statistics
Delete the Database Statistics Snapshots
You can now delete snapshot data from the form. Select one or more of the
snapshots and press the [Delete] button.
Compact the Total Visual Agent Settings Database
Even the Total Visual Agent database needs to be compressed from time to
time. This is now an option from the Tools menu: Compact Settings
Database.
New User Manual and Help File
Total Visual Agent includes a new user manual and online help file to
support the new features.
Enhancements in Total Visual Agent 2007
These enhancements were made in the prior version of Total Visual Agent:
Support for Access 2007 and ACCDBs
Total Visual Agent 2007 introduces support for Microsoft Access 2007 and
the new Access 2007 file format (ACCDBs). It continues to support all earlier
versions of Microsoft Access (1.0 through 2003) and Visual Basic (3.0
through 6.0).

Total Visual Agent Chapter 1: Introduction 17
Enhanced Total Visual Agent Service
The Total Visual Agent Service now supports launching external programs
(such as macros and custom commands). Before using this feature, keep in
mind that launching programs from a Service is potentially dangerous. See
Chapter 8: Running Scheduled Events for details and special considerations.
Streamlined Database Statistics Form
The user interface for viewing Database Statistics is redesigned and
streamlined to make it more modern and user-friendly.
Windows Theme Support
The Manager has a more modern look, with support for Windows themes.
New User Manual and Help File
New user manual and help file to document the new features.
Visit Our Web Site
FMS is constantly developing new and better developer solutions. Total
Visual Agent is part of our complete line of products designed specifically
for the Access developer. Please take a moment to visit us online at
www.fmsinc.com to find out about new products and updates.
Product Registration
If you did not order Total Visual Agent directly from us, you can register it
online. Be sure to select the email notification option so you can be
contacted when updates are available or news is released. You must be
registered to receive technical support.
Product Updates
FMS is committed to quality software. When we find problems in our
products, we fix them and notify registered users to download the new
version.
From the Help menu, you can see if you have the latest version by selecting
“Check for Latest Version”:

18 Chapter 1: Introduction Total Visual Agent
You can also go to the “Product Updates Page” to see the history of
updates.
Product Announcements and Press Releases
Read the latest information on new products, new versions, and future
products. Press releases are available the same day they are sent to the
press. Sign up in our Feedback section to have press releases automatically
sent to you via email.
Product Descriptions and Demos
Detailed descriptions for all of our products are available. Each product has
its own page with information about features and capabilities. Demo
versions for most of our products are also available.
Technical Papers and Tips
FMS personnel often speak at conferences and write magazine articles,
papers, and books. Copies and portions of this information are available to
you online. Learn about our latest ideas and tricks for developing more
effectively.
Social Media: Blog, Facebook, Twitter
Keep in touch with us:
Signup for our blog: http://blog.fmsinc.com/
Follow us on Twitter: http://www.twitter.com/fmsinc
Like our Facebook page:
https://www.facebook.com/MicrosoftAccessProducts

Total Visual Agent Chapter 1: Introduction 19
Links to Other Development Sites
Jump to other locations, including forums, user groups, and other sites with
news, techniques, and related services from our web site.


Total Visual Agent Chapter 2: Installation 21
Chapter 2: Installation
Total Visual Agent comes with an automated setup program to get you up and running as
quickly as possible. This chapter describes the system requirements, installation steps, and
instructions for uninstalling Total Visual Agent.
Topics in this Chapter
System Requirements
Installing Total Visual Agent
Uninstalling Total Visual Agent

22 Chapter 2: Installation Total Visual Agent
System Requirements
Total Visual Agent requires:
15 MB free disk space for Total Visual Agent program files
150 MB free disk space for Microsoft .NET Framework if it’s not
already installed (should not be an issue with recent Windows
versions)
If you want to run Access database macros or compact ADPs, your
machine needs to have Access installed (standard or runtime
versions). Total Visual Agent does not Access to be installed if you
are only running other tasks.
Hardware and operating system supported by your version of
Microsoft Access.
Additional free space to store Total Visual Agent log files and
Database Statistics, and any backup files you create.
Microsoft Access 2013 or Later Does Not Support ADPs
Support for Access Data Projects (ADPs) was discontinued with Access 2013.
If you want Total Visual Agent to compact or run macros in ADP files, your
machine must have Microsoft Access 2007 or 2010 installed rather than just
Microsoft Access 2013 or later.
Installing Total Visual Agent
The latest version of Total Visual Agent replaces all earlier versions. You can
uninstall previous versions as instructed on page 23.
Total Visual Agent is installed with an automated setup program. You need
Administrator rights to install the program. To install the program, run the
Setup.exe program and follow these steps:

Total Visual Agent Chapter 2: Installation 23
Initial Screen after Launching Setup.exe
1. When prompted, enter your registration information and serial number.
2. Specify the destination folder for the files.
3. Be sure to read the readme file for any late breaking news that is not included in the manual or help file.
Installing the .NET Framework
Total Visual Agent includes components that require the .NET Framework
3.51 to be installed. It is included in Windows 7 or later. If you’re using an
older operating system and it’s not already installed, a screen will appear to
download it from Microsoft (free).
Uninstalling Total Visual Agent
Total Visual Agent supports the standard Windows installation protocol, so
uninstalling is similar to uninstalling other programs:
Start the Uninstall Process
From the Windows Menu, select Control Panel, then:
Windows Vista, Windows 7, and later
Select Programs and Features

24 Chapter 2: Installation Total Visual Agent
Windows XP
Select Add/Remove Programs
Select Total Visual Agent for Removal
Select Total Visual Agent from the list of installed programs
Click the Uninstall button from the menu
The installation program loads. Choose Remove and follow the
prompts:
Removing Total Visual Agent
After a few moments, the Total Visual Agent program files and its registry
entries are deleted.
Uninstalling Total Visual Agent does not remove the settings database
(C:\ProgramData\FMS\Total Visual Agent\16.0\TVAGENT16.MDB), which
holds all configuration and Event Schedule information. This database is
retained to allow you to use your existing settings with future installations
of the product. If you do not plan to reuse your settings, you can delete this
database. That folder is also the default location for your archive and data
extract files.

Total Visual Agent Chapter 3: Startup and Configuration 25
Chapter 3: Startup and Configuration
After installing Total Visual Agent, it’s important to take some time to configure the product
to suit your needs. This chapter explains how to start the program for the first time, how to
use the available options to get the most out of Total Visual Agent, and how to import
schedules from a previous installation.
Topics in this Chapter
Launching Total Visual Agent
Starting Total Visual Agent for the First Time
Using the Total Visual Agent Manager
Configuring the Options
Importing Settings from a Previous Version

26 Chapter 3: Startup and Configuration Total Visual Agent
Launching Total Visual Agent
After installing Total Visual Agent, use the Manager to configure options and
create a schedule.
From the Windows 8 or 10, launch it from the “T” section under “Total
Visual Agent 2016”:
Windows 8 and later is Grouped by Product Name
From Windows 7 and earlier, our programs are in subfolders in the FMS
folder. Go to All Programs, FMS, Total Visual Agent 2016, Total Visual Agent
Manager:
Menu Shortcut to Launch Total Visual Agent
Starting Total Visual Agent for the First Time
The first time you run Total Visual Agent, you are prompted to enter the
initial options. This dialog appears:
First Time Alert to Set Options

Total Visual Agent Chapter 3: Startup and Configuration 27
Setting Program Options
Options Form, Microsoft Access Locations tab
After pressing [OK], this prompt reminds you that you can change the
settings under the Tools, Options menu:
Using the Total Visual Agent Manager
The Total Visual Agent Manager appears:
Main Total Visual Agent Manager Screen
The Manager is comprised of three main sections: the Menu and Toolbar,
the Scheduled Events Treeview, and the Details Pane.

28 Chapter 3: Startup and Configuration Total Visual Agent
Menu and Toolbar
Most program functionality is available from the Total Visual Agent Manager
menu bar, and shortcuts for common tasks are available from the Toolbar.
Total Visual Agent Menu and Toolbar
The menu contains the following items:
File Menu
File Menu
Import Manager Settings: Import schedules from a previous installation of
Total Visual Agent. See page 38 for details.
Exit: Close Total Visual Agent Manager.
View Menu
View Menu
Managed Databases: Review and configure databases and projects
currently managed by Total Visual Agent. See page 96 for details.
Monitor/Service Status: Start and stop the Monitor and Service. See
page 97 for details.
History: View the event log to see details about events run and errors
encountered. See page 99 for details.
Database Statistics: View statistics collected using the Databases
Statistics Action. See page 102 for details.

Total Visual Agent Chapter 3: Startup and Configuration 29
Schedule Menu
Schedule Menu
Schedule Total Visual Agent Events, Items, and Actions. Schedule menu
items are also available from the Treeview right click menu. See Chapter 4:
Scheduling Events for details.
Tools Menu
Tools Menu
Options: Set the program options to define Access locations and
workgroup settings, SMTP email configuration, etc. See page 32 for
details.
Add Monitor Shortcut to Startup Menu: Easily add a shortcut to your
startup menu so the Monitor which runs your scheduled events is always
restarted with your machine.

30 Chapter 3: Startup and Configuration Total Visual Agent
Compact Settings Database: Compact the program’s database which
contains the activity log file and database statistics.
Help
Help Menu
Total Visual Agent Help: View the Help file for Total Visual Agent.
Check for Latest Version: See if you are running the latest build.
FMS Home Page: Visit the fmsinc.com web site
Total Visual Agent Page: Visit the product’s main page.
Product Updates Page: Visit the product’s update page to learn of previous
version, new features, and patches
Suggestions: Send an email to the FMS development team with your
suggestions for improving the product.
About: Open the About form to see information about the program version,
system information, and program log.
Scheduled Events Treeview
The Scheduled Events Treeview shows a hierarchical view of your scheduled
Events, Items, and Actions.
See Creating an Event on page 42 for details.

Total Visual Agent Chapter 3: Startup and Configuration 31
Scheduled Events Treeview
Details Pane
The Details Pane displays settings specific to the selected item in the
treeview.
The information displayed in this pane depends on whether an Event, an
Item, or an Action is selected in the treeview. See Chapter 4: Scheduling
Events on page 41 for more information.

32 Chapter 3: Startup and Configuration Total Visual Agent
Details Pane with Example of a Daily Schedule
Configuring the Options
Prior to scheduling tasks, it’s important to configure Total Visual Agent’s
global settings and options. Open the Manager, and select Tools, Options
from the menu to display the Configuration Options.
Default Access Locations and Settings
Use the “Microsoft Access Locations” tab to specify file locations and
settings for the installed versions of Access:

Total Visual Agent Chapter 3: Startup and Configuration 33
Configuration Options—Default Access Settings
For most tasks, Total Visual Agent does not need to run Microsoft Access.
There are certain Actions, however, that require Access:
Execute Macro: When executing a macro, Total Visual Agent
launches Access and runs the macro. Configure the Access database
version(s) to use for launching macros (see page 88).
Compact Access Data Projects: Because the Microsoft Jet database
engine does not control Access Data Projects, Total Visual Agent
must launch Microsoft Access to compact ADPs (see page 79).
If you do not plan to execute macros or compact Access Data Projects, you
do not need to specify the Microsoft Access file locations. Microsoft Access
2013 and later no longer support ADPs.
Workgroup Security
If you are managing secured databases, optionally specify the default
security options (Workgroup system database, User ID, and password).
These global security settings are used by default for secured databases, but
can be overridden for individual databases. Note that database-level
passwords cannot be set here, but must be set at the database level.
Filter for the Access Versions Installed on Your Machine
A checkbox is available to filter the list of Access versions to just the ones
which are installed on your machine:

34 Chapter 3: Startup and Configuration Total Visual Agent
Default File Locations
The Default File Locations tab allows you to specify default settings for
Archives and Table Data Extracts:
Configuration Options—Default File Locations
Specify the directory, whether to compress archive files, and the number of
archive copies to save. You can also specify similar information for
performing data extracts.
These settings are used by default for new actions and can be overridden on
a case-by-case basis.
Error Alert Mail Settings
If Total Visual Agent encounters an error while processing a Scheduled
Event, it automatically logs the error into the History Log File (see page 99).
Total Visual Agent can also email a designated recipient using SMTP. Use the
“Error Alert Mail Settings” tab to configure mail settings:

Total Visual Agent Chapter 3: Startup and Configuration 35
Configuration Options—Error Alert Mail Settings
To send email error alerts, check “Mail Alert Upon Error”, and provide the
required settings. Then click “Submit Test Message” to validate the settings
and send a test message.
From Address
In the From textbox, enter the FROM email address for the emails.
To and Cc Addresses
In the To and Cc textboxes, enter the email address of the recipient.
Multiple emails can be specified by separating with commas.
Supplementary Message Text
In addition to the error messages provided by Total Visual Agent, optionally
specify additional text to include in the message. This can include the
machine name, contact information, etc.
SMTP Mail Server, Connection Type and Port
Enter the name or IP address of the SMTP mail server used to send
message, and the port number on which the SMTP service is running. Note
that the server must allow relay in order for Total Visual Agent to send
email.
You can choose among four different connection types:

36 Chapter 3: Startup and Configuration Total Visual Agent
If your organization or email provider offers an SMTP service that allows
relay, configure Total Visual Agent to use that. Many internet service
providers and webmail services, including gmail.com, allow access to SMTP
servers.
The default port is 25 (or 465 for servers that require SSL).
User Name and Password
If the mail server requires authentication, enter the User Name and
Password credentials with sufficient privileges to send email through the
SMTP server. The user name may be different from the FROM address.
Submit Test Message Button
Use the [Submit Test Message] button to verify your settings are correct. If
it works, the message appears in your email Inbox.
You may discover your SMTP settings are not correct. Some common errors:
Your SMTP mail server does not allow relay.
Your connection type and/or port number are not correct.
The User Name and Password may or may not be necessary. Some
servers validate on your IP Address.
Mismatch between user name and FROM address. Some servers
require the user name and FROM address to match, while other
user names may permit any FROM address from the domain.
Check with your provider to confirm you have the correct settings. If a
failure occurs, Total Visual Agent tries to explain why but often the only
information the server returns is that it failed without additional details.
Monitor Settings
The “Monitor Settings” tab offers two options for specifying how the
Monitor behaves when you run it (more details at Using the Total Visual
Agent Monitor on page 108):

Total Visual Agent Chapter 3: Startup and Configuration 37
Configuration Options— Monitor Settings
By default, when you run the Monitor, it appears as a form showing the
current task, last event, and next scheduled event. You can hide that.
Hide the Monitor Icon and Display it as an icon in the System Tray on your
TaskBar
If checked, the Monitor form does not appear, but an icon appears on your
system tray so you can select and open the form from there:
Total Visual Agent Appears on the System Tray as a Big M
Hide Monitor Icon While Running
If this option is checked, the Total Visual Agent Monitor is hidden while it’s
running. This prevents it from accidentally opening it when you just want it
to run in the background continuously.
When it runs invisibly, you cannot interact with it unless you have selected
the previous option to put it on your system tray. You can always run the
Manager again to view the status and open the Monitor form.

38 Chapter 3: Startup and Configuration Total Visual Agent
Importing Settings from a Previous Version
When upgrading from a previous version of Total Visual Agent (or Total
Access Agent) you can import your existing schedule and configuration
settings rather than setting them up from scratch. You can also import
settings from the trial version, or another installation of Total Visual Agent.
Total Visual Agent and the earlier Total Access Agents store their
configuration settings in a Microsoft Jet database. The name of the
database depends on the version of Total Visual Agent:
Database Name Description
TVAGENT16.MDB Total Visual Agent 2016 (version 16)
TVAGENT15.MDB Total Visual Agent 2013 (version 15)
TVAGENT12.MDB Total Visual Agent 2007 (version 12)
TVAGENT11.MDB Total Visual Agent 2003 (version 11)
TVAGENT10.MDB Total Visual Agent 2002 (version 10)
TVAGENT9.MDB Total Visual Agent 2000 (version 9)
TAAGNT32.MDB Total Access Agent 8.0 or 1.0 (32-bit version)
To start the import process, select File, Import Manager Settings from the
Total Visual Agent Manager:
This form appears:

Total Visual Agent Chapter 3: Startup and Configuration 39
Import Previous Settings Dialog
Locate the file to import, and click [Import]. After a final confirmation
message, the settings are imported and appended to your existing ones.
Import Appends to Your Existing Events
When you import settings, they are added to your existing settings. Your
previously defined events, databases, and actions are retrieved and appear
on your treeview. The import makes these adjustments:
Imported events are set to Disabled. This prevents them from
running immediately upon import and gives you the opportunity to
review, edit and test them. Enable the new events when you are
ready to activate them.
If an imported event name conflicts with an existing event, the
imported event is given a new name with a number (e.g. Monthly
Import1). This avoids them being mixed up with your existing event.
You can use the Move feature to move items into your existing
event if you desire.
If an imported database is already defined in your list of databases,
your current settings are used. This avoids the same database being
defined more than once and uses your latest settings.
Imported databases are “upgraded” to the latest version of
Microsoft Access on your machine. Each database is associated with
a version of Access. Your older settings may be from another
machine referencing the wrong version of Access.

40 Chapter 3: Startup and Configuration Total Visual Agent

Total Visual Agent Chapter 4: Scheduling Events 41
Chapter 4: Scheduling Events
The Total Visual Agent Manager gives you complete control over when and how Total Visual
Agent works. This chapter describes how to set up and manage the schedules that determine
when Total Visual Agent performs its Actions.
Topics in this Chapter
Event Schedule Overview
Creating an Event
Event Schedule Cycles
Hourly Schedules
Daily Schedules
Weekly Schedules
Monthly Schedules
One Time Events
Managing Events
Next Steps

42 Chapter 4: Scheduling Events Total Visual Agent
Event Schedule Overview
Event Schedules are configured using the Total Visual Agent Manager.
Schedules are organized into a hierarchy of Events, Items, and Actions.
Events are your schedules—an Event handles everything you need
to do at a particular time. Events run tasks every X minutes, hourly,
daily, weekly, monthly, or one time. See page 43 for details.
Events contain Items. An item can be a specific database/project, a
set of databases organized into a Task Group, or all databases or
files in a selected directory. See Chapter 5: Adding Items to Events
for details.
For each Item in an Event, one or more Actions can be performed.
Actions include Archive Database, Table Data Extract, Compact
Database, Custom Command, Database Statistics, and Execute
Named Macro. See Chapter 6: Adding Actions to Event Items for
details.
For instance, to archive several databases at 2:00 A.M. each day, create one
Event, and schedule it to run at 2:00 A.M. If your requirements change, you
can easily reschedule the Event’s time.
Then add the databases as Items under the event. If the Items have
common Actions, add them as a Task Group. If the require different Actions,
add each as a separate item.
Finally, specify the Actions—archive, compact, collect statistics, extract
table data, execute macro, and/or run custom command. All Actions are
performed when the Event’s scheduled time arrives.
A database can be in more than one Event. For example, you may want to
perform Actions on your Sales database at different times. Once an hour,
you want to extract (backup) data from your Orders table, once a day you
want to archive the entire database, and once a week you want to repair
and compact. To set this up, create three Events (hourly, daily, and weekly),
include the Sales database in all three, and add the appropriate Actions.
Creating an Event Group
The Total Visual Agent Manager’s main form is organized with a hierarchical
treeview listing of the Events, Items, and Actions on the left side of the
screen.

Total Visual Agent Chapter 4: Scheduling Events 43
Scheduled Events
Event Schedule Cycles
Events can be scheduled to run Hourly, Daily, Weekly, Monthly, or One-
Time. Additionally, you can run Events every X minutes using the options in
the Hourly schedule type. By default, Total Visual Agent contains Events for
hourly, daily, weekly, and monthly schedules, but events can be added,
deleted, or modified to suit your needs.
Adding a New Event
To create a new Event, select Schedule, Add Event from the Manager’s
menu. When the dialog appears, enter a name that describes the Event:
New Event Name Dialog
The new event is added to the Treeview on the left of the form.
Configuring Event Schedules
Select the Event in the treeview, and the right side of the form changes to
display the appropriate information. Choose a schedule type from the drop-
down list.

44 Chapter 4: Scheduling Events Total Visual Agent
Different settings are available depending on the schedule type you choose.
Each schedule type allows you to specify the Event Processing Window.
Event Processing Window
Each schedule types allow you to specify starting and ending times. This
range is known as the Event Processing Window. The Event Processing
Window is useful when you only want to run an Event within a specified
period of time, or when going beyond a particular time could interfere with
other events or people working on the databases.
If an Event does not start right at its scheduled time (either because another
event has not finished, or because the Monitor or Service is not running), it
can still begin if the Event Processing Window has not passed when the
other events have completed. If this period of time passes, the Event does
not start, it is skipped, and an error is logged. If you have email notification
turned on, you’ll also receive an email.
Once started, the Event processes each of its scheduled Items. After
processing each Item, it checks to see if the time has passed the Event
Processing Window. If so, the remaining Items are not processed and an
error is logged. Check the Total Visual Agent Event Log periodically to see if
you need to adjust your schedule parameters so that all Events can finish
within their Event Processing Window. Processing times increase as Items
are added to an Event or existing databases get larger over time.
Hourly Schedules
If you select the Hourly schedule type, the Settings section of the form
changes to display the hourly options.
These options depend on the mode you choose. Using the Mode drop-
down, choose whether to run the Event Once Per Hour or Every X Minutes.

Total Visual Agent Chapter 4: Scheduling Events 45
Hourly Schedule Options
Running Events Once Per Hour
Selecting Once Per Hour displays this screen:
Hourly Event, Once Per Hour Options
The Event begins and ends at the specified number of minutes after the
hour. You can optionally limit the event to certain hours of the day by
specifying beginning and ending hours, or limit the days of the week by un-
checking the days that you do want to run the event.
If you do not specify a beginning time, processing begins at midnight. If you
do not specify an ending time, the latest processing can begin is midnight.
Leave both times blank to create a continuous hourly schedule.
Time Periods that Span Midnight
You can specify a period of time that spans midnight (e.g. 9 PM to 3 AM). If
a day is excluded, the event will not start at that beginning time. However, if
the next day is included, it will launch at midnight ( it does not wait until
9PM the next day). Similarly, an event that starts at 9 PM but goes into a
day that is excluded will stop at midnight.
Running Events Every X Minutes
Selecting Every X Minutes displays this screen:

46 Chapter 4: Scheduling Events Total Visual Agent
Hourly Event, Every X Minutes Options
Select how often to run the Event by choosing the number of minutes from
the dropdown combo box or entering your own value. Note that you can
enter values more than 60 so that it runs less than once per hour (e.g. every
90 minutes).
Of course, your tasks should be completed in fewer minutes than you
specify—i.e., if an Event takes up to 11 minutes to run, you shouldn’t
schedule it to run every 10 minutes.
As with Events that run once per hour, you can limit the event to certain
hours of the day or certain days of the week. If you do not specify a
beginning time, processing begins at midnight. If you do not specify an
ending time, the latest processing can begin is midnight. Leave both times
blank to create a continuous schedule. The beginning and ending hours may
span midnight (e.g. 9PM to 3 AM). See page 44 for details about the Event
Processing Window.
Daily Schedules
The Daily schedule type displays these options:
Daily Event Options
Enter the Event Processing Window for this Event (see page 44 for details).
Total Visual Agent begins processing the Event as soon as possible after the
“Start at” time, and stops at the “Ending no later than” time.
To create a daily Event limited to certain days of the week, un-check the
days that you do not want to run the Event.

Total Visual Agent Chapter 4: Scheduling Events 47
Weekly Schedules
The Weekly schedule type displays options for the day of the week to run
the event, and for the Event Processing Window. See page 44 for details
about the Event Processing Window.
Weekly Event Options
Monthly Schedules
The Monthly schedule type displays options for the day of the month to run
the event, and for the Event Processing Window (explained on page 44).
Monthly Event Options
Scheduling Events on the Last Day of the Month
To run an Event on the last day of every month, schedule it to run on the
31st day of the month. This runs the Event on the month’s last day, even for
months with fewer than 31 days. For instance in February, the Event would
run on the 28th or the 29th in a leap year.
After the Event is processed, the schedule is disabled. If you want to
execute the Event again, change the “starting at” time to a future time and
enable the Event.

48 Chapter 4: Scheduling Events Total Visual Agent
One Time Events
You can have events only run once at a date and time you specify in the
future. Enter the date it should start. You can leave the ending date blank or
specify it if you don’t want to run it after that time if other events delay the
launch of this event. See page 44 for details about the Event Processing
Window.
One Time Event Options
Managing Events
The Events you create in Total Visual Agent are at the top-level items in the
treeview:
Scheduled Events Treeview
The icon is if the event is enabled (active) and if it’s disabled
(inactive).
Schedule Status
Select an Event in the treeview to see its status at a glance. The right side of
the Manager displays information about when the Event was last run, and
when it will run again:

Total Visual Agent Chapter 4: Scheduling Events 49
Schedule Status
Right Click Menu
From the treeview, if you have an Event selected, right click your mouse and
bring up the menu of options:
Event Menu Options
Duplicate Events
To duplicate an Event and all related schedule information, select “Duplicate
Event” from the Schedule menu or the right-click shortcut menu:
Duplicate Event Group Dialog

50 Chapter 4: Scheduling Events Total Visual Agent
Enter the name for the new Event and click [OK]. When you duplicate an
Event, the Event schedule parameters are copied (i.e., the dates and times
you specify) along with the Items and Actions associated with that Event.
Rename Events
To change an Event’s name, select “Rename Event” from the Schedule
menu or the right-click shortcut menu. The following dialog appears:
Rename Event Dialog
Enter the new name for the Event. Only the name is changed; no other
schedule information is affected.
Delete Events
To delete an Event, select “Delete Event” from the Schedule menu or the
right-click shortcut menu. After confirming the deletion, the Event is
deleted, along with all related schedule information.
Prior to deleting an Event, you should stop the Total Visual Agent Monitor and Service so that you don’t delete an Event while it’s being processed. See page 97 for information about starting and stopping the Monitor.
Test All Event Actions
This lets you test all the actions within the event without requiring the event
to be enabled. Verify everything works before you enable the event to run
automatically and repeatedly. The Activity History Log provides details on
what it does along with any errors that occur. The test will also send emails
to you if you set email notification of errors under Tools, Options.
Enable and Disable Events
Occasionally you may want to suspend processing an Event without
removing it permanently. You can temporarily disable an Event by selecting
“Disable Event” from the Schedule menu or the right-click shortcut menu.
To re-enable the Event, select “Enable Event” from the Schedule menu or
the right-click shortcut menu.

Total Visual Agent Chapter 4: Scheduling Events 51
You can visually identify which Events are enabled by looking at the Event in
the treeview. If the Event is disabled, the icon is grayed out with a red
slashed circle .
Next Steps
Configuring a Scheduled Event
So far, we have created and scheduled an Event, but have not instructed
Total Visual Agent on what to do when the scheduled time arrives. To do
that, configure the Event to specify the Items to manage and the Actions to
perform. This is described in Chapter 5: Adding Items to Events.
Activating Schedules
Creating the Event Groups and specifying the databases and tasks to
perform does not automatically execute the Actions. Either the Monitor or
the Service must be running at the scheduled time. See Chapter 8: Running
Scheduled Events for more information about these components.


Total Visual Agent Chapter 5: Adding Items to Events 53
Chapter 5: Adding Items to Events
After creating Event Groups to control when Events are run, you need to instruct Total Visual
Agent on what to do when the scheduled time arrives. This chapter describes how to
configure the Event Group to specify the Items to manage and the Actions to perform on
these items.
Topics in this Chapter
Event Item Overview
Adding an Access Jet Database Item
Adding an Access Data Project Item
Adding a Task Group Item
Adding a Directory Item
Moving Items to a Different Event
Next Steps

54 Chapter 5: Adding Items to Events Total Visual Agent
Event Item Overview
In Chapter 4: Scheduling Events, you learned how to create and manage
Event Groups, but you still need to instruct Total Visual Agent on what to do
when the scheduled time arrives. To do that, configure the Event Group to
specify the Items to manage and the Actions to perform on these items.
Event Items
There are four types of Items that can be added to an Event: Jet databases
(MDBs/ACCDBs), Access Data Projects (ADPs), Task Groups, and Directories.
Access Jet Database
This is a specific, named Microsoft Access (Jet) database, created in any
version of Microsoft Access from Access 1.x to Access 2016. Generally
Microsoft Jet databases use the file extension .MDB or .ACCDB.
Access Data Project
Access 2000 to 2010 support Access Data Projects, which generally have the
file extension .ADP. This file type does not contain any local data storage,
but instead works with data stored in a SQL Server or SQL Express client
server database. ADP support was deprecated in Access 2013.
Task Group
A Task Group is a list of specific Microsoft Access databases or projects that
are grouped together, so that the Actions and settings apply to all of the
Items in the group. Task Groups make it easy to manage multiple Items with
similar settings.
Directory (Folder)
When you add a Directory to an Event, Total Visual Agent performs the
same set of Actions for all files in that folder that match the specified file
type and mask. This lets you perform the tasks against all the files in a drive
and/or folder without specifying their individual names.
The Directory may be set up so that the files it finds are assumed to be Jet
databases (MDBs/ACCDBs), Access Data Projects (ADPs), or other files. You
can choose to also include its subdirectories.

Total Visual Agent Chapter 5: Adding Items to Events 55
Adding an Access Jet Database Item
To add a Microsoft Access Jet database to the Scheduled Event, select “Add
Database to Event” from the Schedule menu, or “Add Database” from the
right-click shortcut menu:
Add Database to Event
Databases that you have already added are listed in the upper pane, and the
“Assigned to These Events” pane lists all Events that the Database is
included in. Select an existing database from the list, or click [New] to add a
new database to the list:
New Database Dialog

56 Chapter 5: Adding Items to Events Total Visual Agent
Select Multiple Databases at Once
Select multiple databases from the same folder by holding the [Ctrl] key and
clicking the database names in the list, or the [Shift] key to select all the files
between the beginning and ending clicks.
Database Settings
After adding the database, the Database Settings form appears. This is also
the dialog that appears if you press [Edit] for an existing database in your
list:
Database Settings Dialog
Note that this is the same dialog used to maintain database settings for
existing database entries. You can also open this dialog by pressing the
[Settings] button on the Event Group Details form. If you select more than
one database to add, the settings you specify in the Database Settings
dialog are applied to each database.
Comments
The Comments field lets you add notes about the database.
Access Version
Specify the Microsoft Access version that you want to associate with the
database. The Access version is used to execute Macro Actions.

Total Visual Agent Chapter 5: Adding Items to Events 57
Security Settings
To perform certain Actions, such as compacting and archiving data, Total
Visual Agent must be able to open, read, and write to those databases. If
the database is secured, you must provide Total Visual Agent with a User ID
and Password to log on to that database. You must also specify the system
“workgroup database” for logging on.
Note that the workgroup database is also known as a “system database” or
a “workgroup information file.” For more information, search the Access or
Visual Basic online help for “Security.”
Security Source
Tell Total Visual Agent how to access your databases:
Security Method Process
None (no security) The database is not secured. No special login ID or system workgroup database is required.
Use global default Use the system-wide settings established in the Configuration Options. See page 30 for details.
Specify Workgroup (or INI file)
For databases created with Access 95 or higher, specify the path to the system workgroup database. For databases created with earlier versions of Access and VB (Jet 1.x and 2.x), specify the initialization file that contains the reference to your system workgroup database.
Access 2003/2002/2000/97/95 and Visual Basic 6.0/5.0/4.0 Security
If your database is secured, and you wish to use security settings that are
different from the global settings on the Total Visual Agent Configuration
Options screen, you must specify the system workgroup database, User ID,
and password for Total Visual Agent to perform its work:
Database Security Settings
You can type in the full path to the system workgroup database, or browse
for it by pressing the […] button.

58 Chapter 5: Adding Items to Events Total Visual Agent
Alternatively, if your database is protected with just a database password,
you only need to enter that.
If you enter a “Database Password” for a database that does not have a
password assigned, and you use Total Visual Agent to compact that
database, the “Database Password” is assigned to the compacted database.
Be sure to enter the correct password for your database.
Access 2.0/1.x and Visual Basic 3.0 Security
For databases created with earlier versions of Access or VB, specify the
initialization file (.INI file) containing a reference to the workgroup
database:
Database Security Settings
The initialization file should have a section similar to the following, which
provides the path to the secured system workgroup database:
[Options]
SystemDB=C:\Access\Apps\faqsys.mda
By default, Access 2.0 uses C:\WINDOWS\MSACC20.INI.
Security Considerations
In order to compact secured databases, you must provide Total Visual Agent
with enough information to open them. In addition, Total Visual Agent
needs Read definitions and Read Data permissions to extract data from your
tables, and Execute permission to run macros.
When managing secured databases, it is important to test the Actions you
schedule to ensure your security settings are correct. See page 51 for more
information on the test feature.
If Total Visual Agent is unable to perform an Action because of insufficient
security privileges, or if you provide incorrect system workgroup settings, an
entry is made in the Total Visual Agent log file when the task fails. See page
99 for information on using the log file to track activity and detect errors.
Total Visual Agent stores the User IDs and passwords that you provide in the
configuration database TVAGENT15.MDB. The information in this table is

Total Visual Agent Chapter 5: Adding Items to Events 59
inaccessible, even when the database is opened with Access. For maximum
security, however, Total Visual Agent should be installed to a secured
location on the network, where you can ensure that only authorized
personnel have access.
Adding the Database and Selecting Actions
After configuring your database settings, select the databases from the list
and press the [Next] button. The Wizard displays a list of available Actions
for the database:
Database Actions
Select the Actions to perform by checking the items in the list. To change
the order in which the Actions are performed, select the Action and press
the up or down arrow to change its position in the list.
When you finish selecting the Actions, press the [Finish] button to add the
Item and Actions to the Event Group. After adding Items and Actions, be
sure to review each Action and configure its settings to suit your needs.
Actions are described in detail in Chapter 6: Adding Actions to Event Items.
Adding an Access Data Project Item
Adding an Access Data Project (ADP) Item to an Event is similar to adding a
Jet Database (see page 55). To add an ADP, choose “Add Access Data Project
to Event” from the Schedule menu, or “Add Access Data Project” from the
right-click shortcut menu:

60 Chapter 5: Adding Items to Events Total Visual Agent
Add Access Data Project (ADP) to Event
As with Access Jet databases, you can either select an existing ADP from the
list, or add an ADP by clicking [New]. After you select the ADP(s) to add, the
Database Settings form is displayed. The options on this form are similar to
the database options (explained on page 56), without the security options
which do not apply to ADPs:
Access Data Project (ADP) Settings
After configuring the database settings, select the ADPs from the list, and
click [Next]. The Wizard displays a list of available Actions for the ADP:

Total Visual Agent Chapter 5: Adding Items to Events 61
Select Actions for ADPs
Select the Actions for the ADP, and optionally use the arrows to change the
order in which the Actions are performed. Then click [Finish] to add the Item
and Actions to the Event. After adding Items and Actions, review each
Action and configure its settings to suit your needs. Actions are described in
detail in Chapter 6: Adding Actions to Event Items.
Adding a Task Group Item
A Task Group is a collection of databases or projects that share common
Actions and settings. To add a new Task Group, choose “Add Task Group to
Event” from the Schedule menu, or “Add Task Group” from the right-click
shortcut menu:
Add Task Group to Event
Specify the name of the Task Group, and optionally add a comment.

62 Chapter 5: Adding Items to Events Total Visual Agent
Continue Processing Databases Option
There is an option to decide how the Task Group should behave when it
runs and encounters an error. For instance, a database may no longer exist
or can’t be opened.
Check this box if you want Total Visual Agent to continue with the next
database in the list if one database in the Task Group fails:
If this box is not checked and Total Visual Agent encounters an error,
subsequent databases in the Task Group are skipped. If this option is
checked, Total Visual Agent continues processing all other databases in the
Task Group after an error is encountered.
Note that if one Action fails for a database, subsequent Actions for that
database are not processed. For example, if you schedule a Compact Action
and an Archive Database Action for your Sales database, and the Compact
Action cannot run, the Archive Action is skipped.
Click [Next] to go to the second page of the wizard:
Select Databases to Add to the Task Group
This dialog is similar to the one you see when adding a database or project
(see page 55), except that it lists Jet databases and ADPs together. If the
database you want to add is not listed, click [New] to add it.
After selecting the database(s) to add to the Task Group, click [Next] to
select the Actions to perform on the databases in the Task Group:

Total Visual Agent Chapter 5: Adding Items to Events 63
Select Actions for All the Databases in the Task Group
Select the Actions for the Task Group, and optionally use the arrows to
change the order in which the Actions are performed. Then click [Finish] to
add the Item and Actions to the Event. After adding Items and Actions,
review each Action and configure its settings to suit your needs. Actions are
described in detail in Chapter 6: Adding Actions to Event Items.
Adding a Directory Item
A Directory is a folder on the network that is accessible to Total Visual
Agent. To add a Directory, choose “Add Directory to Event” from the
Schedule menu, or “Add Directory” from the right-click shortcut menu:
Add Directory to Event
The following options are available on this form:
Directory
Type the full path of the Directory to manage, or use the […] button to
browse for the directory. You can use either the UNC path (\\server\share),
or the mapped drive letter. Note that if you use a mapped drive letter, the

64 Chapter 5: Adding Items to Events Total Visual Agent
Service must be configured to log on as a user account with the same drive
letter mappings in order to access the folder. See page 115 for details about
configuring the Service settings.
Include Subdirectories
Check this box to include files in the subdirectories of the directory
specified, as well as the directory itself. If this checkbox is left unchecked,
only files in the specified directory will be included.
Include Files Matching Mask
This file specification mask filters the files in the directory to those matching
the specification. The specification uses standard MS-DOS file name
conventions, where “*” means any number of characters, and “?” means
any single character.
More than one specification may be added by separating them by
semicolons. Note that you should not have a space between the semicolon
and the second file mask.
Examples of valid file specifications are:
*.MDB;*.ACCDB All files with the MDB or ACCDB extension.
AB*.* All files beginning with AB, with any extension.
*.MDB;AB*.*; X*.MDE
All files with MDB extension, all files starting with AB, and all files beginning with X and having an MDE extension.
Exclude Files Matching Mask
Of the files satisfying the Include Files Matching Mask, you can exclude files
matching this mask. The formatting of the Exclude specification is identical
to the Include specification. Leaving this field blank excludes no files.
Directory Contains
This drop-down list box determines which file types to manage in the
specified directory. The valid choices are:
Databases (MDB/ACCDB)
Projects (ADP)
Other Files
This setting determines which Actions are valid for the files in the directory,
and how those Actions are to be performed.

Total Visual Agent Chapter 5: Adding Items to Events 65
Total Visual Agent cannot determine the actual types of files that are selected based on the settings you choose. Be sure to set the “Directory Contains” and file specification masks so that only the correct files types are selected. Click [View Matches] to view the files that match the mask.
Click [Next] to select the Actions to perform on the files in the directory:
Add Directory to Event
Select the Actions for the Directory, and optionally use the arrows to change
the order in which the Actions are performed. Then click [Finish] to add the
Item and Actions to the Event. After adding Items and Actions, review each
Action and configure its settings to suit your needs. Actions are described in
detail in Chapter 6: Adding Actions to Event Items.
Process Next Database Option
When you select a Directory in the treeview, one additional option is
available. Check this box if you want Total Visual Agent to continue with the
next database if one database in the Directory fails:
If you do not have this box checked, and Total Visual Agent encounters an
error with one of the databases in the directory, subsequent databases in
the directory are skipped. If you do have this option checked, Total Visual
Agent continues processing all other databases in the directory.
Note that if one Action fails for a database, subsequent Actions for that
database are not processed. For example, if you schedule a Compact Action
and an Archive Action for your Sales database, and the Compact Action
cannot run, the Archive Action is skipped.

66 Chapter 5: Adding Items to Events Total Visual Agent
Moving Items to a Different Event
In some cases, you may want to move an Item to a different Event Group.
Rather than deleting and re-creating the Item, you can move the Item to
another Event. Select the Item in the Event treeview, and choose “Move
Item to Different Event” from the Schedule menu or the right-click shortcut
menu:
Menu with Selection to Move a Database to Another Event
When the dialog appears, select the target Event:
Select New Event for the Item
When you move the Item, all settings remain intact—only the Event Group
it belongs to is changed.
Next Steps
After you add an Item to an Event Group, it’s time to configure its Actions.
See Chapter 6: Adding Actions to Event Items for details about adding and
configuring Actions.

Total Visual Agent Chapter 6: Adding Actions to Event Items 67
Chapter 6: Adding Actions to Event Items
After adding the Event Items to manage, configure the Actions to perform. This chapter
describes the Actions available for each Item type, and how to add and customize them.
Topics in this Chapter
Action Overview
Archive Database Action
Table Data Extract Action
Compact Database Action
Custom Command Action
Database Statistics Action
Execute Named Macro Action
Testing a Scheduled Action

68 Chapter 6: Adding Actions to Event Items Total Visual Agent
Action Overview
When you add an Item (Access Jet database, ADP, Task Group, or Directory)
to an Event, you can specify the Actions to perform. Additionally, you can
add Actions to existing Items by selecting the Item in the treeview and
selecting “Add Action” from the Schedule menu or the right-click shortcut
menu.
Add Action Menu for the Current Database
Note that not all Actions are available for each Item type. Details about the Actions available for each Item are provided in the remainder of this chapter.
Available Actions
Total Visual Agent can perform the following Actions:
Archive Database: Make a copy of an entire database, and
optionally compress (zip) it. See page 69 for details.
Table Data Extract: Copy table data into another database and
optionally compress (zip) it. You can extract data from all tables, or
only a subset of tables. See page 74 for details.
Compact Database: Compact a database onto itself or into a new
database file. See page 78 for details.
Custom Command: Execute a DOS or Windows command,
optionally using the file name as an argument. See page 82 for
details.
Database Statistics: Collect Database Statistics, including object
counts, record counts, and database size. See page 86 for details.
Execute Named Macro: Execute a macro contained in a Jet
database or Data Project. See page 88 for details.

Total Visual Agent Chapter 6: Adding Actions to Event Items 69
Each of the Actions has unique settings. The Actions available and the
options for these Actions may vary based on the type of Event Item.
Archive Database Action
Total Visual Agent’s Archive Database action saves an entire copy of your
database, ADP, or other files into a location you designate. You can save up
to 99 copies (versions) of the same files. The files are named using the
original file name, plus a two-digit addition to the file portion of the name.
For example, if you are archiving the database:
C:\MsOffice\Access\Samples\Solutions.ACCDB
Into the directory:
C:\Save
And you choose to save three copies of that database, after processing the
Event three times Total Visual Agent would create files named:
C:\Save\Solutions01.ACCDB
C:\Save\Solutions02.ACCDB
C:\Save\Solutions03.ACCDB
When Total Visual Agent executes the Event enough times so that the
maximum number of copies is created, the numbering starts over with one,
overwriting the first copy. To keep more than 99 copies of your databases,
move or rename the Archive files created by Total Visual Agent.
If a zip file with the same name exists in the specified directory, it is
overwritten. Please ensure that the file does not already exist if you do not
want to lose data.
Selecting an Archive Directory
By default, Total Visual Agent Archives files to the location you specified in
the Configuration Options. To override the default, simply type the directory
name where Total Visual Agent should store the archived copies of your
files, or press the […] button to browse for the folder.
If you choose to store Archived copies of more than one database in the
same directory, be sure that the names of the databases are unique. The
following two databases would generate the same Total Visual Agent
archive names if archived to the same folder:
C:\MyDir\MyData.ACCDB
C:\OtherDir\MyData.ACCDB

70 Chapter 6: Adding Actions to Event Items Total Visual Agent
Archive each database to its own directory to resolve the problem. If you
choose a directory that doesn’t exist, Total Visual Agent creates it.
Compressing Archives
Total Visual Agent can optionally compress your databases into a
compressed archive (ZIP) file. Depending on the contents of your database,
you can save substantial amounts of hard disk space. Be aware that if you
have encrypted your database using Access security, the database cannot
be significantly compressed. The technique used to encrypt the database
randomizes the data in such a way that the Zip compression tool cannot
make the file significantly smaller than the original database.
For compressed archived copies, Total Visual Agent uses the naming
convention discussed above including the extension plus the .ZIP
extensions. For instance, MyData.accdb becomes MyData.accdb.zip. The
original extension is kept to support situations where you may have multiple
files with the same name and different extensions (e.g. MyData.ACCDB,
MyData.MDB, MyData.ADP, etc.)
Archive Database Suggestions
Schedule archives for a time when no users are logged on to the
database. Archives require exclusive use of the database by Total
Visual Agent.
To protect against hardware failure, save backups onto a different
machine than the original database.
For extra security, copy the saved archives to another location. Use
the Custom Command Action (see page 82) to do this automatically.
Copy the archive onto a backup tape.
Details by Event Item Type
When you select the Archive Action in the Treeview, The right side of the
screen displays the Action’s options. The options are similar for each Item
type:
Microsoft Access/Jet Database
The Archive Action for Access Jet Databases copies the database to the
specified location with optional compression. You can also specify the
number of Archived copies to keep, as explained on page 69.

Total Visual Agent Chapter 6: Adding Actions to Event Items 71
Archive Options for a Database
Microsoft Access Data Project
The same settings are available when running the Archive Action on an
Access Data Project (ADP). Specify the location and number of Archived
copies, and optionally choose to compress the file.
Archive Options for an Access Data Project
When you run the Archive Action on a Task group, the settings apply to each
database or project in the Task Group.

72 Chapter 6: Adding Actions to Event Items Total Visual Agent
Archive Settings for an Access Database Project Task Group
Archive Options for a Task Group
Directory of Databases/Access Data Projects
When you Archive Directory of Databases or ADPs, the settings that you
specify apply to each file in the directory that matches your selection mask
(as explained on page 64).
Archive Options for a Directory of Databases

Total Visual Agent Chapter 6: Adding Actions to Event Items 73
Archive Options for a Directory of ADPs
Directory of Other Files
The Archive Action works slightly different for a Directory of Other Files.
Every file in the directory that matches the selection mask is copied to the
backup location, and is compressed into a single ZIP file including files from
subdirectories if that option is checked. Unlike the other Directory Item
types, the files are not archived in individual files.
By default, the base name of the ZIP file is the name of the source directory,
but you can override the default using the “Base Name for Archive File”
option.
Archive Options for a Directory of Other Files

74 Chapter 6: Adding Actions to Event Items Total Visual Agent
Table Data Extract Action
In addition to archiving a complete copy of your database, Total Visual
Agent can copy just the data from all or selected tables in your database.
There are a couple of reasons to consider the Table Data Extract Action:
Archiving the entire database may not be possible while users have
it open. Archiving just the table data lets you create live backups
even as users are changing the data.
Your forms, reports, and module code only change when you create
a new version of your application, and much of the table data is
static (such as lookup tables and state codes). Archiving the entire
database wastes time and disk space if you only need to back up the
tables that change often.
The Archive Table Data feature in Total Visual Agent lets you extract the
table data with indexes. The archived data is saved in a database in the
directory you specify.
The tables do not include security settings, table relationships and some
properties. Some of these properties may conflict with your existing data.
For instance, your table or fields may have validation rules or lookups that
conflict with data added before the rule was created.
The Archive Table Data feature does not eliminate the need to archive the
entire database. To recover from a database loss, follow these steps:
Restore the last good Archive copy of your database.
Empty the tables backed up by the Table Data Extract.
Use the last saved Table Data Extract to append data into the empty
tables.
Alternatively, if you have a limited amount of changes, you may be able to
simply copy and paste new records from the Archive Data Extract tables to
your previous database backup. Be very careful pasting records into tables
with AutoNumber fields because they may not be the same if records were
deleted.
Note that restoring individual tables may not work if your tables are in
relationships with constraints such as cascading deletes.
Do not import the tables or else your table relationships, indexes, properties, validation rules, etc. will be lost.

Total Visual Agent Chapter 6: Adding Actions to Event Items 75
Table Data Extract Settings
Saving copies of your table data with Total Visual Agent’s Table Data Extract
feature is similar to archiving an entire database. You can select the number
of copies to save, and you can optionally compress the copies into
compressed archive (ZIP) files. See page 70 for details about these options.
Table Data Extract Format
There are a few things to keep in mind about the format of the tables
extracted by Total Visual Agent’s Table Data Extract Action:
All of the field names, data types, and indexes are recreated in the
archived database.
Inter-table referential integrity and lookups are not recreated.
Table or field level validation rules, captions, default values, etc. are
not recreated.
The archived database and tables are not secured.
Table Data Extract Suggestions
Schedule table data extracts more frequently than full database
backups. It takes less time and works while users are in the
database. If there is significant data entry, consider running the
Table Data Extract Action hourly or even Every X Minutes.
Save backups to a different machine than the original database in
case of hardware failure.
Table data extracts are snapshots of your data at a particular point
in time. If you have multi-table relationships, which must be
preserved, it is up to you to ensure that all of the data in the
required tables is extracted
Total Visual Agent extracts table data one table at a time, so it is
possible for extracts from more than one table to become
“logically” out of sync with one another if data changes while the
Action is processing.
Details by Event Item Type
When you select the Table Data Extract Action in the Treeview, the right
side of the main form displays its options.
The Table Data Extract Action has slightly different options depending on
the Event Item type. For example, only Access Jet databases allow you to

76 Chapter 6: Adding Actions to Event Items Total Visual Agent
select specific tables to extract; Task Groups and Directories extract data
from all tables. The Table Data Extract Action is not available for ADPs.
Microsoft Access/Jet Database
Like the Archive Action, Table Data Extract lets you select the location of the
Archive, the number of Archived copies, and optionally compress the file as
explained on page 69.
Additionally, you can specify whether to archive all tables or selected tables.
To extract the data from all the tables in the selected database, select “Copy
All Local Tables.” Total Visual Agent copies all local Access tables except
system tables. Note that attached or “linked” tables are not copied.
Table Data Extract Settings for a Database
To select a subset of tables to back up, click [Select Tables…] button:
Select Tables Dialog

Total Visual Agent Chapter 6: Adding Actions to Event Items 77
All available tables appear in the list on the left. To select a table, double
click on it (or select it and click the [>] button). Select all tables in the list by
clicking [>>].
To remove a table, double click on it in the list of selected tables (or select it
and click the [<] button). Click [<<] to remove all tables from the list.
Note that when you select a subset of tables and new tables are added to
the database, they are not included in the archive. To always include new
tables, use the Copy All Local Tables option.
Microsoft Access Data Project
The Table Data Extract Action does not apply to ADPs, since ADPs store
table data in a SQL Server database.
Task Group
For a Task Group, all tables in each database are copied to the backup
location. You cannot select specific tables to extract from when using this
Action on a Task Group—all non-system tables are copied.
Table Data Extract Settings for a Task Group
Directory of Databases
For each database in the selected directory that matches the file selection
mask, the Table Data Extract action copies all tables to the backup location.
It is not possible to select specific tables when using this Action on a
Directory Item—all non-system tables are copied.

78 Chapter 6: Adding Actions to Event Items Total Visual Agent
Table Data Extract Settings for a Directory of Databases
Directory of Access Data Projects
The Table Data Extract Action does not apply to directories of ADPs, since
ADPs store table data in a SQL Server database.
Directory of Other Files
The Table Data Extract Action does not apply to directories of other files.
Compact Database Action
Microsoft Access/Jet databases require routine maintenance to ensure
reliability, integrity, and efficiency. When you compact a database, Total
Visual Agent invokes the Microsoft Jet Engine to:
Consolidate and organize data pages, recovering space used by
deleted or renamed objects.
Update table and index statistics so the query optimizer can choose
the most efficient query plan.
Physically re-order the rows in the table in the order of the chosen
clustered index on the table.
Reset the next available number for AutoNumber (or “identity”)
fields so the next available number is one higher than the current
highest value in the table.
Repair the database if structural inconsistencies are found.
Unfortunately, you cannot compact and repair a database while it is in use,
since performing these Actions requires exclusive access to the database.
Scheduling Total Visual Agent Events during off-hours lets you perform

Total Visual Agent Chapter 6: Adding Actions to Event Items 79
these maintenance chores when users are not likely to have the database
open.
Total Visual Agent invokes the Jet Engine’s built-in repair function. If the
database becomes corrupt to the extent that the Jet Engine is unable to
repair it, Total Visual Agent cannot repair it either. Additionally, Total Visual
Agent cannot tell you whether corruption was repaired, since the Microsoft
Jet Engine does not provide that information.
With the Compact Action, you can either compact to a different file
name/directory, or compact to the same file name. If you choose to
compact the database to a different file name, you are essentially creating
an optimized copy of the database, leaving the original database untouched.
If the database specified in the “Compact To Name” field of the
“Compact/Repair Database” Settings box already exists, it is overwritten.
If you choose to compact the database onto the original file name, Total
Visual Agent performs the following steps:
1. Attempts to obtain exclusive access to the database.
2. Compacts the database to a temporary file.
3. Verifies that the temporary database was created.
4. Renames the original database to a temporary file.
5. Renames the temporary database to the original file.
Although every precaution is taken to ensure that your database can be
safely compacted onto itself, it is always a good idea to perform a separate
backup of the database prior to scheduling the compact operation.
Access Jet Databases versus Access Data Projects
Microsoft Access/Jet databases (MDBs/ACCDBs) are compacted directly by
the Microsoft Jet database engine via the Total Visual Agent program. It is
not necessary to run Microsoft Access to compact Jet databases.
For Access Data Projects (ADPs) however, Total Visual Agent must run
Microsoft Access to perform the Compact Action. This is because the Jet
database engine does not control ADPs—Total Visual Agent launches Access
with a command line switch telling it to compact the file. To compact ADPs,
be sure that you have the appropriate version(s) of Access configured on
the Settings form (see page 32).
VBA Project Storage in Access 2000 and Later
Total Visual Agent performs the Compact Action directly via Microsoft DAO
(Data Access Objects interface), and therefore does not use Microsoft

80 Chapter 6: Adding Actions to Event Items Total Visual Agent
Access. This is not a problem for versions of Access prior to Access 2000,
where the compact operation is purely a Jet operation.
Beginning with Access 2000, however, the way the program stores its VBA
project information (data about forms, reports, modules, and classes)
changed. With the post-Access 2000 VBA project storage scheme,
compacting a database from DAO instead of Microsoft Access does not
compact the VBA project. Table data is compacted and query statistics are
updated, but the VBA project information is not fully compacted. In order to
perform this extra level of compaction, use your copy of Microsoft Access.
For projects that are distributed to users, this should not be an issue, since
the VBA project should be compiled and stable. This limitation generally
only affects projects that are currently under development and seeing
ongoing changes to the VBA project information.
To schedule Total Visual Agent to use your copy of Microsoft Access to
perform this extra level of compaction, you can use the Total Visual Agent
“Custom Command” feature to launch Microsoft Access using the /compact
command line switch. The following is an example command line that you
might use:
"C:\Program Files\Office\Msaccess.exe" "#MDB#"
/compact
Details by Event Item Type
When you select the Compact Action in the treeview, the right side of the
main form displays its options. The options are very similar for each Item
type.
Microsoft Access/Jet Database
You can choose to compact the Databases to their original file, or to a
specific named file.

Total Visual Agent Chapter 6: Adding Actions to Event Items 81
Compact Settings for a Database
Microsoft Access Data Project
Likewise, you can compact Access Data Projects their original file or to a
separate file. Remember that to compact ADPs, Total Visual Agent launches
Access. Make sure that you have Access configured properly (see page 32).
Task Group
Similarly, the Compact Action compacts each file in the Task Group onto
itself, or into the specified directory. If you compact the databases into a
different directory, the new file name is the same as the original. The
settings apply to each database in the Task Group.
Directory of Databases/Access Data Projects
When you run the Compact Action on a Directory of Databases or ADPs, the
settings that you specify apply to each file in the directory that matches
your selection mask (as explained on page 64).
Directory of Other Files
The Compact Action does not apply Directories of Other Files.
Failure to Compact
The Microsoft Jet Engine requires an exclusive lock on the database to
compact it. It is unable to compact the database if a machine has the
database open either directly or through a linked table. If Total Visual Agent
is unable to compact the database, an error is generated in the log database
and email sent to warn of the problem (if email alerts are enabled under
Options). The list of machines locking the database is provided so you can
address the offending parties. Unfortunately, Total Visual Agent and the
Microsoft Jet Engine cannot kick people out of the database.

82 Chapter 6: Adding Actions to Event Items Total Visual Agent
Custom Command Action
With Total Visual Agent’s Custom Command feature, you can schedule the
execution of any valid DOS or Windows command. The command does not
necessarily have to refer to the current database. For example, you can
schedule a command that simply copies all files from one directory into
another directory.
Total Visual Agent allows you to reference the current database in the
Custom Command with one of the following special strings:
#MDB# Full path and name of the Database Item (MDB or ACCDB file)
#ADP# Full path and name of the Project (ADP file)
#FILE# Full path and name of the File (in a directory of other files)
When Total Visual Agent finds the string #MDB#, #ADP# or #FILE# in the
custom command line, it substitutes in the full path of the current database
or file. For example, for the database “Northwind.ACCDB” in the
“c:\msoffice\samples” directory, the following Custom Command string:
xcopy #MDB# c:\access\backup\*.*
Is executed as:
xcopy c:\MSOffice\Samples\Northwind.ACCDB
c:\access\backup\*.*
If the replaceable parameter refers to a database or file whose name
contains spaces you might want to consider enclosing the parameter name
in double-quote characters:
MSpaint "#FILE#"
Some internal DOS commands (such as DIR, COPY, RENAME) require that
you start a separate copy of the command shell processor. In this case, the
command line string would be:
command.com /c DIR
Pausing after Execution
Total Visual Agent cannot determine when your command ends. By default,
Total Visual Agent executes the command, and then proceeds immediately
to the next Action. You may, however, instruct Total Visual Agent to pause
for one or more minutes before performing the next task. This can be
important if you launch several memory-intensive custom commands.
Enter the number of minutes to pause in this text box:

Total Visual Agent Chapter 6: Adding Actions to Event Items 83
Details by Event Item Type
When you select the Custom Command Action in the treeview, the right
side of the main form displays its options. The options are similar for each
Item type.
Microsoft Access/Jet Database
For the Jet database Item type, the Custom Command Action inserts the
name of the Jet database when it finds the string #MDB#, and executes the
command.
Custom Command Settings for a Database
Microsoft Access Data Project
Similarly, the Custom Command Action for an ADP inserts the name of the
project when it finds the string #ADP#, and executes the command.

84 Chapter 6: Adding Actions to Event Items Total Visual Agent
Custom Command Settings for an Access Data Project
Task Group
A command line is created for each database in the Task Group, and each
command is executed separately. The Custom Command Action inserts the
name of the database when it finds the string #MDB#.
Custom Command Settings for a Task Group
Directory of Databases/Access Data Projects
When you run the Custom Command Action on a Directory of Databases or
ADPs, a command line is executed separately for each database in the
directory that matches your selection mask. For a Directory of MDBs, the
#MDB# string is replaced with the name of the database. For a Directory of
ADPs, the #ADP# string is replaced with the name of the project.

Total Visual Agent Chapter 6: Adding Actions to Event Items 85
Custom Command Settings for a Directory of Databases
Custom Command Settings for a Directory of ADPs
Directory of Other Files
For a Directory of other files, a command line is created for each file in the
directory that matches the selection mask (as explained on page 64). The
Custom Command Action inserts the name of the file when it finds the
string #FILE#.

86 Chapter 6: Adding Actions to Event Items Total Visual Agent
Custom Command Settings for a Directory of Other Files
Database Statistics Action
The Database Statistics Action allows you to take periodic snapshots of your
Microsoft Access/Jet databases. You can track the following information:
Database size
Table record count for all or selected tables
Object counts for tables, queries, forms, reports, macros, modules,
indexes, and relations
To view the Database Statistics output, select the View, Database Statistics
menu item or press the icon from the toolbar (see page 102 for more
information).
Details by Event Item Type
The Database Statistics action applies only to Event Items that manage
Microsoft Access/Jet databases. When you select the action in the treeview,
the right side of the main form displays its options.
Microsoft Access/Jet Database
For Access/Jet Databases, you can track Database Statistics for all tables, or
select a subset of tables. To track Statistics for all tables, select the “Check
All Tables” option.

Total Visual Agent Chapter 6: Adding Actions to Event Items 87
Database Statistics Settings for a Database
To select a subset of tables, click [Select Tables]:
Select Tables Dialog
All available tables appear in the list on the left. To select a table, double
click on it (or select it and click the [>] button). Select all tables by clicking
[>>]. To remove a table, double click on it in the list of selected tables (or
select it and click the [<] button). Click [<<] to remove all tables.
Note that when you select a subset of tables, Database Statistics are not tracked for new tables that are added to the database. To always include new tables, use the Check All Tables option.
Microsoft Access Data Project
The Database Statistics Action does not apply to ADPs.

88 Chapter 6: Adding Actions to Event Items Total Visual Agent
Task Group
For a Task Group, Database Statistics are tracked separately for each
database on the Task Group. There are no options to select the tables to
include. All non-system tables are tracked.
Directory of Databases
For a Directory of Databases, statistics are collected for each database that
matches the file selection mask (see page 64). It is not possible to select
specific tables—all non-system tables are tracked.
Directory of Access Data Projects
The Database Statistics Action does not apply to directories of ADPs.
Directory of Other Files
The Database Statistics Action does not apply to directories of other files.
Execute Named Macro Action
The Execute Named Macro Action lets you schedule a macro to run at any
time. You can specify a single macro name to execute, but that macro can
perform multiple functions. It can also use the RunCode macro action to
perform any function contained in an Access module function. For instance,
you may have a macro that generates nightly reports, performs analysis,
imports data, or resets settings.
Total Visual Agent launches your copy of Microsoft Access using the settings
provided in the Configuration Options (as explained on page 32). If these
settings are incorrect, Total Visual Agent cannot run the macro.
When using Total Visual Agent to run a macro, please note the following
important information:
The macro is launched in the version of Microsoft Access specified
in Database Settings (see page 56 for details).
o The only exception is databases with a database password.
These databases are launched with the current version of
Access associated with its file extension type.
If you do not specify the name of a macro to execute, Total Visual
Agent simply launches your copy of Access with the specified
database loaded. This will launch your database’s autoexec macro
or startup form if defined.

Total Visual Agent Chapter 6: Adding Actions to Event Items 89
If your database contains an Autoexec macro, it executes when
Access opens, before the specified macro runs. Rename the
Autoexec macro or make sure it does not interfere with your macro.
Total Visual Agent simply launches your database and designated
macro, and cannot respond to any prompts or other dialogs that
appear (such as database password prompts, or Security Warnings
in Access 2003). If Access displays a prompt, it remains open and
does not complete your Macro Action. You should use the
SetWarnings macro action to turn off the warning messages when
update queries are run.
Total Visual Agent cannot determine what your macro does or
whether it runs properly. Ensure that the macro executes correctly
by running Microsoft Access and the macro from the machine
where Total Visual Agent runs. If Total Visual Agent runs a bad
macro or a macro that does not exist, it still reports successful
execution, since it cannot determine what the macro should do.
If you want to close the copy of Microsoft Access, your macro must
include the Quit macro action. Total Visual Agent does not close the
launched copy of Microsoft Access after the specified Macro Action
completes.
Pausing after Execution
Total Visual Agent cannot determine when your macro finishes executing.
By default, Total Visual Agent executes the macro, and then proceeds
immediately to the next Action. You may, however, instruct Total Visual
Agent to pause to pause for one or more minutes before performing the
next task. This can be important if you launch several macros that each
require a separate copy of Access to run.
Enter the number of minutes to pause in this text box. You can enter
fractional minutes (e.g. 0.1 is six seconds):
Details by Event Item Type
When you select the Macro Action in the treeview, the right side of the
main form displays its options. The options are similar for each Item type.

90 Chapter 6: Adding Actions to Event Items Total Visual Agent
Microsoft Access/Jet Database
For the Jet database Item type, the Macro Action opens the selected
database in Access, and runs the specified macro. You can optionally include
a pause before Total Visual Agent continues with the next Action.
Macro Settings for a Database
Microsoft Access Data Project
Similarly, the Macro Action for an ADP opens the selected project in Access,
and runs the specified macro. You can optionally include a pause before
Total Visual Agent continues with the next Action.
Macro Settings for an Access Data Project
Directory of Databases/Access Data Projects
When you run the Macro Action on a Directory of Databases or ADPs, a
separate instance of Microsoft Access is launched for each database that

Total Visual Agent Chapter 6: Adding Actions to Event Items 91
matches the Item’s file selection mask, and the macro is executed for each.
Note that the name of the macro must be identical in each database/project
in the directory.
Directory of Other Files
The Macro Action is not available for Directories of Other Files.
Testing a Scheduled Action
The first time you schedule an Action for Total Visual Agent to perform, you
should use the Test feature to verify that the Action performs successfully.
There are several reasons that an Action could fail, for example:
Incorrect security settings or insufficient privileges to perform the
Action
Incorrect file settings, such as a bad path or specifying a file location
with insufficient disk space
A misspelled macro name or bad command line Action
The database was renamed or deleted
With the Action selected in the treeview, click [Test] to perform the Action.
Regardless of the number of Actions assigned for this database, only the
selected Action is tested.
If the test is successful, the following message appears:
Test Completed Successfully
If there are warnings or errors, the following message appears:

92 Chapter 6: Adding Actions to Event Items Total Visual Agent
Test Completed With Warnings
Click [OK] to open the Activity History Log, which contains more information
about the warning or error (see page 99 for details). Take the steps
necessary to correct the problem and repeat the test.
Testing Multiple Actions
Test all the actions for an Event or item in the event (database, task group,
or directory).
Testing All Actions in an Event
From the treeview, select an event, right mouse click and choose Test All
Event Actions from the popup menu:
Menu Selection to Test All Event Actions
A prompt appears to confirm the test:

Total Visual Agent Chapter 6: Adding Actions to Event Items 93
Confirmation for Testing All Actions for an Event
Press [Yes] to run the test. During the testing of all the actions in an event,
any time specified for pausing during a Custom Command or Execute Macro
action are ignored. This allows the test to run more quickly.
If you prefer to test the event with all the pauses, change the event settings
to make it a One Time event scheduled in the immediate future and run the
Monitor to launch it.
Testing an Item (Database, Task Group or Directory)
Rather than testing all the actions of an event, you can test all the actions
for one item in the event (database, task group, or directory). From the
treeview, select the item with the actions to test, right mouse click and
choose Test All Actions from the popup menu:
Test All Actions for a Database
A prompt appears to confirm the test:
Confirmation for Testing All Actions for a Database

94 Chapter 6: Adding Actions to Event Items Total Visual Agent
Similar to testing an Event, all the pauses for Custom Command and Execute
Macro actions are ignored.

Total Visual Agent Chapter 7: Other Management Features 95
Chapter 7: Other Management Features
The Total Visual Agent Manager provides other features in addition to setting up and
maintaining Event Groups. It allows you to maintain a high-level view of the databases being
managed, as well as track historic activity and Database Statistics. This chapter explains the
other features available in Total Visual Agent.
Topics in this Chapter
Managed Databases
Monitor and Service Status
Activity History Log
Database Statistics

96 Chapter 7: Other Management Features Total Visual Agent
Managed Databases
Since a database may be used in more than one Event Group, there may be
times that you want to see every place a particular database is assigned. To
view this information, open the Managed Databases screen by selecting the
“Managed Databases” from the View menu item, or by clicking the
button on the toolbar:
View Managed Databases Dialog
The top portion of this form lists the databases managed by Total Visual
Agent. The lower portion lists the Event Groups where the selected
database is used. Microsoft Access/Jet databases are listed on the “Access
Databases” tab, and ADPs are listed on the “Access Data Projects” tab.
From this screen, you can perform maintenance functions without editing
each scheduled Event. Be aware, however, that changes you make here
affect all places where the database is referenced. If you delete a database
from this screen, for example, it is removed from all Event Groups.
Add Database
You can add a new database to the list of managed databases by adding it
directly to an Event Group. You can also add a database to the list of
managed databases without adding it to an Event Group. Use the [Add]
button to select an existing database for your list. This process is similar to

Total Visual Agent Chapter 7: Other Management Features 97
adding a database through by adding it to an Event Group, as described on
page 55.
Edit
The Edit button takes you to the “Database Settings” form (see page 56).
Remove Database
Click [Remove] to delete a database from the list of Managed Databases and
from all Event Groups. Activity History Log information and Database
Statistics for the database are retained.
Monitor and Service Status
Total Visual Agent includes two components for processing scheduled
Events: the Monitor and the Service. These components run in the
background, waiting for the appropriate time to execute the scheduled
Actions. See Chapter 8: Running Scheduled Events for more information.
To view the status of the Monitor and the Service, choose the “Monitor and
Service Status” from the View menu, or click the button on the toolbar.
If the component is not currently running, the traffic light icon displays a red
light and reads “Monitor Stopped” or “Service Stopped:”
Monitor and Service Dialog: Monitor and Service Stopped
Use the [Start Monitor] or [Start Service] button to start the appropriate
component, and the traffic light icon changes to green and reads “Monitor
Running” or “Service Running:”

98 Chapter 7: Other Management Features Total Visual Agent
Monitor and Service Dialog: Monitor Running
When the Monitor is launched, the Monitor form appears. You may be
prompted to install the .NET Framework if you didn’t do so during the
installation process. See Installing the .NET Framework on page 23 for more
information.
If events are enabled and scheduled, the Monitor Status form shows the
currently processed event and the next event:
Monitor Status
The Monitor is a separate program from the Manager and can remain
running even if you close exit the Total Visual Agent manager. You can also
start it from the Total Visual Agent Windows menu via Launch Monitor:
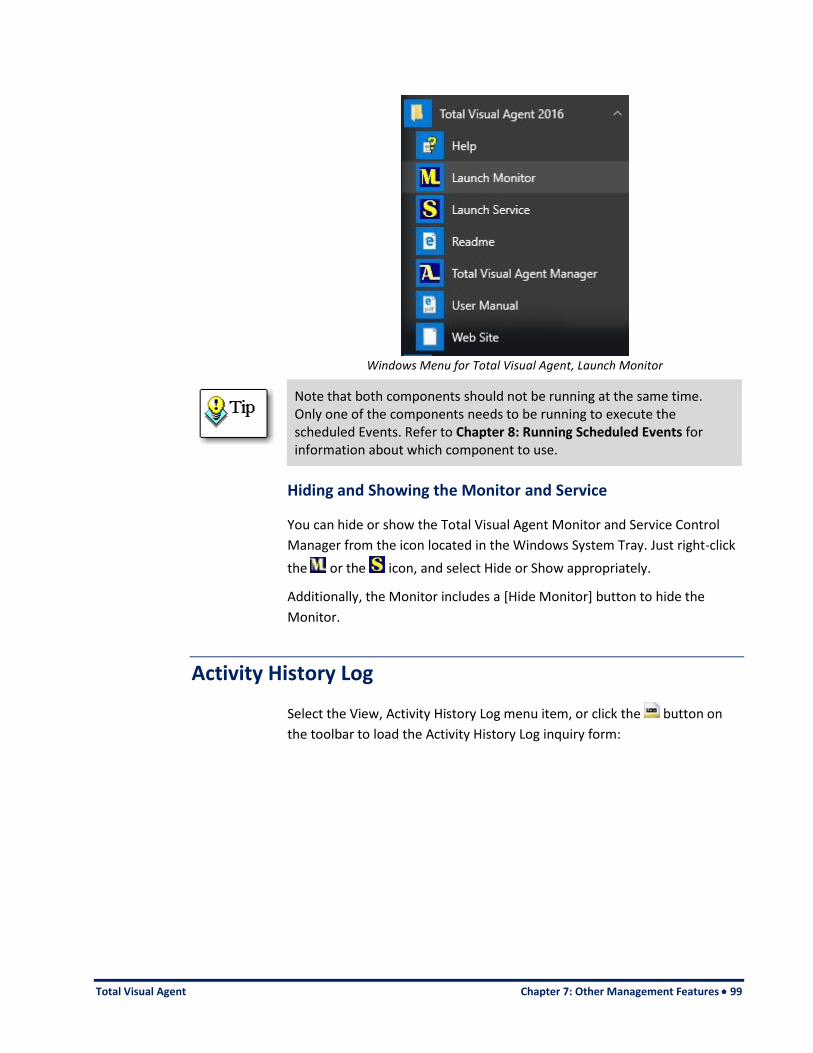
Total Visual Agent Chapter 7: Other Management Features 99
Windows Menu for Total Visual Agent, Launch Monitor
Note that both components should not be running at the same time. Only one of the components needs to be running to execute the scheduled Events. Refer to Chapter 8: Running Scheduled Events for information about which component to use.
Hiding and Showing the Monitor and Service
You can hide or show the Total Visual Agent Monitor and Service Control
Manager from the icon located in the Windows System Tray. Just right-click
the or the icon, and select Hide or Show appropriately.
Additionally, the Monitor includes a [Hide Monitor] button to hide the
Monitor.
Activity History Log
Select the View, Activity History Log menu item, or click the button on
the toolbar to load the Activity History Log inquiry form:

100 Chapter 7: Other Management Features Total Visual Agent
Activity History Log Inquiry Form
Events are logged at one of three levels:
Event Group
Tells when the Event begins and ends, and whether nor not all
Actions for the Event were completed successfully.
Item
Lists the name of the database, directory, or Task Group.
Action
Shows each Action performed and its outcome.
The items of information that are available on the log file are:
Column Description
Log Level The Event, Item or Action.
Event Name The name of the Event Group.
Database or Directory
The full path of the database or directory being managed.
Action The Action performed, such as “Compact.”
Start Time The time the Action began.
End Time The time the Action ended.
Error Status Whether or not the Item ran successfully. This displays the error that occurred during the processing, or is blank if processing was successful.
Comment Any additional information, such as the name of an archive database copy, file size before and after compact, macro or command line run, etc.

Total Visual Agent Chapter 7: Other Management Features 101
Filtering History Data
By default, this form shows all activity ever performed by Total Visual Agent.
You can filter the data so that only certain rows are displayed.
You can filter by a particular “Event,” “Item,” and “Action” by using the
drop-down boxes at the top. Additionally, you can filter by date by entering
a beginning and/or ending date in the “between” and “and” fields.
For example, to select all Events that were logged between April 7th and
April 9th, enter:
If you leave the first text box blank, no beginning time limit is assumed. If
you leave the second text box blank, no ending time limit is assumed.
To only show errors, check the box labeled “Errors Only”. The Resort button
lets you resort the list based on Start Time in ascending or descending
order.
Deleting History Data
The [Delete] button lets you delete the data that is displayed. If you have a
filter on, only the filtered data is deleted.
Generating Log File Reports
Total Visual Agent stores log file history data in the table named
“tblEventLog” in the configuration database (TVAGENT16.MDB). You can
use Microsoft Access (or another database reporting tool) to create reports
based on the Total Visual Agent log file table. Several example reports are
provided in the database for your use, and you can add, copy, and modify
reports to suit your needs.
Top open the database, press the [Open Log Database] button.
Access Reports
The Total Visual Agent configuration database contains several sample
reports which you can run as-is, or modify with your copy of Microsoft
Access. The configuration database is found in the Total Visual Agent
installation directory.

102 Chapter 7: Other Management Features Total Visual Agent
Be careful not to alter or delete any tables or queries contained in the Total Visual Agent Configuration database. These objects are required for proper execution of Total Visual Agent. To be safe, consider copying the reports into another database, and linking the required tables from the Total Visual Agent Configuration database.
Database Statistics
The Database Statistics Action (explained on page 86) collects statistics
(database size, record counts, and object counts) about your databases.
Keeping track of this type of information is helpful for capacity management
and application performance reasons. Over time, the statistics may be a
valuable management tools in gauging the growth of your databases, usage
levels during the day, and future capacity needs.
To view the statistics collected by Total Visual Agent, choose “Database
Statistics” from the View menu, or press the button on the toolbar. The
Database Statistics form provides three tabs to view the data collected:
Snapshot Tab
Displays all detail data for each snapshot.
Tables Tab
Displays record counts for a selected table over time (multiple
snapshots).
Objects Tab
Displays object counts for a database over time.

Total Visual Agent Chapter 7: Other Management Features 103
Snapshot Tab
Database Statistics—Snapshot Tab
Each time a statistical snapshot is taken for a particular database, a new
entry is made into the “Snapshot Taken” list. You can scroll through the list,
or select a particular snapshot by clicking on it. When you select a snapshot
from the list, its information displays on the right side with the database
name, object counts, table record counts, and database size.
Object Counts
The “Object Counts” section of the form displays counts of the various types
of objects in the database when the snapshot was taken. Object counts
include:
Tables Queries
Forms Reports
Macros Modules
Indexes (number of primary and secondary indexes)
Relations (number of links between pairs of tables and/or queries)
Database Size (size of the database in bytes)
Table Details
For each table, this form displays the table name and the number of records
it contained when the snapshot was taken.

104 Chapter 7: Other Management Features Total Visual Agent
Table Record Count and Total
Filtering Database Statistics Snapshot Data
By default, this form shows all statistics collected by Total Visual Agent,
however options are available to filter the data to display specific Events,
databases, or date ranges.
Type the name of the database in the combo box, or select it from the list to
display a subset of the Database Statistics. To display all Statistics, choose
the entry “<ALL>.”
Additionally, you can narrow down the statistics to those collected between
certain dates. Specify the beginning and ending date range in the text boxes
captioned “between” and “and.”
For example, to select all snapshots taken between April 7th and April 9th,
enter:

Total Visual Agent Chapter 7: Other Management Features 105
Tables Tab
Database Statistics—Tables Tab
The Tables tab displays the records for each table over time. As with
Snapshot tab, you can filter by database and by date. The “<ALL>” choice for
database, however, is not valid for Tables tab, since you can only view one
database at a time.
You can filter the results further by selecting a particular table to view. This
can be useful in determining how tables grow over time. To filter for one
table, select the table name from the combo box:
Table Selection

106 Chapter 7: Other Management Features Total Visual Agent
Objects Tab
Database Statistics—Objects Tab
The Objects tab displays file size and object counts for the database over
time. The count for tables includes Local, Linked and System table counts.
As with Snapshot tab, you can filter by database and by date. The “<ALL>”
choice for database, however, is not valid for Objects tab, since you can only
view one database at a time.
Generating Statistical Snapshot Reports
Total Visual Agent stores Database Statistics snapshot entries in a table
called “tblSysStatSnapShot” in the Total Visual Agent configuration database
named TVAGENT15.MDB. This table stores one record for each snapshot
that was taken. A related table named “tblSysStatSnapShotTableDetail”
stores one row for each table that was checked when the snapshot was
taken.
You may use Microsoft Access, or another database reporting tool to create
reports based on the Total Visual Agent Database Statistics tables. Several
Access reports are provided in the database for your use. Feel free to
modify or copy these reports. See 101 for more information about using this
database and the included reports.

Total Visual Agent Chapter 8: Running Scheduled Events 107
Chapter 8: Running Scheduled Events
After scheduling events and actions through the Manager, you’re ready to let Total Visual
Agent perform the work. Two components are available for performing the work: the
Monitor and the Service. Select the most appropriate component for your situation, and it
waits in the background for the next scheduled Event. This chapter describes the Total Visual
Agent Monitor and Service components, and how to decide which to use.
Topics in this Chapter
Running Scheduled Events
Using the Total Visual Agent Monitor
Using the Total Visual Agent Service

108 Chapter 8: Running Scheduled Events Total Visual Agent
Running Scheduled Events
In order for scheduled events and actions to run, either the Total Visual
Agent Monitor or the Total Visual Agent Service must be running. When
deciding to use the Monitor or the Service, consider the benefits and
drawbacks of each. After determining which component to use, refer to the
appropriate section in this chapter for details about that component.
When to Use the Monitor
The Monitor is ideal if Total Visual Agent is running on a machine that
always has a user logged on. Since a user is logged on, they are able to see
and react to any warnings or prompts that occur when Total Visual Agent
executes external programs (macros, custom commands, and compacting
ADPs).
The Monitor performs its processing in the background without disrupting
any other activities in the foreground, and can be shown or hidden as
desired. However, a user must be logged onto the Total Visual Agent
computer for the Monitor to execute scheduled events. If the computer is
rebooted and a user does not log on, the Monitor cannot run.
When to Use the Service
The Total Visual Agent Service runs as a Windows Service, and executes
scheduled events with or without a user logged on. Since the Service does
not require a user to be logged on, it is more secure than the Monitor. The
Service can also be configured to start automatically when the computer is
rebooted, so you can be confident that it’s always running.
Using the Service to launch external programs is potentially dangerous. If
the external program fails for any reason, the program may remain open in
memory with no feedback shown on screen. This can cause your computer
to stop responding, and may potentially cause database corruption.
See page 112 for details about using the Service to launch external
programs.
Using the Total Visual Agent Monitor
The Total Visual Agent Monitor runs in the background to execute
scheduled Actions at the specified time. Generally, the monitor is useful if

Total Visual Agent Chapter 8: Running Scheduled Events 109
you’re testing or running processes while you are using the computer. The
Monitor is a Windows program that requires you to be logged in to run it.
Consider Using the Service Instead
For higher security and resilience, consider using the Service instead of the
Monitor if you intend to run it continuously and unattended. The Service is
integrated with Windows Services and runs without you being logged in and
automatically reloads should your machine reboot (see page 108 for more
information).
Starting the Monitor
For the Total Visual Agent Monitor to execute scheduled Events, it must be
running at the scheduled time. In general, you should leave the Monitor
running around the clock, or be sure to start it prior to the scheduled event
time.
There are several options for starting the Total Visual Agent Monitor:
Launch it from the Total Visual Agent Manager
You can start and stop the Monitor through the Monitor/Service
Status form in the Manager. See Monitor and Service Status on
page 97 for more information.
Launch it from the Start menu
From the Windows Start menu, choose All Programs, FMS, Total
Visual Agent 2016, Launch Monitor:
Windows Menu for Total Visual Agent, Launch Monitor
Adding Total Visual Agent Monitor to Startup
Once you set up Total Visual Agent to manage your databases, you may
want to have the Monitor running at all times. Add the Monitor to your

110 Chapter 8: Running Scheduled Events Total Visual Agent
Startup folder to have it start automatically every time your machine
reboots. From the menu, select Tools, Add Monitor Shortcut to Startup
Menu:
Tools Menu to Add Monitor to the Startup Menu
This instructs the Total Visual Agent Monitor to automatically start the next
time you restart and log onto your machine.
Total Visual Agent Monitor Form
When the Total Visual Agent Monitor is launched, it displays the following
form:
Total Visual Agent Monitor
If the form doesn’t appear, you may have set the options to hide it under
Tools, Options, Monitor Settings on page 36.
The “Current Processing Activity” section at the top of the form displays
information about what the Monitor is currently doing. When the Monitor
processes an Event, this section displays the Item it is working on as well as
the Action it is performing on that Item.
The “Next Scheduled Activity” section at the bottom of the form displays
the name and time of the next Event that the Monitor is scheduled to
perform.

Total Visual Agent Chapter 8: Running Scheduled Events 111
Updating the Schedule
Normally, the Monitor rechecks the schedule at two times:
When it is first launched.
When it finishes processing an Event.
Once your schedule is established, that is really all that needs to be done.
Total Visual Agent Monitor keeps track of which Events it needs to perform,
and when to perform them.
If you update the schedule through Total Visual Agent Manager, but do not
shut down and restart Total Visual Agent Monitor, it is not aware of any
changes you made.
To have the Monitor recheck the latest schedule information prior to
executing the next Event, press the [Refresh] button. The Monitor
immediately re-checks the Event Schedule, and resets the Next Scheduled
Activity settings.
Running the Monitor
Normally, you do not need to do anything while Total Visual Agent Monitor
is running in the background. You can minimize it so its form does not take
up screen space or hide it altogether by clicking the [Hide Monitor] button,
or right-clicking the System Tray icon and choosing “Hide Monitor” (see
page 99 for details).
Total Visual Agent can perform its processing in the background without
disturbing any other activities in the foreground. If you are using a machine
with a slow processor or limited memory, however, we suggest running
Total Visual Agent on a dedicated machine that is not used for other tasks.
Shutting Down the Monitor
To stop the Monitor and suspend Event processing, close the Monitor form.
Remember to restart the Monitor prior to the next scheduled Event. When
you restart the Monitor, any Events that were skipped are logged as errors,
and new Events are scheduled.
If the Monitor form is hidden, you need to show it prior to shutting it down.
To show the Monitor, right-click the icon in the System Tray and select
“Show Monitor” (see page 99 for details):

112 Chapter 8: Running Scheduled Events Total Visual Agent
Right Click Menu for the Monitor Icon in the System Tray
Using the Total Visual Agent Service
Total Visual Agent includes a Windows Service, which can be used instead of
the Monitor to process Events.
Like the Monitor, the Service runs in the background, waiting for the
appropriate time to execute scheduled Actions. However, since it is a
Windows Service, it does not require that a user be logged on in order to
run its scheduled events. Use the Service instead of the Monitor if you
cannot or do not want a user to be logged on when an Event is scheduled to
be processed.
Important Note about Launching External Programs using the Service
Certain events require Total Visual Agent to launch external programs,
including:
Executing Macros
Compacting ADP files
Executing Custom Commands
Executing these actions from an unattended or a non-interactive user
account is risky, and can cause the computer to stop responding, leave
programs open in memory, and possibly corrupt data.
If you understand these risks and still determined that you want to launch
external programs using the Service, Microsoft has a few suggestions. Refer
to the following Microsoft KnowledgeBase articles for more information:
Article ID Article Title
257757 Considerations for Server-Side Automation of Office
259971 How to Dismiss a Dialog Box Displayed by an Office Application with Visual Basic
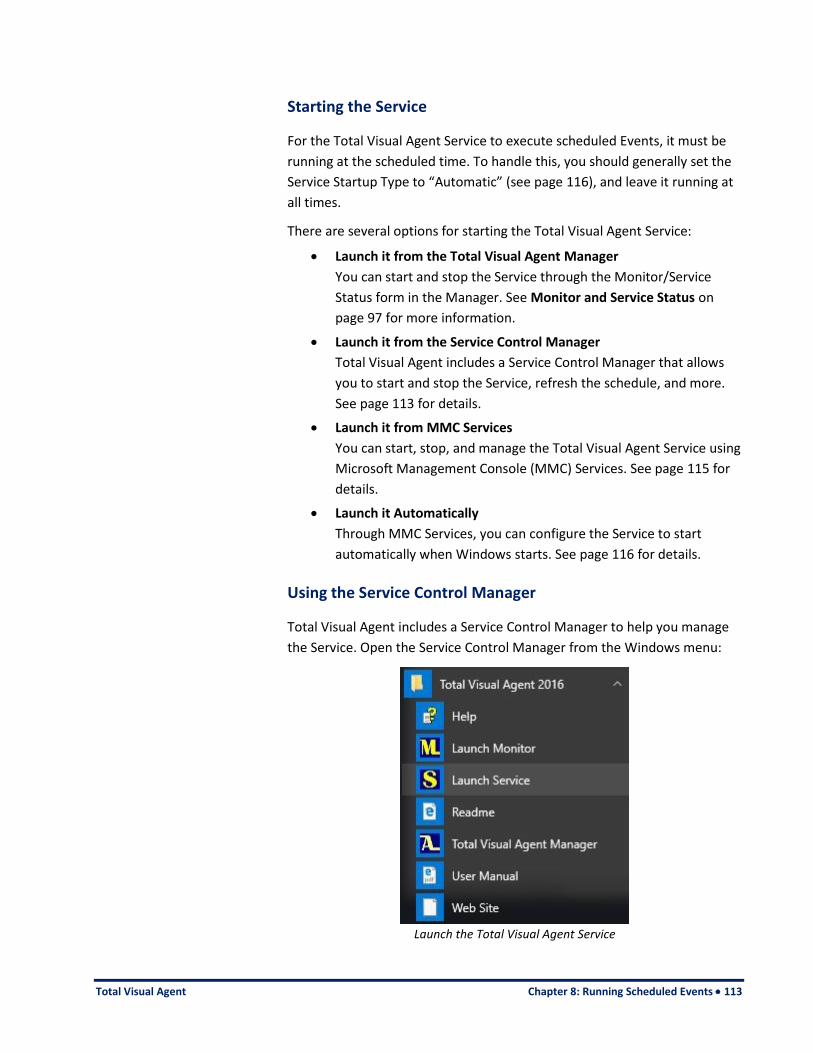
Total Visual Agent Chapter 8: Running Scheduled Events 113
Starting the Service
For the Total Visual Agent Service to execute scheduled Events, it must be
running at the scheduled time. To handle this, you should generally set the
Service Startup Type to “Automatic” (see page 116), and leave it running at
all times.
There are several options for starting the Total Visual Agent Service:
Launch it from the Total Visual Agent Manager
You can start and stop the Service through the Monitor/Service
Status form in the Manager. See Monitor and Service Status on
page 97 for more information.
Launch it from the Service Control Manager
Total Visual Agent includes a Service Control Manager that allows
you to start and stop the Service, refresh the schedule, and more.
See page 113 for details.
Launch it from MMC Services
You can start, stop, and manage the Total Visual Agent Service using
Microsoft Management Console (MMC) Services. See page 115 for
details.
Launch it Automatically
Through MMC Services, you can configure the Service to start
automatically when Windows starts. See page 116 for details.
Using the Service Control Manager
Total Visual Agent includes a Service Control Manager to help you manage
the Service. Open the Service Control Manager from the Windows menu:
Launch the Total Visual Agent Service

114 Chapter 8: Running Scheduled Events Total Visual Agent
The Service requires Administrator rights if you want to modify its status. If
you are not logged in as the Administrator, right mouse click and select Run
as Administrator:
Launch the Service with Run as Administrator
The Service Control Manager displays the following form:
Total Visual Agent Service Control Manager
The Service Control Manager works with the Windows Service to let you
turn the Service on and off, and see what it’s doing.
The “Current Processing Activity” section displays information about the
Service’s current activity. When the Service processes an Event, this section
displays the Item and Action that is being processed.
The “Next Scheduled Activity” section displays the name and time of the
next Event that the Service is scheduled to perform. If the Service is not
currently running, the fields show as “None”.
The buttons along the bottom of the form allow you to control the Service:

Total Visual Agent Chapter 8: Running Scheduled Events 115
Refresh
The Service rechecks schedule information when it first starts and when it
completes processing for an Event. If you update the schedule while the
Service is running, press the Refresh button to recheck the latest schedule
information. See page 111 for more information.
Start
Starts or resumes the Service, allowing it to process scheduled Events.
Stop
Stops the Service and prevents it from processing scheduled Events. When
you restart the Service, any Events that were skipped are logged as errors,
and new Events are scheduled.
Pause
Temporarily suspends processing.
Help
Opens context-sensitive help about the Service Control Manager.
Managing the Service through MMC Services
The Total Visual Agent Service is a standard Windows Service, and like other
services, can be managed through Microsoft Management Console (MMC)
Services. MMC includes more advanced management options than the
Service Control manager, and can be used if you are familiar with Windows
Services.
To open MMC Services, just type Services, or from the Control Panel choose
Administrative Tools, Services:
Microsoft Management Console (MMC) Services
Locate the service named “Total Visual Agent 2016 Service,” and select
“Properties” from the Action menu, or double click on the service to open
the Properties window.
Properties
The Properties Window is standard across all Windows Services. This
manual does not document standard Windows Service properties; instead,
it only lists information specific to the Total Visual Agent Service.

116 Chapter 8: Running Scheduled Events Total Visual Agent
Refer to the MMC help file for more information about the settings on this
form. For context-sensitive help, put the cursor in the appropriate field, and
press [F1] on your keyboard.
General Tab
The General tab provides options for starting and stopping the Service:
Total Visual Agent Service, General Properties
From this tab, you can specify the startup type for the Service. We
recommend that you set the Startup Type to “Automatic” so the Service
automatically starts when Windows is rebooted. You can also and manually
start, stop, pause, and resume the Service.
The Total Visual Agent Service does not have any applicable parameters, so
the “Start parameters” field should always be blank.
Log On Tab
The Log On tab provides options for how the Service logs on to the system:

Total Visual Agent Chapter 8: Running Scheduled Events 117
Total Visual Agent Service, Log On Properties
Select "Local System Account" to specify that the Service logs on to the local
system account. This is appropriate if Total Visual Agent is only working with
files on that machine.
Allow Service to Interact with Desktop
For “Local System Account,” you have the option to “Allow service to
interact with Desktop.” This tells the Service to display a user interface
when the service is started. This includes any prompts or dialogs that may
be shown when Total Visual Agent launches external programs.
Remember that using the Total Visual Agent Service to launch external
programs is potentially dangerous (see page 112). Additionally, the “Allow
service to interact with Desktop” option is only useful if a user is logged on
to Windows and available to respond to prompts. It is not useful when the
Service is running unattended, or with no user logged on.

118 Chapter 8: Running Scheduled Events Total Visual Agent
Network Permissions
If Total Visual Agent processes protected local files and folders, or network
files, you need to specify a specific user account with the appropriate
permissions:
Provide Account Information to Have Network Permissions
Recovery Tab
The Recovery tab provides options for how the Service behaves if it fails:

Total Visual Agent Chapter 8: Running Scheduled Events 119
Total Visual Agent Service, Recovery Properties
If the Service fails to start, consider restarting it, or running another
program to notify you of the failure.
Make sure you periodically monitor whether the Service is running properly.
Scheduled Events are not be processed if the Monitor and Service are not
running.
Dependencies Tab
The Dependencies tab displays dependency information for the Service. The
Total Visual Agent Service has no dependencies, so this tab is not applicable.


Total Visual Agent Chapter 9: Product Support 121
Chapter 9: Product Support
This chapter provides information about troubleshooting problems that arise and obtaining
support for Total Visual Agent.
Topics in this Chapter
Support Resources
Web Site Support
Technical Support Options
Contacting Technical Support

122 Chapter 9: Product Support Total Visual Agent
Support Resources
There are many resources available to help you resolve issues you may
encounter. Please check the following:
Readme File
Check the README file for the latest product information. The README file
is located in the directory where you installed the product.
Product Documentation
We’ve spent a great deal of care and time to make sure the Total Visual
Agent manual and help file are very detailed. Check the Table of Contents
and Index for your question, and read the appropriate pages.
Web Site Support
The FMS web site contains extensive resources to help you use our The FMS
web site contains extensive resources to help you use our products better.
Resources include product updates, frequently asked questions (FAQs),
forums, information on new versions, betas, and other resources.
Web Site
The FMS web site is located at:
www.fmsinc.com
News and important announcements are posted here.
Support Site
The main support page is located at:
http://support.fmsinc.com
From this page, you can quickly locate the other support resources.
Product Updates
FMS takes product quality very seriously. When bugs are reported and we
can fix them, we make the updates available on our web site. If you are
encountering problems with our product, make sure you are using the latest
version.

Total Visual Agent Chapter 9: Product Support 123
Frequently Asked Questions (FAQs)
Common questions and additional information beyond what is in the
manual is often available from our FAQs.
Microsoft Patches
Our support site also includes links to Microsoft patches that are related to
our products. Make sure you’re using the latest versions by checking here or
visiting the Microsoft site.
Technical Support Options
FMS is committed to providing professional support for all of our products.
We offer free access to our online FAQs and forums. Bug reports, feature
requests, suggestions, and general pre-sales questions related to our
products are always available at no cost.
Additional maintenance plans are available to provide subscribers with
enhanced technical support. This is the best way for you to stay current with
the rapidly changing technologies that impact project development, and to
ensure you are getting the maximum return from your software investment.
Please visit our web site, www.fmsinc.com, for the most up-to-date
information.
Features & Benefits Premium Incident Standard
Access to FAQs
Access to Forums
Minor Upgrades/ Bug Fixes
Telephone Support Per incident First 30
Days
Email Support Per incident First 30
Days
Priority Response Time 1
Senior Engineer Support Team
Email Project for Testing
Programmatic Code Assistance 2

124 Chapter 9: Product Support Total Visual Agent
Major Upgrades for Current Version (not between Access versions)
Additional
fee Additional
fee
Cost Annual Fee Fee Per Incident
Included
1. Response generally within two business days. Actual resolution may take longer
depending on complexity of the issue reported.
2. Custom Programming implementation is not provided in our Support Maintenance
plans. For products that include a programmatic interface, we can provide
instructions for using our programmatic interface, and show examples, but we do not
implement this into your projects. This service is available from our Professional
Solutions Group.
Premium Subscription
The Premium Subscription is the ideal option for customers seeking the
highest level of support from FMS. The annual fee entitles you to telephone
and email technical support from a senior support engineer.
From time to time, FMS may release new versions of existing products
which add new features. These are point releases (e.g. from version 16.0 to
16.1) and are different from new builds that correct problems in existing
features (e.g. from version 16.00.0001 to 16.00.0004).
These point releases are available for a nominal upgrade fee to existing
customers. Premium Technical Support subscribers receive these upgrades
automatically and for no additional charge during their subscription term.
NOTE: Upgrades between versions (for instance going from Access
2013 to Access 2016) are not considered Point Release Upgrades
and are not included in the Premium Subscription.
Subscriptions are available for a twelve month period, and may be
purchased at any time. You must be the registered owner of the product to
purchase a subscription and the only person contacting FMS for support
under the subscription.
Please ensure you have purchased the Subscription you need for Total
Visual Agent.
Per Incident
Our Per Incident package is available individually or by purchasing multiple
incidents in advance. The Per Incident support package provides telephone
and email technical support from a Senior Technical Support Engineer for
resolving one incident.

Total Visual Agent Chapter 9: Product Support 125
An incident is defined as a single question related to one of our
products. The Per Incident period is from start to finish (report of the
incident to resolution) for a single incident. If you anticipate multiple
questions for a single product, we recommend purchasing the Premium
Subscription.
Standard Subscription
Our Standard Subscription comes with every product purchased for no
additional cost. The standard subscription comes with access to our FAQs
and forums, and responses to bug reports and feature requests for that
version.
Please note that the person requesting support must also be the registered
user of the product. Registration is required and will be requested by our
Technical Support professionals.
Contacting Technical Support
If the troubleshooting suggestions and other support resources fail to
resolve your problem, please contact our technical support department. We
are very interested in making sure you are satisfied with our product.
Registering Your Software
Please register your copy of Total Visual Agent at:
http://www.fmsinc.com/register
You must be registered to receive technical support. Registration also
entitles you to free product updates, notifications, information about
upcoming products, and beta invitations. You can even receive free email
notification of our latest news.
Contact Us
The best way to contact us is to submit a ticket on our support site:
http://support.fmsinc.com
Please provide detailed information about the problem that you are
encountering. This should include the name and version of the product,
your operating system, and the specific problem. If the product generated
an error file, please submit that as well.
Our ticketing system will let you track the progress of your issue and see the
entire thread of communications and file attachments.

126 Chapter 9: Product Support Total Visual Agent
Please bear in mind that a unique issue may involve meetings between the
technical support staff and product developers, so your patience is
appreciated.
Microsoft Technical Support
FMS only provides technical support for its products. If you have questions
regarding Microsoft products, please contact Microsoft technical support.

Total Visual Agent Index 127
Index
.
.NET Framework installation, 23
6
64-bit, 11
A
Access 2007, 16
Access 2010, 10
Access 2013, 10
Access 2016, 6
Access Data Projects. see ADPs
Access Locations, 33–34
Access Version, 58
actions
testing, 93–96
Actions, 44, 93–96
Archive Database. see Archive
Database
Compact Database. see Compact
Database
Custom Command. see Custom
Command
Database Statistics. see Database
Statistics
Execute Macro. see Execute Macro
Table Data Extract. see Table Data
Extract
activity log, 7
activity log files. see History Log
ADPs, 56, 61–63
Archive Database, 35, 70, 71–75
ADPs, 73
archive directory, 71
compressing, 72
copies, 71
default settings, 35
Directories, 74, 90
Jet Databases, 72
Task Groups, 74
zip, 72
Archive Table Data. see Table Data
Extract
B
blog, 18
C
Compact Database, 70, 80–84
ADPs, 81, 83
Directories, 83
Jet Databases, 81, 82
Task Groups, 83
VBA project storage, 81
configuration options. see options
connection type, 36
continue processing databases, 64
copy Event, 51
Custom Command, 70, 72, 84–88
#ADP#, 84
#FILE#, 84
#MDB#, 84
ADPs, 85
Directories, 86
Jet Databases, 85
pausing after, 84
Task Groups, 86
D
Daily Events, 48
database. Jet Databases
database lock, 7
database password, 60
database settings, 58–61, 99
Access Version, 58
security. see security
Database Statistics, 70, 88–90, 104–8
ADPs, 89
filtering, 106
Jet Databases, 88
object counts, 105
Objects Tab, 108
reports, 108
select tables, 89
Snapshot Tab, 105
table details, 105
Tables Tab, 107
Task Groups, 90
viewing, 104
delete Event, 52
Details Pane, 32
Directories, 56, 65–67
contain, 66
file mask, 66
include subdirectories, 66
process next database, 67
disable Event, 52
duplicate event, 51
E
email, 35–37
email server, 36
enable Event, 52
Engine, 6
error alert mail settings, 35
errors, 35–37
Event Actions. see Actions
Event Group, 44
adding, 45
copying, 51
deleting, 52
disabling, 52
enabling, 52
next scheduled, 50
once per hour, 47
renaming, 52

128 Index Total Visual Agent
running, 109–21
schedule type. see Event schedule
Event Items. see Items
Event processing window, 46, 48
Event schedule, 43–53, 45
daily, 48
hourly, 46
monthly, 49
multiple times per hour, 47
once per hour, 47
processing window. see Event
processing window
status, 50
weekly, 49
Execute Macro, 70, 90–93
ADPs, 92
bad macros, 91
Directories, 92
Jet Databases, 92
pausing after, 91
F
Facebook, 18
file mask, 66
FMS web site, 17
H
hide Monitor icon, 38
History Log, 101–4
deleting, 103
filtering, 103
reports, 103
viewing, 101
Hourly Events, 46–48
multiple times per hour, 47
once per hour, 47
I
import settings, 39–41
INI file, 59, 60
installation, 21–24
setup, 22
installing .NET Framework, 23
Items, 44, 55–68
ADPs, 56
Directories. see Directories
Jet Databases. see Jet Databases
managing, 98–99
moving, 68
Task Groups. see Task Groups
J
Jet Databases, 56, 57–61
L
license agreement, i–iii
lock error, 7
log files. see History Log
M
Macro. see Execute Macro
managed Databases, 98–99
Manager, 5, 26–33
Details Pane, 32
importing settings, 39–41
menu, 28
starting, 26
toolbar, 28
treeview, 31
menu, 28
Microsoft Access
locations. see Access locations
security. see security
Version. see Access Version
Microsoft Access 2007, 16
Microsoft Access 2010, 10
Microsoft Access 2013, 10
Microsoft Access 2016, 6
Microsoft Management Console
(MMC), 117
Monitor, 5, 99–101, 109–21
hide icon, 38
refreshing, 113
running, 113
starting, 111
startup menu, 112
status, 99
stopping, 113
task bar icon, 38, 101
monitor settings, 37
Monthly Events, 49
move item. see Items, moving
N
new features, 6
O
options, 33–41
Access Locations, 33–34
default file locations, 35
error alert mail settings, 35–37
monitor settings, 37
P
password, 37, 60
port, 36
process next database, 67
processing window. see Event
processing window
R
recovery, 76
registration, 127
rename Event, 52
Repair Database. see Compact
Database
reports, 103, 108
Run as Administrator, 116
S
schedule Events. see Event schedule
schedule status, 50
schedule type. see Event schedule
Scheduled Events treeview, 31, 44
security, 59–61
database password, 60
INI file, 59, 60
permissions, 60
workgroup database, 59
select tables, 78, 89
Service, 6, 99–101, 109–21
external programs, 114
interact with desktop, 119
limitations, 114
starting, 118
status, 99
stopping, 118
settings database, 7
setup, 21–24
SMTP, 9, 36
statistics. see Database Statistics
support, 123–28
support forums, 18

Total Visual Agent Index 129
system requirements, 22
T
Table Data Extract, 35, 70, 76–80
ADPs, 79
copies, 77
default settings, 35
Directories, 79
format, 77
Jet Databases, 78
select tables, 78
Task Groups, 79
task bar icon, 38
Task Groups, 56, 63–65
technical support, 123–28
test actions, 93–96
test event actions, 94
test item actions, 95
test message, 37
test multiple actions, 94
TLS, 9
toolbar, 28
Total Visual Agent Engine. see Engine
Total Visual Agent Manager. see
Manager
Total Visual Agent Monitor. see
Monitor
Total Visual Agent Service. see
Service
Transport Layer Security, 9
treeview. see Scheduled Events
treeview
troubleshooting, 123–28
Twitter, 18
U
uninstall, 23
updates, 17
upgrading, 39–41
user name, 37
W
web site, 17
Weekly Events, 49
workgroup database, 59
Z
zip, 72, 77