macintosh supplement · before you install the software, make sure your macintosh meets the...
TRANSCRIPT
EPSON PowerLite 7850pMultimedia Projector
Macintosh Supplement
System Requirements
Installing the Software
Setting Up Your Macintosh
Connecting to the Projector
CPD-17267
®®
®
2
EPSON is a registered trademark and EasyMP is a trademark of SEIKO EPSON CORPORATION.
PowerLite is a registered trademark of Epson America, Inc.
General Notice: Other product names used herein are for identification purposes only and may be trademarks of their respective owners. EPSON disclaims any and all rights in those marks.
© 2003 by Epson America, Inc. 10/03

3
IntroductionYour EPSON PowerLite 7850p projector now lets you project wirelessly from an Apple® Macintosh® computer equipped with an AirPort® or AirPort Extreme (802.11b or 802.11g) wireless network interface. This supplement includes the following:
■ System requirements for using the new wireless software
■ Software installation instructions
■ How to set up your Macintosh for wireless projecting
■ How to connect to the projector
When you’ve finished with the instructions in this supplement, see the User’s Guide for information about creating projector groups, receiving e-mail alerts, or using other networking features supported by your projector.
System RequirementsBefore you install the software, make sure your Macintosh meets the following requirements for projecting wirelessly:
■ Power Macintosh® series, iMac,® PowerBook,® or iBook® series system
■ Mac OS X 10.2.4 or above
■ AirPort (802.11b) or AirPort Extreme (802.11g) wireless network interface
■ At least 256MB of RAM
■ At least 128MB of free hard disk space
■ SVGA (800 × 600) or better display adapter and monitor
noteIf you are using AirPort Extreme, you must set the Wireless mode to 802.11b only in the AirPort ® Admin Utility. See your AirPort documentation, or contact Apple technical support for help.
4
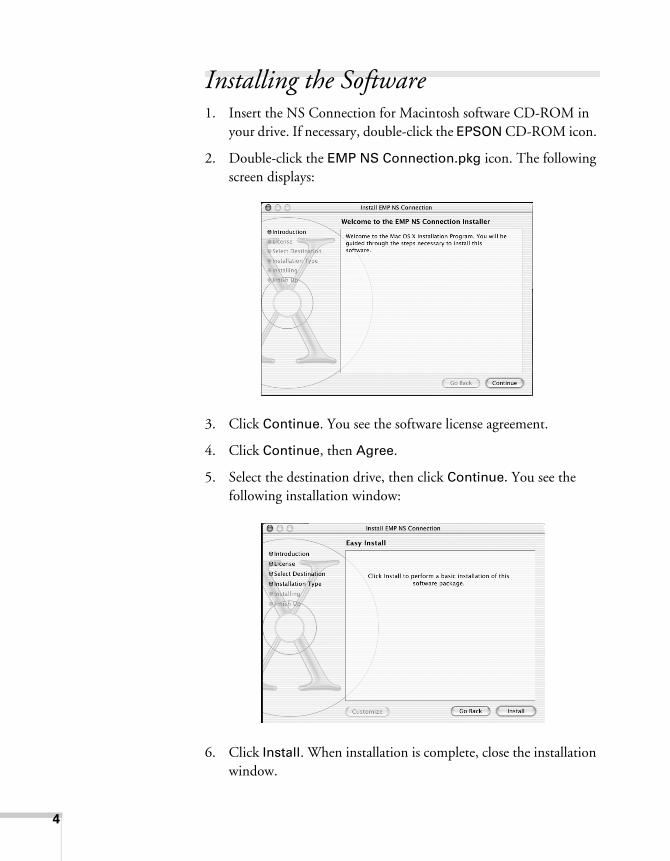
Installing the Software1. Insert the NS Connection for Macintosh software CD-ROM in
your drive. If necessary, double-click the EPSON CD-ROM icon.
2. Double-click the EMP NS Connection.pkg icon. The following screen displays:
3. Click Continue. You see the software license agreement.
4. Click Continue, then Agree.
5. Select the destination drive, then click Continue. You see the following installation window:
6. Click Install. When installation is complete, close the installation window.

5
Setting Up Your MacintoshBefore you begin, do the following:
■ Configure your projector for wireless projecting; see the User’s Guide for instructions.
■ Insert the EPSON wireless (802.11b) card in the projector and start EasyMP.™ See the User’s Guide for details.
Follow these steps to set up your Macintosh for wireless projecting:
1. From the Apple pull-down menu, select System Preferences. Then double-click the Network icon. You see the Network Settings window.
2. Select Network Port Configuration in the Show pull-down menu:
3. Under Port Configurations, select AirPort.
4. Click Apply Now. Then close the window.
noteDon’t set your projector to Channel ad hoc mode. This mode is not supported for Macintosh.
then select AirPort
Select Network Port Configurations here. . .
noteIf you don’t need the other network ports, disable them by deselecting their check boxes. If more than one network port is enabled, the projector software warns you to turn off AirPort when you first connect to the projector. Disregard this message.
6
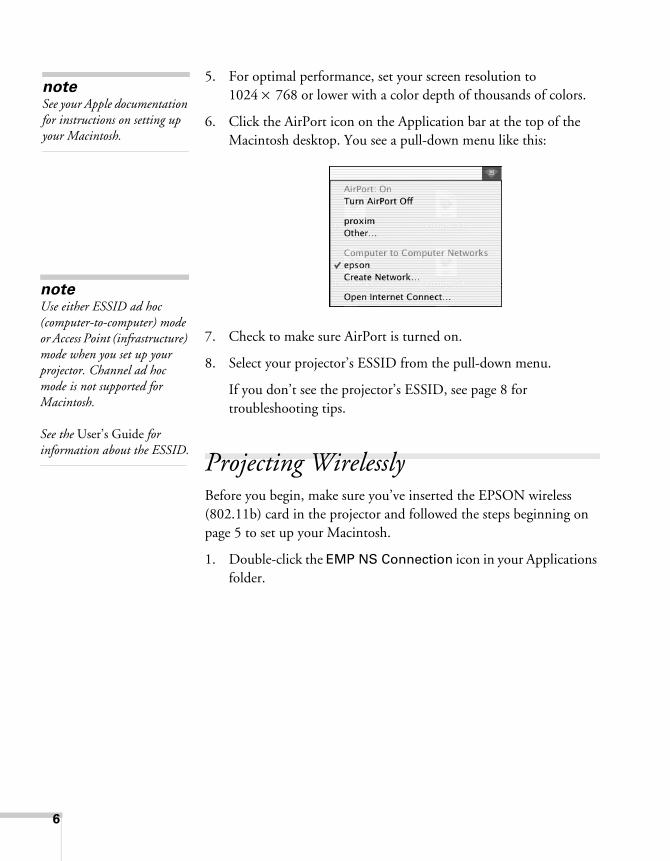
5. For optimal performance, set your screen resolution to 1024 × 768 or lower with a color depth of thousands of colors.
6. Click the AirPort icon on the Application bar at the top of the Macintosh desktop. You see a pull-down menu like this:
7. Check to make sure AirPort is turned on.
8. Select your projector’s ESSID from the pull-down menu.
If you don’t see the projector’s ESSID, see page 8 for troubleshooting tips.
Projecting WirelesslyBefore you begin, make sure you’ve inserted the EPSON wireless (802.11b) card in the projector and followed the steps beginning on page 5 to set up your Macintosh.
1. Double-click the EMP NS Connection icon in your Applications folder.
noteSee your Apple documentation for instructions on setting up your Macintosh.
noteUse either ESSID ad hoc (computer-to-computer) mode or Access Point (infrastructure) mode when you set up your projector. Channel ad hoc mode is not supported for Macintosh.
See the User’s Guide for information about the ESSID.

7
You see a screen similar to the following:
If the connection is working properly, you see your projector listed. If you have additional EPSON projectors on the network, they are also listed.
The color of the status icon next to each projector’s name indicates its status:
■ Gray—The projector is not connected
■ Orange—The projector is connected to another computer
■ Green—The projector is connected to your computer
2. Select your projector and click Connect.
If more than one projector is listed, you can select up to four projectors and connect to them at the same time.
3. If you turned the projector keyword on when setting up the projector, enter it when prompted and click OK. (It’s the four-digit number displayed at the bottom of your projector screen.)
This box indicates projector status
Select projector
noteYou can connect to a projector that is being used by another person; however, doing so automatically disconnects the other user.
If you assign a keyword to the projector, only people in the same room as the projector can connect to it, so you won’t be disconnected during a presentation.

8
Once the connection is established, your computer’s desktop and a floating control bar are projected:
4. If necessary, drag the control bar out of the way, or minimize it.
5. When done with your presentation, click Disconnect on the control bar.
Solving Connection Problems
If you don’t see your projector in the EMP NS Connection window, try the following:
■ Make sure the EPSON 802.11b card is inserted in the projector; see the User’s Guide for instructions. If you have to insert the card, restart EMP NS Connection, or the program will not be able to detect the projector.
■ Make sure you aren’t projecting one of the EasyMP configuration screens. You should see a message that the projector is ready to connect. If you have to exit a configuration screen, restart EMP NS Connection.
■ Click the AirPort icon on the Application bar at the top of your Macintosh desktop to make sure you’re trying to connect to the right network. The projector’s ESSID should be displayed and selected.
notePosition your pointer over a button for a description of its function. For more detailed descriptions, see the User’s Guide.
9
■ Make sure AirPort is turned on. Click the AirPort icon on the Application bar and select AirPort: On if necessary. If you don’t see the AirPort icon, follow the instructions beginning on page 5 to enable AirPort.
■ If possible, move your projector, Macintosh, and base station (if you’re using one) closer together.
■ If you’re using Access Point (infrastructure) mode and you’re connecting to the wrong network, you may be experiencing signal interference from another network. Open the Applications folder on your hard drive, then double-click the Utilities folder. Double-click AirPort Admin Utility. If you don’t see your base station listed, reset the base station (see the instructions that came with your base station).
If your base station is listed, check its name and IP address. Your projector should have the same ESSID name, and the first three segments of the projector’s IP address should be identical to the first three segments of the base station’s IP address. The last segment of the projector’s IP address should be close, but not identical to the last segment of the base station’s IP address. In addition, the projector’s gateway address should be identical to the base station’s IP address. See the User’s Guide for instructions on setting up the projector in Access Point mode.
■ If you’re unable to connect to the projector, use IP Connect Mode to connect manually. See the User’s Guide for instructions.
■ Check the Network Configuration tab for your AirPort base station. If you set up your projector to connect in DHCP mode, Distribute IP Addresses and Start a Single IP Address should both be on. See your AirPort documentation for details about configuring your base station.
noteIn Access Point mode, your projector’s ESSID name and IP number are shown at the bottom of the EasyMP Network Screen.


