machinecontrol™ - digidesignakarchive.digidesign.com/support/docs/machinecontrol_guide_2.0.pdf ·...
TRANSCRIPT

MachineControl™Guide
Version 2.0 for Pro Tools TDM on Macintosh and Windows
Digidesign
2001 Junipero Serra Boulevard
Daly City, CA 94014-3886 USA
tel: 650·731·6300
fax: 650·731·6399
Technical Support (USA)
tel: 650·731·6100
fax: 650·731·6384
Product Information (USA)
tel: 650·731·6102
tel: 800·333·2137
International Offices
Visit the Digidesign Web site
for contact information
Web Site
www.digidesign.com

Copyright
This guide is copyrighted ©2002 by Digidesign, a division of Avid Technology, Inc. (hereafter “Digidesign”), with all rights reserved. Under copyright laws, this guide may not be duplicated in whole or in part without the written consent of Digidesign.
DIGIDESIGN, AVID and PRO TOOLS are trademarks or registered trademarks of Digidesign and/or Avid Technology, Inc. All other trademarks are the property of their respective owners.
All features and specifications subject to change without notice.
PN 932010791-00 REV A 12/02

contents
Chapter 1. Introduction . . . . . . . . . . . . . . . . . . . . . . . . . . . . . . . . . . . . . . . . . . . . . . . . . . . . . . 1
MachineControl Capabilities . . . . . . . . . . . . . . . . . . . . . . . . . . . . . . . . . . . . . . . . . . . . . . . . . 1
System Requirements . . . . . . . . . . . . . . . . . . . . . . . . . . . . . . . . . . . . . . . . . . . . . . . . . . . . . 2
About This Guide. . . . . . . . . . . . . . . . . . . . . . . . . . . . . . . . . . . . . . . . . . . . . . . . . . . . . . . . . 4
MachineControl and Pro Tools Versions . . . . . . . . . . . . . . . . . . . . . . . . . . . . . . . . . . . . . . . . . 4
Chapter 2. Installation . . . . . . . . . . . . . . . . . . . . . . . . . . . . . . . . . . . . . . . . . . . . . . . . . . . . . . . 5
Register MachineControl . . . . . . . . . . . . . . . . . . . . . . . . . . . . . . . . . . . . . . . . . . . . . . . . . . . 5
9-pin Connections and Cables. . . . . . . . . . . . . . . . . . . . . . . . . . . . . . . . . . . . . . . . . . . . . . . . 6
Connecting Machines . . . . . . . . . . . . . . . . . . . . . . . . . . . . . . . . . . . . . . . . . . . . . . . . . . . . . 8
Starting Up Your System . . . . . . . . . . . . . . . . . . . . . . . . . . . . . . . . . . . . . . . . . . . . . . . . . . . 9
Installing MachineControl Software . . . . . . . . . . . . . . . . . . . . . . . . . . . . . . . . . . . . . . . . . . . . 9
Authorizing MachineControl . . . . . . . . . . . . . . . . . . . . . . . . . . . . . . . . . . . . . . . . . . . . . . . . 10
Configuring Pro Tools for MachineControl . . . . . . . . . . . . . . . . . . . . . . . . . . . . . . . . . . . . . . 10
Session Settings and MachineControl . . . . . . . . . . . . . . . . . . . . . . . . . . . . . . . . . . . . . . . . . 12
Additional Commands and Features . . . . . . . . . . . . . . . . . . . . . . . . . . . . . . . . . . . . . . . . . . 14
Chapter 3. Serial Control Mode and Transport Control. . . . . . . . . . . . . . . . . . . . . . . . . . 17
Preferences for Serial Control Mode . . . . . . . . . . . . . . . . . . . . . . . . . . . . . . . . . . . . . . . . . . 18
Serial Control Mode . . . . . . . . . . . . . . . . . . . . . . . . . . . . . . . . . . . . . . . . . . . . . . . . . . . . . . 19
Serial Time Code. . . . . . . . . . . . . . . . . . . . . . . . . . . . . . . . . . . . . . . . . . . . . . . . . . . . . . . . 22
Chapter 4. Remote 9-Pin Deck Emulation Mode . . . . . . . . . . . . . . . . . . . . . . . . . . . . . . . 25
Configuring Remote Mode . . . . . . . . . . . . . . . . . . . . . . . . . . . . . . . . . . . . . . . . . . . . . . . . . 25
Playback in Remote 9-Pin Deck Emulation Mode . . . . . . . . . . . . . . . . . . . . . . . . . . . . . . . . . 27
Recording in Remote 9-Pin Deck Emulation Mode . . . . . . . . . . . . . . . . . . . . . . . . . . . . . . . . 27
Track Arming in Remote 9-Pin Deck Emulation Mode . . . . . . . . . . . . . . . . . . . . . . . . . . . . . . 28
9-Pin Commands . . . . . . . . . . . . . . . . . . . . . . . . . . . . . . . . . . . . . . . . . . . . . . . . . . . . . . . 28
Contents iii

iv
Chapter 5. Remote Track Arming . . . . . . . . . . . . . . . . . . . . . . . . . . . . . . . . . . . . . . . . . . . . 29
Configuring Track Arming . . . . . . . . . . . . . . . . . . . . . . . . . . . . . . . . . . . . . . . . . . . . . . . . . 29
Create Machine Track Arming Profile . . . . . . . . . . . . . . . . . . . . . . . . . . . . . . . . . . . . . . . . . 30
Using Remote Track Arming . . . . . . . . . . . . . . . . . . . . . . . . . . . . . . . . . . . . . . . . . . . . . . . 33
Appendix A. Key Commands. . . . . . . . . . . . . . . . . . . . . . . . . . . . . . . . . . . . . . . . . . . . . . . . . 35
Appendix B. Troubleshooting . . . . . . . . . . . . . . . . . . . . . . . . . . . . . . . . . . . . . . . . . . . . . . . . 37
Appendix C. Machine IDs . . . . . . . . . . . . . . . . . . . . . . . . . . . . . . . . . . . . . . . . . . . . . . . . . . . 39
Appendix D. 9-Pin Cable Pinouts . . . . . . . . . . . . . . . . . . . . . . . . . . . . . . . . . . . . . . . . . . . . . 41
Serial Control 9-Pin Cable . . . . . . . . . . . . . . . . . . . . . . . . . . . . . . . . . . . . . . . . . . . . . . . . . 41
Remote Mode 9-Pin Cable. . . . . . . . . . . . . . . . . . . . . . . . . . . . . . . . . . . . . . . . . . . . . . . . . 42
9-Pin to 9-Pin. . . . . . . . . . . . . . . . . . . . . . . . . . . . . . . . . . . . . . . . . . . . . . . . . . . . . . . . . . 43
Index . . . . . . . . . . . . . . . . . . . . . . . . . . . . . . . . . . . . . . . . . . . . . . . . . . . . . . . . . . . . . . . . . . . . . 45
MachineControl Guide
chapter 1
Introduction
MachineControl™ is special purpose software for Pro Tools that enables serial communication with remote audio and video machines. MachineControl lets you integrate a TDM-equipped Pro Tools system with external 9-pin or V-LAN machines.
This guide provides installation and operational instructions for MachineControl version 2.0 only (for Pro Tools 6.0 and higher on Macintosh OS X). If you are using a prior version of Pro Tools (5.3.1 or earlier) see the MachineControl 1.1 Guide included with your MachineControl package.
MachineControl Components
Your MachineControl package includes:
◆ MachineControl Installer CD-ROM
◆ One serial to 9-pin Serial Control Cable (male 9-pin)
◆ One Remote Mode cable (female 9-pin)
◆ MachineControl iLok License Card
MachineControl CapabilitiesOn all supported Pro Tools systems, Machine-Control provides the following features:
Pro Tools Transport Master The Pro Tools Trans-port lets you select Pro Tools or a machine as the transport master. When Transport = Pro Tools, the machine play start point is determined by the current Pro Tools timeline location or selec-tion. The Machine Pre-Roll setting is applied, to help assure Pro Tools is seeing time code in time to lock up at the insertion/selection. When Transport = Machine, the machine play start is determined by the machine location. Machine pre-roll and timeline selection do not affect ma-chine location in this mode.
Cueing, Scrubbing, and Pre-Roll Numerous set-tings let you optimize MachineControl opera-tion. Adjustable machine pre-roll, selectable edit and memory location chasing, and other prefer-ence settings are provided.
With Pro Tools|HD, a SYNC I/O is required for frame edge accurate synchronization. With Pro Tools|24 MIX, either a SYNC I/O or USD is required for frame edge accuracy.
Chapter 1: Introduction 1

2
Modes of Operation
MachineControl supports two machine com-munication modes, Serial Control mode and Re-mote 9-Pin Deck Emulation mode. These modes require a SYNC I/O (or USD).
Serial Control Mode
When used with a SYNC I/O or USD, Serial Con-trol mode provides the following features:
Track Arming Lets you arm tracks of external machines from within Pro Tools, for layback and transfer configuration. Features include in-dividual record enables for up to 48 external tracks, with selectable record protocol and Edit-mode. Machine profiles preconfigure track arm-ing for most machine types.
Serial Time Code Lets Pro Tools not only control an external machine, but also receive time code position using only the serial cable. (This mode requires that the 9-pin device be capable of transmitting serial time code.)
Remote 9-Pin Deck Emulation Mode
Remote 9-Pin Deck Emulation mode enables Pro Tools to operate in a type of VTR emulation mode. This lets a 9-pin master machine control Pro Tools playback, cueing, and record-arming of tracks. Remote mode requires a Digidesign SYNC I/O (for HD systems) or Universal Slave Driver (USD), and use of the special Remote Mode cable.
MachineControl Guide
System Requirements
Macintosh
• A Digidesign Pro Tools|HD-series, Pro Tools|24 MIX-series, or Pro Tools|24-series system.
• Digidesign SYNC I/O (for Pro Tools|HD, Pro Tools|24 MIX, or Pro Tools|24), or a USD (for Pro Tools|24 MIX or Pro Tools|24)
• For Remote 9-Pin Deck Emulation mode, a se-rial port is required for the Remote 9-Pin Deck Emulation cable. On USB-only CPUs (such as the G4 and the Blue & White G3), a supported USB-to-serial adaptor, or modem adaptor, may be required. (All other MachineControl features are supported through both of the 9-pin ports on the SYNC I/O.)
• Macintosh OS X v10.2.3
Power Macintosh G4 and G3 If you are using a G4 or a Blue & White G3 with a Pro Tools|24 MIX or Pro Tools|24 system, and you are not us-ing a USD, MachineControl can be connected to the DigiSerial Port. See “When to use the DigiSerial Port” on page 7 for more informa-tion.
We recommend a Keyspan 28x USB to se-rial adapter for best performance. Check the Digidesign Web site for more information.

Windows
• Digidesign Pro Tools|HD-series, Pro Tools|24 MIX-series, or Pro Tools|24 se-riessystem.
• Digidesign SYNC I/O (for Pro Tools|HD, Pro Tools|24 MIX, or Pro Tools|24), or a USD (for Pro Tools|24 MIX or Pro Tools|24)
• A serial port (COM port) must be available for the included MachineControl cable. If you are not using a USD with Pro Tools, Machine-Control can be connected to the DigiSerial Port.
For the latest compatibility information, and a list of qualified computers and hard drives, con-tact your Digidesign dealer or visit the Digide-sign Web site (www.digidesign.com).
Hardware Requirements
Cables
MachineControl comes with the following two cables included:
• Remote Mode 9-Pin Cable, required for VTR emulation. This cable has a female 9-pin con-nector (D9) at one end and a male 8-pin mini-DIN connector at the other end. Use this cable to connect your 9-pin machine to a serial port on your computer.
• Standard male 8-pin mini-DIN cable to 9-pin cable, for serial time code and all other MachineControl functions (some features re-quire a SYNC I/O or USD).
Machine Requirements
• Video or audio machines that are Sony® 9-pin or Videomedia® V-LAN™ compatible devices. Certain V-LAN machines may not require a time code reader card. Refer to your machine's documentation for more information. For Re-mote 9-Pin Deck Emulation mode, a control-ler compatible with the Sony “P2” 9-Pin specification is required.
Synchronization Requirements
The following are required for Serial Control mode and Remote 9-Pin Deck Emulation mode.
Pro Tools|HD A Digidesign SYNC I/O
Pro Tools|24 MIX or Pro Tools|24 A Digidesign SYNC I/O, or Universal Slave Driver™ (USD)
With Pro Tools|24 MIX or Pro Tools|24 systems, the following can be substituted for a SYNC I/O or USD (some limitations apply, as noted):
• A Digidesign Video Slave Driver™ (VSD), plus a standard MIDI interface capable of convert-ing Linear Time Code (LTC) to MIDI Time Code (MTC). This configuration does not sup-port Remote 9-Pin Deck Emulation mode or serial time code.
– or –
• A compatible third-party synchronization de-vice, capable of generating SuperClock (256x clock), and LTC-to-MTC conversion (along with an available serial port for it—do not use the DigiSerial Port for any device other than a SYNC I/O or USD). This type of configuration does not not support Remote 9-Pin Deck Em-ulation mode or serial time code.
Chapter 1: Introduction 3

4
About This GuideThis guide assumes:
• You have installed Pro Tools and verified that it works properly.
• You have a thorough understanding of your video deck, external 9-pin decks, mixer, and other equipment.
◆ You have an understanding of your synchro-nization equipment and requirements.
This guide uses the following conventions to in-dicate menu choices and key commands:
The following symbols are used to highlight im-portant information:
Convention Action
File > Save Session Choose Save Session from the File menu
Control+n Hold down the Control key and press the n key
Option-click Hold down the Option key and click the mouse but-ton
Right-click (Windows) Click with the right mouse button
User Tips are helpful hints for getting the most from your system.
Important Notices include information that could affect your Pro Tools session data or the performance of your Pro Tools system.
Cross References point to related sections in the Pro Tools Guides.
MachineControl Guide
MachineControl and Pro Tools VersionsThis guide documents features available in Pro Tools version 6.0. Though MachineControl can be used with some earlier software releases of Pro Tools, not all features are available in each version.
The following table lists the versions of Pro Tools supported by MachineControl, along with the major features contained in each MachineControl release.
History of MachineControl Features in Pro Tools
Machine-Control
Pro Tools Features Introduced
2.0 6.0 only, for Macin-tosh OS X
Remote Mode Chase LTC, Redefine Current Time Code Location, Track Arming Profiles
1.1 5.3.1 Support for Pro Tools|HD and the SYNC I/O
1.0 5.1 or higher
9-pin Remote mode
1.0 5.0 or higher
Support for Serial TIme Code as posi-tional reference
1.0 4.3 or higher
Track Arming of Remote Decks
1.0 4.1.1 or higher
Original release
chapter 2
Installation
This chapter shows how to connect your hard-ware, install MachineControl software, and con-figure Pro Tools for MachineControl.
Before you Begin
Before you install MachineControl, you must install Pro Tools and confirm that it is operating correctly. Make sure that Pro Tools and your SYNC I/O or other synchronization equipment are already installed and working properly.
Synchronization Requirements
Make sure that you have already connected and verified communication and operation of all your synchronization peripherals.
If you are using a SYNC I/O or USD, use the in-structions included in their guides to make sure your equipment is installed correctly.
If you are using a third party synchronization peripheral, refer to its documentation for the proper connections and software settings. Con-firm operation and synchronization in Pro Tools.
Register MachineControlMake sure to complete and return the registra-tion card included with MachineControl. Regis-tered users will receive periodic software update and upgrade notices. Please refer to the registra-tion card for information on technical support.
Chapter 2: Installation 5

6
9-pin Connections and CablesMachineControl requires its own connections between Pro Tools (or its host computer) and the machine.
Connections differ depending on your Pro Tools hardware and software version, and on which of the two MachineControl opera-tional modes you want to make available.
Serial Control Mode This mode supports bi-di-rectional, serial 9-pin communication between Pro Tools and a machine. Features include the ability to synchronize to serialized time code, arm tracks on the machine remotely, control multiple transports from Pro Tools, and config-ure other machine settings and options.
Remote 9-Pin Deck Emulation Mode This mode enables a form of VTR emulation in Pro Tools. When the Remote Mode cable is used on a sup-ported system, Pro Tools can respond to record-arming, transport, and other standard 9-pin commands.
To determine your connection and cable re-quirements, use the instructions appropriate for your Pro Tools system and MachineControl op-erating mode in the following sections.
Pro Tools|HD
Serial Control Mode 9-pin to 9-pin connec-tion(s). When using Pro Tools|HD with a SYNC I/O, as many as two machines can be con-nected simultaneously using the two 9-pin Out ports on the SYNC I/O. You can control one ma-chine at a time, and switch between them from within Pro Tools. These ports support all MachineControl modes except Remote 9-Pin Deck Emulation mode.
MachineControl Guide
As an alternative, you can utilize the included Serial Control cable connected to a supported serial adaptor. See “System Requirements” on page 2
Remote 9-Pin Deck Emulation mode Serial to 9-pin. This mode requires a CPU serial port or equivalent, and use of the included Remote Mode cable. See Chapter 4, “Remote 9-Pin Deck Emulation Mode” for details on this mode.
Pro Tools|24 MIX or Pro Tools|24
Serial Control Mode Serial to 9-pin (male). Using the Serial Control cable supports bi-directional, serial 9-pin communication between Pro Tools and a machine. Serial Control mode lets you synchronize to serialized time code, arm tracks on the machine remotely, control multiple transports from Pro Tools, as well as other ma-chine settings and options. See “Connecting Machines” on page 8 for connection instruc-tions.
Remote 9-Pin Deck Emulation Mode Serial to 9-pin (female). Using the Remote Mode cable en-ables a form of VTR emulation in Pro Tools. When this cable is installed, Pro Tools can re-sponds to record-arming, transport, and other standard 9-pin commands. See “Connecting Machines” on page 8 for instructions.
Do not attempt to substitute 9-pin or serial adaptors for either MachineControl cable. Each cable is specifically wired for one op-eration mode.

Serial Ports and MachineControl
Serial port requirements vary depending on whether or not you are using a SYNC I/O, USD, a DigiSerial Port, or other synchronization de-vices. Before you install MachineControl, you must determine the ports you will use for your system’s connections.
When to use the DigiSerial Port
Pro Tools HD Core, MIX Core, and d24 audio cards feature the DigiSerial Port, a special-pur-pose serial connector.
Though this port is identical in appearance to the serial ports on some CPUs, it is designed to only be used according to the following rules:
When using a SYNC I/O or USD
◆ If you are using a SYNC I/O (or a USD), the SYNC I/O (or USD) should always be connected to the DigiSerial Port of your HD Core or MIX Core card.
If your HD Core card has two DigiSerial Ports (some of the first production units do) always use the DigiSerial Port closest to the DigiLink port. The second port is not active and should never be used.
Without a SYNC I/O or USD
◆ If you are using MachineControl, but not a SYNC I/O or USD, then the DigiSerial Port can be used for MachineControl. (Not all Machine-Control features are supported without a SYNC I/O or USD.)
G3 and G4 Computers
Power Macintosh G3 and G4 computers do not have a conventional serial port, so use of a sup-ported serial port adaptor is required.
Currently supported devices include:
• Keyspan USA-28X dual-port high-speed USB-to-Serial adapter (with Printer emulation not enabled).
• GeeThree.com Stealth serial port for G4/AGP
• Griffin Technology G4Port serial port for G4/AGP
For the most current list of supported peripher-als, including serial port devices, check the Digidesign Web site (www.digidesign.com).
The DigiSerial Port should not be used for MIDI interfaces or any other serial device.
Chapter 2: Installation 7

8
Connecting MachinesThe following provide separate installation in-structions for Pro Tools|HD, and Pro Tools|24 MIX. Use the instructions appropriate for your system.
Pro Tools|HD with SYNC I/O
SYNC I/O provides two 9-pin machine ports, to support direct 9-pin connection for Machine-Control-enabled Pro Tools systems. Both ports can be connected simultaneously. In this con-figuration, MachineControl and SYNC I/O pro-vide all connections required for Serial modes, remote track arming, and all MachineControl features except Remote 9-Pin Deck Emulation mode.
Serial Mode
To connect a machine or machines for MachineControl Serial mode:
■ Connect a 9-pin cable from either SYNC I/O 9-pin Out port to the 9-pin port of the machine. You can connect two machines, one to each port, and control either one of them at any time.
Remote Mode
To connect a machine for Pro Tools Remote 9-Pin Deck Emulation mode:
■ Connect the Remote Mode 9-Pin cable (male 8-pin mini-DIN to female D9) to the 9-pin out-put of the machine.
Do not use the DigiSerial Port on your HD Core card. This port should only be used for SYNC I/O connection using a DigiSerial cable.
MachineControl Guide
Pro Tools|24 MIX
MachineControl serial connections must be made using the proper 8-pin mini-DIN to 9-pin cable, depending on whether you plan to use Se-rial mode, or Remote 9-Pin Deck Emulation mode.
Serial Mode
To connect a machine for standard Serial Control mode
■ For all MachineControl modes and features (except 9-Pin Deck Emulation), connect the Se-rial Control Cable (male 9-pin) to the 9-pin in-put on the machine.
Remote 9-Pin Deck Emulation
To connect to a Macintosh G3 or G4:
1 Connect the serial end of your Machine-Control cable to the computer, or Pro Tools card:
• If the DigiSerial Port is being used for a SYNC I/O or USD, connect the Machine-Control cable to an available port on a sup-ported serial port adaptor. (See “G3 and G4 Computers” on page 7 for more information.)
• If you are not using a SYNC I/O or USD, con-nect the other end to the DigiSerial Port on your Pro Tools MIX Core or d24 card.

To connect to a Macintosh 9500 or 9600:
1 Connect the serial end of your Machine-Control cable to the computer, or to Pro Tools card:
• If you are using a SYNC I/O or USD, use the computer Modem or Printer port or equiva-lent, whichever is available.
• If you are not using a SYNC I/O or USD, con-nect the other end to the DigiSerial Port on your Pro Tools MIX Core or d24 card.
To connect to a Windows computer:
1 Connect the serial end of your Machine-Control cable to the computer, or Pro Tools card:
■ If you are using a SYNC I/O or USD, use an available COM port for MachineControl con-nection.
■ If you are not using a SYNC I/O or USD, con-nect the other end to the DigiSerial Port on your MIX Core or d24 card.
Starting Up Your SystemYou should start up (power) your system in a specific order.
Start your equipment in this order:
1 External hard drives. Wait approximately ten seconds for them to come up to speed.
2 External machine (VTR, ATR, or synchronizer, and monitors).
3 Pro Tools audio interfaces.
4 MIDI interfaces and equipment.
5 Computer.
6 Speakers or monitor system.
Machine Local and Remote Mode
Be sure to set your machine-controllable device to “remote” or “ext” mode to receive the 9-pin or V-LAN information (not “local” or front-panel mode). If all other Pro Tools machine communication is established and the machine is not in remote mode, Pro Tools will indicate machine “local” mode.
Installing MachineControl Software To install MachineControl, use the Pro Tools In-staller CD-ROM, the MachineControl Installer CD–ROM, or download the installer from the Digidesign Web site. There are two install op-tions:
MachineControl for Pro Tools|HD Select this op-tion if you are currently using Pro Tools|HD.
MachineControl for Pro Tools 24|MIX and Pro Tools|24 Systems Select this option if you are currently using Pro Tools 24|MIX or Pro Tools|24.
To install MachineControl:
1 Insert the Installer CD-ROM in your DVD or CD-ROM drive and double-click the Installer.
2 Select the desired install option.
3 Click Install.
4 When installation is complete, click Restart.
Chapter 2: Installation 9

10
Authorizing MachineControlWhen you launch Pro Tools the first time after installing MachineControl, you will be prompted to authorize it.
One iLok hardware key is included with your Pro Tools|HD system. This key can hold over 100 authorizations for all of your iLok-enabled software. Once iLok is authorized for a given piece of software, use iLok to authorize that soft-ware on any computer.
The iLok is authorized using the License Card included with MachineControl 2.0.
To authorize MachineControl using iLok:
1 Insert the iLok into an available USB port on your computer.
2 Launch Pro Tools.
3 Separate the License Card—the smaller GSM cutout—from the larger protective card by pull-ing the cutout up and out with your thumb. Do not force your finger downward.
4 Insert the MachineControl License Card into the iLok. Visually verify that the License Card makes contact with the iLok’s metal card reader.
5 After authorizing, remove the License Card.
If you are upgrading MachineControl, you can purchase an empty iLok hardware key from Digidesign's online store at:
www.digidesign.com
iLok with License Card
MachineControl Guide
6 Follow the on-screen instructions to complete the authorization process.
Configuring Pro Tools for MachineControl
To set up a MachineControl device:
1 Make sure your equipment is powered on, and launch Pro Tools.
2 Choose Setups > Peripherals, and click the Synchronization tab. Configure your synchroni-zation peripheral as necessary. The SYNC I/O is automatically detected and configured by Pro Tools, if connected. (See the SYNC I/O Guide, or the manual that came with your peripheral, for more information.)
3 Click the Machine Control tab in the Periph-erals window.
4 In the 9-pin Serial section, click Enable.
5 Use the Port pop-up to select the 9-pin or V-LAN MachineControl port/connection. The available choices will depend on your platform and configuration.
6 If necessary, select the appropriate machine type (Sony 9-pin or V-LAN) from the Machine Type pop-up menu.

7 If using a SYNC I/O with Pro Tools|HD, and if you have two machines connected to the two 9-pin ports, repeat the above steps for both de-vices and ports. This confirms communication, and is also the method to switch between the two machines in a session. See “Selecting Ma-chines in Serial Control Mode” on page 19 for more information.
8 Pro Tools automatically polls the port to see what kind of machine is connected. This process is referred to as auto detection. Pro Tools also lets you choose any profile from the Node menu. If your machine is not auto-detected, or if you want to use one of the generic profiles, you can choose it from this pop-up menu.
• If the machine is recognized, Pro Tools loads the corresponding Machine Type and Node. This includes the corresponding track layout and automatically enters the name of that machine into the Pro Tools Machine Track Arming window.
– or –
Do not use the designated machine port for any other function (such as time code or MIDI metronome). Make sure that 9-pin or V-LAN is the only communication on the selected port.
Configuring MachineControl for 9-pin Serial Control
Pro Tools also lets you define and save cus-tom machine profiles. See Chapter 5, “Re-mote Track Arming” for more information.
• If the machine isn’t recognized, the generic1” personality is loaded. You can also choose the “generic2” personality.
9 Set machine pre-roll, as desired (see “Machine Pre-Roll” on page 11 for more information).
10 Click OK to close the Peripherals dialog box.
To learn how to configure and use Machine-Control features in Pro Tools, see Chapter 3, “Serial Control Mode and Transport Control.”
Machine Pre-Roll
You can set a variable amount of Machine pre-roll to account for any time it may take the ma-chine to achieve servo lock. Set this value low for non-linear machines. Longer pre-roll values may work better for some older tape transports.
The Machine pre-roll value is added to any per-roll specified in the Pro Tools Transport window.
To set MachineControl pre-roll:
1 In Pro Tools, choose Setups > Peripherals, and select Machine Control.
2 In the 9-pin Serial section, enter the desired number of frames of pre-roll.
3 Click OK to close this dialog. Pro Tools retains this Peripherals configuration unless you change or disconnect it.
Pro Tools also lets you define and save cus-tom machine profiles. See Chapter 5, “Re-mote Track Arming” for more information.
Chapter 2: Installation 11

12
Session Setup for MachineControl
The Session Setup window is a floating window that provides session time code settings and options, as well as session status displays.
MachineControl Guide
Figure 1. Session Setup window
Clock Source
Session displays and settings
SYNC Setup
Time Code settings
Session Offsets
click to show
click to show
Displays and controls are organized into three view sections. The Session displays and controls are always displayed at the top of the Session Setup window. The Synchronization and Ses-sion Offsets section, and the Time Code Settings section, can be shown or hidden using their show/hide icons.
SYNC (or USD) Setup Settings
To show SYNC or USD Setup Settings
■ Click the SYNC Setup and Session Offsets icon.
The controls in this section configure parame-ters of the Digidesign SYNC I/O or USD. Settings are provided for Clock and Positional Reference, Video Format, and Variable Speed Override.
Session Settings and MachineControlUse the steps in this section to quickly configure the basic session settings for MachineControl. These will include session settings (start time, frame rate, and video format), as well as syn-chronization settings for clock and positional reference. Additional options include multiple time code display offsets, generator, freewheel, and pull up and pull down settings.

Basic Session Settings
Confirm the following settings for every session.
To configure the session for MachineControl:
1 Choose Windows > Show Session Setup.
2 In the Status and Display section, do the fol-lowing:
◆ Set a Session start time.
◆ Set the appropriate session frame rate
3 Click the show/hide icon to display the SYNC Setup section, if it is not already displayed.
4 In the SYNC Setup section, set the appropriate format for NTSC or PAL using the Frame Rate and Video Format selectors.
Clock Source, Clock and Positional Reference
The Session Setup window provides selectors for the system Clock Source, as well as Clock and Positional Reference. These settings must be configured based on the signal connections be-tween Pro Tools, the SYNC I/O, and external de-vices.
Basic session settings in the Session Setup window
Video Format selector
Incoming Time display
Session Start Time
Frame Rate
click to show/hide
Video Format
To configure these parameters, do one of the fol-lowing as appropriate for your system:
Pro Tools|HD In Session Setup, choose an appro-priate Clock Source (the SYNC I/O, or an HD-se-ries audio interface). Configure the Clock Refer-ence and Positional Reference menus as appropriate. See the SYNC I/O Guide for more in-formation.
Pro Tools|24 MIX or Pro Tools|24 Set the Ch 1–2 Input and session Sync Mode as necessary. (Sync Mode must be set to analog for the SYNC I/O or USD to be clock master.)
System Test
To check your basic session and Machine-Control settings, place the machine in Local mode and manually start playback on the exter-nal machine. If Pro Tools is receiving time code, the current location will be shown in the In-coming Time display. Be sure to reset the ma-chine to Remote mode when finished.
Incoming Time display (Pro Tools 6.0 or higher)
Incoming Time display
Chapter 2: Installation 13

14
Session Start Offsets
To compensate for devices that are consistently offset by a relatively small number of frames (such as some color–corrected video masters), Pro Tools provides three different Session Start Time Code Offset settings. These offsets include:
• MMC (MIDI Machine Control)
• 9-Pin (Serial machine control)
• Synchronization peripherals such as the SYNC I/O, USD, or other (for example, MTC from MIDI interfaces). Individual display off-sets can be set for any of these items as avail-able on your system.
Positive and negative offset values can be en-tered to offset Pro Tools time code display later or earlier, respectively. Up to three unique offset values can be defined, or you can link all three to adjust in unison.
Offsets and Time Code Displays
The SYNC I/O (and USD) Time Code Display continue to display actual incoming time code, regardless of any Session Start Offset applied in Pro Tools.
To set a Session Start Time Offset:
1 In the Session Setup window, click the show/hide icon to show the SYNC Setup and Session Start Time Offset section.
2 To enter a single offset value for all three choices, click the chain icon to enable offset linking.
– or –
Unlink the settings to enter a unique offset for MMC, 9-Pin, or the current Synchronization pe-ripheral.
MachineControl Guide
Time Code Settings
The Time Code settings control time code gen-eration, Freewheel, and session Pull Up and Pull Down options.
Configure these settings as appropriate for the current project and situation. For complete in-structions, see the SYNC I/O Guide.)
Time Code Reader Offset
The Time Code Reader Offset lets you set a “trig-ger offset” for incoming MIDI Time Code, in samples.
Additional Commands and FeaturesThe following commands are available in all MachineControl operating modes.
Redefine Current Time Code Position
The Redefine Current Time Code Position com-mand lets you redefine the session start time. By creating an insertion point (or selection) and then entering the desired new time code posi-tion for that location, the session start time will be recalculated based on the new, relative time code location.
For example, place an insertion point at 01:02:04:11, select Edit > Redefine Current Time Code Position, and enter 01:00:08:00 to corre-spond to the first frame of film. This adjusts the session start time such that the insertion point’s location is now 01:00:08:00, and the session start time is correspondingly earlier (exactly how much earlier depends on the current loca-tion of the insertion point).
In prior versions of Pro Tools, this feature was labelled Sync Offset.

To redefine the current time code location:
1 Enable Link Edit/Timeline.
2 Locate Pro Tools to the beginning of the rele-vant material (usually the “first audio” of a scene, a 2 pop, or similar).
3 If appropriate, cue the external time code source to the appropriate location (this will be the location to which you want to align the cur-rent Pro Tools insertion point). Note the time code location, or copy it to the clipboard.
4 Choose Edit > Redefine Current Time Code Position.
5 Enter the desired time code position and click OK.
Create Machine Track Arming Profile
The Create Machine Track Arming Profile com-mand lets you create and save machine descrip-tions as Machine Profiles. Profiles are provided for an ever-increasing list of common machines, or you can customize profiles for specific situa-tions and requirements. Options include the ability to emulate a different machine type, remap and rename audio tracks, and choose to include or exclude the video and time code tracks, when available. For more information, see “Create Machine Track Arming Profile” on page 30.
Redefining the current time code position
Chapter 2: Installation 15

16
MachineControl Guide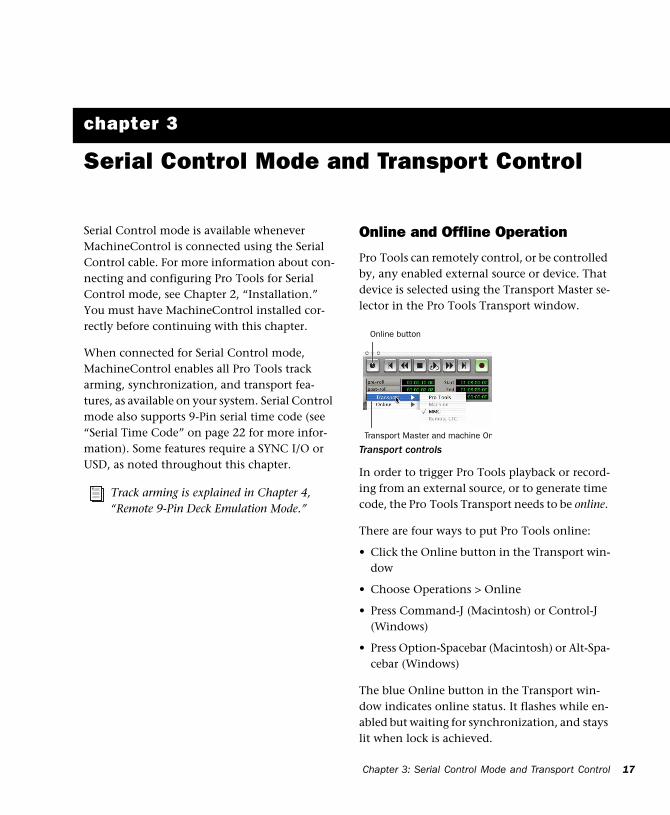
chapter 3
Serial Control Mode and Transport Control
Serial Control mode is available whenever MachineControl is connected using the Serial Control cable. For more information about con-necting and configuring Pro Tools for Serial Control mode, see Chapter 2, “Installation.” You must have MachineControl installed cor-rectly before continuing with this chapter.
When connected for Serial Control mode, MachineControl enables all Pro Tools track arming, synchronization, and transport fea-tures, as available on your system. Serial Control mode also supports 9-Pin serial time code (see “Serial Time Code” on page 22 for more infor-mation). Some features require a SYNC I/O or USD, as noted throughout this chapter.
Track arming is explained in Chapter 4, “Remote 9-Pin Deck Emulation Mode.”
Online and Offline Operation
Pro Tools can remotely control, or be controlled by, any enabled external source or device. That device is selected using the Transport Master se-lector in the Pro Tools Transport window.
In order to trigger Pro Tools playback or record-ing from an external source, or to generate time code, the Pro Tools Transport needs to be online.
There are four ways to put Pro Tools online:
• Click the Online button in the Transport win-dow
• Choose Operations > Online
• Press Command-J (Macintosh) or Control-J (Windows)
• Press Option-Spacebar (Macintosh) or Alt-Spa-cebar (Windows)
The blue Online button in the Transport win-dow indicates online status. It flashes while en-abled but waiting for synchronization, and stays lit when lock is achieved.
Transport controls
Online button
Transport Master and machine On
Chapter 3: Serial Control Mode and Transport Control 17

18
Preferences for Serial Control ModePreferences are available to specify the following aspects of MachineControl behavior.
Record and Chase Settings
The following Preferences select record and chase options available while working with ex-ternal time code, including:
◆ Preferences for Record Online at Time Code (or ADAT) Lock and Record Online at Insertion/Selec-tion.
◆ Preferences for Machine Chases Memory Loca-tions and Machine Follows Edit Insertion/Scrub.
To change Record or Chase Preferences:
1 Choose Setups > Preferences, and click the Op-erations tab.
2 Select one of the following options or con-trols:
Online Options
Record Online at Time Code (or ADAT) Lock On-line recording begins as soon as Pro Tools re-ceives and locks to time code.
Record Online at Edit Insertion/Selection On-line recording begins at the current Edit selec-tion start or playback location.
Machine preferences, in the Operations tab
MachineControl Guide
Machine Control
Machine Chases Memory Locations The ma-chine chases Pro Tools memory location selec-tions. The machine will not locate with pre-roll, but will instead park on the desired frame for Auto Spotting.
Machine Follows Edit Insertion/Scrub Pro Tools sends locate commands to the external deck whenever the timeline selection changes.
Machine Cues Intelligently When enabled, if you navigate to a cue point that is more than 10 seconds from the current location, Pro Tools will command a connected transport to shuttle to the desired location at full speed, to within 10 seconds of the cue point. Cueing will then slow to normal speed until the point is reached.
Stop At Shuttle Speed Zero When enabled, Pro Tools sends a Stop command when shuttle speed equals zero. While most machines auto-matically stop when shuttle speed is equal to zero (in other words, whenever you stop shut-tling), some machines require an explicit stop command to park correctly. Consult the manu-facturer of your machine if you need to deter-mine its shuttle stop capability.
Delay before Locking to LTC Lets you enter a number of frames for Pro Tools to wait upon re-ceiving incoming LTC, before attempting to lock to the incoming time code signal. This de-lay gives a variable amount of frames for the LTC source to stabilize. This lets Pro Tools lock more accurately to any fluctuations that can oc-cur when some LTC sources are first engaged.
Other MachineControl Preferences are lo-cated in the Remote mode section of the Op-erations page. These settings are explained in Chapter 4, “Remote 9-Pin Deck Emula-tion Mode.”
Serial Control Mode
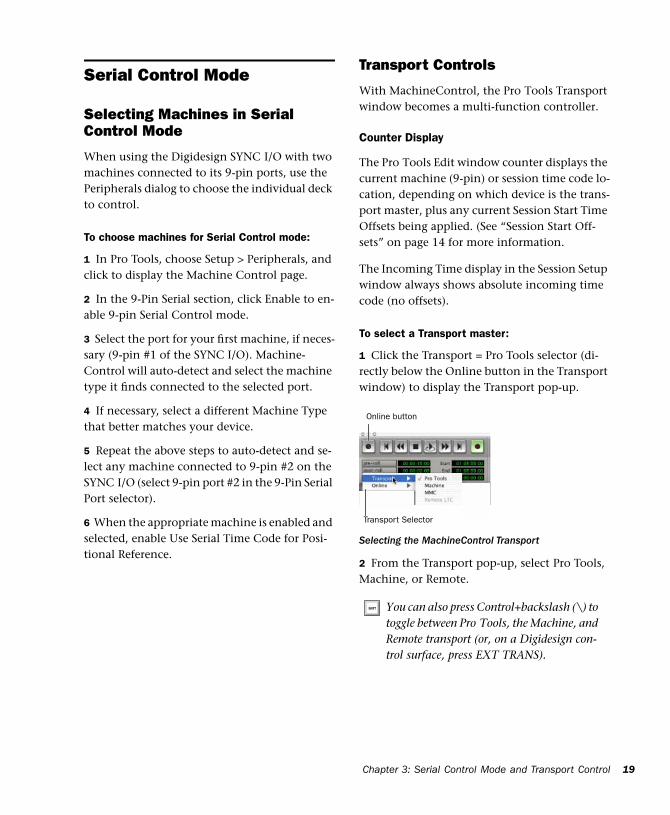
Selecting Machines in Serial Control Mode
When using the Digidesign SYNC I/O with two machines connected to its 9-pin ports, use the Peripherals dialog to choose the individual deck to control.
To choose machines for Serial Control mode:
1 In Pro Tools, choose Setup > Peripherals, and click to display the Machine Control page.
2 In the 9-Pin Serial section, click Enable to en-able 9-pin Serial Control mode.
3 Select the port for your first machine, if neces-sary (9-pin #1 of the SYNC I/O). Machine-Control will auto-detect and select the machine type it finds connected to the selected port.
4 If necessary, select a different Machine Type that better matches your device.
5 Repeat the above steps to auto-detect and se-lect any machine connected to 9-pin #2 on the SYNC I/O (select 9-pin port #2 in the 9-Pin Serial Port selector).
6 When the appropriate machine is enabled and selected, enable Use Serial Time Code for Posi-tional Reference.
Transport Controls
With MachineControl, the Pro Tools Transport window becomes a multi-function controller.
Counter Display
The Pro Tools Edit window counter displays the current machine (9-pin) or session time code lo-cation, depending on which device is the trans-port master, plus any current Session Start Time Offsets being applied. (See “Session Start Off-sets” on page 14 for more information.
The Incoming Time display in the Session Setup window always shows absolute incoming time code (no offsets).
To select a Transport master:
1 Click the Transport = Pro Tools selector (di-rectly below the Online button in the Transport window) to display the Transport pop-up.
2 From the Transport pop-up, select Pro Tools, Machine, or Remote.
Selecting the MachineControl Transport
You can also press Control+backslash (\) to toggle between Pro Tools, the Machine, and Remote transport (or, on a Digidesign con-trol surface, press EXT TRANS).
Transport Selector
Online button
Chapter 3: Serial Control Mode and Transport Control 19

20
Transport = Pro Tools
In this mode, the controls in the Transport win-dow are focussed on Pro Tools playback, record-ing, and so on. When Pro Tools is online and you begin playback the machine slaves to Pro Tools, cueing to a pre-roll time before the current insertion time and then beginning play-back. The session locks to the machine’s time code.
Additionally, when online, the machine will follow current Preferences for Machine Chase and Online Record (see “Record and Chase Set-tings” on page 18).
Transport = Machine
In this mode, the controls in the Transport win-dow are focussed on the machines connected and enabled for Serial Control mode (for Re-mote 9-Pin Deck Emulation mode, see “Trans-port = Remote and Transport = Remote LTC” on page 20).
When online, Pro Tools slaves to the machine. When offline, the Transport only controls the machine.
When Pro Tools is slaved to the machine, the Pro Tools Transport can be used as a machine re-mote control or a system master control. When online, the Transport still controls the machine, but Pro Tools chases and locks to the machine.
In addition:
◆ When Auto Spot is turned on, regions are spotted to the current machine time.
◆ When Auto Spot is turned on, the Trimmer tool trims to the current machine time.
Refer to the Pro Tools Reference Guide for details on Auto Spotting.
MachineControl Guide
Toggling the Transport while Online
When online, toggling the transport control be-tween Pro Tools and your machine will also tog-gle their master/slave relationship.
Transport = Remote and Transport = Remote LTC
When Pro Tools is online in Remote 9-Pin Deck Emulation mode, Pro Tools responds to com-mands sent by the master 9-Pin machine. Many Pro Tools commands, including transport con-trols, are inactive.
Pro Tools can generate time code, or chase LTC when online in Remote 9-Pin Deck Emulation mode.
When Pro Tools is offline, Pro Tools operates in Local mode and ignores commands from the 9-pin master. Pro Tools responds only to requests from the 9-pin master for machine type and sta-tus, and responds that it is in Local mode.
For more information, see Chapter 4, “Remote 9-Pin Deck Emulation Mode.”
Using the Transport
To play or cue your machine independently of Pro Tools:
1 Select Transport > Machine in the Pro Tools Transport window.
2 Make sure Pro Tools is not online (the Online button in the Transport window is not high-lighted).
3 Click any of the buttons in the Pro Tools Transport window to control your machine.
Pro Tools always displays incoming LTC or 9-pin time in the Current Time field during fast-wind, and switches during playback to display the current positional reference.
To synchronize Pro Tools and machine playback from the Pro Tools Transport:
1 Select Transport > Pro Tools in the Pro Tools Transport window.
2 Put Pro Tools online.
3 Click Play in the Transport window.
If the tape in the machine is striped with time code that matches your Session time, the ma-chine will locate to the position of the Pro Tools on-screen selection/insertion point or memory location (plus pre-roll), and begin playing back in sync.
Machine Remote Setting
If the Transport toggle will not stay in Machine mode, or if the toggle suddenly switches to Pro Tools mode from Machine mode, check your machine’s Local/Remote setting. Pro Tools polls the connected machine periodically to check the status of the machine’s Local/Remote setting and posts a message if a problem is de-tected.
Online Display Information
Several display elements of the Edit and Trans-port windows provide machine status informa-tion.
◆ When Pro Tools is online, the Transport on-line button flashes. “Waiting for Sync” will be displayed in the status box in the lower left cor-ner of the Edit window.
◆ The online button continues to flash until you click Play and time code lockup occurs (all devices locked and responding in sync). The Time Code display in the Edit window shows the Machine Time when the machine is Master.
◆ Upon lockup, the display switches to show the session time. If your system doesn’t lock up quickly enough, you may want to adjust your machine pre-roll. See “Machine Pre-Roll” on page 11 for more information.
Machine Cueing
MachineControl provides two Cue modes for re-mote machine operation: Search and Hi-speed.
◆ In Search mode, the tape remains laced during Fast Forward or Rewind.
◆ In Hi-speed mode, the tape is unlaced before fast-forward/rewind. The Pro Tools Transport window indicates the status of the tape as de-scribed below.
Chapter 3: Serial Control Mode and Transport Control 21
22
Search Mode
In Search mode, the tape is laced against the heads when the machine is paused or searching, and the Stop button stays lit (it does not flash) and the Play button flashes. When cueing in this mode, the Fast Forward or Rewind button also lights when searching in either direction.
Hi-Speed Mode
In Hi-speed mode, the tape is unlaced, and all Transport buttons turn off (none light or flash). While cueing in this mode, only the selected Fast Forward or Rewind button lights.
To fast-forward and rewind in Search mode:
1 Select Transport > Machine in the Pro Tools Transport window.
2 Click Play in the Transport window or press the Spacebar to begin machine playback, then press the Spacebar again to pause the machine (this is to ensure that the tape is laced).
3 Click Fast Forward or Rewind in the Transport window to search the tape.
To fast-forward and rewind in Hi-speed mode:
1 Select Transport > Machine in the Pro Tools Transport window.
2 Press Command+period (.) or click Stop in the Transport window to unlace the tape.
3 Click Fast Forward or Rewind in the Transport window. The Pro Tools cursor indicates the cur-rent machine location.
Some devices, including several popular VHS decks, do not support a shuttle mode in which the tape stays laced. These decks unlace the tape before shuttling. Refer to your tape machine’s manual for more infor-mation.
MachineControl Guide
4 Press the Spacebar to pause the machine.
Spotting to the Machine
To spot regions to the machine’s current loca-tion, use Pro Tools Spot mode and/or Auto Spot (if using VITC). Refer to the Pro Tools Reference Guide for information on using Spot and Auto Spot mode to spot regions to SMPTE locations.
Serial Time CodeIf you are using a Digidesign SYNC I/O or USD connected to your DigiSerial Port, and your ma-chine has time code reader capability, you can take advantage of serial time code to achieve faster lockup times.
Serial time code can only be supplied by ma-chines with built-in time code readers which can serialize the time code when Machine-Control requests it. Most professional machines have such readers (including DA88, D2, Digi-Beta, and most 3/4˝ decks).
Some devices may not support a shuttle mode, and will not accept the above shuttle commands. In these cases, the Fast Forward and Rewind buttons in the Pro Tools Trans-port window blink, and clicking them places the device in true Fast Forward /Re-wind mode.
Auto Spot mode uses incoming VITC for lo-cation information. Therefore, Auto Spot mode will force the Region to be spotted to the current incoming machine time code lo-cation, not the current insertion cursor loca-tion. To spot your elements directly to the current cursor location, Control-drag (Mac-intosh) or Right-click and drag (Windows) the elements.

To enable Serial Time Code:
1 In Pro Tools, choose Setups > Peripherals and click Synchronization.
2 Make sure the SYNC I/O (or USD) and DigiSe-rial Port are the selected device and port.
3 Ensure that the both the SYNC I/O (or USD) and the external machine are locked to the same video reference signal.
4 Click the Machine Control tab in the Periph-erals window to open the Machine Control page.
5 Enable Use Serial Time Code for Positional Reference.
Serial TIme Code enabled in the Peripherals dialog
Serial Time Code and SYNC I/O Settings
When Serial Time Code is enabled, the Pro Tools Clock Reference switches to Video Reference. Additionally, the Positional Refer-ence pop-up is grayed out and displays Serial Time Code. (These controls are located in the SYNC I/O Settings section of the Session Setup window.)
Generate and Serial Time Code
Pro Tools automatically puts the SYNC I/O (or USD) in Generate mode and prohibits any changes to the Positional and Clock Reference settings. While Serial Time Code is being used, this Generate mode is engaged to calculate frame-edge accuracy in Pro Tools.
Chapter 3: Serial Control Mode and Transport Control 23

24
MachineControl Guide
chapter 4
Remote 9-Pin Deck Emulation Mode
Remote 9-Pin Deck Emulation mode makes Pro Tools operate as a virtual tape deck, support-ing most standard Sony P2 9-pin commands. For a list of supported commands, see “9-Pin Commands” on page 28. By default, Pro Tools emulates a Sony BVW-75 model video deck. You can also configure Pro Tools to emulate other machines. For more information, see “Alternate Machine Types” on page 26.
Generating Time Code in Remote 9-Pin Deck Emulation Mode
Pro Tools with MachineControl and the SYNC I/O can generate frame-edge aligned time code at 1x play speed while in Remote 9-Pin Deck Emulation mode.
Configuring Remote Mode
To configure Pro Tools for Remote 9-Pin Deck Emulation mode:
1 Choose Setups > Peripherals, and open the Synchronization tab.
2 Make sure the SYNC I/O (or USD) is the se-lected Synchronization device, enabled on the DigiSerial Port.
For instructions on connecting Pro Tools for Remote 9-Pin Deck Emulation mode, see Chapter 2, “Installation.”
3 Click at the top of the Peripherals dialog to open the Machine Control tab.
4 In the Remote section, click Enable.
5 Choose the appropriate port from the Port menu.
6 Choose the appropriate machine profile from the Machine ID selector.
7 Enable Chase LTC to have Pro Tools chase the master time code source. Leave this choice off to have Pro Tools and the SYNC I/O provide the master time code signal.
8 Click OK when you are done.
9 In the Session Setup window, Generate Using SYNC I/O (or, using USD) is automatically en-abled. This is required for Pro Tools to lock to the video reference with frame edge accuracy.
Remote 9-Pin Deck Emulation mode settings
In addition to the option to chase LTC, Re-mote mode also provides a preference setting to follow or ignore remote track arming commands. For more information, see “Ig-nore Track Arming Commands” on page 28.
Chapter 4: Remote 9-Pin Deck Emulation Mode 25

26
10 Make sure Video Reference is selected as the SYNC I/O (or USD) clock reference.
11 In the Pro Tools Transport window, select Re-mote, or Remote LTC, as appropriate, as the Transport master.r.
12 Put Pro Tools online.
13 Begin machine playback.
Chase LTC
Remote 9-Pin Deck Emulation mode lets a mas-ter device control Pro Tools track and Transport arming. In standard Remote 9-Pin Deck Emula-tion mode, Pro Tools serves as the time code master device while simultaneously responding to 9-pin transport and track arming commands.
When Chase LTC is enabled, Pro Tools can still respond to 9-pin track arming and record com-mands but chase incoming LTC instead of being the time code master device. By slaving Pro Tools to the LTC source instead of slaving the machine to Pro Tools time code, you can avoid waiting (and tape wear) while a machine transport locates and bumps tape to the cue point.
When Chase LTC is enabled, the Transport mas-ter selector shows Transport = Remote LTC. Pro Tools also communicates record status to the machine.
Remote 9-Pin Deck Emulation mode settings
See also “Optimizing Remote Mode Play-back” on page 27.
when Chase LTC enabled
Chase LTC not enabled
MachineControl Guide
Receiving Commands While Chase LTC is Enabled
When Chase LTC is enabled, and the system is online, Pro Tools waits until it receives only spe-cific transport record and track record com-mands from the machine. When Chase LTC is not enabled, Pro Tools will listen to all transport commands arriving through the serial connec-tion, including bump and crawl commands nec-essary for a tape machine to locate.
Scrubbing and Chase LTC
The Chase LTC option does not affect scrub-bing. Pro Tools video playback will always re-spond to locate and scrubbing command, even if Chase LTC is enabled.
Alternate Machine Types
By default, MachineControl lets Pro Tools emu-late a Sony BVW-75. If you use a machine that follows a different 9-pin command set, you can configure Pro Tools for its machine description by selecting it as the Remote mode device in the MachineControl page of the Peripherals dialog.
Remote Mode Preferences
Pro Tools provides the following preference set-tings to configure Remote mode options.
Punch In Frame Offset Sets an offset in frames to compensate for punch in timing advances or de-lays.
Punch Out Frame Offset Sets an offset in frames to compensate for punch out timing advances or delays.
Remote 9-Pin Deck Emulation mode preferences in the Operations page

Delay After Play Command Sets a number of frames of delay for Pro Tools to wait before at-tempting to lock, to compensate for the amount of time needed for the master machine to stabi-lize. This setting can be especially useful in a multi-machine environment.
Ignore Track Arming Allows Pro Tools to respond to all 9-pin remote commands except track arm-ing.
Playback in Remote 9-Pin Deck Emulation ModePro Tools will only play back audio when the re-ceived command requires audio play back at 1X speed in the forward direction. Reverse playback and varispeed playback are not supported in Pro Tools.
Online Status Display
When online in Remote mode, the Online but-ton flashes until Pro Tools and the machine es-tablish communication. When MachineControl and Remote mode are enabled and communica-tion is established, the Online button will re-main highlighted.
Optimizing Remote Mode Playback
Use the Delay After Play Command preference to optimize Pro Tools response in Remote 9-Pin Deck Emulation mode. (See “Remote Mode Pref-erences” on page 26 for instructions on how to configure this preference.) This setting lets you enter a number of frames for Pro Tools to wait, before responding to locate and play com-mands. A small delay before play allows the time code master device to stabilize before
Pro Tools attempts to achieve lock. By delaying play in this manner, Pro Tools can avoid multi-ple nudge and bump messages while attempting to lockup.
Recording in Remote 9-Pin Deck Emulation ModeMachineControl lets Pro Tools support Auto Edit (selection-based) and Punch-in/Punch-Out (QuickPunch) commands.
Pro Tools must have QuickPunch enabled when recording in Remote mode with an edit control-ler.
Auto Edit Recording
When a machine sends Auto Edit commands to Pro Tools in Remote 9-Pin Deck Emulation mode, the edit in and out points are converted to a Pro Tools Timeline selection. This selection, with offsets options, will then be used to record on all armed tracks when Pro Tools receives the Perform Auto Edit Record command.
Punch In/Out Recording
Punch-In/Punch-Out Recording supports punch-on-the-fly, with Pro Tools in QuickPunch mode. In this mode, tracks are armed before the record pass, and recording begins and ends when Punch-In and Punch-Out commands are received form the master machine.
QuickPunch must be enabled and the required voices must be available in Pro Tools for Punch-In/Punch-Out recording commands to work. This mode must be set manually in Pro Tools.
Preview Edit and Record Rehearse modes are not supported by Pro Tools.
Chapter 4: Remote 9-Pin Deck Emulation Mode 27

28
Track Arming in Remote 9-Pin Deck Emulation ModeIn Remote 9-Pin Deck Emulation mode, Pro Tools can be configured to either respond to, or ignore, track arming (record enabling) commands. Pro Tools communicates track record status back to the control machine.
Ignore Track Arming Commands
You can set Pro Tools to ignore incoming track arming (record-enable) commands. Use this to record-safe Pro Tools if, for example, you are us-ing a master 9-pin transport controller to arm tracks on several other machines, but not Pro Tools tracks. You can still manually arm Pro Tools audio tracks, as needed.
To have Pro Tools ignore remote track arming commands:
1 Choose Setups > Preferences, and select the Operations window.
2 Select (or, deselect) Ignore Track Arming.
See Chapter 5, “Remote Track Arming” for more information.
MachineControl Guide
9-Pin CommandsIn Remote Mode, Pro Tools with Machine-Control can respond to the following 9-pin commands from compatible workstations, syn-chronizers, and other devices:
• Play
• Stop
• Pause
• Rewind
• Forward
• Cue To
• Poll Time Code
• Record Arm Track
• Set In/Out Point (for Auto Edit)
• Set Pre/Post Roll (for Auto Edit)
• Perform Auto Edit Record
• Perform Punch-In/Punch-Out Record (re-quires QuickPunch mode and voices)
• Return Status-Online, State, Tracks Armed
• Servo Lock
• Clear “In” Point

chapter 5
Remote Track Arming
Pro Tools with MachineControl provides the ability to arm audio, video, or time code tracks on external decks.
On MachineControl-equipped systems, the Show Machine Track Arming Window com-mand is available in the Pro Tools Windows menu. The Track Arming window lets you con-figure track arming during sessions, using the settings appropriate for the current Track Arm-ing Profile. (See “Identifying your Machine” on page 30.)
To display the Machine Track Arming window:
■ Choose Windows > Show Machine Track Arming Window.
Track Arming in Pro Tools 6 and higher
Protocoland Mode
Record Arm buttons
Configuring Track ArmingPro Tools provides automatic, direct support for track configuration of most common video decks. If your deck is supported, Machine-Control will be able to identify and display your machine’s particular track layout. Even if your machine is not directly supported, the Track Arming window lets you arm tracks, set the Record Protocol and configure the Record mode for the machine.
You can also use the Create Track Arming Profile dialog box to define, save, and load customized device profiles. (See “Create Machine Track Arming Profile” on page 30 for more informa-tion.)
Not all machines support independent arm-ing of their audio tracks locally or remotely. In addition, some machines require a sepa-rate utility menu selection. Pro Tools remote track arming cannot operate in these situa-tions.
Chapter 5: Remote Track Arming 29

30
Identifying your Machine
As long as you have configured Pro Tools and MachineControl correctly, Track Arming will automatically load the track arming profile ap-propriate for the identified machines. For more information on basic Pro Tools settings for MachineControl, see “Configuring Pro Tools for MachineControl” on page 10.
If Pro Tools does not recognize your machine, or if you want your machine to emulate a different type of device (for a different track layout, per-haps), you can load a generic machine profile.
For maximum flexibility, utilize Track Arming Profiles to create, customize, and manage multi-ple machine descriptions (see “Create Machine Track Arming Profile” on page 30).
Requesting additional machine profiles for Track Arming
If you would like Digidesign to facilitate auto-detection of a specific machine in an upcoming release, you can e-mail a request, including the manufacturer and machine model to [email protected].
If you are using the generic1 device person-ality, be sure to double-check record behav-ior using non-essential tapes before at-tempting to use MachineControl’s remote track arming modes.
MachineControl Guide
Create Machine Track Arming ProfileThe Create Track Arming Profile window pro-vides extensive control over Pro Tools Track Arming. You can customize arming, track nam-ing, and mapping, and save configurations for different machines as Track Arming Profile files. These Profiles can be imported to quickly recon-figure Track Arming as needed for future projects. You can also test track mapping, and remap tracks if needed.
Use the Create Track Arming Profile feature to create profiles for machines that may not be in-cluded with Pro Tools today, and to manage multiple profiles.
To create a machine Track Arming Profile:
1 Choose Operations > Create Track Arming Profile.
Choosing a Machine ID
To recognize your machine:
■ Click Identify Machine.
A Stop command is sent to any connected machine, to protect elements on tape.
Create Track Arming Profile
Load Profile
Track Arm buttons
Save ProfileMachine ID
Profile settings
MachineControl queries the connected ma-chine for its machine ID, which is then dis-played below the Identify Machine button.
You can edit or replace the ID manually if needed. See “Entering a New Byte Code” on page 32 for more information.
Configuring a Profile
The Create Track Arming window lets you spec-ify track names and track mapping.
Customizing Names for Track Arming Buttons
You can rename the Track Arm buttons dis-played in each Track Arming Profile to better de-scribes the recording taking place. For example, an eight track profile might be easier to use with tracks named Dx-L, Dx-R, FX-L, FX-R, Mx-L, Mx-R, Lt, and Rt, for eight tracks comprised of stereo Dialog, stereo FX, stereo Music, and an LtRt mix. (Default names might be the generic Track 1, Track 2, Track 3, and so on.)
To edit the name of a track arming button:
1 Click the appropriate Track Arm button to dis-play its sub-menu, and select Enter New Track Name, or double-click the appropriate Track Arm button.
2 Enter a new track name in the dialog, and click OK.
Remapping Tracks
You can remap track buttons to target different tracks on the machine.
Entering a custom track name
To remap tracks:
1 Click the Track button you want to remap to display its remap selector.
2 Choose a new target track.
– or –
■ Choose a different machine profile from the Load Configuration selector.
Reassigning the Byte Value for a Track
Each record track on a remote machine has a unique hexadecimal byte code in their firmware that tells the machine which track should be armed when that command is received by a re-mote master. The standard profile (the default setup) corresponds to the Sony P-2 protocol, but many decks have their own unique mapping of byte codes to track numbers for a particular deck.
If an audio or video track, or the deck time code track do not arm when its corresponding track arming button is pressed, do the following:)
To select a different hex value for an individual track arm button:
1 Select another hex value byte code from the Byte Code sub-menu for the appropriate track arm button.
Remapping a track arming button
Chapter 5: Remote Track Arming 31

32
Entering a New Byte Code
As the Sony P2 protocol continues to expand, more manufacturers add specific byte code com-mands that may be listed in the current byte code list. Pro Tools lets you create entirely new, custom byte codes. This lets you enter addi-tional byte commands as needed to support new features as they are added to decks.
Choosing a Record Protocol
The following two choices are available for con-figuring the recording protocol to be utilized by the target deck:
Auto Edit
This mode is a highly accurate way to ensure that the target deck will record only within the boundaries of an on-screen selection. (If your deck does not support Auto Edit, use Punch In/Punch Out, as explained below.)
In Auto Edit mode, the record start/end times are downloaded to the target deck (along with any pre- or post-roll), and the deck is responsible for performing the insert punch in/out at the specified times (see “Rules for On-Screen Selec-tions” on page 33 for details).
Because this protocol removes the vagaries of CPU timing from the remote recording process, Auto Edit is frame-accurate. It is also the best way to ensure that your machine will punch out correctly and avoid accidental erasure of audio, even in the event of a CPU error.
Entering a new byte code
MachineControl Guide
Punch In/Out
This mode uses Pro Tools to control the process of punch in/out. Instead of downloading the punch points (as in Auto Edit), Pro Tools actu-ally performs them during the record pass. Be-cause serial communication has inherent de-lays, timing with Punch In/Punch Out mode cannot guarantee frame-accuracy (though it will almost always be within 2 to 3 frames).
Choosing a Record Mode
The Remote Track Arming window provides two choices for Record mode:
Insert
This mode is used to perform insert editing (punching in individual tracks) where one or more audio tracks is replaced by new material and the video material is retained.
Assemble
Assemble mode should be used when you want to:
◆ Begin recording program onto a completely blank tape (unformatted)
– or –
◆ Append program to the remainder of a tape which already has program you wish to keep
Assemble mode is not appropriate for audio lay-backs to video masters.
Assemble mode should be used carefully be-cause it arms all tracks on the target deck for re-cording—including the video track, time code track and control track. When performing an Assemble edit, all material on all tracks after the
edit in point will be replaced. Because a break in the control track will result at the edit out point, any remaining program material after an Assem-ble edit may be unusable.
To avoid accidentally recording over program material, experiment with Assemble and Insert modes on a dispensable tape to familiarize your-self with the edit capabilities of your deck.
Rules for On-Screen Selections
The Record Protocol buttons allow you to choose between the two different record proto-col choices described above (Auto Edit and Punch In/Punch Out). Regardless of which choice is used, however, Pro Tools follows these rules for record selection:
◆ If there is an on-screen selection, recording will take place over the period of the selection and punch out at the end of the selection.
◆ If pre- or post-roll is enabled, recording takes place only in the selection area, not during pre- or post-roll.
◆ If there is no selection (only a start location), recording will continue until it is manually stopped.
◆ If you make a selection in Pro Tools that crosses the “midnight” boundary (00:00:00:00), make sure your deck can handle this situation. Experiment with a dispensable tape to familiar-ize yourself with the crossover capabilities of your deck.
Assemble mode replaces all the elements on the target tape deck—audio, video and time code. Use this mode with caution.
Using Remote Track Arming The first step in using Remote Track Arming is to configure the parameters of the Track Arming window.
To configure Track Arming:
1 Make sure your machine is properly con-nected and configured to slave to Pro Tools as described in your MachineControl and Pro Tools Guides.
2 Make sure Transport = Machine.
3 Open the Track Arming window. If the entire window is not visible, click the Zoom box.
4 Select a Record Protocol (Auto Edit or Punch In/Out).
5 Select a Record mode (Insert or Assemble).
To perform a layback:
1 In Pro Tools, select the audio to layback, or place the playback cursor at a start point.
2 In the Remote Track Arming window, arm the appropriate tracks.
3 Select Transport > Machine in the Pro Tools Transport window.
4 Click Record in the Transport window to arm recording.
5 Click Play in the Transport window.
Your machine will cue to the selection start mi-nus all relevant pre-roll, then begin to play back. Pro Tools will then sync to the deck, and the tar-get deck will record as determined by your set-
Once the Track Arming parameters are con-figured, you can change the Track Arming window to “small view” and still see the track arm buttons.
Chapter 5: Remote Track Arming 33

34
tings for Record Protocol and Record mode. If you did not create an on-screen selection, deck recording will continue until you manually stop playback.
MachineControl Guide

appendix a
Key Commands
Command Macintosh Windows
Rewind Shift+< Shift+<
Fast Forward Shift+> Shift+>
Shuttle Backward Option+comma Alt+comma
Shuttle Forward Option+period Alt+period
Toggle Transport Master Command+\ Control+\
All Transport Buttons Off/Unthread Tape Command+period Control+period
Search Mode Toggle (Play-Pause/Stop) Spacebar/Com-mand+period
Spacebar/Ctrl+period
When Transport = Machine:
Locate to Selection Start Command+Left Arrow Control+Left Arrow
Locate to Selection End Command+Right Arrow Control+Right Arrow
Locate to Selection Start Minus Preroll Option+Left Arrow Alt+Left Arrow
Locate to Selection End Minus Preroll Option+Right Arrow Alt+Right Arrow
Appendix A: Key Commands 35

36
MachineControl Guide
appendix b
Troubleshooting
Installation
Problem
MachineControl options are not available in Pro Tools.
Possible Solution
Make sure MachineControl is installed and au-thorized correctly (see Chapter 2, “Installa-tion.”)
Machine Not Recognized
Problem:
The session was saved with MachineControl, but now opens without it being selected in the Transport window. When opening a session saved with MachineControl, a dialog warns that there were “problems initializing Machine-Control.” When spotting a region, the “Capture Machine Time” button is grayed out.
Possible Solutions:
◆ Open Setup > Peripherals and choose the Ma-chine Control tab (and confirm that the correct port is chosen for your MachineControl operat-ing mode. Verify that the correct serial port is chosen in the Serial Port dialog (Setups menu). Make certain that all cables are fully connected at both ends.
◆ Verify that the machine and any V-LAN inter-faces are powered on. Open the Machine Con-trol tab in the Setups > Peripherals dialog, reset the Machine Port, and close the dialog; this causes Pro Tools to scan the serial port for V-LAN or 9-pin.
Pro Tools Transport Not Controlling Machine
Problem:
Though the MachineControl dialog indicates that Pro Tools recognizes the machine, nothing happens when you use the transport in Pro Tools (the machine doesn’t respond to com-mands). When spotting a region using the “Capture Machine Time” button, an incorrect time is entered.
Appendix B: Troubleshooting 37

38
Possible Solutions:
◆ Most machine controllable transports need to be placed in a “Remote” or “Ext” mode to allow them to be slaved to other devices. Verify that the device is in this mode. Refer to the docu-mentation that came with your device for more information on Remote and Local modes.
◆ In the Transport window, check the status of the “Transport = Pro Tools” or “Transport = Machine” setting.
◆ If the machine protocol is V-LAN and there are multiple machines on the V-LAN network, choose Setups > Machine Setup and verify that the correct machine is selected in the pop-up menu.
Time Code Inaccuracy
Problem:
The time code locations shown in the Selection and Position Indicator boxes do not match ma-chine time code.
Possible Solutions:
This problem can be caused by a number of things. Sometimes the Time Code times re-ported by machines are not in sync with the time code that gets played out of their time code ports. (One example of this is when the ma-chine's time code reader is looking at VITC while Pro Tools is chasing LTC.)
◆ If the values get progressively farther and far-ther apart, check the frame rate. Make sure you have set Pro Tools to the same frame rate as the movie/machine frame rate. Also check the frame format (drop or non-drop).
MachineControl Guide
◆ If the values differ by a significant margin (such as an hour or more), perhaps the Start Frame number isn’t set correctly. Choose Setups > Machine Setup and check the Pro Tools Start Frame number.
Changing Session Start Time, and Dropped Frames
When you change the session frame rate from a non-drop to drop rate, or from drop to non-drop, the session start time and material in the timeline may be affected. Be aware of the follow-ing:
Non-drop changed to Drop: The Session Start Time is changed to the next possible supported frame if the current one is not supported in DF. For example, changing from non-drop to drop frame in a session that starts at 00:59:00:00 will change the session’s start time to 00:59:00:02 (due to the methodology by which frames are dropped in each rate and format).
Every event in the timeline is moved back two frames, maintaining each event’s relative time code location (relative to the start of the ses-sion).
Drop changed to Non-drop When going from drop to non-drop, no compensation is applied to the session start time. This is done because all frames in drop exist in a non-drop timeline (or, a drop rate timeline is a subset of its non-drop rate). So, when changing from a drop rate to a non-drop rate, Pro Tools will keep events at their current location relative to the start of the session.

appendix c
Machine IDs
The following table lists the machine profiles supported in MachineControl, by their Pro Tools hex ID.
For special IDs to support 48-track arming, see “48 Track Profiles” on page 40.
Machines and Hex ID Numbers
The first 0x signifies hex value. The next four numbers signify the machine ID. The name of the associated machine follows.
Machines, by ID number
ID number Machine
0x0000 Generic
0x1000 BVU-800
0x101C BVU-950
0x1019 BVU-920
0x1080 BVU-900
0x104C VO-9850
0x1048 VO-9800
0x102C SVO-9600
0x2000 BVW-10
0x2001 BVW-40
0x2002 BVW-11
0x2003 BVW-15
0x2010 BVW-35
0x2020 BVW-60
0x2021 BVW-65
0x2022 BVW-95
0x2023 BVW-96
0x2024 BVW-70
0x2025 BVW-75
0x2125 BVW-75P
0x4000 DVR-10
0x4003 DVR-18
0x4002 DVRC-10
0x4020 DVR-20
0x4022 DVR-28
0xF019 AJ-D350 (D3)
0x3011 DVR-2100
0x3000 DVR-1000
0x0010 BVH-2000
0x0011 BVH-2000
0x0110 BVH-2000 PS
0x0111 BVH-2000 PS
0x0018 BVH-2180
0x0020 BVH-2500
0x0120 BVH-2500 PS
0x0030 BVH-2700
0x0040 BVH-2800
Machines, by ID number
ID number Machine
Appendix C: Machine IDs 39

40
0x0048 BVH-2830
0x0050 BVH-3000 (NTSC)
0x0060 BVH-3100 (NTSC)
0x0150 BVH-3000 PS
0x0160 BVH-3100 PS
0x2041 PVW-2800
0x1211 ASC Virtual Recorder
0x1011 Fostex D-10
0xF027 Otari R-DAT
0x7001 TASCAM DA-88
0xF01D TASCAM DA-88
0x7003 PCM-800
0x7000 PCM-7000
0xA088 AG-DS555
0x2051 UVW-1800
0xB000 DVW-500
0xB010 DVW-500
0xA050 V1
0x2124 BCB-70
0x2101 BVW-40P
0x2141 PVW-2800P
Tascam DA-88 and other decks can be set to emulate other machines. If a deck is set to emulate another type of machine, the ma-chine type being emulated will be displayed.
Machines, by ID number
ID number Machine
MachineControl Guide
48 Track Profiles
The following are special IDs to support 48-track arming.
Pro Tools
Machines
IDs for 48-Track Capable Machines
ID Machine
0xD0 E1 Pro Tools
0XD1 E1 Pro Tools
0XD2 E1 Pro Tools
IDs for 48-Track Capable Machines
ID Machine
0x6007 3348HR
0x6005 3348HRV
0x6003 3324

appendix d
9-Pin Cable Pinouts
Serial Control 9-Pin Cable
Figure 2. MachineControl Serial Control 9-Pin Cable pinout
7
8
3
1 2
n/c n/c
n/c
Serial Control Cable
Mini - 812345678
Shield
DB-9NCNC8123
NC7
NCShield
Mini - 812345678
Shield
DB-9NCNC2187
NC3
NCShield
V-Lan Pin Configuration
DIN Mini 8
9-pin, male D-SUB
76 8 9
21 43 5
Appendix D: 9-Pin Cable Pinouts 41

42
Remote Mode 9-Pin Cable
MachineControl Guide
Figure 3. MachineControl Remote Mode 9-Pin cable pinout
Remote Mode 9-Pin Deck Emulation Mode cable
Mini - 8 DB - 9
1 NC
2 NC
3 2
4 9, 1
5 8
6 7
7 NC
8 3
Shield NC Shield
Shielding
The outside shielding of the D-Sub 9 (female) should be wired to the outside shielding of the Mini DIN 8 (male).

9-Pin to 9-Pin
Figure 4. 9-pin to 9-pin cable
1127653849
Shell
DB-9M DB-9M127653849Shell
NC NC
This is a standard ESBus MachineControl Cable.
• All pins wired straight through.
• Pins 2 and 7 are a Twisted Pair with shield drain wire on Pin 6.
• Pins 3 and 8 are a Twisted Pair with shield drain wire on Pin 4.
Appendix D: 9-Pin Cable Pinouts 43

44
MachineControl Guide
Aadaptors
serial port 7arming
safe (ignore) 28Assemble 32authorizing iLok 10auto detection 11Auto Edit 32
and Remote mode 27Auto Spot
with Machine as master 20
Ccables
9 to 9 43required 3
caution 33CH 1-2 Input 13Chase LTC 26chasing 18control track 32Create Machine Track Arming Profile 30cueing
and preferences for 18hi-speed mode 21search mode 22
Current 20Current Time 13
DDelay After Play Command 27Delay before Locking to LTC 18DigiSerial Port 7
and MachineControl 7
Eemulation
of 9-pin deck via Remote mode 8ESBus cable 43
Fframe rate 13frame-edge
and serial time code 23
GG3/G4
and ports 7Generate
and serial time code 23generic 11
Hhi-speed mode
cueing 21
IIDs 39
48-track capable48 track arming 40
Ignore Track Arming 27, 28iLok hardware key 10Incoming Time 13Insert 32install options 9Installer CD-ROM 9installing Soft SampleCell 9
index
Index 45

46
Llaced 21layback 33License Card 10linking offsets 14local 9local mode (machine) 9Local/Remote 21LTC
Chase LTC in Remote mode 26remote mode transport 20
Mmachine
pre-roll 11transport master 20
Machine Chases Memory Locationpref 18
Machine Cues Intelligently 18Machine Follows Edit Insertion/Scrub 18machine IDs 39machine profiles 30MachineControl
and DigiSerial Port 7selecting machines 19
machineslist of profiles 39remote versus local mode 9
Macintoshsystem requirements 2
memory locationsand machine chase 18
midnight 33Mode 32
NNTSC 13
Ooffsets
9-pin 14linking 14MMC 14sync 14
MachineControl Guide
Onlinebutton in Transport 19toggling 17
On-Screen Selections 33
PP2 25PAL 13ports
determining serial 7DigiSerial 7for USD 7with G3 and G4 7
preferences 18Machine Cues Intelligently 18Remote mode 26
pre-rollmachine 11setting for machine from Pro Tools 11
pre-roll compensating 11Punch In Frame Offset 26Punch In/Out 32Punch Out Frame Offset 26
RRecord Mode 32Record Online at Insertion/Selection 18Record Online at Time Code (or ADAT) Lock 18Record Protocol 32recording
Remote mode 27Redefine Current Time Code Position 14Remote 9-pin Deck Emulation mode
Chase LTC 26preferences 26see also Remote mode
Remote modeand track arming 28Auto Edit 27commands 28connections for 9-pin deck emulation 8playback 27recording 27transport master 20
remote mode (machine) 9requirements
serial ports 7

Ssearch mode 22
cueing 22serial
port requirements 7Serial Control Mode 19serial ports
adaptors 7with G3 and G4 7
serial time code 22and Generate mode 23
servo lock 11Show Machine Track Arming Window 29slaved
Serial Control mode 20start time 13
see also Redefine Current Time Code Position 14
Stop At Shuttle Speed Zero 18Sync Mode 13synchronization
requirements 3system requirements 2
Ttime code
offsets 14quick signal test 13redefine current 14
time code track 32track arming
48-track IDs 40and Remote mode 28create machine profile 30IDs 39ignore 28remap tracks 31using 33
track layout 11transport
Machine 20Pro Tools 20Remote 20Remote LTC 20selecting master 19
Transport = Machine 19Transport = Pro Tools 19Trimmer
when Transport = Machine 20
UUSD
and DigiSerial Port 7Use Serial Time Code for Positional Reference 23
VVideo Format 13Video Reference
and serial time code 23video track 32VSD 3VTR emulation (see Remote 9-Pin Deck Emulation)
8
WWindows
system requirements 2
Index 47