mac os x server - apple inc,
TRANSCRIPT

Mac OS X ServerWindows Services AdministrationFor Version 10.4 or Later

Apple Computer, Inc.© 2005 Apple Computer, Inc. All rights reserved.
The owner or authorized user of a valid copy of Mac OS X Server software may reproduce this publication for the purpose of learning to use such software. No part of this publication may be reproduced or transmitted for commercial purposes, such as selling copies of this publication or for providing paid-for support services.
Every effort has been made to ensure that the information in this manual is accurate. Apple Computer, Inc., is not responsible for printing or clerical errors.
Apple1 Infinite LoopCupertino CA 95014-2084www.apple.com
The Apple logo is a trademark of Apple Computer, Inc., registered in the U.S. and other countries. Use of the “keyboard” Apple logo (Option-Shift-K) for commercial purposes without the prior written consent of Apple may constitute trademark infringement and unfair competition in violation of federal and state laws.
Apple, the Apple logo, AppleTalk, Mac, and Macintosh are trademarks of Apple Computer, Inc., registered in the U.S. and other countries. Finder is a trademark of Apple Computer, Inc.
Adobe and PostScript are trademarks of Adobe Systems Incorporated.
UNIX is a registered trademark in the United States and other countries, licensed exclusively through X/Open Company, Ltd.
Other company and product names mentioned herein are trademarks of their respective companies. Mention of third-party products is for informational purposes only and constitutes neither an endorsement nor a recommendation. Apple assumes no responsibility with regard to the performance or use of these products.
019-0172/03-24-2005

1 Contents
Preface 7 About This Guide7 What’s New in Version 10.48 What’s in This Guide9 Using This Guide9 Using Onscreen Help
10 The Mac OS X Server Suite11 Getting Documentation Updates11 Getting Additional Information
Chapter 1 13 Overview of Windows Services14 Providing a PDC for Domain Login15 Providing BDCs for Failover and Backup16 Providing Home Directories and Roaming User Profiles17 Providing Windows Services as a Domain Member17 Providing File, Print, Browsing, and Name Resolution Services17 Providing VPN Service18 Providing Windows Services on a Server With Multiple Network Interfaces18 Ensuring the Best Cross-Platform Experience18 Tools for Managing Windows Services19 Server Admin19 Workgroup Manager20 Directory Access20 Command-Line Tools
Chapter 2 21 Setting Up Windows Services22 Setting the Server’s Role and Identity for Windows Services23 Setting Up a Server of Standalone Windows Services24 Setting Up a Server as a Mac OS X Server PDC Domain Member25 Setting Up a Server as an Active Directory Domain Member26 Setting Up a Server as a Primary Domain Controller27 Setting Up a Server as a Backup Domain Controller29 Changing Windows Services Access Settings29 Changing Windows Services Logging Settings
3

4
30 Changing Windows Services Advanced Settings31 Starting Windows Services31 Setting Up a Share Point for Windows Access32 Setting Up a Print Queue for Windows Access33 Supporting Windows Client Computers33 Setting Up Windows Clients for TCP/IP Networking33 Setting Up Windows XP for Domain Login34 Setting Up Windows 2000 for Domain Login34 Connecting for File Service From Windows35 Connecting to the Server by Name or Address in Windows XP35 Connecting to the Server by Name or Address in Windows 200035 Connecting to the Server by Name or Address in Windows 95, 98, or ME36 Setting Up Windows Clients for Print Service
Chapter 3 37 Administering Windows Users, Groups, Computers, and Share Points37 Setup Overview38 Managing Accounts for Windows Users39 Where Windows User Accounts Are Stored39 Creating Windows User Accounts for a PDC Server40 Creating User Accounts for a Windows Standalone Server41 Editing Windows User Accounts42 Working With Basic Settings for Windows Users43 Working With Windows Settings for Users43 Changing a Windows User’s Profile Location45 Changing a Windows User’s Login Script Location45 Changing a Windows User’s Home Directory Drive Letter46 Changing a Windows User’s Home Directory Location47 Working With Advanced Settings for Windows Users48 Providing Secure Authentication for Windows Users48 Working With Group Settings for Windows Users49 Setting Up a Home Directory for a Windows User51 Working With Mail Settings for Windows Users51 Working With Print Quota Settings for Windows Users51 Working With Info Settings for Windows Users52 Defining a Windows Guest User52 Deleting a Windows User Account52 Disabling a Windows User Account53 Managing Groups for Windows Users53 Working With Group Folder Settings for Windows Groups54 Managing the Windows Computer List54 Adding Computers to the Windows Computers List54 Removing Computers From the Windows Computers List55 Changing Information About a Computer in the Windows Computers List
Contents

55 Moving a Windows Computer to a Different Computer List55 Deleting the Windows Computers List55 Managing SMB/CIFS Share Points56 File Locking With SMB/CIFS Share Points56 Creating an SMB/CIFS Share Point and Setting Privileges58 Controlling Access to a Windows Share Point or Shared Folder59 Changing Windows Settings for a Share Point60 Managing SMB/CIFS Share Points
Chapter 4 61 Managing Windows Services61 Starting and Stopping Windows Services61 Starting Windows Services62 Stopping Windows Services62 Monitoring Windows Status, Logs, and Graphs62 Viewing Windows Services Status63 Viewing Windows Services Logs63 Viewing Windows Services Graphs63 Managing Connections to Windows Services63 Viewing Windows Services Connections64 Disconnecting Windows Users64 Changing the Server’s Windows Identity64 Changing the Server’s Windows Computer Name65 Changing the Server’s Windows Domain66 Changing the Sever’s Windows Workgroup66 Managing Access to Windows Services66 Controlling Access to Windows Services67 Controlling Windows Users’ Access to Print Queues67 Allowing Guest Access for Windows Services68 Limiting the Number of Connected Windows Clients68 Managing PDC/BDC Replication68 Scheduling Replication of a PDC68 Synchronizing Primary and Backup Domain Controllers on Demand68 Managing Windows Services Logging69 Managing Advanced Windows Services Settings69 Changing the Windows Code Page70 Enabling Windows Domain Browsing70 Changing WINS Registration71 Enabling or Disabling Virtual Share Points
Chapter 5 73 Solving Problems With Windows Services73 Problems With a Primary or Backup Domain Controller73 User Can’t Log in to the Windows Domain73 Windows User Has No Home Directory
Contents 5

6
74 Windows User’s Profile Settings Revert to Defaults74 Windows User Loses Contents of My Documents Folder75 Problems With Windows File Service75 User Can’t Authenticate for Windows File Service75 User Doesn’t See the Server in My Network Places75 General Problems With File Services76 Problems With Windows Print Service76 Windows Users Can’t Print76 General Problems With Print Services
Glossary 77
Index 85
Contents

Pref
ace
About This GuideThis guide describes the services that Mac OS X Server can provide to Windows computer users and tells you how to set up your server to provide Windows services.
Mac OS X Server can provide domain services for NT-compatible Windows clients, including Windows NT-compatible domain login and home directories, file service, print service, Windows domain browsing, and Windows name resolution. In addition, Windows clients can use cross-platform network services provided by Mac OS X Server such as mail, web, and VPN. Mac OS X Server uses the Samba open-source software to provide Windows services.
What’s New in Version 10.4Mac OS X Server version 10.4 offers the following major enhancements in services for Windows users:• Backup domain controller (BDC). If you have more than one Mac OS X Server
system, you can make one server a primary domain controller (PDC) and other servers BDCs. A BDC provides automatic failover and backup for the PDC. The PDC and BDCs have synchronized copies of directory and authentication data, and they share client requests for this data. If the PDC becomes unavailable, clients automatically fail over to a BDC until the PDC becomes available.
• Active Directory domain member. Mac OS X Server can be a member of an Active Directory domain hosted by a Windows server. In this role it can provide file and print services and accept Kerberos authentication for users and groups in the Active Directory domain.
• Nested groups. Groups can have other groups as members. A user inherits membership in a group whose members include a group of which the user is a direct member. Nesting groups lets you control access for groups of users at both a global level (when you want to control access for all users of a group) and at a smaller, more focused level (when you want to control access for only certain members of a group).
7

8
• File system access control lists (ACLs). ACLs are compatible with those in Windows servers and workstations. ACLs give you a way to craft share point and folder access privileges with a high degree of precision. A wide range of permissions can be assigned to groups and users, including nested groups. You can use inheritance to propagate access privileges through a folder hierarchy.
• Unified locking. Mac OS X Server unifies file locking across AFP and SMB/CIFS protocols. This feature lets users working on Windows and Macintosh platforms simultaneously share files without worrying about file corruption.
• Service access control. You can specify which users and groups can use Windows services and other individual services hosted by Mac OS X Server.
• NTLMv2 authentication. NTLMv2 provides more secure password validation than NTLM or Lan Manager (LM) and is required by some Windows server administrators.
What’s in This GuideThis guide includes the following chapters:• Chapter 1, “Overview of Windows Services,” highlights important concepts and
introduces the tools you use to manage Windows services.• Chapter 2, “Setting Up Windows Services,” explains how to set up Mac OS X Server as
a provider of standalone Windows services, a Windows domain member, a PDC, or a BDC. Standalone Windows services include file service, print service, Windows Internet Naming Service (WINS), and Windows domain browsing service. A Windows domain member server and a BDC can also provide some or all of these services. If you have only one server and set it up as a PDC, it can also provide all other Windows services.
• Chapter 3, “Administering Windows Users, Groups, Computers, and Share Points,” tells you how to set up and manage accounts for Windows users, groups, and computers (workstations). This chapter also explains how to set up share points that Windows users can access.
• Chapter 4, “Managing Windows Services,” describes how to start and stop, monitor, control access to, change identity, and change the code page for Windows services. It also explains how to manage PDC and BDC, service logs, domain browsing, and WINS registration.
• Chapter 5, “Solving Problems With Windows Services,” helps you deal with common problems that occur with a PDC, Windows file service, and Windows print service.
• The Glossary defines terms you’ll encounter as you read this guide.
Mac OS X Server Migrating from Windows NT for Version 10.4 or Later explains how to easily import users, groups, and computers from a Microsoft Windows NT server to a Mac OS X Server PDC. The Windows NT migration guide also explains how to migrate home directories, share points, and server configuration information.
Note: Because Apple frequently releases new versions and updates to its software, images shown in this book may be different from what you see on your screen.
Preface About This Guide

Using This GuideThe chapters in this guide are arranged in the order that you’re likely to need them when setting up Mac OS X Server to provide Windows services.• Review Chapter 1 to acquaint yourself with Windows services and management
tools. • Follow the instructions in Chapter 2 to set up Windows services and support
Windows client computers.• Whenever you need to manage Windows users, groups, computers, or share points,
look for instructions in Chapter 3. This includes setting up home directories and roaming user profiles.
• For ongoing maintenance of Windows services, use the instructions in Chapter 4. • Review Chapter 5 if you encounter problems with Windows services.
Using Onscreen HelpYou can view instructions and other useful information from this and other documents in the server suite by using onscreen help.
On a computer running Mac OS X Server, you can access onscreen help after opening Workgroup Manager or Server Admin. From the Help menu, select one of the options:• Workgroup Manager Help or Server Admin Help displays information about the
application.• Mac OS X Server Help displays the main server help page, from which you can search
or browse for server information.• Documentation takes you to www.apple.com/server/documentation, from which you
can download server documentation.
You can also access onscreen help from the Finder or other applications on a server or on an administrator computer. (An administrator computer is a Mac OS X computer with server administration software installed on it.) Use the Help menu to open Help Viewer, then choose Library > Mac OS X Server Help.
To see the latest server help topics, make sure the server or administrator computer is connected to the Internet while you’re using Help Viewer. Help Viewer automatically retrieves and caches the latest server help topics from the Internet. When not connected to the Internet, Help Viewer displays cached help topics.
Preface About This Guide 9

10
The Mac OS X Server SuiteThe Mac OS X Server documentation includes a suite of guides that explain the services and provide instructions for configuring, managing, and troubleshooting the services. All of the guides are available in PDF format from:
www.apple.com/server/documentation/
This guide ... tells you how to:
Mac OS X Server Getting Started for Version 10.4 or Later
Install Mac OS X Server and set it up for the first time.
Mac OS X Server Upgrading and Migrating to Version 10.4 or Later
Use data and service settings that are currently being used on earlier versions of the server.
Mac OS X Server User Management for Version 10.4 or Later
Create and manage users, groups, and computer lists. Set up managed preferences for Mac OS X clients.
Mac OS X Server File Services Administration for Version 10.4 or Later
Share selected server volumes or folders among server clients using these protocols: AFP, NFS, FTP, and SMB/CIFS.
Mac OS X Server Print Service Administration for Version 10.4 or Later
Host shared printers and manage their associated queues and print jobs.
Mac OS X Server System Image and Software Update Administration for Version 10.4 or Later
Use NetBoot and Network Install to create disk images from which Macintosh computers can start up over the network. Set up a software update server for updating client computers over the network.
Mac OS X Server Mail Service Administration for Version 10.4 or Later
Set up, configure, and administer mail services on the server.
Mac OS X Server Web Technologies Administration for Version 10.4 or Later
Set up and manage a web server, including WebDAV, WebMail, and web modules.
Mac OS X Server Network Services Administration for Version 10.4 or Later
Set up, configure, and administer DHCP, DNS, VPN, NTP, IP firewall, and NAT services on the server.
Mac OS X Server Open Directory Administration for Version 10.4 or Later
Manage directory and authentication services.
Mac OS X Server QuickTime Streaming Server Administration for Version 10.4 or Later
Set up and manage QuickTime streaming services.
Mac OS X Server Windows Services Administration for Version 10.4 or Later
Set up and manage services including PDC, BDC, file, and print for Windows computer users.
Mac OS X Server Migrating from Windows NT for Version 10.4 or Later
Move accounts, shared folders, and services from Windows NT servers to Mac OS X Server.
Preface About This Guide

Getting Documentation UpdatesPeriodically, Apple posts new onscreen help topics, revised guides, and solution papers. The new help topics include updates to the latest guides.• To view new onscreen help topics, make sure your server or administrator computer
is connected to the Internet and then click the Late-Breaking News link on the main Mac OS X Server help page.
• To download the latest guides and solution papers in PDF format, go to the Mac OS X Server documentation webpage: www.apple.com/server/documentation.
Getting Additional InformationFor more information, consult these resources:
Read Me documents—important updates and special information. Look for them on the server discs.
Mac OS X Server website—gateway to extensive product and technology information.www.apple.com/macosx/server/
AppleCare Service & Support—access to hundreds of articles from Apple’s support organization.www.apple.com/support/
Mac OS X Server Java Application Server Administration For Version 10.4 or Later
Configure and administer a JBoss application server on Mac OS X Server.
Mac OS X Server Command-Line Administration for Version 10.4 or Later
Use commands and configuration files to perform server administration tasks in a UNIX command shell.
Mac OS X Server Collaboration Services Administration for Version 10.4 or Later
Set up and manage weblog, chat, and other services that facilitate interactions among users.
Mac OS X Server High Availability Administration for Version 10.4 or Later
Manage IP failover, link aggregation, load balancing, and other hardware and software configurations to ensure high availability of Mac OS X Server services.
Mac OS X Server Xgrid Administration for Version 10.4 or Later
Manage computational Xserve clusters using the Xgrid application.
Mac OS X Server Glossary: Includes Terminology for Mac OS X Server, Xserve, Xserve RAID, and Xsan
Interpret terms used for server and storage products.
This guide ... tells you how to:
Preface About This Guide 11

12
Apple customer training—instructor-led and self-paced courses for honing your server administration skills.train.apple.com/
Apple discussion groups—a way to share questions, knowledge, and advice with other administrators.discussions.info.apple.com/
Apple mailing list directory—subscribe to mailing lists so you can communicate with other administrators using email.www.lists.apple.com/
Samba website—information about Samba, the open source software on which the Windows services in Mac OS X Server are based.www.samba.org
Preface About This Guide

1
1 Overview of Windows ServicesWindows services encompass primary and backup domain controllers, SMB/CIFS file and print services, Windows domain browsing, and name resolution.
Mac OS X Server can provide a variety of services to users of Microsoft Windows 95, 98, ME (Millennium Edition), XP, NT 4.0, and 2000.• File service allows Windows clients to connect to the server using Server Message
Block/Common Internet File System (SMB/CIFS) protocol on a TCP/IP network.• Print service allows Windows clients to print via SMB/CIFS to network print queues of
PostScript printers.• Windows Internet Naming Service (WINS) allows Windows clients to resolve Windows
names and addresses across multiple subnets.• Domain browsing allows Windows clients to browse for available servers across
subnets.• Primary and backup domain controllers (PDC and BDCs) offer:
• Windows domain login with single sign-on authentication from Windows NT 4.x, Windows 2000, and Windows XP workstations
• Users changing their passwords during login• Login using the same user account on Mac OS X and Windows computers• Roaming user profiles stored on a Mac OS X Server computer• Network home directories located on a Mac OS X Server computer• Authentication of Windows 95, 98, and ME clients for file services
By providing these services via SMB/CIFS, Mac OS X Server can replace Windows NT servers in small workgroups. Settings for Windows services are grouped in Workgroup Manager and Server Admin, to make them easy to find. These settings are also designed to be familiar to experienced Windows administrators.
Mac OS X Server can also provide platform-neutral services to Windows clients:• Virtual private network (VPN) provides secure remote connections over a public
network to the private network.• DHCP dynamically assigns IP addresses to computers that request them.• DNS resolves Internet names and IP addresses.
13

14
• NAT connects multiple computers to the Internet with one IP address.• Web service has support for WebDAV file access, an application server, and extensive
dynamic web technologies.• Mail service supports the SMTP, POP, and IMAP protocols.• Weblog service provides multiuser weblogs that comply with RSS and Atom XML
standards.• iChat service provides instant messaging with client applications that support the
Jabber protocol.
The services that Mac OS X Server provides via SMB/CIFS are based on Samba 3, an open source SMB/CIFS server. For more information about Samba, visit the Samba website:
www.samba.org
Providing a PDC for Domain LoginSetting up Mac OS X Server as a Windows primary domain controller (PDC) enables users of Windows NT-compatible workstations to log in using domain accounts. Instead of logging in with a user name and password that are defined locally on a workstation, each user can log in with a user name and password that are defined on the PDC. A PDC gives each Windows user one user name and password for logging in from any Windows NT 4.x, Windows 2000, and Windows XP workstation on the network.
The same user account that can be used for login from a Windows workstation can also be used for login from a Mac OS X computer. Thus someone who uses both platforms can have the same home directory, email account, and print quotas on both platforms. Users can change their passwords while logging in to the Windows domain.
The user accounts are stored in the server’s LDAP directory together with group, computer, and other information. The PDC has access to this directory information because you set up the PDC on a server that is already an Open Directory master, which hosts an LDAP directory. Furthermore, the PDC uses the Open Directory master’s Password Server to authenticate users when they log in to the Windows domain. The Password Server can validate passwords using the NTLMv2, NTLMv1, LAN Manager, and many other authentication methods.
The Open Directory master can also have a Kerberos KDC. The PDC doesn’t use Kerberos to authenticate users for Windows services, but mail and other services can be configured to use Kerberos to authenticate Windows workstation users who have accounts in the LDAP directory.
Chapter 1 Overview of Windows Services

To have its password validated by the Open Directory Password Server and Kerberos, a user account must have a password type of Open Directory. A user account with a password type of crypt password can’t be used for Windows services because a crypt password isn’t validated using the NTLMv2, NTLMv1, or LAN Manager authentication methods.
The server may also have user accounts in its local directory—every Mac OS X Server has one. The PDC doesn’t use these accounts for Windows domain login, but the PDC can use these accounts to authenticate users for Windows file service and other services. User accounts in the local directory that have a password type of shadow password can be used for Windows services because a shadow password can be validated using the NTLMv2, NTLMv1, LAN Manager, and many other authentication methods.
For compatibility, Mac OS X Server supports user accounts that were configured to use the legacy Authentication Manager technology for password validation in Mac OS X Server versions 10.0–10.2. After upgrading a server to Mac OS X Server version 10.4, existing users can continue to use their same passwords. An existing user account uses Authentication Manager if the account is in a NetInfo domain for which Authentication Manager has been enabled and the account is set to use a crypt password. If you migrate a directory from NetInfo to LDAP, all user accounts that used Authentication Manager for password validation are converted to have a password type of Open Directory.
When setting up Mac OS X Server as a PDC, make sure your network doesn’t have another PDC with the same domain name. The network can have multiple Open Directory masters, but only one PDC.
For additional information and instructions on Mac OS X Server directory and authentication services, see the Open Directory administration guide.
Providing BDCs for Failover and BackupSetting up Mac OS X Server as a backup domain controller (BDC) provides failover and backup for the PDC. The PDC and BDC share Windows client requests for domain login and other directory and authentication services. If the Mac OS X Server PDC becomes unavailable, the Mac OS X Server BDC automatically provides domain login and other directory and authentication services.
The BDC has a synchronized copy of the PDC’s user, group, computer, and other directory data. The PDC and BDC have also have synchronized copies of authentication data. Mac OS X Server automatically synchronizes the directory and authentication data.
Chapter 1 Overview of Windows Services 15

16
Before setting up Mac OS X Server as a BDC, you must set up the server as an Open Directory replica. The BDC uses the read-only LDAP directory, Kerberos KDC, and Password Server of the Open Directory replica. Mac OS X Server synchronizes the PDC and BDC by automatically updating the Open Directory replica with changes made to the Open Directory master. For more information and instructions on setting up Open Directory replicas, see the Open Directory administration guide.
You use Server Admin after installation to make Mac OS X Server an Open Directory replica and BDC. You can set up multiple BDCs, each on a separate Open Directory replica server.
It is important that duplicate PDCs not be present on the network.
Providing Home Directories and Roaming User ProfilesIf you set up a Mac OS X Server system as a Windows PDC, you can set up another Mac OS X Server system to provide home directories for Windows users. Normally the PDC server stores users’ roaming profile data, but you can also have another Mac OS X Server system store the user profile data for any users. If you have only one Mac OS X Server system, it can be the PDC and host home directories and roaming user profiles.
Each Windows user who logs in to the PDC or a BDC has a network home directory. If a user puts files or folders in his or her home directory, the user can access them after logging in to the PDC or BDC from any Windows workstation that has joined the domain. The user also has access to the contents of his or her home directory after logging in to a Mac OS X computer. The user has the same network home directory whether logging in to a Windows computer or a Mac OS X computer.
A user’s network home directory is located in a Mac OS X Server share point. A setting in the user account specifies which share point the home directory is in. You can manage home directories with Workgroup Manager.
With roaming profiles, each user has the same profile when he or she logs in to the domain from any Windows workstation on the network. A roaming profile stores a Windows user’s preference settings (screensaver, colors, backgrounds, event sounds, and so on), favorites, My Documents folder, and more in a share point on a Mac OS X Server. A user’s roaming profile is stored by default in a predetermined folder on the PDC, and BDCs have an up-to-date copy of this folder.
Chapter 1 Overview of Windows Services

Providing Windows Services as a Domain MemberIf you have Mac OS X Server systems that are neither PDC nor BDC, you can set them up to provide additional Windows services as members of a Windows domain. Mac OS X Server can be a member of the Windows NT-compatible domain of a Mac OS X Server PDC, or it can be a member of the Active Directory domain of a Windows 2000 or 2003 server.
As a Windows domain member, Mac OS X Server’s Windows services use the domain controller for user identification and authentication. Home directories and roaming user profiles of Windows users can be located in share points on servers that are members of the PDC Windows domain.
Providing File, Print, Browsing, and Name Resolution ServicesWhether you set up a PDC or not, you can set up Mac OS X Server to provide other services to Windows users. Starting Windows services on Mac OS X Server enables it to provide access to share points via the Windows standard protocol for file service, Server Message Block/Common Internet File System (SMB/CIFS). Windows services also enable Mac OS X Server to provide SMB/CIFS access to print queues that have been set up for PostScript printers.
In addition, you can set up Mac OS X Server to provide a WINS server or to register with an existing WINS server on the network. A WINS server resolves NetBIOS names to IP addresses for Windows clients.
Mac OS X Server can also provide network browsing service as a workgroup master browser or a Windows domain master browser for Windows clients. A workgroup master browser enables Windows computers to discover servers on one subnet. A domain master browser enables Windows computers to discover servers across subnets. Windows users browse for discovered servers in the My Network Places window (Windows XP and 2000) or the Network Neighborhood window (Windows 95, 98, or ME).
Providing VPN ServiceThe Mac OS X Server virtual private network (VPN) service can include Windows workstations as well as Mac OS X computers. The workstations connect to the server by a private link of encrypted data, simulating a local connection as if the remote computer were attached to the local area network (LAN).
Mac OS X Server VPN uses Microsoft’s Challenge Handshake Authentication Protocol version 2 (MS-CHAPv2) for authentication. MS-CHAPv2 is also the standard Windows authentication scheme for VPN.
Chapter 1 Overview of Windows Services 17

18
You can set up VPN service in Mac OS X Server to use the Windows standard protocol for encrypted transport of VPN data, which is point-to-point tunneling protocol (PPTP). You can also set up Mac OS X Server VPN service to use an additional protocol, layer two tunneling protocol, secure Internet protocol (L2TP/IPSec).
See the VPN chapter of the network services administration guide for additional information.
Providing Windows Services on a Server With Multiple Network InterfacesOn a server with multiple network interfaces, Mac OS X Server makes Windows services available over all interfaces.
Ensuring the Best Cross-Platform ExperienceMac OS and Windows computers store and maintain files differently. For the best user experience:• Set up at least one share point to be used only by your Windows users. See
“Managing SMB/CIFS Share Points” on page 55.• Use comparable versions of application software on both platforms.• Modify files only with the application they were created in.• Don’t use symbols or characters with accents in the names of shared items.
Tools for Managing Windows ServicesThe Workgroup Manager, Server Admin, and Directory Access applications provide a graphical interface for managing Windows services in Mac OS X Server. In addition, you can manage Windows services from the command line by using Terminal.
These applications are included with Mac OS X Server and can be installed on another computer with Mac OS X v10.4 or later, making that computer an administrator computer. For more information on setting up an administrator computer, see the server administration chapter of the getting started guide.
Chapter 1 Overview of Windows Services

Server AdminThe Server Admin application provides access to tools you use to set up, manage, and monitor Windows services and other services. You use Server Admin to: • Set up Mac OS X Server as a PDC, as a BDC, as a Windows domain member, or for
standalone Windows services. For instructions, see Chapter 2.• Manage Windows PDC and BDCs, file and print services, WINS name resolution, and
Windows domain browsing. For instructions, see Chapter 4. • Monitor Windows services. For instructions, see Chapter 4.• Set up password policies that apply to all users who don’t have overriding individual
password policies. (To set up individual password policies, use Workgroup Manager.) For instructions, see the Open Directory administration guide.
See the chapter on server administration in the getting started guide for basic information about using Server Admin, including:• Opening and authenticating in Server Admin• Working with specific servers• Administering services• Using SSL for remote server administration• Customizing the Server Admin environment
Server Admin is installed in /Applications/Server/.
Workgroup ManagerThe Workgroup Manager application provides comprehensive management of clients of Mac OS X Server. You use Workgroup Manager to:• Set up and manage user accounts, group accounts, and computer lists. For
instructions, see Chapter 3 of this guide and the chapters on user accounts, group accounts, and computer lists in the user management guide. For instructions on managing user authentication, see the Open Directory administration guide.
• Manage share points for file service and for user home directories and roaming user profiles. For instructions, see Chapter 3 of this guide and the chapter on share points in the file services administration guide.
• Work with the Inspector to view or edit directory entries in raw form. For instructions, see the Open Directory administration guide.
See the chapter on server administration in the getting started guide for basic information about using Workgroup Manager including:• Opening and authenticating in Workgroup Manager• Administering accounts• Customizing the Workgroup Manager environment
Workgroup Manager is installed in /Applications/Server/.
Chapter 1 Overview of Windows Services 19
20
Directory AccessDirectory Access determines how Mac OS X Server (or any Mac OS X computer) uses directory services, discovers network services, and searches directory services for authentication and contacts information. You use Directory Access to:• Configure access to LDAP directories, an Active Directory domain, and other kinds of
directory domains.• Define policies for searching multiple directory services for authentication and
contact information.• Enable or disable kinds of directory services and kinds of network service discovery.
Directory Access can connect to other servers on your network so you can configure them remotely.
For instructions on using Directory Access, see the Open Directory administration guide.
Directory Access is installed on every Mac OS X computer in /Applications/Utilities/.
Command-Line ToolsA full range of command-line tools is available for administrators who prefer to use command-driven server administration. For remote server management, submit commands in a Secure Shell (SSH) session. You can type commands on Mac OS X servers and computers using the Terminal application, located in /Applications/Utilities/. For instructions, see the command-line administration guide.
Chapter 1 Overview of Windows Services

2
2 Setting Up Windows ServicesMac OS X Server is ready out-of-the-box to provide standalone Windows file and print services. You can also make it a primary domain controller, domain member, or backup domain controller.
Mac OS X Server can provide several native services to Windows clients:• Domain login. Allows each user to log in using the same user name, password,
roaming profile, and network home directory on any Windows computer capable of logging in to a Windows NT domain.
• File service. Allows Windows clients to access files stored in share points on the server using Server Message Block/Common Internet File System (SMB/CIFS) protocol over TCP/IP.
• Print service. Allows Windows clients to print to PostScript printers with print queues on the server.
• Windows Internet Naming Service (WINS). Allows clients to resolve NetBIOS names and IP addresses across multiple subnets.
• Windows domain browsing. Allows clients to browse for available servers across subnets.
You set up Windows services by configuring four groups of settings:• General. Specify the server’s role in providing Windows services and the server’s
identity among clients of its Windows services.• Access. Limit the number of clients and control guest access.• Logging. Choose how much information is recorded in the service log.• Advanced. Configure WINS registration and domain browsing services; choose a
code page for clients; and control virtual share points for home directories.
Because the default settings work well if you want to provide only Windows file and print services, you may need only to start Windows services. Nonetheless, you should take a look at the settings and change anything that isn’t appropriate for your network.
21

22
You will have to change some settings if you want to set up Mac OS X Server as the PDC, a BDC, a member of the Windows domain of Mac OS X Server PDC, or a member of an Active Directory domain of a Windows server.
Your Windows client computers will also need to be configured to access the Windows services of Mac OS X Server as described at the end of this chapter, especially if users will be logging in to the Windows domain.
Besides setting up services and clients, you need to set up user accounts, group accounts, and share points as described in the next chapter.
Setting the Server’s Role and Identity for Windows ServicesYou can set up Mac OS X Server to assume any of four roles in providing Windows services:• Primary domain controller (PDC). The server hosts a Windows domain, storing user,
group, and computer records and providing authentication for domain login and other services. If no domain member server is available, the PDC server can provide Windows file and print services, and it can host user profiles and network home directories for users who have user accounts on the PDC.
• Backup domain controller (BDC). The server provides automatic failover and backup for the Mac OS X Server PDC. The BDC automatically handles authentication requests for domain login and other services as needed. The BDC can host user profiles and network home directories for users who have user accounts on the PDC.
• Domain member. The server provides Windows file and print services to users who log in to the Windows domain of a Mac OS X Server PDC or the Active Directory domain of a Windows server. A domain member can host user profiles and network home directories for users who have user accounts on the PDC or the Active Directory domain.
• Standalone Windows services. The server provides Windows file and print services to users with accounts in the server’s local directory domain. The server does not provide authentication services for Windows domain login on Windows computers. This is the default role.
Mac OS X Server can host a PDC only if the server is an Open Directory master, and can host a BDC only if the server is an Open Directory replica. For information on Mac OS X Server directory and authentication services, including Open Directory master and replicas, see the Open Directory administration guide.
Important: If your network has multiple Mac OS X Server systems, set up only one as a PDC. The others can be BDCs, domain members, or standalone Windows service providers.
Chapter 2 Setting Up Windows Services

Setting Up a Server of Standalone Windows ServicesUsing Server Admin, you can set up Mac OS X Server to provide standalone Windows services: file, print, browsing, and Windows Internet Name Service (WINS). The server isn’t a member of a Windows domain. The server provides authentication for its Windows file service, but doesn’t provide authentication services for Windows domain login on Windows computers.
To set up standalone Windows services:1 Open Server Admin and select Windows for a server in the Computers & Services list.
2 Click Settings (near the bottom of the window), then click General (near the top).
3 Choose Standalone Server from the Role pop-up menu, then enter a description (optional), computer name, and workgroup name.
• Description: This description appears in the My Network Places window of Windows XP and 2000 (the Network Neighborhood window of Windows 95, 98, or ME), and it is optional.
• Computer Name: Enter the name you want Windows users to see when they connect to the server. This is the server’s NetBIOS name. The name should contain no more than 15 characters, no special characters, and no punctuation. If practical, make the server name match its unqualified DNS host name. For example, if your DNS server has an entry for your server as “server.example.com,” give your server the name “server.”
• Workgroup: Enter a workgroup name. Windows users see the workgroup name in the My Network Place (or Network Neighborhood) window. If you have Windows domains on your subnet, use one of them as the workgroup name to make it easier for clients to communicate across subnets. Otherwise, consult your Windows network administrator for the correct name. The workgroup name cannot exceed 15 characters.
4 Click Save.
Warning: If a server is an Active Directory domain member and you change its Windows role to standalone, you won’t be able to make it an Active Directory domain member again easily. You’ll have to unbind the server from the Active Directory domain. Then you’ll have to configure access to the Active Directory domain and join the Active Directory Kerberos realm again. See the Open Directory administration guide for more information and instructions.
Chapter 2 Setting Up Windows Services 23

24
After setting up standalone Windows services, you may want to change access restrictions, logging detail level, code page, domain browsing, or WINS registration. Then if Windows services aren’t already running, you can start them. Instructions for these tasks are on page 29 through page 31. See: • “Changing Windows Services Access Settings” on page 29• “Changing Windows Services Logging Settings” on page 29• “Changing Windows Services Advanced Settings” on page 30• “Starting Windows Services” on page 31
From the Command LineYou can also set a server’s role in providing Windows services by using the serveradmin command in Terminal. For more information, see the file services chapter of the command-line administration guide.
Setting Up a Server as a Mac OS X Server PDC Domain MemberUsing Server Admin, you can set up Mac OS X Server to join a Windows domain hosted by a Mac OS X Server primary domain controller (PDC). A server that joins a Windows domain can provide file, print, and other services to users with accounts on the PDC. The domain member server gets authentication services from the PDC or a backup domain controller (BDC). The server can host user profiles and home directories for users who have user accounts on the PDC. The domain member server does not provide authentication services to other domain member servers.
To join Mac OS X Server to the Windows domain of a Mac OS X Server PDC:1 Open Server Admin and select Windows for a server in the Computers & Services list.
2 Click Settings (near the bottom of the window), then click General (near the top).
3 Choose Domain Member from the Role pop-up menu, then enter a description, computer name, and domain.
• Description: This description appears in the My Network Places window of Windows XP and 2000 (the Network Neighborhood window of Windows 95, 98, or ME), and it is optional.
• Computer Name: Enter the name you want Windows users to see when they connect to the server. This is the server’s NetBIOS name. The name should contain no more than 15 characters, no special characters, and no punctuation. If practical, make the server name match its unqualified DNS host name. For example, if your DNS server has an entry for your server as “server.example.com,” give your server the name “server.”
• Domain: Enter the name of the Windows domain that the server will join. The domain must be hosted by a Mac OS X Server PDC. The name cannot exceed 15 characters and cannot be “WORKGROUP.”
4 Click Save.
Chapter 2 Setting Up Windows Services

5 Enter the name and password of an LDAP directory administrator account, then click OK.
When authenticating, you must use an LDAP directory administrator account. You can’t use a local directory administrator account, such as the primary server administrator account (user ID 501), to join a Windows domain.
After setting up a Windows domain member, you may want to change access restrictions, logging detail level, code page, domain browsing, or WINS registration. Then if Windows services aren’t already running, you can start them. Instructions for these tasks are on page 29 through page 31. See: • “Changing Windows Services Access Settings” on page 29• “Changing Windows Services Logging Settings” on page 29• “Changing Windows Services Advanced Settings” on page 30• “Starting Windows Services” on page 31
From the Command LineYou can also set a server’s role in providing Windows services by using the serveradmin command in Terminal. For more information, see the file services chapter of the command-line administration guide.
Setting Up a Server as an Active Directory Domain MemberUsing Server Admin and Directory Access, you can set up Mac OS X Server to join an Active Directory domain hosted by a Windows 2000 or 2003 server. A server that joins an Active Directory domain can provide file, print, and other services to users with accounts in the Active Directory domain. The domain member server gets authentication services from Active Directory. The domain member server does not provide authentication services to other domain member servers.
To join Mac OS X Server to the Active Directory domain of a Windows server:1 Configure the server to access the Active Directory domain.
Open Directory Access, select Active Directory in the Services pane, then click Configure. Enter the DNS name of the Active Directory domain, edit the computer ID, and optionally set the advanced options. Then click Bind and authenticate as an Active Directory domain administrator. For detailed instructions, see the Open Directory administration guide.
2 Join the server to the Active Directory Kerberos realm.
Open Server Admin and select Open Directory for the server. In the Settings pane, click General, then click Join Kerberos. Choose the Active Directory Kerberos realm from the Realm pop-up menu and enter credentials for a local administrator on the server.
3 In Server Admin, select Windows for the server, click Settings, then click General.
4 Verify that the server is now a member of the Active Directory domain.
Chapter 2 Setting Up Windows Services 25

26
The description appears in the Network Places window on Windows computers, and it is optional.
After setting up an Active Directory domain member, you may want to change access restrictions, logging detail level, code page, domain browsing, or WINS registration. Then if Windows services aren’t already running, you can start them. Instructions for these tasks are on page 29 through page 31. See: • “Changing Windows Services Access Settings” on page 29• “Changing Windows Services Logging Settings” on page 29• “Changing Windows Services Advanced Settings” on page 30• “Starting Windows Services” on page 31
Setting Up a Server as a Primary Domain ControllerUsing Server Admin, you can set up Mac OS X Server as a Windows primary domain controller (PDC). The PDC hosts a Windows domain and provides authentication services to other domain members, including authentication for domain login on Windows workstations. If no domain member server is available, the PDC server can provide Windows file and print services, and it can host user profiles and home directories for users who have user accounts on the PDC.
Important: When setting up Mac OS X Server as a PDC, make sure your network doesn’t have another PDC with the same domain name. If you want to set up additional domain controllers, make them BDCs.
To set up a Windows PDC:1 Make sure the server is an Open Directory master.
To determine whether a server is an Open Directory master, open Server Admin, select Open Directory for the server in the Computers & Services list, then click Overview. The first line of status information states the server’s Open Directory role. Consult the Open Directory administration guide to learn more about an Open Directory master.
2 In Server Admin’s Computers & Services list, select Windows for the Open Directory master server.
3 Click Settings (near the bottom of the window), then click General (near the top).
4 Choose Primary Domain Controller (PDC) from the Role pop-up menu, then enter a description, computer name, and domain.
• Description: This description appears in the Network Places window on Windows computers, and it is optional.
Chapter 2 Setting Up Windows Services

• Computer Name: Enter the name you want Windows users to see when they connect to the server. This is the server’s NetBIOS name. The name should contain no more than 15 characters, no special characters, and no punctuation. If practical, make the server name match its unqualified DNS host name. For example, if your DNS server has an entry for your server as “server.example.com,” give your server the name “server.”
• Domain: Enter the name of the Windows domain that the server will host. The domain name cannot exceed 15 characters and cannot be “WORKGROUP.”
5 Click Save.
6 Enter the name and password of an LDAP directory administrator account, then click OK.
When authenticating, you must use an LDAP directory administrator account. You can’t use a local directory administrator account, such as the primary server administrator account (user ID 501), to create a PDC.
After setting up a PDC, you may want to change access restrictions, logging detail level, code page, domain browsing, or WINS registration. Then if Windows services aren’t already running, you can start them. Instructions for these tasks are on page 29 through page 31. See: • “Changing Windows Services Access Settings” on page 29• “Changing Windows Services Logging Settings” on page 29• “Changing Windows Services Advanced Settings” on page 30• “Starting Windows Services” on page 31
From the Command LineYou can also set a server’s role in providing Windows services by using the serveradmin command in Terminal. For more information, see the file services chapter of the command-line administration guide.
Setting Up a Server as a Backup Domain ControllerUsing Server Admin, you can set up Mac OS X Server as a Windows backup domain controller (BDC). The BDC provides automatic failover and backup of Windows domain login and other Windows client requests for authentication and directory services. The BDC server can provide other Windows services: file, print, browsing, and Windows Internet Name Service (WINS). The BDC can host home directories for users who have user accounts on the PDC/BDC.
Chapter 2 Setting Up Windows Services 27
28
To set up a Windows BDC:1 Make sure the server is an Open Directory replica.
To determine whether a server is an Open Directory master, open Server Admin, select Open Directory for the server in the Computers & Services list, then click Overview. The first line of status information states the server’s Open Directory role. Consult the Open Directory administration guide to learn more about an Open Directory master.
2 In Server Admin’s Computers & Services list, select Windows for the Open Directory replica server.
3 Click Settings (near the bottom of the window), then click General (near the top).
4 Choose Backup Domain Controller (BDC) from the Role pop-up menu, then enter a description, computer name, and domain.
• Description: This description appears in the Network Places window on Windows computers, and it is optional.
• Computer Name: Enter the name you want Windows users to see when they connect to the server. This is the server’s NetBIOS name. The name should contain no more than 15 characters, no special characters, and no punctuation. If practical, make the server name match its unqualified DNS host name. For example, if your DNS server has an entry for your server as “server.example.com,” give your server the name “server.”
• Domain: Enter the name of the Windows domain that the server will host. The domain name cannot exceed 15 characters and cannot be “WORKGROUP.”
5 Click Save.
6 Enter the name and password of a user account that can administer the LDAP directory on the server, then click OK.
When authenticating, you must use an LDAP directory administrator account. You can’t use a local directory administrator account, such as the primary server administrator account (user ID 501), to create a BDC.
After setting up a BDC, you may want to change access restrictions, logging detail level, code page, domain browsing, or WINS registration. Then if Windows services aren’t already running, you can start them. Instructions for these tasks are next: • “Changing Windows Services Access Settings” (next topic)• “Changing Windows Services Logging Settings” on page 29• “Changing Windows Services Advanced Settings” on page 30• “Starting Windows Services” on page 31
From the Command LineYou can also set a server’s role in providing Windows services by using the serveradmin command in Terminal. For more information, see the file services chapter of the command-line administration guide.
Chapter 2 Setting Up Windows Services

Changing Windows Services Access SettingsYou can use the Access pane of Windows services settings in Server Admin to allow anonymous Windows users or limit the number of simultaneous Windows client connections. You can also select the kinds of authentication Windows services accept: NTLMv2 and Kerberos, NTLMv1, and/or LAN Manager.
To configure Windows services access settings:1 Open Server Admin and select Windows in the Computers & Services list.
2 Click Settings (near the bottom of the window), then click Access (near the top).
3 To allow Windows or other SMB/CIFS users to connect for Windows file service without providing a user name or password, select “Allow Guest access.”
4 To limit the number of users who can be connected for Windows services at one time, select “__ maximum” and type a number in the field.
5 Select the kinds of authentication Windows users can use.
All Windows services can be authenticated using NTLMv2, NTLMv1, or LAN Manager. NTLMv2 is the most secure, but clients need Windows NT, Windows 98, or later to use it. LAN Manager is the least secure, but Windows 95 clients can use it.
6 Click Save.
From the Command LineYou can also change the Windows services settings by using the serveradmin command in Terminal. For more information, see the file services chapter of the command-line administration guide.
Changing Windows Services Logging SettingsYou can use the Logging pane of Windows services settings in Server Admin to specify how much information is recorded in the Windows log file.
To configure Windows services logging level:1 Open Server Admin and select Windows in the Computers & Services list.
2 Click Settings (near the bottom of the window), then click Logging (near the top).
3 Choose a level of log detail from the pop-up menu:
• Low records errors and warning messages only.• Medium records error and warning messages, service start and stop times,
authentication failures, and browser name registrations.• High records error and warning messages, service start and stop times,
authentication failures, browser name registrations, and all file access.
4 Click Save.
Chapter 2 Setting Up Windows Services 29
30
From the Command LineYou can also change Windows services settings using the serveradmin command in Terminal. For more information, see the file services chapter of the command-line administration guide.
Changing Windows Services Advanced SettingsYou can use the Advanced pane of Windows services settings in Server Admin to choose a client code page, set the server to be a workgroup or domain master browser, specify the server’s WINS registration, and enable virtual share points for user homes.
To configure Windows services Advanced settings:1 Open Server Admin and select Windows in the Computers & Services list.
2 Click Settings, then click Advanced.
3 Choose the character set you want clients to use from the Code Page pop-up menu.
4 Next to Services, choose whether to enable domain browsing services.
• Workgroup Master Browser provides discovery and browsing of servers in a single subnet.
• Domain Master Browser provides discovery and browsing of servers across subnets.
5 Next to WINS Registration, select how you want the server to register with WINS.
• “Off”: prevents your server from using or providing WINS for NetBIOS name resolution.
• “Enable WINS server”: your server provides NetBIOS name resolution service. This allows clients across multiple subnets to perform name/address resolution.
• “Register with WINS server”: your server will use an existing WINS service for NetBIOS name resolution. Enter the IP address or DNS name of the WINS server.
6 To simplify setting up share points for Windows user home directories, select “Enable virtual share points.”
• If you enable virtual share points, each user has the same network home directory whether logging in from a Windows workstation or a Mac OS X computer.
• If you disable virtual share points, you have to set up an SMB/CIFS share point for Windows home directories, and you have to configure each Windows user account to use this share point.
From the Command LineYou can also change Windows services settings using the serveradmin command in Terminal. For more information, see the file services chapter of the command-line administration guide.
Chapter 2 Setting Up Windows Services

Starting Windows ServicesYou can use Server Admin to start Windows services.
To start Windows services:1 Open Server Admin and select Windows in the Computers & Services list.
2 Click Start Service.
From the Command LineYou can also start Windows services using the serveradmin command in Terminal. For more information, see the file services chapter of the command-line administration guide.
Setting Up a Share Point for Windows AccessUsing Workgroup Manager, you can allow Windows clients to access an existing share point via the standard Windows file sharing protocol, Sever Message Block/Common Internet File System (SMB/CIFS). You can optionally allow or disallow Mac OS client access via Apple Filing Protocol (AFP), UNIX client access via Network File System (NFS), and mixed client access via File Transfer Protocol (FTP). Workgroup Manager enables sharing via SMB/CIFS, AFP, and FTP by default for every newly created share point.
To provide SMB/CIFS access to a share point:1 Open Workgroup Manager and click Sharing.
2 Click Share Points and select the share point that you want to configure.
3 Click Protocols (on the right) and choose Windows File Settings from the pop-up menu.
4 To provide SMB/CIFS access to the share point, select “Share this item using SMB.”
5 To allow unregistered users access to the share point, select “Allow SMB guest access.”
For greater security, don’t select this item.
6 To change the name that clients see when they browse for and connect to the share point using SMB/CIFS, type a new name in the “Custom SMB name” field.
Changing the custom SMB/CIFS name doesn’t affect the name of the share point itself, only the name that SMB/CIFS clients see.
7 Select “Enable strict locking” to have clients use standard file locks with a share point that’s also accessed by protocols other than SMB/CIFS.
Do not select “Enable oplocks” for a share point that’s using any protocol other than SMB/CIFS. For more information on oplocks, see “File Locking With SMB/CIFS Share Points” on page 56.
Chapter 2 Setting Up Windows Services 31

32
8 Choose a method for assigning default UNIX access permissions for new files and folders in the share point.
• To have new items adopt the permissions of the enclosing item, select “Inherit permissions from parent.”
• To assign specific permissions, select “Assign as follows” and use the Owner, Group, and Everyone pop-up menus.
9 To prevent AFP access to the share point, choose Apple File Settings from the pop-up menu and deselect “Share this item using AFP.”
10 To prevent FTP access to the share point, choose FTP Settings from the pop-up menu and deselect “Share this item using FTP.”
11 To prevent NFS access to the share point, choose NFS Export Settings from the pop-up menu and deselect “Export this item and its contents to.”
12 Click Save.
Windows services must be running to provide SMB/CIFS access to share points. For instructions, see “Starting Windows Services” on page 31.
For additional information, see “Managing SMB/CIFS Share Points” on page 55 and the share points chapter of the file services administration guide.
Setting Up a Print Queue for Windows AccessYou can allow Windows clients to access an existing print queue via the standard Windows protocol for printer sharing, SMB/CIFS. You use Server Admin to configure queues for shared printers on the server.
To provide SMB/CIFS access to a print queue:1 In Server Admin, select Print in the Computers & Services list.
2 Click Settings, then click Queues.
3 Select the print queue in the list, then click the Edit button (below the list).
If you don’t see the Queues button, at the top of the Settings pane, you might already be looking at queue settings. Click the Back button at the top of the pane (the left-pointing arrow in the upper right).
4 Make sure Sharing Name is compatible with SMB/CIFS sharing.
Changing the Sharing Name does not change the Printer Setup Utility queue name on the server.
Names of queues shared via SMB/CIFS should be 15 characters maximum and should not contain characters other than A–Z, a–z, 0–9, and _ (underscore).
5 Select “SMB.”
Chapter 2 Setting Up Windows Services

6 Click Save, then click the Back button (in the upper right).
Windows services must be running to provide SMB/CIFS access to print queues. For instructions, see “Starting Windows Services” on page 31.
Supporting Windows Client ComputersWindows XP, Windows 2000, and Windows NT 4.x computers can be set up to allow users to log in using PDC domain accounts of Mac OS X Server. These Windows computers as well as Windows ME, 98, and 95 computers can connect to Mac OS X Server for Windows file and print services.
Setting Up Windows Clients for TCP/IP NetworkingTo have access to Windows services, Windows client computers must be properly configured to connect over TCP/IP. See your Windows networking documentation for information on TCP/IP configuration.
Setting Up Windows XP for Domain LoginYou can enable domain login on a Windows XP computer by joining it to the Windows domain of a Mac OS X Server PDC. Joining the Windows domain requires the name and password of an LDAP directory administrator account.
You can delegate this task to someone with a local administrator account on the Windows computer. In this case, you may want to create a temporary LDAP directory administrator account with limited privileges. See the user management guide for instructions.
To join a Windows XP computer to a Windows domain:1 Log in to Windows XP using a local administrator account.
2 Open the Control Panel, then open System.
3 Click Computer Name, then click Change.
4 Enter a computer name, click Domain, enter the domain name of the Mac OS X Server PDC, and click OK.
If you need to look up the server’s domain name, use Server Admin on the server or an administrator computer. Select Windows in the Computers & Services list, click Settings, then click General.
5 Enter the name and password of an LDAP directory administrator and click OK.
Chapter 2 Setting Up Windows Services 33

34
Setting Up Windows 2000 for Domain LoginYou can enable domain login on a Windows 2000 computer by joining it to the Windows domain of a Mac OS X Server PDC. Joining the Windows domain requires the name and password of an LDAP directory administrator account.
You can delegate this task to someone with a local administrator account on the Windows computer. In this case, you may want to create a temporary LDAP directory administrator account with limited privileges. See the user management guide for instructions.
To join a Windows 2000 computer to a Windows domain:1 Log in to Windows 2000 using a local administrator account.
2 Open the Control Panel, then open System.
3 Click Network Identification, then click Properties.
4 Enter a computer name, click Domain, enter the domain name of the Mac OS X Server PDC, and click OK.
If you need to look up the server’s domain name, use Server Admin on the server or an administrator computer. Select Windows in the Computers & Services list, click Settings, then click General.
5 Enter the name and password of an LDAP directory administrator and click OK.
Connecting for File Service From WindowsWindows users can connect to the Windows file service of Mac OS X Server by using My Network Places in Windows XP or 2000 or the Network Neighborhood in Windows 95, 98, or ME. To connect this way, Windows users need to know the server’s Windows domain or workgroup. You can see the server’s domain or workgroup name in Server Admin by selecting Windows in the Computers & Services list, clicking Settings, then clicking General.
To connect to Windows file service from a Windows computer:1 On the Windows client computer, open My Network Places (Windows XP or 2000) or
the Network Neighborhood (Windows 95, 98, or ME). If you are in the same workgroup or domain as the server, skip to step 4.
2 Double-click the Entire Network icon.
3 Double-click the icon of the workgroup or domain the server is located in.
4 Double-click the server’s icon.
5 Authenticate using the short name and password of a user account accessible to the server.
The user account can be stored in the server’s local directory or another directory that the server is configured to access.
Chapter 2 Setting Up Windows Services

Connecting to the Server by Name or Address in Windows XPA Windows XP user can connect to Mac OS X Server for Windows file service without using My Network Places. This method requires knowing the server’s IP address or its Windows computer name (also known as its NetBIOS name).
To connect to Windows file service without using My Network Places:1 In Windows XP, click Start, click Search, click “Computers or people,” then click
“A computer on the network.”
2 Type the name or IP address of your Windows server and click Search.
3 Double-click the server to connect.
4 Authenticate using the short name and password of a user account accessible to the server.
The user account can be stored in the server’s local directory or another directory that the server is configured to access.
Connecting to the Server by Name or Address in Windows 2000A Windows 2000 user can connect to Mac OS X Server for Windows file service without using My Network Places. This method requires knowing the server’s IP address or its Windows computer name (also known as its NetBIOS name).
To connect to Windows file service without using My Network Places:1 In Windows 2000, click Start, click Search, then click “For Files or Folders.”
2 Click Computers (under “Search for other items”), then type the name or IP address of your Windows server and click Search.
3 Double-click the server to connect.
4 Authenticate using the short name and password of a user account accessible to the server.
The user account can be stored in the server’s local directory or another directory that the server is configured to access.
Connecting to the Server by Name or Address in Windows 95, 98, or MEA Windows 95, 98, or Millennium Edition (ME) user can connect to Mac OS X Server for Windows file service without using the Network Neighborhood. This method requires knowing the server’s IP address or its Windows computer name (also known as its NetBIOS name).
To connect to Windows file service without using the Network Neighborhood:1 In Windows 95, 98, or ME, click Start, click Find, then click Computer.
2 Type the name or IP address of your Windows server.
3 Double-click the server to connect.
Chapter 2 Setting Up Windows Services 35

36
4 Authenticate using the short name and password of a user account accessible to the server.
The user account can be stored in the server’s local directory or another directory that the server is configured to access.
Setting Up Windows Clients for Print ServiceTo enable printing by Windows users who submit jobs using SMB/CIFS, make sure Windows services are running and that one or more print queues are available for SMB/CIFS access.
All Windows computers—including Windows 95, Windows 98, Windows Millennium Edition (ME), Windows 2000, and Windows XP—support SMB/CIFS for using printers on the network. Windows 2000 and Windows NT also support LPR.
Note: Third-party LPR drivers are available for Windows computers that do not have built-in LPR support.
Windows users can use the Add Printer Wizard to connect to Mac OS X Server print queues. The wizard allows users to browse the network for a printer or to specify the printer’s address using the universal naming convention (UNC) format:
\\servername\printqueuename
where servername is the NetBIOS name of the PDC server or a Windows domain member server where you want the user share point stored; printqueuename is the sharing name assigned to the print queue on the server.
You can see the server’s NetBIOS name by opening Server Admin, clicking Windows in the Computers & Services list, clicking Settings, clicking General, and looking at the Computer Name field.
You can see the print queue’s sharing name by clicking Print in Server Admin’s Computers & Services list, clicking Settings, and clicking Queues. If you don’t see the Queues button, you might be looking at queue settings. The queue’s sharing name is also displayed in this pane.
Chapter 2 Setting Up Windows Services

3
3 Administering Windows Users, Groups, Computers, and Share PointsYou can manage accounts for Windows users, groups of Windows users, and a computer list account for Windows workstations. You can also manage SMB/CIFS share points.
User accounts, group accounts, computer lists, and share points play a fundamental role in a server’s day-to-day operations:• A user account stores data Mac OS X Server needs for authenticating Windows users
and providing Windows domain login, roaming user profiles, home directories, file service, mail service, and so on.
• A group account offers a simple way to control access to files and folders. A group account stores the identities of users who belong to the group.
• A computer list is a group of computers that are available to the same users and groups. The Windows Computers list includes the Windows workstations that have joined the Windows domain of the primary domain controller (PDC)—they are the Windows computers that can be used to log in to the Windows domain of the Mac OS X Server PDC.
• A share point is a folder, hard disk, or hard disk partition that you make accessible over the network.
To make Windows services usable, Mac OS X Server needs to have accounts for Windows users, groups, and workstations. The server also needs share points for Windows services.
Setup OverviewFollowing is a summary of the major tasks you perform to set up users, groups, computers, and share points for Windows services. See the pages indicated for detailed information about each step.
37

38
Step 1: Set up share points (optional)You share folders and volumes with users on the network by designating them as share points. On a server that is the PDC or a BDC, share points are created automatically for roaming user profiles and home directories. You can set up alternate share points for home directories and user profiles on a PDC server or a domain member server. Additionally, you can set up other share points for files and folders that Windows users need to share. See “Managing SMB/CIFS Share Points” on page 55.
Step 2: Set up user accountsEach Windows user who will log in to the Windows domain must have a user account in the PDC server’s LDAP directory. A user who will not log in to the Windows domain but will use Windows file service or mail service must also have a user account in a directory domain that’s included in the server’s search policy. The server’s search policy always includes its local directory and may include shared directory domains as well. See “Managing Accounts for Windows Users” (next topic).
Step 3: Join workstations to the Windows domainIf Windows workstations will be used for Windows domain login, they must join the Windows domain. You can set up Windows workstations to join the Mac OS X Server PDC just as you would set up workstations to join a Windows NT server’s domain. For example, in Windows 2000 Professional or Windows XP Professional, you could use the Network Identification Wizard.
When a Windows workstation joins the Windows domain of a Mac OS X Server PDC, the PDC automatically adds the workstation to the server’s computer list named Windows Computers. You can also add workstations to this computer list by using Workgroup Manager. See “Managing the Windows Computer List” on page 54.
Step 4: Set up group accounts for Windows users (optional)Create group accounts for controlling access to shared folders and files. You can set up access control lists (ACLs) and other access privileges to restrict a group’s access to particular folders or files. You don’t have to create new group accounts if you have existing groups that are suitable for Windows users. See “Managing Groups for Windows Users” on page 53.
Managing Accounts for Windows UsersA user account stores the data Mac OS X Server needs to validate a user’s identity and provide services for the user, such as access to particular files on the server. If the user account resides on a server that is a primary domain controller (PDC), the user account also enables someone using a Windows computer to log in to the Windows domain.
The same user account can be used to log in to a Mac OS X computer.
Chapter 3 Administering Windows Users, Groups, Computers, and Share Points

Where Windows User Accounts Are StoredFor Windows file service and other services, user accounts can be stored in any directory domain accessible from the server that needs to authenticate users for a service. To be used for Windows domain login from a Windows computer, a user account must be stored in the LDAP directory of the Mac OS X Server that is the primary domain controller (PDC), or in the copy of this LDAP directory on a backup domain controller (BDC).
A Windows user account that is not stored in the PDC server’s LDAP directory can be used to access other services. For example, Mac OS X Server can authenticate users with accounts in the server’s local directory for the server’s Windows file service. Mac OS X Server can also authenticate users with accounts on other directory systems, such as an open Directory master on another Mac OS X Server system or Active Directory on a Windows server.
See the Open Directory administration guide for complete information about the different kinds of directory domains.
Creating Windows User Accounts for a PDC ServerYou can use Workgroup Manager to create user accounts on a Mac OS X Server primary domain controller (PDC). Windows users with accounts on the PDC server can log in to the Windows domain from a Windows workstation. These user accounts can also be used for authenticating to Windows file service and other services. These accounts can also be used to log in to Mac OS X computers on the network.
When you create user accounts on the Mac OS X Server PDC, you create them in the server’s LDAP directory. You need administrator privileges for the LDAP directory to create user accounts in it.
You can create user accounts in the Mac OS X Server PDC’s LDAP directory, but not in a BDC’s read-only LDAP directory. If you have a BDC, the PDC server automatically replicates the new accounts to the BDC.
To create a user account on the PDC server:1 In Workgroup Manager, click Accounts, then click the User button.
2 Open the PDC server’s LDAP directory and authenticate as an administrator of the directory.
To open the LDAP directory, click the small globe icon above the list of users and choose from the pop-up menu.
To authenticate, click the lock icon and enter the name and password of a directory administrator whose password type is Open Directory so you can create users with this password type. Users must have Open Directory passwords for Windows domain login.
3 Choose Server > New User or click New User in the toolbar.
Chapter 3 Administering Windows Users, Groups, Computers, and Share Points 39

40
4 Specify settings for the user in the panes provided.
Instructions for these panes are on page 42 through page 51: • “Working With Basic Settings for Windows Users” on page 42 • “Working With Windows Settings for Users” on page 43• “Working With Advanced Settings for Windows Users” on page 47• “Working With Group Settings for Windows Users” on page 48• “Setting Up a Home Directory for a Windows User” on page 49• “Working With Mail Settings for Windows Users” on page 51• “Working With Print Quota Settings for Windows Users” on page 51• “Working With Info Settings for Windows Users” on page 51
You can also use a preset or an import file to create a new user. For details, see the user management guide.
Creating User Accounts for a Windows Standalone ServerYou can use Workgroup Manager to create Windows user accounts in a Mac OS X Server local directory for authenticating users of Windows file service mail service, and other platform-neutral services. User accounts in a server’s local directory can be used only to authenticate for services provided by that server. User accounts in the server’s local directory can’t be used for Windows domain login. Nor can these accounts be used to log in to a Mac OS X client computer.
If a Windows standalone server is configured to access an Open Directory master’s LDAP directory, you can also create user accounts in the master’s LDAP directory. Windows users can use these accounts to authenticate for Windows file service and other services provided by the Windows standalone server. These accounts can also be used by Mac OS X clients for login and other services.
To create a user account in a local or connected directory:1 Ensure that the Mac OS X Server for which you’re creating user accounts has been
configured to access the directory system where the user records will be stored.
Mac OS X Server can always access its own local directory. If you need to configure access to another server’s LDAP directory, use Directory Access. See the Open Directory administrator’s guide for instructions.
2 In Workgroup Manager, click Accounts, then click the User button.
3 Open the directory in which you want to create user accounts, and authenticate as an administrator of the directory.
To open a directory, click the small globe icon above the list of users and choose from the pop-up menu.
Chapter 3 Administering Windows Users, Groups, Computers, and Share Points

To authenticate, click the lock icon and enter the name and password of an administrator of the directory. Authenticate as an administrator whose password type is shadow password or Open Directory so you can create user accounts with the same password type. Users must have one of these password types to authenticate for Windows file service.
4 Choose Server > New User or click New User in the toolbar.
5 Specify settings for the user in the panes provided.
Instructions for these panes are on page 42 through page 51: • “Working With Basic Settings for Windows Users” on page 42 • “Working With Windows Settings for Users” on page 43• “Working With Advanced Settings for Windows Users” on page 47• “Working With Group Settings for Windows Users” on page 48• “Setting Up a Home Directory for a Windows User” on page 49• “Working With Mail Settings for Windows Users” on page 51• “Working With Print Quota Settings for Windows Users” on page 51• “Working With Info Settings for Windows Users” on page 51
You can also use a preset or an import file to create a new user. For details, see the user management guide.
Editing Windows User AccountsYou can use Workgroup Manager to change the password, password policy, and other settings in accounts of Windows users. The user accounts can reside in a server’s local directory, a Mac OS X Server PDC’s LDAP directory, or another directory system that allows read-write access (not read-only access) such as an Open Directory master’s LDAP directory or Active Directory on a Windows server.
You can change the user account settings in the Mac OS X Server PDC’s LDAP directory, but not in a BDC’s read-only LDAP directory. If you have a BDC, the PDC server automatically replicates the changes to the BDC.
To make changes to a user account:1 Ensure that the directory services of the Mac OS X Server or administrator computer
you’re using has read-write access to the directory containing the user records you want to edit.
Mac OS X Server can always access its own local directory. A server that is a PDC can access its own LDAP directory. To configure access to another server’s LDAP directory, Active Directory, or another read-write directory, use Directory Access. See the Open Directory administrator’s guide for instructions.
2 In Workgroup Manager, click Accounts, then click the User button.
3 Open the directory in which you want to edit user accounts, and authenticate as an administrator of the directory.
Chapter 3 Administering Windows Users, Groups, Computers, and Share Points 41

42
To open a directory, click the small globe icon above the list of users and choose from the pop-up menu.
To authenticate, click the lock icon and enter the name and password of an administrator of the directory. For a Mac OS X Server local directory or LDAP directory, authenticate as an administrator whose password type is shadow password or Open Directory so you can edit user accounts with the same password type. Mac OS X Server user accounts must have one of these password types to authenticate for Windows services.
4 Select the account you want to edit.
5 Change settings for the user in the panes provided.
Instructions for these panes are next: • “Working With Basic Settings for Windows Users” (next topic)• “Working With Windows Settings for Users” on page 43• “Working With Advanced Settings for Windows Users” on page 47• “Working With Group Settings for Windows Users” on page 48• “Setting Up a Home Directory for a Windows User” on page 49• “Working With Mail Settings for Windows Users” on page 51• “Working With Print Quota Settings for Windows Users” on page 51• “Working With Info Settings for Windows Users” on page 51
Working With Basic Settings for Windows UsersBasic settings are a collection of attributes that must be defined for all users. You work with basic settings in the Basic pane of a Workgroup Manager user account window. For detailed instructions on the following tasks, see the chapter on user accounts in the user management guide:• Defining long user names• Defining short names• Choosing stable short names• Avoiding duplicate names• Avoiding duplicate short names• Defining user IDs• Defining passwords• Setting password options for imported users• Assigning administrator rights for a server• Assigning administrator rights for a directory domain
You can change the user account settings in the Mac OS X Server PDC’s LDAP directory, but not in a BDC’s read-only LDAP directory. If you have a BDC, the PDC server automatically replicates the changes to the BDC.
Chapter 3 Administering Windows Users, Groups, Computers, and Share Points

Working With Windows Settings for UsersA user account that can be used to log in to a Windows domain has settings for a Windows home directory, a roaming user profile, and a Windows login script. You can work with these settings in the Windows pane of a Workgroup Manager user account window.
You can change the user account settings in the Mac OS X Server PDC’s LDAP directory, but not in a BDC’s read-only LDAP directory. If you have a BDC, the PDC server automatically replicates the changes to the BDC.
To configure Windows settings for a user account:1 In Workgroup Manager, open the user account with which you want to work.
To open an account, click the Accounts button, and then click the small globe icon below the toolbar and open the directory where the user’s account resides. To edit the Windows settings, click the lock to be authenticated, and then select the user in the user list.
2 Click Windows and change the settings as needed.
For detailed instructions, see:• “Changing a Windows User’s Profile Location” (next)• “Changing a Windows User’s Login Script Location” on page 45• “Changing a Windows User’s Home Directory Drive Letter” on page 45• “Changing a Windows User’s Home Directory Location” on page 46
Changing a Windows User’s Profile LocationUsing Workgroup Manager, you can change where a Windows user’s profile settings are stored. The profile includes the user’s My Documents folder, favorites (web browser bookmarks), preference settings (such as backgrounds, event sounds), and more.
By default, user profiles are stored in /Users/Profiles/ on the PDC server. This is an SMB/CIFS share point, although it is not shown as a share point in Workgroup Manager.
You can designate a different location for a user profile. You can designate a share point on the PDC server or a Windows domain member server. The share point must be configured to use the SMB/CIFS protocol. See “Creating an SMB/CIFS Share Point and Setting Privileges” on page 56 for instructions.
Instead of a roaming profile stored in a share point on a server, you can designate the location of a local profile stored on the Windows computer.
Important: If you change the location of a user’s Windows roaming profile, you should copy the folders and files from the old location to the new one.
You set the user profile location for a user account in the Mac OS X Server PDC’s LDAP directory. If you have a BDC, the PDC server automatically replicates the changes to the BDC.
Chapter 3 Administering Windows Users, Groups, Computers, and Share Points 43

44
To change the Windows roaming profile location for a user account:1 In Workgroup Manager, open the user account whose profile location you want to
specify.
To open a user account in the PDC, click the small globe icon above the list of accounts and open the PDC server’s LDAP directory. If the directory is locked, click the lock to authenticate as an LDAP directory domain administrator. Then select the user in the account list.
2 Click Windows and enter the new profile location in the User Profile Path field.
• Leave this field blank to use the default share point for user profiles.• For a roaming profile stored in a different share point, enter the location of the share
point using the universal naming convention (UNC) format:\\servername\sharename\usershortname
For servername, substitute the NetBIOS name of the PDC server or a Windows domain member server where the share point is located. You can see the server’s NetBIOS name by opening Server Admin, clicking Windows in the Computers & Services list, clicking Settings, clicking General, and looking at the Computer Name field.
For sharename, substitute the name of the share point.
For usershortname, substitute the first short name of the user account you’re configuring.
• For a local profile stored on the Windows computer, enter the drive letter and folder path in UNC format as in this example:C:\Documents and Settings\juan
3 Click Save.
4 To preserve the user’s My Documents folder, preference settings, and so forth, copy the contents of the former profile location to the new profile location.
If you don’t copy the user’s profile settings, Windows will use default profile settings the next time the user logs in.
5 If the user’s computer has Windows 2000 Service Pack 4 or later, or Windows XP Service Pack 1 or later, it may need to be configured to allow loading user profiles that aren’t stored in the default share point for profiles.
For more information, see article 300257, “Windows Domain Member Servers Cannot Host Profiles,” on the AppleCare Search & Support website at:
www.info.apple.com/kbnum/n300257
Chapter 3 Administering Windows Users, Groups, Computers, and Share Points

Changing a Windows User’s Login Script LocationUsing Workgroup Manager, you can change the folder location of a user’s Windows login script within the /etc/netlogon/ folder on the PDC server.
You set the login script location for a user account in the Mac OS X Server PDC’s LDAP directory. If you have a BDC, the PDC server automatically replicates the changes to the BDC.
To change the Windows login script location for a user account:1 In Workgroup Manager, open the user account whose Windows login script location
you want to change.
To open a user account in the PDC, click the small globe icon above the list of accounts and open the PDC server’s LDAP directory. If the directory is locked, click the lock to authenticate as an LDAP directory domain administrator. Then select the user in the account list.
2 Click Windows and enter the new login script location in the Login Script field.
Enter the relative path to a login script within /etc/netlogon/ on the PDC server. For example, if an administrator places a script named setup.bat in /etc/netlogon/, the Login Script field should contain “setup.bat”.
3 Click Save.
Changing a Windows User’s Home Directory Drive LetterUsing Workgroup Manager, you can change the Windows drive letter that a user’s home directory is mapped to.
You set the home directory drive letter for a user account in the Mac OS X Server PDC’s LDAP directory. If you have a BDC, the PDC server automatically replicates the changes to the BDC.
To change the Windows home directory drive letter for a user account:1 In Workgroup Manager, open the user account whose Windows home directory drive
letter you want to change.
To open a user account in the PDC, click the small globe icon above the list of accounts and open the PDC server’s LDAP directory. If the directory is locked, click the lock to authenticate as an LDAP directory domain administrator. Then select the user in the account list.
2 Click Windows and choose a drive letter from the Hard Drive pop-up menu.
The default drive letter is H. Windows uses the drive letter to identify the mounted home directory.
3 Click Save.
Chapter 3 Administering Windows Users, Groups, Computers, and Share Points 45

46
Changing a Windows User’s Home Directory LocationUsing Workgroup Manager, you can change where a Windows user’s network home directory is stored. By default, the network home directory is the same for Windows as the Mac OS X, and its location is specified in Workgroup Manager’s Home pane.
You can designate a different location for a user’s network home directory. You can designate a share point on a Windows domain member server or the PDC server. The share point must be configured to use the SMB/CIFS protocol. See “Creating an SMB/CIFS Share Point and Setting Privileges” on page 56 for instructions.
Instead of a network home directory stored on a server, you can designate the location of a local home directory on the Windows computer.
Important: If you change the location of a Windows user’s home directory, you will need to copy the folders and files from the old location to the new one.
You set the home directory location for a user account in the Mac OS X Server PDC’s LDAP directory. If you have a BDC, the PDC server automatically replicates the changes to the BDC.
To change the Windows home directory location for a user account:1 In Workgroup Manager, open the user account whose Windows home directory
location you want to change.
To open a user account in the PDC, click the small globe icon above the list of accounts and open the PDC server’s LDAP directory. If the directory is locked, click the lock to authenticate as an LDAP directory domain administrator. Then select the user in the account list.
2 Click Windows and enter the new home directory location in the Path field.
• Leave Path blank to use the same home directory for Windows login and Mac OS X login. You can also specify this home directory by entering a UNC path that doesn’t include a share point:
\\servername\usershortname.
For servername, substitute the NetBIOS name of the PDC server or a Windows domain member server where the share point is located. You can see the server’s NetBIOS name by opening Server Admin, clicking Windows in the Computers & Services list, clicking Settings, clicking General, and looking at the Computer Name field.
For usershortname, substitute the first short name of the user account you’re configuring.
• To specify a different SMB/CIFS share point, enter a UNC path that includes the share point:
\\servername\sharename\usershortname
For sharename, substitute the name of the share point.
Chapter 3 Administering Windows Users, Groups, Computers, and Share Points
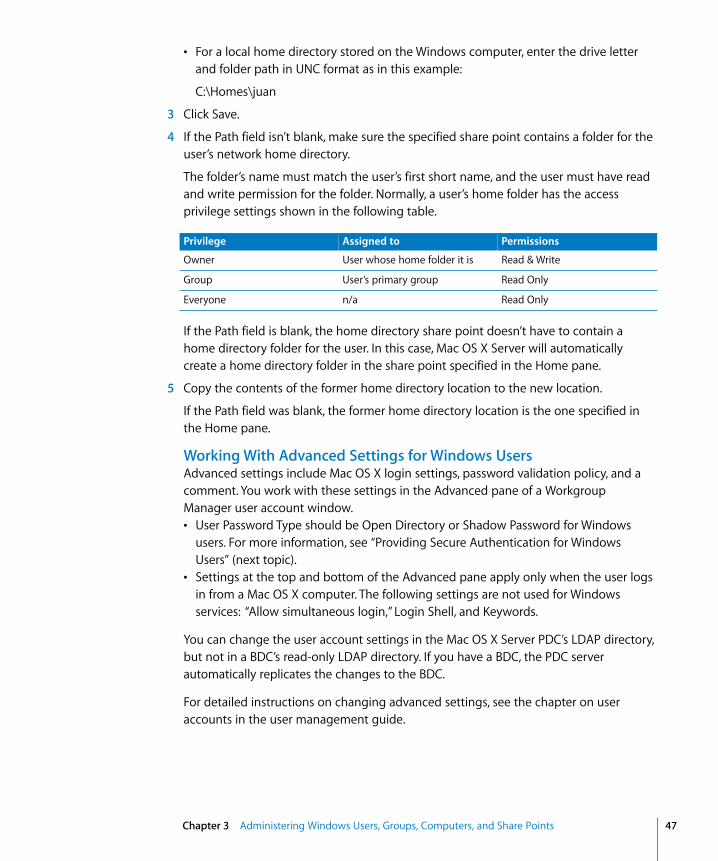
• For a local home directory stored on the Windows computer, enter the drive letter and folder path in UNC format as in this example:
C:\Homes\juan
3 Click Save.
4 If the Path field isn’t blank, make sure the specified share point contains a folder for the user’s network home directory.
The folder’s name must match the user’s first short name, and the user must have read and write permission for the folder. Normally, a user’s home folder has the access privilege settings shown in the following table.
If the Path field is blank, the home directory share point doesn’t have to contain a home directory folder for the user. In this case, Mac OS X Server will automatically create a home directory folder in the share point specified in the Home pane.
5 Copy the contents of the former home directory location to the new location.
If the Path field was blank, the former home directory location is the one specified in the Home pane.
Working With Advanced Settings for Windows UsersAdvanced settings include Mac OS X login settings, password validation policy, and a comment. You work with these settings in the Advanced pane of a Workgroup Manager user account window. • User Password Type should be Open Directory or Shadow Password for Windows
users. For more information, see “Providing Secure Authentication for Windows Users” (next topic).
• Settings at the top and bottom of the Advanced pane apply only when the user logs in from a Mac OS X computer. The following settings are not used for Windows services: “Allow simultaneous login,” Login Shell, and Keywords.
You can change the user account settings in the Mac OS X Server PDC’s LDAP directory, but not in a BDC’s read-only LDAP directory. If you have a BDC, the PDC server automatically replicates the changes to the BDC.
For detailed instructions on changing advanced settings, see the chapter on user accounts in the user management guide.
Privilege Assigned to Permissions
Owner User whose home folder it is Read & Write
Group User’s primary group Read Only
Everyone n/a Read Only
Chapter 3 Administering Windows Users, Groups, Computers, and Share Points 47

48
Providing Secure Authentication for Windows UsersMac OS X Server offers three types of secure passwords for Windows users:• Open Directory password• Shadow password• Crypt password with Authentication Manager enabled (a legacy technology)
Open Directory passwords are required for domain login from a Windows workstation to a Mac OS X Server PDC and can be used to authenticate for Windows file service. This type of password can be validated using many authentication methods including NTLMv2, NTLMv1, and LAN Manager. Open Directory passwords are stored in a secure database, not in user accounts.
Shadow passwords can’t be used for domain login, but they can be used for Windows file service and other services. This type of password can also be validated using NTLMv2, NTLMv1, and LAN Manager authentication methods. Shadow passwords are stored in secure files, not in user accounts.
A crypt password with Authentication Manager enabled provides compatibility for user accounts on a server that has been upgraded from Mac OS X Server version 10.1. After upgrading the server to Mac OS X Server version 10.4, these user accounts should be changed to use Open Directory passwords, which are more secure than the legacy Authentication Manager.
For more information on user authentication with Mac OS X Server, see the Open Directory administration guide.
Working With Group Settings for Windows UsersGroup settings identify the groups a user is a member of. You work with these settings in the Groups pane of a Workgroup Manager user account window. For detailed instructions on the following tasks, see the chapter on user accounts in the user management guide:• Defining a user’s primary group• Adding a user to groups• Removing a user from a group• Reviewing a user’s group memberships
You can change the user account settings in the Mac OS X Server PDC’s LDAP directory, but not in a BDC’s read-only LDAP directory. If you have a BDC, the PDC server automatically replicates the changes to the BDC.
Chapter 3 Administering Windows Users, Groups, Computers, and Share Points

Setting Up a Home Directory for a Windows UserUsing Workgroup Manager, you can set up a network home directory that will be mounted automatically when a Windows user logs in to a Windows domain. Normally, the same network home directory is also mounted automatically if the user logs in on a Mac OS X computer. You can set up separate home directories if you prefer.
You can create a home directory in any existing share point, or you can create the home directory in the /Users folder—a predefined share point. If you want to create a home directory in a new share point, create the share point first. The share point for a Windows home directory must be on a Windows domain member server or the PDC server and must be configured to use the SMB/CIFS protocol. See “Managing SMB/CIFS Share Points” on page 55 for instructions.
If the share point will be used for Mac OS X home directories, it must also use the AFP or NFS protocol and have a network mount record configured for home directories. For instructions on Mac OS X home directories, see the chapter on home directories in the user management guide.
You set the Windows home directory for a user account in the Mac OS X Server PDC’s LDAP directory. If you have a BDC, the PDC server automatically replicates the changes to the BDC.
To set up a home directory in an existing share point:1 In Workgroup Manager, open the user account for which you want to set up a home
directory.
To open an account, click the Accounts button, and then click the small globe icon below the toolbar and open the PDC’s LDAP directory. To edit the home directory information, click the lock to authenticate as an LDAP directory domain administrator. Then select the user in the user list.
2 If you want to use the same network home directory for Windows as for Mac OS X, click Home and specify the share point to use.
In the share points list, select /Users or the share point you want to use, then click Create Home Now.
If you want to select /Users but it isn’t listed, click the Add (+) button, and in the Home field, enter the path to the user’s home directory in the Home field and click OK. Enter the path as follows:
/Users/usershortname
For usershortname, substitute the first short name of the user account you’re configuring.
Chapter 3 Administering Windows Users, Groups, Computers, and Share Points 49

50
3 Click Windows and enter the home directory location in the Path field.
• Leave Path blank to use the same home directory for Windows login and Mac OS X login. You can also specify this home directory by entering a UNC path that doesn’t include a share point:
\\servername\usershortname.
For servername, substitute the NetBIOS name of the PDC server or a Windows domain member server where the share point is located. You can see the server’s NetBIOS name by opening Server Admin, clicking Windows in the Computers & Services list, clicking Settings, clicking General, and looking at the Computer Name field.
For usershortname, substitute the first short name of the user account you’re configuring.
• To specify a different SMB/CIFS share point, enter a UNC path that includes the share point:
\\servername\sharename\usershortname
For sharename, substitute the name of the share point.
4 Choose a drive letter from the Hard Drive pop-up menu.
The default drive letter is H. Windows uses the drive letter to identify the mounted home directory.
5 Click Save.
6 If the Path field isn’t blank, make sure the specified share point contains a folder for the user’s home directory.
The folder’s name must match the user’s first short name, and the user must have read and write permission for the folder. Normally, a user’s home folder has the access privilege settings shown in the following table.
If the Path field is blank, the home directory share point doesn’t have to contain a home directory folder for the user. In this case, Mac OS X Server will automatically create a home directory folder in the share point specified in the Home pane.
Privilege Assigned to Permissions
Owner User whose home folder it is Read & Write
Group User’s primary group Read Only
Everyone n/a Read Only
Chapter 3 Administering Windows Users, Groups, Computers, and Share Points

Working With Mail Settings for Windows UsersA Windows user can have a Mac OS X Server mail service account. You create a mail service account for a user by specifying mail settings for the user in the Mail pane of a Workgroup Manager user account window. For detailed instructions on the following tasks, see the chapter on user accounts in the user management guide:• Disabling a user’s mail service• Enabling mail service account options• Forwarding a user’s mail
To use a mail service account, the user simply configures a mail client to identify the user name, password, mail service, and mail protocol you specify in the Mail pane.
See the mail service administration guide for information about how to set up and manage Mac OS X Server mail service.
You can change the user account settings in the Mac OS X Server PDC’s LDAP directory, but not in a BDC’s read-only LDAP directory. If you have a BDC, the PDC server automatically replicates the changes to the BDC.
Working With Print Quota Settings for Windows UsersPrint quota settings associated with a user’s account define the ability of a user to print to accessible Mac OS X Server print queues for which print service enforces print quotas. The print service administration guide tells you how to set up quota-enforcing print queues.
You work with a user’s print quotas in the Print Quota pane of a user account window in Workgroup Manager:• By default, a user has access to none of the print queues that enforce print quotas.• You can allow a user access to all print queues that enforce quotas. • You can let a user print to specific print queues that enforce quotas.
For detailed instructions on working with print quota settings for users, see the chapter on user accounts in the user management guide.
You can change the user account settings in the Mac OS X Server PDC’s LDAP directory, but not in a BDC’s read-only LDAP directory. If you have a BDC, the PDC server automatically replicates the changes to the BDC.
Working With Info Settings for Windows UsersSome settings in the Info pane of a Workgroup Manager user account window are used by Mac OS X Server’s weblog and iChat services. Other settings in this pane can be used by client address book and email applications such as Mac OS X Mail and Address Book. For more information on these settings, see the chapter on user accounts in the user management guide and the collaboration services administration guide.
Chapter 3 Administering Windows Users, Groups, Computers, and Share Points 51

52
You can change the user account settings in the Mac OS X Server PDC’s LDAP directory, but not in a BDC’s read-only LDAP directory. If you have a BDC, the PDC server automatically replicates the changes to the BDC.
Defining a Windows Guest UserYou can set up Windows services and some other services to support anonymous users, who don’t have user accounts. These guest users can’t be authenticated because they don’t have user names and passwords. You do not have to create a user account of any kind to support guest users.
The following services can support guest access:• Windows file, print, browsing, and name resolution services (for setup information,
see “Allowing Guest Access for Windows Services” on page 67)• Apple file service (for setup information, see the file services administration guide)• FTP service (for setup information, see the file services administration guide)• Web service (for setup information, see the web technologies administration guide)
Users who connect to a server anonymously are restricted to files, folders, and websites with permissions accorded to Everyone.
Deleting a Windows User AccountYou can use Workgroup Manager to delete a user account from the LDAP directory of a Mac OS X Server PDC, a Mac OS X Server local directory, or another directory that’s configured for write access (not read-only access).
You can delete user accounts from the Mac OS X Server PDC’s LDAP directory, but not from a BDC’s read-only LDAP directory. If you have a BDC, the PDC server automatically replicates the changes to the BDC.
To delete a user account using Workgroup Manager:1 In Workgroup Manager, click the Accounts button, then click the User button.
2 Open the directory that contains the user account you want to delete, and authenticate as an administrator of the directory.
To open a directory, click the small globe icon above the list of users and choose from the pop-up menu. If the directory is locked, click the lock to authenticate as an LDAP directory domain administrator.
3 Select the account you want to delete, then choose Server > Delete Selected User or click Delete in the toolbar.
Disabling a Windows User AccountTo disable a Windows user account, you can:• Deselect the “User can access account” option in the Basic pane in Workgroup
Manager. For instructions, see “Working With Basic Settings for Windows Users” on page 42.
Chapter 3 Administering Windows Users, Groups, Computers, and Share Points
• Set a password policy that disables login. For instructions, see the user authentication chapter of the Open Directory administration guide.
• Delete the account. For instructions, see the previous task, “Deleting a Windows User Account.”
• Change the user’s password and don’t tell the user what it is. For instructions, see “Working With Basic Settings for Windows Users” on page 42.
Managing Groups for Windows UsersA group account offers a simple way to manage a collection of users with similar needs. A group account stores the identities of users who belong to the group and other information that applies only to Mac OS X users. Although some group information doesn’t apply to Windows users, you can add Windows users to groups that you create. A group can be assigned special access permissions to files and folders, as described in the file services administration guide.
Group accounts need to be stored in a directory domain accessible from the server that needs them. For services provided by a Mac OS X Server PDC or Windows domain member server, group accounts can be stored in the PDC’s LDAP directory. For services provided by an Active Directory domain member, group accounts can be stored in the Active Directory domain. For services provided by a Windows standalone server, group accounts can be stored in the server’s local directory domain. If a server is configured to access multiple directory domains, group accounts can be stored in any of them.
The procedures for managing group accounts are the same for groups whose members include Windows users as for groups that contain only Mac OS X users. You use Workgroup Manager to administer group accounts. For detailed instructions on the following tasks, see the chapter on group accounts in the user management guide:• Creating group accounts• Editing group account information• Adding users to a group• Removing users from a group• Naming a group• Defining a group ID• Deleting a group account
Working With Group Folder Settings for Windows GroupsIf you use the Group Folder pane in Workgroup Manager to set up a folder for members of a particular group, the group folder isn’t mounted automatically on Windows workstations when group members log in to the Windows domain. If the group folder’s share point is shared using SMB/CIFS, a Windows user can go to My Network Places (or Network Neighborhood) and access the contents of the group folder. For more information on group folders, see the chapter on group accounts in the user management guide.
Chapter 3 Administering Windows Users, Groups, Computers, and Share Points 53

54
Managing the Windows Computer ListEvery Windows computer that joins the Windows domain of a Mac OS X Server PDC must be part of the Windows Computers computer list. Each computer in the Windows Computers computer list has a computer record in the PDC’s LDAP directory. The computer record identifies the Windows computer by its NetBIOS name. The computer record for a Windows computer also contains information for authenticating the computer as a trusted workstation in the Windows domain. Mac OS X Server creates this information (a UID and a GID) for each computer you add to the Windows Computers list.
For general information on computer lists and adding computers to them, see the chapter on computer lists in the user management guide.
Adding Computers to the Windows Computers ListA Mac OS X Server PDC automatically adds a Windows computer to the server’s Windows Computers list when the computer joins the PDC’s Windows domain, but you can also use Workgroup Manager to add computers to the PDC server’s computer list for Windows computers list.
You can add computers directly to the Windows Computers computer list on a PDC server but not on a BDC server. If you have a BDC, the PDC server automatically replicates the changes to the BDC.
To add computers to the Windows Computer list:1 In Workgroup Manager, click Accounts, then click the Computer Lists button.
2 Open the PDC server’s LDAP directory and authenticate as a directory administrator.
To open the PDC server’s LDAP directory, click the small globe icon above the accounts list and choose from the pop-up menu. If the directory is locked, click the lock and enter the name and password of an LDAP directory administrator.
3 Click List, then select Windows Computers.
4 Click the Add (+) button, enter the computer’s NetBIOS name and an optional description, and click Add.
The computer name you enter must end with a dollar sign ($).
5 Click Save.
6 Continue adding computers until your list is complete.
Removing Computers From the Windows Computers ListUsing Workgroup Manager, you can remove one or more computers from the Windows Computers computer list of a Mac OS X Server PDC. When you delete a computer from the Windows Computers list, the computer can no longer be used for logging in to the Windows domain.
Chapter 3 Administering Windows Users, Groups, Computers, and Share Points

You can remove computers from the Windows Computers computer list on a PDC server but not on a BDC server. If you have a BDC, the PDC server automatically replicates the changes to the BDC.
To remove computers from the Windows Computer list:1 In Workgroup Manager, click Accounts, then click the Computer Lists button.
2 Open the PDC server’s LDAP directory and authenticate as a directory administrator.
To open the LDAP directory, click the small globe icon above the accounts list and choose from the pop-up menu. If the directory is locked, click the lock and enter the name and password of an LDAP directory administrator.
3 Click List, then select Windows Computers.
4 In the List pane, select one or more computers that you want to remove.
To select multiple computers, Command-click or Shift-click in the list.
5 Click the Delete button (–), then click Save.
Changing Information About a Computer in the Windows Computers ListIf you want to change the name or description of a computer in the Windows Computers computer list, use Workgroup Manager to remove the computer and then add the computer back with the revised information.
Moving a Windows Computer to a Different Computer ListYou cannot move a Windows computer from the Windows Computers list to a different computer list. Windows computers must be part of the Windows Computers list, and computers cannot belong to more than one computer list.
Deleting the Windows Computers ListThe Windows Computers list cannot be deleted.
Managing SMB/CIFS Share PointsShare points for Windows home directories and roaming user profiles are set up automatically on a Mac OS X Server primary domain controller (PDC) and backup domain controller (BDC), but you can set up other share points. Windows uses the Server Message Block/Common Internet File System (SMB/CIFS) protocol to access share points.
The default share point for Windows home directories is the same as the share point for Mac OS X home directories. The default share point for user profiles is the /Users/Profiles/ folder on the PDC server and BDC servers. (This SMB/CIFS share point is not shown in Workgroup Manager.) You can set up alternate SMB/CIFS share points for home directories and user profiles on the PDC server or on domain member servers.
Chapter 3 Administering Windows Users, Groups, Computers, and Share Points 55

56
You can set up additional share points for exclusive or nonexclusive use of Windows users. For example, you could set up a share point where Windows and Mac OS users save shared graphics or word processing files that can be used on either platform. Conversely, you could set up a share point for SMB/CIFS access only, so that Windows users have a network location for files that can’t be used on other platforms.
For an overview of share points, including a discussion of issues you may want to consider before creating them, see the share points chapter in the file services administration guide.
File Locking With SMB/CIFS Share PointsIt’s normally the responsibility of a client application to see if a file is locked before it tries to open it. A poorly written application may fail to check for locks, and could corrupt a file already being used by someone else.
Strict locking, which is enabled by default, helps prevent this. When strict locking is enabled, the SMB/CIFS server itself checks for and enforces file locks.
SMB/CIFS share points in Mac OS X Server support the improved performance offered by opportunistic locking (“oplocks”).
In general, file locking prevents multiple clients from modifying the same information at the same time; a client locks the file or part of the file to gain exclusive access. Opportunistic locking grants this exclusive access but also allows the client to cache its changes locally (on the client computer) for improved performance.
To enable oplocks, you change the Windows protocol settings for a share point using Workgroup Manager. For instructions, see “Changing Windows Settings for a Share Point” on page 59.
Important: Do not enable oplocks for a share point that’s using any protocol other than SMB/CIFS.
Creating an SMB/CIFS Share Point and Setting PrivilegesYou use the Sharing module of Workgroup Manager to share volumes (including disks, CDs and DVDs), partitions, and individual folders by setting up share points. When you create a share point, you can configure it to be shared using any combination of the AFP, FTP, SMB/CIFS, and NFS protocols. You can also set privileges in access control lists (ACLs) for the share point and folders in it.
Note: Don’t use a slash (/) in the name of a folder or volume you plan to share. Users trying to access the share point might have trouble seeing it.
Chapter 3 Administering Windows Users, Groups, Computers, and Share Points
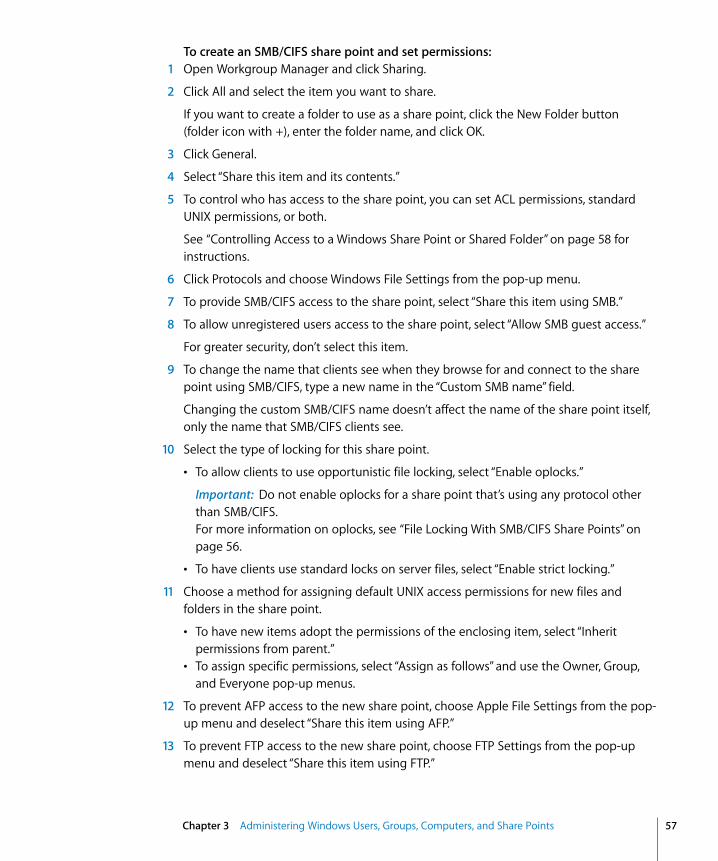
To create an SMB/CIFS share point and set permissions:1 Open Workgroup Manager and click Sharing.
2 Click All and select the item you want to share.
If you want to create a folder to use as a share point, click the New Folder button (folder icon with +), enter the folder name, and click OK.
3 Click General.
4 Select “Share this item and its contents.”
5 To control who has access to the share point, you can set ACL permissions, standard UNIX permissions, or both.
See “Controlling Access to a Windows Share Point or Shared Folder” on page 58 for instructions.
6 Click Protocols and choose Windows File Settings from the pop-up menu.
7 To provide SMB/CIFS access to the share point, select “Share this item using SMB.”
8 To allow unregistered users access to the share point, select “Allow SMB guest access.”
For greater security, don’t select this item.
9 To change the name that clients see when they browse for and connect to the share point using SMB/CIFS, type a new name in the “Custom SMB name” field.
Changing the custom SMB/CIFS name doesn’t affect the name of the share point itself, only the name that SMB/CIFS clients see.
10 Select the type of locking for this share point.
• To allow clients to use opportunistic file locking, select “Enable oplocks.”
Important: Do not enable oplocks for a share point that’s using any protocol other than SMB/CIFS. For more information on oplocks, see “File Locking With SMB/CIFS Share Points” on page 56.
• To have clients use standard locks on server files, select “Enable strict locking.”
11 Choose a method for assigning default UNIX access permissions for new files and folders in the share point.
• To have new items adopt the permissions of the enclosing item, select “Inherit permissions from parent.”
• To assign specific permissions, select “Assign as follows” and use the Owner, Group, and Everyone pop-up menus.
12 To prevent AFP access to the new share point, choose Apple File Settings from the pop-up menu and deselect “Share this item using AFP.”
13 To prevent FTP access to the new share point, choose FTP Settings from the pop-up menu and deselect “Share this item using FTP.”
Chapter 3 Administering Windows Users, Groups, Computers, and Share Points 57

58
14 To prevent NFS access to the new share point, choose NFS Export Settings from the pop-up menu and deselect “Export this item and its contents to.”
15 Click Save.
From the Command LineYou can also set up a share point using the sharing command in Terminal. For more information, see the file services chapter of the command-line administration guide.
Controlling Access to a Windows Share Point or Shared FolderUsing Workgroup Manager, you can set privileges in access control lists (ACLs) and standard UNIX permissions for a share point or any folder in it. ACL permissions fully supersede the standard UNIX permissions for users who access a share point or folder using the SMB/CIFS or AFP protocols. Only the standard UNIX privileges affect users who access a share point or folder using the NFS protocol. The standard UNIX privileges are also known as POSIX permissions.
The ACLs for folders in Mac OS X Server share points are compatible with Windows XP ACL settings. A Windows XP user can use Windows Explorer to set ACL permissions of shared folders, and the changes will affect Windows, Mac OS X, and UNIX clients that access the folders.
To set access privileges for a share point or shared folder:1 Open Workgroup Manager and click Sharing.
2 If you want to set ACL permissions for a share point or folder, make sure ACLs are enabled for the volume on which the share point or folder is located.
To enable ACLs for a volume, click All, select the volume, select “Enable Access Control Lists on this volume,” and click Save.
3 Click Share Points and select the share point or folder you want to control access to.
If you want to create a folder in a share point, select the share point or a folder inside it, click the New Folder button (folder icon with +), enter the new folder name, and click OK.
4 Click Access.
5 Change the standard UNIX access privileges.
• To change the owner or group of the shared item, type a name or drag a name from the Users & Groups drawer.
To open the drawer, click Users & Groups. If you don’t see a recently created user or group, click Refresh. To change the autorefresh interval, choose Workgroup Manager > Preferences.
• Use the pop-up menus next to the fields to change the permissions for Owner, Group, and Everyone.
Chapter 3 Administering Windows Users, Groups, Computers, and Share Points

Everyone is any user who can log in to the file server: registered users and guests, alike.
6 Change the ACL permissions.
• To add an entry to the ACL, drag a name from the Users & Groups drawer.• To change an entry in the ACL, select it, click the Edit button (pencil shaped), and
change permission settings.
You can also change an entry’s type and permission level by choosing from the pop-up menus in the Type and Permission columns of the ACL.
• To remove an entry from the ACL, select it and click the Delete button (–).
7 (Optional) To apply access privileges of a share point or folder to all files and folders it contains, select the share point or folder, choose Propagate Permissions from the Action menu, then select what you want to propagate and click OK.
This overrides access privileges that other users may have set for the affected files and folders.
8 Click Save.
Changing Windows Settings for a Share PointYou can use Workgroup Manager to enable or disable access to a share point via the Sever Message Block/Common Internet File System (SMB/CIFS) protocol. You can also change the share point name that SMB/CIFS clients see; whether guest access is allowed; whether opportunistic locking is allowed; and you can set the default permissions for new files and folders in the share point.
To change the settings of an SMB/CIFS share point:1 Open Workgroup Manager and click Sharing.
2 Click Share Points and select the share point.
3 Click Protocols (on the right) and choose Windows File Settings from the pop-up menu.
4 To provide SMB/CIFS access to the share point, select “Share this item using SMB.”
5 To allow unregistered users access to the share point, select “Allow SMB guest access.”
For greater security, don’t select this item.
6 To change the name that clients see when they browse for and connect to the share point using SMB/CIFS, type a new name in the “Custom SMB name” field.
Changing the custom SMB/CIFS name doesn’t affect the name of the share point itself, only the name that SMB/CIFS clients see.
Chapter 3 Administering Windows Users, Groups, Computers, and Share Points 59

60
7 Select the type of locking for this share point.
• To allow clients to use opportunistic file locking, select “Enable oplocks.”
Important: Do not enable oplocks for a share point that’s using any protocol other than SMB/CIFS. For more information on oplocks, see “File Locking With SMB/CIFS Share Points” on page 56.
• To have clients use standard locks on server files, select “Enable strict locking.”
8 Choose a method for assigning default UNIX access permissions for new files and folders in the share point.
• To have new items adopt the permissions of the enclosing item, select “Inherit permissions from parent.”
• To assign specific permissions, select “Assign as follows” and use the Owner, Group, and Everyone pop-up menus.
9 Click Save.
For additional information, see the share points chapter of the file services administration guide.
From the Command LineYou can also change a share point’s SMB/CIFS settings using the sharing command in Terminal. For more information, see the file services chapter of the command-line administration guide.
Managing SMB/CIFS Share PointsFor information on typical day-to-day tasks you might perform after you have set up share points on your server, see the chapter on share points in the file services administration guide. It describes the following tasks:• Disabling a share point• Disabling a protocol for a share point• Viewing share points• Copying privileges to enclosed items• Viewing share point settings• Viewing a Share Point’s Path• Managing share point access privileges• Changing the protocols used by a share point• Changing NFS share point client scope• Allowing guest access to a share point• Setting up a drop box
For an explanation of share point and folder access privileges, see the file services administration guide.
Chapter 3 Administering Windows Users, Groups, Computers, and Share Points

4
4 Managing Windows ServicesYou can use Server Admin to start and stop Windows services, monitor them, change their server’s Windows identity, manage access to them, manage their logs, and change their advanced settings.
For management task descriptions and instructions, see:• “Starting and Stopping Windows Services” on this page• “Monitoring Windows Status, Logs, and Graphs” on page 62• “Managing Connections to Windows Services” on page 63• “Changing the Server’s Windows Identity” on page 64• “Managing Access to Windows Services” on page 66• “Managing PDC/BDC Replication” on page 68• “Managing Windows Services Logging” on page 68• “Managing Advanced Windows Services Settings” on page 69• “Enabling or Disabling Virtual Share Points” on page 71
Starting and Stopping Windows ServicesYou can start and stop Windows services.
Starting Windows ServicesYou can use Server Admin to start Windows services if they are stopped.
To start Windows services:1 Open Server Admin and select Windows in the Computers & Services list.
2 Click Start Service.
From the Command LineYou can also start Windows services by using the serveradmin command in Terminal. For more information, see the file services chapter of the command-line administration guide.
61

62
Stopping Windows ServicesYou can use Server Admin to stop Windows services.
Important: When you stop Windows services, connected users will lose any information they haven’t saved.
To stop Windows services:1 Open Server Admin and select Windows in the Computers & Services list.
2 Click Stop Service.
From the Command LineYou can also stop Windows services by using the serveradmin command in Terminal. For more information, see the file services chapter of the command-line administration guide.
Monitoring Windows Status, Logs, and GraphsYou can check the status of Windows services, view the Windows services logs, and see usage graphs.
Viewing Windows Services StatusYou can use Server Admin to see whether Windows services are running, check client connections, view logs, and more.
To view Windows services status:1 Open Server Admin and select Windows in the Computers & Services list.
2 Click Overview to see whether the service is running and how many users are connected.
3 Click Logs to see the Windows file service and name service logs.
• Use the Show pop-up menu to choose which log to view.• Enter some text in the Filter field and press return to show only lines containing the
text you entered.
4 Click Connections to see a list of the users currently connected to the Windows services.
The list includes the users’ names, IP addresses, and duration of connections. A button at the bottom of the pane lets you disconnect a user.
5 Click Graphs to see graphs of connected users or throughput.
Use the slider to adjust the time scale.
Chapter 4 Managing Windows Services

From the Command LineYou can also check Windows services status by using the serveradmin command in Terminal or by using the cat or tail command to view the log files in /var/log/samba. For more information, see the file services chapter of the command-line administration guide.
Viewing Windows Services LogsYou can use Server Admin to view the logs of Windows services.
To view Windows services logs:1 Open Server Admin and select Windows in the Computers & Services list.
2 Click Logs to see the Windows file service and name service logs.
3 Use the Show pop-up menu to choose which log to view.
4 Optionally, enter some text in the Filter field and press return to show only lines containing the text you entered.
From the Command LineYou can also view the logs of Windows services by using the cat or tail command in Terminal to view the log files in /var/log/samba. For more information, see the file services chapter of the command-line administration guide.
Viewing Windows Services GraphsYou can use Server Admin to view graphs of connected Windows users or the throughput of Windows services.
To view Windows services graphs:1 Open Server Admin and select Windows in the Computers & Services list.
2 Click Graphs to see graphs of connected users or throughput.
3 Use the slider to adjust the time scale.
Managing Connections to Windows ServicesYou can view a list of users who are currently connected for Windows services and disconnect users if necessary.
Viewing Windows Services ConnectionsYou can use Server Admin to see which users are connected to Windows services, and you can forcibly disconnect users.
Important: Users who are disconnected will lose unsaved work in open files.
Chapter 4 Managing Windows Services 63

64
To view Windows services connections:1 Open Server Admin and select Windows in the Computers & Services list.
2 Click Connections to see a list of the users currently connected to the Windows services.
The list includes the users’ names, IP addresses, and duration of connections.
A button at the bottom of the pane lets you disconnect a user.
From the Command LineYou can also check the number of connections to Windows services by using the serveradmin command in Terminal. For more information, see the file services chapter of the command-line administration guide.
Disconnecting Windows UsersYou can use Server Admin to forcibly disconnect users of Windows services.
Important: Users who are disconnected will lose unsaved work in open files.
To forcibly disconnect users of Windows services:1 Open Server Admin and select Windows in the Computers & Services list.
2 Click Connections to see a list of the users currently connected to the Windows services.
The list includes the users’ names, IP addresses, and duration of connections.
3 Select one or more users that you want to forcibly disconnect and click Disconnect.
To select multiple users, Command-click or Shift-click in the list of connected users.
Changing the Server’s Windows IdentityYou can change a server’s identity among clients of Windows services by changing the server’s Windows computer name or by changing its Windows domain or workgroup.
Changing the Server’s Windows Computer NameUsing Server Admin, you can change the computer name by which Mac OS X Server is known in a Windows domain or workgroup. If the server is the primary domain controller (PDC), a backup domain controller (BDC), or a Windows domain member, the computer name is the server’s NetBIOS name in the domain. If the server provides standalone Windows services, the computer name is the server’s NetBIOS name in the workgroup. Windows users see this name when they connect to the server.
Chapter 4 Managing Windows Services

To change the Windows computer name of Mac OS X Server:1 In Server Admin’s Computers & Services list, select Windows for the server whose
Windows computer name you want to change.
2 Click Settings (near the bottom of the window), then click General (near the top).
3 Enter the computer name, then click Save.
The name should contain no more than 15 characters, no special characters, and no punctuation. If practical, make the server name match its unqualified DNS host name. For example, if your DNS server has an entry for your server as “server.example.com,” give your server the name “server.”
4 If the server is the PDC, a BDC, or a Windows domain member, you must authenticate by entering the name and password of a user account that can administer the PDC’s LDAP directory (not a local directory administrator).
Since workgroups are ad hoc, you do not have to authenticate as an administrator to change the computer name of a server that provides only standalone Windows services.
From the Command LineYou can also change the server name using the serveradmin command in Terminal. For more information, see the file services chapter of the command-line administration guide.
Changing the Server’s Windows Domain Using Server Admin, you change the Windows domain of a server that is a PDC, BDC, or domain member.
To change the Windows domain of Mac OS X Server:1 In Server Admin’s Computers & Services list, select Windows for the server whose
Windows domain you want to change.
2 Click Settings (near the bottom of the window), then click General (near the top).
3 Enter the Windows domain name, then click Save.
4 If the server is the PDC, a BDC, or a Windows domain member, you must authenticate by entering the name and password of a user account that can administer the PDC’s LDAP directory (not a local directory administrator).
Warning: Do not change the domain name of the PDC server unless absolutely necessary. If you change the name of the PDC domain, Windows workstations that were domain members will have to rejoin the domain under its new name.
Chapter 4 Managing Windows Services 65

66
Changing the Sever’s Windows WorkgroupUsing Server Admin, you can change the workgroup name of a server that provides only standalone Windows services (file, print, browsing, or WINS). Windows users see the workgroup name in the My Network Places window of Windows XP and 2000 (the Network Neighborhood window of Windows 95, 98, or ME). If you have Windows domains on your subnet, use one of them as the workgroup name to make it easier for clients to communicate across subnets. Otherwise, consult your Windows network administrator for the correct name.
To change the Windows workgroup name of Mac OS X Server:1 In Server Admin’s Computers & Services list, select Windows for the server whose
Windows domain you want to change.
2 Click Settings (near the bottom of the window), then click General (near the top).
3 Type a name in the Workgroup field, then click Save.
From the Command LineYou can also change the Windows workgroup name using the serveradmin command in Terminal. For more information, see the file services chapter of the command-line administration guide.
Managing Access to Windows ServicesYou can manage access to Windows services by configuring service access controls, allowing or disallowing guest access to Windows file service, limiting the number of connected Windows clients, controlling access to individual print queues, and controlling access to shared folders and files.
Controlling Access to Windows ServicesYou can use Server Admin to control which users and groups have access to Windows file, print, and PDC/BDC services. Windows services access control affects all services that use the SMB/CIFS protocol. You can configure access controls separately for Windows services and other services, or you can configure access controls that apply to all services.
To control access to Windows services:1 Open Server Admin and in the Computers & Services list, connect to the server that
provides Windows services, then select the server in the Computers & Services list.
Select the server, not Windows services under the server.
2 Click Settings, then click Access.
3 Deselect “Use same access for all services” and select Windows in the list on the left.
4 Select “Allow only users and groups below” and edit the list of users and groups that you want to have access to the server’s Windows services.
Chapter 4 Managing Windows Services

• Add users or groups that can use Windows services by clicking the Add button (+) and supplying the requested information.
• Remove users or groups from the list by selecting one or more and clicking the Remove button (–).
5 Click Save.
If “Allow all users and groups” is selected when you deselect “Use same access for all services” in step 3, all users and groups will be allowed to access all listed services except Windows. If you want to restrict who can access a listed service besides Windows, select the service in the list, select “Allow only users and groups below,” and add to the list of allowed users and groups.
If you want all users to have access to the server’s Windows services, select Windows, then select “Allow all users and groups.”
Controlling Windows Users’ Access to Print QueuesYou can use Server Admin to control which Windows users and groups have access to a print queue. The procedure is the same as for Mac OS X users. For instructions, see the print service administration guide.
Allowing Guest Access for Windows ServicesYou can use Server Admin to enable or disable guest access to Windows file service. Guest users can access Windows file service on your server without supplying a name and password. For better security, do not allow guest access.
Users must always enter a name and password to log in to the Windows domain of the Mac OS X Server PDC.
To enable guest access to Windows file service:1 Open Server Admin and select Windows in the Computers & Services list.
2 Click Settings, then click Access.
3 Click “Allow Guest access,” then click Save.
If “Allow Guest access” is selected, users can connect for Windows file service without using a name or password.
If “Allow Guest access” is unselected, users must supply a valid name and password to use Windows file service.
From the Command LineYou can also enable or disable guest access to Windows file service using the serveradmin command in Terminal. For more information, see the file services chapter of the command-line administration guide.
Chapter 4 Managing Windows Services 67

68
Limiting the Number of Connected Windows ClientsUsing Server Admin, you can limit the potential resources consumed by Windows services by limiting the maximum number of connections.
To set the maximum number of connections:1 Open Server Admin and select Windows in the Computers & Services list.
2 Click Settings, then click Access.
3 Select “__maximum” and type the maximum number of connections.
4 Click Save.
From the Command LineYou can also limit client connections by using the serveradmin command in Terminal to limit the number of SMB/CIFS processes. For more information, see the file services chapter of the command-line administration guide.
Managing PDC/BDC ReplicationIf you have set up Mac OS X Server as a BDC, you can use Server Admin to schedule replication of PDC data or replicate on demand.
Scheduling Replication of a PDCYou can specify how frequently a PDC updates its BDCs with changes to directory and authentication information. The PDC can update the BDCs whenever a change occurs in the PDC server’s LDAP directory domain or on a schedule you specify. You set the schedule for PDC replication by scheduling Open Directory replication. For instructions, see the Open Directory administration guide.
Synchronizing Primary and Backup Domain Controllers on DemandAlthough a PDC automatically synchronizes directory and authentication data with BDCs, you can use Server Admin to synchronize the data on demand. You do this by synchronizing the Open Directory master of the PDC server and the Open Directory replica of a BDC. For instructions, see the Open Directory administration guide.
Managing Windows Services LoggingUsing Server Admin, you can choose the level of detail you want to log for Windows services.
To specify log contents:1 Open Server Admin and select Windows in the Computers & Services list.
2 Click Settings, then click Logging (near the top).
Chapter 4 Managing Windows Services

3 Choose from the Log Detail pop-up menu to set the level of detail you want to record, then click Save.
The more detailed the logging, the larger the log file.
The following table shows the level of detail you get for each setting.
From the Command LineYou can also change Windows services logging settings using the serveradmin command in Terminal. For more information, see the file services chapter of the command-line administration guide.
Managing Advanced Windows Services SettingsYou can use the Advanced pane of Windows services settings in Server Admin to choose a client code page, set the server to be a workgroup or domain master browser, specify the server’s WINS registration, and enable virtual share points for user homes. For instructions, see:• “Changing the Windows Code Page” (next topic)• “Enabling Windows Domain Browsing” on page 70• “Changing WINS Registration” on page 70
Changing the Windows Code PageYou can use Server Admin to change the code page, which determines the character set used for Windows services.
To change the Windows code page:1 Open Server Admin and select Windows in the Computers & Services list.
2 Click Settings, then click Advanced.
3 Choose the character set you want clients to use from the Code Page pop-up menu, then click Save.
From the Command LineYou can also change the Windows code page by using the serveradmin command in Terminal. For more information, see the file services chapter of the command-line administration guide.
Events logged Low detail Medium detail High detail
Warnings and errors Yes Yes Yes
Service startup and stop No Yes Yes
User login failures No Yes Yes
Browser name registrations No Yes Yes
File access events No No Yes
Chapter 4 Managing Windows Services 69

70
Enabling Windows Domain BrowsingIf there are no Microsoft servers on your subnet or network to control domain browsing, you can use these options to restrict domain browsing to a single subnet or allow browsing across your network.
To enable domain browsing:1 Open Server Admin and select Windows in the Computers & Services list.
2 Click Settings, then click Advanced.
3 Next to Services, select Workgroup Master Browser, Domain Master Browser, or both.
• Workgroup Master Browser provides discovery and browsing of servers in a single subnet.
• Domain Master Browser provides discovery and browsing of servers across subnets.
4 Click Save.
From the Command LineYou can also change Windows domain browsing settings by using the serveradmin command in Terminal. For more information, see the file services chapter of the command-line administration guide.
Changing WINS RegistrationWindows Internet Naming Service (WINS) matches server names with IP addresses. You can use your server as the local name resolution server, register with an external WINS server, or not use WINS.
To register your server with a WINS server:1 Open Server Admin and select Windows in the Computers & Services list.
2 Click Settings, then click Advanced.
3 Select one of the options under WINS Registration.
• “Off”: prevents your server from using or providing WINS for NetBIOS name resolution.
• “Enable WINS server”: your server provides NetBIOS name resolution service. This allows clients across multiple subnets to perform name/address resolution.
• “Register with WINS server”: your server will use an existing WINS service for NetBIOS name resolution. Enter the IP address or DNS name of the WINS server.
4 Click Save.
From the Command LineYou can also change WINS settings using the serveradmin command in Terminal. For more information, see the file services chapter of the command-line administration guide.
Chapter 4 Managing Windows Services

Enabling or Disabling Virtual Share PointsUsing Server Admin, you can control whether Mac OS X Server creates a virtual SMB/CIFS share point that maps to the share point selected for each user in the Home pane of Workgroup Manager. This simplifies setting up home directories for Windows users by using the same home directory for Windows and Mac OS X.
If you enable virtual share points, each user has the same network home directory whether logging in from a Windows workstation or a Mac OS X computer.
If you disable virtual share points, you have to set up an SMB/CIFS share point for Windows home directories, and you have to configure each Windows user account to use this share point.
To enable or disable virtual SMB/CIFS share points for Windows home directories:
1 Open Server Admin and select Windows in the Computers & Services list.
2 Click Settings, then click Advanced.
3 Click “Enable virtual share points.”
4 Click Save.
Chapter 4 Managing Windows Services 71

72
Chapter 4 Managing Windows Services

5
5 Solving Problems With Windows ServicesIf you encounter problems while working with Windows services of Mac OS X Server, you might find a solution in this chapter.
Problems are listed in the following categories:• Problems with a primary or backup domain controller• Problems with Windows file service• Problems with Windows print service
Problems With a Primary or Backup Domain ControllerProblems with a primary domain controller (PDC) or backup domain controller (BDC) can have several causes.
User Can’t Log in to the Windows Domain• Make sure the user account has a password type of Open Directory. If the user
account was created in a previous version of Mac OS X Server (version 10.1 or earlier) and is still configured to use Authentication Manager (the password type is “Crypt password”), change the password type to Open Directory.
• Make sure the workstation has joined the Windows domain of Mac OS X Server.
Windows User Has No Home DirectoryThere are a number of things to check if a user’s home directory isn’t mounted in Windows.• Make sure the correct home directory location is selected in the Home pane of
Workgroup Manger. • Make sure the home directory path is correct in the Windows pane of Workgroup
Manger. It should be blank to use the home directory specified in the Home pane.• Using Server Admin, connect to the server where the user’s home directory resides.
Select Windows in the Computers & Services list, click Advanced, and make sure the “Enable virtual share points” setting is selected.
73

74
• The drive letter chosen for the user may be conflicting with a drive letter that’s already in use on the Windows workstation. Remedy: change either the drive letter setting in the Windows pane of Workgroup Manager or the mappings of other drive letters on the workstation.
Windows User’s Profile Settings Revert to Defaults• If the user profile location is not blank in the Windows pane of Workgroup Manager,
the default share point for user profiles will not be used. In this case, the user profile location must specify a valid SMB/CIFS share point.• Make sure the user profile location specifies a share point that exists. See
“Managing SMB/CIFS Share Points” on page 55 for more information.• If the client computer has Windows 2000 Service Pack 4 or later, or Windows XP
Service Pack 1 or later, it may need to be configured to allow loading user profiles that aren’t stored in the default share point for profiles. For more information, see article 300257, “Windows Domain Member Servers Cannot Host Profiles,” on the AppleCare Service & Support website at:www.info.apple.com/kbnum/n300257
• Make sure the home directory is specified correctly in the Windows and Home panes of Workgroup Manager. These panes should be configured in one of the following ways:• If the home directory path in the Windows pane is blank, make sure the correct
home directory location is selected in the Home pane. • If the home directory path is not blank in the Windows pane, make sure the home
directory path specifies a valid SMB/CIFS share point. • The drive letter chosen for the user’s home directory may be conflicting with a drive
letter that’s already in use on the Windows workstation. Remedy: change either the drive letter setting in the Windows pane of Workgroup Manager or the mappings of other drive letters on the workstation.
Windows User Loses Contents of My Documents Folder• Make sure the correct home directory location is selected in the Home pane of
Workgroup Manger. • Make sure the user profile path is correct in the Windows pane of Workgroup
Manger. If the user profile path is blank, the default profile folder will be used. The contents of My Documents are stored in the user profile.
• The drive letter chosen for the user’s home directory may be conflicting with a drive letter that’s already in use on the Windows workstation. Remedy: change either the drive letter setting in the Windows pane of Workgroup Manager or the mappings of other drive letters on the workstation.
Chapter 5 Solving Problems With Windows Services

Problems With Windows File ServiceYou can solve some common problems with Windows file service and with file services in general.
User Can’t Authenticate for Windows File ServiceIf a user can’t authenticate for Windows file service, check the account’s password type in the Advanced pane for user accounts in Workgroup Manager. For Windows services, the user account needs a shadow password or an Open Directory password. If the user account was created in a previous version of Mac OS X Server (version 10.1 or earlier) and is still configured to use Authentication Manager, change the account to have an Open Directory password.
User Doesn’t See the Server in My Network PlacesIf a server that provides Windows file service doesn’t appear in the My Network Places window of Windows XP and 2000 (the Network Neighborhood window of Windows 95, 98, or ME):• Make sure the user’s computer is properly configured for TCP/IP and has the
appropriate Windows networking software installed.• Go to the DOS prompt on the client computer and type “ping IP address” where
IP address is your server’s address. If the ping fails, then there is a TCP/IP network problem.
• If the user’s computer is on a different subnet from the server, try the following:• Make sure the “Enable WINS server” option is selected, or the “Register with WINS
server” option is selected and configured correctly. These options are in the Settings pane of Windows services in Server Admin.
• On the Windows computer, choose View > Refresh to force Windows to discover newly added network resources, which can otherwise take several minutes to be discovered.
• On the Windows computer, map a Mac OS X Server share point to a drive letter. You can do this by opening My Network Places (or Network Neighborhood) and choosing Tools > Map Network Drive.
Note: If Windows computers are properly configured for networking and connected to the network, client users can connect to the Windows file service of Mac OS X Server even if they can’t see the server icon in My Network Places (or Network Neighborhood).
General Problems With File ServicesFor possible solutions to the following additional file services problems, see the chapter on solving problems in the file services administration guide.• Users can’t find a shared item• Users can’t see the contents of a share point• You can’t find a volume or directory to use as a share point
Chapter 5 Solving Problems With Windows Services 75

76
Problems With Windows Print ServiceYou can solve some common problems with Windows print service and with print services in general.
Windows Users Can’t PrintIf Windows NT 4.x clients can’t print to the server, make sure that the queue name is not the TCP/IP address of the printer or server. Use the DNS host name instead of the printer or server address or, if there is none, enter a queue name containing only letters and numbers. The name of an SMB/CIFS print queue must not exceed 15 characters.
General Problems With Print ServicesFor additional problems and possible solutions, see the chapter on solving problems in the print service administration guide.• Print service doesn’t start• Clients can’t add queue• Jobs in a server queue don’t print• Print queue becomes unavailable
Chapter 5 Solving Problems With Windows Services

Glo
ssar
y
Glossaryaccess control list See ACL.
access privileges See permissions.
ACL Access Control List. A list maintained by a system that defines the rights of users and groups to access resources on the system.
Active Directory The directory and authentication service of Microsoft Windows 2000 Server and Windows Server 2003.
administrator A user with server or directory domain administration privileges. Administrators are always members of the predefined “admin” group.
administrator computer A Mac OS X computer onto which you’ve installed the server administration applications from the Mac OS X Server Admin CD.
AFP Apple Filing Protocol. A client/server protocol used by Apple file service on Macintosh-compatible computers to share files and network services. AFP uses TCP/IP and other protocols to communicate between computers on a network.
attribute A named data item containing a specific type of information and belonging to an entry (record or object) in a directory domain. The actual data that an attribute contains is its value.
authentication The process of proving a user’s identity, typically by validating a user name and password. Usually authentication occurs before an authorization process determines the user’s level of access to a resource. For example, file service authorizes full access to folders and files that an authenticated user owns.
authorization The process by which a service determines whether it should grant a user access to a resource and how much access the service should allow the user to have. Usually authorization occurs after an authentication process proves the user’s identity. For example, file service authorizes full access to folders and files that an authenticated user owns.
back up (verb) The act of creating a backup.
77

78
backup (noun) A collection of data that’s stored for purposes of recovery in case the original copy of data is lost or becomes inaccessible.
BSD Berkeley System Distribution. A version of UNIX on which Mac OS X software is based.
character A synonym for byte.
chatting See instant messaging.
CIFS Common Internet File System. See SMB/CIFS.
client A computer (or a user of the computer) that requests data or services from another computer, or server.
code page Defines extensions to the character set for Microsoft Windows. The base character set, defined by the American Standard Code for Information Interchange (ASCII), maps letters of the Latin alphabet, numerals, punctuation, and control characters to the numbers 0 through 127. The code page maps additional characters, such as accented letters for a particular language and symbols, to the numbers 128 through 255.
command line The text you type at a shell prompt when using a command-line interface.
command-line interface A way of interfacing with the computer (for example, to run programs or modify file system permissions) by entering text commands at a shell prompt.
computer account See computer list.
computer list A list of computers that have the same preference settings and are available to the same users and groups.
cracker A malicious user who tries to gain unauthorized access to a computer system in order to disrupt computers and networks or steal information. Compare to hacker.
crypt password A type of password that’s stored as a hash (using the standard UNIX encryption algorithm) directly in a user record.
default The automatic action performed by a program unless the user chooses otherwise.
directory domain A specialized database that stores authoritative information about users and network resources; the information is needed by system software and applications. The database is optimized to handle many requests for information and to find and retrieve information quickly. Also called a directory node or simply a directory.
Glossary

directory services Services that provide system software and applications with uniform access to directory domains and other sources of information about users and resources.
DNS Domain Name System. A distributed database that maps IP addresses to domain names. A DNS server, also known as a name server, keeps a list of names and the IP addresses associated with each name.
DNS domain A unique name of a computer used in the Domain Name System to translate IP addresses and names. Also called a domain name.
DNS name A unique name of a computer used in the Domain Name System to translate IP addresses and names. Also called a domain name.
domain Part of the domain name of a computer on the Internet. It does not include the Top Level Domain designator (for example, .com, .net, .us, .uk). Domain name “www.example.com” consists of the subdomain or host name “www,” the domain “example,” and the top level domain “com.”
drive letter A letter of the alphabet by which a disk or disk partition is identified in the Windows operating system.
encryption The process of obscuring data, making it unreadable without special knowledge. Usually done for secrecy and confidential communications.
file server A computer that serves files to clients. A file server may be a general-purpose computer that’s capable of hosting additional applications or a computer capable only of serving files.
FTP File Transfer Protocol. A protocol that allows computers to transfer files over a network. FTP clients using any operating system that supports FTP can connect to a file server and download files, depending on their access privileges. Most Internet browsers and a number of freeware applications can be used to access an FTP server.
group A collection of users who have similar needs. Groups simplify the administration of shared resources.
group folder A directory that organizes documents and applications of special interest to group members and allows group members to pass information back and forth among themselves.
guest user A user who can log in to your server without a user name or password.
hacker An individual who enjoys programming, and explores ways to program new features and expand the capabilities of a computer system. See also cracker.
Glossary 79

80
home directory A folder for a user’s personal use. Mac OS X also uses the home directory, for example, to store system preferences and managed user settings for Mac OS X users.
instant messaging Live interactions in which two or more computer users exchange text messages, pictures, audio, or video in real time. Often called chatting because of its spontaneous, conversation-like qualities.
IP Internet Protocol. Also known as IPv4. A method used with Transmission Control Protocol (TCP) to send data between computers over a local network or the Internet. IP delivers packets of data, while TCP keeps track of data packets.
IP address A unique numeric address that identifies a computer on the Internet.
KDC Kerberos Key Distribution Center. A trusted server that issues Kerberos tickets.
Kerberos A secure network authentication system. Kerberos uses tickets, which are issued for a specific user, service, and period of time. Once a user is authenticated, it’s possible to access additional services without retyping a password (this is called single sign-on) for services that have been configured to take Kerberos tickets. Mac OS X Server uses Kerberos v5.
Kerberos Key Distribution Center See KDC.
Kerberos realm The authentication domain comprising the users and services that are registered with the same Kerberos server. The registered services and users trust the Kerberos server to verify each other’s identities.
LDAP Lightweight Directory Access Protocol. A standard client-server protocol for accessing a directory domain.
local directory domain A directory of identification, authentication, authorization, and other administrative data that’s accessible only on the computer where it resides. The local directory domain isn’t accessible from other computers on the network.
log in (verb) The act of starting a session with a system (often by authenticating as a user with an account on the system) in order to obtain services or access files. Note that logging in is separate from connecting, which merely entails establishing a physical link with the system.
mount (verb) In general, to make a remote directory or volume available for access on a local system. In Xsan, to cause an Xsan volume to appear on a client’s desktop, just like a local disk.
name server A server on a network that keeps a list of names and the IP addresses associated with each name. See also DNS, WINS.
Glossary

nested group A group that is a member of another group. Nested groups enable administrators to manage groups of users at a global level (to influence all members of a group) and at a smaller level (to influence only certain members of a group).
NetBIOS Network Basic Input/Output System. A program that allows applications on different computers to communicate within a local area network.
NetInfo One of the Apple protocols for accessing a directory domain.
Network File System See NFS.
network interface Your computer’s hardware connection to a network. This includes (but isn’t limited to) Ethernet connections, AirPort cards, and FireWire connections.
NFS Network File System. A client/server protocol that uses Internet Protocol (IP) to allow remote users to access files as though they were local. NFS exports shared volumes to computers according to IP address, rather than user name and password.
Open Directory The Apple directory services architecture, which can access authoritative information about users and network resources from directory domains that use LDAP, NetInfo, or Active Directory protocols; BSD configuration files; and network services.
Open Directory master A server that provides LDAP directory service, Kerberos authentication service, and Open Directory Password Server.
Open Directory password A password that’s stored in secure databases on the server and can be authenticated using Open Directory Password Server or Kerberos (if Kerberos is available).
Open Directory Password Server An authentication service that validates passwords using a variety of conventional authentication methods required by the different services of Mac OS X Server. The authentication methods include APOP, CRAM-MD5, DHX, LAN Manager, NTLMv1, NTLMv2, and WebDAV-Digest.
open source A term for the cooperative development of software by the Internet community. The basic principle is to involve as many people as possible in writing and debugging code by publishing the source code and encouraging the formation of a large community of developers who will submit modifications and enhancements.
oplocks See opportunistic locking.
opportunistic locking Also known as oplocks. A feature of Windows services that prevents users of shared files from changing the same file at the same time. Opportunistic locking locks the file or part of the file for exclusive use, but also caches the user’s changes locally on the client computer for improved performance.
Glossary 81

82
owner The owner of an item can change access permissions to the item. The owner may also change the group entry to any group in which the owner is a member. By default the owner has Read & Write permissions.
password An alphanumeric string used to authenticate the identity of a user or to authorize access to files or services.
password policy A set of rules that regulate the composition and validity of a user’s password.
Password Server See Open Directory Password Server.
pathname The location of an item within a file system, represented as a series of names separated by slashes (/).
PDC Primary domain controller. In Windows networking, a domain controller that has been designated as the primary authentication server for its domain.
permissions Settings that define the kind of access users have to shared items in a file system. You can assign four types of permissions to a share point, folder, or file: read/write, read-only, write-only, and none (no access). See also privileges.
print queue An orderly waiting area where print jobs wait until a printer is available. The print service in Mac OS X Server uses print queues on the server to facilitate management.
privileges The right to access restricted areas of a system or perform certain tasks (such as management tasks) in the system.
protocol A set of rules that determines how data is sent back and forth between two applications.
replication The creation of duplicate copies of a directory domain in order to improve performance or ensure uninterrupted network services in the event of a system failure.
roaming user profiles The set of personal desktop and preference settings that a user makes, the Windows domain controller stores on a server, and Windows applies when the user logs in to the Windows domain from any workstation.
Samba Open source software that provides file, print, authentication, authorization, name resolution, and network service browsing to Windows clients using the SMB/CIFS protocol.
SASL Simple Authentication and Security Layer. An extensible authentication scheme that allows the Open Directory Password Server to support a variety of network user authentication methods required by the different services of Mac OS X Server.
security identifier See SID.
Glossary

Server Message Block/Common Internet File System See SMB/CIFS.
shadow password A password that’s stored in a secure file on the server and can be authenticated using a variety of conventional authentication methods required by the different services of Mac OS X Server. The authentication methods include APOP, CRAM-MD5, DHX, LAN Manager, NTLMv1, NTLMv2, and WebDAV-Digest.
share point A folder, hard disk (or hard disk partition), or CD that’s accessible over the network. A share point is the point of access at the top level of a group of shared items. Share points can be shared using AFP, Windows SMB, NFS (an “export”), or FTP protocols.
SID Security Identifier. A unique value that identifies a user, group, or computer account in a Windows NT-compatible domain.
SMB/CIFS Server Message Block/Common Internet File System. A protocol that allows client computers to access files and network services. It can be used over TCP/IP, the Internet, and other network protocols. Windows services use SMB/CIFS to provide access to servers, printers, and other network resources.
standalone server A server that provides services on a network but doesn’t get directory services from another server or provide directory services to other computers.
strict locking A feature of Windows services that prevents users of shared files from changing the same file at the same time. With strict locking, the Windows server checks whether a file is locked and enforces file locks, rather than relying on the client application to do so.
subnet A grouping on the same network of client computers that are organized by location (different floors of a building, for example) or by usage (all eighth-grade students, for example). The use of subnets simplifies administration.
TCP Transmission Control Protocol. A method used along with the Internet Protocol (IP) to send data in the form of message units between computers over the Internet. IP takes care of handling the actual delivery of the data, and TCP takes care of keeping track of the individual units of data (called packets) into which a message is divided for efficient routing through the Internet.
user profile The set of personal desktop and preference settings that Windows saves for a user and applies each time the user logs in.
VPN Virtual Private Network. A network that uses encryption and other technologies to provide secure communications over a public network, typically the Internet. VPNs are generally cheaper than real private networks using private lines but rely on having the same encryption system at both ends. The encryption may be performed by firewall software or by routers.
Glossary 83

84
weblog A webpage that hosts chronologically ordered entries. It functions as an electronic journal or newsletter. Weblog service lets you create weblogs that are owned by individual users or by all members of a group.
Weblog service The Mac OS X Server service that lets users and groups securely create and use weblogs. Weblog service uses Open Directory authentication to verify the identity of weblog authors and readers. If accessed using a website that’s SSL enabled, Weblog service uses SSL encryption to further safeguard access to weblogs.
Windows domain The Windows computers on a network that share a common directory of user, group, and computer accounts for authentication and authorization. An Open Directory master can provide the directory services for a Windows domain.
WINS Windows Internet Naming Service. A name resolution service used by Windows computers to match client names with IP addresses. A WINS server can be located on the local network or externally on the Internet.
workgroup A set of users for whom you define preferences and privileges as a group. Any preferences you define for a group are stored in the group account.
Glossary

Inde
x
IndexAaccess control, service 8access privileges 8, 58Active Directory domain 7, 23, 25Add Printer Wizard 36administrator computer 18advanced settings, Windows user accounts 47anonymous access, Windows 29authentication, VPN 17authentication, Windows
Authentication Manager password 48BDC server 27crypt password 48domain member server 17, 24, 25logging of failures 29methods, selecting 29Open Directory password 48password types 48PDC server 26shadow password 48standalone server 23
Authentication Manager 15, 48
Bbackup, PDC 27basic settings, Windows user account 42BDC (backup domain controller) 7, 27, 68
Cclients, Windows. See Windows clients, Windows workstationscode page, changing 30, 69Common Internet File System (CIFS)
See SMB/CIFScomputer list
See also Windows Computers listdefined 37Windows Computers 38, 54
computer name, Windows 64connections, Windows client
limiting 29, 68viewing 63
cross-platform file service 18crypt password 15
DDirectory Access application 20documentation 8, 9, 11domain, Windows
See Windows domaindomain browsing, Windows 17, 30, 70domain login, Windows
BDC for 27PDC for 14, 26problem solving 73user accounts for 39
domain memberActive Directory 7, 23, 25Mac OS X Server PDC 17, 24
Ffailover, PDC 27file service, Windows
Active Directory domain member 25connecting from Windows 35domain member 24guest access 29, 67log 63PDC 26, 27problems 75problem solving 75providing 17standalone 23
Ggraphs, Windows services 63group accounts, Windows
defined 37group folder settings 53managing 53users in 38
group folder 53groups, nested 7group settings, Windows user accounts 48guest access, Windows 29, 59, 67
85
86
guest user 52
Hhard drive letter 45help, using 9home directories, Windows
accessing 16hard drive letter 45local 46mounted automatically 49path 46problem solving 73setting up 49/Users folder 49virtual share points for 30, 71
home settings, Windows user account 46, 49
Iinfo settings, Windows user accounts 51
KKerberos 14, 25, 29
LLDAP directory 14local directory, Windows user accounts in 15locking
SMB/CIFS opportunistic 56SMB/CIFS strict 56unified 8
login. See domain loginlogin script location 45logs, Windows services 29, 63, 69
MMac OS X Server
administration applications 18what’s new 7
mail settings, Windows user accounts 51master browser, Windows 30MS-CHAPv2 17My Documents folder, Windows 74My Network Places, Windows 75
Nnested groups 7NetBIOS name 64network interfaces, multiple 18Network Neighborhood, Windows 75NTLMv2 8, 14, 29
OOpen Directory password 15Open Directory Password Server 14oplocks. See opportunistic locking
opportunistic lockingdescribed 56enabling 31, 57, 60
Ppassword
crypt 15, 48Open Directory 15, 48shadow 15, 48
PDC (primary domain controller)BDC replication scheduling 68domain login 14home directories 16problem solving 73setting up 26syncing on demand 68user profiles 16
print quota settings, Windows user accounts 51print service, Windows
clients 36problem solving 76setting up a queue 32sharing name 36
privileges, access 8, 58
Rremote administration 18roaming user profiles 16, 43, 74
SServer Admin
uses of 19Windows print queue 32Windows services, monitoring 62Windows services, starting 31, 61Windows services, stopping 62Windows services access control 66Windows services advanced settings 30Windows services code page 69Windows services computer name 65Windows services connections, limiting 68Windows services connections, viewing 64Windows services domain browsing 70Windows services domain name 65Windows services general settings 29Windows services graphs 63Windows services guest access 67Windows services logs 63, 68Windows services log settings 29Windows services role, setting 23, 24, 25, 26, 28Windows services users, disconnecting 64Windows services virtual share points 71Windows services WINS 70Windows services workgroup 66
server administration guides 10
Index

Server Message Block (SMB)See SMB/CIFS
service access control 8shadow password 15share points, Windows
access to 59creating 56defined 37managing 55planning 38setting up 31SMB/CIFS name 56, 59users of 18
SMB/CIFS protocol 17standalone Windows services 23status, Windows service 62strict locking
described 56enabling 31, 57, 60
TTCP/IP Networking 33
Uuser accounts, Windows
changing 41defined 37deleting 52disabling 52guest 52locations 39PDC 39planning 38standalone server 40
user profiles 16, 43, 74
Vvirtual share points 30, 71VPN service
Windows clients 17
WWindows 2000
domain login 34file service, using 34, 35print service, using 36
Windows clients See also Windows workstationscross-platform guidelines 18disconnecting 64domain login 33, 34file services, using 34limiting 68TCP/IP setup 33
Windows Computers list
adding computers to 38, 54changing computer information 55deleting 55moving a computer from 55removing computers from 54
Windows domainbrowsing 17, 30, 70changing name 65login 14, 26, 27, 39, 73member server 17, 24
Windows services See also BDC, domain member, PDCaccess controls 66advanced settings 30, 69code page 30, 69connected users 63connecting by name or address 35default settings 21disconnecting users 63, 64domain browsing 30, 70domain name 65general settings 29graphs 63guest access 67limiting connections 68logs 63, 68log settings 29monitoring 62overview 13, 21role 22standalone 23starting 61status 62stopping 62tools summary 18what’s new 7WINS 70workgroup name 66
Windows settings, user account 43Windows workgroup
changing 66master browser 30
Windows workstationsadding to Windows Computers list 54connecting to file service 34, 35joining PDC 38removing from Windows Computers list 54setting up printing 36
Windows XPdomain login 33file service, using 34, 35print service, using 36
WINS 63WINS (Windows Internet Naming Service) 30, 70workgroup, Windows
See Windows workgroup
Index 87

88
Workgroup Manageradvanced settings, Windows user 47basic settings, Windows user 42group accounts 53group folder, Windows user 53group settings, Windows user 48info settings, Windows user 51mail settings, Windows user 51print quota settings, Windows user 51shared folder access control 58SMB/CIFS share point 31, 57, 59user account, creating 39, 40
user account, deleting 52user account, disabling 52user account, editing 41user profile path 44uses of 19Windows Computers list, adding to 54Windows Computers list, removing from 55Windows hard drive letter 45Windows home directory 46, 49Windows login script 45Windows settings, user 43
Index