mac mini late 2012 ram replacement mini late 2012 ram replacement upgrade the ram for faster overall...
TRANSCRIPT
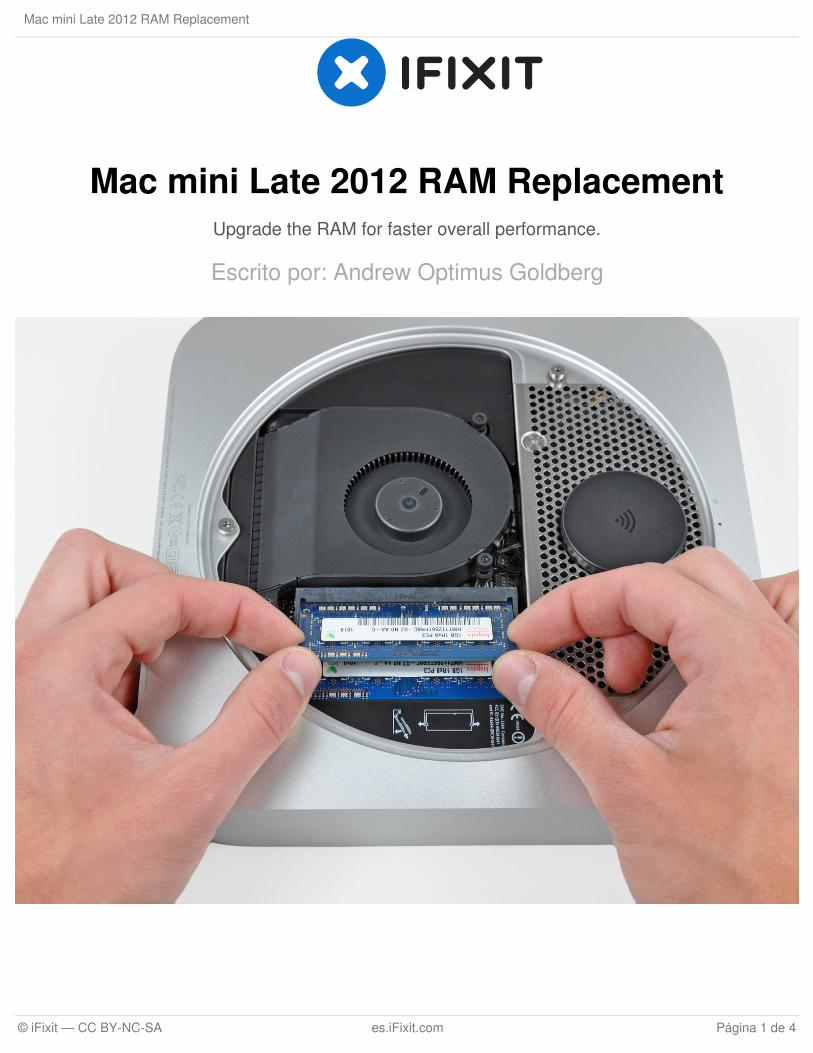
Mac mini Late 2012 RAM ReplacementUpgrade the RAM for faster overall performance.
Escrito por: Andrew Optimus Goldberg
Mac mini Late 2012 RAM Replacement
© iFixit — CC BY-NC-SA es.iFixit.com Página 1 de 4

INTRODUCCIÓN
Removing the RAM is an easy task that requires no tools.
PARTES:Mac mini Late 2012 Memory Maxxer RAM Upgrade Kit (1)
PC3-12800 2 GB RAM Chip (1)
PC3-12800 4 GB RAM Chip (1)
PC3-12800 8 GB RAM Chip (1)
Mac mini Late 2012 RAM Replacement
© iFixit — CC BY-NC-SA es.iFixit.com Página 2 de 4
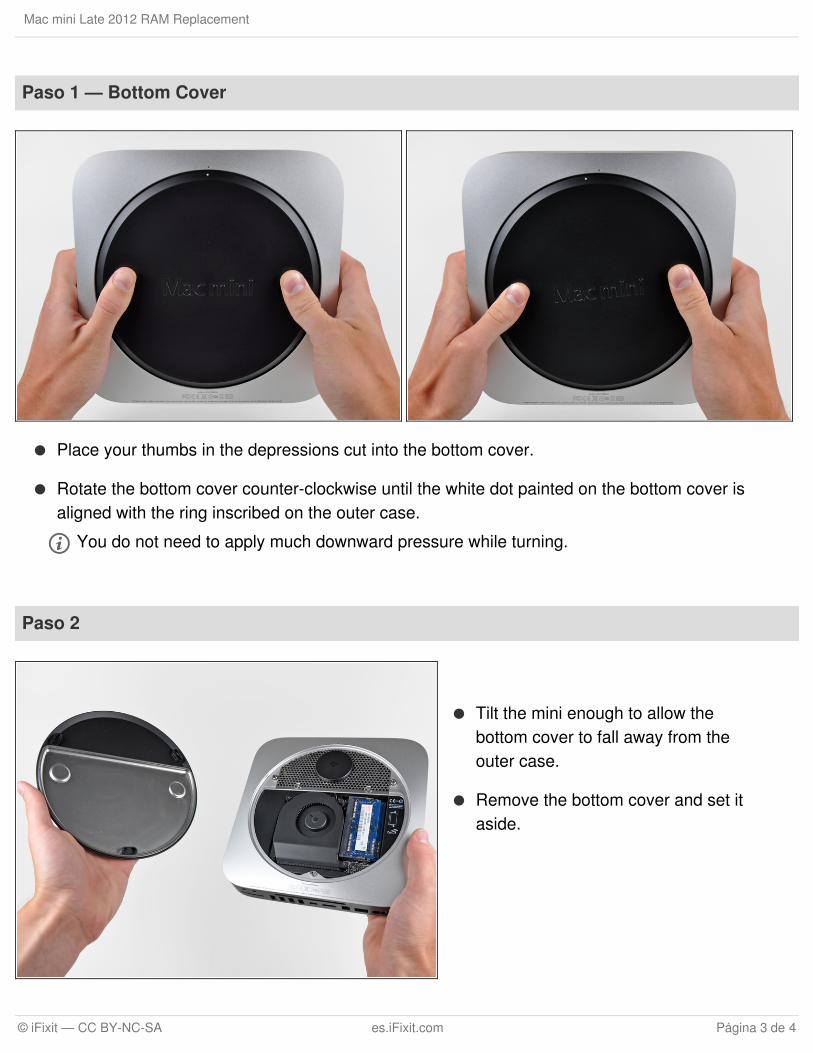
Paso 1 — Bottom Cover
Place your thumbs in the depressions cut into the bottom cover.
Rotate the bottom cover counter-clockwise until the white dot painted on the bottom cover isaligned with the ring inscribed on the outer case.
You do not need to apply much downward pressure while turning.
Paso 2
Tilt the mini enough to allow thebottom cover to fall away from theouter case.
Remove the bottom cover and set itaside.
Mac mini Late 2012 RAM Replacement
© iFixit — CC BY-NC-SA es.iFixit.com Página 3 de 4

To reassemble your device, follow these instructions in reverse order.
La versión más reciente de este documento fue generada en 2018-07-08 08:07:02 PM .
Paso 3 — RAM
Release the tabs on each side of the RAM chip by simultaneously pushing each tab away from thechip.
These tabs lock the chip in place and releasing them will cause the chip to "pop" up.
After the RAM chip has popped up, pull it straight out of its socket.
Repeat this process if a second RAM chip is installed.
Mac mini Late 2012 RAM Replacement
© iFixit — CC BY-NC-SA es.iFixit.com Página 4 de 4