looking ahead to next year’s butterfly project? live ... · • please read these live butterfly...
TRANSCRIPT
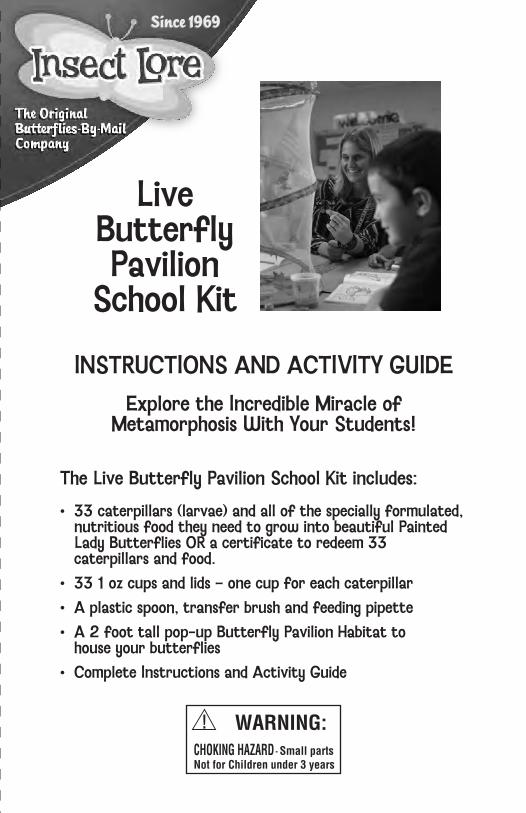
LiveButterflyPavilion
School Kit
INSTRUCTIONS AND ACTIVITY GUIDE
Explore the Incredible Miracle ofMetamorphosis With Your Students!
Small partsNot for Children under 3 years
The Live Butterfly Pavilion School Kit includes:
• 33 caterpillars (larvae) and all of the specially formulated, nutritious food they need to grow into beautiful Painted Lady Butterflies OR a certificate to redeem 33 caterpillars and food.• 33 1 oz cups and lids – one cup for each caterpillar• A plastic spoon, transfer brush and feeding pipette• A 2 foot tall pop-up Butterfly Pavilion Habitat to house your butterflies• Complete Instructions and Activity Guide
11. Wash your Butterfly Pavilion Habitat
Your Butter�y Pavilion Habitat is easy to clean and store away until your next project. Simply wash the mesh with warm tap water and a drop of mild dishwashing detergent. Rinse. Hang the habitat to dry and it will be ready for more butter�y friends!
Looking ahead to next year’s butterfly project? Do you plan to share the Miracle of Metamorphosis with your students next year? The Live Butter�y Pavilion School Kit Re�ll is ideal for those teachers and educators who already have the Butter�y Pavilion Habitat. The Live School Kit Re�ll includes: • 33 caterpillars and all of the nutritious food they need to develop into beautiful Painted Lady Butter�ies • 33 small 1 oz cups • feeding pipette • transfer brush• plastic spoon • instructions
Order the Live Butter�y Pavilion School Kit Re�ll at InsectLore.com.
Feedback
Your students’ butter�y experience is important to us! Please share your stories, reviews and images with us on Facebook, Twitter and Pinterest or at InsectLore.com!
Contact Us: [email protected]
Visit Us: InsectLore.comhttp://www.pinterest.com/insectlore/
https://www.facebook.com/insectlore
http://instagram.com/insectlore
Insect Lore Online
Visit us online at InsectLore.com to �nd helpful instructional videos, our Caterpillar Quick Guide, Teaching Support and Butter�y-themed Curricula. See our Pinterest Boards at pinterest.com/insectlore to �nd Butter�y Classroom Lessons, Butter�y Crafts, Butter�y Games and much more. Our Live Butter�y Kit FAQ Board will provide you with answers to the common questions you may have about raising and caring for your special caterpillars and butter�ies.
1. Plan your Project
For those educators who have purchased the Live Butter�y Pavilion School Kit with Certi�cateMake sure you and your students are ready to begin this special butter�y-growing project. Planning is very important. Depending on the temperature and humidity in your area, metamorphosis can take up to three weeks and then you may choose to feed and observe your butter�ies for a few more days before you release them.
• Please read these Live Butterfly Pavilion School Kit Instructions thoroughly, so you and your students know what to expect.
• Plan your lessons accordingly. Prior to redeeming your certificate, allow for school breaks, holidays and long weekends or any other interruptions that may impact your project.
• Redeem your certificate when daytime temperatures are below 90 degrees Fahrenheit and above 50 degrees Fahrenheit.
• Try to have your caterpillars sent to an indoor address or mailbox, where temperatures are controlled, rather than to an outdoor mailbox, where temperatures can be dangerously extreme.
• To redeem your certificate, visit InsectLore.com. Once your certi�cate has been redeemed you will receive your caterpillars within 3 to 7 days.
• Please keep in mind that springtime is our busiest season and shipping may be delayed.
2. Be Prepared to Receive your Caterpillars
Please track your package so you know when your caterpillars are scheduled to arrive. Simply visit InsectLore.com, click on “Track My Order” at the bottom of the page and �ll in the required �elds. Expect to receive your caterpillars in a special box that reads: Live Caterpillars Inside! Open Immediately!
• Do not leave your caterpillars unattended in a mailbox.
• Be aware if your package’s destination has been sprayed for insects.
• Do not expose your caterpillars to dramatic changes in temperature.
• When you receive your caterpillars, leave them in the unopened box for about an hour. This allows the caterpillars to slowly and safely adjust to the new temperature in an insulated container.
3. Before you Begin
33 caterpillars arrive in one 8 oz cup with a small amount of caterpillar food inside. This food is necessary to provide nourishment for the caterpillars during shipping. Another 8 oz cup and two small1 oz cups included in this delivery contain more than enough caterpillar food to enable all of your caterpillars to grow and develop into beautiful Painted Lady Butter�ies.
It will be your job to transfer each little caterpillar and its food to a small 1 oz cup as soon as possible. Please do not leave the caterpillars in the large cup for very long; your new friends grow very quickly and there is not enough room or food in the large cup for all 33 caterpillars.
Use the spoon to place a speci�c amount of food into each of the small 1 oz cups. Then, using the transfer brush, carefully transfer one caterpillar to each individual cup – so every student can raise, observe and enjoy his or her very own butter�y!
Your caterpillars are hardy creatures, but you must take some important precautions before you transfer them to their individual cups.Caterpillars are extremely sensitive to bacteria and excessive moisture. Make sure your hands, materials and your working area are very clean and dry. Do not touch the caterpillars as the natural oils and salts on your skin can be harmful.
1 2
4. Place the Caterpillar Food in Each Small 1 oz Cupa. Find a large workspace where you can comfortably set out all of your tools and materials.
b. Keep your work area and hands dry and clean.
c. Separate the 1 oz cups.
d. Open the large cup of caterpillar food.
e. Scoop a generous half-spoonful of the food with the plastic spoon provided and place it in a 1 oz cup.
f. Using the bottom of another 1 oz cup, press the caterpillar food down into the cup. Do not squeeze the food so �rmly that the moisture in the food is pressed out. Just make sure the food is wedged into the bottom of the cup. The cup should have approximately ¼ inch of food at the bottom. Do not over�ll! This is more than enough food for one caterpillar. If you put too much food in the cup, the caterpillar will be cramped and may experience di�culties moving, growing and forming into a chrysalis. g. Using the method described above, place caterpillar food in the remaining 1 oz cups. You will have enough food for all of your caterpillars.
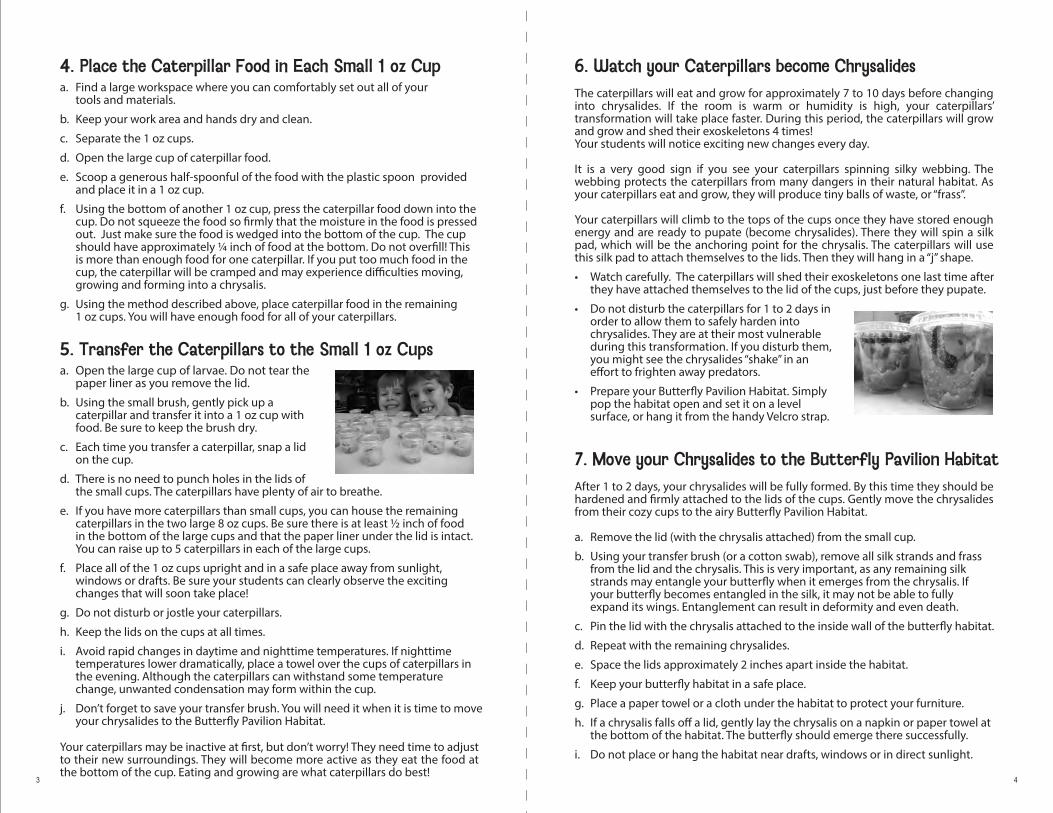
5. Transfer the Caterpillars to the Small 1 oz Cupsa. Open the large cup of larvae. Do not tear the paper liner as you remove the lid. b. Using the small brush, gently pick up a caterpillar and transfer it into a 1 oz cup with food. Be sure to keep the brush dry. c. Each time you transfer a caterpillar, snap a lid on the cup.
d. There is no need to punch holes in the lids of the small cups. The caterpillars have plenty of air to breathe. e. If you have more caterpillars than small cups, you can house the remaining caterpillars in the two large 8 oz cups. Be sure there is at least ½ inch of food in the bottom of the large cups and that the paper liner under the lid is intact. You can raise up to 5 caterpillars in each of the large cups.
f. Place all of the 1 oz cups upright and in a safe place away from sunlight, windows or drafts. Be sure your students can clearly observe the exciting changes that will soon take place!
g. Do not disturb or jostle your caterpillars.
h. Keep the lids on the cups at all times.
i. Avoid rapid changes in daytime and nighttime temperatures. If nighttime temperatures lower dramatically, place a towel over the cups of caterpillars in the evening. Although the caterpillars can withstand some temperature change, unwanted condensation may form within the cup.
j. Don’t forget to save your transfer brush. You will need it when it is time to move your chrysalides to the Butter�y Pavilion Habitat.
Your caterpillars may be inactive at �rst, but don’t worry! They need time to adjust to their new surroundings. They will become more active as they eat the food at the bottom of the cup. Eating and growing are what caterpillars do best!
6. Watch your Caterpillars become ChrysalidesThe caterpillars will eat and grow for approximately 7 to 10 days before changing into chrysalides. If the room is warm or humidity is high, your caterpillars’ transformation will take place faster. During this period, the caterpillars will grow and grow and shed their exoskeletons 4 times! Your students will notice exciting new changes every day.
It is a very good sign if you see your caterpillars spinning silky webbing. The webbing protects the caterpillars from many dangers in their natural habitat. As your caterpillars eat and grow, they will produce tiny balls of waste, or “frass”.
Your caterpillars will climb to the tops of the cups once they have stored enough energy and are ready to pupate (become chrysalides). There they will spin a silk pad, which will be the anchoring point for the chrysalis. The caterpillars will use this silk pad to attach themselves to the lids. Then they will hang in a “j” shape.
• Watch carefully. The caterpillars will shed their exoskeletons one last time after they have attached themselves to the lid of the cups, just before they pupate.
• Do not disturb the caterpillars for 1 to 2 days in order to allow them to safely harden into chrysalides. They are at their most vulnerable during this transformation. If you disturb them, you might see the chrysalides “shake” in an e�ort to frighten away predators.
• Prepare your Butterfly Pavilion Habitat. Simply pop the habitat open and set it on a level surface, or hang it from the handy Velcro strap.
7. Move your Chrysalides to the Butterfly Pavilion HabitatAfter 1 to 2 days, your chrysalides will be fully formed. By this time they should be hardened and �rmly attached to the lids of the cups. Gently move the chrysalides from their cozy cups to the airy Butter�y Pavilion Habitat.
a. Remove the lid (with the chrysalis attached) from the small cup.
b. Using your transfer brush (or a cotton swab), remove all silk strands and frass from the lid and the chrysalis. This is very important, as any remaining silk strands may entangle your butter�y when it emerges from the chrysalis. If your butter�y becomes entangled in the silk, it may not be able to fully expand its wings. Entanglement can result in deformity and even death.
c. Pin the lid with the chrysalis attached to the inside wall of the butter�y habitat.
d. Repeat with the remaining chrysalides.
e. Space the lids approximately 2 inches apart inside the habitat.
f. Keep your butter�y habitat in a safe place.
g. Place a paper towel or a cloth under the habitat to protect your furniture.
h. If a chrysalis falls o� a lid, gently lay the chrysalis on a napkin or paper towel at the bottom of the habitat. The butter�y should emerge there successfully.
i. Do not place or hang the habitat near drafts, windows or in direct sunlight.
3 4

8. See the Birth of your Butterflies!
For 7 to 10 days, the chrysalides may look like they are resting, but an amazing transformation is taking place inside! The caterpillar parts inside each chrysalis are liquefying and re-arranging to become the cells, tissues and organs of a gorgeous butter�y.
As the days pass, be sure to keep a close eye on the chrysalides. These little creatures are all approximately the same age and are at the same stage of development. They will likely begin to emerge around the same time.
Please Note: Birth is an incredible miracle, but it can also be a little messy. After a butter�y emerges from the chrysalis, it may expel a small amount of red meconium. Do not be disturbed by this natural occurrence. Meconium is not blood; it is the waste liquid left over after metamorphosis. It is a good idea to place a paper towel or cloth under the habitat to protect any permeable surfaces or furniture from staining.
Are your chrysalides beginning to darken? This is a big clue that your butter�ies are preparing to emerge. You’ll be able to see the outlines of the butter�ies’ wings and abdomen inside the chrysalides.
Watch carefully – the magical birth of a butter�y happens surprisingly quickly. When a butter�y is ready to emerge, it takes in air through tiny spiracles (tiny holes) in the chrysalis. This added air pressure helps the butter�y split the chrysalis open at speci�c seams or “lines of weakness”.
The butter�y will climb out of the split chrysalis with soft, crumpled wings and then position itself head upward in a vertical position. It will sway from side to side, forcing blood into the veins of its wings in order to expand them to their full size. Do not touch or disturb the butter�y during this process. You may see the butter�y expel a small amount of red meconium during this wing expansion. Explain to your students that this substance is the leftover wing pigments and �uid not needed for the formation of the butter�y. Evidence of meconium means that your butter�y is healthy!When a butter�y is born, its tongue (or proboscis) begins as two long strands or halves that must be fused together. Students will observe the butter�y coiling and uncoiling the two halves during wing expansion. The two halves eventually join to form a tube-like tongue. The butter�y will use this tube to sip nectar.
Once its wings are fully expanded and hardened and the proboscis is fused, your butter�y is ready for �ight!
9. Feed and Observe your ButterfliesYour butter�ies will not be hungry for the �rst day. But soon your students will �nd feeding their butter�ies is easy, fun and fascinating! Here’s what to do to make sure your hungry butter�ies are happy:
• Mix 3 teaspoons of sugar into 1 cup of water. Stir.
• You may, if you like, place fresh flowers on the bottom of your habitat.
• Sprinkle the sugar water, or nectar, on the flowers daily with the pipette included.
• Or, soak a tissue with the sugar water and place the tissue on a paper plate at the bottom of the habitat.
• Refrigerate any leftover nectar.
• Do not leave an open container of sugar water in the habitat. Your butterflies may fall into it and drown.
Watch the butter�ies unroll their proboscises like a party noisemaker to sip the sweet nectar. When they are �nished, they coil their proboscises back up again!
Butter�ies also enjoy fresh slices of orange, apple or watermelon. Did you know butter�ies taste with their feet? This tasting method enables a butter�y to quickly determine whether a �ower will provide nectar without uncoiling its proboscis.
10. Set Them Free!Our favorite part of growing Painted Lady Butter�ies is the excitement of letting them go! Insect Lore recommends that you and your students release your butter�ies into their natural environment after a few days of observation. Your butter�y release can be even more meaningful if it coincides with a special school celebration!
The Adult Painted Lady Butter�y has a life span of 2 to 5 weeks. After you have watched, studied and shared the wonder of your butter�ies, it is time to Set Them Free!
• Release your butterflies within a week after they have emerged from their chrysalides. • Be sure temperatures are above 55 degrees Fahrenheit.
• Open the habitat carefully. Patiently wait for the butterflies to take flight.
• Do not shake the habitat.
• Or, carefully and quietly allow the butterflies to crawl onto your hand and fly away.
When you release your butter�ies outdoors, your little friends will be free to begin the amazing life cycle all over again. Remember, butterflies are important and helpful members of our environment. They pollinate �owers to help in the production of seeds.
5 6
LiveButterflyPavilion
School Kit
INSTRUCTIONS AND ACTIVITY GUIDE
Explore the Incredible Miracle ofMetamorphosis With Your Students!
Small partsNot for Children under 3 years
The Live Butterfly Pavilion School Kit includes:
• 33 caterpillars (larvae) and all of the specially formulated, nutritious food they need to grow into beautiful Painted Lady Butterflies OR a certificate to redeem 33 caterpillars and food.• 33 1 oz cups and lids – one cup for each caterpillar• A plastic spoon, transfer brush and feeding pipette• A 2 foot tall pop-up Butterfly Pavilion Habitat to house your butterflies• Complete Instructions and Activity Guide
11. Wash your Butterfly Pavilion Habitat
Your Butter�y Pavilion Habitat is easy to clean and store away until your next project. Simply wash the mesh with warm tap water and a drop of mild dishwashing detergent. Rinse. Hang the habitat to dry and it will be ready for more butter�y friends!
Looking ahead to next year’s butterfly project? Do you plan to share the Miracle of Metamorphosis with your students next year? The Live Butter�y Pavilion School Kit Re�ll is ideal for those teachers and educators who already have the Butter�y Pavilion Habitat. The Live School Kit Re�ll includes: • 33 caterpillars and all of the nutritious food they need to develop into beautiful Painted Lady Butter�ies • 33 small 1 oz cups • feeding pipette • transfer brush• plastic spoon • instructions
Order the Live Butter�y Pavilion School Kit Re�ll at InsectLore.com.
Feedback
Your students’ butter�y experience is important to us! Please share your stories, reviews and images with us on Facebook, Twitter and Pinterest or at InsectLore.com!
Contact Us: [email protected]
Visit Us: InsectLore.comhttp://www.pinterest.com/insectlore/
https://www.facebook.com/insectlore
http://instagram.com/insectlore