logic 660 user manual - chilledgrowlights.com · logic 660 user manual speci˜cations input power...
TRANSCRIPT
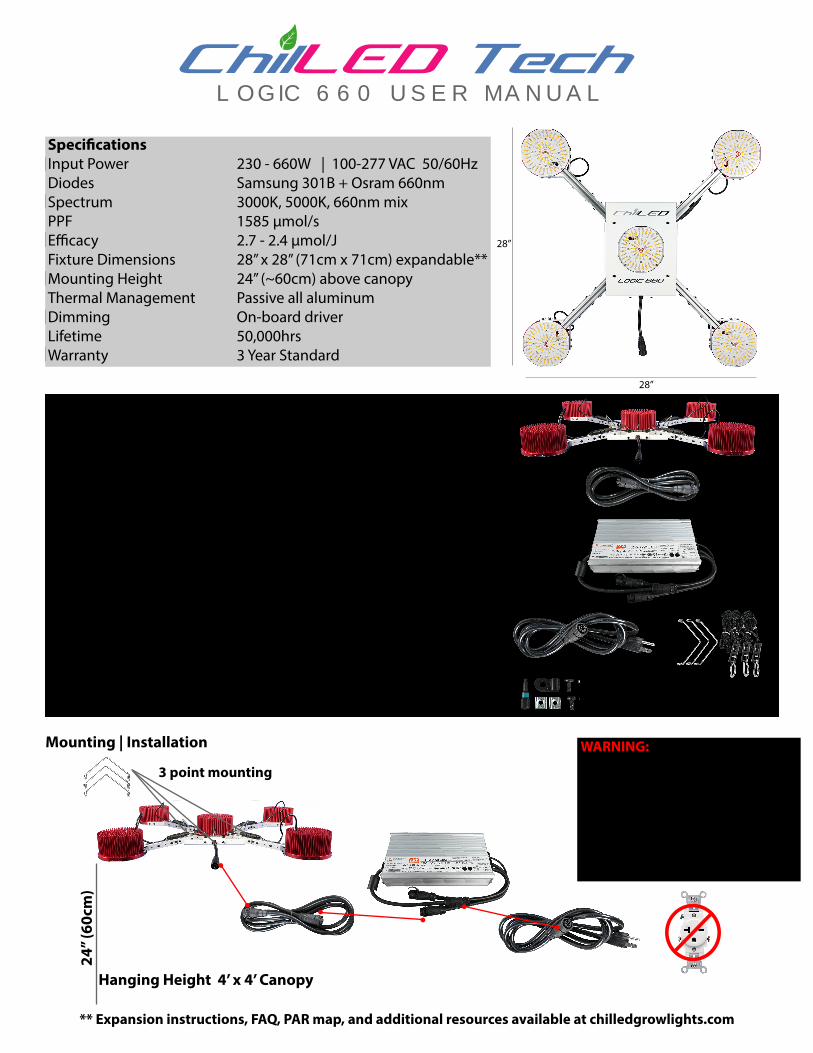
LOGIC 660 USER MANUAL
Speci�cationsInput PowerDiodesSpectrumPPFE�cacyFixture DimensionsMounting HeightThermal ManagementDimmingLifetimeWarranty
230 - 660W | 100-277 VAC 50/60HzSamsung 301B + Osram 660nm3000K, 5000K, 660nm mix1585 µmol/s2.7 - 2.4 µmol/J28” x 28” (71cm x 71cm) expandable**24” (~60cm) above canopyPassive all aluminumOn-board driver50,000hrs3 Year Standard
28”
28”
3”System hardware
A. LOGIC 660 LED �xture
B. 79” (2M) DC remote driver cable
C. Meanwell HLG-600 LED Driver
D. 79” (2M) AC Power Cord
E. SS hangers | Aluminum mechanism rope ratchets (x3)
F. Spare Fasteners + T15 torx bit
A.
F.
E.D.
C.
B.
*one included. user may link up to three cables for longer distance remote driver mounting
Mounting | Installation
24” (
60cm
)
Hanging Height 4’ x 4’ Canopy
3 point mounting
WARNING:Never plug into wall before allother connections are made.
Connecting or disconnectingthe DC extension while energized could permanently damage your�xture & void warranty.
** Expansion instructions, FAQ, PAR map, and additional resources available at chilledgrowlights.com
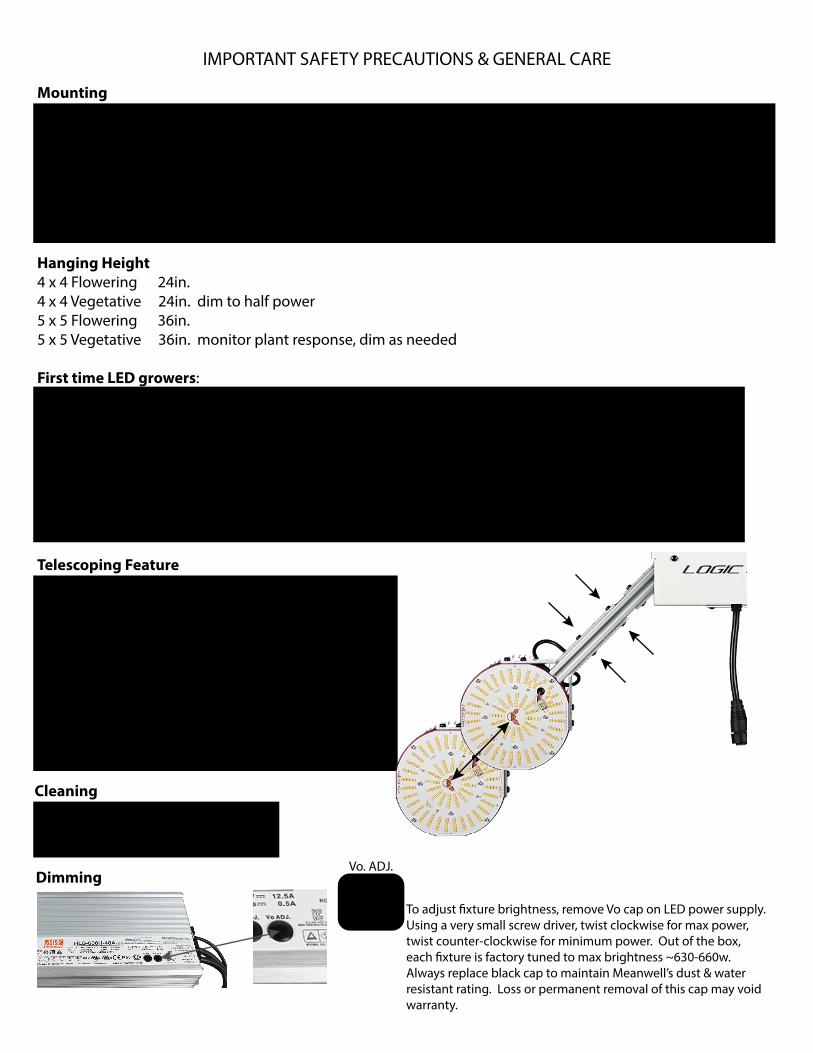
IMPORTANT SAFETY PRECAUTIONS & GENERAL CARE
Mounting
CleaningIsopropyl Alcohol / Rubbing Alcohol is an approved cleaning agentfor Samsung LEDs.
Dimming
Hanging Height4 x 4 Flowering 24in.4 x 4 Vegetative 24in. dim to half power 5 x 5 Flowering 36in.5 x 5 Vegetative 36in. monitor plant response, dim as needed
First time LED growers: A note from growmau5,If this is your �rst LED grow light, congratulations & thank you for supporting ChilLED Tech. LED �xtures of this caliber are very intense. For me personally, I like to start by hanging the �xture as high as my space allowson day one. Using a “Kil-a-watt” power monitor, I will also dim the �xture by 50%. The new growth will likelybe a lighter lime green color, then settle into a deeper , darker green color as the internodes stack. If the growthstays a lighter lime green color , or looks washed out, this is likely a “too much light” issue. Start slow, start highand let the plants get used to the intensity and spectrum over the course of a week. This will save you time in the long run. ~growmau5
Three hanging sets are included with each light. We recommend hanging this �xture using all three.Set your level (left / right balance) �rst, then add the third hanger at the wire harness mounting point.You can secure the DC extension cable to this third rope ratchet using cable ties for a cleaner look.
IMPORTANT: This is an aluminum, passively cooled LED �xture. The top of the pin heatsinks must be unobstructed to properly radiate heat away from the LEDs. Leave a minimum 4 inch (10cm) air gap above the�xture for proper passive ventilation.
Telescoping FeatureFor 4x4 spaces, use the 24” hanging height & factorymounting position right out of the box. For larger spaces, users can telescope the four cornerarms for a larger �xture & larger spread. Place �xtureon a clean, smooth, �at surface. Do NOT adjust while hanging.Using the included T15 Torx bit, loosen (but do not remove)the (4) screws securing each LED bracket. Adjust to your desired spread then re-tighen.
+-
To adjust �xture brightness, remove Vo cap on LED power supply.Using a very small screw driver, twist clockwise for max power,twist counter-clockwise for minimum power. Out of the box, each �xture is factory tuned to max brightness ~630-660w. Always replace black cap to maintain Meanwell’s dust & waterresistant rating. Loss or permanent removal of this cap may voidwarranty.
Vo. ADJ.