littlegeranium made by rae · littlegeranium a free sewing pattern by rae hoekstra © rae hoekstra...
TRANSCRIPT
© Rae Hoekstra 2013. All Rights Reserved. 1Little Geranium
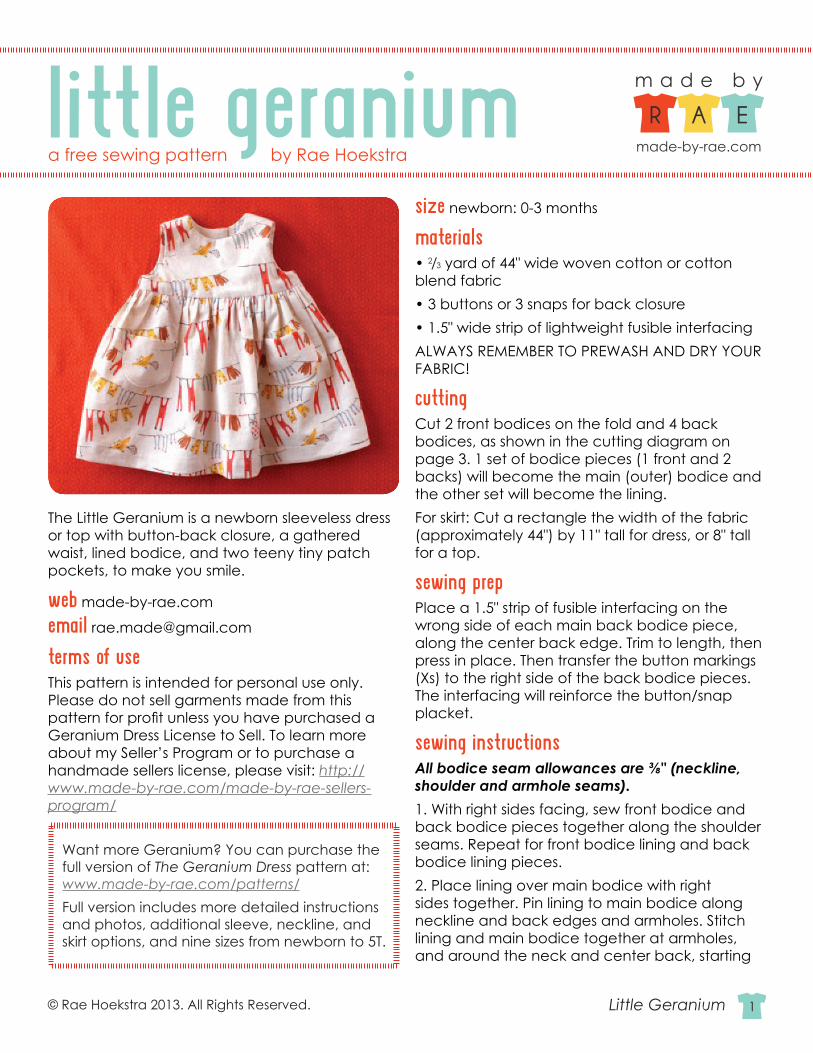
The Little Geranium is a newborn sleeveless dress or top with button-back closure, a gathered waist, lined bodice, and two teeny tiny patch pockets, to make you smile.
web made-by-rae.com
email [email protected]
terms of useThis pattern is intended for personal use only. Please do not sell garments made from this
Geranium Dress License to Sell. To learn more about my Seller’s Program or to purchase a handmade sellers license, please visit: http://www.made-by-rae.com/made-by-rae-sellers-program/
size newborn: 0-3 months
materials2/3 yard of 44" wide woven cotton or cotton
blend fabric
ALWAYS REMEMBER TO PREWASH AND DRY YOUR FABRIC!
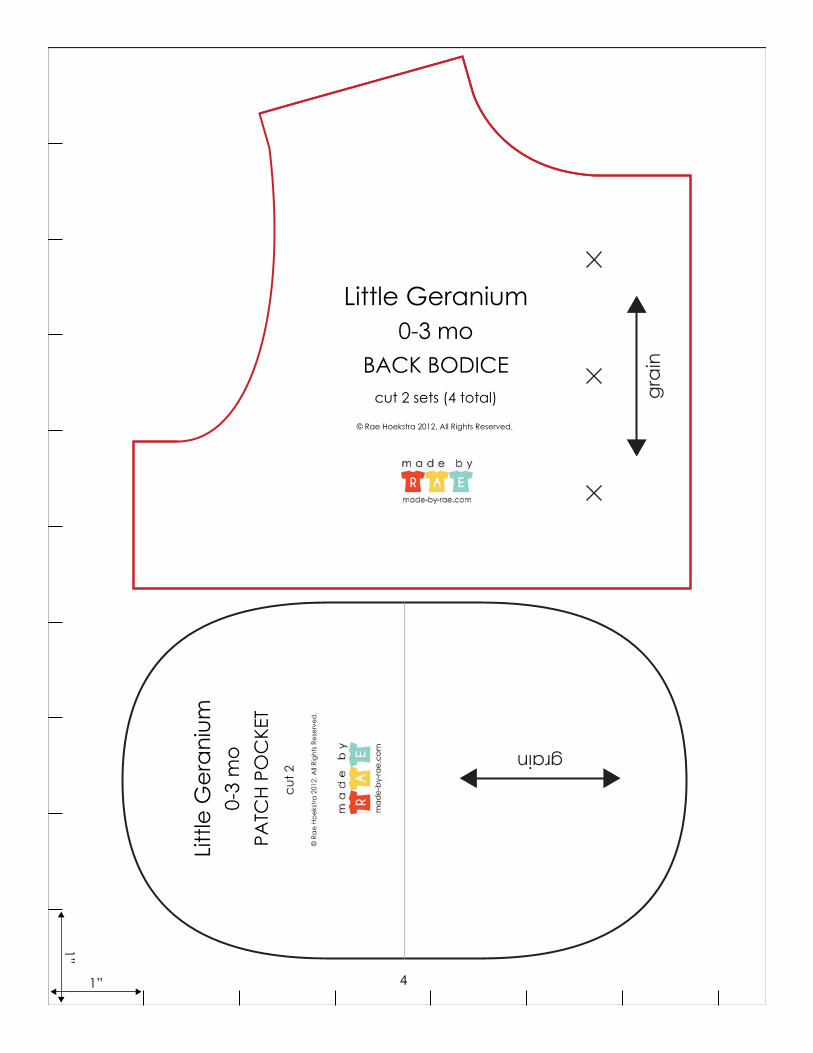
cuttingCut 2 front bodices on the fold and 4 back bodices, as shown in the cutting diagram on page 3. 1 set of bodice pieces (1 front and 2 backs) will become the main (outer) bodice and the other set will become the lining.For skirt: Cut a rectangle the width of the fabric (approximately 44") by 11" tall for dress, or 8" tall for a top.
sewing prep
wrong side of each main back bodice piece, along the center back edge. Trim to length, then press in place. Then transfer the button markings (Xs) to the right side of the back bodice pieces. The interfacing will reinforce the button/snap placket.
sewing instructions
shoulder and armhole seams).1. With right sides facing, sew front bodice and back bodice pieces together along the shoulder seams. Repeat for front bodice lining and back bodice lining pieces.2. Place lining over main bodice with right sides together. Pin lining to main bodice along neckline and back edges and armholes. Stitch lining and main bodice together at armholes, and around the neck and center back, starting
R A E
m a d e b y
made-by-rae.com
Want more Geranium? You can purchase the full version of The Geranium Dress pattern at: www.made-by-rae.com/patterns/ Full version includes more detailed instructions and photos, additional sleeve, neckline, and
little geraniuma free sewing pattern by Rae Hoekstra
© Rae Hoekstra 2013. All Rights Reserved. 2Little Geranium
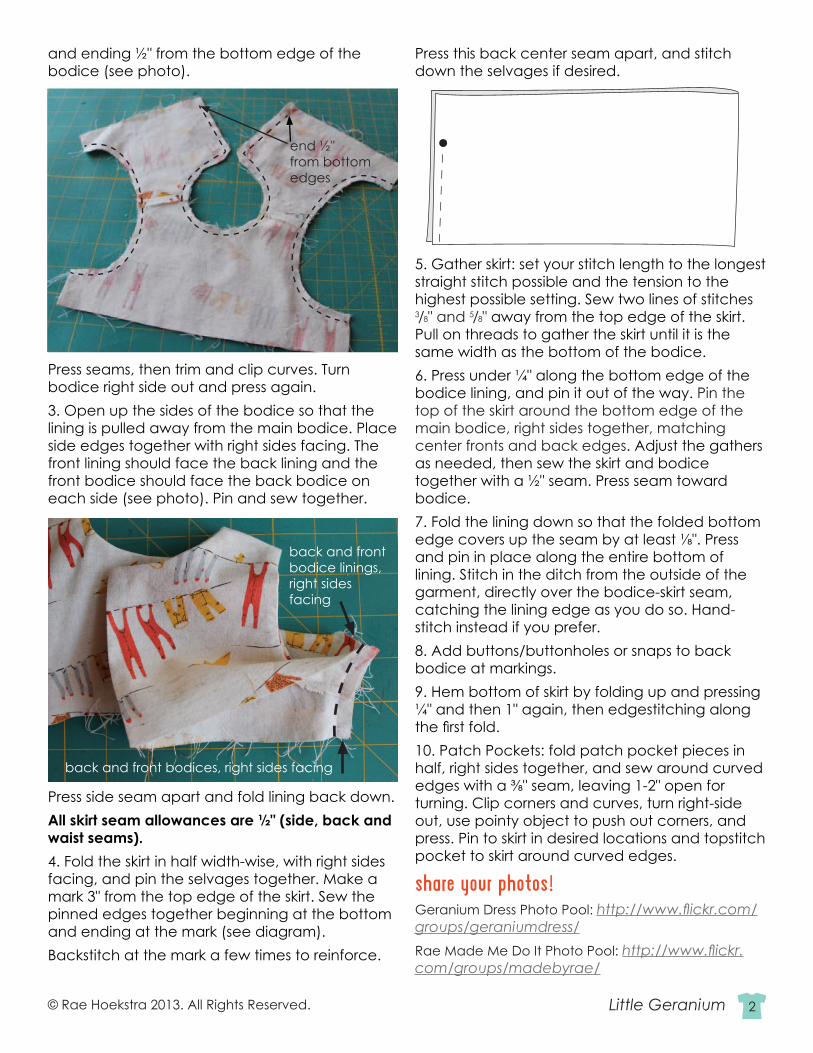
and ending ½" from the bottom edge of the bodice (see photo).
Press seams, then trim and clip curves. Turn bodice right side out and press again.3. Open up the sides of the bodice so that the lining is pulled away from the main bodice. Place side edges together with right sides facing. The front lining should face the back lining and the front bodice should face the back bodice on each side (see photo). Pin and sew together.
Press side seam apart and fold lining back down.All skirt seam allowances are ½" (side, back and waist seams).4. Fold the skirt in half width-wise, with right sides facing, and pin the selvages together. Make a mark 3" from the top edge of the skirt. Sew the pinned edges together beginning at the bottom and ending at the mark (see diagram). Backstitch at the mark a few times to reinforce.
Press this back center seam apart, and stitch down the selvages if desired.
straight stitch possible and the tension to the highest possible setting. Sew two lines of stitches 3/8" and /8" away from the top edge of the skirt. Pull on threads to gather the skirt until it is the same width as the bottom of the bodice.6. Press under ¼" along the bottom edge of the bodice lining, and pin it out of the way. Pin the top of the skirt around the bottom edge of the main bodice, right sides together, matching center fronts and back edges. Adjust the gathers as needed, then sew the skirt and bodice together with a ½" seam. Press seam toward bodice.7. Fold the lining down so that the folded bottom
and pin in place along the entire bottom of lining. Stitch in the ditch from the outside of the garment, directly over the bodice-skirt seam, catching the lining edge as you do so. Hand-stitch instead if you prefer.8. Add buttons/buttonholes or snaps to back bodice at markings.9. Hem bottom of skirt by folding up and pressing ¼" and then 1" again, then edgestitching along
10. Patch Pockets: fold patch pocket pieces in half, right sides together, and sew around curved
turning. Clip corners and curves, turn right-side out, use pointy object to push out corners, and press. Pin to skirt in desired locations and topstitch pocket to skirt around curved edges.
share your photos! Geranium Dress Photo Pool: groups/geraniumdress/Rae Made Me Do It Photo Pool: com/groups/madebyrae/
end ½" from bottom edges
back and front bodice linings, right sides facing
back and front bodices, right sides facing
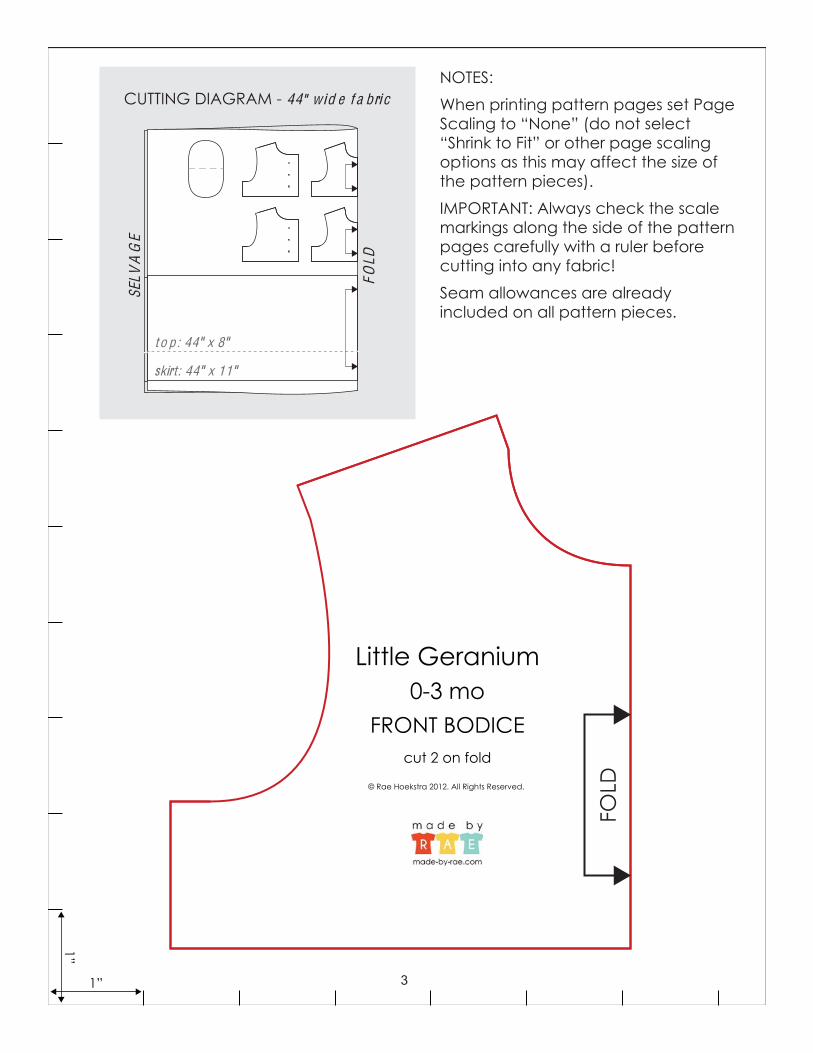
CUTTING DIAGRAM - 44" w id e f a b ri c
SELV
AG
E
FOLD
t o p : 44" x 8"
skirt: 44" x 11"