linksys velop cujo setup step by step guide · cellular data or vpn are running in the phone turn...
TRANSCRIPT

LINKSYS VELOP + CUJO SETUP (STEP-BY-STEP GUIDE)
1. Linksys Velop setup
1.1 The demo setup was performed on iPhone, but all steps apply to Android
environment too. Linksys Velop mesh system nodes are being recognized through Bluetooth
so before starting the setup enable Bluetooth on your smartphone:
1.2 Download and install the Linksys Velop app:
1.3 Open the app:

1.4 Since this is a fresh setup choose new setup option:
1.5 In the following screen choose Velop system:
1.6 Agree to the terms and conditions:
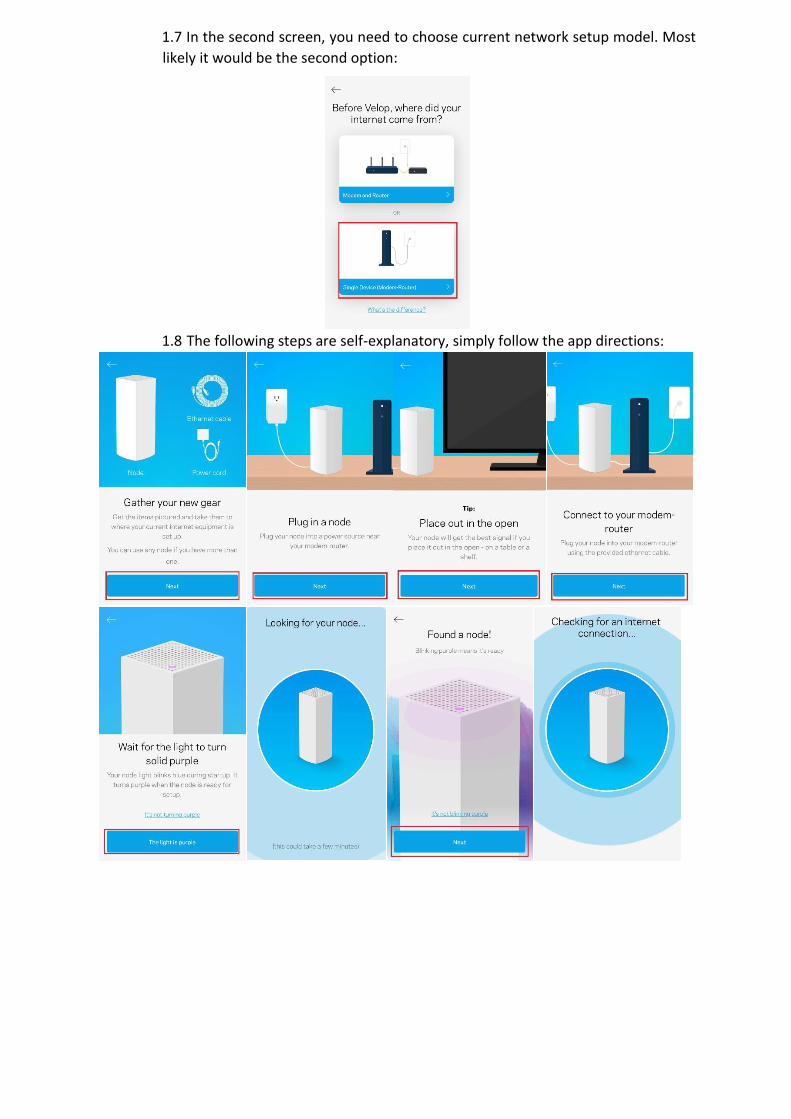
1.7 In the second screen, you need to choose current network setup model. Most
likely it would be the second option:
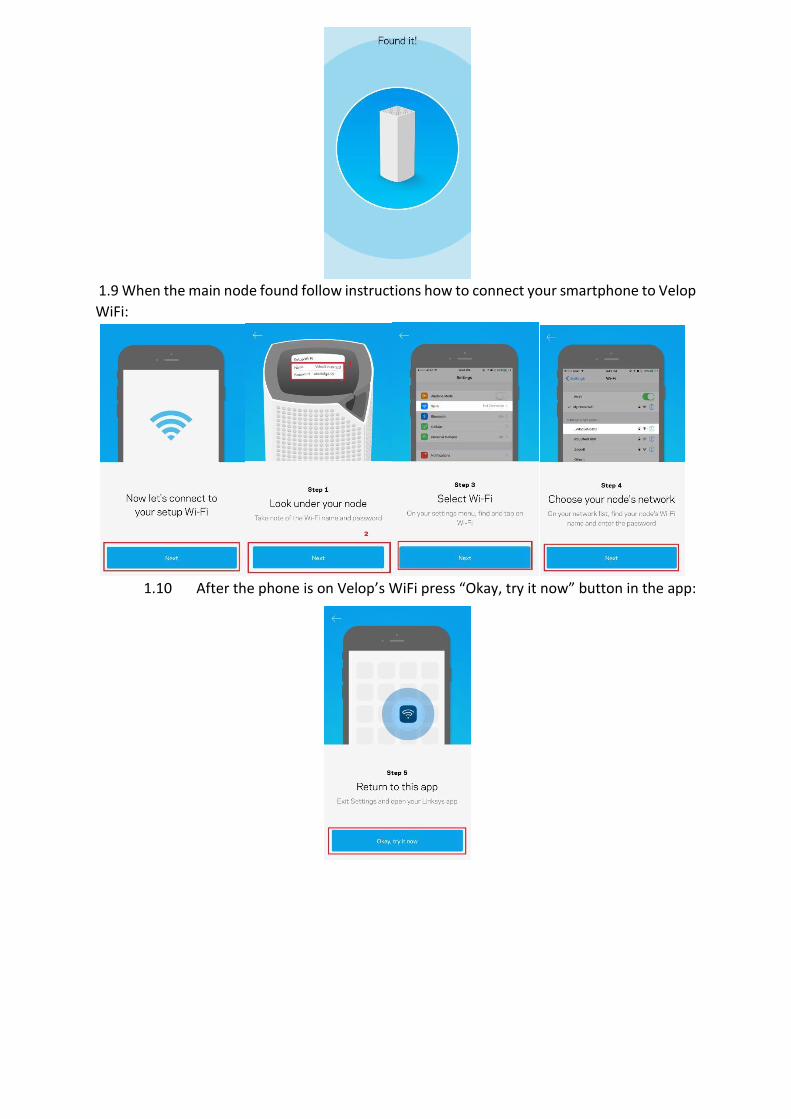
1.8 The following steps are self-explanatory, simply follow the app directions:
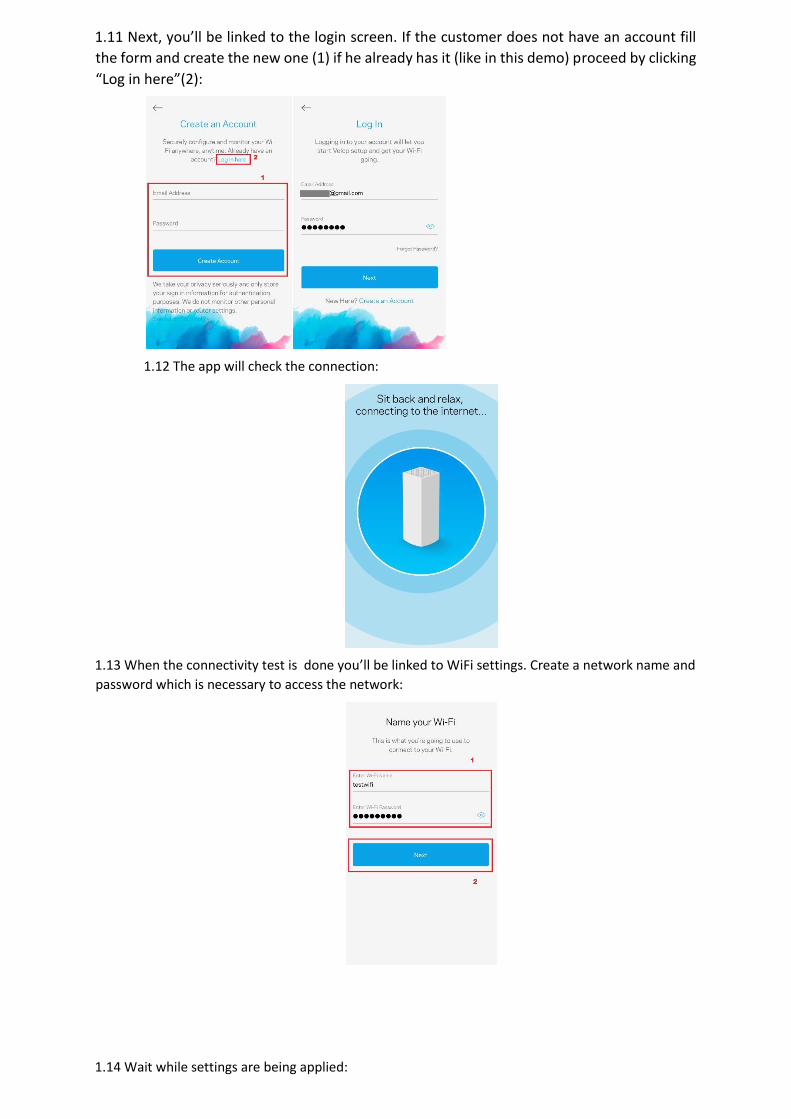
1.9 When the main node found follow instructions how to connect your smartphone to Velop
WiFi:
1.10 After the phone is on Velop’s WiFi press “Okay, try it now” button in the app:
1.11 Next, you’ll be linked to the login screen. If the customer does not have an account fill
the form and create the new one (1) if he already has it (like in this demo) proceed by clicking
“Log in here”(2):
1.12 The app will check the connection:
1.13 When the connectivity test is done you’ll be linked to WiFi settings. Create a network name and
password which is necessary to access the network:
1.14 Wait while settings are being applied:
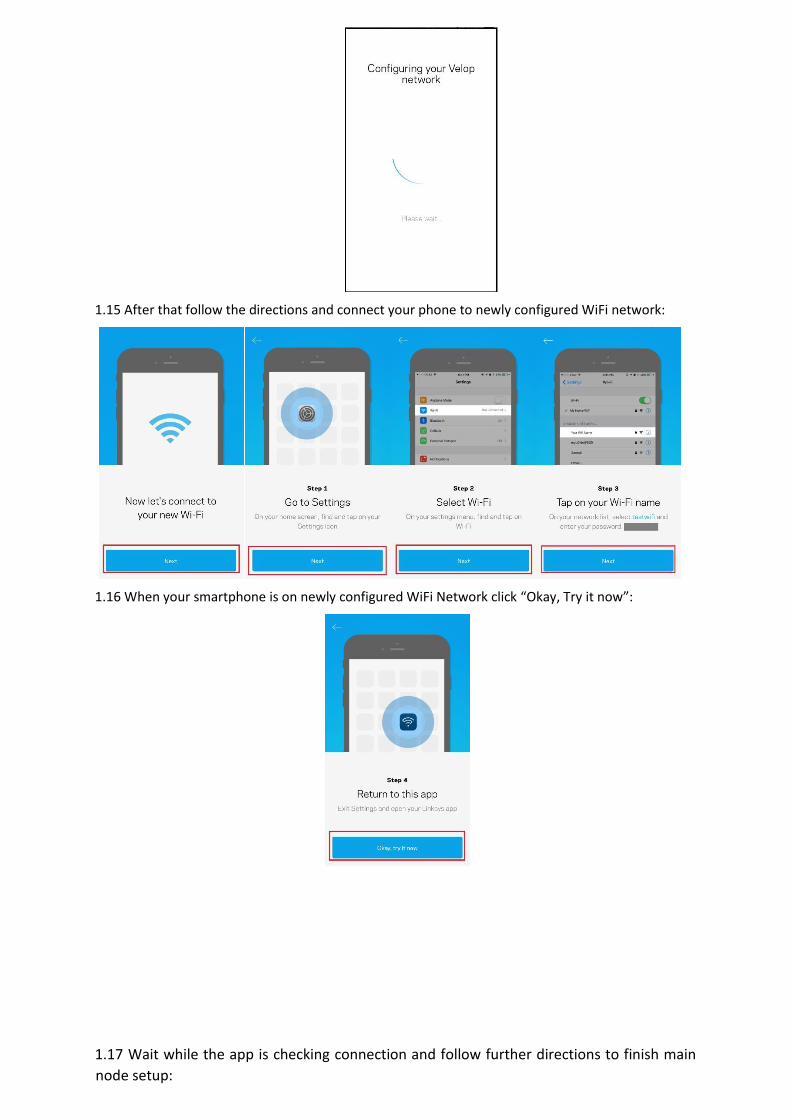
1.15 After that follow the directions and connect your phone to newly configured WiFi network:
1.16 When your smartphone is on newly configured WiFi Network click “Okay, Try it now”:
1.17 Wait while the app is checking connection and follow further directions to finish main
node setup:
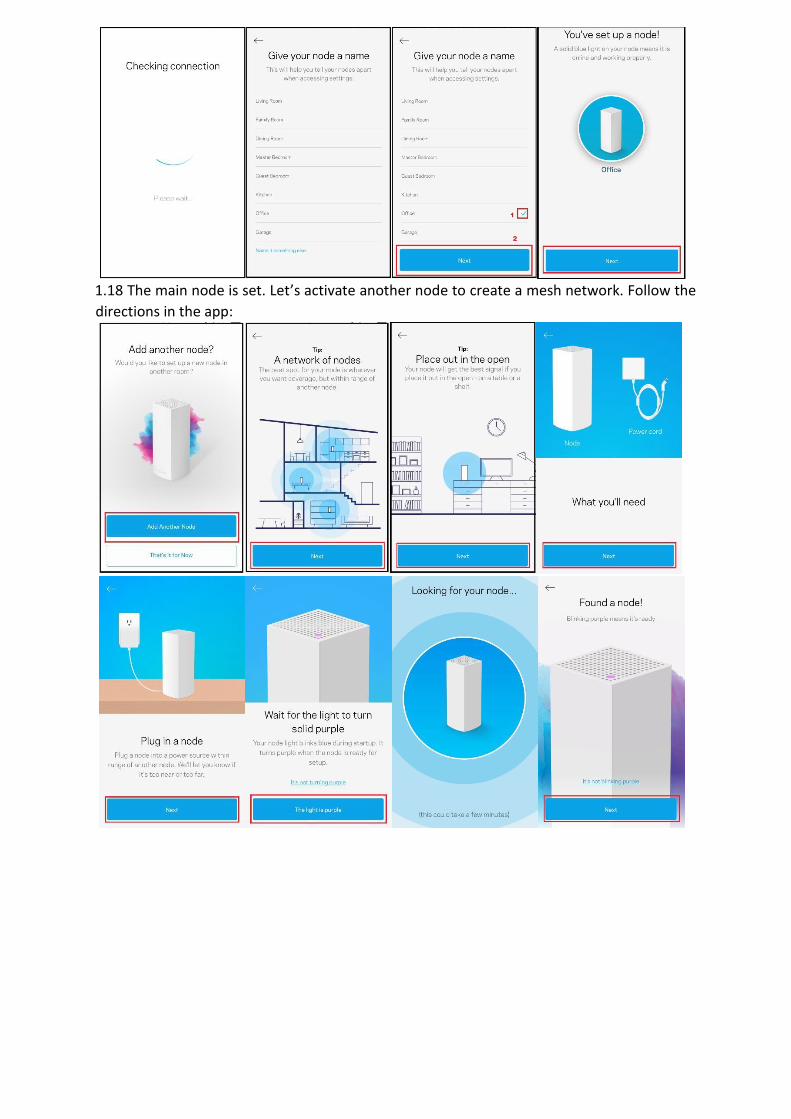
1.18 The main node is set. Let’s activate another node to create a mesh network. Follow the
directions in the app:
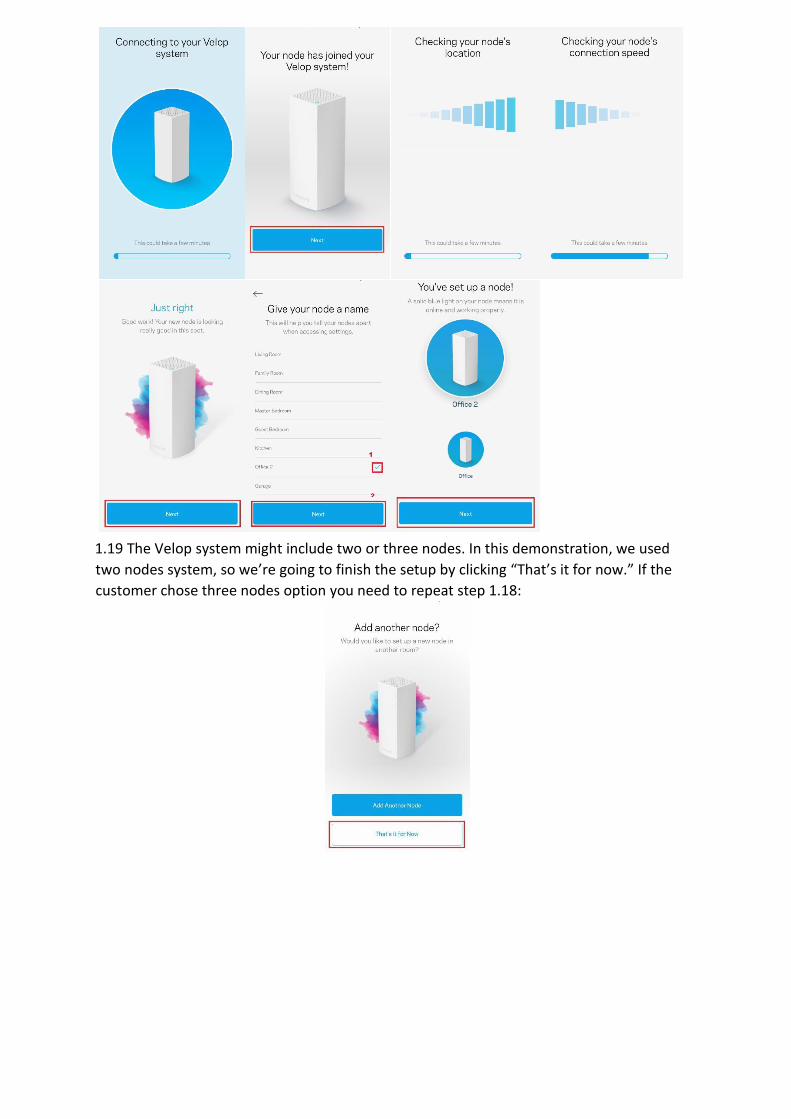
1.19 The Velop system might include two or three nodes. In this demonstration, we used
two nodes system, so we’re going to finish the setup by clicking “That’s it for now.” If the
customer chose three nodes option you need to repeat step 1.18:
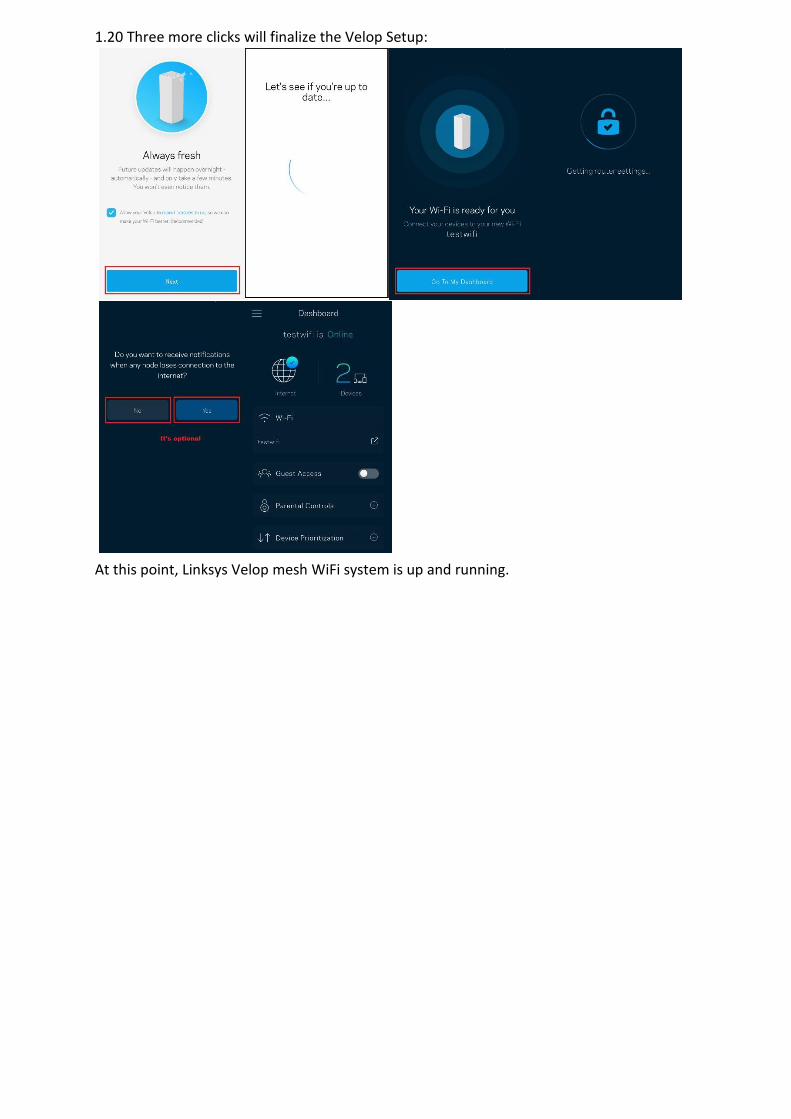
1.20 Three more clicks will finalize the Velop Setup:
At this point, Linksys Velop mesh WiFi system is up and running.
2. CUJO setup
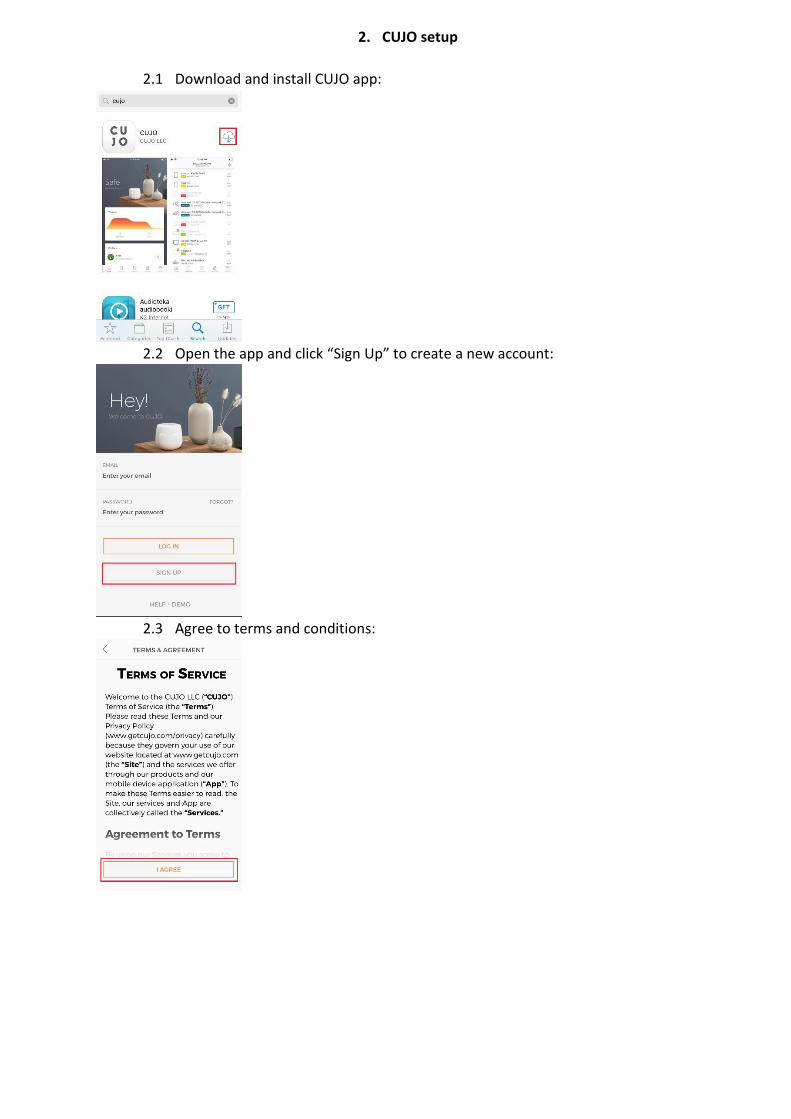
2.1 Download and install CUJO app:
2.2 Open the app and click “Sign Up” to create a new account:
2.3 Agree to terms and conditions:
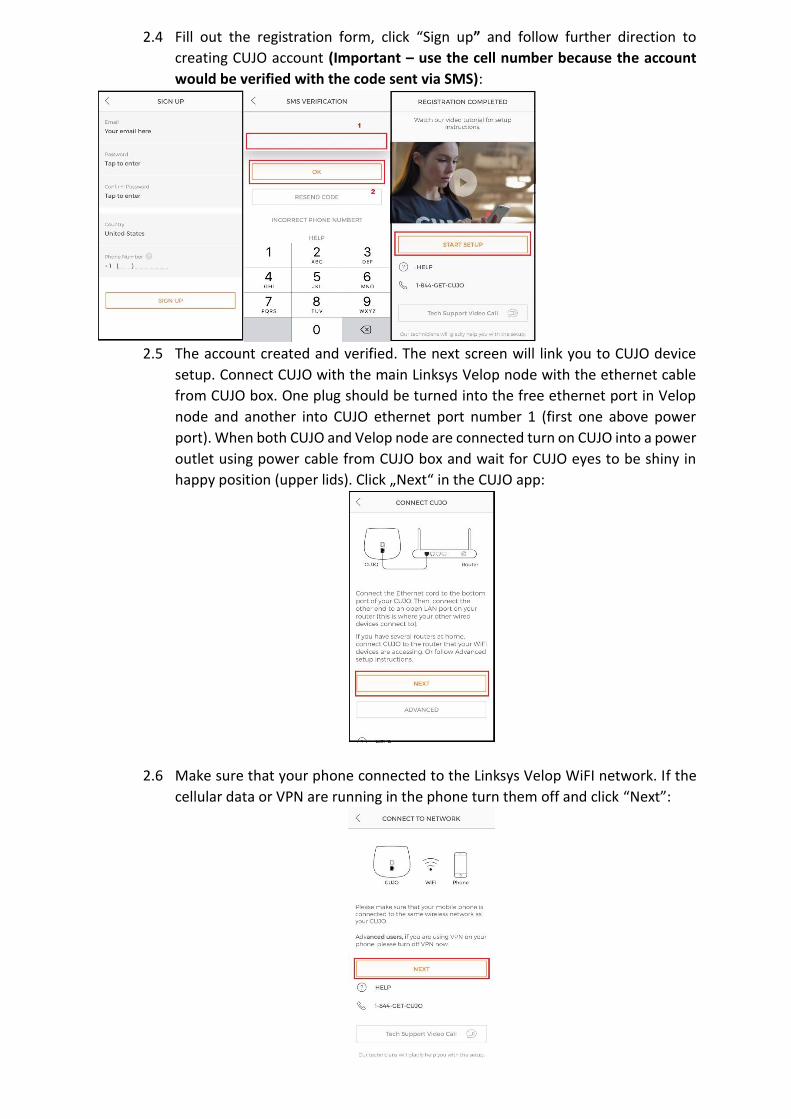
2.4 Fill out the registration form, click “Sign up” and follow further direction to
creating CUJO account (Important – use the cell number because the account
would be verified with the code sent via SMS):
2.5 The account created and verified. The next screen will link you to CUJO device
setup. Connect CUJO with the main Linksys Velop node with the ethernet cable
from CUJO box. One plug should be turned into the free ethernet port in Velop
node and another into CUJO ethernet port number 1 (first one above power
port). When both CUJO and Velop node are connected turn on CUJO into a power
outlet using power cable from CUJO box and wait for CUJO eyes to be shiny in
happy position (upper lids). Click „Next“ in the CUJO app:
2.6 Make sure that your phone connected to the Linksys Velop WiFI network. If the
cellular data or VPN are running in the phone turn them off and click “Next”:
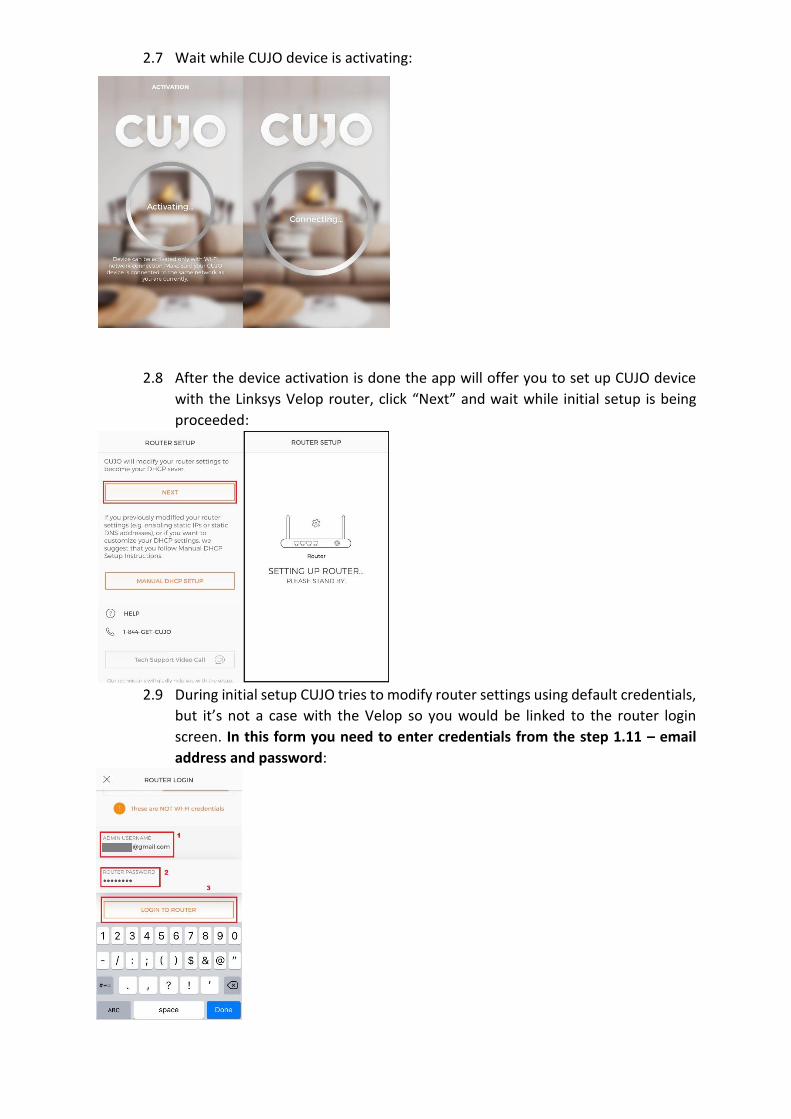
2.7 Wait while CUJO device is activating:
2.8 After the device activation is done the app will offer you to set up CUJO device
with the Linksys Velop router, click “Next” and wait while initial setup is being
proceeded:
2.9 During initial setup CUJO tries to modify router settings using default credentials,
but it’s not a case with the Velop so you would be linked to the router login
screen. In this form you need to enter credentials from the step 1.11 – email
address and password:
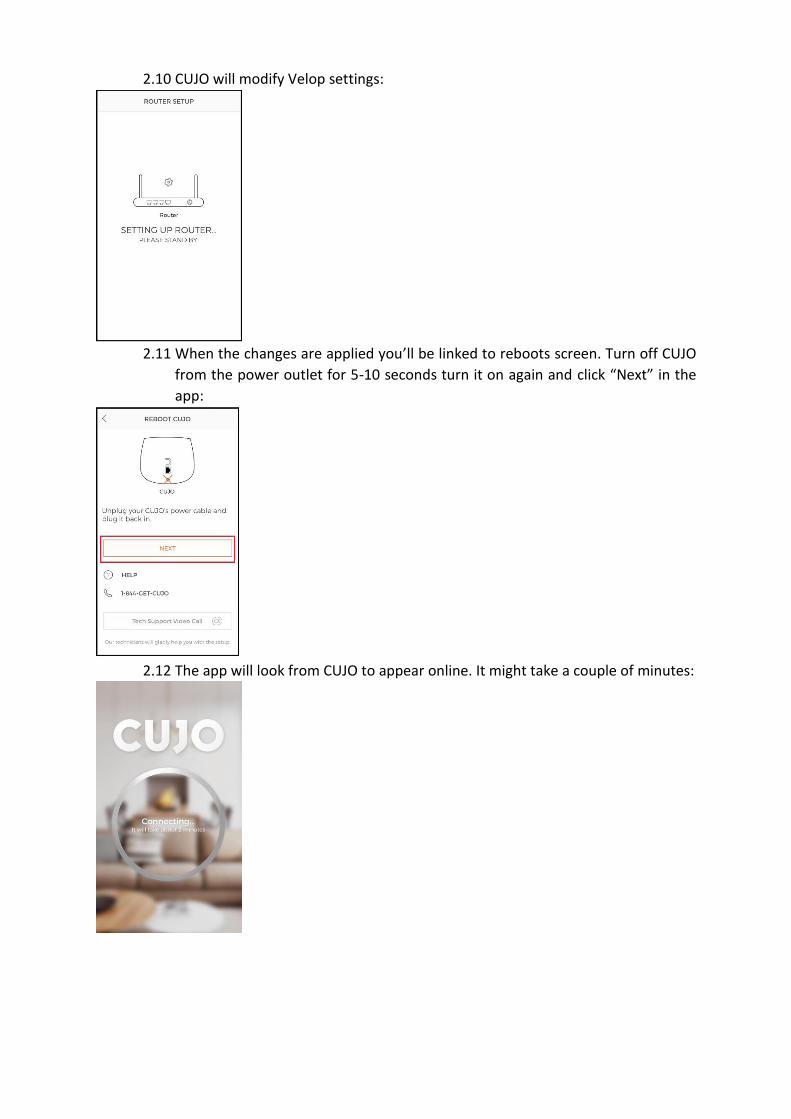
2.10 CUJO will modify Velop settings:
2.11 When the changes are applied you’ll be linked to reboots screen. Turn off CUJO
from the power outlet for 5-10 seconds turn it on again and click “Next” in the
app:
2.12 The app will look from CUJO to appear online. It might take a couple of minutes:
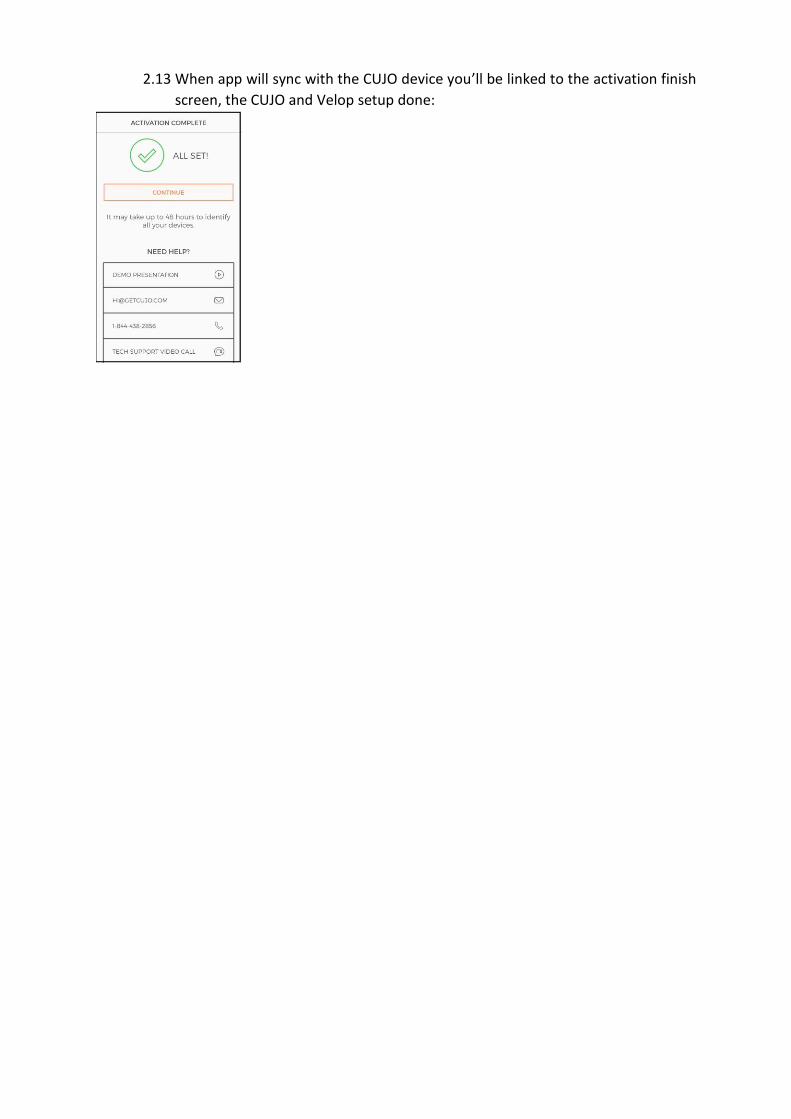
2.13 When app will sync with the CUJO device you’ll be linked to the activation finish
screen, the CUJO and Velop setup done: