light and shadows - mill river schoolsmillriverschools.org/documents/drivesync/curriculum... ·...
TRANSCRIPT

This work is licensed by the MA Department of Elementary & Secondary Education under the Creative Commons Attribution-NonCommercial-ShareAlike 3.0 Unported License (CC BY-NC-SA 3.0). Educators may use, adapt, and/or share. Not for commercial use. To view a copy of the license, visit http://creativecommons.org/licenses/by-nc-sa/3.0/ July 2015 Page 1 of 52
Light and Shadows Physical Science (Waves and their Applications in Technologies for
Information Transfer) and Engineering, Grade 1
Students explore sources of light and how important it is to us. They investigate how shadows are made, focusing on how the shape and size of shadows can be changed. Inside explorations include investigating the formation of shadows and interaction of light with different materials. Outside shadow explorations engage students in manipulating shadows based on position and orientation. Students also begin to look at reflection using mirrors to
redirect a light beam. In the final assessment, students apply their learning in a skit about the interaction of light and materials.
This Model Curriculum Unit is designed to illustrate effective curriculum that lead to expectations outlined in the Draft Revised Science and Technology/Engineering Standards (www.doe.mass.edu/STEM/review.html) as well as the MA Curriculum Frameworks for English Language Arts/Literacy
and Mathematics. This unit includes lesson plans, a Curriculum Embedded Performance Assessment (CEPA), and related resources. In using this unit it is important to consider the variability of learners in your class and make adaptations as necessary.
July, 2015
This work is licensed by the MA Department of Elementary & Secondary Education under the Creative Commons Attribution-NonCommercial-ShareAlike 3.0 Unported License (CC BY-NC-SA 3.0). Educators may use, adapt, and/or share. Not for commercial use. To view a copy of the license, visit http://creativecommons.org/licenses/by-nc-sa/3.0/ July 2015 Page 2 of 52
This document was prepared by the Massachusetts Department of Elementary and Secondary Education. Mitchell D. Chester, Ed.D., Commissioner The Massachusetts Department of Elementary and Secondary Education, an affirmative action employer, is committed to ensuring that all of its programs and facilities are accessible to all members of the public. We do not discriminate on the basis of age color, disability, national origin, race, religion, sex, or sexual orientation. © 2015 Massachusetts Department of Elementary and Secondary Education (ESE). ESE grants permission to use the material it has created under the terms of the Creative Commons Attribution-NonCommercial-ShareAlike 3.0 Unported License. Additionally, the unit may also contain other third party material used with permission of the copyright holder. Please see Image and Text Credits for specific information regarding third copyrights. Every effort has been made to acknowledge copyright. Any omissions brought to our attention will be corrected in subsequent editions. Image and Text Credits:
This unit is based, in part, on PEEP and the Big Wide World Explorer’s Guide, PBS, PEEP and the Big Wide World:
http://peepandthebigwideworld.com © 2014 WGBH Educational Foundation. This unit was adapted with permission from the Public Schools of Brookline.
The contents of this Model Curriculum Unit were developed under a grant from the U.S. Department of Education. However, those contents do not necessarily represent the policy of the U.S. Department of Education, and you should not assume endorsement by the Federal Government. Massachusetts Department of Elementary and Secondary Education, 75 Pleasant St, Malden, MA 02148-4906. Phone 781-338-3300, TTY: N.E.T. Relay 800-439-2370, www.doe.mass.edu

This work is licensed by the MA Department of Elementary & Secondary Education under the Creative Commons Attribution-NonCommercial-ShareAlike 3.0 Unported License (CC BY-NC-SA 3.0). Educators may use, adapt, and/or share. Not for commercial use. To view a copy of the license, visit http://creativecommons.org/licenses/by-nc-sa/3.0/ July 2015 Page 3 of 52
Table of Contents Unit Assumptions and Comments on Sequence ...................................................................................................................................................... 4
Unit Plan ................................................................................................................................................................................................................................... 7
Lesson 1: Sources of Light ............................................................................................................................................................................................. 11
Lesson 2: Light and Properties of Materials .......................................................................................................................................................... 15
Lesson 3: Introduction to Shadows ........................................................................................................................................................................... 19
Lesson 4: Outdoor Shadows ......................................................................................................................................................................................... 22
Lesson 5: Friendly Shadows ......................................................................................................................................................................................... 25
Lesson 6: Moving Shadows ........................................................................................................................................................................................... 28
Lesson 7: Indoor Shadows ............................................................................................................................................................................................. 31
Lesson 8: Shrinking and Stretching Shadows ....................................................................................................................................................... 34
Lesson 9: Using Light to Send Signals ....................................................................................................................................................................... 37
Curriculum Embedded Performance Assessment (CEPA): Teacher Instructions: Shadow Puppet Theater ............................. 42
CEPA: Student Instructions: Shadow Puppet Theater ....................................................................................................................................... 45
CEPA Rubric ......................................................................................................................................................................................................................... 46
Unit Resources .................................................................................................................................................................................................................... 47

This work is licensed by the MA Department of Elementary & Secondary Education under the Creative Commons Attribution-NonCommercial-ShareAlike 3.0 Unported License (CC BY-NC-SA 3.0). Educators may use, adapt, and/or share. Not for commercial use. To view a copy of the license, visit http://creativecommons.org/licenses/by-nc-sa/3.0/ July 2015 Page 4 of 52
Unit Assumptions and Comments on Sequence In this unit, students explore sources of light and how important it is to us. They investigate how shadows are made outside and inside, focusing on how the shape and size of shadows can be changed. Inside shadow explorations include investigating the formation of shadows using different materials. Students also are presented with a problem to solve: how to use light to send a signal. They use experimental design to identify ways to come up with solutions to this problem, and then test their ideas and designs. The unit ends with students creating a Shadow Puppet Theater skit in which they demonstrate how light interacts with different materials, as well as how shadows can change in both shape and size. As they move through this unit, students will be asking questions, gathering data, making claims based on their evidence, and sharing ideas. In this way, the teacher is the facilitator: rather than sharing the big ideas and concepts with students, in the form of lectures or demonstrations, the teacher will allow the students to come to the big ideas on their own, with guidance. Similarly, the focus will be on deep understanding of the concepts, rather than memorization of vocabulary, which should only be shared with students after they understand the concepts. The unit is organized around focus questions that will be used to direct science learning, as well as literacy connections: science notebook entries, science writing, science reading and science talk, all of which are key components of this unit. Science Dispositions for the Unit:
• Everyone can be a scientist. • Scientists are curious and learn by asking questions and exploring different ways to answer them. • Scientists gather evidence to answer their questions in many ways -observing, investigating, and seeking information from reliable sources. • When investigating, scientists change only one thing at a time to make it a fair test. • Scientists share their claims and evidence with others who may or may not agree with their findings. • The most important tools of scientists are their minds, imaginations and creativity. However, they often use tools and technology to obtain more
information than they can gather with their senses. • Engineers design objects/tools to solve problems. • Engineers try out many different ways to solve a problem. • When solving a problem, engineers draw their designs, build them, and try them out. If their design doesn’t work, they revise it and try again.

This work is licensed by the MA Department of Elementary & Secondary Education under the Creative Commons Attribution-NonCommercial-ShareAlike 3.0 Unported License (CC BY-NC-SA 3.0). Educators may use, adapt, and/or share. Not for commercial use. To view a copy of the license, visit http://creativecommons.org/licenses/by-nc-sa/3.0/ July 2015 Page 5 of 52
Notes about the unit: • Each lesson uses an Engage – Explore – Evaluation format, which informs learning within a lesson. Its educational value involves initiation of a
topic with students, providing students a chance to explore or investigate the topics on their own or in groups, and ends with a summation of the learned information and a formative assessment of student understanding.
• Throughout the unit, there are notes to the teachers to suggest ideas, strategies, and answers. They are noted as such and written in italics within parentheses.
• Lessons 4, 5, & 6 (Outdoor shadows) require a sunny day. • All handouts are located at the end of the unit in the Unit Resources section. • This unit requires multiple objects and tools, i.e. flashlights, lamps, mirrors; see each lesson for required class supplies.
See the strand map, on the next page, for an overview of the science standards that precede this unit and how the standards learned in this unit contribute to students’ learning in later grades.

This work is licensed by the MA Department of Elementary & Secondary Education under the Creative Commons Attribution-NonCommercial-ShareAlike 3.0 Unported License (CC BY-NC-SA 3.0). Educators may use, adapt, and/or share. Not for commercial use. To view a copy of the license, visit http://creativecommons.org/licenses/by-nc-sa/3.0/ July 2015 Page 6 of 52

This work is licensed by the MA Department of Elementary & Secondary Education under the Creative Commons Attribution-NonCommercial-ShareAlike 3.0 Unported License (CC BY-NC-SA 3.0). Educators may use, adapt, and/or share. Not for commercial use. To view a copy of the license, visit http://creativecommons.org/licenses/by-nc-sa/3.0/ July 2015 Page 7 of 52
Unit Plan Stage 1 Desired Results
ESTABLISHED GOALS G [NOTE: These are draft revised STE standards (as of 12/20/13); final adopted STE standards may be slightly different.] 1-PS4-3. Determine the effect of placing materials that allow light to pass through them, allow only some light through them, block all the light, or redirect light when put in the path of a beam of light. [Clarification Statement: Effects can include some or all light passing through, creation of a shadow, or redirecting light.] [Assessment Boundary: Assessment does not include quantitative measures.] 1-PS4-4. Use tools and materials to design and build a device that uses light or sound to send a signal over a distance.* [Clarification Statement: Examples of devices could include a light source to send signals, paper cup and string “telephones,” and a pattern of drum beats.] [Assessment Boundary: Assessment does not include technological details for how communication devices work.] K-2-ETS1-2. Generate multiple solutions to a design problem and make a drawing (plan) to represent one or more of the
Transfer Students will be able to independently use their learning to… T
• Engage in sustained, complex and successful scientific inquiry. • Analyze mechanisms of cause and effect in natural and designed systems based on
physical and chemical principles. Meaning
UNDERSTANDINGS U Students will understand that… 1. Some materials allow light to pass
through them, others allow only some light through, others block all the light (and create a dark shadow on any surface beyond them-on the other side from the light source-where the light can’t reach), and others redirect the light when put in the path of a beam of light.
2. A shadow is made when an object blocks the path of a beam of light, and creates a dark shape on a surface on the other side of the object away from the light source (where the light can’t reach).
3. The shape and size of shadows change when the source of light moves and the object stays in the same place, or when the object moves and the source of light stays in the same place.
4. Light can be redirected in different directions using a mirror.
5. Designing an investigation is based on prior knowledge and practice.
ESSENTIAL QUESTIONS Q
1. What happens when light shines on different types of materials?
2. How are shadows made? 3. How can the shape and size of shadows
be changed? 4. Can light and shadows be used to
communicate?
This work is licensed by the MA Department of Elementary & Secondary Education under the Creative Commons Attribution-NonCommercial-ShareAlike 3.0 Unported License (CC BY-NC-SA 3.0). Educators may use, adapt, and/or share. Not for commercial use. To view a copy of the license, visit http://creativecommons.org/licenses/by-nc-sa/3.0/ July 2015 Page 8 of 52
solutions.* English Language Arts and Literacy W.1.2 Write informative/explanatory texts in which they name a topic, supply some facts about the topic, and provide some sense of closure. W.1.8. With guidance and support from adults, recall information from experiences or gather information from provided sources to answer a question.
6. Light can be used to send a signal over a distance.
7. Answering questions based on newly learned information.
8. Writing informative text on a concept requires recalling information and experiences with the concept.
Acquisition
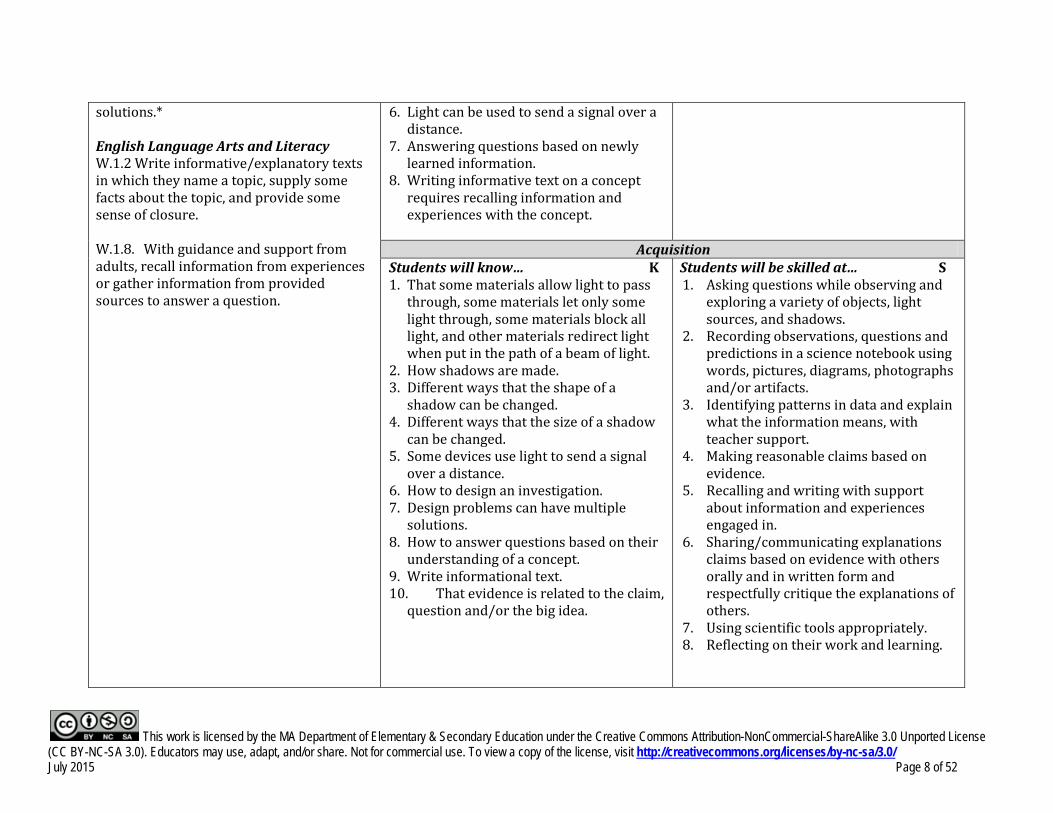
Students will know… K 1. That some materials allow light to pass
through, some materials let only some light through, some materials block all light, and other materials redirect light when put in the path of a beam of light.
2. How shadows are made. 3. Different ways that the shape of a
shadow can be changed. 4. Different ways that the size of a shadow
can be changed. 5. Some devices use light to send a signal
over a distance. 6. How to design an investigation. 7. Design problems can have multiple
solutions. 8. How to answer questions based on their
understanding of a concept. 9. Write informational text. 10. That evidence is related to the claim,
question and/or the big idea.
Students will be skilled at… S 1. Asking questions while observing and
exploring a variety of objects, light sources, and shadows.
2. Recording observations, questions and predictions in a science notebook using words, pictures, diagrams, photographs and/or artifacts.
3. Identifying patterns in data and explain what the information means, with teacher support.
4. Making reasonable claims based on evidence.
5. Recalling and writing with support about information and experiences engaged in.
6. Sharing/communicating explanations claims based on evidence with others orally and in written form and respectfully critique the explanations of others.
7. Using scientific tools appropriately. 8. Reflecting on their work and learning.

This work is licensed by the MA Department of Elementary & Secondary Education under the Creative Commons Attribution-NonCommercial-ShareAlike 3.0 Unported License (CC BY-NC-SA 3.0). Educators may use, adapt, and/or share. Not for commercial use. To view a copy of the license, visit http://creativecommons.org/licenses/by-nc-sa/3.0/ July 2015 Page 9 of 52
Stage 2 - Evidence Evaluative Criteria Assessment Evidence See CEPA Rubric CURRICULUM EMBEDDED PERFORMANCE ASSESSMENT (PERFORMANCE TASKS) PT
Shadow Puppet Theater Goal: To create a Shadow Puppet skit that teaches other students how light interacts with different materials, as well as how shadows can get bigger or smaller and can change shape. Role: Students will take on the role of a Shadow Puppet director and performer who is designing an educational skit. Audience: Theater full of students interested in learning about making different shadows and lighting effects. Situation: Students will write a skit about how materials interact with light and create characters (puppets) using different materials and popsicle sticks. Product Performance and Purpose: The product will be the performance of a skit and demonstration of how light interacts with materials and how shadows can change.
OTHER EVIDENCE: OE Formative Assessment: Circle Time Brainstorm (Lesson 1) Class Chart (Lessons 4 & 5) Class Discussion (Lessons 5 & 8) Student Writing (Lesson 6) Wrap-up Worksheets (Lessons 1, 2, 3, 7, & 9)
Stage 3 – Learning Plan Summary of Key Learning Events and Instruction
Lesson 1 – Sources of Light (Day 1; one 30-minute instructional period): Students’ prior knowledge and possible misconceptions about light and how light behaves are assessed through a circle-time discussion. Students are asked “Where do you think light comes from?” and they record their answers on class charts. Students then identify sources of light in the classroom.
This work is licensed by the MA Department of Elementary & Secondary Education under the Creative Commons Attribution-NonCommercial-ShareAlike 3.0 Unported License (CC BY-NC-SA 3.0). Educators may use, adapt, and/or share. Not for commercial use. To view a copy of the license, visit http://creativecommons.org/licenses/by-nc-sa/3.0/ July 2015 Page 10 of 52
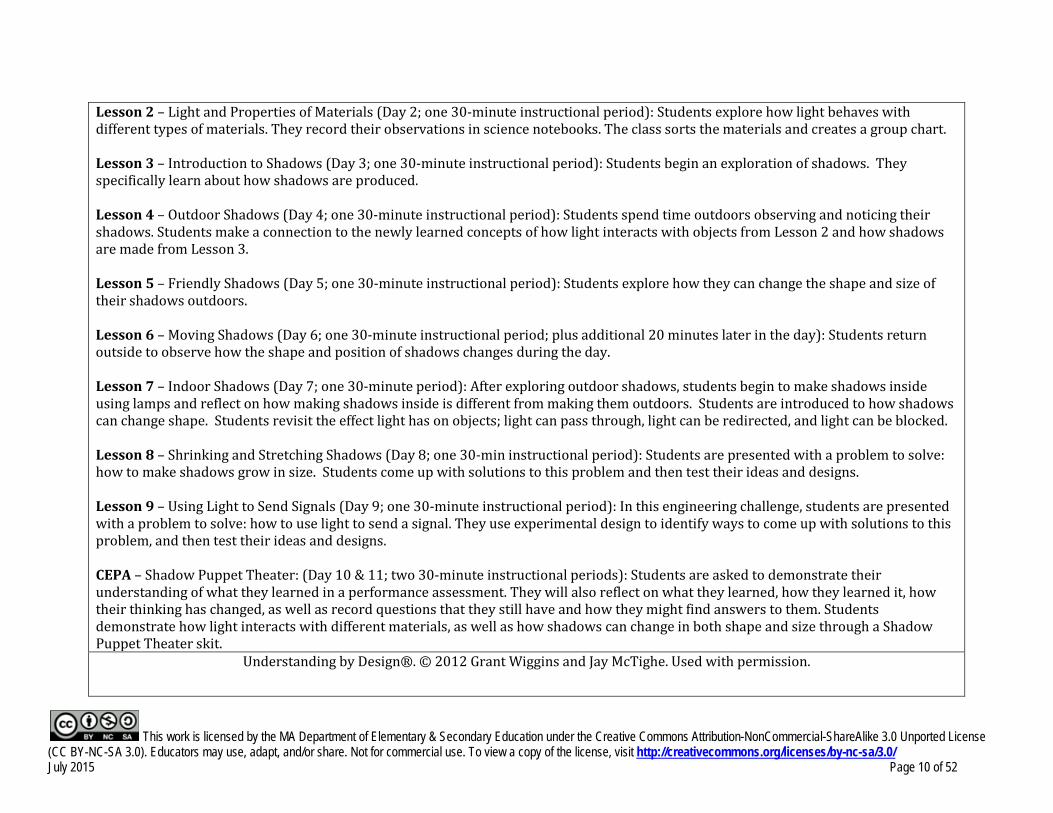
Lesson 2 – Light and Properties of Materials (Day 2; one 30-minute instructional period): Students explore how light behaves with different types of materials. They record their observations in science notebooks. The class sorts the materials and creates a group chart. Lesson 3 – Introduction to Shadows (Day 3; one 30-minute instructional period): Students begin an exploration of shadows. They specifically learn about how shadows are produced. Lesson 4 – Outdoor Shadows (Day 4; one 30-minute instructional period): Students spend time outdoors observing and noticing their shadows. Students make a connection to the newly learned concepts of how light interacts with objects from Lesson 2 and how shadows are made from Lesson 3. Lesson 5 – Friendly Shadows (Day 5; one 30-minute instructional period): Students explore how they can change the shape and size of their shadows outdoors. Lesson 6 – Moving Shadows (Day 6; one 30-minute instructional period; plus additional 20 minutes later in the day): Students return outside to observe how the shape and position of shadows changes during the day. Lesson 7 – Indoor Shadows (Day 7; one 30-minute period): After exploring outdoor shadows, students begin to make shadows inside using lamps and reflect on how making shadows inside is different from making them outdoors. Students are introduced to how shadows can change shape. Students revisit the effect light has on objects; light can pass through, light can be redirected, and light can be blocked. Lesson 8 – Shrinking and Stretching Shadows (Day 8; one 30-min instructional period): Students are presented with a problem to solve: how to make shadows grow in size. Students come up with solutions to this problem and then test their ideas and designs. Lesson 9 – Using Light to Send Signals (Day 9; one 30-minute instructional period): In this engineering challenge, students are presented with a problem to solve: how to use light to send a signal. They use experimental design to identify ways to come up with solutions to this problem, and then test their ideas and designs. CEPA – Shadow Puppet Theater: (Day 10 & 11; two 30-minute instructional periods): Students are asked to demonstrate their understanding of what they learned in a performance assessment. They will also reflect on what they learned, how they learned it, how their thinking has changed, as well as record questions that they still have and how they might find answers to them. Students demonstrate how light interacts with different materials, as well as how shadows can change in both shape and size through a Shadow Puppet Theater skit.
Understanding by Design®. © 2012 Grant Wiggins and Jay McTighe. Used with permission.
This work is licensed by the MA Department of Elementary & Secondary Education under the Creative Commons Attribution-NonCommercial-ShareAlike 3.0 Unported License (CC BY-NC-SA 3.0). Educators may use, adapt, and/or share. Not for commercial use. To view a copy of the license, visit http://creativecommons.org/licenses/by-nc-sa/3.0/ July 2015 Page 11 of 52
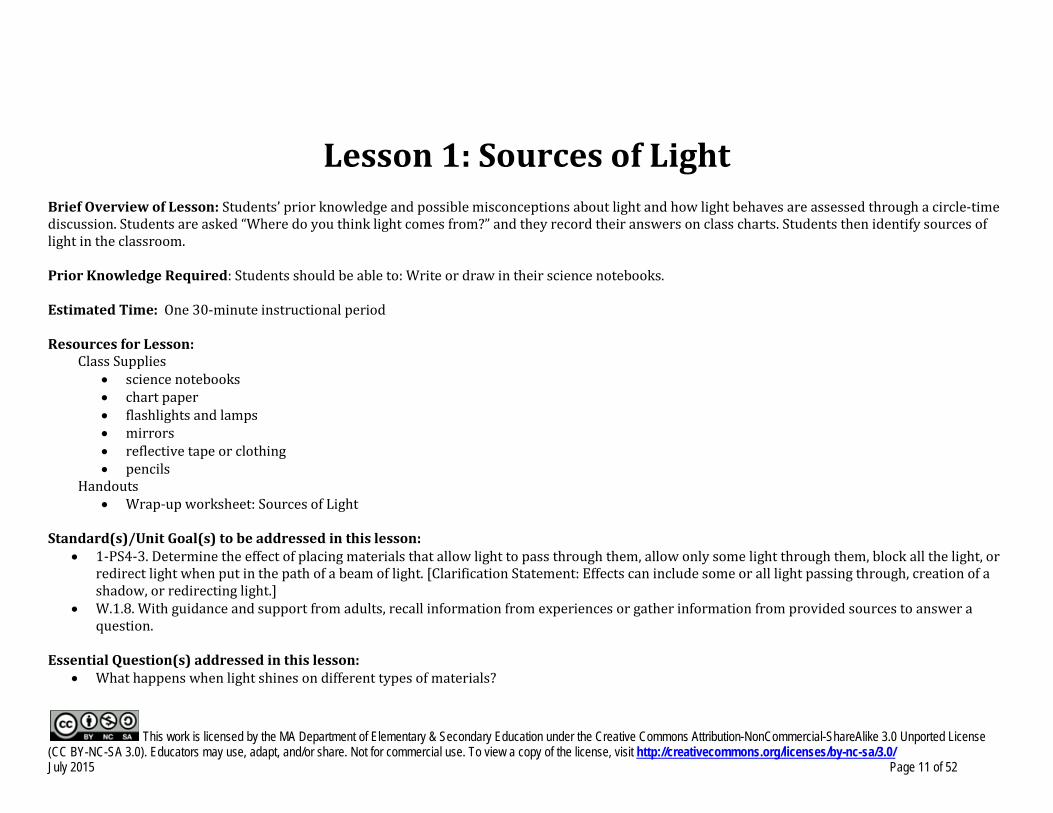
Lesson 1: Sources of Light Brief Overview of Lesson: Students’ prior knowledge and possible misconceptions about light and how light behaves are assessed through a circle-time discussion. Students are asked “Where do you think light comes from?” and they record their answers on class charts. Students then identify sources of light in the classroom. Prior Knowledge Required: Students should be able to: Write or draw in their science notebooks.
Estimated Time: One 30-minute instructional period Resources for Lesson:
Class Supplies • science notebooks • chart paper • flashlights and lamps • mirrors • reflective tape or clothing • pencils
Handouts • Wrap-up worksheet: Sources of Light
Standard(s)/Unit Goal(s) to be addressed in this lesson:
• 1-PS4-3. Determine the effect of placing materials that allow light to pass through them, allow only some light through them, block all the light, or redirect light when put in the path of a beam of light. [Clarification Statement: Effects can include some or all light passing through, creation of a shadow, or redirecting light.]
• W.1.8. With guidance and support from adults, recall information from experiences or gather information from provided sources to answer a question.
Essential Question(s) addressed in this lesson:
• What happens when light shines on different types of materials?

This work is licensed by the MA Department of Elementary & Secondary Education under the Creative Commons Attribution-NonCommercial-ShareAlike 3.0 Unported License (CC BY-NC-SA 3.0). Educators may use, adapt, and/or share. Not for commercial use. To view a copy of the license, visit http://creativecommons.org/licenses/by-nc-sa/3.0/ July 2015 Page 12 of 52
Objectives: • Students will identify different light sources in and around their classroom. • Students will articulate their thinking about how light behaves.
Targeted Academic Language:
• Content Specific: source, light • Academic Specific: brainstorm, record
Anticipated Student Preconceptions/Misconceptions:
• Misconception: Students might think that a source of light comes from objects that reflect light and do not produce light. • Misconception: Our eyes produce light so we can see things. • Misconception: Light needs air to travel.
Instructional Tips/Strategies/Suggestions for Teacher:
• There is more information about Wrap-up worksheets at the end of the unit under Unit Resources. • In preparation for this lesson, provide additional lamps and flashlights around the room for students to explore. Also, if possible, open shades in
the room so students are able to see the sun and/or light outside. Compare sunny versus cloudy days. • In order to have students investigate many items, place hand mirrors and reflective tape or clothing around the room. • The chart paper list that is made during the circle-time brainstorm should be saved until the end of the unit when you will come back to the list
and have students assess what they have learned. • Students can either write or draw in their science notebooks, based on ability. • Vocabulary should be introduced AFTER students have observed or investigated and have a need to know the new words.
o Student Safety: Tell students never to point a flashlight at their own, or another student’s, face. A flashlight can be very bright and can hurt their eyes. Show students how to turn a flashlight on and off and ask them to always turn their flashlight off when they have finished using it. Because lamps can get very hot, explain to students that they are not allowed to touch, or put their bodies or objects very close to, the lamp. They should also not touch or play with the lamp cord or plug. To avoid tripping you may want to tape down the lamp cord.
Assessment:
• Circle-Time Brainstorm – during this whole class brainstorm, students will be answering the question “Where do you think light comes from?” • Wrap-up worksheet: Sources of Light – this Formative Assessment will help you evaluate students’ understanding of their in-class exploration of
sources of light. On the worksheet, students are instructed to circle the pictures on the worksheet that are sources of light.

This work is licensed by the MA Department of Elementary & Secondary Education under the Creative Commons Attribution-NonCommercial-ShareAlike 3.0 Unported License (CC BY-NC-SA 3.0). Educators may use, adapt, and/or share. Not for commercial use. To view a copy of the license, visit http://creativecommons.org/licenses/by-nc-sa/3.0/ July 2015 Page 13 of 52
Lesson Details: Lesson Opening Step 1 (Engage) 10 minutes: Post and read aloud from the lesson objective on the board, “Students will identify different light sources in and around their classroom.” Using a circle-time formation, instruct students that in their new unit they are going to be learning about light and shadows. Tell them that today we are going to learn about light. Ask the students to think about the following question: “Where do you think light comes from?” Tell students that you will be asking them to raise their hand if they think they have an answer and that you will be recording answers on the chart paper. Ask the question again: “Where do you think light comes from?” Remind students not to shout out answers and that you will only be calling on those who have raised their hands. Provide a 5-10 second wait time for all students to think about their answers. Call on students until you have exhausted a list on the chart paper. As students share ideas about sources of light, help them to distinguish between whether the source of light they have named is a people-made light (i.e., flashlight, lamp) or a natural light (i.e., sun, lightning). During this brainstorming time, the answers from students are formative and all answers should be included in the list, even if they are not correct. Use the answers students provided as individual and class formative assessment of prior knowledge. This chart paper should be saved for the end of the unit. During the Lesson Step 2 (Explore) 15 minutes: After the list has been created, you will be asking students to locate sources of light within the classroom. Before you begin this activity, you should introduce the vocabulary term “source” to students. Write the word “source” on the whiteboard and tell students that the word “source” means that it is something that “makes” light. Write the word “makes” under the word “source” on the whiteboard. Use an analogy for sound to help students understand the term “source”. “When someone yells at a wall, the yelling is a source, because the person’s voice makes the sound. If the wall makes an echo, then it is reflecting the sound, not making the sound. The wall is not a source.” Students should move around the room with a partner and their science notebooks. Have students explore sources of light such as light switches for overhead lights, flashlights, lamps, and sun shining in through the windows. When students think they have found a source of light, they should either draw a picture of the source or write the name of the light source in their science notebook. When they have finished drawing or writing for that light source, they can then move on to another source of light. If students move towards items that are not sources of light, i.e., mirrors, glass, etc., let them write or draw them. The next lesson will explore more about reflection of light and whether or not it is a source. Lesson Closing Step 3 (Evaluate) 5 minutes: Bring students back into a whole group to close out the lesson. Remind students that the objective of the lesson was “Students will identify different light sources in and around their classroom.” Ask for one or two volunteers to share aloud the type of light source they found in the classroom. Then handout

This work is licensed by the MA Department of Elementary & Secondary Education under the Creative Commons Attribution-NonCommercial-ShareAlike 3.0 Unported License (CC BY-NC-SA 3.0). Educators may use, adapt, and/or share. Not for commercial use. To view a copy of the license, visit http://creativecommons.org/licenses/by-nc-sa/3.0/ July 2015 Page 14 of 52
to students the Lesson 1 Wrap-up: Sources of Light worksheet. Have students complete the Wrap-up worksheet and turn them into you. Use the Wrap-up worksheet as a formative assessment of practice and content. (Students should be circling the sun, camera, candles, computer, light bulb, and lighthouse). Collect science notebooks and other lesson materials (lamps, flashlights, etc.).

This work is licensed by the MA Department of Elementary & Secondary Education under the Creative Commons Attribution-NonCommercial-ShareAlike 3.0 Unported License (CC BY-NC-SA 3.0). Educators may use, adapt, and/or share. Not for commercial use. To view a copy of the license, visit http://creativecommons.org/licenses/by-nc-sa/3.0/ July 2015 Page 15 of 52
Lesson 2: Light and Properties of Materials
Brief Overview of Lesson: Students explore how light behaves with different types of materials. They record their observations in science notebooks. The class sorts the materials and creates a group chart. Prior Knowledge Required: Students should know about: Which types of objects are sources of light; the difference between natural light and people-made light. Students should be able to: Write or draw in the science notebooks.
Estimated Time: One 30-minute instructional period Resources for Lesson:
Class supplies • science notebooks • chart paper • flashlights (one or two per group) • foil, construction paper, cardboard, wax paper, light-colored tissue paper, plastic wrap, plastic transparency sheets, plastic mirrors, CDs,
reflective tape, wooden block • pencils
Handouts • Wrap-up worksheet: Materials and Light
Standard(s)/Unit Goal(s) to be addressed in this lesson:
• 1-PS4-3. Determine the effect of placing materials that allow light to pass through them, allow only some light through them, block all the light, or redirect light when put in the path of a beam of light. [Clarification Statement: Effects can include some or all light passing through, creation of a shadow, or redirecting light.]
• W.1.8. With guidance and support from adults, recall information from experiences or gather information from provided sources to answer a question.
Essential Question(s) addressed in this lesson:
• What happens when light shines on different types of materials?

This work is licensed by the MA Department of Elementary & Secondary Education under the Creative Commons Attribution-NonCommercial-ShareAlike 3.0 Unported License (CC BY-NC-SA 3.0). Educators may use, adapt, and/or share. Not for commercial use. To view a copy of the license, visit http://creativecommons.org/licenses/by-nc-sa/3.0/ July 2015 Page 16 of 52
Objectives: • Students will be able to describe the effects of light on different materials. • Students will use flashlights to shine light on objects and determine their properties. • Students will be able to answer questions based on their observations of objects.
Targeted Academic Language:
• Content Specific: source, light, see-through, reflective, block, redirect • Academic Specific: observe, record, compare, predict, cause and effect
Anticipated Student Preconceptions/Misconceptions:
• Misconception: Students might think that the reflective tape or clothing is a source of light. • Misconception: Black does not reflect any light and/or white does not absorb any light. • Misconception: Only shiny materials reflect light. Shiny objects reflect more light than dull objects. • Misconception: Light always passes straight through transparent objects without changing direction.
Instructional Tips/Strategies/Suggestions for Teacher
• There is more information about Wrap-up worksheets at the end of the unit under Unit Resources. • The four concepts of how light interacts with objects should be written on posters and hung up in the classroom for this lesson and for future
lessons. The four concepts are 1) materials that the light shines through really well, 2) materials that the light shines partly through, 3) materials that block the light, and 4) materials that redirect the light.
• Save chart paper until the end of the unit. • Vocabulary should be introduced AFTER students have observed or investigated and have a need to know the new words. • Create a word bank on the wall of the objects students will use in their investigation to support them in filling out their worksheet. • Student Safety: Tell students never to point a flashlight at their own, or another student’s, face. A flashlight can be very bright and can hurt their
eyes. Show how to turn a flashlight on and off and ask them to always turn their flashlight off when they have finished using it. Tell students never to put plastic wrap over their face/head or another student’s face/head.
Assessment:
• Wrap-up worksheet: Materials and Light – this Formative Assessment will help you evaluate students understanding of their in- class exploration of sources of light.

This work is licensed by the MA Department of Elementary & Secondary Education under the Creative Commons Attribution-NonCommercial-ShareAlike 3.0 Unported License (CC BY-NC-SA 3.0). Educators may use, adapt, and/or share. Not for commercial use. To view a copy of the license, visit http://creativecommons.org/licenses/by-nc-sa/3.0/ July 2015 Page 17 of 52
Lesson Details: Lesson Opening Step 1 (Engage) 5 minutes: Post and read aloud from the lesson objective on the board, “Students will be able to describe the effects of light on various materials.” Review with the class the main concept of sources of light from last instructional period. Remind students that last time they learned that a light source is something that makes light. Ask students to volunteer answers for something they found in the classroom last time that is a source of light. Provide wait time for students to recall their observations (an alternative to this oral recall is to let students look in their science notebooks) and then ask students to answer one at a time by calling on students who have their hands raised (student answers should include lights, lamps, the sun, flashlights, etc.). During the Lesson Step 2 (Explore) 15 minutes: The next part of the lesson will focus on the new concepts for the properties of light. These concepts should be introduced to students and clarified before they begin the activity. The four concepts are: 1) materials that the light shines through really well, 2) materials that the light shines partly through, 3) materials that block the light, and 4) materials that reflect and redirect the light. Split students up into small groups of 2-3 students. Provide each group of students with one or two flashlights. Give the groups of students a variety of materials to explore with using flashlights (foil, construction paper, cardboard, wax paper, light-colored tissue paper, plastic wrap, plastic transparency sheets, plastic mirrors, CDs, reflective tape, wooden blocks). Encourage students to take turns using the flashlights. Have students sort the materials into four groups: 1) materials that the light shines through really well, 2) materials that the light shines partly through, 3) materials that block the light, and 4) materials that reflect and redirect the light. Have students record their observations in their Science notebooks. Observations should include whether or not light shines through the object, allows only some light to pass through, is blocked by the object, or reflects or redirects the light. Lesson Closing Step 3 (Evaluate) 10 minutes: Bring groups back together and remind students that the objective of the lesson was “Students will be able to describe the effects of light on various materials.” Have one group at a time share with the class their object and the observations they recorded in their science notebooks. Create a class chart of the information students gathered about the objects. The following are questions that might help guide students during this group share-out.
• Which materials allow light to pass through? • Which materials allow only some light to pass through? • Which materials block all the light? • Which materials redirect the light? • How can you tell?

This work is licensed by the MA Department of Elementary & Secondary Education under the Creative Commons Attribution-NonCommercial-ShareAlike 3.0 Unported License (CC BY-NC-SA 3.0). Educators may use, adapt, and/or share. Not for commercial use. To view a copy of the license, visit http://creativecommons.org/licenses/by-nc-sa/3.0/ July 2015 Page 18 of 52
After all of the groups share their information, have students complete Wrap-up worksheet: Materials and Light. In the boxes for each property of light, students will be writing two examples of objects they observed during the lesson that represent the way in which light interacts with the object. For example, in the box titled “Which objects allow light to pass through?” students might write plastic wrap and plastic transparency sheets. Collect the Wrap-up worksheet: Materials and Light worksheets and Science notebooks.

This work is licensed by the MA Department of Elementary & Secondary Education under the Creative Commons Attribution-NonCommercial-ShareAlike 3.0 Unported License (CC BY-NC-SA 3.0). Educators may use, adapt, and/or share. Not for commercial use. To view a copy of the license, visit http://creativecommons.org/licenses/by-nc-sa/3.0/ July 2015 Page 19 of 52
Lesson 3: Introduction to Shadows Brief Overview of Lesson: Students begin an exploration of shadows. They specifically learn about how shadows are produced. Prior Knowledge Required: Students should know about the various properties of light and materials. Students should be able to use a flashlight to direct light at an object.
Estimated Time: One 30-minute instructional period Resources for Lesson: A/V Equipment: projector; screen; computer with internet access
Class supplies • chart paper
Videos: • Peep and the Big Wide World: Shadow Play http://peepandthebigwideworld.com/en/educators/curriculum/center-based-
educators/shadows/activity/stand-alone/516/introduce-shadows/?node_context (8:50) Handouts:
• Shadow Play • Lesson 3 Wrap-up: Being Shadowed
Standard(s)/Unit Goal(s) to be addressed in this lesson:
• 1-PS4-3. Determine the effect of placing materials that allow light to pass through them, allow only some light through them, block all the light, or redirect light when put in the path of a beam of light. [Clarification Statement: Effects can include some or all light passing through, creation of a shadow, or redirecting light.]
• W.1.8. With guidance and support from adults, recall information from experiences or gather information from provided sources to answer a question.
Essential Question(s) addressed in this lesson:
• How are shadows made? Objectives:
• Students will be able explain how shadows are made. • Students will be able to answer questions based on information from the video.

This work is licensed by the MA Department of Elementary & Secondary Education under the Creative Commons Attribution-NonCommercial-ShareAlike 3.0 Unported License (CC BY-NC-SA 3.0). Educators may use, adapt, and/or share. Not for commercial use. To view a copy of the license, visit http://creativecommons.org/licenses/by-nc-sa/3.0/ July 2015 Page 20 of 52
Targeted Academic Language: • Content Specific: sun, light, outline, shape, shadow • Academic Specific: notice, observe, describe, compare, contrast
Anticipated Student Preconceptions/Misconceptions:
• Preconception: Students might think that shadows can only occur outside. • Misconception: The stronger the source of light, the bigger the shadow and the bigger the source of light the smaller the shadow. • Misconception: Shadows are always black. • Misconception: A shadow is a reflection from the sun.
Instructional Tips/Strategies/Suggestions for Teacher:
• There is more information about the Write-Pair-Share and Wrap-up worksheets at the end of the unit under Unit Resources. • Save chart paper until end of unit. • Vocabulary should be introduced AFTER students have observed or investigated and have a need to know the new words.
Assessment:
• Wrap-up worksheet: Being Shadowed – this Formative Assessment will help you evaluate students understanding of their in-class exploration of the sources of light that produce shadows.
Lesson Details: Lesson Opening Step 1 (Engage) 5 minutes: Post and read aloud from the lesson objective on the board, “Students can explain how shadows are made.” Begin class by asking students “What is a shadow?” In this brainstorming activity, record student answers on the chart paper. Remember that in the brainstorm, no answers are incorrect and all ideas should be listed on the chart paper. Once you have completed the brainstorm, ask students to raise their hand if they have ever seen their shadow before. If students raise their hands, ask them to tell you where they have seen their shadows. (Most answers will be “outside.”) Finally, ask students to tell you what their shadow looked like? (Students typically say “dark” or “long”). Finally, tell students that today they are going to be learning how shadows are made.

This work is licensed by the MA Department of Elementary & Secondary Education under the Creative Commons Attribution-NonCommercial-ShareAlike 3.0 Unported License (CC BY-NC-SA 3.0). Educators may use, adapt, and/or share. Not for commercial use. To view a copy of the license, visit http://creativecommons.org/licenses/by-nc-sa/3.0/ July 2015 Page 21 of 52
During the Lesson Step 2 (Explore) 20 minutes: Students will now be watching an episode of Peep and the Big Wide World. The episode Shadow Play will introduce students to shadows and how and when they are created. Play the video for students (http://peepandthebigwideworld.com/en/educators/curriculum/center-based-educators/shadows/activity/stand-alone/516/introduce-shadows/?node_context) (8:50). (The video is at the bottom of the web page and can be expanded to be shown full screen.) After the video, hand out to students the Shadow Play Worksheet. For each question, students will complete a Write-Pair-Share, read the question aloud and answer the question in the box. Then have students turn to a partner and share their answer for the first question. Repeat this process for the second and third questions. Lesson Closing Step 3 (Evaluate) 5 minutes: Bring students’ attention back to the front of the room and remind students that the objective of the lesson was “Students can explain how shadows are made.” Tell students that today Peep and his friends showed us how shadows were made and that during the next instructional period they will be finding their own shadows. Distribute to students the Lesson 3 Wrap-up: Being Shadowed. Have students complete the Wrap-up and turn them into you. Use Wrap-up as a formative assessment of practice and content. Students should be drawing the shadow of the boy in the same direction as the lamppost.

This work is licensed by the MA Department of Elementary & Secondary Education under the Creative Commons Attribution-NonCommercial-ShareAlike 3.0 Unported License (CC BY-NC-SA 3.0). Educators may use, adapt, and/or share. Not for commercial use. To view a copy of the license, visit http://creativecommons.org/licenses/by-nc-sa/3.0/ July 2015 Page 22 of 52
Lesson 4: Outdoor Shadows Brief Overview of Lesson: Students spend time outdoors observing and noticing their shadows. Students make a connection to the newly learned concepts of how light interacts with objects from Lesson 2 and how shadows are made from Lesson 3. Prior Knowledge Required: Students should know about: How shadows are produced. Students should be able to predict ideas and make observations.
Estimated Time: One 30-minute instructional period Resources for Lesson:
A/V Equipment: • projector • screen • computer with internet access
Class supplies • chart paper
Videos: • Shadow Walk: http://peepandthebigwideworld.com/en/educators/curriculum/center-based-educators/shadows/activity/stand-
alone/518/shadow-walk/?node_context=823 (1:27) Standard(s)/Unit Goal(s) to be addressed in this lesson:
• 1-PS4-3. Determine the effect of placing materials that allow light to pass through them, allow only some light through them, block all the light, or redirect light when put in the path of a beam of light. [Clarification Statement: Effects can include some or all light passing through, creation of a shadow, or redirecting light.]
• W.1.8. With guidance and support from adults, recall information from experiences or gather information from provided sources to answer a question.
Essential Question(s) addressed in this lesson:
• How are shadows made? Objectives:
• Students will explore their own shadows. • Students will make observations of their shadows and answer questions about their shadows.

This work is licensed by the MA Department of Elementary & Secondary Education under the Creative Commons Attribution-NonCommercial-ShareAlike 3.0 Unported License (CC BY-NC-SA 3.0). Educators may use, adapt, and/or share. Not for commercial use. To view a copy of the license, visit http://creativecommons.org/licenses/by-nc-sa/3.0/ July 2015 Page 23 of 52
Targeted Academic Language: • Content Specific: sun, light, outline, shape, shadow • Academic Specific: notice, observe, describe, compare
Anticipated Student Preconceptions/Misconceptions:
• Misconception: Students might think that their shadows can smile back at them, or that they can see a shadow’s eyes, etc. • Misconception: A shadow is a reflection from the sun.
Instructional Tips/Strategies/Suggestions for Teacher:
• This lesson works best on a sunny day. • Save chart paper until the end of the unit. • Vocabulary should be introduced AFTER students have observed or investigated and have a need to know the new words.
Assessment: • Class Chart – this formative assessment will be used at the end of class to gather the observations students made about their shadows.
Lesson Details: Lesson Opening Step 1 (Engage) 5 minutes: Post and read aloud from the lesson objective on the board, “Students will explore their own shadows.” Reinforce with students the concept that shadows are made when an object blocks light. Remind students that during their exploration of objects in Lesson 2, they saw that some items blocked light. Tell students that if those items were placed outside, that they would make a shadow. Also, ask students to recall the Peep and the Big Wide World video they watched in Lesson 3 and how when the sun was shining Peep, Chirp, and Quack could see their shadows. Ask the students “What happened to Peep, Chirp, and Quack’s shadows when the clouds came out?” Provide wait time for students to think and remind them that they should raise their hands if they want to answer. Call on a student for the answer (Answer: the shadows disappeared). Now tell students that the class is going to go outside into the sun to see if they can find their own shadows.

This work is licensed by the MA Department of Elementary & Secondary Education under the Creative Commons Attribution-NonCommercial-ShareAlike 3.0 Unported License (CC BY-NC-SA 3.0). Educators may use, adapt, and/or share. Not for commercial use. To view a copy of the license, visit http://creativecommons.org/licenses/by-nc-sa/3.0/ July 2015 Page 24 of 52
During the Lesson Step 2 (Explore) 15 minutes: Take students outside to a flat, open, sunny area where students will be able to see their shadows. Have them take turns describing what they see. Ask the following questions, one at a time, and give students a chance to respond to each:
• Can you tell which shadow is yours? How do you know? • Wave to your shadow. Does your shadow wave back? • What else can your shadow do that you can do? (jump, dance, raise hands, etc.) • Smile at your shadow. Does your shadow smile back? • Do you see anything else outside that has a shadow? What?
Following this activity, return to the classroom for a discussion of the students’ observations. Lesson Closing Step 3 (Evaluate) 10 minutes: Remind students that the objective of the lesson was “Students will explore their own shadows.” As a class, students will be sharing their observations about their shadows. Tell students that as scientists it is important to gather observations that are made when exploring new things. Ask students the following question and record their answers on a class chart, “Describe what you observed or noticed about your shadows?” Provide a chance for all students to share their observations. Once all students have shared their observations, play the following video for them which shows students making shadows in different places. http://peepandthebigwideworld.com/en/educators/curriculum/center-based-educators/shadows/activity/stand-alone/518/shadow-walk/?node_context=823 (1:27) (The video is at the bottom of the web page and can be expanded to be shown full screen.) Ask students to notice their shadows when they are outside later today on their way home from school.

This work is licensed by the MA Department of Elementary & Secondary Education under the Creative Commons Attribution-NonCommercial-ShareAlike 3.0 Unported License (CC BY-NC-SA 3.0). Educators may use, adapt, and/or share. Not for commercial use. To view a copy of the license, visit http://creativecommons.org/licenses/by-nc-sa/3.0/ July 2015 Page 25 of 52
Lesson 5: Friendly Shadows Brief Overview of Lesson: Students explore how they can change the shape and size of their shadows outdoors. Prior Knowledge Required: Students should know how outdoor shadows are made; shadows do not show small details and features of an object. Students should be able to discuss observations with other students.
Estimated Time: One 30-minute instructional period Resources for Lesson: A/V Equipment
• projector • screen • computer with internet access
Class Supplies • chart paper
Videos • Friendly Shadows: http://peepandthebigwideworld.com/en/educators/curriculum/center-based-educators/shadows/activity/stand-
alone/520/friendly-shadows/?node_context=#goto-video (1:27) Standard(s)/Unit Goal(s) to be addressed in this lesson:
• 1-PS4-3. Determine the effect of placing materials that allow light to pass through them, allow only some light through them, block all the light, or redirect light when put in the path of a beam of light. [Clarification Statement: Effects can include some or all light passing through, creation of a shadow, or redirecting light.]
• W.1.8. With guidance and support from adults, recall information from experiences or gather information from provided sources to answer a question.
Essential Question(s) addressed in this lesson:
• How can the shape and size of shadows be changed? Objectives:
• Students will explore how shadow shapes can change based on position of objects. • Students will apply their current learning of shadows in order to answer the question of changing the shape of shadows.

This work is licensed by the MA Department of Elementary & Secondary Education under the Creative Commons Attribution-NonCommercial-ShareAlike 3.0 Unported License (CC BY-NC-SA 3.0). Educators may use, adapt, and/or share. Not for commercial use. To view a copy of the license, visit http://creativecommons.org/licenses/by-nc-sa/3.0/ July 2015 Page 26 of 52
Targeted Academic Language: • Content Specific: sun, light, outline, shape, rotate, turn, direction • Academic Specific: describe, compare, observe, notice, experiment
Anticipated Student Preconceptions/Misconceptions:
• Misconception: Students might not understand how combining two object’s (or people’s) shadows can change the shape of a shadow. • Misconception: A shadow is a reflection from the sun.
Instructional Tips/Strategies/Suggestions for Teacher:
• Optional strategy is to photograph student shadow creations so they can see them at a later date. • Save chart paper until the end of the unit. • Vocabulary should be introduced AFTER students have observed or investigated and have a need to know the new words.
Assessment:
• Group Discussion – this Formative Assessment will allow you to evaluate student understanding of the lesson, specifically, how the shape of shadows can change when more than one person is making a shadow.
Lesson Details: Lesson Opening Step 1 (Engage) 5 minutes: Post and read aloud from the lesson objective on the board, “Students will explore how shadow shapes can change based on position of objects.” Ask students to share examples of shadows they saw on their way home from school last night. Instruct students to do a Write-Pair-Share with a partner and have them each share what types of shadows they saw. After two minutes of sharing with a partner, bring the students’ attention back to the front of the room and ask for a few volunteers to share what they or their partner saw. Inform students that today they are going to explore shadows some more. This time they are going to see if they can experiment and create fun shapes from their shadows. Show students the following video, Friendly Shadows, before you take them outside (start the video at 0:51 and play through): http://peepandthebigwideworld.com/en/educators/curriculum/center-based-educators/shadows/activity/stand-alone/520/friendly-shadows/?node_context=#goto-video (1:27)(The video is at the bottom of the web page and can be expanded to be shown full screen.)

This work is licensed by the MA Department of Elementary & Secondary Education under the Creative Commons Attribution-NonCommercial-ShareAlike 3.0 Unported License (CC BY-NC-SA 3.0). Educators may use, adapt, and/or share. Not for commercial use. To view a copy of the license, visit http://creativecommons.org/licenses/by-nc-sa/3.0/ July 2015 Page 27 of 52
During the Lesson Step 2 (Explore) 20 minutes: Tell students that they will be working with partners to make shapes by combining their shadows. ring students outside and divide them into pairs. Ask them if they can make one large shadow using both of their shadows. Encourage students to move around and face different directions to make lots of different shapes. Ask students to try out some of the following challenges:
• Can you and your partner make a shadow with three legs? With four arms? • Can you and your partner make your shadows touch hands, even if the two of you are not really touching hands? • Can you make your shadow hide inside your partner’s shadow? • Can you and your partner make your shadows cross while walking without bumping into each other? • Can you make your shadow stand on the head of your partner’s shadow?
Optional - photograph the students’ shadow creations and look at them together at a later time. Bring students back into the classroom to reflect and share about the exploration. Lesson Closing Step 3 (Evaluate) 5 minutes: After you are back inside, remind students that the objective of the lesson was “Students will explore how shadow shapes can change based on position of objects.” Then, have students describe one of the shadows that they created with their partner. Record student answers on a chart paper or on the board. Ask:
• What shapes did you and your partner make with your shadows? • How did you and your partner make these shapes? • Could you have made these shapes by yourself? Why not?
Inform students that in the next lesson they will explore how shadows can move.

This work is licensed by the MA Department of Elementary & Secondary Education under the Creative Commons Attribution-NonCommercial-ShareAlike 3.0 Unported License (CC BY-NC-SA 3.0). Educators may use, adapt, and/or share. Not for commercial use. To view a copy of the license, visit http://creativecommons.org/licenses/by-nc-sa/3.0/ July 2015 Page 28 of 52
Lesson 6: Moving Shadows Brief Overview of Lesson: Students return outside to observe how the shape and position of shadows changes during the day. Prior Knowledge Required: Students should know how outdoor shadows are made. Students should be able to trace shadows on the ground or large paper.
Estimated Time: One 30-minute instructional period; plus 20 additional minutes later in the school day Resources for Lesson: Class supplies
• different colored chalk (crayons or makers and large paper with tape – if needed) • science notebooks • pencils
Standard(s)/Unit Goal(s) to be addressed in this lesson:
• 1-PS4-3. Determine the effect of placing materials that allow light to pass through them, allow only some light through them, block all the light, or redirect light when put in the path of a beam of light. [Clarification Statement: Effects can include some or all light passing through, creation of a shadow, or redirecting light.]
• W.1.8. With guidance and support from adults, recall information from experiences or gather information from provided sources to answer a question.
• W.1.2 Write informative/explanatory texts in which they name a topic, supply some facts about the topic, and provide some sense of closure. Essential Question(s) addressed in this lesson:
• How can the shape and size of shadows be changed? Objectives:
• Students will be able to see how outdoor shadows can change positions over time. • Students will answer questions about the change of their shadows over time. • Students will write an informational text about shadows.

This work is licensed by the MA Department of Elementary & Secondary Education under the Creative Commons Attribution-NonCommercial-ShareAlike 3.0 Unported License (CC BY-NC-SA 3.0). Educators may use, adapt, and/or share. Not for commercial use. To view a copy of the license, visit http://creativecommons.org/licenses/by-nc-sa/3.0/ July 2015 Page 29 of 52
Targeted Academic Language: • Content Specific: sun, light, position, move, direction • Academic Specific: describe, compare, observe, notice, record, predict, experiment, fact, topic, rotate, closure
Anticipated Student Preconceptions/Misconceptions:
• Misconception: students might not have thought, or noticed, that shadows change shape and location as the day progresses. • Misconception: A shadow is a reflection from the Sun.
Instructional Tips/Strategies/Suggestions for Teacher:
• Students will need an additional 20 minutes later in the school day to go back outside and observe the tracings of their shadows. Ideally the first 30 minutes will occur in the morning and the return to the shadows will occur in the afternoon.
• This lesson requires a sunny day. • This lesson requires a place for shadows to be traced in chalk. If no location exists, you will need to use crayons or markers on large paper that
can be taped outside, in place, for a few hours. • Vocabulary should be introduced AFTER students have observed or investigated and have a need to know the new words.
Assessment:
• Student Writing – in this formative assessment, students will be writing three sentences on what they have learned so far about shadows. Lesson Details: Lesson Opening Step 1 (Engage/Explore) 15 minutes: Post and read aloud from the lesson objective on the board, “Students will be able to see how outdoor shadows can change positions over time.” After reading the lesson objective, tell students that they will be tracing shadows outside at different times during the day. Decide if you’ll have students use chalk to draw on the ground, or if you’ll have them use crayons or markers on large sheets of paper spread on the ground. Take students outside to a sunny area where there is a smooth surface (pavement, sidewalk, etc.). Have them use chalk to trace the shadow of an object they see on the surface (examples: slide or jungle gym on a playground, or a pole or fence) or have students take turns tracing each other’s shadows. You can also have them use a stick to trace shadows in the dirt. If you can’t draw on the ground, trace the shadow of an object on large sheets of paper. Caution students not to walk on other’s tracings. Once each student has finished tracing, they should return to the classroom.

This work is licensed by the MA Department of Elementary & Secondary Education under the Creative Commons Attribution-NonCommercial-ShareAlike 3.0 Unported License (CC BY-NC-SA 3.0). Educators may use, adapt, and/or share. Not for commercial use. To view a copy of the license, visit http://creativecommons.org/licenses/by-nc-sa/3.0/ July 2015 Page 30 of 52
During the Lesson Step 2 (Explain) 15 minutes: Once students have returned to the classroom, they should get their science notebooks. For the remaining portion of this lesson, students will be working on informational writing that explains how shadows are made. Use the front board to model how to write informational text. Create a scaffold in which you write the following components on the board: Topic: (Students will write Shadows in their science notebooks.) Facts about topic: (Instruct students to write facts they have learned about shadows.) Closure to topic: (Write one closure sentence as a whole class that each student would copy into their science Notebook. A closure sentence might be
something like: “Many objects can have shadows, but not everything makes a shadow.”) Guide students through this writing as a whole class, providing time for individual writing during the “facts” component. Students should save room at the bottom of this page in their science notebooks, as they will return to this page during the CEPA. (This is a formative assessment to check for student understanding and students will be expanding on this writing later during the CEPA.) Lesson Closing Step 3 (Evaluate) 20 minutes: At a later time in the day, return to the object/tracings outside to trace its shadow a second time. Have them use a different color to trace the new shadow. (Optional: After the students have finished tracing a second shadow, take a photo of each student’s shadow tracings.) While still outside (or you can return to the classroom for this portion and capture the student’s answers on chart paper), ask students the following questions and provide a chance for multiple students to answer each question:
• How did the shadow change? (Did it move, rotate, grow, shrink, etc.?) • What’s different about where the sun was this morning and where it is now? • Why do you think the shadows change? • Do you think that other outside shadows also change throughout the day? Why? How could we find out?
After students have answered the questions, return to the classroom.

This work is licensed by the MA Department of Elementary & Secondary Education under the Creative Commons Attribution-NonCommercial-ShareAlike 3.0 Unported License (CC BY-NC-SA 3.0). Educators may use, adapt, and/or share. Not for commercial use. To view a copy of the license, visit http://creativecommons.org/licenses/by-nc-sa/3.0/ July 2015 Page 31 of 52
Lesson 7: Indoor Shadows Brief Overview of Lesson: After exploring outdoor shadows, students begin to make shadows inside using lamps and reflect on how making shadows inside is different from making them outdoors. Students are introduced to how shadows can change shape. Students revisit the effect light has on objects; light can pass through, light can be redirected, and light can be blocked. Prior Knowledge Required: Students should know about lamp safety; various sources of people made light. Students should be able to identify an object’s shadow; make predictions and observations.
Estimated Time: One 30-minute instructional period Resources for Lesson: Class Supplies
• desk lamp with a 100-watt bulb (or a slide projector) • flat blank wall, projector screen, or other surface to project shadows onto • multiple objects that look different from different angles and have various interactions with light (i.e,. can let light pass through, redirect
light, or block light - book, ruler, comb, pencil, bottle, mug, hair elastic, paper plate, glass jar, mirror, etc.) • science notebooks
Standard(s)/Unit Goal(s) to be addressed in this lesson:
• 1-PS4-3. Determine the effect of placing materials that allow light to pass through them, allow only some light through them, block all the light, or redirect light when put in the path of a beam of light. [Clarification Statement: Effects can include some or all light passing through, creation of a shadow, or redirecting light.]
• W.1.2 Write informative/explanatory texts in which they name a topic, supply some facts about the topic, and provide some sense of closure. • W.1.8. With guidance and support from adults, recall information from experiences or gather information from provided sources to answer a
question. Essential Question(s) addressed in this lesson:
• What happens when light shines on different types of materials? • How are shadows made?
This work is licensed by the MA Department of Elementary & Secondary Education under the Creative Commons Attribution-NonCommercial-ShareAlike 3.0 Unported License (CC BY-NC-SA 3.0). Educators may use, adapt, and/or share. Not for commercial use. To view a copy of the license, visit http://creativecommons.org/licenses/by-nc-sa/3.0/ July 2015 Page 32 of 52
Objectives: • Students will use a lamp and solid objects to create indoor shadows. • Students will answer questions on indoor shadows and properties of light. • Students will write an informational text about shadows.
Targeted Academic Language:
• Content Specific: light, outline, position, rotate, turn, move, direction • Academic Specific: describe, compare, observe, notice, predict, evidence
Anticipated Student Preconceptions/Misconceptions:
• Preconception: Students might think that the only way for an object’s shadow shape to change is to add something to the object. • Misconception: The stronger the source of light, the bigger the shadow and the bigger the source of light the smaller the shadow. • Misconception: Shadows are always black.
Instructional Tips/Strategies/Suggestions for Teacher:
• There is more information about Wrap-up worksheets at the end of the unit under Unit Resources. • Vocabulary should be introduced AFTER students have observed or investigated and have a need to know the new words. • Student Safety:
o Because lamps can get very hot, explain to students that they are not allowed to touch, or put their bodies or objects very close to, the lamp. They should also not touch or play with the lamp cord or plug. To avoid tripping, you may want to tape down the lamp cord.
Assessment: • Wrap-up Questions - this Formative Assessment will help you evaluate students’ understanding of their in class exploration of turning objects to
make many different shadows. Lesson Details: Lesson Opening Step 1 (Engage) 5 minutes: Post and read aloud from the lesson objective on the board, “Students will use a lamp and solid objects to create indoor shadows.” Hand out to students their science notebooks. During this lesson, students will be making and writing predictions and observations in their science notebooks. Instruct students to label a new page in their science notebooks as “Indoor Shadows.” Then have each student, or pair of students if you prefer, choose an object (book, ruler, comb, pencil, bottle, mug, hair elastic, paper plate, glass bottle, mirror etc.). Have students record the name of their

This work is licensed by the MA Department of Elementary & Secondary Education under the Creative Commons Attribution-NonCommercial-ShareAlike 3.0 Unported License (CC BY-NC-SA 3.0). Educators may use, adapt, and/or share. Not for commercial use. To view a copy of the license, visit http://creativecommons.org/licenses/by-nc-sa/3.0/ July 2015 Page 33 of 52
object in their science notebooks. Ask students to make a prediction about whether light will pass through, be redirected, or be blocked, and if blocked, what the shadow of their object will look like in their science notebooks. During the Lesson Step 2 (Explore) 15 minutes: Once students have written their predictions in their science notebooks, have students or pairs of students take turns putting their object in front of an “on” lamp. Dim the lights and allow students to try their object one at a time. Once they have seen their object under the light, have them return to their science notebooks and determine whether or not their prediction was correct, i.e., light passed through, the light was redirected, or the light was blocked. While that is occurring, the next student(s) can come up and put their object(s) under the light. Complete this process until all students have put their objects under the light and determined whether or not their predictions were correct. Discuss with the class whose objects created a shadow and whose did not. Demonstrate to students how the shape of shadows can be changed by taking an object that makes a shadow and placing it under the light. Have students gather around the light and show them how if you change how you hold the object it can change the shape of the shadow. Lesson Closing Step 3 (Evaluate) 5 minutes: Remind students that the objective of the lesson was, “Students will use a lamp and solid objects to create indoor shadows.” Tell students that they will be completing a Wrap-up assignment in their science notebooks under the work they did today with their objects (students should be given support with their writing and should be encouraged to write in full sentences – some students might need scaffolding for this portion). Write the following questions on the board and instruct students to answer each question in their science notebooks: “Explain what happened when your object was placed under the light” and “How come all objects do not make shadows?” Remind students that they should be using facts, evidence, and targeted vocabulary to answer the questions. Use Wrap-up as a formative assessment of practice and content. Students should be providing answers about properties of light and materials. Collect lesson materials and science notebooks.

This work is licensed by the MA Department of Elementary & Secondary Education under the Creative Commons Attribution-NonCommercial-ShareAlike 3.0 Unported License (CC BY-NC-SA 3.0). Educators may use, adapt, and/or share. Not for commercial use. To view a copy of the license, visit http://creativecommons.org/licenses/by-nc-sa/3.0/ July 2015 Page 34 of 52
Lesson 8: Shrinking and Stretching Shadows Brief Overview of Lesson: Students are presented with a problem to solve: how to make shadows grow in size. Students come up with solutions to this problem and then test their ideas and designs. Prior Knowledge Required: Students should know about changing or rotating an object in order to change the shadow’s shape; flashlight safety. Students should be able to move an object to change its shape.
Estimated Time: One 30-minute instructional period Resources for Lesson: A/V Equipment
• projector • screen • computer with internet access
Class Supplies • flashlights (one per pair of students) • science notebooks • multiple objects (book, ruler, comb, pencil, bottle, mug, hair elastic, paper plate, etc.)
Videos • Night Light: http://peepandthebigwideworld.com/en/educators/curriculum/center-based-educators/shadows/activity/stand-
alone/525/all-sorts-of-shadows/?node_context=824 (8:49) Standard(s)/Unit Goal(s) to be addressed in this lesson:
• 1-PS4-3. Determine the effect of placing materials that allow light to pass through them, allow only some light through them, block all the light, or redirect light when put in the path of a beam of light. [Clarification Statement: Effects can include some or all light passing through, creation of a shadow, or redirecting light.]
• 1-PS4-4. Use tools and materials to design and build a device that uses light or sound to send a signal over a distance.* [Clarification Statement: Examples of devices could include a light source to send signals, paper cup and string “telephones,” and a pattern of drum beats.]
• W.1.8. With guidance and support from adults, recall information from experiences or gather information from provided sources to answer a question.

This work is licensed by the MA Department of Elementary & Secondary Education under the Creative Commons Attribution-NonCommercial-ShareAlike 3.0 Unported License (CC BY-NC-SA 3.0). Educators may use, adapt, and/or share. Not for commercial use. To view a copy of the license, visit http://creativecommons.org/licenses/by-nc-sa/3.0/ July 2015 Page 35 of 52
Essential Question(s) addressed in this lesson: • How can the shape and size of shadows be changed? • How can light and shadows be used to communicate?
Objectives:
• Students will use flashlights to make an object’s shadow bigger or smaller. • Students will show how the length of a shadow can change based on the location of the object to the flashlight. • Students will generate ideas on how to send a signal using a lamp and solid objects. • Students will generate ideas for how they can increase or decrease the size of a shadow. • Students will answer questions based off their investigations.
Targeted Academic Language:
• Content Specific: flashlight, shine, outline, position, shape, rotate, turn, move, direction, above, behind, next to • Academic Specific: describe, compare, observe, notice, predict, experiment, device
Anticipated Student Preconceptions/Misconceptions:
• Preconception: Students might think that the size of an object’s shadow can only change if the object itself changes. • Misconception: The stronger the source of light, the bigger the shadow and the bigger the source of light the smaller the shadow. • Misconception: Shadows are always black.
Instructional Tips/Strategies/Suggestions for Teacher:
• Vocabulary should be introduced AFTER students have observed or investigated and have a need to know the new words. • Student safety: Tell students never to point a flashlight at their own or another student’s face. A flashlight can be very bright and can hurt their
eyes. Show students how to turn a flashlight on and off and ask them to always turn their flashlight off when they have finished using it. Assessment:
• Formative Assessment: Class discussion – by asking students about what has happened to the shadow of their object when they move the object or move the flashlight, you can assess student understanding of the concepts.
Lesson Details: Lesson Opening Step 1 (Engage) 5 minutes: Post and read aloud from the lesson objective on the board, “Students will use flashlights to make an object’s shadow bigger or smaller.”

This work is licensed by the MA Department of Elementary & Secondary Education under the Creative Commons Attribution-NonCommercial-ShareAlike 3.0 Unported License (CC BY-NC-SA 3.0). Educators may use, adapt, and/or share. Not for commercial use. To view a copy of the license, visit http://creativecommons.org/licenses/by-nc-sa/3.0/ July 2015 Page 36 of 52
Tell students that today they are going to be using flashlights to change the size of a shadow. Ask students to “predict how you might make an object’s shadow bigger or smaller?” Have students record their thinking in their science notebooks. During the Lesson Step 2 (Explore) 15 minutes: Now students will be testing their predictions from the “Engage” portion of the lesson. Put students into pairs, providing each pair with one flashlight. Dim the lights and have students take turns making shadows with their hands using the flashlight. As students explore, have them describe in their science notebooks what they are doing and how the size and appearance of the shadows are changing. Students should also write about how they think making shadows bigger or smaller could help people send signals and communicate. Tell students to “look how the shadow changes as you move your hand closer to the light. How is it changing? How can you make the shadow smaller and less blurry?” Next tell students that they are going to change an object’s shadow without moving the object. Have each pair of students choose an object or two to use to make a shadow. Dim the lights again and have one student shine the flashlight on the object. Have students observe and describe the shadow they see. They should write their observations in their science notebook. Then ask: How could you change the way this shadow looks without moving your object? If students are uncertain what to do, invite them to try moving their flashlight around their object. Then ask:
• What happens when you move your flashlight? • What happens when you hold your flashlight directly above your object? Where does the shadow go? • How can you create the longest shadow without moving or touching your object? The shortest shadow?
Then have the pair of students switch roles, having the partner shine the flashlight on an object. Lesson Closing Step 3 (Evaluate) 10 minutes: Remind students that the objective of the lesson was “Students will use flashlights to make an object’s shadow bigger or smaller.” Emphasize to students that using light to make shadows bigger or smaller is a way to use light to send signals and communicate. Tell students that they are going to end the lesson by watching Peep and his friends make shadows of different sizes. Tell students to pay attention to how Peep and his friends made their shadows bigger or smaller to see if it is the same way the students made their shadows bigger or smaller today in class. Play the video Night Light: http://peepandthebigwideworld.com/en/educators/curriculum/center-based-educators/shadows/activity/stand-alone/525/all-sorts-of-shadows/?node_context=824 (8:49) (The video is at the bottom of the web page and can be expanded to be shown full screen.) End the lesson by asking students if they made their shadows grow bigger or shrink the same way Peep and his friends did in the video.

This work is licensed by the MA Department of Elementary & Secondary Education under the Creative Commons Attribution-NonCommercial-ShareAlike 3.0 Unported License (CC BY-NC-SA 3.0). Educators may use, adapt, and/or share. Not for commercial use. To view a copy of the license, visit http://creativecommons.org/licenses/by-nc-sa/3.0/ July 2015 Page 37 of 52
Lesson 9: Using Light to Send Signals Brief Overview of Lesson: In this engineering challenge, students are presented with a problem to solve: how to use light to send a signal. They use experimental design to identify ways to come up with solutions to this problem, and then test their ideas and designs. Prior Knowledge Required: Students should know about echoes and how they are a reflection of sound; changing the location of an object or a light source to change the size of an object; the properties of reflection; flashlight safety. Students should be able to use a flashlight as a source of light.
Estimated Time: Two 30-minute instructional periods Resources for Lesson: Class Supplies
• flashlight (one per pair of students) • mirror, metal, glass, reflective tape, block of wood (enough for each pair to access all objects) • science notebooks • pencils • objects located in the room for students to illuminate • chart paper
Handouts • Wrap-up Worksheet: Sending Light Signals
Standard(s)/Unit Goal(s) to be addressed in this lesson:
• 1-PS4-3. Determine the effect of placing materials that allow light to pass through them, allow only some light through them, block all the light, or redirect light when put in the path of a beam of light. [Clarification Statement: Effects can include some or all light passing through, creation of a shadow, or redirecting light.]
• 1-PS4-4. Use tools and materials to design and build a device that uses light or sound to send a signal over a distance.* [Clarification Statement: Examples of devices could include a light source to send signals, paper cup and string “telephones,” and a pattern of drum beats.]
• K-2-ETS1-2. Generate multiple solutions to a design problem and make a drawing (plan) to represent one or more of the solutions. • W.1.8. With guidance and support from adults, recall information from experiences or gather information from provided sources to answer a
question. Essential Question(s) addressed in this lesson:
• Can light and shadows be used to communicate?

This work is licensed by the MA Department of Elementary & Secondary Education under the Creative Commons Attribution-NonCommercial-ShareAlike 3.0 Unported License (CC BY-NC-SA 3.0). Educators may use, adapt, and/or share. Not for commercial use. To view a copy of the license, visit http://creativecommons.org/licenses/by-nc-sa/3.0/ July 2015 Page 38 of 52
Objectives: • Students will use their understanding of the properties of light to send light signals. • Students will design a device to reflect light into a different direction. • Students will predict and complete design elements to relay/reflect light. • Students will answer questions based on their learned knowledge from this unit.
Targeted Academic Language:
• Content Specific: light, reflect, signal, turn, rotate • Academic Specific: predict, observe, design, investigate
Anticipated Student Preconceptions/Misconceptions:
• Misconception: Students might think that the objects are a source of light and not a tool to redirect light. • Misconception: The distance that light travels depends on the amount of energy that light has. • Misconception: When a lens is moved, an image will become bigger or smaller but will always remain sharp. • Misconception: Moving position when looking at a mirror image will change the amount of the image that can be seen or the position of the image
in the mirror. Instructional Tips/Strategies/Suggestions for Teacher:
• There is more information about Wrap-up worksheets at the end of the unit under Unit Resources. • Vocabulary should be introduced AFTER students have observed or investigated and have a need to know the new words. • Student Safety: Tell students never to point a flashlight at their own or another student’s face. A flashlight can be very bright and can hurt their
eyes. Show students how to turn a flashlight on and off and ask them to always turn their flashlight off when they have finished using it. Tell students to be careful where they point the mirror as it can be very bright and can hurt their eyes when the flashlight is shining on it.
Assessment:
• Wrap-up worksheet: Sending Light Signals – this Formative Assessment will help you evaluate students understanding of their in class exploration of how a light signal can change direction.

This work is licensed by the MA Department of Elementary & Secondary Education under the Creative Commons Attribution-NonCommercial-ShareAlike 3.0 Unported License (CC BY-NC-SA 3.0). Educators may use, adapt, and/or share. Not for commercial use. To view a copy of the license, visit http://creativecommons.org/licenses/by-nc-sa/3.0/ July 2015 Page 39 of 52
Lesson Details: Day One Lesson Opening Step 1 (Engage) 5 minutes: Post and read aloud the lesson objective from the board, “Students will use their understanding of the properties of light to send light signals.” Remind students of the Night Light video they watched at the end of last lesson. Ask them how Peep and Quack found Chirp in the tree? Student answers should include the concept of the light from the flashlight reflecting off the watch. Instruct students that today they are going to find objects in the classroom by sending signals. During the Lesson Step 2 (Explore) 20 minutes: Begin by putting students in pairs. Ask students to predict and design in their science notebooks how they are going to use an object (mirror, metal, glass, reflective tape, block of wood) to send a light signal. Students will be able to try to solve this design problem by using a flashlight and multiple objects. They will be determining which types of objects can send light signals. Students should write their predictions and draw or write designs for each other (students should try all the objects available to them). Once students have their designs, hand out one flashlight to each pair and have them explore the multiple objects provided. Dim the lights and ask students to take turns in their pairs shining their flashlight on the object and determine if they can redirect the light and send a message (students might need help initially with this task). Instruct students to record their observations in their science notebooks. Then they should move onto the other objects, one-by-one, attempting to send a light signal. Lesson Closing Step 3 (Evaluate) 5 minutes: Remind students that the objective of the lesson was, “Students will use their understanding of the properties of light to send light signals.” Hand out the Lesson 9 Wrap-up: Sending Light Signals. Have students complete the Wrap-up and turn them into you. Use Wrap-up as a formative assessment of practice and content. (Check that students are drawing lines that show the correct reflection angle based on the position of their flashlight and an object that redirected light from today’s class.) Collect other lesson materials such as the objects, flashlights, and science notebooks.
This work is licensed by the MA Department of Elementary & Secondary Education under the Creative Commons Attribution-NonCommercial-ShareAlike 3.0 Unported License (CC BY-NC-SA 3.0). Educators may use, adapt, and/or share. Not for commercial use. To view a copy of the license, visit http://creativecommons.org/licenses/by-nc-sa/3.0/ July 2015 Page 40 of 52
Day 2 Lesson Opening Step 1 (Engage) 5 minutes: Remind students that in the last lesson, they learned about using light to send signals and that they explored how well different materials sent signals. Have students come together as a whole group. Ask the students to think about the following question: “When is light used to send signals in the real world?” Tell students that you will be asking students to raise their hands if they think they have an answer and that you will be recording answers on chart paper. If students have difficulty coming up with real world examples, bring up examples such as lighthouses and how they use light to warn ships about being too close to land, or how fireflies make light to communicate with each other. During this brainstorming time, the answers from students are formative and all answers should be included in the list, even if they are not correct. Use the answers students provided as individual and class formative assessment of prior knowledge. This chart paper should be saved for the end of the unit. Instruct students that they are going to be using light signals to solve a problem and that they should use the information they learned during the last lesson to help them complete the task. During the Lesson Step 2 (Explore) 15 minutes Begin by telling students that today they are going to be figuring out how to send a signal from an island to a boat one mile away. Explain that their desk will represent the “island” and that the “boat” is looking for their signal one to three feet from their desk (the distance of the “boat” from the desk is arbitrary. Base the distance on how much space is in your classroom and how far the flashlights being used will shine). Put students into pairs. Ask students to predict and design in their science notebooks how they are going to use an object (mirror, metal, glass, reflective tape, block of wood) to send a light signal to their boat. Each pair of students should be instructed to design and draw one potential signaling device. Students will have access to a flashlight, as well as multiple objects, to solve the design problem. They will be determining which types of objects can best send light signals. After students have drawn a design for their signaling device, they will use the objects available to them to build the signaling device. What the students build should be based off on the design they drew in their science notebooks. Lesson Closing Step 3 (Evaluate) 10 minutes: After all pairs have been given a chance to build their signaling device, bring the class together as a whole group. Once the group is together, have each pair come to the front of the class to test their design. A desk, with a “boat” three feet away should be set up for the students to use during their test.

This work is licensed by the MA Department of Elementary & Secondary Education under the Creative Commons Attribution-NonCommercial-ShareAlike 3.0 Unported License (CC BY-NC-SA 3.0). Educators may use, adapt, and/or share. Not for commercial use. To view a copy of the license, visit http://creativecommons.org/licenses/by-nc-sa/3.0/ July 2015 Page 41 of 52
Dim the lights and give the presenting pair a flashlight. Have the students point the flashlight at their device in order to test if it will be able to send a message to the “boat” (students might need help initially with this task). Have all students record their observation in their science notebooks for all of the devices that were created. Conclude the lesson with a discussion of which designs worked the best, least, etc and what they would do differently if they were to redesign their device.
This work is licensed by the MA Department of Elementary & Secondary Education under the Creative Commons Attribution-NonCommercial-ShareAlike 3.0 Unported License (CC BY-NC-SA 3.0). Educators may use, adapt, and/or share. Not for commercial use. To view a copy of the license, visit http://creativecommons.org/licenses/by-nc-sa/3.0/ July 2015 Page 42 of 52
Curriculum Embedded Performance Assessment (CEPA) Teacher Instructions: Shadow Puppet Theater
Brief Overview of CEPA: Students are asked to demonstrate their understanding of what they learned in a performance assessment. They will also reflect on what they learned, how they learned it, how their thinking has changed, as well as record questions that they still have, and how they might find answers to them. Students demonstrate how light interacts with different materials, as well as how shadows can change in both shape and size through a Shadow Puppet Theater skit. Estimated Time: Two 30-minute instructional periods Materials:
• white bed sheet or linen for a screen • projector • construction paper • popsicle sticks or straws • pencils, scissors, tape • science notebooks • Video - Shadow Theater: Animal Theater: http://peepandthebigwideworld.com/en/educators/curriculum/center-based-
educators/shadows/activity/stand-alone/531/shadow-theater-animal-shadows/?node_context (1:27) Explanation of CEPA (GRASP model) Goal: I can create a Shadow Puppet story and skit that teaches other students how light interacts with different materials, as well as how shadows can get bigger or smaller and can change shape. Role: You will take on the role of a Shadow Puppet director and performer who is designing an educational skit. Audience: Theater full of students interested in learning about making different shadows and lighting effects. Situation: You will write a story about how materials interact with light and create characters (puppets) out of different materials and popsicle sticks. Product Performance and Purpose: The product will be the performance of a skit and demonstration of how light interacts with materials and how shadows can change. Standard(s)/Unit Goal(s) to be assesed in this lesson:
• 1-PS4-3. Determine the effect of placing materials that allow light to pass through them, allow only some light through them, block all the light, or redirect light when put in the path of a beam of light.

This work is licensed by the MA Department of Elementary & Secondary Education under the Creative Commons Attribution-NonCommercial-ShareAlike 3.0 Unported License (CC BY-NC-SA 3.0). Educators may use, adapt, and/or share. Not for commercial use. To view a copy of the license, visit http://creativecommons.org/licenses/by-nc-sa/3.0/ July 2015 Page 43 of 52
• 1-PS4-4. Use tools and materials to design and build a device that uses light or sound to send a signal over a distance. • W.1.8. With guidance and support from adults, recall information from experiences or gather information from provided sources to answer a
question.
Assessment: • Use the rubric to evaluate student work based on their writing, planning, and delivery of shadow information in their story/skit. See the
Assessment of Learning Directions and Rubric.
CEPA Lesson Details: Day 1: Distribute to students the CEPA assignment page with the rubric on the back side of the assignment page. Review the assignment with students. Explain to them the GRASP model that they will follow. Have students take out their science notebooks and turn to the page where they wrote their sentences on shadows from Lessons 6 and 7. Have students add to these sentences. They will be adding two or three more sentences to describe how light interacts with objects (pass through, redirect, or block) and how shadows can get bigger or smaller and change shape. Once students have finished writing, put them in pairs. Tell students that in today’s lesson, they are creating a Shadow Puppet story and skit that teaches other students how light interacts with different materials, as well as how shadows can get bigger or smaller and can change shape. The students will develop their characters for their Shadow Puppet Theater. Students should be thinking about how their characters will look when light shines on them. Have students ask themselves whether or not their characters will let light pass through, redirect light, or block light. Have students draw an animal, plant, person, etc. on construction paper, and then cut it out. If students aren’t sure what to make, suggest a simple shape, such as a fish or a bird. Help them tape a Popsicle stick or straw to the back of their puppet: this will become the handle. Show them how to hold the handle and move their puppet. Show students the following video to help them visualize a shadow puppet theater Shadow Theater: Animal Theater: http://peepandthebigwideworld.com/en/educators/curriculum/center-based-educators/shadows/activity/stand-alone/531/shadow-theater-animal-shadows/?node_context (1:27) (The video is at the bottom of the web page and can be expanded to be shown full screen.) Following the video, instruct students that they will have to demonstrate their learning from this unit in their puppet show/skit. Give students five minutes at the end of class to work with their partners to write down ideas that they want to be sure to share in the next instructional period to demonstrate what they have learned about the properties of light and shadows in this unit. Use the following prompts (write prompts on the board) to engage students in their final thinking: “What will happen when you move your puppets closer to the light? Farther from the light?” and “Will light pass through your shadow, be redirected, or be blocked?” (Move around the room as students are talking with their partners and listen for initial understanding).

This work is licensed by the MA Department of Elementary & Secondary Education under the Creative Commons Attribution-NonCommercial-ShareAlike 3.0 Unported License (CC BY-NC-SA 3.0). Educators may use, adapt, and/or share. Not for commercial use. To view a copy of the license, visit http://creativecommons.org/licenses/by-nc-sa/3.0/ July 2015 Page 44 of 52
Day 2: Prepare a large shadow theater ahead of time: set up the large shadow theater by draping a sheet across two chairs that are a few feet apart. Use binder clips or tape to attach the corners of the sheet to the top and bottom of each chair and make sure that the sheet is stretched tightly. Place the lamp behind the theater so that it shines through the sheet. Provide students 10 minutes to get with their partners and discuss their performance. Be sure to tell students that each person in the pair will talk and show their puppet in the skit, so it is very important that they take turns. Allow each pair of students to tell their “story” of properties of light and shadows behind the curtain. If students are sharing their “stories” and are not describing the properties of light or how shadows can change in both size and shape, you might need to prompt students. Some students might struggle with their explanations within the story, but when prompted, are they able to demonstrate the process in which a character grows or shrinks or changes in shape? After each pair of students have completed their performance, consider closing the unit by showing students the class charts that were made in the various lessons in this unit. Point out what they have learned as a class and how they have grown. Provide space for a class discussion about what aspects of the unit students enjoyed the most and possible questions they still have on the topic.
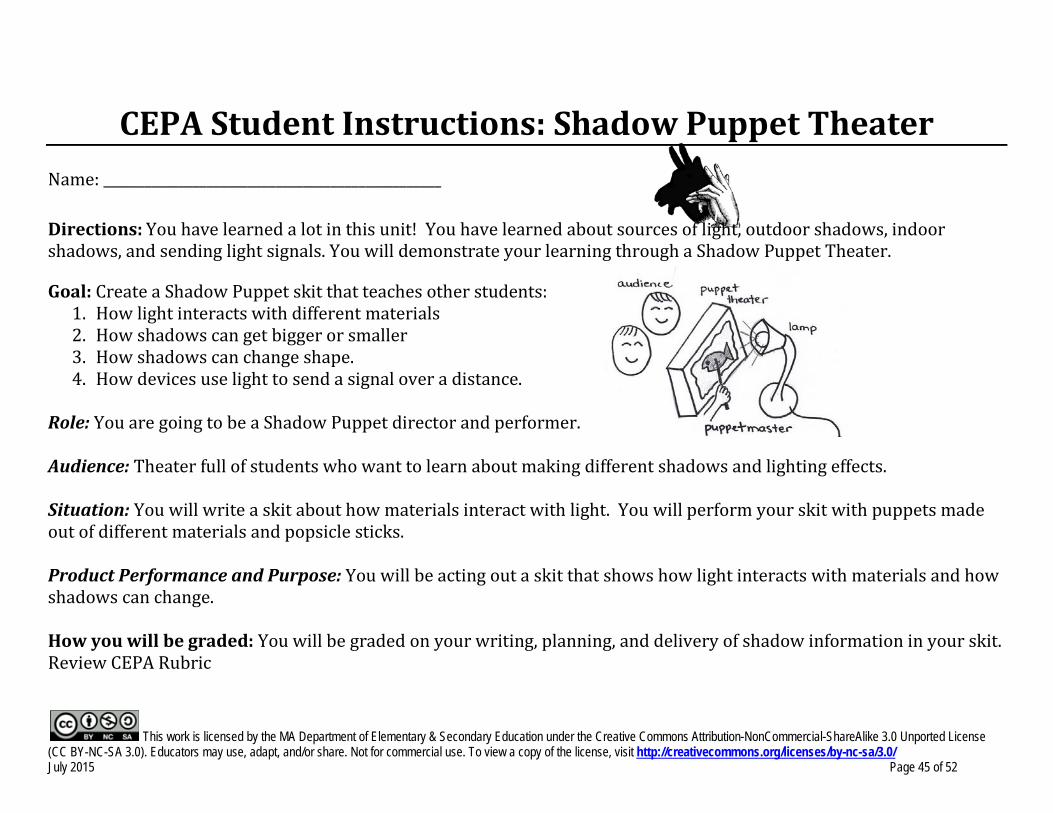
This work is licensed by the MA Department of Elementary & Secondary Education under the Creative Commons Attribution-NonCommercial-ShareAlike 3.0 Unported License (CC BY-NC-SA 3.0). Educators may use, adapt, and/or share. Not for commercial use. To view a copy of the license, visit http://creativecommons.org/licenses/by-nc-sa/3.0/ July 2015 Page 45 of 52
CEPA Student Instructions: Shadow Puppet Theater
Name: _________________________________________________
Directions: You have learned a lot in this unit! You have learned about sources of light, outdoor shadows, indoor shadows, and sending light signals. You will demonstrate your learning through a Shadow Puppet Theater. Goal: Create a Shadow Puppet skit that teaches other students:
1. How light interacts with different materials 2. How shadows can get bigger or smaller 3. How shadows can change shape. 4. How devices use light to send a signal over a distance.
Role: You are going to be a Shadow Puppet director and performer. Audience: Theater full of students who want to learn about making different shadows and lighting effects. Situation: You will write a skit about how materials interact with light. You will perform your skit with puppets made out of different materials and popsicle sticks. Product Performance and Purpose: You will be acting out a skit that shows how light interacts with materials and how shadows can change. How you will be graded: You will be graded on your writing, planning, and delivery of shadow information in your skit. Review CEPA Rubric

This work is licensed by the MA Department of Elementary & Secondary Education under the Creative Commons Attribution-NonCommercial-ShareAlike 3.0 Unported License (CC BY-NC-SA 3.0). Educators may use, adapt, and/or share. Not for commercial use. To view a copy of the license, visit http://creativecommons.org/licenses/by-nc-sa/3.0/ July 2015 Page 46 of 52
CEPA Rubric Name: _________________________________________________
Standard Exemplary (4) Accomplished (3) Developing (2) Beginning (1)
1-PS4-3. Determine the effect of placing materials that allow light to pass through them, allow only some light through them, block all the light, or redirect light when put in the path of a beam of light.
Student shadow puppet skit thoroughly demonstrated how light interacts with different materials (allows only some light through them, blocks all the light, or redirects light when put in the path of a beam of light) while also incorporating sources of light and changes in shadows.
Student shadow puppet skit sufficiently demonstrated how light interacts with different materials (allows only some light through them, blocks all the light, or redirects light when put in the path of a beam of light) while also incorporating sources of light and changes in shadows.
Student shadow puppet skit demonstrated a limited understanding of how light interacts with different materials (allows only some light through them, blocks all the light, or redirects light when put in the path of a beam of light) and only incorporated sources of light OR changes in shadows.
Student shadow puppet skit partially explained how light interacts with different materials (allows only some light through them, blocks all the light, or redirects light when put in the path of a beam of light) and only incorporated sources of light OR changes in shadows.
1-PS4-4. Use tools and materials to design and build a device that uses light or sound to send a signal over a distance.
Student shadow puppet characters are used in a way that thoroughly demonstrates how a device uses light to send signals over a distance.
Student shadow puppet characters are used in a way that sufficiently demonstrates how a device uses light to send signals over a distance.
Student shadow puppet characters are used to tell a story, gives a limited understanding of how a device uses light to send signals over a distance.
Student shadow puppet characters partially explain how a device uses light to send signals over a distance.
W.1.8.With guidance and support from adults, recall information from experiences or gather information from provided sources to answer a question.
Student recalled information for their skit correctly. Includes a detailed explanation.
Student recalled information for their skit correctly. Includes an explanation.
Student recalled information for their skit, but did not give sufficient science content information.
Student did not recall information for their skit and/or did not include science content information.

This work is licensed by the MA Department of Elementary & Secondary Education under the Creative Commons Attribution-NonCommercial-ShareAlike 3.0 Unported License (CC BY-NC-SA 3.0). Educators may use, adapt, and/or share. Not for commercial use. To view a copy of the license, visit http://creativecommons.org/licenses/by-nc-sa/3.0/ July 2015 Page 47 of 52
Unit Resources Additional Instructional Materials
Lesson 1: Wrap-up Worksheet: Sources of Light Lesson 2: Wrap-up Worksheet: Materials and Light Lesson 3: Shadow Play, Wrap-up Worksheet: Being Shadowed Lesson 9: Wrap-up Worksheet: Sending Light Signals CEPA: Assessment of Learning Directions and Rubric
Unit Sources:
• Expeditionary Learning materials, http://www.elschools.org • PBS, Peep and the Big Wide World, Shadow’s Curriculum: http://peepandthebigwideworld.com/en/educators/curriculum/family-child-care-
educators/15/shadows/; PBS, PEEP and the Big Wide World: http://peepandthebigwideworld.com • 3M light and shadow lesson plans http://scienceofeverydaylife.com/teachers/pdfs/K2_LightandShadow.pdf • Keeley, Page. “Science Formative Assessment.” 2008: Corwin Press, California. Pg. 192. • Being Shadowed worksheet, http://www.greatschools.org/worksheets-activities/6133-being-shadowed.gs • Common Misconceptions About Light, http://www.nsta.org/elementaryschool/connections/201404Schleigh.pdf
Tools/Unit Strategy Descriptions:
• Wrap-up Worksheet (EXIT TICKET) o Purpose: At the end of the instructional period, students complete a short worksheet (usually circling information) to demonstrate their
understanding of material from that day’s lesson. These Exit Tickets can be used to assess students’ knowledge or to make decisions about next teaching steps or points that need clarifying. This reflection helps students to solidify learning before they move onto another subject or leave for the day. (Expeditionary Learning materials, http://www.elschools.org)
• Write-Pair-Share or Think-Pair-Share combines thinking with communication. The teacher poses a question and gives individual students time to think about the question. Consider prompting students to write their thoughts in a variation called Write-Pair-Share. Students then pair up with a partner to discuss their ideas. After pairs discuss, students share their ideas in a small-group or whole-class discussion. (Keeley, Page. “Science Formative Assessment.” 2008: Corwin Press, California. Pg. 192.)

This work is licensed by the MA Department of Elementary & Secondary Education under the Creative Commons Attribution-NonCommercial-ShareAlike 3.0 Unported License (CC BY-NC-SA 3.0). Educators may use, adapt, and/or share. Not for commercial use. To view a copy of the license, visit http://creativecommons.org/licenses/by-nc-sa/3.0/ July 2015 Page 48 of 52
Wrap-up Worksheet: Sources of Light Lesson 1 │ Page 1 of 1 Name: _________________________________________________________ Directions: Circle the item that is a source of light.
Diamond Ring
Camera Candles Computer
Light Bulb Lighthouse
Sun
Iron

This work is licensed by the MA Department of Elementary & Secondary Education under the Creative Commons Attribution-NonCommercial-ShareAlike 3.0 Unported License (CC BY-NC-SA 3.0). Educators may use, adapt, and/or share. Not for commercial use. To view a copy of the license, visit http://creativecommons.org/licenses/by-nc-sa/3.0/ July 2015 Page 49 of 52
Images from Microsoft Word Clipart.
Wrap-up Worksheet: Materials and Light Lesson 2 │ Page 1 of 1 Name: ________________________________________________________________
Write the name of two objects you saw in class
that allowed light to pass through?
Write the name of two objects you saw in class that allowed only some light to pass
through?
Write the name of two objects you saw in class that redirected the light?
Write the name of two objects you saw in class that blocked all the light?

This work is licensed by the MA Department of Elementary & Secondary Education under the Creative Commons Attribution-NonCommercial-ShareAlike 3.0 Unported License (CC BY-NC-SA 3.0). Educators may use, adapt, and/or share. Not for commercial use. To view a copy of the license, visit http://creativecommons.org/licenses/by-nc-sa/3.0/ July 2015 Page 50 of 52
Shadow Play Lesson 3 │ Page 1 of 1 Name: _________________________________________________
Question #1: What did Peep, Quack, and Chirp see when the sun came out?
Question #2: Why did Peep, Quack, and Chirp's shadows disappear when they were under the tree?
Question #3: What happened to Peep, Quack, and Chirp's shadows when they went to show them to Nelly?
Answer:
Answer:
Answer:

This work is licensed by the MA Department of Elementary & Secondary Education under the Creative Commons Attribution-NonCommercial-ShareAlike 3.0 Unported License (CC BY-NC-SA 3.0). Educators may use, adapt, and/or share. Not for commercial use. To view a copy of the license, visit http://creativecommons.org/licenses/by-nc-sa/3.0/ July 2015 Page 51 of 52
Wrap-up Worksheet: Being Shadowed Lesson 3 │ Page 1 of 1 Name: _________________________________________________
Directions: Draw a shadow for the boy. Make sure it is in the correct place on the page.
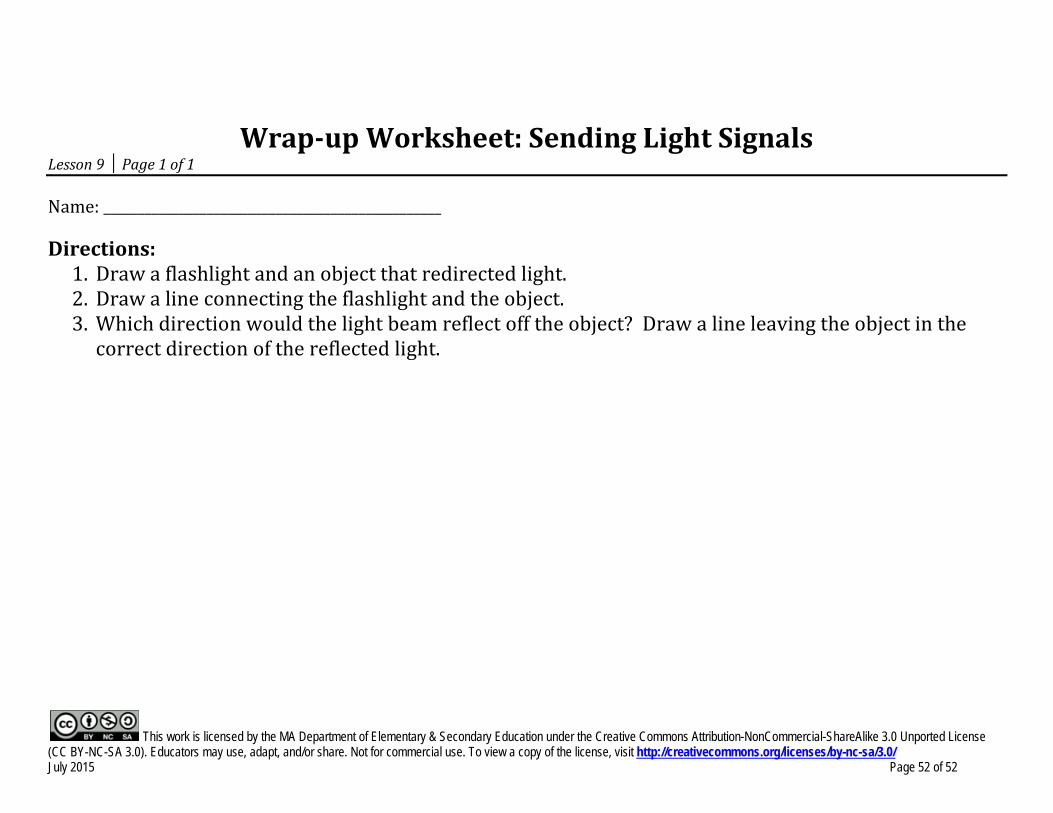
This work is licensed by the MA Department of Elementary & Secondary Education under the Creative Commons Attribution-NonCommercial-ShareAlike 3.0 Unported License (CC BY-NC-SA 3.0). Educators may use, adapt, and/or share. Not for commercial use. To view a copy of the license, visit http://creativecommons.org/licenses/by-nc-sa/3.0/ July 2015 Page 52 of 52
Wrap-up Worksheet: Sending Light Signals Lesson 9 │ Page 1 of 1 Name: _________________________________________________ Directions:
1. Draw a flashlight and an object that redirected light. 2. Draw a line connecting the flashlight and the object. 3. Which direction would the light beam reflect off the object? Draw a line leaving the object in the
correct direction of the reflected light.