light & healthy backpack food made simple
TRANSCRIPT

Make your own dehydrated meals for the trip!
1
Premise:
You can go lightweight and very simple at
camp, get the calories you need, and still
carry rich, varied foods that you love to eat!
– Adds to your enjoyment of any long trip, on the trail and
at camp
It’s easy to prepare your own dehydrated
meals even if you’re too busy to cook

Making your own dehydrated meals for the trip
Lots of options – easy way to start a dehydrated meal
• Purchase your favorite frozen or deli-counter casseroles, vegies and meats – chop and pop them in the dehydrator overnight. Will be ready to bag up in the morning.
• When you make a favorite recipe to eat at home, double it and dehydrate the leftovers overnight.
YOU control the flavor, nutrition and variety – choose only foods that you already know you love to eat!
By removing the water, dehydration, (the heaviest component of any food), you reduce the weight and volume of the meal per unit of nutrition
2
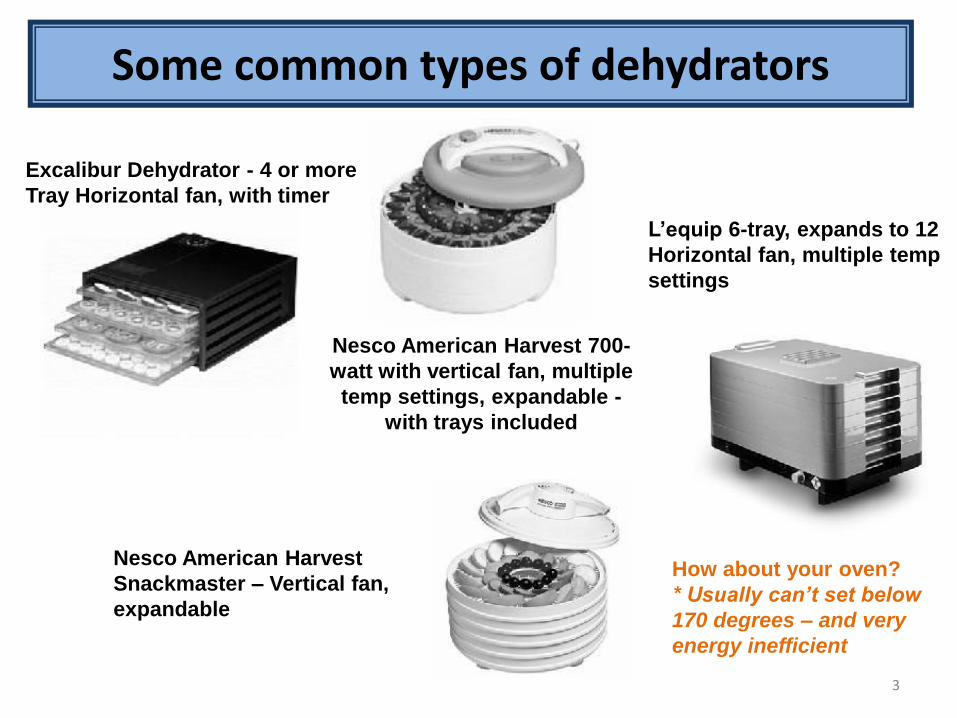
Some common types of dehydrators
3
Excalibur Dehydrator - 4 or more
Tray Horizontal fan, with timer
Nesco American Harvest 700-
watt with vertical fan, multiple
temp settings, expandable -
with trays included
L’equip 6-tray, expands to 12
Horizontal fan, multiple temp
settings
Nesco American Harvest
Snackmaster – Vertical fan,
expandable
How about your oven?
* Usually can’t set below
170 degrees – and very
energy inefficient
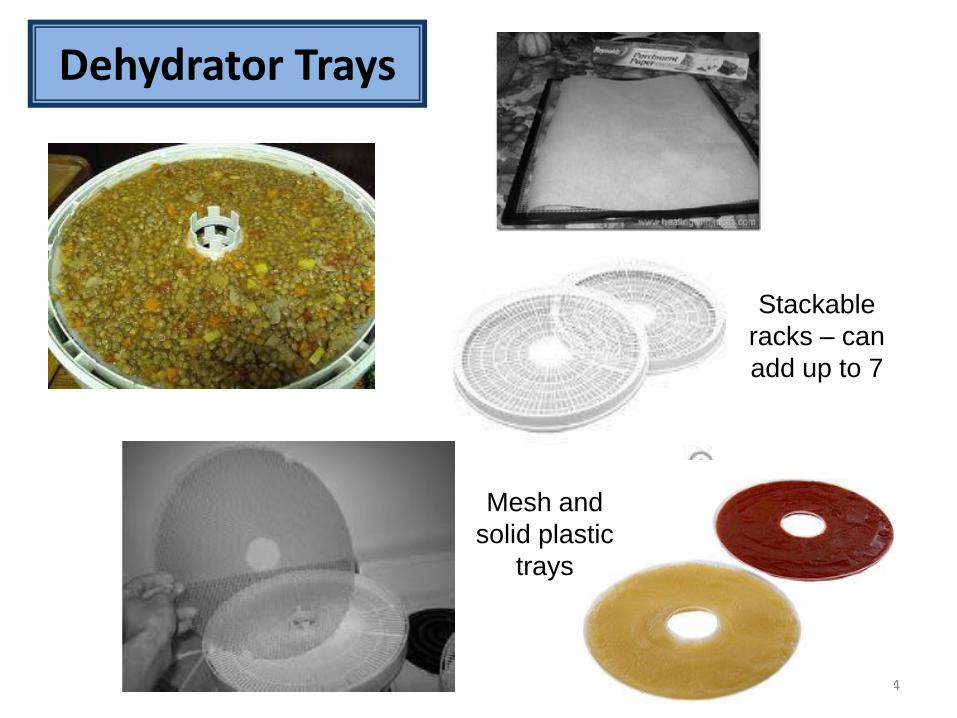
Dehydrator Trays
4
Mesh and
solid plastic
trays
Stackable
racks – can
add up to 7
Foods that work well:• Casseroles, stews, soup bases with thick sauces
• Grains & beans (but test them to be sure they rehydrate in atimely way)
• Thick sauces or purees that can be served over ramen, instantrice, mashed potatoes or polenta – or turned into soup at camp!
• Deli-counter Rotisserie chicken, pressure-cooked canned meats
• Vegetable mixtures (fine dice) – (freezer packs with sauce orbutter packs are great!)
Key to success is uniform, small pieces.
5
Making your own dehydrated meals for the trip
Foods that don’t work as well:• Large pieces – the outside dried before the inside
• Recipes with high oil content, or oil-packed (fish)
• Smelly foods – make the whole house smelly when dehydrating
• Thin soups (thicken the soup before dehydrating it)
Layered dishes (enchiladas, lasagna) ok, but must be chopped up
6
Making your own dehydrated meals for the trip

Different ways to assemble a dehydrated meal• Dehydrate prepared meals (home made or store bought)
• Dehydrate ingredients; fruit, vegetables, meat
• Mix with dried store bought ingredients (e.g. egg crystal, instant rice, ramen, couscous)
• Store bought dry soups and mixed spices
EXPERIMENT!!! (Preferably at home first)
7
Making your own dehydrated meals for the trip

• Pea soup - Karen
• Chicken Taco - Karen
• Chicken and quinoa – Karen
• Enchilada - Karen
• Vegetable soup – Diane
• Pizza sauce – Diane
• Apple and cinnamon - Diane
• Vegetarian Thai curry - Felicia
• Pad see ew - Felicia
• Vegetable biryani - Felicia
• Ratatouille - Felicia
• Korean glass noodle (Chap jae) – Felicia
Some of the recipes are available in print, otherwise contact the person8
Some of our favorite meals

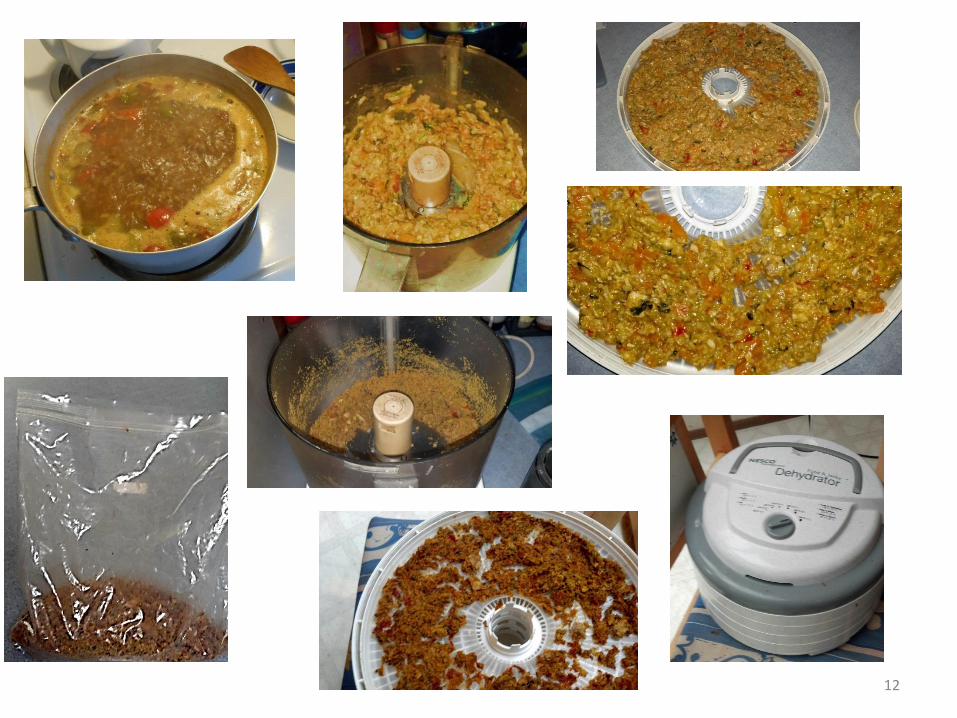
• Prepare casseroles, stews or sauces as you would to eat at
home. Cook all components thoroughly.
Can prepare-dehydrate sauces, vegies, meats separately – gives you the
flexibility to mix them in different combinations at camp
• Chop or puree all components to uniform small size
• Measure the food/ingredients into servings before you put it
in the dehydrator (Note the original volume before dehydrating. Add
water at camp to bring the food to the original volume.
• Spread the food/ingredients thinly & uniformly over the
dehydrator trays – key for fast, thorough drying.
– Use solid plastic tray for runny sauces, mesh tray for drier recipes
– Foods dry faster on mesh trays. Transfer from solid tray midway.9
Tips for successful dehydrated meals

• The optimum temperature range for dehydrating is 140°F(vegies, fruits) to 160oF (meats, eggs)
– Higher temps can ‘harden’ the food on the outside before it dries theinside, and the remaining moisture can breed pathogens.
– Check your dehydrator (empty) with a food thermometer
• Don’t scrimp on drying time (overnight or longer).
– Food should be crisp-brittle, no moisture or stickiness to the touch,after cooling. (jerky, fruit will be hard but pliable)
• May want to re-chop sauces or stews in food processor aftermost of the liquid has evaporated.– The closer you can get sauces to a powder consistency, the richer the
sauce will taste when rehydrated.
– The smaller the pieces, the faster it will rehydrate (but you may prefer abit more texture).
10
Tips for successful dehydrated meals

• The fully dried product should be crispy, brittle dry. Test forbrittleness (or, for fruit, lack of stickiness) after fully cooling.Cool down fully before packaging.
• After the food is fully dry, let cool, then chop, process orcrumble, place in a zip-loc freezer bag, and store it in a cool,secure place until time to pack.
• Use sturdy freezer bags with a very secure seal.
– Particularly useful if you plan to rehydrate and eat out of the bag atcamp.
• Put a tag into the bag with name of the food, # servings anddate it was packed.
11
Tips for successful dehydrated meals
12

• Seal tightly to keep the food from re-absorbingmoisture or contaminants during storage, which couldallow bacteria growth.
– Package in single serving bags – don’t dip out of larger bag.
• If dried to the brittle stage it is not necessary tofreezer-store the food (though colder is better). Cansafely store most foods for 4-6 months or longer ifkept dry.
• Vacuum-sealing may add some length to storage
13
Safe Storage of Dehydrated Foods
Preparing Your Dehydrated Meal At Camp
• Rehydration strategies at camp:
– Put (treated) cold water in the bag mid-afternoon and let it soakfor 1-2 hours or more before eating.
– Heat (treated) water to almost boiling, then rehydrate for 5-30minutes in freezer bag, mug or pot. OR…..
– Boil the dehydrated food in a pot of water for 4-5 minutes (canuse untreated water for this).
• For most foods my rule of thumb is to add enoughwater to cover the dry food with a little extra.– Powderized sauces or soups will need more water.
– Can check, stir and add more if needed.
14

Preparing Your Dehydrated Meal At Camp
• CAMP TIP: The hotter you can keep your food packetwhile rehydrating, the more quickly the food will beready.
Use a cozy or foil, keep in closed pot or insulated mug, orcontinue to apply heat.
• CAMP TIP: Heat just enough water for rehydrating,rinsing – does not need to boil if you’ve treated it(conserves fuel).
• CAMP TIP: Bring ‘goodies’ to spice up your dehydratedmeal!
Spices, sauce packets, cheese, hot sauce, lemon/lime
15
I encourage you to email one of us if you have more questions or get
results you’re not happy with.Karen - [email protected]
Diane - [email protected]
Felicia - [email protected]
16
Making your own dehydrated meals for the trip