lesson plans pre-k through grade 3 · lesson plans pre-k through grade 3 ... living things interact...
TRANSCRIPT
Lesson Plans Pre-K through Grade 3
Recycling is Doggone Easy - Page 2Compost Skit - Page 9Sorting and Describing Properties - Page 15Composting with Worms (Grade K) - Page 30Composting with Worms (Grade 1) - Page 33Composting with Worms (Grade 2) - Page 39Composting with Worms (Grade 3) - Page 47Earth's Resources are Limited Phase 1 - Page 52Earth's Resources are Limited Phase 2 - Page 59Crude Oil's Properties (Grade 3) - Page 66

Created1/2014 visit:hamiltoncountyrecycles.org
RecyclingLessonPre-KandKindergarten
Thislessonismeanttobeaguideandteachersarewelcometoincorporatetheirownideasandresources.Partsofthislessonareadaptedfromandmoreresourcescanbefoundat:http://hamiltoncountyrecycles.org/index.php?page=educatorresourceshttp://dnr.wi.gov/org/caer/ce/eek/teacher/weerecyclers.htm
Circle/LargeGroup
Storytime:RecyclingisDoggoneEasy,printorshowonProjector/SmartBoardhttp://issuu.com/hcdoes/docs/recycling_is_doggone_easy
Movement
Reduce-Reuse-Recycle:Studentsstandinwidecircle,arm’slengthapart,raisingrightfisttoairsaying,“reduce”;raiseleftfisttoairsaying,“reuse”;loweringbotharmsandformingacirclewiththeirarmssaying,“recycle”whileturningtheirwholebodyinacircle.
Phonemicawareness
Reduce-Reuse-Recycle
Centertime
1. Studentsusefeltboard,pocketboardtosortrecyclable,reusableobjectswithpictureandwordcards.Resourcehere:http://dnr.wi.gov/org/caer/ce/eek/teacher/wee/onlineresources/Sorting%20Game.pdf
2. Studentsusecrayonstotraceandcolortheletter“R”andtherecyclingsymbol(AttachmentB)
SmallGroup
Studentswillgroup,categorize,describeandcomparevariousrecyclableobjects
Closing Reviewandrecallthethemeofrecycling.ReinforceThe3R’sasacivicresponsibility,necessaryduetoscarcityandtheimportanceofconservation.SingtheRecyclingSong,(AttachmentA)tothetuneofRow,Row,RowYourBoat.
Created1/2014 visit:hamiltoncountyrecycles.org
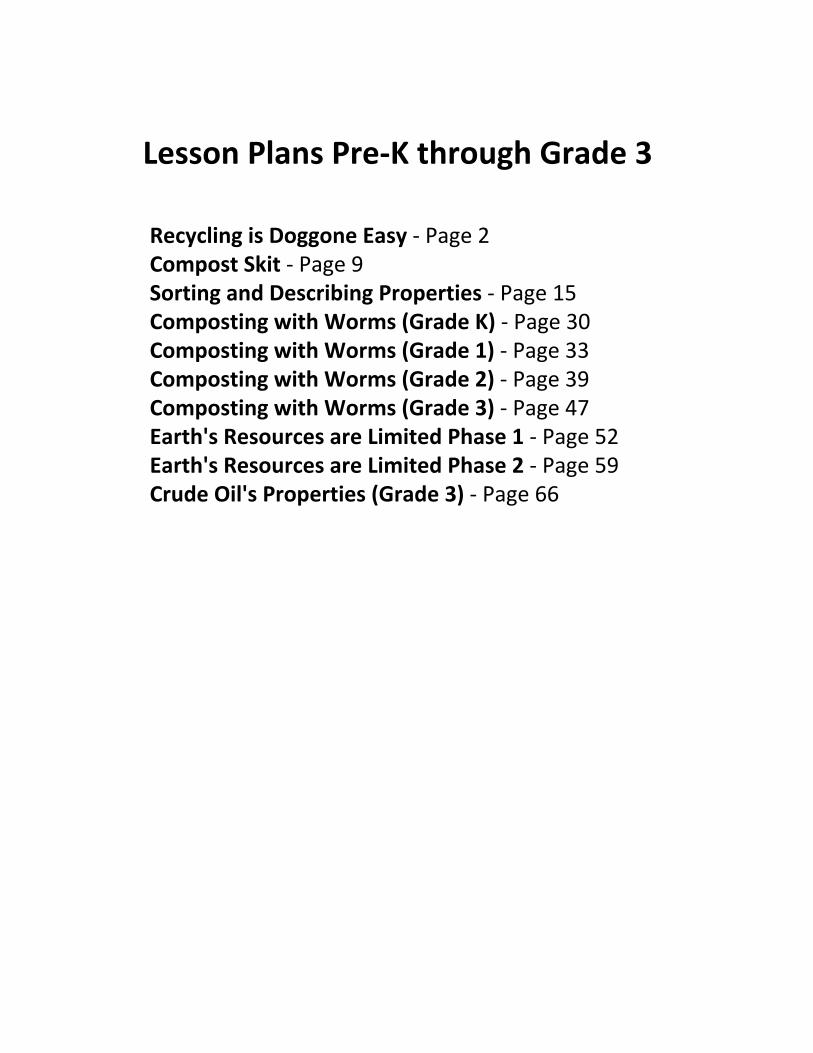
Save, save, save the can, throw it in the bin,
We can help to save the earth if we all pitch in.
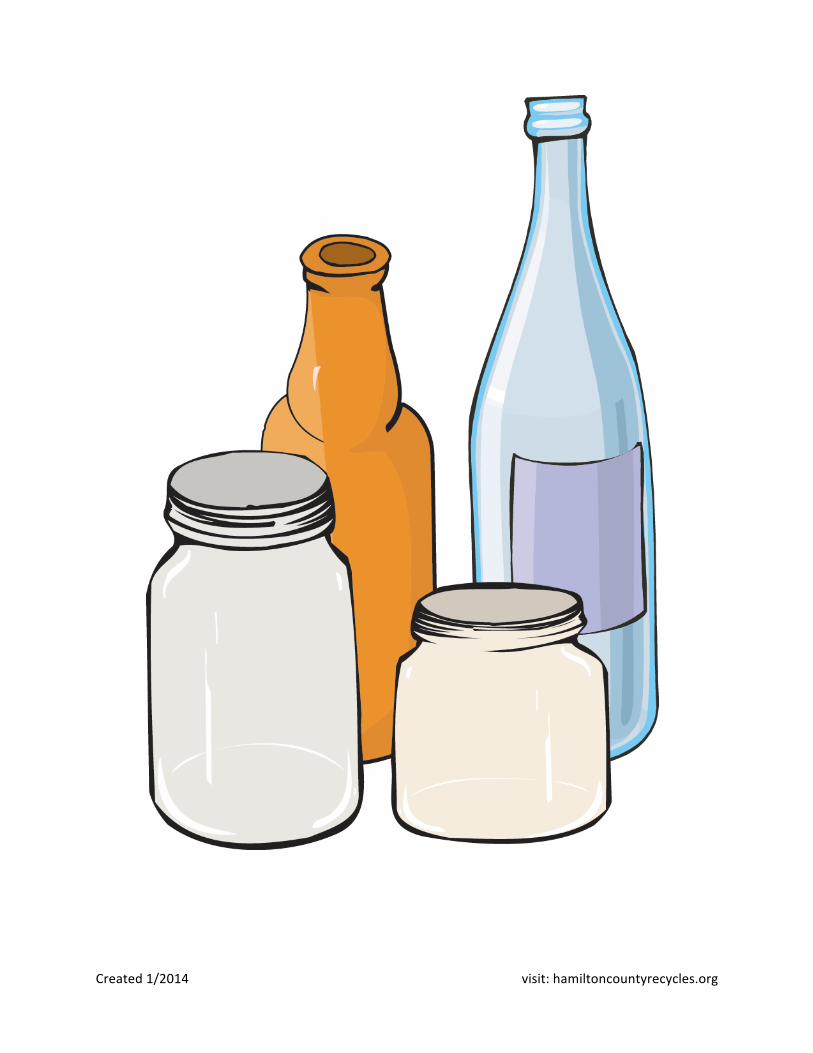
Save, save, save the paper, throw it in the bin,
We can help to save the earth if we all pitch in.
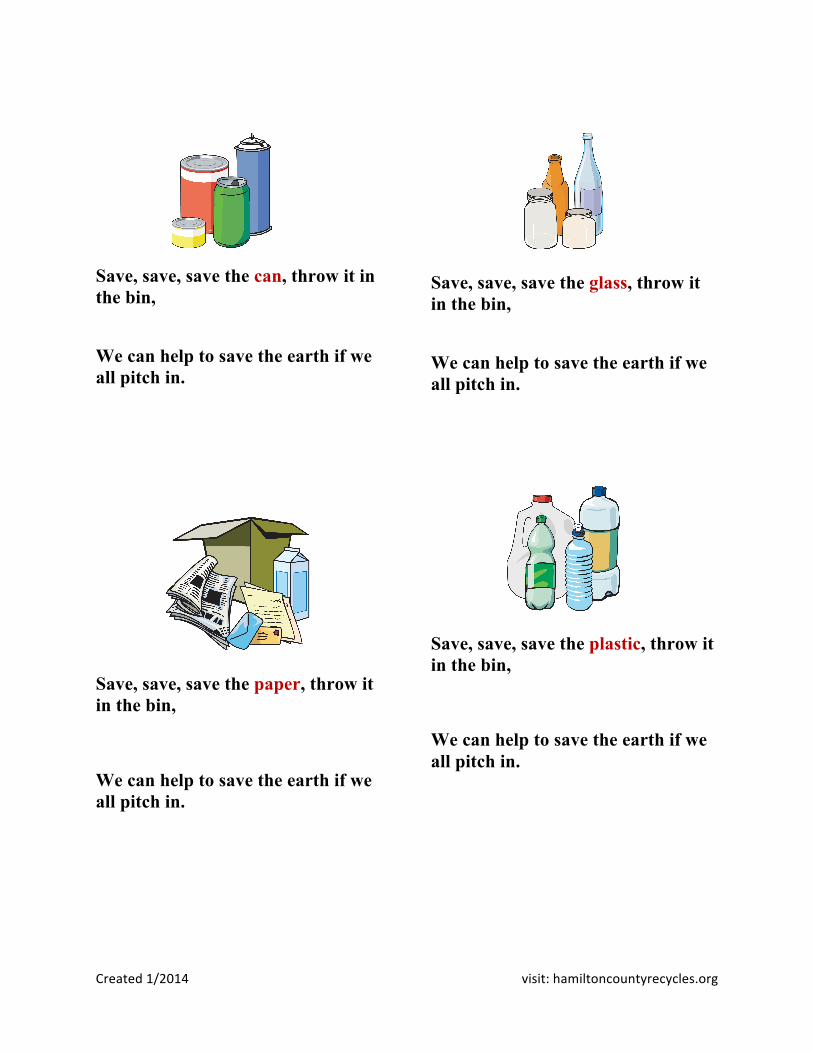
Save, save, save the glass, throw it in the bin,
We can help to save the earth if we all pitch in.
Save, save, save the plastic, throw it in the bin,
We can help to save the earth if we all pitch in.

Created1/2014 visit:hamiltoncountyrecycles.org

Created1/2014 visit:hamiltoncountyrecycles.org
Created1/2014 visit:hamiltoncountyrecycles.org
Created1/2014 visit:hamiltoncountyrecycles.org

Created1/2014 visit:hamiltoncountyrecycles.org
Compost Skit
Grades: K – 3
Background: Students should have a basic understanding of what compost is and how it is created before the skit. For older students, incorporate discussion of food chains and energy pyramids.
Overview: One student is the master gardener while another is the farmer. The rest of the class represents leaves, grass or other organisms found in the compost pile.
MATERIALS
Yarn or chalk Nametags or color coded symbols for all participating roles Empty watering can (or sprinkling sounds) Attached diagram: WOW Food Web of Compost
ROLES – up to 30 students (adjust roles to class size)
Master Gardener – 1 Farmer – 1 Leaves – 5 Grass – 5 Bacteria – 4 (first level consumers) Mushrooms/Fungus – 4 (first level consumers) Worms (or Springtails) – 3 (second level consumers) Beetles –3 (second level consumers) Centipedes –2 (third level consumers) Ants –2 (third level consumers)

DIRECTIONS Use yarn or chalk to create a circle boundary for compost bin.
Explain to students they will be performing a skit that represents what happens in a
compost bin and point out the “bin.”
Teacher assigns roles, gives students props and nametags as needed, and tells students to listen carefully as you read when and what each should do.
Be sure to tell the students that when they are told to “eat” they should only move their mouths and they should not touch other students.
STEPS IN SKIT
1. Master Gardener adds leaves and grass to the compost pile; Leaves and Grass lay in
bin.
2. The Farmer adds Oxygen to the bin by stirring; Leaves and Grass turn over and wiggle. This helps the organisms in the compost pile to live.
3. Master Gardener adds water to the bin; Leaves and Grass slurp. This starts the rot
cycle and the process of decomposition.
4. Conditions are perfect so Bacteria and Mushrooms pretend to eat the Grass and Leaves. Leaves and Grass decompose by curling.
5. May add here or use as background information: Fungus decomposes the wet brown and green matter as it gets its food from them. Fungus is a living thing, but it is not a plant. Bacteria heat up the pile and decompose brown and green matter and fungus. You can’t see bacteria in the compost pile, but if you could line up 10,000 bacteria side-by-side, they would equal one inch. Heat is released when the bacteria eat organic material. An active compost pile typically generates heat in the range of 90 to 140 degrees Fahrenheit. (May end here and discuss compost cycle or continue with below.)
6. Worms (or Springtails) and Beetles eat the brown and green leaves, as well as the
Bacteria and Mushrooms growing on them. Worms and Beetles help the process of decomposition by eating and digesting dead plants and animals.
7. Centipedes and Ants eat the worms (or springtails) and beetles. They are predators.
After the last step, go over the roles with the students. Ask the students what could happen to the centipede or ant (They could be eaten, perhaps by a bird. Any of the worms or beetles could also be eaten by something outside the compost bin). Explain that the food chain doesn’t end here. Besides getting eaten by an animal outside the bin, centipedes or ants can also die and then become food for bacteria and fungi. So a compost pile is an example of how nature works in
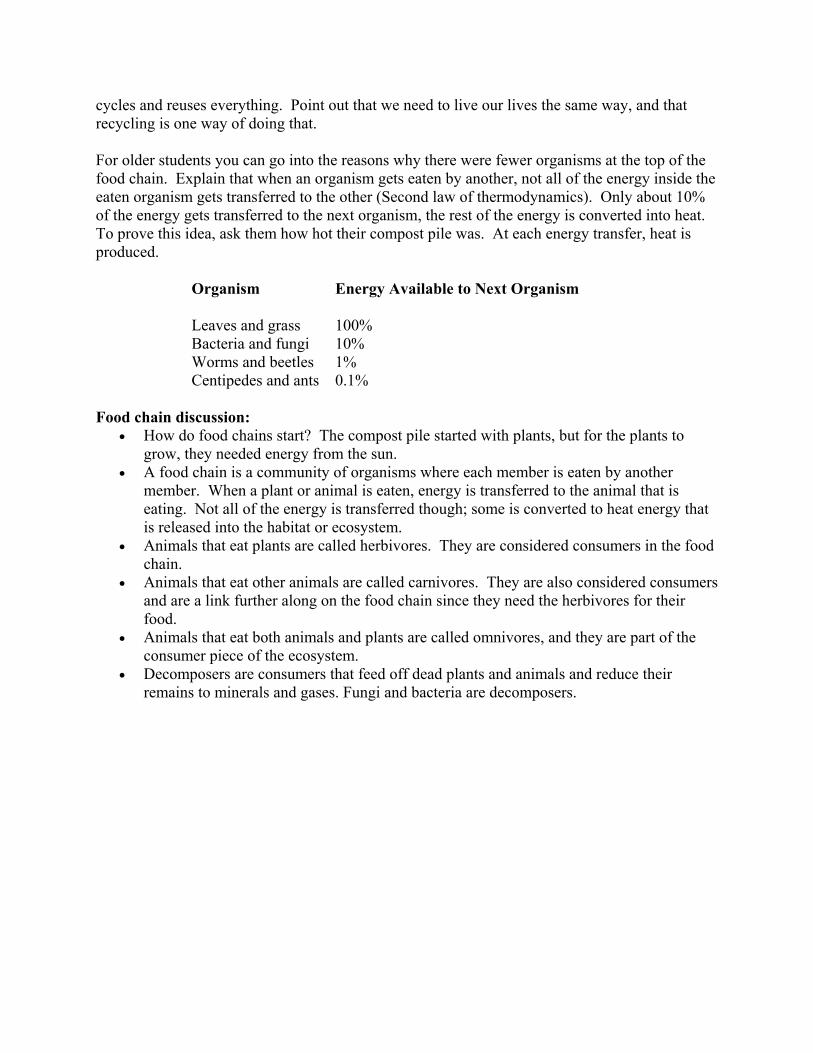
cycles and reuses everything. Point out that we need to live our lives the same way, and that recycling is one way of doing that. For older students you can go into the reasons why there were fewer organisms at the top of the food chain. Explain that when an organism gets eaten by another, not all of the energy inside the eaten organism gets transferred to the other (Second law of thermodynamics). Only about 10% of the energy gets transferred to the next organism, the rest of the energy is converted into heat. To prove this idea, ask them how hot their compost pile was. At each energy transfer, heat is produced. Organism Energy Available to Next Organism Leaves and grass 100% Bacteria and fungi 10% Worms and beetles 1%
Centipedes and ants 0.1%
Food chain discussion: How do food chains start? The compost pile started with plants, but for the plants to
grow, they needed energy from the sun. A food chain is a community of organisms where each member is eaten by another
member. When a plant or animal is eaten, energy is transferred to the animal that is eating. Not all of the energy is transferred though; some is converted to heat energy that is released into the habitat or ecosystem.
Animals that eat plants are called herbivores. They are considered consumers in the food chain.
Animals that eat other animals are called carnivores. They are also considered consumers and are a link further along on the food chain since they need the herbivores for their food.
Animals that eat both animals and plants are called omnivores, and they are part of the consumer piece of the ecosystem.
Decomposers are consumers that feed off dead plants and animals and reduce their remains to minerals and gases. Fungi and bacteria are decomposers.

This skit aligns with the following Ohio Revised Science Standards, 2011:
Kindergarten:
Life Science (LS)
Topic: Physical and Behavioral Traits of Living Things
This topic focuses on observing, exploring, describing and comparing living things in Ohio.
Content Statement: Living things are different from nonliving things.
Living things include anything that is alive or has ever been alive. Living things have specific characteristics and traits. Living things grow and reproduce. Living things are found almost everywhere in the world. There are somewhat different
kinds in different places.
Grade 1
Life Science (LS)
Topic: Basic Needs of Living Things
This topic focuses on the physical needs of living things in Ohio. Energy from the sun or food, nutrients, water, shelter and air are some of the physical needs of living things.
Content Statement 1: Living things have basic needs, which are met by obtaining materials from the physical environment.
Living things require energy, water, and a particular range of temperatures in their environments.
Plants get energy from sunlight. Animals get energy from plants and other animals. Living things acquire resources from the living and nonliving components of the
environment.
Content Statement 2: Living things survive only in environments that meet their needs.
Resources are necessary to meet the needs of an individual and populations of individuals.
Living things interact with their physical environments as they meet those needs.
Grade 2
Life Science (LS)
Topic: Interactions within Habitats
This topic focuses on how ecosystems work by observations of simple interactions between the biotic/living and abiotic/nonliving parts of an ecosystem. Just as living things impact the environment in which they live, the environment impacts living things.
Content Statement: Living things cause changes on Earth.

Living things function and interact with their physical environments. Living things cause changes in the environments where they live; the changes can be very
noticeable or slightly noticeable, fast or slow.
Grade 3
Life Science (LS)
Topic: Behavior, Growth and Changes
This topic explores life cycles of organisms and the relationship between the natural environment and an organism’s (physical and behavioral) traits, which affect its ability to survive and reproduce.
Content Statement: Plants and animals have life cycles that are part of their adaptations for survival in their natural environments.
Over the whole earth, organisms are growing, reproducing, dying and decaying. The details of the life cycle are different for different organisms, which affects their
ability to survive and reproduce in their natural environments.
Physical Science (PS)
Topic: Matter and Forms of Energy
This topic focuses on the relationship between matter and energy. Matter has specific properties and is found in all substances on Earth. Heat is a familiar form of energy that can change the states of matter.
Content Statement 1: Matter exists in different states, each of which has different properties.
One way to change matter from one state to another is by heating and cooling.
Content Statement 2: Heat, electrical energy, light, sound and magnetic energy are forms of energy.
There are many different forms of energy. Energy is the ability to cause motion or create change.
Reference: This lesson originated at Hamilton County Solid Waste District.

Presents
Sorting and Describing by Properties: Recycling 101
Grade: Kindergarten
Topic: Properties of Everyday Objects and Materials
Science: Properties of Everyday Objects and Materials, Ohio Science Curriculum, 2011, Physical Science.
Social Studies: Civic Participation and Skills, and Scarcity: There are not enough resources to produce all the
goods and services that people desire; Ohio Kindergarten Social Studies Model Curricula, August 2011, A
Child’s Place in Time and Space.
Content Statements:
Science: 1. Objects and materials can be sorted and described by their properties.
Social Studies: 1. Individuals have shared responsibilities toward the achievement of common goals in homes, schools
and communities.
2. People have many wants and make decisions to satisfy those wants. These decisions impact others.
Reference and content elaboration: page 43, Ohio Revised Science Standards and Model Curriculum Grades
Pre-K through Eight, March 2011; page 9 and page 11, Ohio Kindergarten Social Studies Model Curricula,
August 2011.
Overview of Activity: Children will learn to recognize the recycling symbol and how to correctly sort items
according to their properties. They will identify recycled objects as achieving common goals and satisfying
wants which impact others.
Materials Needed:
copy of attachments
5 shoe boxes
examples of recycled and recyclable items
glue sticks/scissors
plastic bottle caps or other “chips” for bingo
crayons/pencils

Directions for Recycling Bingo:
1. Each student makes up their own bingo card using the pictures provided, cutting out 16 of the 24
pictures and gluing them onto the blank bingo card. The teacher will also need a master set of all
cards to use for “call out.” as well as the Recycling Bingo Clue Cards. It may be helpful to show the
picture card to the pre-readers.
2. Students cover picture with bottle caps or other item as teacher calls out each item. First to have a
four in a row will yell “recycle!”
3. Teacher verifies correct items on bingo card.
Option to above:
Teacher may want to prepare bingo items ahead of time and laminate for year-to-year use. Teacher may also
decide to put one or more “free” spots on the bingo cards.
5Es Lesson Designer
Questions to be investigated: How can we sort and describe these objects? How can recycling help us satisfy wants?
“5-E” Phase Activities for Each Phase
Engage
Tap prior knowledge
Focus learners’ thinking
Spark interest in topic
1) Show picture of recycling symbol and ask students if they know what it means.
2) Ask students to name some things that are recyclable.
3) Show some items that were made from recycled products such as carpet, decking, paperboard, aluminum can, etc.
Explore
Provide learners with common, concrete, hands-on experiences with skills and concepts
1) In groups, give each group recyclable items and ask them to describe how the item feels. Is it easily bent or hard? Smooth or rough? Next, have them describe its color.
2) Each group should then place like items together, sorting by similar properties.
Explain
Learners present and share explanations
Teacher clarifies, redirects, and corrects misconceptions
1) Each group should describe how they separated their objects, with teacher asking probing questions.
Elaborate
Apply concepts and skills in a new context resulting in deeper understanding
1) Each student should then further their understanding of sorting by placing one object in the appropriate box (each box with a word and picture of: glass, plastic, metal, aluminum, paper). Teacher may want to keep glass items and talk about it separately, for

safety reasons. 2) Explain that each of the items is recyclable,
and at home we can put all these items in one recycling container, we don’t have to separate them. If you have a recycling paper box in the classroom, remind the children to put their papers there instead of the garbage can. Reinforce individuals have shared responsibilities toward the achievement of common goals both at school and at home.
3) Describe other recycling efforts your school may also participate in and how they can help.
4) Ask students what they think would happen if we never recycled. We could run out of things or they could become very expensive (scarcity). Recycling impacts other people in a positive way.
5) Play recycling bingo.
Evaluate
Formally and/or informally assess progress learners have toward achieving understanding
1) Set up and monitor paper recycling in the classroom.
2) Give students attached worksheet and have them circle items that are recyclable, crossing off items that are not recyclable.
3) Further reinforce reusing by using the other side of paper, placing construction paper back in the scrap pile if they don’t use the whole thing, etc.


Recycling Bingo Clue Cards
1. I am made of metal. You find peas in
me. When I’m empty, just rinse me and toss me in the bin
8. I’m clear and made of plastic. When I’m
full you put me on your barbeque or nuggets. When I’m empty, just rinse me, crush me, and put my lid back on and toss me in the
bin.
2. I’m made of plastic. I contain milk. Just
rinse me, crush me, put my lid back on and toss me in the bin.
9. I am made of metal. You find beans in me. When I’m empty, just rinse me and toss me in
the bin
3. I’m clear and made of plastic. When I’m full you put me on your hot dogs and fries. When I’m empty, just rinse me, crush me, and put my lid back on and
toss me in the bin.
10. I am made of plastic and come in many colors. I condition your hair. Just rinse me, crush
me, put my lid back on and toss me in the bin.
4. I’m made of aluminum and hold soda
pop or punch. Just crush me and throw me in the bin.
11. I’m made of plastic and come in
many colors. I help clean clothes in the washer. I am laundry soap. Just rinse me
and toss me in the bin.
5. I’m made of plastic and contain 2 liters
of your favorite kind of pop. Just rinse me, crush me, put my lid back on and
toss me in the bin.
12. I’m made of plastic. I contain juice. Just rinse me, crush me, put my lid back on and
toss me in the bin.
6. I’m made of plastic and come in many
colors. I help soften clothes in the washer. I am fabric softener. Just rinse
me and toss me in the bin.
13. I am made of glass. Inside I hold pickles.
When I’m empty, just rinse me and place my jar in your bin.
7. I am made of plastic and come in many
colors. I shampoo your hair. Just rinse me, crush me, put my lid back on and
toss me in the bin.
14. I am made of glass and love peanut butter. Yes, I am jelly! When you finish me, just rinse
me and place me in your bin.

15. I am made of paper, and sometimes you
bring your groceries home in me. Please put me in your bin, so I can be made into more paper.
21. I am made of paper; sometimes I am glossy and have neat pictures. I am a magazine. When
you finish reading me, share me with a friend or toss me in your bin.
16. I am a paper book where you find phone
numbers. When you get your new phonebook, just put your old one in the bin.
22. I am made of plastic and am soap to wash your hands. When I’m empty, rinse me, crush
me, and toss me in your bin.
17. I am made of paper and you might like to read my comics. Once you read my news, put
me in your bin, so I can make new paper.
23. I am made of plastic and hold water. When you’re done drinking me, just crush me, put the
lid back on and toss me in the bin.
18. I am a metal canister and am used to spray your hair. Please empty me, take my nozzle off
and toss me in your bin.
24. I am all paper that is not dirty from food or
wet. I am mixed paper. Please recycle me into new paper. Just toss me in the bin.
19. I am made of plastic and make you dishes
clean. When I’m empty, rinse me, crush me, put the lid back on and toss me in your bin.
20. I am made of metal and you can pull me of a
soda can. You can save me for the Ronald McDonald House or toss me in your bin.

Recycling 101 Worksheet Name__________________________
Circle the objects that are recyclable or put an X on the objects that are
not recyclable.

1
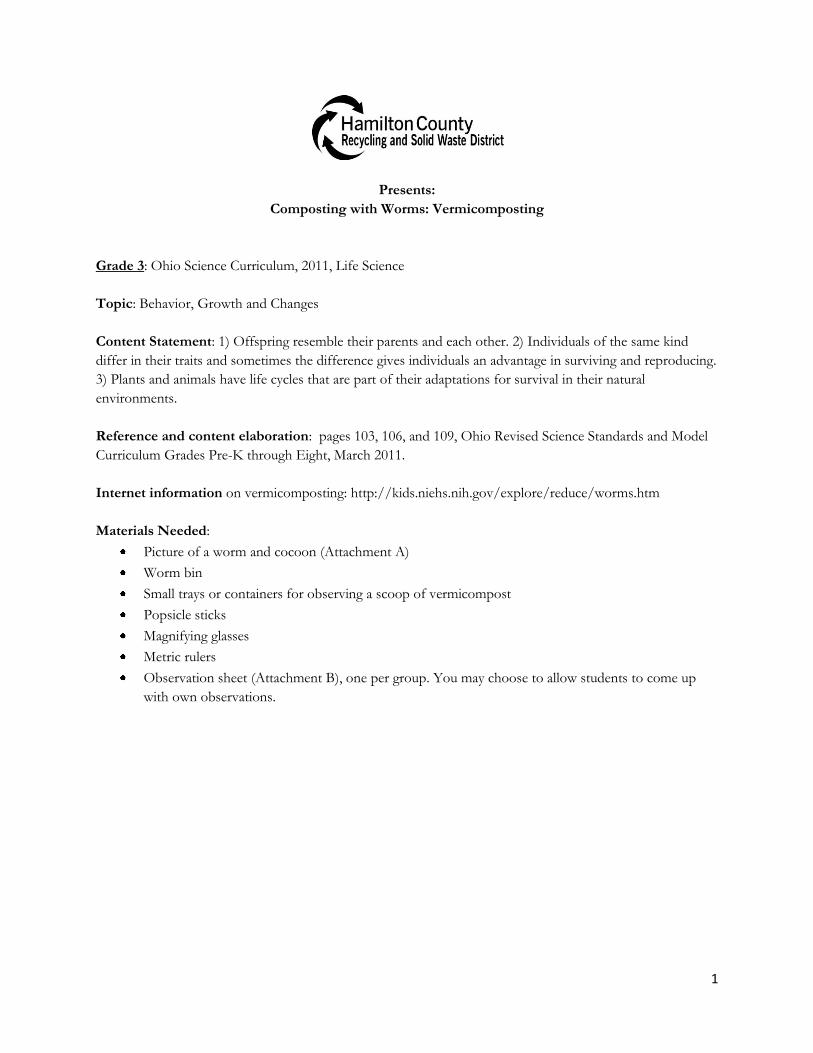
Presents:
Composting with Worms: Vermicomposting
Kindergarten: Ohio Science Curriculum, 2011, Life Science
Topic: Physical and Behavioral Traits of Living Things
Content Statement: Living things have physical traits and behaviors, which influence their survival.
Reference and content elaboration: page 40, Ohio Revised Science Standards and Model Curriculum
Grades Pre-K through Eight, March 2011
Common Misconception Debunked: Children commonly define an “animal” as the vertebrate types that
are most familiar to them such as household pets, local mammals and zoo animals. Animals also include
turtles, snakes, frogs, fish, insects, snails, worms, spiders, birds, etc.
Materials Needed:
Picture of a worm (Attachment A)
Worm bin
Small trays or containers for observing a scoop of vermicompost
Popsicle sticks
Magnifying glasses (optional)
Paper, pencil, and crayons
2
5Es Lesson Designer
Kindergarten
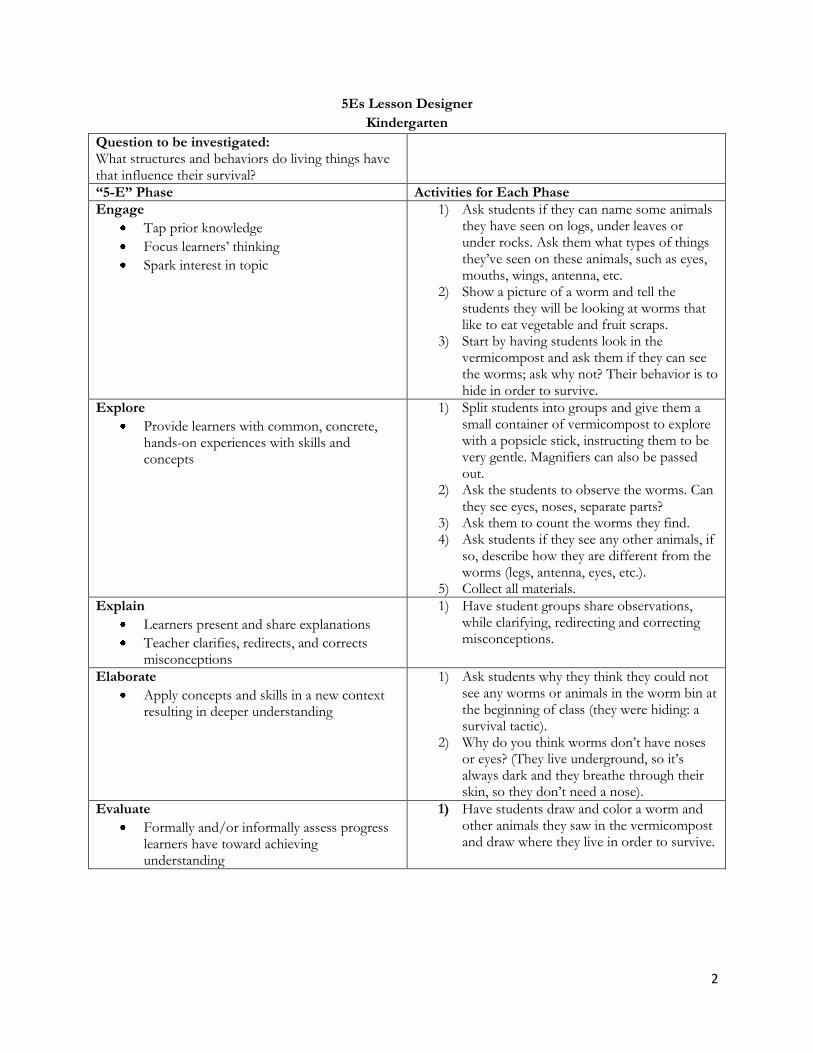
Question to be investigated: What structures and behaviors do living things have that influence their survival?
“5-E” Phase Activities for Each Phase
Engage
Tap prior knowledge
Focus learners’ thinking
Spark interest in topic
1) Ask students if they can name some animals they have seen on logs, under leaves or under rocks. Ask them what types of things they’ve seen on these animals, such as eyes, mouths, wings, antenna, etc.
2) Show a picture of a worm and tell the students they will be looking at worms that like to eat vegetable and fruit scraps.
3) Start by having students look in the vermicompost and ask them if they can see the worms; ask why not? Their behavior is to hide in order to survive.
Explore
Provide learners with common, concrete, hands-on experiences with skills and concepts
1) Split students into groups and give them a small container of vermicompost to explore with a popsicle stick, instructing them to be very gentle. Magnifiers can also be passed out.
2) Ask the students to observe the worms. Can they see eyes, noses, separate parts?
3) Ask them to count the worms they find. 4) Ask students if they see any other animals, if
so, describe how they are different from the worms (legs, antenna, eyes, etc.).
5) Collect all materials.
Explain
Learners present and share explanations
Teacher clarifies, redirects, and corrects misconceptions
1) Have student groups share observations, while clarifying, redirecting and correcting misconceptions.
Elaborate
Apply concepts and skills in a new context resulting in deeper understanding
1) Ask students why they think they could not see any worms or animals in the worm bin at the beginning of class (they were hiding: a survival tactic).
2) Why do you think worms don’t have noses or eyes? (They live underground, so it’s always dark and they breathe through their skin, so they don’t need a nose).
Evaluate
Formally and/or informally assess progress learners have toward achieving understanding
1) Have students draw and color a worm and other animals they saw in the vermicompost and draw where they live in order to survive.
3
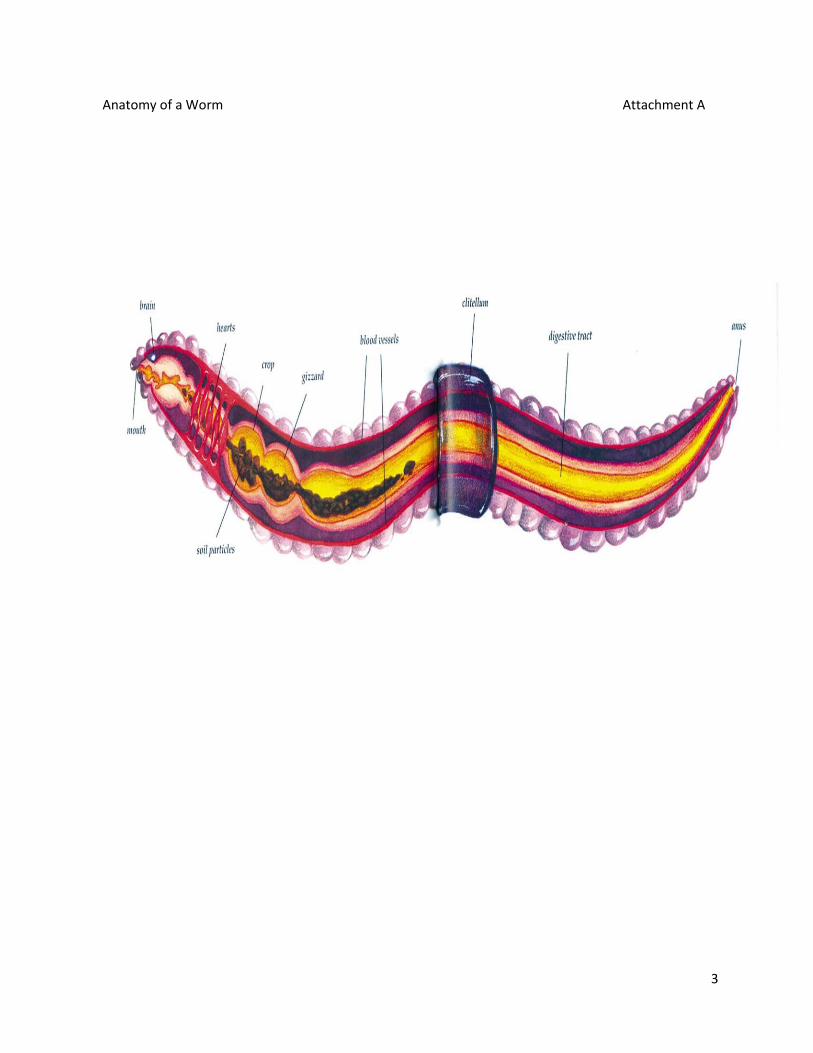
Anatomy of a Worm Attachment A

1
Presents:
Composting with Worms: Vermicomposting
Grade 1: Ohio Science Curriculum, 2011, Life Science
Topic: Basic Needs of Living Things
Content Statement: 1) Living things have basic needs, which are met by obtaining materials from the
physical environment. 2) Living things survive only in the environments that meet their needs.
Reference and content elaboration: page 57 and page 60, Ohio Revised Science Standards and Model
Curriculum Grades Pre-K through Eight, March 2011
Materials Needed:
Picture of a worm (Attachment A)
Scavenger hunt chart (Attachment B)
Worm bin
Small trays or containers for observing a scoop of vermicompost
Popsicle sticks and magnifying glasses
Worksheet: Identify Basic Needs of All Living Things (Attachment C)
5Es Lesson Designer
First Grade
Questions to be investigated: How does the worm bin provide an environment that meets the needs of the worms and other insects in it? What materials are necessary from the physical environment to meet these needs?
“5-E” Phase Activities for Each Phase
Engage
Tap prior knowledge
Focus learners’ thinking
Spark interest in topic
1) Ask students what they have to do so they are not hungry and grow big and strong (Eat); what they have to do so they are not thirsty (Drink water); what do they need to breath? (Air/oxygen); to stay warm in the winter? (Dress for weather/ cover).
2) Ask if they have pets. Do pets also need these things? What about animals that live outside? All living things need these things, even insects.
2
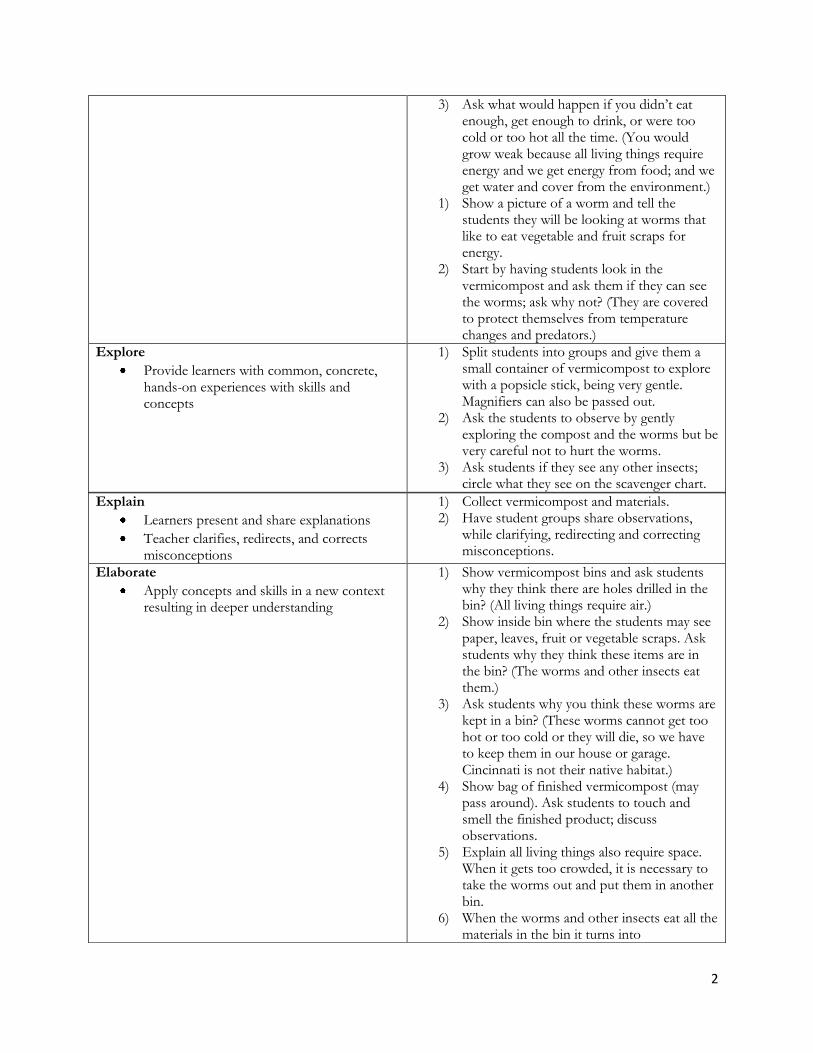
3) Ask what would happen if you didn’t eat enough, get enough to drink, or were too cold or too hot all the time. (You would grow weak because all living things require energy and we get energy from food; and we get water and cover from the environment.)
1) Show a picture of a worm and tell the students they will be looking at worms that like to eat vegetable and fruit scraps for energy.
2) Start by having students look in the vermicompost and ask them if they can see the worms; ask why not? (They are covered to protect themselves from temperature changes and predators.)
Explore
Provide learners with common, concrete, hands-on experiences with skills and concepts
1) Split students into groups and give them a small container of vermicompost to explore with a popsicle stick, being very gentle. Magnifiers can also be passed out.
2) Ask the students to observe by gently exploring the compost and the worms but be very careful not to hurt the worms.
3) Ask students if they see any other insects; circle what they see on the scavenger chart.
Explain
Learners present and share explanations
Teacher clarifies, redirects, and corrects misconceptions
1) Collect vermicompost and materials. 2) Have student groups share observations,
while clarifying, redirecting and correcting misconceptions.
Elaborate
Apply concepts and skills in a new context resulting in deeper understanding
1) Show vermicompost bins and ask students why they think there are holes drilled in the bin? (All living things require air.)
2) Show inside bin where the students may see paper, leaves, fruit or vegetable scraps. Ask students why they think these items are in the bin? (The worms and other insects eat them.)
3) Ask students why you think these worms are kept in a bin? (These worms cannot get too hot or too cold or they will die, so we have to keep them in our house or garage. Cincinnati is not their native habitat.)
4) Show bag of finished vermicompost (may pass around). Ask students to touch and smell the finished product; discuss observations.
5) Explain all living things also require space. When it gets too crowded, it is necessary to take the worms out and put them in another bin.
6) When the worms and other insects eat all the materials in the bin it turns into

3
vermicompost (worm poop). Then they need a new bin to live in. This vermicompost is like a vitamin for plants and helps them grow and be healthy.
Evaluate
Formally and/or informally assess progress learners have toward achieving understanding
1) Have students identify the resources needed by all living things, both living and non-living, by circling these items in Attachment C.

4
Anatomy of a Worm Attachment A

5
Attachment B
Insect Scavenger Hunt Name_____________________________________
Circle each organism you see in the vermicompost (Hint: you will not find all):
Sow bug or Potato bug Millipede Worm
Snail Collembola (white in color) Slug
Beetle Beetle Mite Butterfly

6
Attachment C
Identify Basic Needs of All Living Things
Directions: Circle the items every living thing needs Name________________________________
Air

1
Presents:
Composting with Worms: Vermicomposting
Grade 2: Ohio Science Curriculum, 2011, Life Science
Topic: Interactions with Habitats
Content Statement: Living things cause changes on Earth.
Reference and content elaboration: page 80, Ohio Revised Science Standards and Model Curriculum
Grades Pre-K through Eight, March 2011
Materials Needed:
Pictures of animals in nature (Attachment A)
Worm bin
Finished vermicompost
Small trays or containers for observing a scoop of vermicompost
Popsicle sticks and magnifying glasses
Scavenger hunt chart (Attachment B)
Paper and pencil for recording observations
5Es Lesson Designer
Second Grade
Question to be investigated: How do living things cause changes in the environment where they live?
“5-E” Phase Activities for Each Phase
Engage
Tap prior knowledge
Focus learners’ thinking
Spark interest in topic
1) Ask students if they can think of ways animals change their environment? (Chipmunk digging a hole, bird building a nest, deer eating plants, beaver building dam, insects decomposing wood, etc.) Show pictures of some examples.
2) Start by having students look in the vermicompost bin and ask them what they see (leaves, paper, twigs, “dirt”). Next show them finished vermicompost. Tell them they will be learning how the vermicompost is changed due to a combination of interactions between living things and non-living.

2
Explore
Provide learners with common, concrete, hands-on experiences with skills and concepts
1) Split students into groups and give them a small container of vermicompost to explore with a Popsicle stick, being very gentle. Magnifiers can also be passed out.
2) Ask the students to observe by gently exploring the compost and the worms but be very careful not to hurt the worms.
3) Ask students if they see any other insects, circle what they see on the scavenger chart.
4) Ask students to record other non-living things they find in there container (leaves, paper, twigs, fruit or vegetable scraps, “dirt”, etc.)
5) Ask students to guess (hypothesis) why finished vermicompost looks different than this vermicompost. How did it change?
6) Collect all vermicompost containers and magnifiers.
Explain
Learners present and share explanations
Teacher clarifies, redirects, and corrects misconceptions
1) Have student groups share observations: a) The insects they found b) The non-living objects they found c) Why they thought the vermicompost
changed while clarifying, redirecting and correcting misconceptions.
Elaborate
Apply concepts and skills in a new context resulting in deeper understanding
1) Ask students if they could see the insects eating the items in the bin? Explain that sometimes changes occur slowly and are not very noticeable. Other times change is very fast and noticeable, like when the deer eat all the flowers in your yard.
2) When the insects eat all the items in the bin, the vermicompost is finished and this makes a fertilizer for plants, so they can grow strong and healthy.
Evaluate
Formally and/or informally assess progress learners have toward achieving understanding
1) A vermicompost bin in the classroom would be ideal to further investigate, explore, and observe the impact and actions of living things in their environment.
2) Have students give examples of ways living things impact and take action in their environment which have not yet been discussed.
3) Have students go home and observe their yards for evidence of living things causing changes in the environment where they live, recording and reporting back to school the next day.

3
Attachment A
Muskrat
White-Tailed Deer

4
Opossum
Snowshoe Hare

5
Attachment A

6
Attachment A

7
Attachment A

8
Attachment B
Insect Scavenger Hunt Name_____________________________________
Circle each organism you see in the vermicompost (Hint: you will not find all):
Sow bug or Potato bug Millipede Worm
Snail Collembola (white in color) Slug
Beetle Beetle Mite Butterfly
1
Presents:
Composting with Worms: Vermicomposting
Grade 3: Ohio Science Curriculum, 2011, Life Science
Topic: Behavior, Growth and Changes
Content Statement: 1) Offspring resemble their parents and each other. 2) Individuals of the same kind
differ in their traits and sometimes the difference gives individuals an advantage in surviving and reproducing.
3) Plants and animals have life cycles that are part of their adaptations for survival in their natural
environments.
Reference and content elaboration: pages 103, 106, and 109, Ohio Revised Science Standards and Model
Curriculum Grades Pre-K through Eight, March 2011.
Internet information on vermicomposting: http://kids.niehs.nih.gov/explore/reduce/worms.htm
Materials Needed:
Picture of a worm and cocoon (Attachment A)
Worm bin
Small trays or containers for observing a scoop of vermicompost
Popsicle sticks
Magnifying glasses
Metric rulers
Observation sheet (Attachment B), one per group. You may choose to allow students to come up
with own observations.

2
5Es Lesson Designer
Third Grade
Questions to be investigated: 1) How do the worms differ in appearance from cocoon to adult? 2) What do the worms do when exposed to light? 3) Are all worms equally active? 4) If a certain size worm is more active, what do you think this does for its chances of survival? 5) What physical features of a worm relate to where they live? 6) What behaviors do worms exhibit in order to survive? 7) Why do you think red wiggler worms live about 1 year in nature and an average of 4 ½ years in a
worm bin? 8) When a worm or other animal in a worm bin dies, what happens to it?
“5-E” Phase Activities for Each Phase
Engage
Tap prior knowledge
Focus learners’ thinking
Spark interest in topic
1) Ask students if they are the same size as they were when they were babies? 3 years old? Will they grow bigger? Do they look like their mom or dad?
2) Who has more energy, them or their grandparents? 3) If they get into trouble or are embarrassed, how do they
react? Do they turn red, wiggle around, and get hot? 4) What do you do when you are real hot? Real cold? 5) Show the picture of a worm (Attachment A) and tell the
students they will be looking at worms and charting their sizes, colors, and other differences they notice. Start by having students look in the worm bin and ask them if they can see the worms; ask why not? (They are covered to protect themselves from temperature changes and predators.)
6) Show the picture of the worm cocoons, i.e., eggs (Attachment A), and tell the students they should also be on the lookout for these.
Explore
Provide learners with common, concrete, hands-on experiences with skills and concepts
1) Split students into groups of 3-5 and give them a small container of vermicompost to explore with popsicle sticks, being very gentle. Magnifiers, metric rulers and observation sheets should also be passed out.
2) Ask the students to observe by gently exploring the compost and the worms, but be very careful not to hurt the worms. Tell them any other animals they see are not part of the observations today.
3) Ask students to separate the worms they find and, through observation, chart differences they observe.
4) Students may also find cocoons: record these. 5) Have students measure and record the length of the worms
they find. 6) Ask students to rate the activity level of each worm. 7) Other observations?

3
Explain
Learners present and share explanations
Teacher clarifies, redirects, and corrects misconceptions
1) Collect vermicompost and materials. 2) Have student groups share observations, while clarifying,
redirecting, and correcting misconceptions.
Elaborate
Apply concepts and skills in a new context resulting in deeper understanding
1) Ask students how the worms differ in appearance from cocoon to adult?
2) What do the worms do when exposed to light? (seek dark) 3) Are all worms equally active? (no) 4) If a certain size worm is more active, what do you think this
does for its chances of survival? (better chance of survival) 5) What physical features of a worm relate to where they live?
(no eyes, breathe through skin, color seeks to camouflage, etc.)
6) What behaviors do worms exhibit in order to survive? (live underground, come up only during heavy rains, wriggle to escape into ground, etc.)
7) Why do you think red wiggler worms live about 1 year in nature and an average of 4 ½ years in a worm bin? (no predators)
8) When a worm or other animal in a worm bin dies, what happens to it? (it decomposes, becomes part of the organic matter)
9) Ask for examples of other animals that look different than their parents when they are growing up but very similar once full grown (red robins, puppies, etc.)
10) Which is most likely to survive in nature and reproduce: a bluebird hatched with a broken wing or a bluebird hatched healthy? Two lion brothers, one blind, the other healthy?
11) If a hummingbird does not fly to the south in the fall what is likely to happen to that hummingbird?
Evaluate
Formally and/or informally assess progress learners have toward achieving understanding
1) Have students read a book on an animal of their choice and write a paragraph about its life cycle and some physical and behavioral characteristics that allow it to survive.
2) The Annenberg Media series Essential Science for Teachers: Life Science: Session 3 and 4 provides information about how children can learn about the life cycles of animals and offers classroom footage to illustrate implementation.

4
Anatomy of a Worm Attachment A
Attachment B
Worm cocoons as measured in
centimeters. Pale yellow are newly laid,
they turn brown when ready to hatch.
http://vermicomposters.ning.com/photo/worm-capsules

5
Group: _____________________________________________________________
Worm Observations
Worm Color Size or Cocoon Activity Level (none, little, or
a lot)
Band Around Middle
(yes or no)
Other Observations?
1
2
3
4
5
6
7

1
Presents: Earth’s Resources are Limited, Cross-Curricula Lesson
Phase I
Grade 3: Ohio Science Curriculum, 2011, Earth and Space Science and Standards for English Language
Arts & Literacy in History/Social Studies, Science, and Technical Subjects.
Topic: Earth’s Resources
Content Statement: Some of Earth’s resources are limited.
Reference and content elaboration: Ohio Revised Science Standards and Model Curriculum Grades
Pre-K through Eight, March 2011, pages 99-101. College and Career Readiness Anchor Standards for
Reading: Reading Standards for Informational Text K–5.
Part 1
Materials Needed:
Samples of natural resources that can be recycled, shown in their virgin state and as a
manufactured product:
rock sample of the mineral iron/steel can
rock sample of the mineral bauxite/aluminum can
sand/glass jar
wood chips/paper and/or cardboard
crude oil/plastic bottle
Matching worksheet (Attachment A)
Part 2
Materials Needed:
Data gathering sheet (Attachment B)
Conserving Resources at Home (Attachment C)
Library books and/or computer access

2
Suggestions below are a sampling of available resources and are not meant to be all-inclusive.
Each book can be found at the Public Library of Cincinnati and Hamilton County:
http://www.cincinnatilibrary.org/
*Note: As with all technology, changes are occurring before books can be printed. Not all
information in books is up-to-date or true for all communities. Please go to:
www.HamiltonCountyRecycles.org for most current items that are recyclable in Hamilton
County, Ohio.
Books:
Glass by Alexandra Fix
Glass by Kate Walker
Metal by Alexandra Fix
Metal Cans by Kate Walker
Plastic by Alexandra Fix
Plastic Bottles and Bags by Kate
Walker
Paper by Alexandra Fix
Paper by Kate Walker
Aluminum by Salvatore Tocci
The Earth’s Resources by Richard
and Louise Spilsbury
Links:
http://earth911.com/
http://www.epa.gov/students/index.html
http://www.paperfacts.com/general_paper_facts.php
http://www.mapsofworld.com/minerals/world-crude-oil-producers.html
http://www.mapsofworld.com/minerals/world-bauxite-producers.html
http://www.mapsofworld.com/minerals/world-iron-ore-producers.html
http://whyzz.com/how-is-glass-made
http://whyzz.com/where-does-plastic-come-from
http://whyzz.com/how-is-paper-made
3
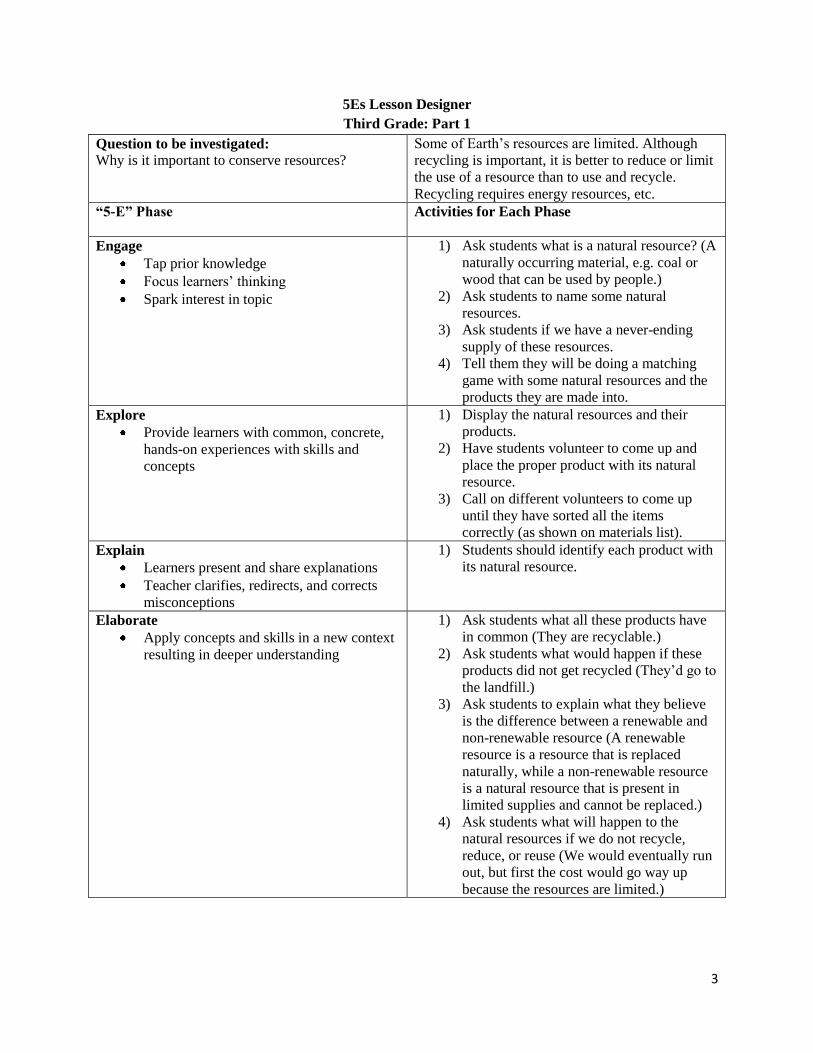
5Es Lesson Designer
Third Grade: Part 1
Question to be investigated:
Why is it important to conserve resources?
Some of Earth’s resources are limited. Although
recycling is important, it is better to reduce or limit
the use of a resource than to use and recycle.
Recycling requires energy resources, etc.
“5-E” Phase
Activities for Each Phase
Engage
Tap prior knowledge
Focus learners’ thinking
Spark interest in topic
1) Ask students what is a natural resource? (A
naturally occurring material, e.g. coal or
wood that can be used by people.)
2) Ask students to name some natural
resources.
3) Ask students if we have a never-ending
supply of these resources.
4) Tell them they will be doing a matching
game with some natural resources and the
products they are made into.
Explore
Provide learners with common, concrete,
hands-on experiences with skills and
concepts
1) Display the natural resources and their
products.
2) Have students volunteer to come up and
place the proper product with its natural
resource.
3) Call on different volunteers to come up
until they have sorted all the items
correctly (as shown on materials list).
Explain
Learners present and share explanations
Teacher clarifies, redirects, and corrects
misconceptions
1) Students should identify each product with
its natural resource.
Elaborate
Apply concepts and skills in a new context
resulting in deeper understanding
1) Ask students what all these products have
in common (They are recyclable.)
2) Ask students what would happen if these
products did not get recycled (They’d go to
the landfill.)
3) Ask students to explain what they believe
is the difference between a renewable and
non-renewable resource (A renewable
resource is a resource that is replaced
naturally, while a non-renewable resource
is a natural resource that is present in
limited supplies and cannot be replaced.)
4) Ask students what will happen to the
natural resources if we do not recycle,
reduce, or reuse (We would eventually run
out, but first the cost would go way up
because the resources are limited.)
4
Evaluate
Formally and/or informally assess progress
learners have toward achieving
understanding
1) Students should complete matching
worksheet (Attachment A).
5Es Lesson Designer
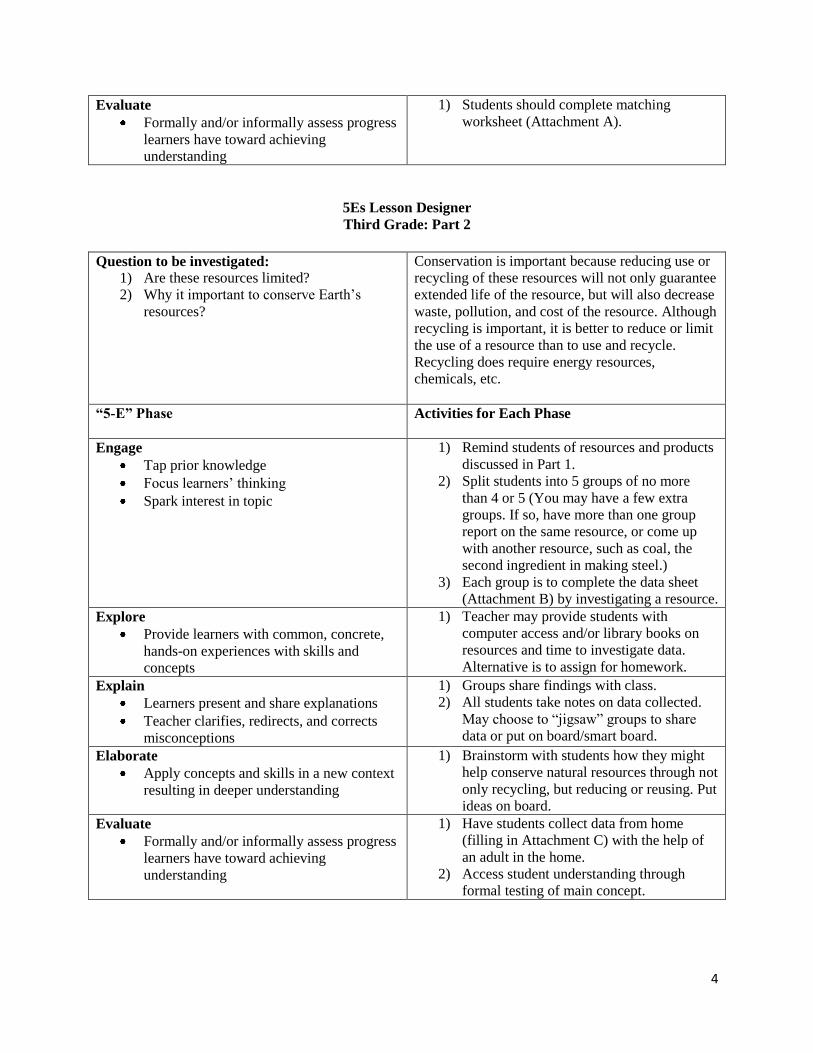
Third Grade: Part 2
Question to be investigated:
1) Are these resources limited?
2) Why it important to conserve Earth’s
resources?
Conservation is important because reducing use or
recycling of these resources will not only guarantee
extended life of the resource, but will also decrease
waste, pollution, and cost of the resource. Although
recycling is important, it is better to reduce or limit
the use of a resource than to use and recycle.
Recycling does require energy resources,
chemicals, etc.
“5-E” Phase
Activities for Each Phase
Engage
Tap prior knowledge
Focus learners’ thinking
Spark interest in topic
1) Remind students of resources and products
discussed in Part 1.
2) Split students into 5 groups of no more
than 4 or 5 (You may have a few extra
groups. If so, have more than one group
report on the same resource, or come up
with another resource, such as coal, the
second ingredient in making steel.)
3) Each group is to complete the data sheet
(Attachment B) by investigating a resource.
Explore
Provide learners with common, concrete,
hands-on experiences with skills and
concepts
1) Teacher may provide students with
computer access and/or library books on
resources and time to investigate data.
Alternative is to assign for homework.
Explain
Learners present and share explanations
Teacher clarifies, redirects, and corrects
misconceptions
1) Groups share findings with class.
2) All students take notes on data collected.
May choose to “jigsaw” groups to share
data or put on board/smart board.
Elaborate
Apply concepts and skills in a new context
resulting in deeper understanding
1) Brainstorm with students how they might
help conserve natural resources through not
only recycling, but reducing or reusing. Put
ideas on board.
Evaluate
Formally and/or informally assess progress
learners have toward achieving
understanding
1) Have students collect data from home
(filling in Attachment C) with the help of
an adult in the home.
2) Access student understanding through
formal testing of main concept.

5
Attachment A
Name_________________________________
Natural Resources Matching
Natural
Resource
Recyclable Product
Wood
Plastic bottle or jug
Iron
Glass jar
Sand
Steel can
Bauxite
Aluminum can
Crude Oil Paper and cardboard

6
Attachment B
DATA SHEET
Group Members: ______________________________________________________________________
_____________________________________________________________________________________
Complete the table below with information you find. Each team member must be given an assigned task.
Natural resource to investigate: ___________________________________________________________
Define the term conservation:
Name 3 products made from your resource:
1)
2)
3)
Name 3 ways to conserve this resource:
1)
2)
3)
Is this resource renewable or nonrenewable?
Name 2 animals whose habitat you will save if you
conserve this resource:
1)
2)
What country is the main producer of this natural
resource?
If you recycle this product, will you decrease the
amount of pollution it creates from when it was a
raw material?
YES NO
Name 2 other resources that are saved when this
resource is recycled?
1)
2)
Match from 1 to 4, the best way to conserve
resource to worst use of resource(from 1 being best
to 4 being worst):
Don’t use resource (reduce)
Recycle resource
Throw resource in garbage
Reuse resource
How long will it take for this resource to
breakdown, or decompose, if left in a landfill?
Interesting fact about this natural resource:
7
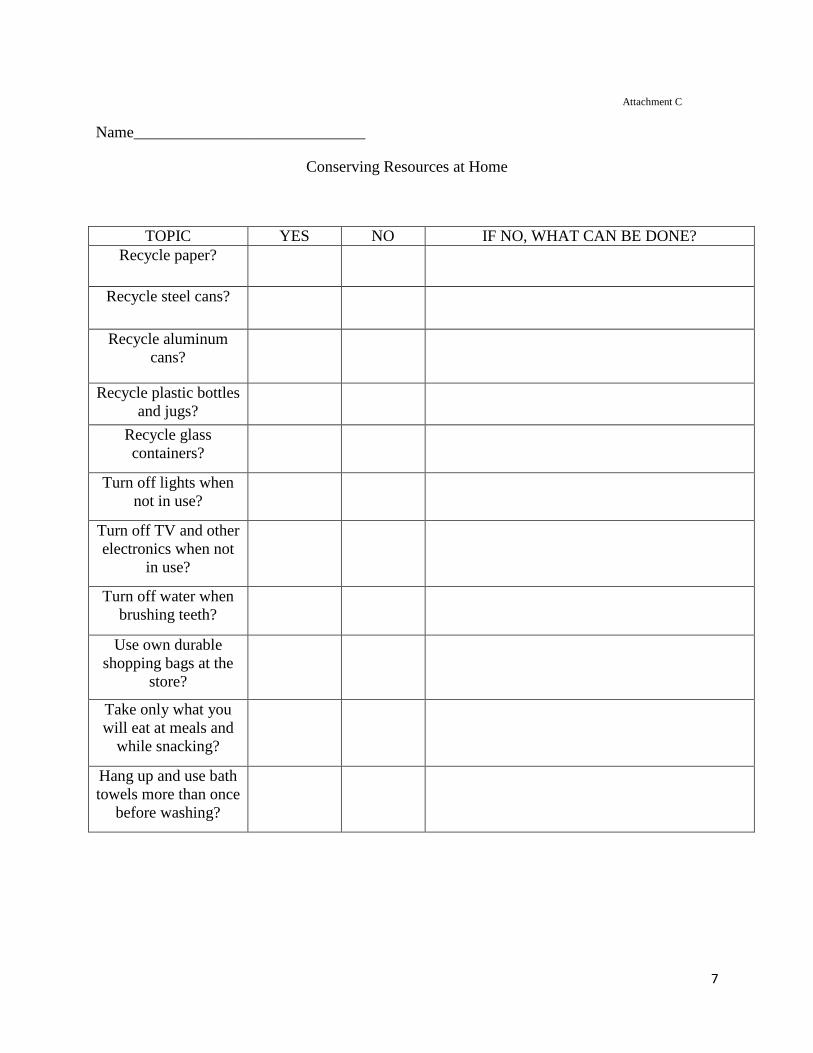
Attachment C
Name_____________________________
Conserving Resources at Home
TOPIC YES NO IF NO, WHAT CAN BE DONE?
Recycle paper?
Recycle steel cans?
Recycle aluminum
cans?
Recycle plastic bottles
and jugs?
Recycle glass
containers?
Turn off lights when
not in use?
Turn off TV and other
electronics when not
in use?
Turn off water when
brushing teeth?
Use own durable
shopping bags at the
store?
Take only what you
will eat at meals and
while snacking?
Hang up and use bath
towels more than once
before washing?

February 2013 Page 1
Presents: Earth’s Resources are Limited, Cross-Curricula Lesson Phase II, Part I
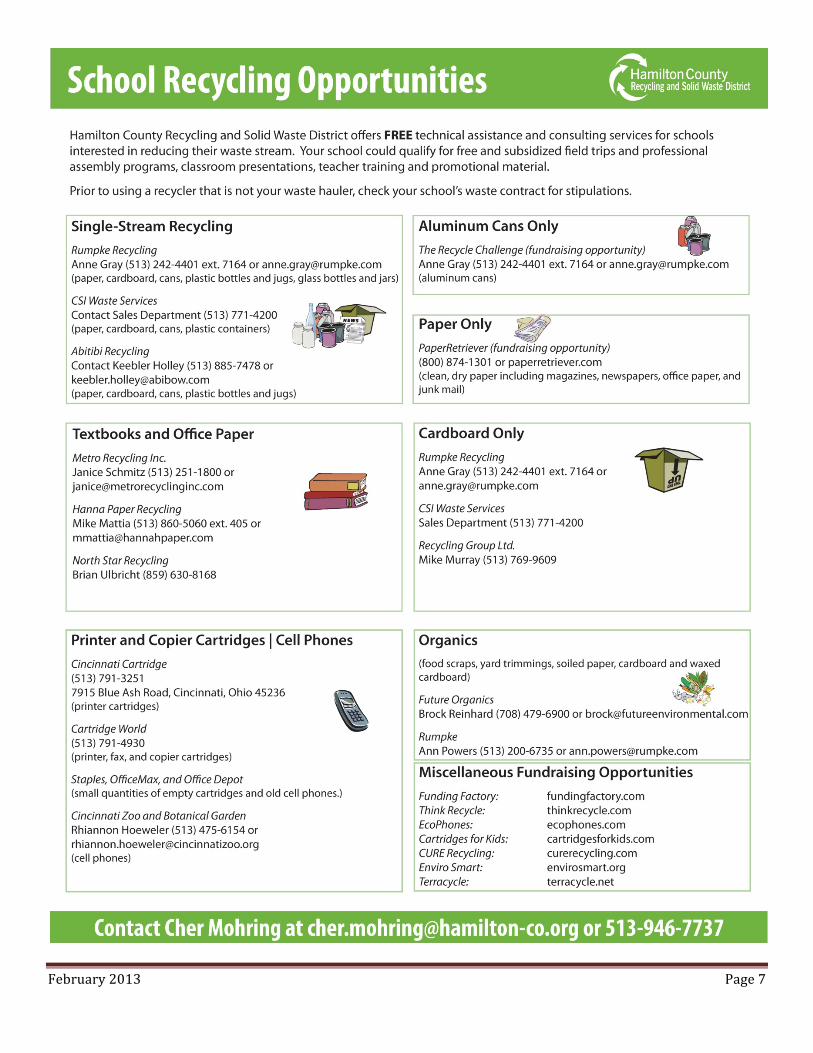
Grade 3: Ohio Science Curriculum, 2011, Earth and Space Science and Ohio’s New Learning Standards: K-8 Social Studies, 2012 Topics: Science: Earth’s Resources Social Studies: Civic Participation and Skills; Economic Decision Making and Skills; Scarcity Content Statements: Science: Some of Earth’s resources are limited. Social Studies: 9. Members of local communities have social and political responsibilities. 10. Individuals make the community a better place by solving problems in a way that promotes the common good. 14. Line graphs are used to show changes in data over time. 15. Both positive and negative incentives affect people’s choices and behaviors. 16. Individuals must make decisions because of the scarcity of resources. Making a decision involves opportunity cost, the value of the next best alternative given up when an economic choice is made. Reference and content elaboration: Grades K-8 Science Revised Standards and Model Curriculum, March 2011, pages 75-77. Ohio’s New Learning Standards: K-8 Social Studies, September 2012, page 8. Background: The largest recyclable item elementary schools generate is paper. Some schools collect only paper while others have a mixed recycling dumpster which accepts any item recycled in your area. This is called single stream recycling. You will want to find out what type of recycling your school has before moving forward with this lesson. Many useful tips and options to support this lesson are on page 7 and at: http://hamiltoncountyrecycles.org/index.php?page=recycling-at-school
Materials Needed:
• clip board, pencil and data sheet (Attachment A or modify/create one of own) • Attachment B (as a resource page) • scale to weigh recyclables • receptacle to empty classroom bins (as necessary) • poster board, markers • computer to look up recycling facts, interesting tidbits • paper and pencil to create line graphs

February 2013 Page 2
5Es Lesson Designer Third Grade
Question to be investigated:
1) How can our class help our school increase its recycling rate or implement a recycling program?
Goal of this lesson as stated on page 76 of the Ohio Science Standards is “plan and implement an investigation to collect and analyze data pertaining to the school’s recycling rate to determine what types of materials have a high recycling rate and which have low rates and why.”
“5-E” Phase
Activities for Each Phase
Engage • Tap prior knowledge • Focus learners’ thinking • Spark interest in topic
1) Remind students what they have learned about the importance of conserving resources.
2) Tell them they are going to become investigators. Their job will be to collect information on what is recycled at their school and how much is recycled.
Explore • Provide learners with common,
concrete, hands-on experiences with skills and concepts
1) Have students brainstorm how they could go about gathering this information, either in groups or with teacher writing ideas on the board.
2) Students should then develop a plan of action to gather and measure data. Attachment B is a sample of data gathering.
3) Measuring and gathering data. Choose one day when students will investigate. Inform all teachers to place recycling bins outside of their classroom. Break students into groups of 2-4 and designate specific areas they will gather data. Don’t forget offices, teachers’ workroom, break room, etc.
4) Students will retrieve recyclables and place in larger container, taking note of any classroom/office that does not have a separate bin for recyclables.
5) Weigh recyclables before they are taken to the outside recycling container (by students or group responsible for emptying recyclables).
6) Students return to classroom with results. Explain
• Learners present and share explanations
• Teacher clarifies, redirects, and corrects misconceptions
1) Students share results, creating a master data sheet identifying how much is being recycled and which areas may need recycling bins.
Elaborate • Apply concepts and skills in a
new context resulting in deeper understanding
1) Ask students how they might improve recycling rates at their school. Some suggestions may be creating service announcements; applying recycling reminders throughout the school; making posters, getting bins for those rooms that need them, etc.
2) Devise an action plan to increase recycling rates using the above ideas. 3) Have students announce the recycling challenge. Choosing a goal,
they should challenge everyone in school to reduce what they throw away. One way they can do this is recycling more.
February 2013 Page 3
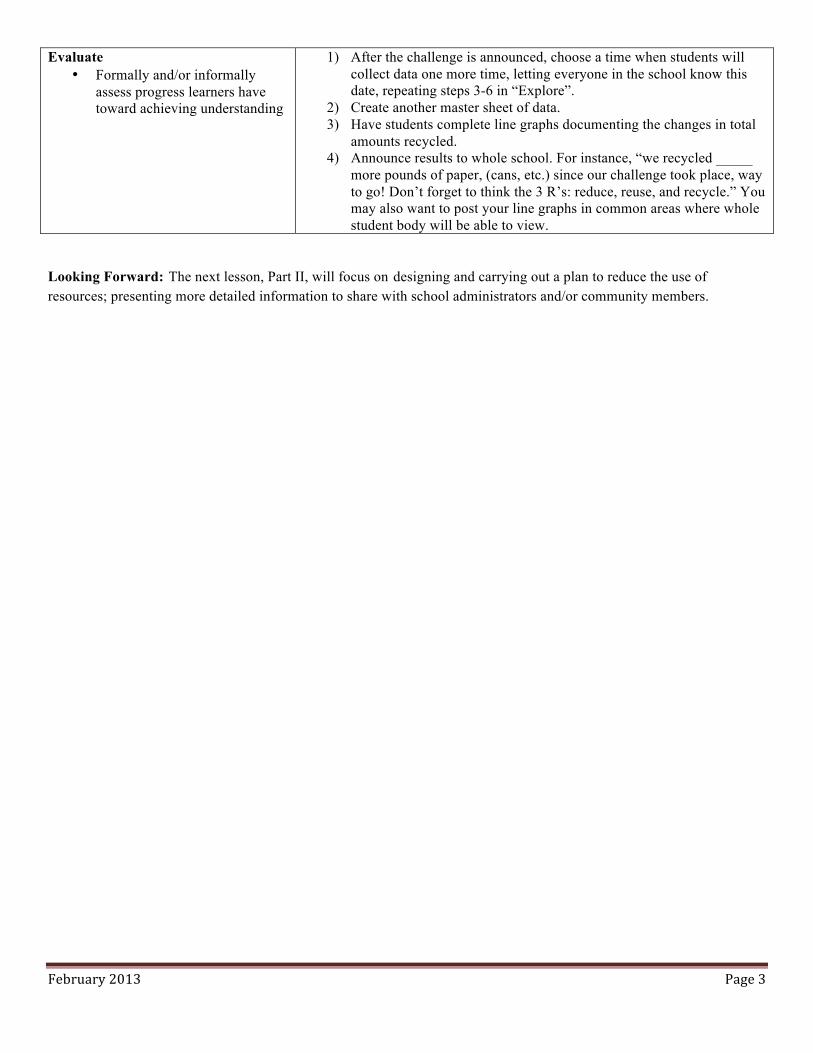
Evaluate • Formally and/or informally
assess progress learners have toward achieving understanding
1) After the challenge is announced, choose a time when students will collect data one more time, letting everyone in the school know this date, repeating steps 3-6 in “Explore”.
2) Create another master sheet of data. 3) Have students complete line graphs documenting the changes in total
amounts recycled. 4) Announce results to whole school. For instance, “we recycled _____
more pounds of paper, (cans, etc.) since our challenge took place, way to go! Don’t forget to think the 3 R’s: reduce, reuse, and recycle.” You may also want to post your line graphs in common areas where whole student body will be able to view.
Looking Forward: The next lesson, Part II, will focus on designing and carrying out a plan to reduce the use of resources; presenting more detailed information to share with school administrators and/or community members.

February 2013 Page 4
Recycling Plan Worksheet Attachment A
Material
Point of Generation: classroom,
office, workroom, hall, kitchen,
cafeteria, gym, other
Who Source Separates
How Collected (By Whom)
Storage Location
Who Moves Material to
Pickup Location
Scheduled Pickup
Paper (all types)
Cardboard (non-‐waxy)
Aluminum cans
Plastic bottles/jugs

February 2013 Page 5
Material Point of Generation
Who Source Separates
How Collected (By Whom)
Storage Location
Who Moves Material to
Pickup Location
Scheduled Pickup
Other metal cans
Printer/copier cartridges
Food waste
Other materials
(Specify)

February 2013 Page 6
Sample Recycling Plan Worksheet Attachment B
Material Point of Generation:
Who Source
Separates
How Collected (By Whom)
Storage Location
Who Moves Material to
Pickup Location
Scheduled Pickup
Mixed paper and cardboard
Classrooms, administrative offices, teacher work rooms
Students, teachers, staff
Place in marked boxes (students, teachers, staff)
At point of generation until full, then emptied in designated interior container (Green Team).
Green Team empties carts into Paper Retriever dumpster.
Abitibi dumpster serviced as needed. Head Custodian places call.
Cans and bottles
Cafeteria, gym
Students, guests, staff, teachers
Place in designated “slim jims” (students, teachers, staff, guests)
At point of generation until full, then emptied into single-‐stream dumpster (custodians).
Custodians moved bags to single-‐stream dumpster daily.
Dumpster serviced on Wednesday. (Rumpke)
Food waste Cafeteria, kitchen
Kitchen staff, students, parent volunteers
In cafeteria: students segregate at sorting station. In kitchen: staff segregates into wheeled cart
Collected food waste stored in wheeled cart in kitchen walk-‐in refrigerator (kitchen staff).
Kitchen staff moves cart to loading dock on service day.
Carts serviced on Friday. (Future Organics)
February 2013 Page 7

1
Presents
Crude Oil’s Properties and Changing States
Grade 3: The College and Career Ready Standards (Ohio Revised), 2011, Physical Science
Topic: Matter and Forms of Energy
Content Statements: 1. All objects and substances in the natural world are composed of matter.
2. The most common of states of matter are solids, liquids and gases.
Reference and content elaboration: Pages 112 and 117, Ohio Revised Science Standards and
Model Curriculum Grades Pre-K through Eight, March 2011.
Essential Question: Crude oil has specific properties; how are they changed into different
states?
Background: Crude oil (or petroleum) comes from plankton that died millions of years ago and
sank to the bottom of the ocean. These remains were covered with sand and mud which became
sedimentary rock. The plankton was trapped inside. After millions of years, the plankton turned
into the energy found in oil because it was never eaten as food by an animal. It still had the sun’s
energy from when it made its own food using sunlight, a gas called carbon dioxide, and other
nutrients found in the ocean.
= 21st Century Skills
Prior knowledge: Students should have been introduced to the non-renewable resource oil and
its specific properties; energy uses; and limited availability, under Earth and Space Science
Topic: Earth’s Resources. Students will be asked to use science inquiry and application in this
lesson.
Materials Needed:
Book: How Does It Happen? How Does a Plant Become Oil? by Linda Tagliaferro
Attachment A
Bottle of crude oil
Polystyrene

2
Clear PS # 6 plastic items (you may collect #6 plastics from a variety of sources, such as
hot deli container lids, clam shell carry out containers, etc.)
Scissors
Colored pencils and sand paper or permanent markers
Hole punch (the bigger the hole, the better)
Small scale
Ruler
String or yarn
Toaster oven set to 350 degrees
Foil-lined pan
Spatula and oven mitt
Science notebook
Procedure for making Shrinky Dinks:
Preheat the oven to 350 degrees. Place foil in pan (not an airbake pan) and Shrinky Dink on top
of the foil (don’t forget to hole-punch a large hole before baking). Place in toaster oven and
watch plastic shrivel, then flatten out. Depending on your oven, it will take about 1 minute. Use
spatula to remove from baking sheet and set to the side. It will be cool enough to touch in a few
minutes. Troubleshooting: If Shrinky Dink folds onto itself and does not right itself after
flattening out, place it back in the oven until it is soft; then using your spatula or a popsicle stick,
gently press the plastic into the correct position. If hole is too small after shrinking for yarn or
string, you may want to use fishing line or dental floss.
Note: Fumes emitted from the Shrinky Dink plastic were measured for volatile organic
compounds, TLVs® and BEIs
®, (science-based occupational exposure guidelines from the
American Conference of Governmental Industrial Hygienists). All measured far below these
guidelines. However, this experiment should be conducted in a well-ventilated room.
Key for Attachment A
1. It is heated and continues on to the fractioning tower where it is separated out by temperature.
2. It is a lower temperature.
3. The temperature is less than 40 degrees Celsius.
4. Discuss answers with students. At this age they should identify liquids and gases from the
chart. The bottom residues are both semi-solids and solids, but many terms will be unfamiliar to
students.

3
5Es Lesson Designer
Third Grade
Questions to be investigated:
Crude oil has specific properties, how are they
changed into different states?
“5-E” Phase Activities for Each Phase
Engage
Tap prior knowledge
Focus learners’ thinking
Spark interest in topic
1) Read How Does a Plant become Oil?
aloud to class.
2) Ask students to share examples of how
people use oil, also known as
petroleum. Remind them oil is a non-
renewable resource, which is limited.
3) Ask students what some problems
might be if oil was never found to be
useful? (No cars, planes, uses for heat,
electricity, etc.)
4) Show a bottle of crude oil and ask
students if they think most plastics are
made from a product of oil? (Yes); Ask
them which state of matter is oil?
(Liquid); plastic? (Solid)
5) Show diagram of oil distillation and
draw their attention to the top of the
diagram. Ask them what form of matter
is the starting material for plastics?
(Gas)
Explore
Provide learners with common,
concrete, hands-on experiences with
skills and concepts
1) Split students into groups or partners
and give them a copy of attachment A.
2) Ask the students to answer the
questions on the worksheet by carefully
observing the diagram.
Explain
Learners present and share explanations
Teacher clarifies, redirects, and corrects
misconceptions
1) Have student groups share observations
while clarifying, redirecting, and
correcting misconceptions.
Elaborate
Apply concepts and skills in a new
context resulting in deeper
understanding
1. Tell students they will be using an oil-
based product, # 6 plastic, to make
something else using heat.
2. Remind students of their unit on the
conservation of resources. #6 plastic is
polystyrene, which is not recyclable in

4
Hamilton County. If you make Shrinky
Dink art you are upcycling. You are
reusing a resource which would
otherwise be thrown out in the trash.
3. Hand out pieces of plastic, markers or
pencils (if using colored pencils, you
will also need to sand the plastic so the
pencil will adhere), scissors, hole
punch.
4. Tell the students they will be making
Shrinky Dinks and may color and cut
out any shape they want on this piece
of plastic.
5. After they cut out their shape, they
should hole-punch a large hole where
they’d like to put a string to hang their
design.
6. Next, students should weigh and
measure across the widest point of their
shape and record.
7. Next, students bring their shape to you
to place in the oven. Each student
should observe what happens to their
shape when it is heated and record their
findings.
8. Once the Shrinky Dink is cooled, the
student should re-weigh and re-measure
the Shrinky Dink and record.
9. They may then cut a piece of yarn or
string to hang their Shrinky Dink in the
classroom or to take home.
Evaluate
Formally and/or informally assess
progress learners have toward
achieving understanding
1) Ask students to compare the weight and
size of the Shrinky Dink before and
after it was heated.
2) Students should write a paragraph on
how heat affected the plastic (it shrank
it and made it thicker but the weight
didn’t change).
3) Have students record the 3 properties of
matter. Thinking back to the diagram in
Attachment A, ask the students whether
heat changes the state of matter.

5
Distillation: a form of separation Attachment A
http://ths.talawanda.net/~BrambleN/classroom/Chemistry/Notes/Section%203A/PetroleumSeparation.htm
1. What happens to crude oil after it leaves the barrel and goes to the furnace?
____________________________________________________________________________________
2. Is the temperature of the oil higher or lower at the top of the fractionating tower?
__________________________________________________________________________________
3. What is the temperature of the gases which make starting material for plastics?
_______________________________________________________________________________________
4. Are all 3 states of matter produced from crude oil?
_______________________________________________________________________________________