lemon battery / pickle experiment lesson planstar.manhattan.edu/userimage/ea lesson plans...lemon...
TRANSCRIPT

Lemon Battery / Pickle Experiment Lesson Plan
Objectives:
● Students will be able to define electrical engineering.
● Students will be able to visualize the atomic nature of electricity.
● Students will be able to differentiate between series and parallel circuit setups.
● Students will be able to define voltage, current, and resistance.
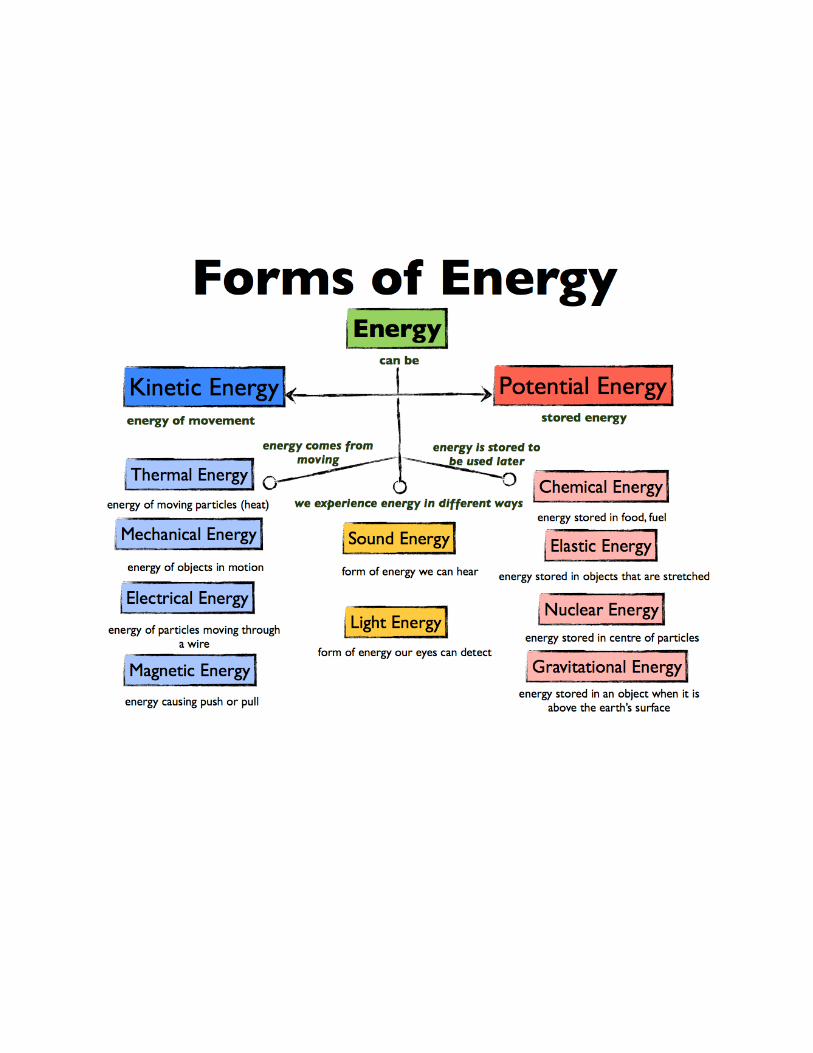
● Students will experience the live effects of energy conversion.
○ Lighting LED with Lemon battery: CE-EE-LE (chemical energy to electrical
energy to light energy)
○ Lights pickle up: EE-LE (electrical energy to light energy)
○ Power up motor with Lemon battery: CE-EE-ME (chemical energy to electrical
energy to mechanical energy)
Overview:
The lesson will begin with the pickle demonstration as the “sponge activity.” We will then
start the portion of the presentation that deals with the electrochemical pickle. After the portion
of the presentation has concluded, we will provide the lemon battery materials to the students
and instruct them to light up the LED with the materials in front of them. Before they begin, we
will instruct the students to write down a plan of action. After the activity has concluded, we will
instruct them to write down the results of their experiment. We will then resume the presentation
and explain basic circuit theory to the students.
Background:
In this context, circuits are closed paths through which electricity runs. Circuits have
many components. Where is there a circuit in your house? Anything that runs on electricity
relies on circuitry. Most items, when plugged in, don’t start doing anything until you switch it on.
The switch closes the circuit, which allows electricity to flow through the item, allowing it to do its
job.
Electric eels have the ability to create an electric shock. This is a form of an
electrochemical reaction, similar to how the pickle works. Batteries also work by an
electrochemical reaction which causes electricity to flow from one side to another.
Materials:
● Pickle Experiment
○ One large pickle saturated with sodium and chloride ions (salt)
○ Two metallic nails (at least 2 inches in length)
○ Set of wires and male plug attachable to nearby wall outlet
○ Two pairs of wire clips
○ Circuit switch or breaker
○ Glass plate
○ Oven mitts or insulating gloves
○ Plastic blast shield for protection
● Lemon Battery
○ 3-4 lemons per group
○ Pennies
○ Paperclips
○ Alligator clips
○ LED lights
○ DC motor
Procedure:
1. Introduce the presenters
2. Sponge activity: pickle experiment
a. Secure the nail at each end of the pickle. Make sure the nails are each
embedded into the pickle at least 1 inch deep.
b. Find a large table or suitable open space and place a glass plate on it. Place the
nailed pickle on the glass plate.
c. Prepare a circuit system for the pickle with the wires and clips. Do NOT attach
anything to the power outlet from the wall yet. Attach a circuit wire to each nail
with a clip. The wires must be connected to a circuit switch or a breaker. The
switch should be turned off when assembling the system. Make sure the system
is well placed so that people will not step on it accidentally
d. Using either some kind of an adaptor or a modified male plug, make sure the
wires are all connected and ready to be plugged into the wall outlet. The wall
outlet should give off approximately 120 Volts. Allow the group leaders or
instructors do this step, so that students can be a safe distance away from this
potential electrical hazard.
e. If you have reasons to believe that students may want to touch the pickle when
the experiment is live (even after warning them before commencing the
experiment), cover the experiment with a transparent blast screen.
f. After making sure students are a safe distance (at least 3 to 5 feet) away from
the pickle, you may turn the switch on for the circuit. The pickle should give a
brilliant orange glow. You may want to turn the lights off in the room to better see
the glow.
g. Turn the switch off once the pickle loses the glow. Unplug the system from the
power outlet, and then appropriately dismantle the circuits. Dispose the burnt
pickle and clean up the experiment site.
3. Pickle PowerPoint
4. Independent study: Use lemon battery materials to light up LED.
a. Provide materials to the students and have them write down what their approach
will be.
b. Allow the students to attempt to light up the LED with the materials in front of
them.
c. Have the students evaluate their original approach and discover what worked
and what did not.
5. Lemon battery PowerPoint
6. Split the students into three groups: electron donors (+ ions), electron acceptors (- ions),
and electrons. Start the electrons “attached” to the donors, but then tell the electrons to
move to the acceptors, creating a “current.”
7. Show the students how mechanical energy can be converted to electrical energy by
connecting a DC motor to an LED and lighting it up by spinning it. Pass it around the
class.
Final Activity:
Tie the procedure with the background and objectives. Have groups discuss what
worked and what did not. Discuss why lemons in series work and lemons in parallel does not
(parallel lemons do not provide enough voltage). Explain why the penny and the paperclip are
required for the experiment (electron donors and electron acceptors).
Assessment:
Have students fill out an anonymous survey of what they learned and the performance of
the presenters.
Ideas:
● Motor (work)
● Battery to compare with lemon
● Breaking Bad battery scene (video attachment)
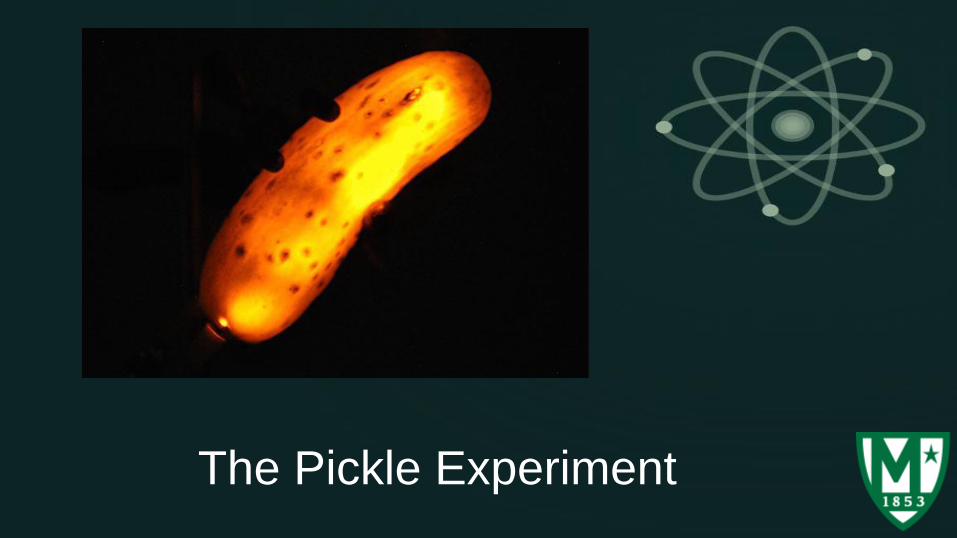
The Pickle Experiment
Electrochemistry
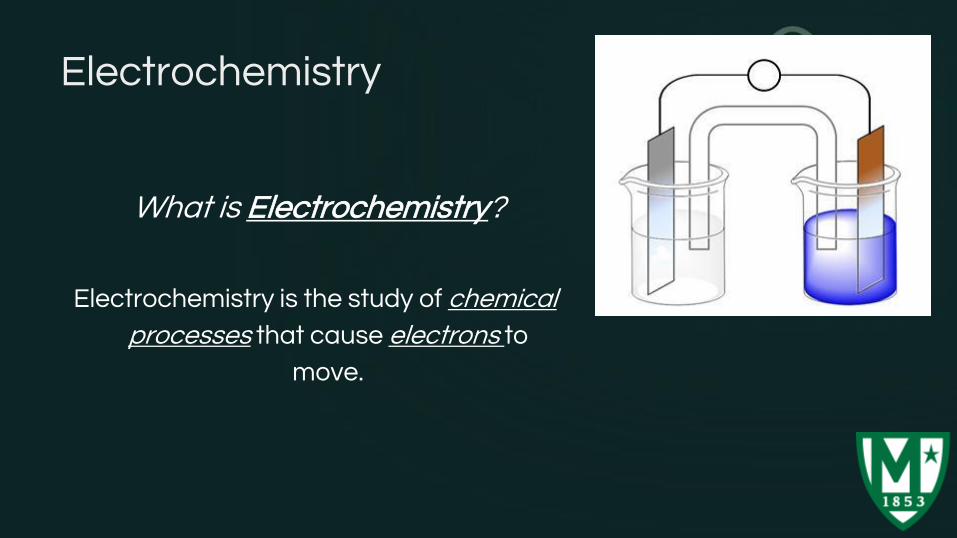
What is Electrochemistry?
Electrochemistry is the study of chemical
processes that cause electrons to
move.
Electrochemistry
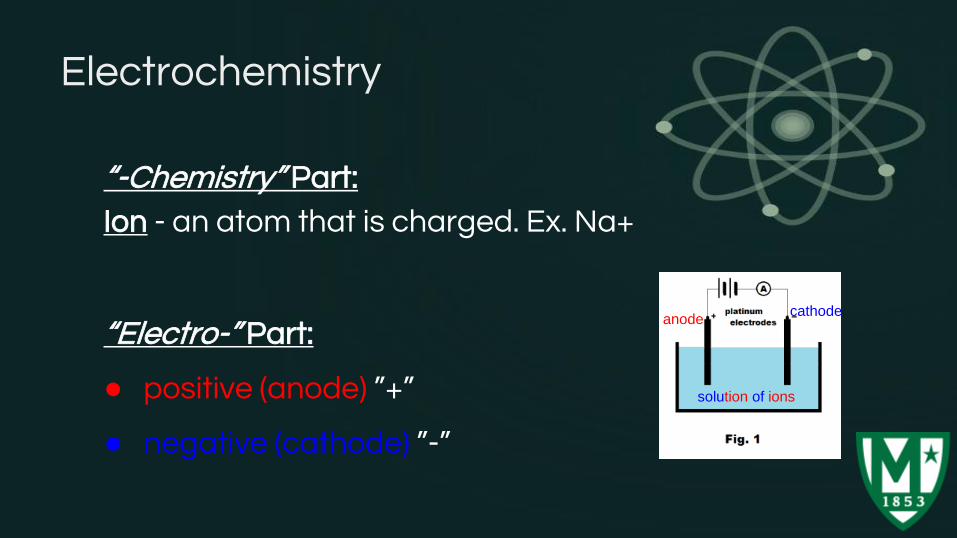
“-Chemistry” Part:
Ion - an atom that is charged. Ex. Na+
anodecathode
solution of ions
“Electro-” Part:
● positive (anode) ”+”
● negative (cathode) ”-”
Electrochemistry
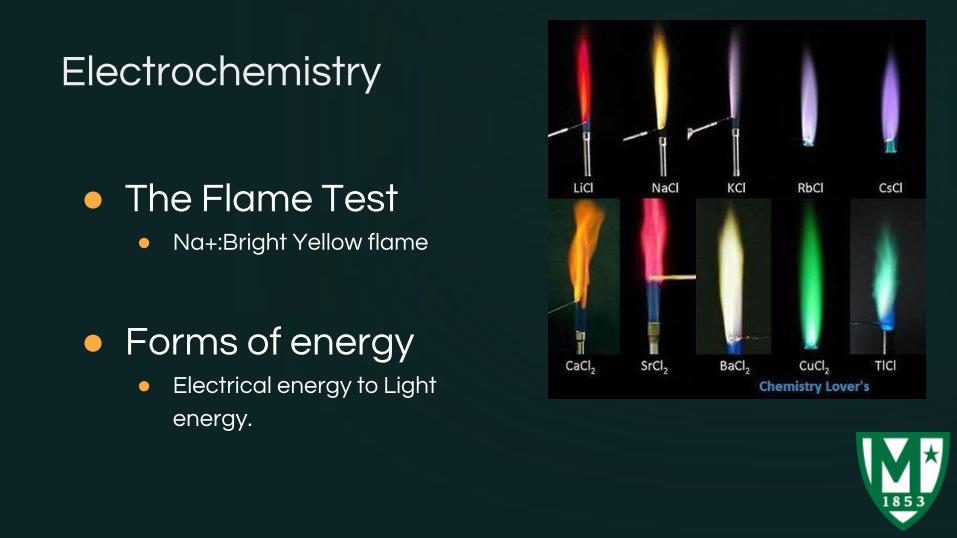
● The Flame Test ● Na+:Bright Yellow flame
● Forms of energy● Electrical energy to Light
energy.
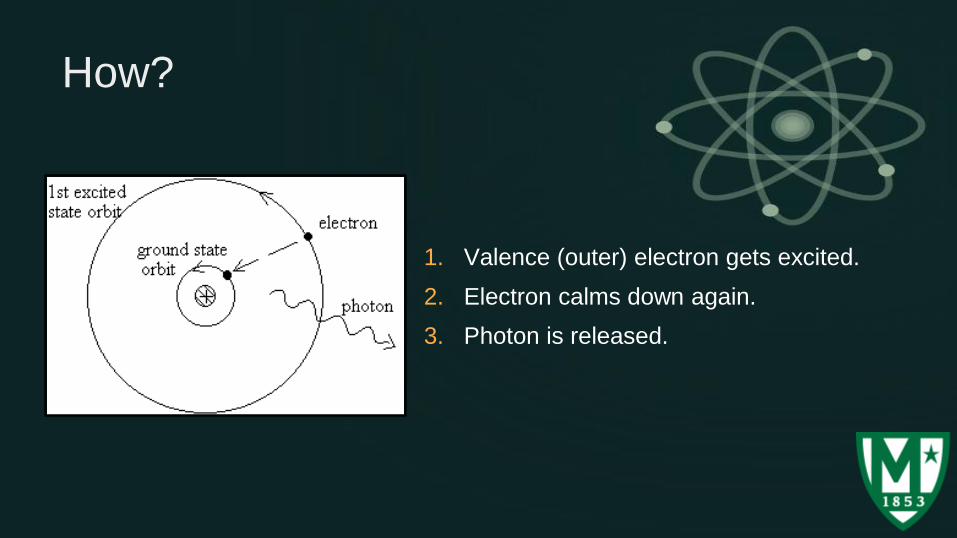
How?
1. Valence (outer) electron gets excited.
2. Electron calms down again.
3. Photon is released.
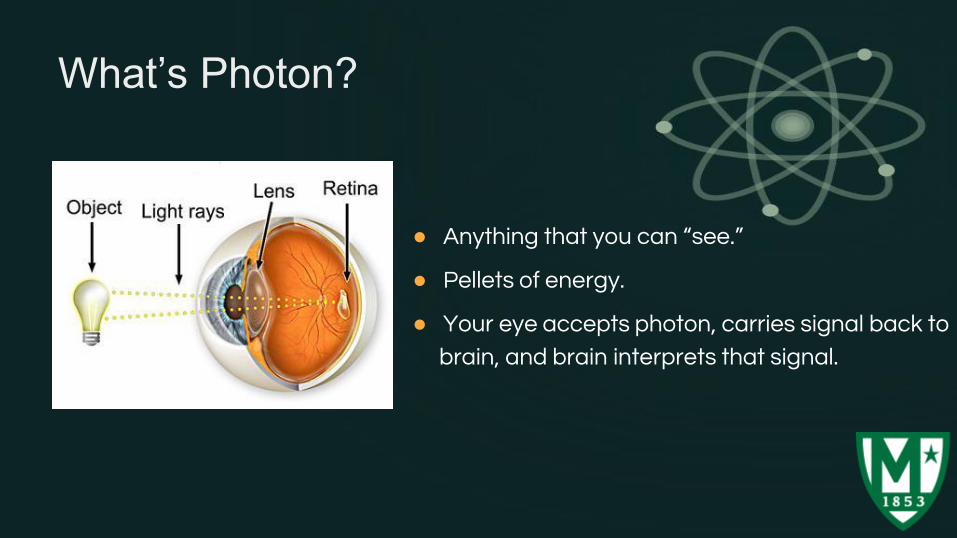
What’s Photon?
● Anything that you can “see.”
● Pellets of energy.
● Your eye accepts photon, carries signal back to
brain, and brain interprets that signal.
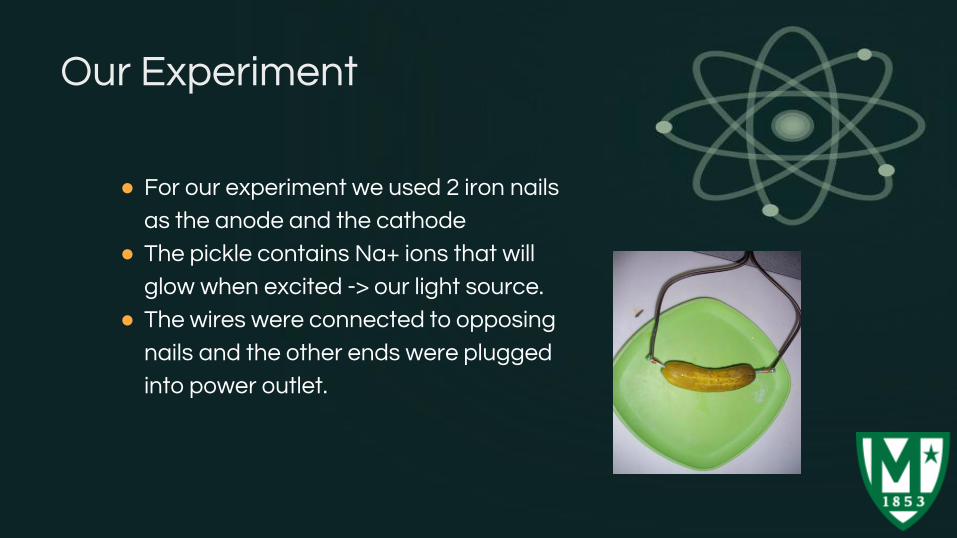
Our Experiment
● For our experiment we used 2 iron nails
as the anode and the cathode
● The pickle contains Na+ ions that will
glow when excited -> our light source.
● The wires were connected to opposing
nails and the other ends were plugged
into power outlet.
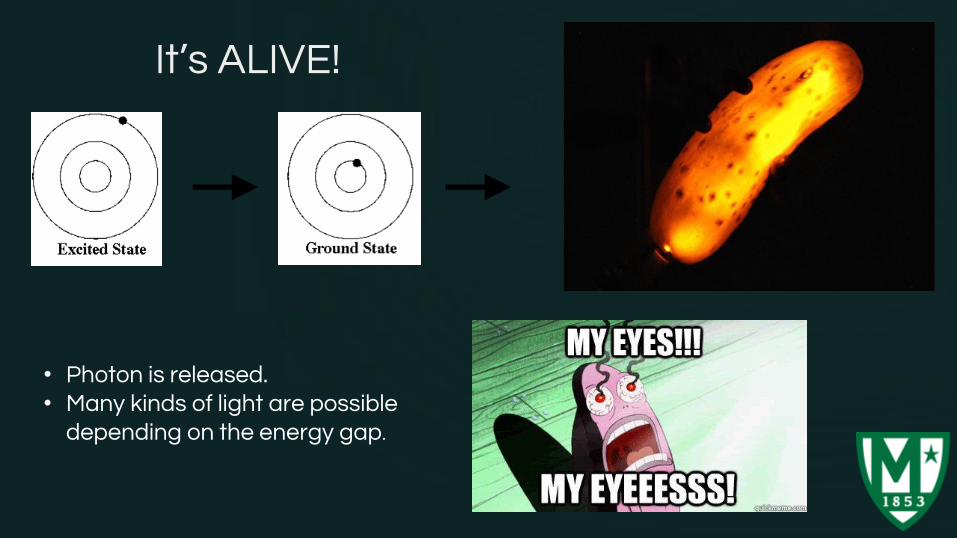
It’s ALIVE!
• Photon is released.• Many kinds of light are possible
depending on the energy gap.
Lemon Battery
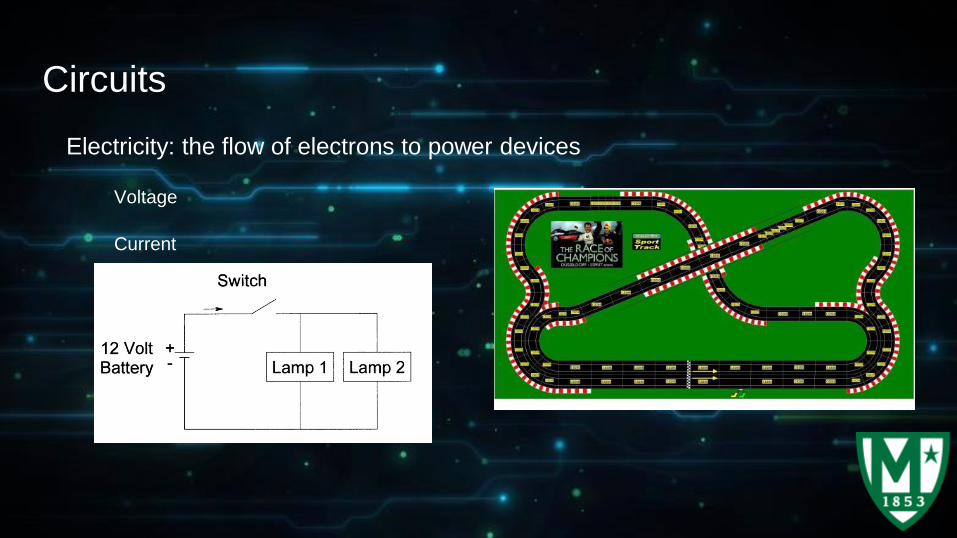
Circuits
Electricity: the flow of electrons to power devices
Voltage
Current
Resistance
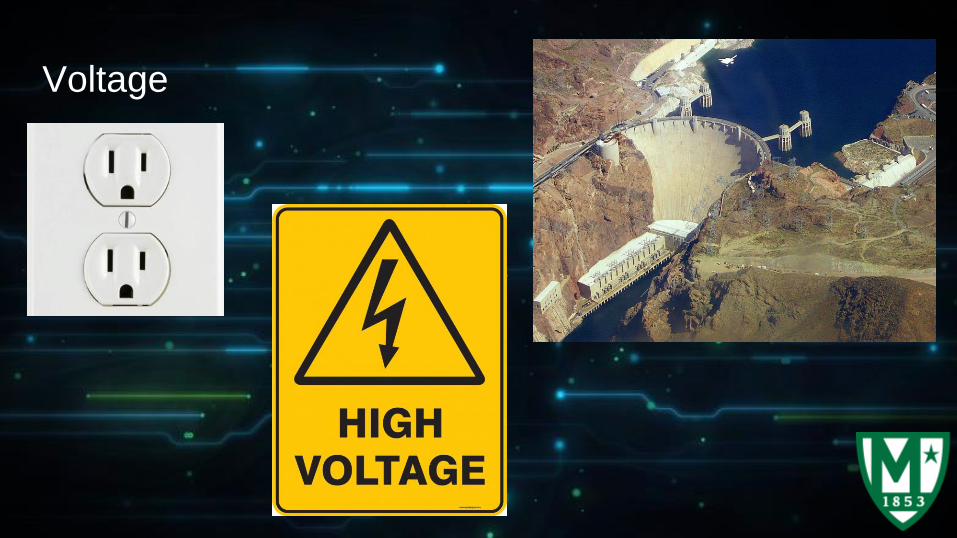
Voltage
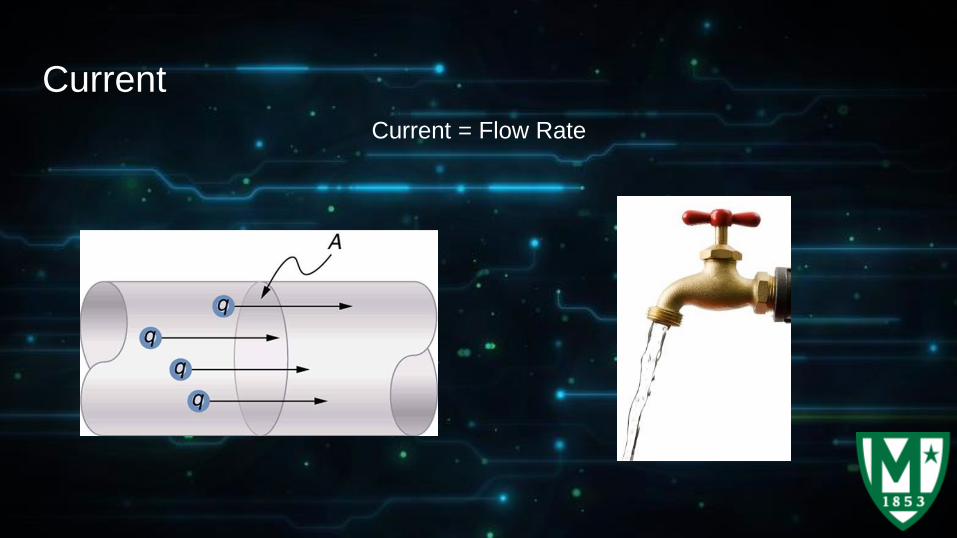
Current
Current = Flow Rate

Resistance
Resistance = Load
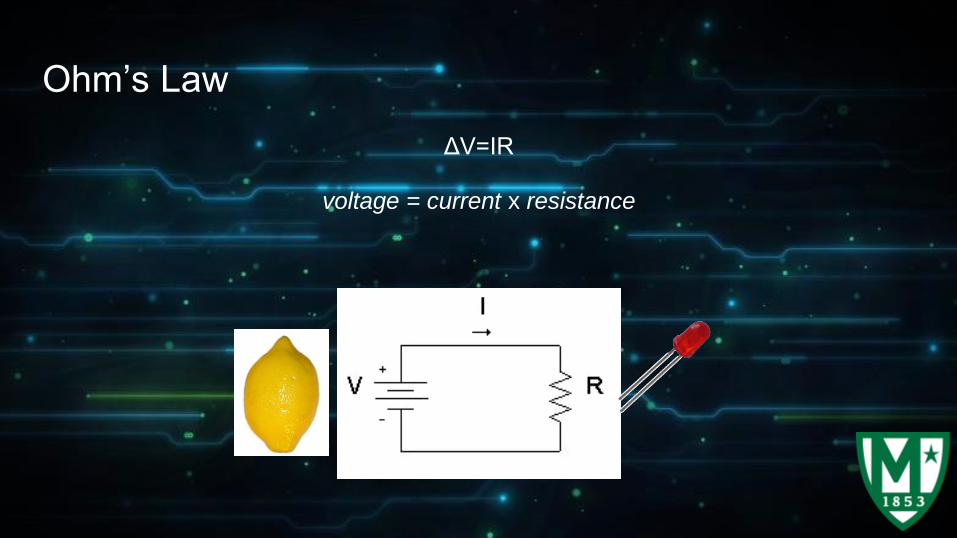
Ohm’s Law
ΔV=IR
voltage = current x resistance
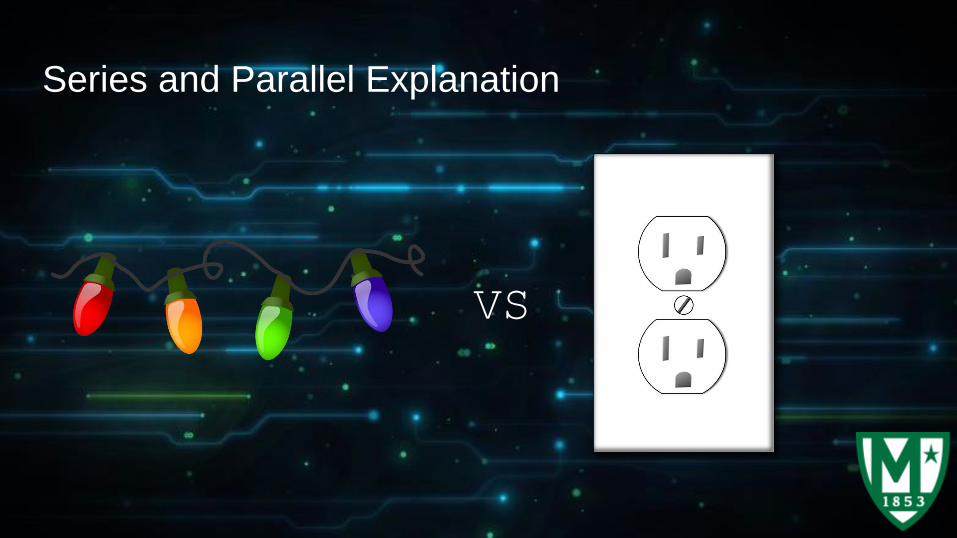
Series and Parallel Explanation
VS
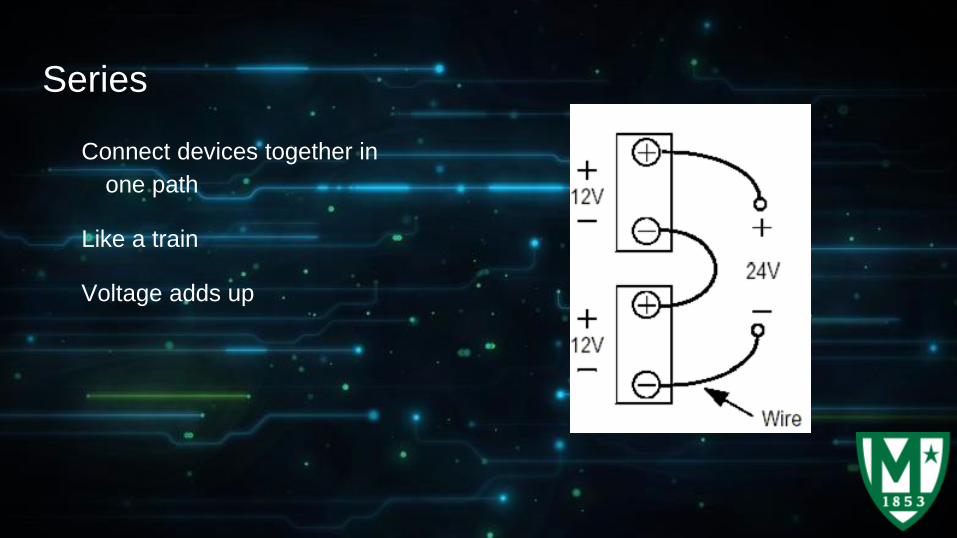
Series
Connect devices together in
one path
Like a train
Voltage adds up

Parallel
Connect device with multiple paths
Voltage is same in each device
Current is split, batteries last
longer
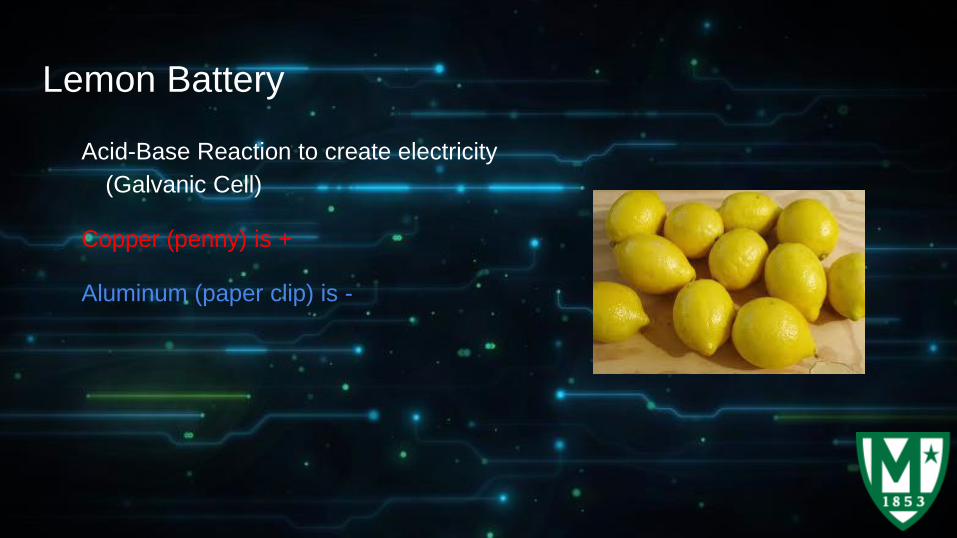
Lemon Battery
Acid-Base Reaction to create electricity
(Galvanic Cell)
Copper (penny) is +
Aluminum (paper clip) is -
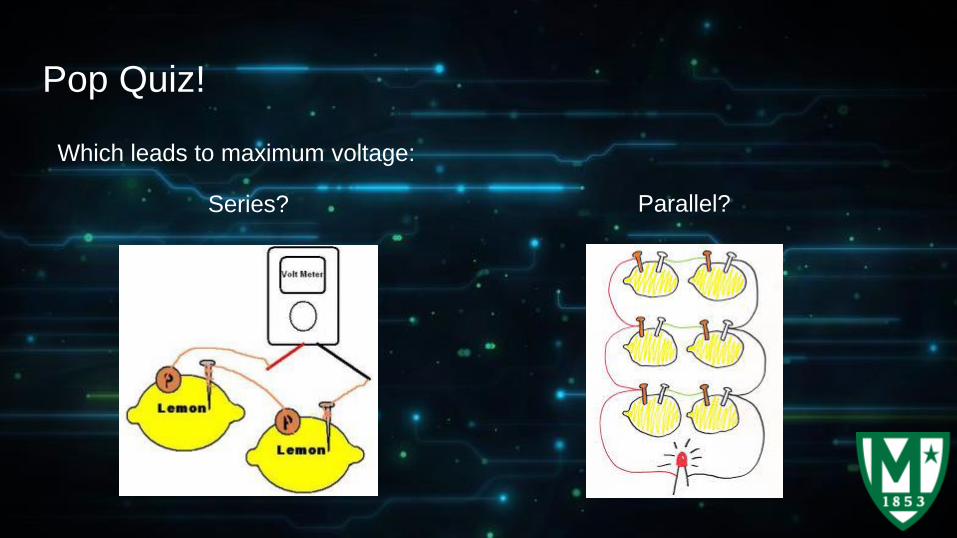
Pop Quiz!
Which leads to maximum voltage:
Parallel?Series?