learning outcomes: ancient art -...
TRANSCRIPT

1
Learning outcomes:Ancient ArtI know how ancient people told stories through artI know why ancient people told stories through artI have used planning and creative skills to create cave artI have worked collaboratively with my classmates to create cave art
Stone CirclesI know what an ancient stone circle isI know what stone circles may have been used for in the ancient worldI know the names of three stone circlesI have used planning and creative skills to create a stone circleI have worked collaboratively with my classmates to create a stone circle
Curriculum linksThe activities within this set of lesson plans have been designed to offer a cross-curricularapproach. They support the following areas of the curriculum across England, Northern Ireland,Scotland and Wales:
England ActivityHistory All ActivitiesEnglish - Speaking, Writing and Listening Ancient Art, Activity 1,2 and 3English (Drama) Ancient Art, Activity 1Art and Design All ActivitiesDesign and Technology Build a Stone CircleGeography Ancient Art, Activity 1 and Build a Stone CircleCitizenship All ActivitiesPersonal, Social and Health Education All ActivitiesScience Ancient Art, Activity 1 and Build a Stone Circle
Northern IrelandThe World Around Us – History All ActivitiesThe World Around Us – Science and Technology Ancient Art, Activity 1 and Build a Stone CircleThe World Around Us – Geography Ancient Art, Activity 1 and Build a Stone CircleLanguage and Literacy Ancient Art, Activity 1,2 and 3The Arts – Drama, Art and design All ActivitiesPersonal Development and Mutual Understanding All Activities
ScotlandSocial Studies All ActivitiesLanguages: Literacy and English and/or Literacyand Gaidhlig All ActivitiesSciences Ancient Art, Activity 1 and Build a Stone CircleExpressive Arts All ActivitiesTechnologies – ICT and Computing Science,Engineering, Design and Graphics All ActivitiesHealth and Well Being – Planning for Choicesand Changes and Mental, Emotional, Socialand Physical Well Being All Activities
WalesHistory Ancient Art, Activity 1 and Build a Stone CircleEnglish and/or Welsh Ancient Art, Activity 1,2 and 3Art Ancient Art, Activity 1,2 and 3Design and Technology Build a stone circleGeography Ancient Art, Activity 1 and Build a Stone CirclePersonal and Social Education All Activities

Use these ancient-themed workshops withgroups of kids, families or communities.The activities are creative, hands-on ways to step back in time and meet our
ancient ancestors.
Hands on History is a two-year campaign from BBC
Learning. Visit the website for more ideas and
resources for inspiring groups and schools to get
hands on with history. You can also find historic sites
to visit using our online map and watch animations
with Eric as he travels through time.
bbc.co.uk/history/handsonhistory
©EnglishHeritage
PhotoLibrary
For Groupsand Schools
Supported by
2

- Tell a story without words (10 minutes)
You will need:
• A large piece of paper on the wall OR a black/whiteboard
• Pens
You can play this quick and simple game to help your participants get into the mind of theirancient ancestors and think about what life must have been like before written languagedeveloped.
Explain to the group that they are now entering the ancient world. It is 12000BC and Britain isbeginning to warm after the Ice Age. They live a hunter-gatherer life, hunting mammals such asreindeer and Arctic hare.
Choose one member of the group and give them a message to share with the rest of the groupwithout using speech. You can make up your own ancient message, or use one of ours:
• I have had a successful hunt today and killed a deer.
• There are many fish in the river over the big hill.
• I have found a new cave that we could shelter in to keep dry.
• Has anyone seen my cutting stone?
The messenger has to draw their message onto the paper orblack/whiteboard for the group to guess.
Give the group three minutes to work out what the message isby calling out their suggestions based on the drawings.
If you have a very strong group, they may work out the message completely.But don’t worry if they don’t, explain that the point of the game is to showjust how tricky it must have been to communicate and share stories withoutwritten language. This may be why some ancient people began to useart to describe the world around them.
bbc.co.uk/history
3
1.Use Introductory activity 1 to set the scene, then choose
either activity 2 or 3 to create some ancient art together.

4
bbc.co.uk/history
(45 minutes)You will need:
• Modelling clay (a piece the size of a fist for each carver)
• Rolling pins
• Optional - ‘Tools’ for carving
Explain to the group that ancient people carved the animals and birds that theysaw around them into the walls of caves. They often started with a natural featurein the rock face and carved around it, using the shapes they saw to inspire them.
Your group can get inspiration for their cave art by looking at the carvings foundat Cresswell Crags in Derbyshire – the oldest art in Britain!
Make your cave wall
1. Give each participant a piece of clay and ask them to roll it out to create a smooth,flat surface around 1cm thick. This is their cave wall.
2. Ask the group to swap sheets of clay with someone else.
3. Using modelling tools or their hands, ask each participant to create a rough surfaceon the piece of clay.
Be inspired
1. Now ask the group to hand back the sheets of clay and take a look at therandom shapes that have now appeared.
2. Ask the group to imagine they are a Stone Age person looking at theirown cave wall for inspiration. (This is a bit like seeing shapes in theclouds!) What shapes do they see? They might just use a line or acouple of bumps on the clay as inspiration.
3. Here are some ideas to get started:
– A hunting scene, with men following a deer
– The night sky with the moon and stars shining brightly
– A bird by a lake or river
Get Carving
1. Ask the participants to begin to shape the clay using their hands.
2. They can also use modelling tools, or if you have outside space, ask thegroup to go outside to find twigs and stones to use as ancient tools.
3. Leave the clay to dry.
You can display all the cave art together to create one piece of ancient art.
©EnglishHeritage.NMR
2.Top tips
You can also run
this activity using
Play Dough or similar,
but remember the
participants won’t
be able to take their
artwork home.

3.
5
bbc.co.uk/history
(45 minutes)You will need:
• Coloured paint (red, black, white, yellow and brown)
• Paper/card
• PVA glue
• Glue spatulas or old paint brushes
• Sand in a large tray
Explain to the group that although no ancient cave paintings have beenfound in Britain (yet!), they are found throughout Europe and are an important record for historianslearning about prehistoric life.
Make your cave wall
1. Give each group member a piece of A4 or A3 paper or card(card works better as it is less likely to wrinkle under the glue).
2. Ask each participant to paint their card with PVA glue.
3. Invite the group to come up one at a time to the sand tray and to carefullydust sand onto their paper/card to create a rough surface.
Find your tools
1. While the ‘cave wall’ paper is drying, take the group outside into a communal area.
2. Explain that the ancients couldn’t pop down to the craft shop for a paintbrush,so the group will need to paint using their fingers and natural objects they find.
3. Ask the group to look for twigs, stones, feathers and leaves to use as painting tools.
Get creative
1. Now the paper is dry, shake off the excess sand back into the tray and hand out the paper/card.
2. Ask the participants to think of the scene they’d like to portray. Here are a few ideas:
• Ancient animals – like deer, cattle and horses
• An ancient message like those included in the introductory activity
• A ‘modern’ cave painting – using inspiration from nature right outsidethe windows
• A simple pattern using lines, dots and zigzags
3. Remind the group that paints were made from natural rocks and mineralsso they can only use colours such as red, black, white, yellow and brown.
Once the group has finished, display all the cave art together to create one piece of ancient art. Ask thegroup to take a look at each other’s paintings and work out what scene or message they have painted.
Top tips
If you don’t have an
outside area nearby,
you can bring in a bag
of twigs and other
natural objects for the
group to choose from
on the day.

6
bbc.co.uk/history
This activity can be run with individuals, but it also workswell with participants working in pairs or small groups.
You will need:• One sand tray per participant/group (an unused cat litter tray, or seed tray with drainageholes covered, works well)
• Lots of clean sand from a craft or toy shop
• Quick-drying modelling clay or a selectionof suitably sized clean stones
• Extension activity – an outside space and/ora dark room with a torch
Setting the sceneBefore you get started, set the scene by explaining to the group that it is 2500BC (around thetime the great circle at Stonehenge was built) and they are ancient stone circle builders. Theirchallenge is to design and build a stone circle using the Stone Circle Builders Instruction Sheetand the Planning Sheet.
You can either read out the instructions as the session progresses, or hand out photocopiedsheets to each participant/group.
It will take around 15 minutes to plan a circle and 30–45 minutes depending on the age ofyour group to build the circle. Call out as the time passes to keep people on track, with warningswhen the time is running out.
Optional extension activityIf you have more time, or a more advanced group, you can also use the Bring the Stones to Life!activity which will take a further 15 minutes. This helps the group to think about how their circlemay have been used and how it would have looked throughout the day. There is a sheet includedin this workshop which can be used as a handout or as instructions for the workshop leader.
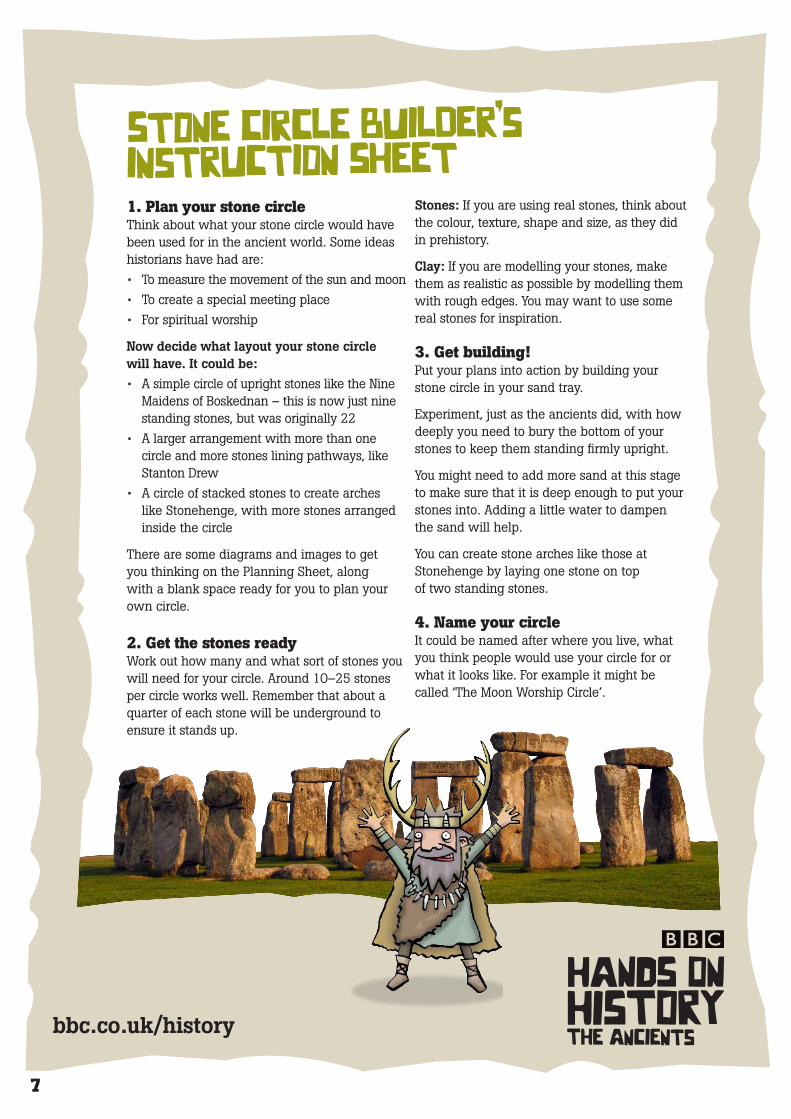
1. Plan your stone circleThink about what your stone circle would havebeen used for in the ancient world. Some ideashistorians have had are:
• To measure the movement of the sun and moon
• To create a special meeting place
• For spiritual worship
Now decide what layout your stone circlewill have. It could be:
• A simple circle of upright stones like the NineMaidens of Boskednan – this is now just ninestanding stones, but was originally 22
• A larger arrangement with more than onecircle and more stones lining pathways, likeStanton Drew
• A circle of stacked stones to create archeslike Stonehenge, with more stones arrangedinside the circle
There are some diagrams and images to getyou thinking on the Planning Sheet, alongwith a blank space ready for you to plan yourown circle.
2. Get the stones readyWork out how many and what sort of stones youwill need for your circle. Around 10–25 stonesper circle works well. Remember that about aquarter of each stone will be underground toensure it stands up.
Stones: If you are using real stones, think aboutthe colour, texture, shape and size, as they didin prehistory.
Clay: If you are modelling your stones, makethem as realistic as possible by modelling themwith rough edges. You may want to use somereal stones for inspiration.
3. Get building!Put your plans into action by building yourstone circle in your sand tray.
Experiment, just as the ancients did, with howdeeply you need to bury the bottom of yourstones to keep them standing firmly upright.
You might need to add more sand at this stageto make sure that it is deep enough to put yourstones into. Adding a little water to dampenthe sand will help.
You can create stone arches like those atStonehenge by laying one stone on topof two standing stones.
4. Name your circleIt could be named after where you live, whatyou think people would use your circle for orwhat it looks like. For example it might becalled ‘The Moon Worship Circle’.
7
bbc.co.uk/history

bbc.co.uk/history
Your plan:
StonehengeStanton Drew
Nine Maidensof Boskednan
8

9
bbc.co.uk/history
How would it have felt for ancient people visiting your circle?Some historians believe they would have visited during the changing of the seasons, orat night for spiritual worship. Many think that ancient people were interested in how thelight from the sun and moon shone on the circle and created shadows.
If you have outside space:You can test the light on your own circle by taking it outside and placing it on the groundwith the sun on it. Now walk around your circle to see how it looks from each angle as thesun creates shadows around it.
If you have a darkened room:If you have a room which can be darkened in some way, you can replicate the sun or moonby using a torch. Turn on the torch, and, starting low to the floor, raise the torch up andaround your model.
As you move the torch up and around your circle, think about which stones will first bewarmed by the sun or lit by the silver light of the moon. What shadows are cast at eachstage as the light climbs into the sky and then sets on the other side?
Extension activity