land rover series power steering kit -...
TRANSCRIPT

Land Rover Series power steering kitC35.220.10 / C35.220.20 / C35.220.30
December 2018
1

1. General
NOTE: As when installing any performance product, a degree of mechanical ability is required. If after reviewing the parts and instructions you don´t feel that you can properly complete this installation, take your car to a competent professional. Proper installation and adjustment will save time, money and aggravation. We recommend using this manual, together with the applicable workshop manual for your car to help you with the installation.
CAUTION: INCORRECT INSTALLATION OF THIS POWER STEERING SYSTEM COULD RESULT IN VEHICLE DAMAGE, SERIOUS INJURY OR DEATH!
Thank you for purchasing the Heystee-Automotive power steering kit kit. Carefully installed, you‘ll really enjoy this system.
These fitting instructions describes the installation to the following Land Rover Series power steering kits :
– C35.220.10 Power Steering font-end kit – C35.220.20 Power Steering kit (Land Rover V8 / 200 Tdi)– C35.220.30 Power Steering kit (Series Land Rover)
2

2. Parts
In the box you will find the following parts:
Part description C35.220.10 C35.220.20 C35.220.30
1 Ram/Cylinder C35.220 X X X
2 Reservoir with bolts X X
3 long drag link with ball joint X X X
4 Chassis Bracket with bolts X X X
5 Short drag link with ball joint X X X
6 Fan Spacer with bolts X
7 Pump with brackets X
8 V-belt X
9 Crankshaft Pulley X
10 High pressure hoses and return hose with all fittings X X
3
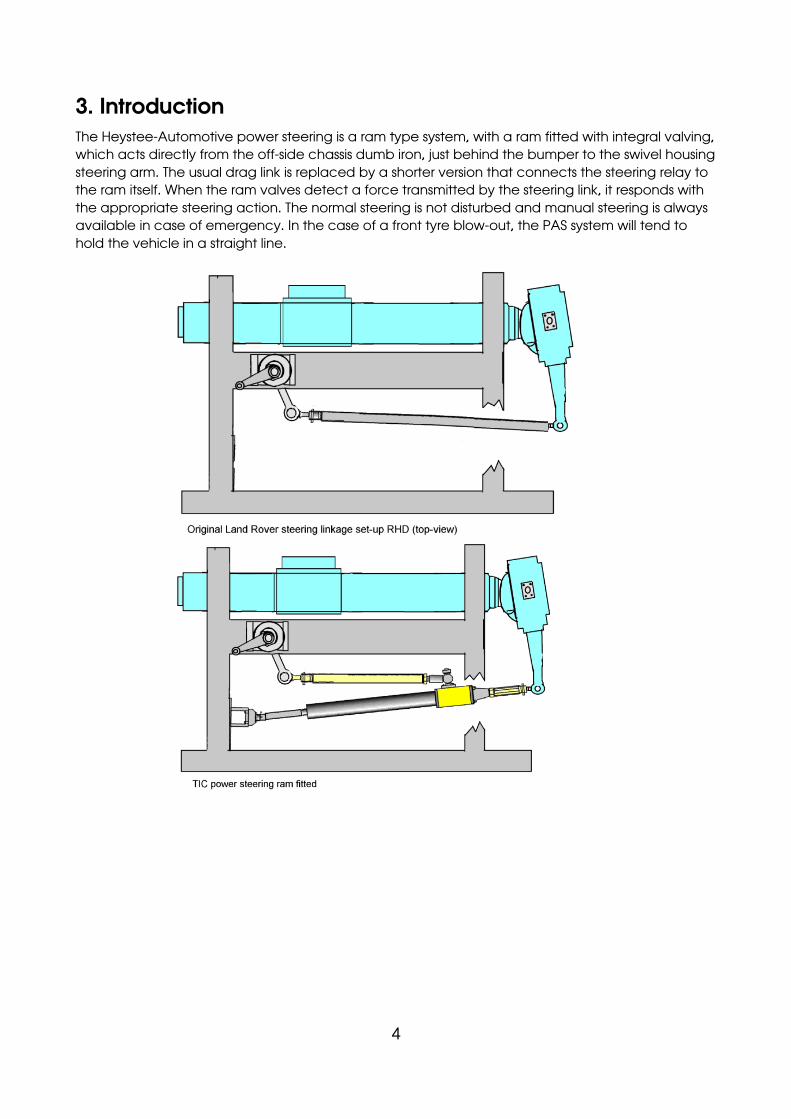
3. IntroductionThe Heystee-Automotive power steering is a ram type system, with a ram fitted with integral valving,which acts directly from the off-side chassis dumb iron, just behind the bumper to the swivel housingsteering arm. The usual drag link is replaced by a shorter version that connects the steering relay to the ram itself. When the ram valves detect a force transmitted by the steering link, it responds with the appropriate steering action. The normal steering is not disturbed and manual steering is alwaysavailable in case of emergency. In the case of a front tyre blow-out, the PAS system will tend to hold the vehicle in a straight line.
4
3. InstallationLand Rover steering components on your car,
Before fitting the system it is worth while making sure that the steering box and all ball joints are in good condition.If necessary adjust the steering box for minimum play consistent with easy movement and set the correct pre-load on the swivels. Please refer to your original workshop manual for the correct procedure which needs to be carefully followed.
All excess play can lead to incorrect and unwanted steering behaviour.
The Heystee-Automotive power steering kit will not compensate for these incorrect settings. It can even amplifiy them.
When all is according Land Rover specifications you can begin the installation of the power steering
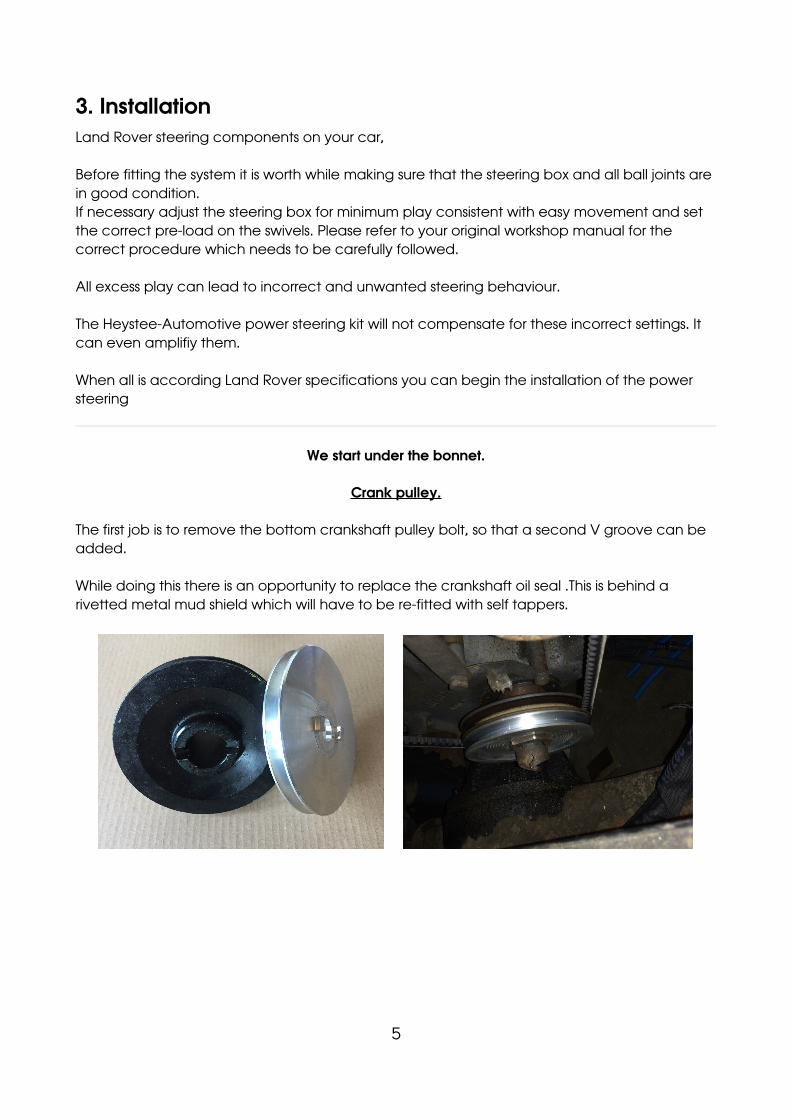
We start under the bonnet.
Crank pulley.
The first job is to remove the bottom crankshaft pulley bolt, so that a second V groove can be added.
While doing this there is an opportunity to replace the crankshaft oil seal .This is behind a rivetted metal mud shield which will have to be re-fitted with self tappers.
5

Fan Spacer
To give the v-belt some extra clearance we supply a Fan spacer in our power steering set. Thiswill be mounted between the fan and water pump pulley, with the 4 supplied bolts and rings.
Pump
The pump is mounted on a special plate (supplied) which picks up the three bolts that hold thefront of the sump in place as well as two staggered tapped holes on the lower corner of the front cover. To line up the pump you find some extra spacers/rings in the box. You can adjust the belt tension with a ½ ratchet.
6

Reservoir
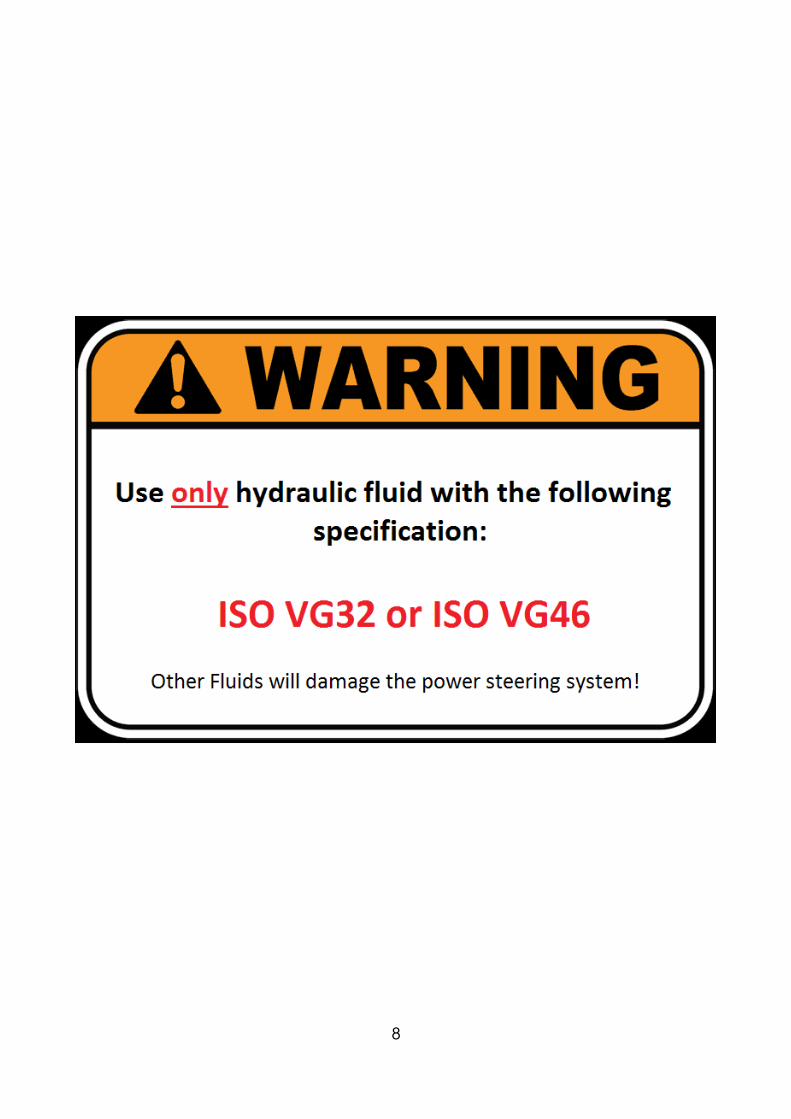
The hydraulic fluid reservoir mounts any where appropriate as long it is mounted above the pump, as this is gravity fed. We recommend to use the place next to the wiper fluid reservoir. Please fill it with the correct fluid! See the decal on the reservoir, otherwise it will damage the seals in the cylinder!
7
8
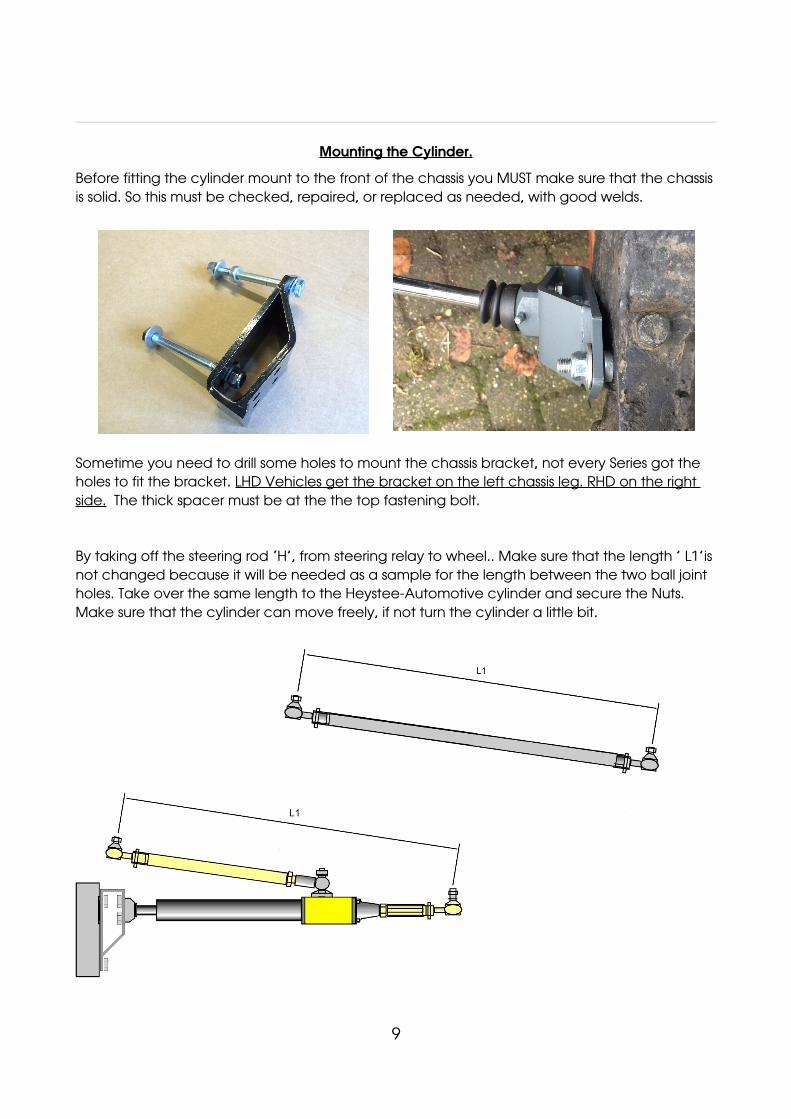
Mounting the Cylinder.
Before fitting the cylinder mount to the front of the chassis you MUST make sure that the chassisis solid. So this must be checked, repaired, or replaced as needed, with good welds.
Sometime you need to drill some holes to mount the chassis bracket, not every Series got the holes to fit the bracket. LHD Vehicles get the bracket on the left chassis leg. RHD on the right side. The thick spacer must be at the the top fastening bolt.
By taking off the steering rod ‘H’, from steering relay to wheel.. Make sure that the length ’ L1’isnot changed because it will be needed as a sample for the length between the two ball joint holes. Take over the same length to the Heystee-Automotive cylinder and secure the Nuts. Make sure that the cylinder can move freely, if not turn the cylinder a little bit.
9
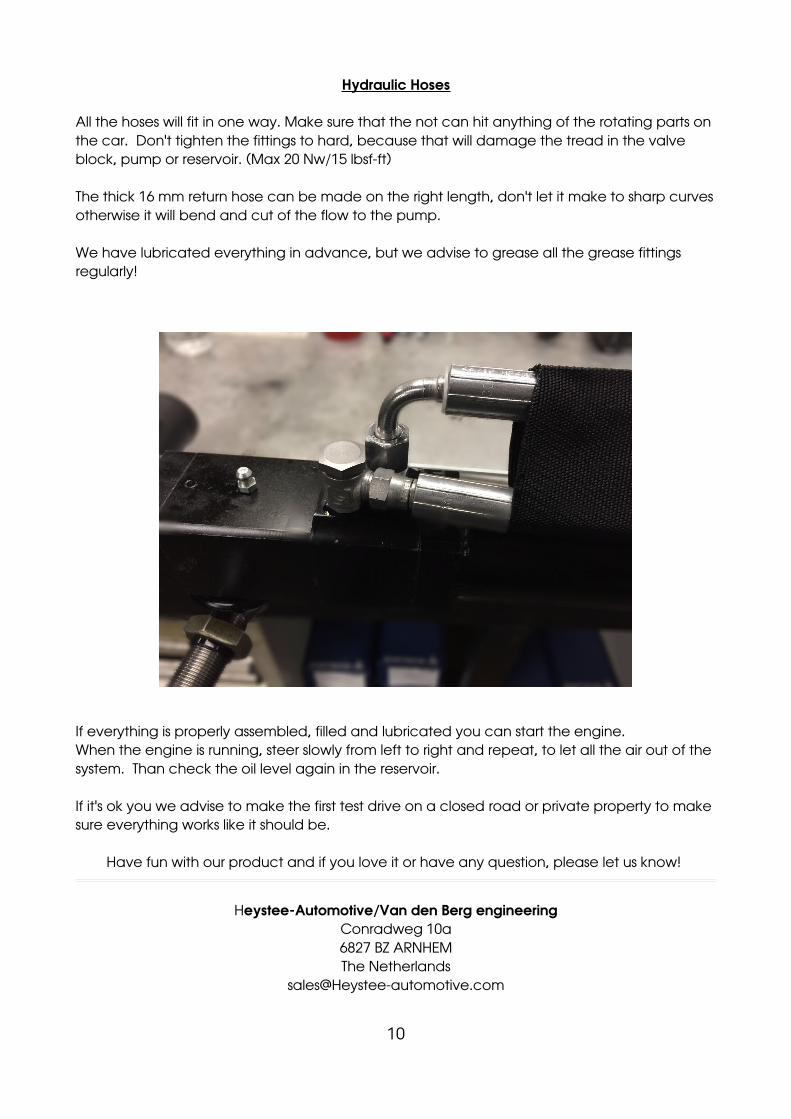
Hydraulic Hoses
All the hoses will fit in one way. Make sure that the not can hit anything of the rotating parts on the car. Don't tighten the fittings to hard, because that will damage the tread in the valve block, pump or reservoir. (Max 20 Nw/15 lbsf-ft)
The thick 16 mm return hose can be made on the right length, don't let it make to sharp curvesotherwise it will bend and cut of the flow to the pump.
We have lubricated everything in advance, but we advise to grease all the grease fittings regularly!
If everything is properly assembled, filled and lubricated you can start the engine. When the engine is running, steer slowly from left to right and repeat, to let all the air out of the system. Than check the oil level again in the reservoir.
If it's ok you we advise to make the first test drive on a closed road or private property to make sure everything works like it should be.
Have fun with our product and if you love it or have any question, please let us know!
Heystee-Automotive/Van den Berg engineeringConradweg 10a6827 BZ ARNHEMThe Netherlands
10