lan based led sign manual
TRANSCRIPT
12/30/2015
For USB / LAN Based led Sign | Prashant
PHOTONPLAY
SYSTEMS INC Operational Manual
Photonplay Systems Inc www.photonplay.com [email protected] Ph. No. +1-800-966-9329
Operational manual For USB / LAN Based led Sign

Photonplay Systems Inc www.photonplay.com [email protected] Ph. No. +1-800-966-9329
First Step 1. Plug the power cable into the socket

Photonplay Systems Inc www.photonplay.com [email protected] Ph. No. +1-800-966-9329
2. The display will start working (It might take few seconds to start so don't worry)
Great! The display is working properly
Things required for programming 1. LAN cable/Wifi
2. Computer/laptop
Insert the CD in your computer Open CD Now double click on Led software

Photonplay Systems Inc www.photonplay.com [email protected] Ph. No. +1-800-966-9329
Installing the software Insert CD in your PC and Open it
Step : 1 Double click on Led Software Present in CD
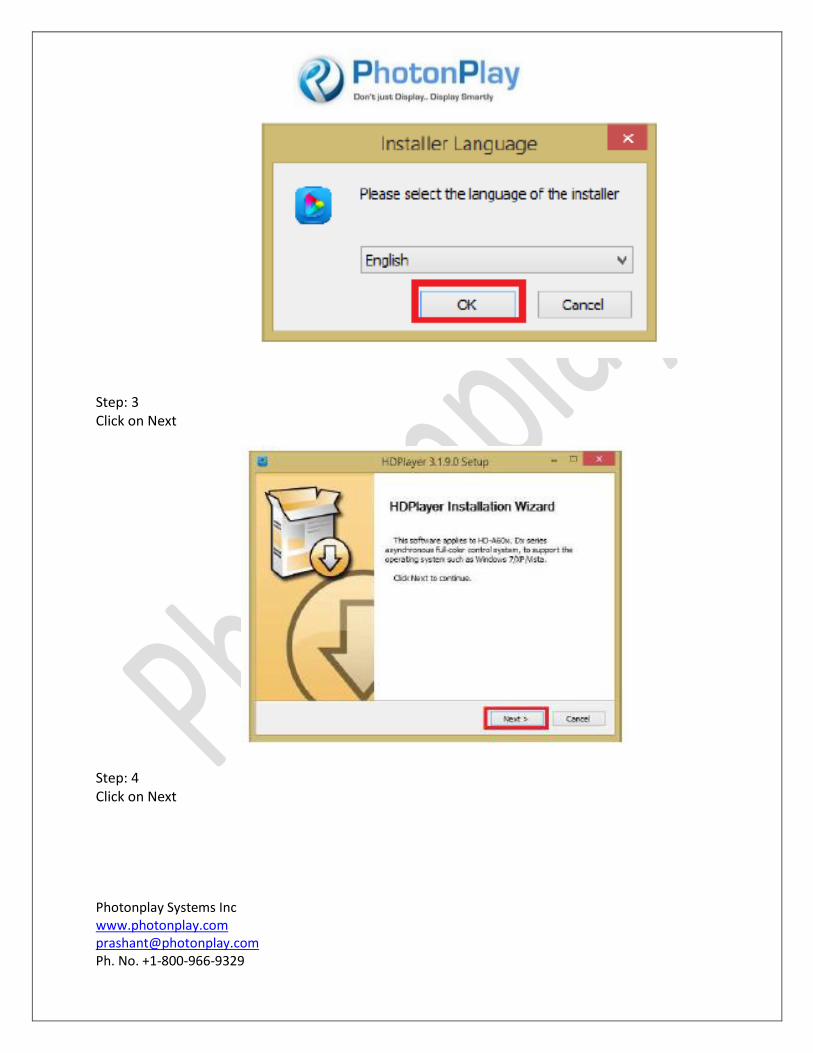
Step: 2 Click on OK
Photonplay Systems Inc www.photonplay.com [email protected] Ph. No. +1-800-966-9329
Step: 3 Click on Next
Step: 4 Click on Next

Photonplay Systems Inc www.photonplay.com [email protected] Ph. No. +1-800-966-9329
Step: 5 Click on Install
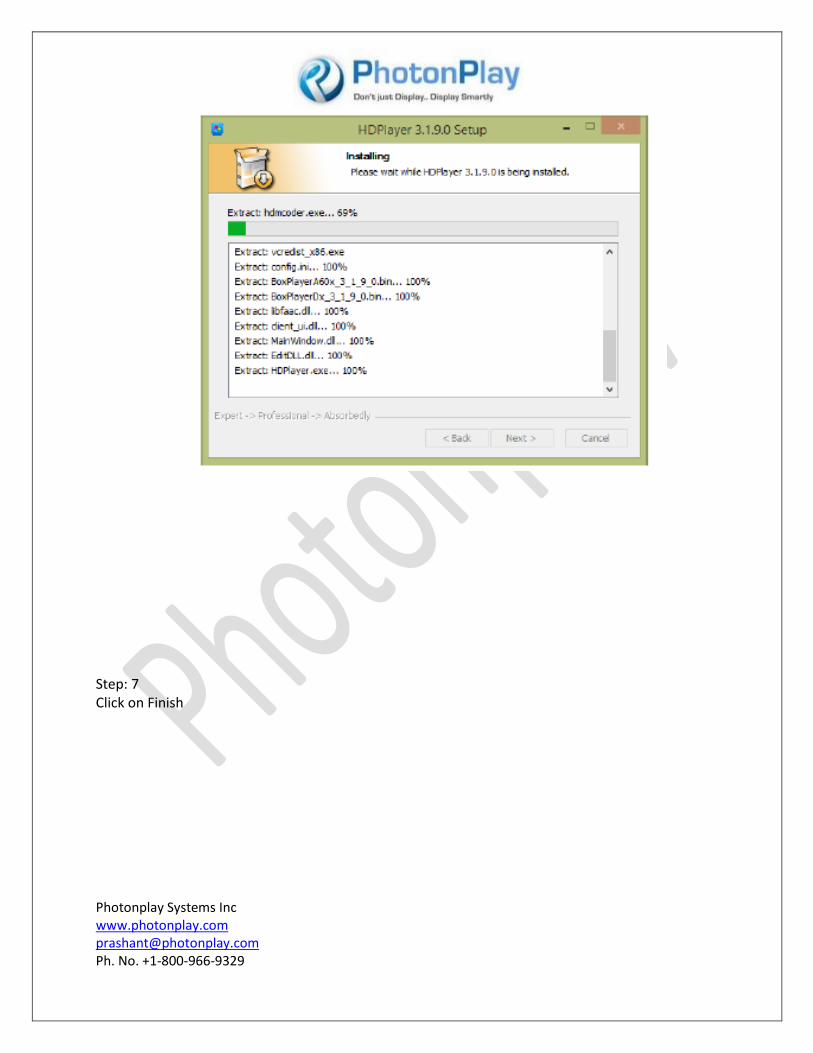
Step: 6 Process will begin
Photonplay Systems Inc www.photonplay.com [email protected] Ph. No. +1-800-966-9329
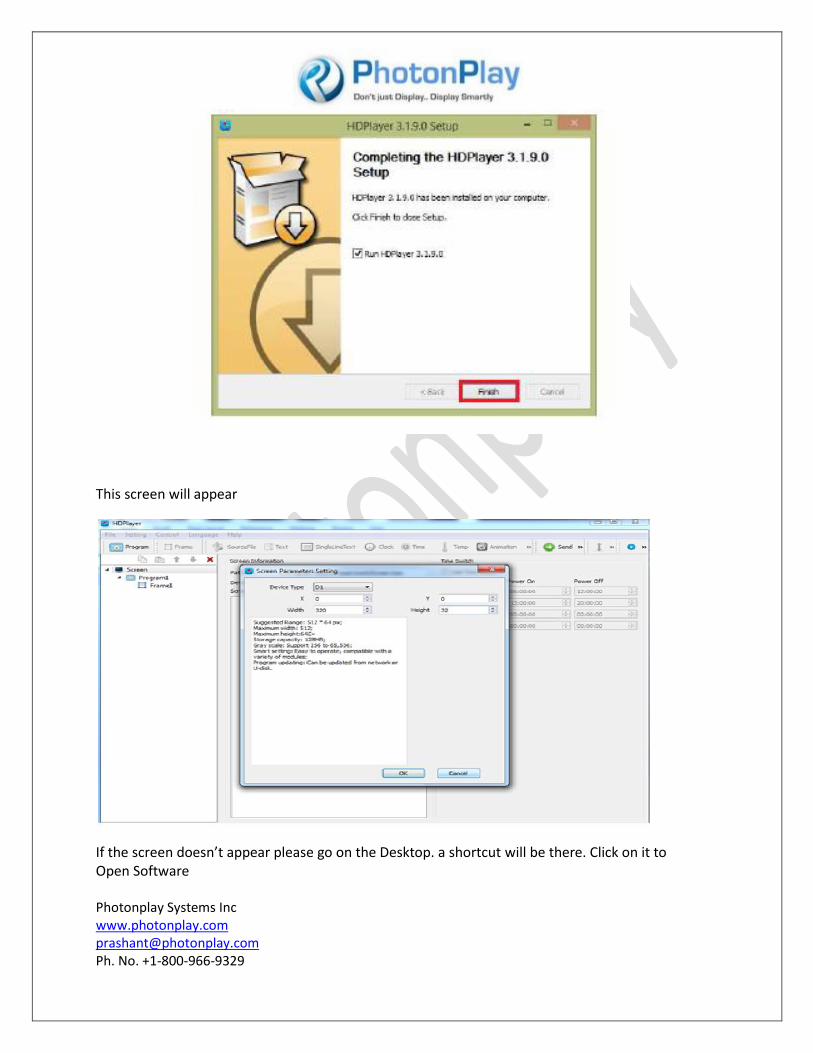
Step: 7 Click on Finish
Photonplay Systems Inc www.photonplay.com [email protected] Ph. No. +1-800-966-9329
This screen will appear
If the screen doesn’t appear please go on the Desktop. a shortcut will be there. Click on it to Open Software

Photonplay Systems Inc www.photonplay.com [email protected] Ph. No. +1-800-966-9329
Now we are going to connect the sign with your computer. (There are different ways to connect)
1. (Direct connection) Plug one side Ethernet Cable In Display port and other side in the Ethernet Port of Your PC
Photonplay Systems Inc www.photonplay.com [email protected] Ph. No. +1-800-966-9329
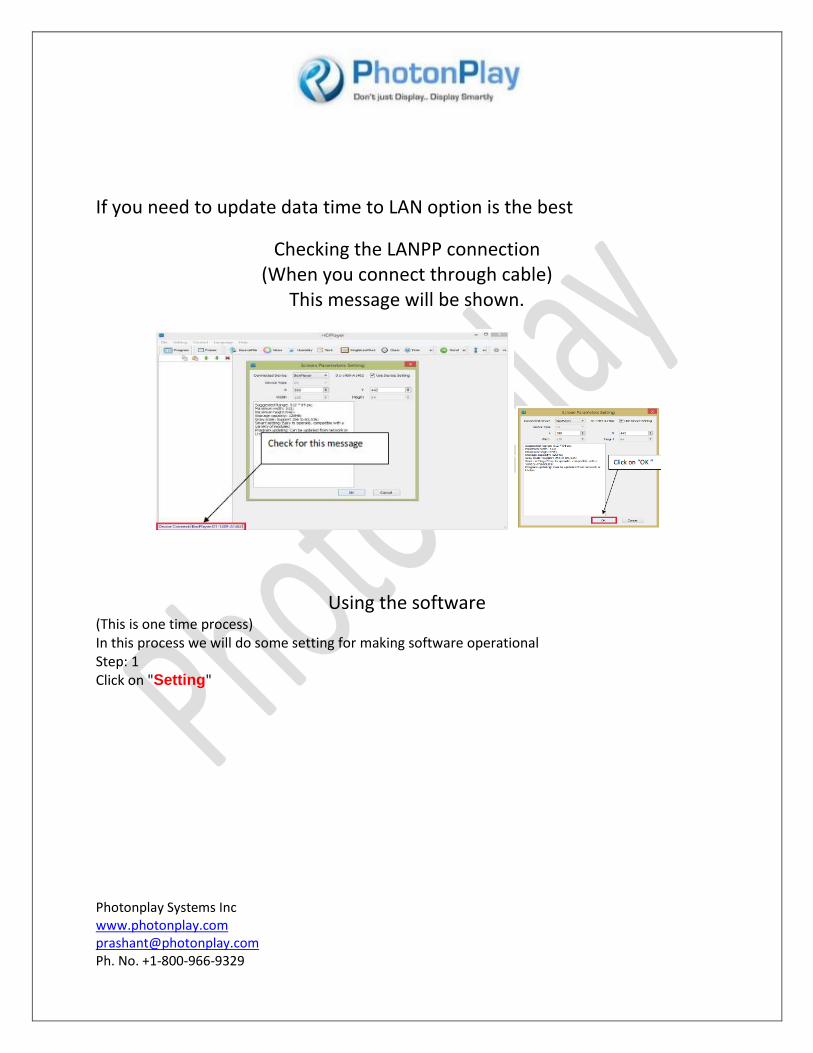
If you need to update data time to LAN option is the best
Checking the LANPP connection (When you connect through cable)
This message will be shown.
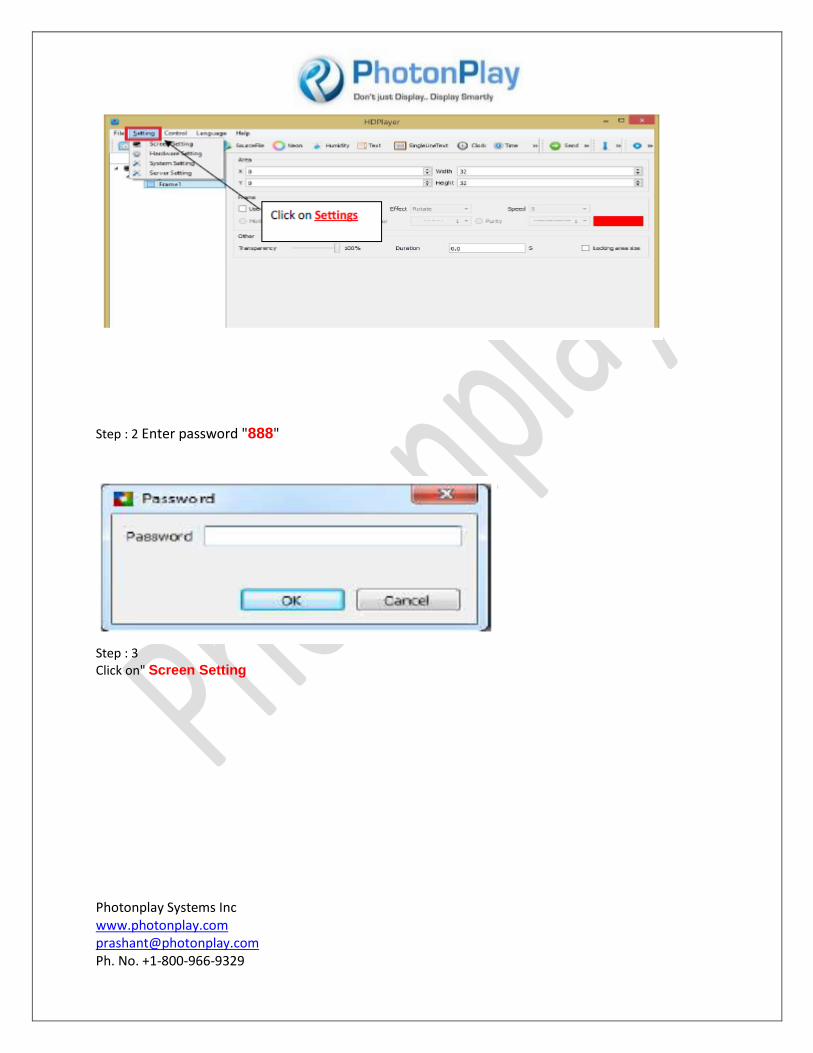
Using the software (This is one time process) In this process we will do some setting for making software operational Step: 1 Click on "Setting"
Photonplay Systems Inc www.photonplay.com [email protected] Ph. No. +1-800-966-9329
Step : 2 Enter password "888"
Step : 3 Click on" Screen Setting


Photonplay Systems Inc www.photonplay.com [email protected] Ph. No. +1-800-966-9329
Match all this fields carefully and the click on “OK” Device Type is : D1 Width: 128 Height: 32
One time setup process ended
Now we are going to learn how to Add Text You will See two different screens First click on program
Photonplay Systems Inc www.photonplay.com [email protected] Ph. No. +1-800-966-9329
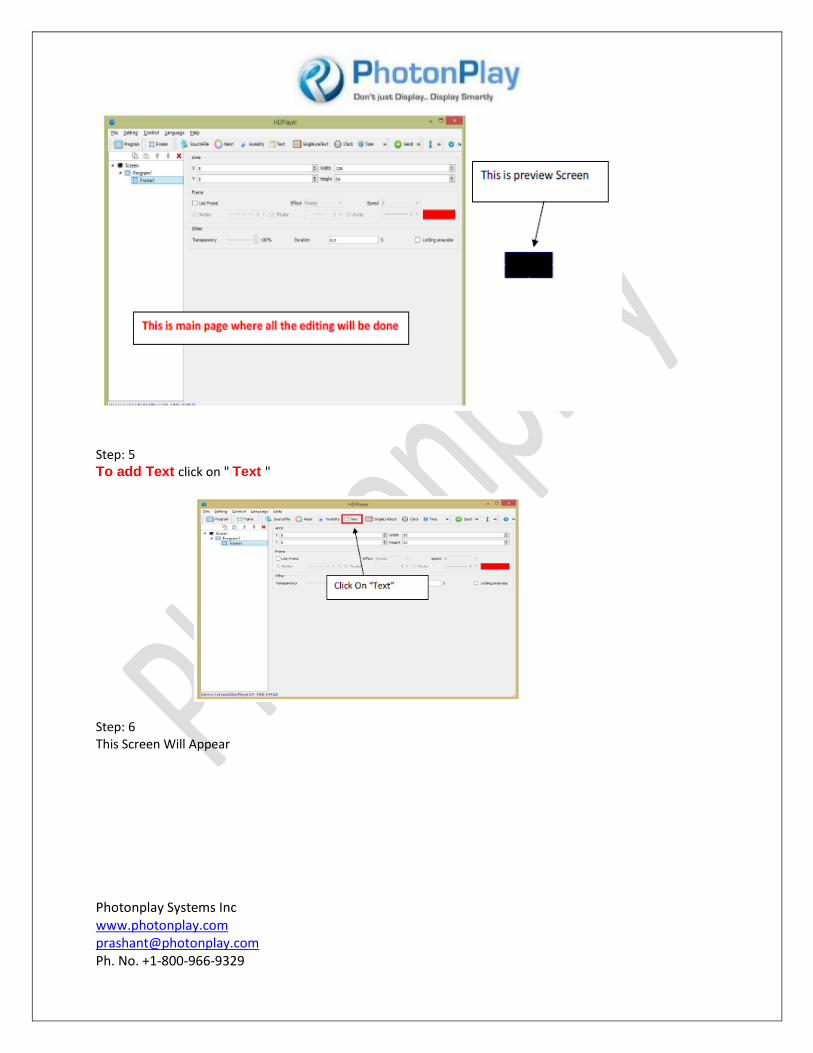
Step: 5
To add Text click on " Text "
Step: 6 This Screen Will Appear

Photonplay Systems Inc www.photonplay.com [email protected] Ph. No. +1-800-966-9329
Step: 7 You will add text on Right one and Preview can be seen on the Preview Screen
Step: 8
Drag to increase or decrees the area of display preview Screen
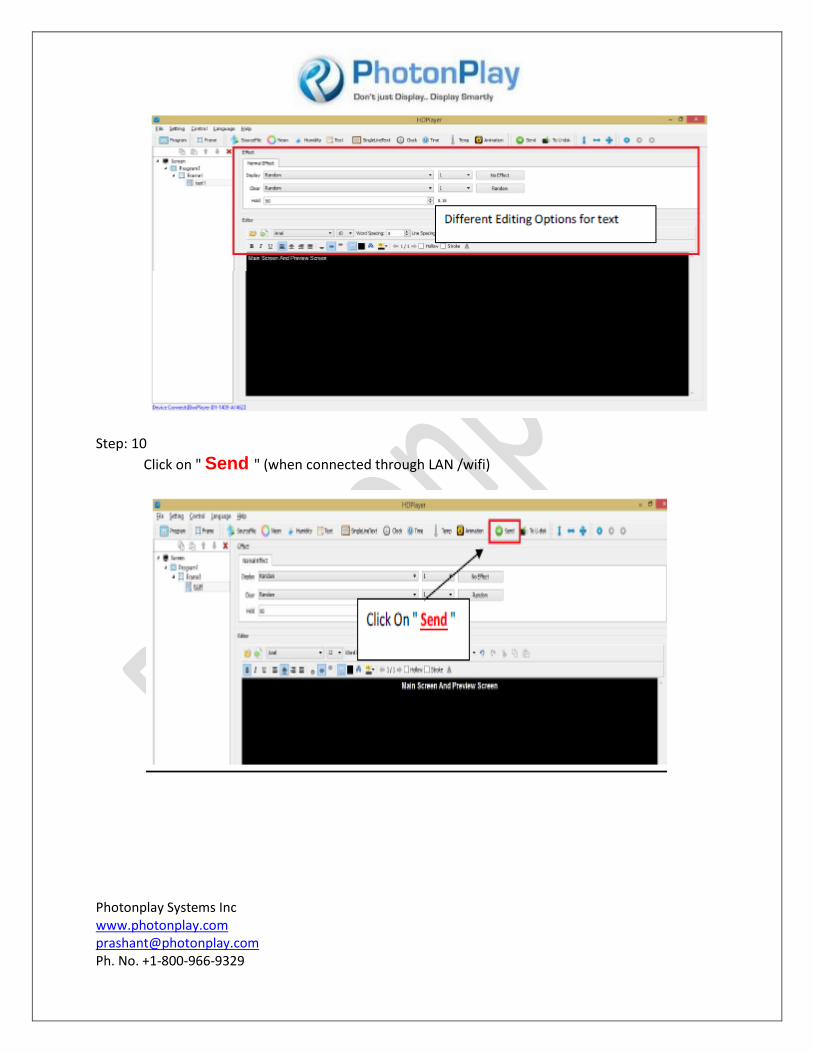
Step: 9
There are number of different options for editing text
Photonplay Systems Inc www.photonplay.com [email protected] Ph. No. +1-800-966-9329
Step: 10
Click on " Send " (when connected through LAN /wifi)

Photonplay Systems Inc www.photonplay.com [email protected] Ph. No. +1-800-966-9329
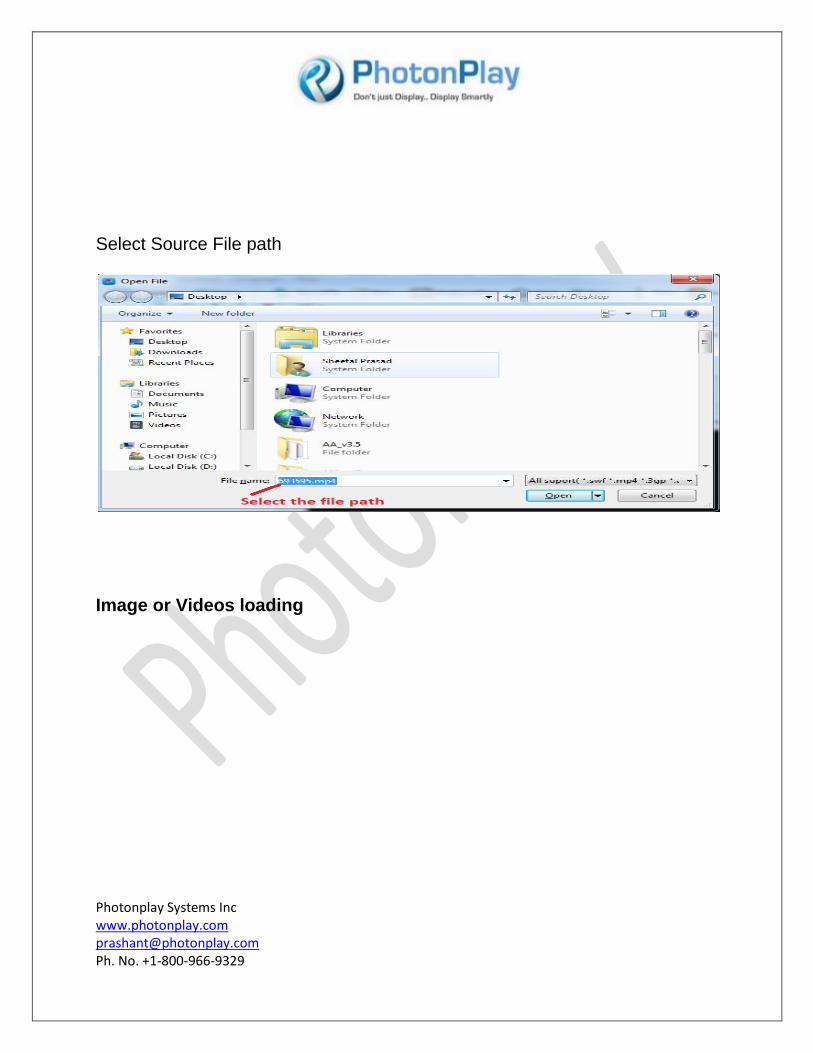
In the same way you can add Source file (images ,videos) etc by selecting these options
Photonplay Systems Inc www.photonplay.com [email protected] Ph. No. +1-800-966-9329
Select Source File path
Image or Videos loading

Photonplay Systems Inc www.photonplay.com [email protected] Ph. No. +1-800-966-9329
Click on " Send " (when connected through LAN/wifi)Data will appear on the Screen

Photonplay Systems Inc www.photonplay.com [email protected] Ph. No. +1-800-966-9329
Delete The Text ,Image and videos
THANK YOU USERS
PHOTONPLAY Systems Inc.