l oops - department of computer science, university of...
TRANSCRIPT
Page 187 of 412 jimyoung.ca/learnToProgram © James Young, 2016
LOOPS
Summary You will look at how to make Processing repeat a command a given number of times, or, while some condition is true. This greatly increases the power of your programs. In this section, you will…
Learn about two different kinds of loops, for making the computer repeat operations: the “for” loop and the “while” loop
See how loops impact variable scope Learn about common problems with loops Get a great deal of practice with loops.
Learning Objectives After finishing this unit, you will be able to …
Create a for loop to repeat an operation a fixed number of times. Create a while loop to repeat an operation while some condition is true.
How to Proceed Read the unit content. Have a Processing window open while you read, to follow along with the
examples. Do the sets of exercises in the Check your Understanding sections. Re-check the Learning Objectives once done.
Page 188 of 412 jimyoung.ca/learnToProgram © James Young, 2016
Introduction So far in our programs, we have to explain every single operation that we want the computer to do. Using if statements some of our programming can be conditional based on the circumstance, but for things that are done, we give each command in an operation. It would be nice if we could provide more general commands to the computer, to more easily do more work.
Loops are simple at their core, but for many, are a new way of thinking. As such, we have included a large number of examples in this chapter.
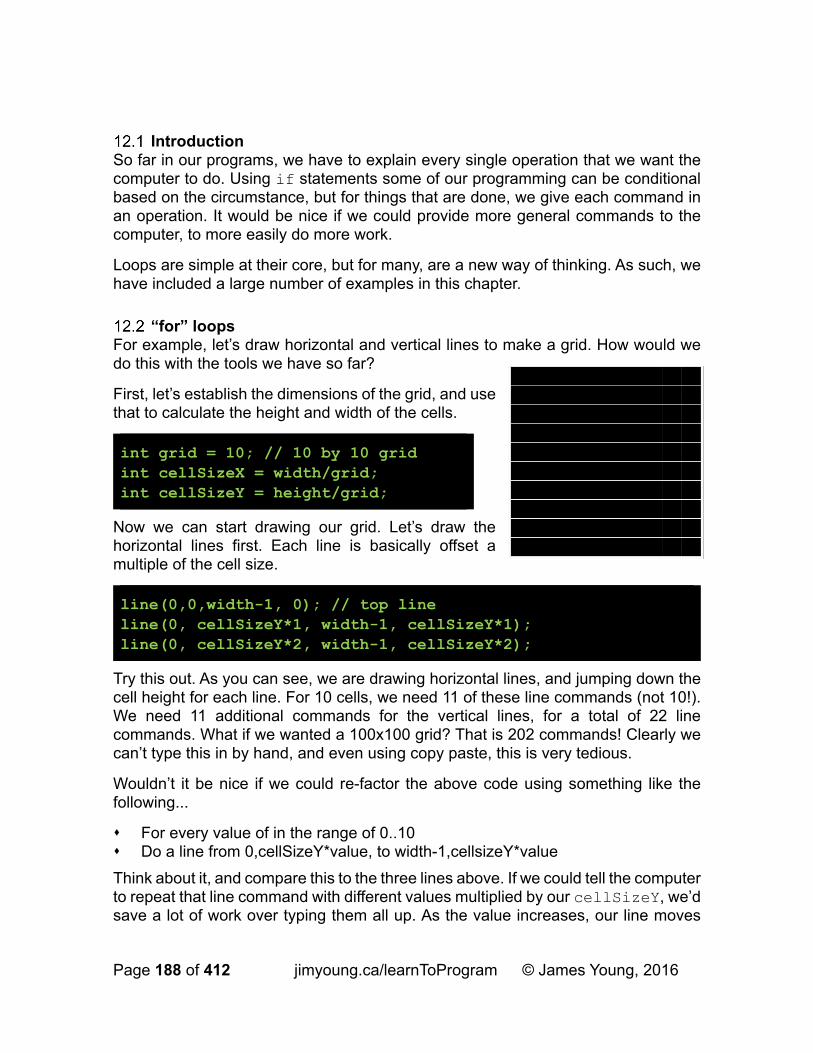
“for” loops For example, let’s draw horizontal and vertical lines to make a grid. How would we do this with the tools we have so far?
First, let’s establish the dimensions of the grid, and use that to calculate the height and width of the cells.
Now we can start drawing our grid. Let’s draw the horizontal lines first. Each line is basically offset a multiple of the cell size.
Try this out. As you can see, we are drawing horizontal lines, and jumping down the cell height for each line. For 10 cells, we need 11 of these line commands (not 10!). We need 11 additional commands for the vertical lines, for a total of 22 line commands. What if we wanted a 100x100 grid? That is 202 commands! Clearly we can’t type this in by hand, and even using copy paste, this is very tedious.
Wouldn’t it be nice if we could re-factor the above code using something like the following...
For every value of in the range of 0..10 Do a line from 0,cellSizeY*value, to width-1,cellsizeY*value
Think about it, and compare this to the three lines above. If we could tell the computer to repeat that line command with different values multiplied by our cellSizeY, we’d save a lot of work over typing them all up. As the value increases, our line moves
int grid = 10; // 10 by 10 grid int cellSizeX = width/grid; int cellSizeY = height/grid;
line(0,0,width-1, 0); // top line line(0, cellSizeY*1, width-1, cellSizeY*1); line(0, cellSizeY*2, width-1, cellSizeY*2);
Page 189 of 412 jimyoung.ca/learnToProgram © James Young, 2016
down the screen. Luckily, we can do this. Let’s learn Processing syntax to do this. This is called a “for” loop.
When Processing encounters the code, it does the following operations: Memorizing this sequence is immensely important, do it!
1. The initial command runs one time, at the start 2. The end condition, a boolean, is checked. If it is true, we run the code block
3. The code block runs like normal processing code 4. The upkeep command is run 5. Go to step #2
Up until now, everything in this list follows what you have learned except for step 5. Now, the program can go back, and repeat something again and again, until the end condition is false. This is why is called a loop, as the code block runs again and again.
It’s useful to think of this code in terms of what we already understand. Let’s work from the following fake code example.
Here, we create a variable and give it an initial value. We use an if test to check for some end condition, for example, if i is less than 10. Then we run the code block. At the end of the code block, we make i larger by one. Then, it would be nice to go back to the if and do it again.
You can see that every time we re-do the if statement, i increases, until i<10 is false – that is, i is 10 or larger. This probably looks confusing, so let’s have a concrete example using the actual syntax of a for loop. The following template of a for loop is by far the most common use of the loop. Let’s assume that times is set to 4.
for (initial command; end condition; upkeep command) { // code block }
int i = 0; if (i < 10) { // draw line at grid position i line(0, cellSizeY*i, width-1, cellSizeY*i);
i++; } // go back to the if and do it again

Page 190 of 412 jimyoung.ca/learnToProgram © James Young, 2016
Let’s look at this using the order of operations specified on the previous page.
1. The initial command runs one time, int i = 0; 2. The end condition is checked. if i<times, then we run the code,
otherwise, we quit the loop. 3. i is 0, so i<times, or 0<4, is true. The code block is run 4. The upkeep command is run, i++ 5. Go to step #2 and repeat
If times is set to 4, then the loop will run 4 times: once with i=0, i=1, i=2, and i=3. When i is 4, then i<times is false (4<4 is false), and the loop ends.
Note: This is a key spot for the dreaded off by one error. Since our loop starts at 0, if we want it to run n times, the final run is with n-1.
You can put any valid Processing code in the initial condition, end condition, and upkeep, but it makes most sense usually to stick to the above template. Let’s re-consider our grid line example. Here are some of the line commands:
Looking for the pattern here, we can factor out the cellSizeY*1,2,3… and make it cellSizeY*i:
If we complete the above command for the values of i from 0 to 9, we get 10 lines. Let’s wrap it in a for loop to make i go from 0 to the grid size:
At the beginning, i is 0, so we get our first line command. Then, i increases to 1, and we get the second line command above... this continues until i = 9, and we get the 10th command. When i is 10 (grid’s value), our test is false, and the loop ends.
for (int i=0; i < times; i++) { // code }
line(0, 0, width-1, 0); // top line line(0, cellSizeY*1, width-1, cellSizeY*1); line(0, cellSizeY*2, width-1, cellSizeY*2);
line(0, cellSize*i, width-1, cellSize*i);
for (int i = 0; i < grid; i++) { line(0, cellSizeY*i, width-1, cellSizeY*i); }

Page 191 of 412 jimyoung.ca/learnToProgram © James Young, 2016
This gives us 10 lines. Above we said we wanted 11 lines – since for n cells there are n+1 lines. Try updating the loop to give that last line (there are several ways to do this).
You can modify the above loop to add the vertical lines as well. A second loop is not needed. The calculation for the vertical lines is very similar to the horizontal ones:
You have the following grid! Wasn’t that easier than typing all those lines manually? If you can think of your problem more generally, you can use the power of for loops to save yourself a bunch of work.
Now, let’s look at another great power of loops. If you setup things generally, like we did here, things scale up very easily! With this code, you can make a grid of any dimensions just by changing that value of the grid variable. Change that variable, and all your calculations change, including how many times your for loop runs. Change the grid to 100 and you get the following result, without any additional work!
Example: Line Art You may remember in elementary school making some line art like the image to the right. You take a ruler and draw straight lines between the first point along the top, and the first point on the right. Then you draw between the second point on the top and the second on the right. You do this for all the points, and you get an approximated curve. The denser your points are, the better your curve is approximated. We can now do this example using for loops. In fact, this is very similar to our grid example.
First, we need to calculate how many points across the top we want, and the spacing of the point. This is identical to our grid above. Then, we use a for loop to iterate through all the points and then draw lines between them.
To start something like this, first think about the line you want to draw before you think of the loop. If you do a couple of examples, then it usually helps you to see a pattern that will work in the loop. Assuming that we have the following variables:
line(cellSizeX*i, 0, cellSizeX*i, height-1);
Page 192 of 412 jimyoung.ca/learnToProgram © James Young, 2016
Then we can draw some lines. The code for the first three lines would look as below, assuming we draw from the top of the screen to the right of the screen. We would draw all the way along, which each line being FROM (x=cell, y=0), TO (x=width-1, y=cell). For example, the first line would be from the 1st cell along the top left, to the 1st cell down the right, the second line would be from the 2nd cell along the top left, the 2nd cell down the right, etc.
From here, you can see that the general case would be rewritten as
for cell i. Now, we wrap this in a for loop that goes through all the cells
And it works! Make sure your code is up and running at this point.
To make this interactive, try setting the grid at the beginning of the draw block using the mouse coordinate. What I did was to set the grid = mouse/10, so that grid ranges from 1 to 49. Try this out to see what happens. Did it work okay? Did you try putting the mouse ALL the way to the left of the screen?
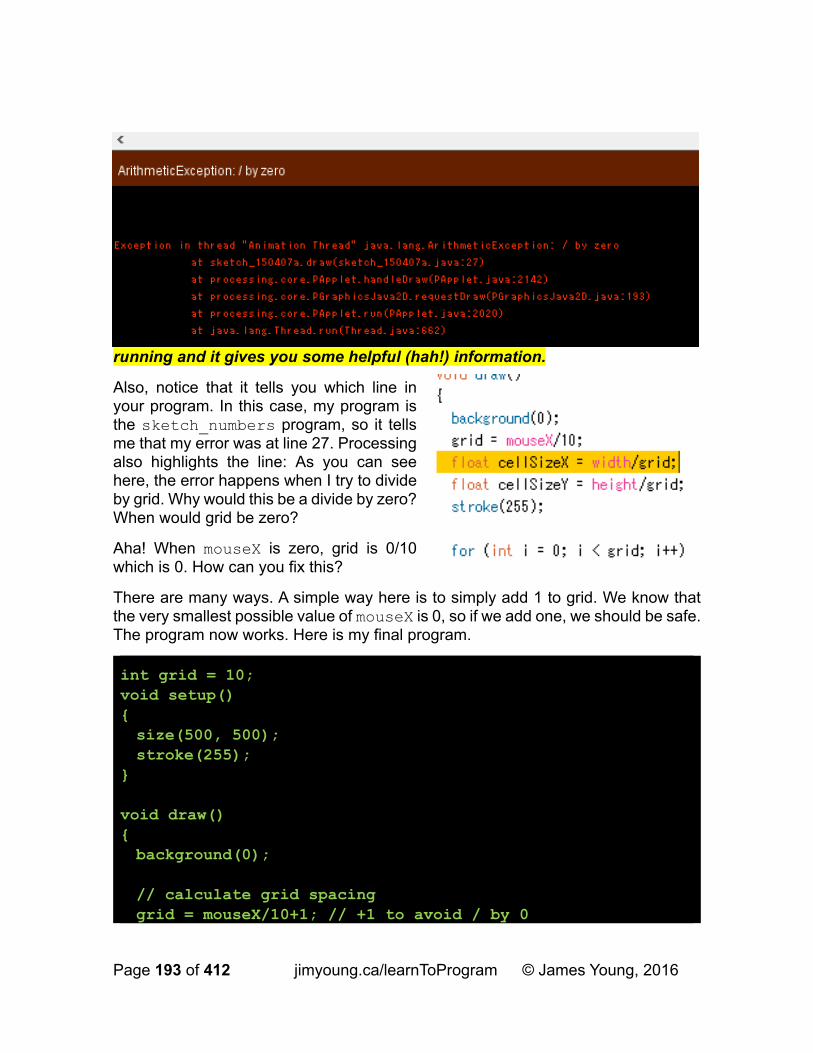
If you put the mouse all the way to the left of the window, the program crashes!! This may be your very first actual crash. If you look in the console of processing, it gives you a very very long description of what happened. Look at the image on the next page. If you look closely, there is some help in here. The first line helps you understand what happened, if you read between the cruft. It says you have a “/ by zero”. What happens if you divide a number by zero? It is undefined, impossible to do, so the computer panics and stops your program.
NOTE: this is called a run-time error. The program starts up but hits an error that it could not foresee ahead of time. This error makes the program stop
int grid = 10; int cellSizeX = width/grid; int cellSizeY = width/grid;
line(cellSizeX*0, 0, width-1, cellSizeY*0); line(cellSizeX*1, 0, width-1, cellSizeY*1); line(cellSizeX*2, 0, width-1, cellSizeY*2);
line(cellSizeX*i, 0, width-1, cellSizeY*i);
for (int i=0; i<grid; i++) { line(cellSizeX*i, 0, width-1, cellSizeY*i); }
Page 193 of 412 jimyoung.ca/learnToProgram © James Young, 2016
running and it gives you some helpful (hah!) information.
Also, notice that it tells you which line in your program. In this case, my program is the sketch_numbers program, so it tells me that my error was at line 27. Processing also highlights the line: As you can see here, the error happens when I try to divide by grid. Why would this be a divide by zero? When would grid be zero?
Aha! When mouseX is zero, grid is 0/10 which is 0. How can you fix this?
There are many ways. A simple way here is to simply add 1 to grid. We know that the very smallest possible value of mouseX is 0, so if we add one, we should be safe. The program now works. Here is my final program.
int grid = 10; void setup() { size(500, 500); stroke(255); } void draw() { background(0); // calculate grid spacing grid = mouseX/10+1; // +1 to avoid / by 0
Page 194 of 412 jimyoung.ca/learnToProgram © James Young, 2016
Notice how sometimes when you move the mouse some additional lines get drawn but the grid does not change? This happens because of the integer math that we are doing. When we do our divisions to calculate the cell sizes, as our mouseX gets larger, we have more of a rounding effect as the remainder is thrown away. Change all the math to floating point to get a smoother animation, as you use real fractions and do not throw away anything.
Note: why are we okay with using a single letter, i, for our variable name? In general, single-letter variables are a bad idea. However, you can use them when it’s convention, or follows a known formula. In this case, it is an accepted convention in both computer science and mathematics to use i for an iterator, a value that goes over a range of integers. Other common iterator variables are j and k.
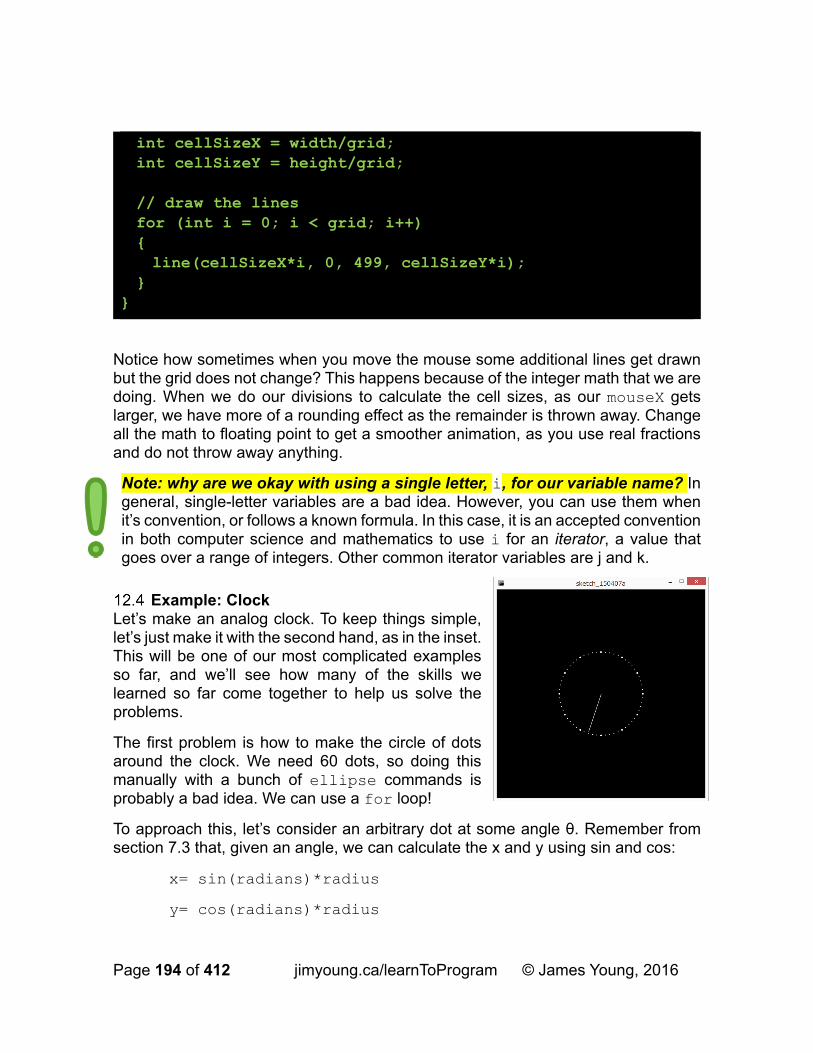
Example: Clock Let’s make an analog clock. To keep things simple, let’s just make it with the second hand, as in the inset. This will be one of our most complicated examples so far, and we’ll see how many of the skills we learned so far come together to help us solve the problems.
The first problem is how to make the circle of dots around the clock. We need 60 dots, so doing this manually with a bunch of ellipse commands is probably a bad idea. We can use a for loop!
To approach this, let’s consider an arbitrary dot at some angle θ. Remember from section 7.3 that, given an angle, we can calculate the x and y using sin and cos:
x= sin(radians)*radius
y= cos(radians)*radius
int cellSizeX = width/grid; int cellSizeY = height/grid; // draw the lines for (int i = 0; i < grid; i++) { line(cellSizeX*i, 0, 499, cellSizeY*i); } }
Page 195 of 412 jimyoung.ca/learnToProgram © James Young, 2016
The challenge here is, how do we calculate all the angles for those dots? If we can get the angles, then we can get the x and y coordinates. The trick, which is very common with for loops, is to work in percentages. First, for a given dot we figure out what percentage around the clock we are, for that dot. Then, multiply that percentage by 2PI (a whole circle), to get radians. Given a dot i (we have 60)
i/60.0 gives the percent of the way around the clock. Don’t forget to use 60.0. If i is an integer, what happens if we use just 60? Integer division! Now that we have the angle, we can calculate the x and y position. Let’s start writing the program.
First, setup some great globals that describe your clock
Then, in the draw loop, use a for loop to go through the 60 tick marks, calculate their angles, and draw tick marks there. In this case, let’s put the clock at the center of the screen.
Try this, and make sure it runs. Do you recall the exact order of operations with the for loop? Does our loop run exactly 60 times? Or is it 59? 61?
There is one more thing. If you look at my example on the previous page, you can see that every 5th tick mark is actually quite a bit bigger, just like on a real clock. How can we go about doing this?
An easy way to do this – and one that is very common with computer scientists – is to use the modulo operator. Remember that we did something similar earlier. If you take some number n and take it modulo m, when do you get zero?
This is probably clearer if we use real numbers. If we take n modulo 5, when do we get zero? Zero means no remainder. There is no remainder when n is a multiple of
float angle = i/60.0 * 2 * PI; // angle to dot
int clockRadius = 100; // size of clock int tickSize = 1; // radius of tick marks
// draw tick marks for (int i = 0; i < 60; i++) { float angle = i/60.0 * 2 * PI; // angle to dot // center these on canvas float x = cos(angle)*clockRadius + width/2; float y = sin(angle)*clockRadius + height/2; ellipse(x,y,tickSize,tickSize); }
Page 196 of 412 jimyoung.ca/learnToProgram © James Young, 2016
five. For example, 0, 5, 10, 15, 20, … We can use this to detect every fifth dot – when we take the number mod 5, and get 0, let’s draw a bigger dot. This is a simple if statement, and I created a new global to define the large tick size:
The last piece of the puzzle is how to get the second hand in there. For this, we need a new processing command:
To draw the second hand, we need to first calculate the angle to use. This is very similar to above. We simply take this number, find the corresponding angle, and draw a line to the x and y point. Try it on your own before reading the following code. This doesn’t belong inside the for loop, because we only draw one second hand.
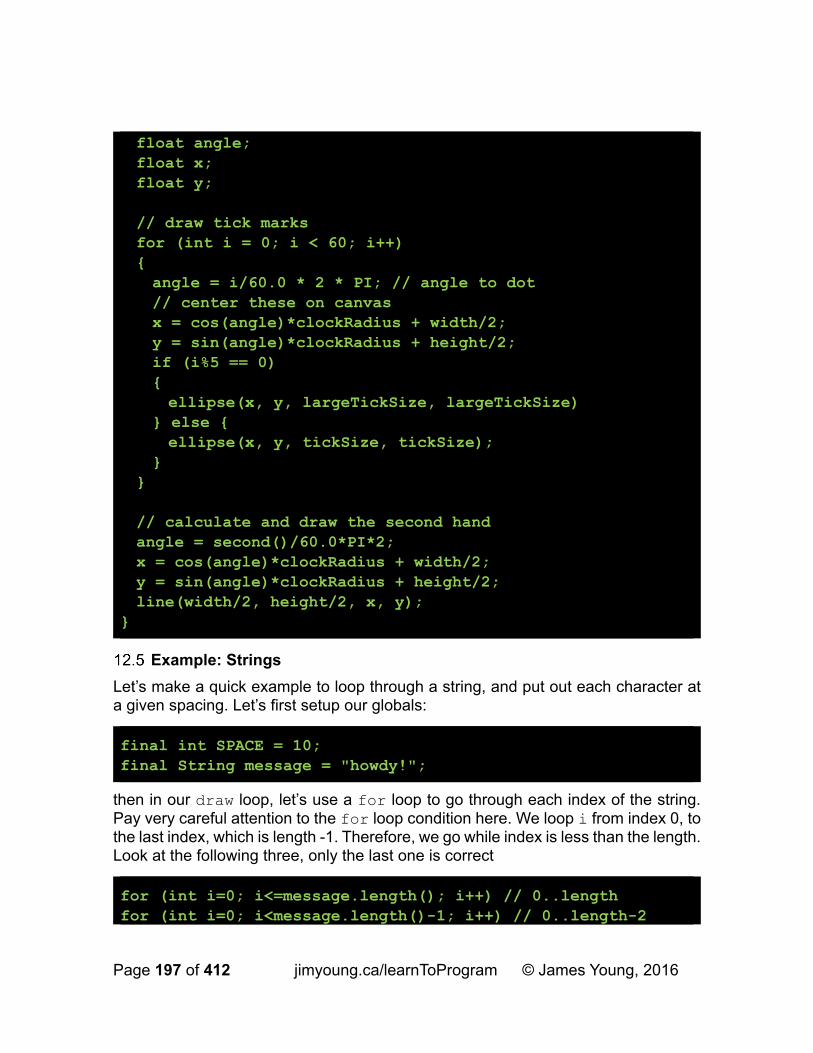
Here is my final code:
if (i%5 == 0) { ellipse(x,y,largeTickSize,largeTickSize); } else { ellipse(x,y,tickSize,tickSize); }
int second(); // returns the current seconds from the clock
angle = second() / 60.0 * PI * 2; // percent around circle x = cos(angle)*clockRadius + width/2; y = cos(angle)*clockRadius + width/2; line(width/2, height/2, x, y);
int clockRadius = 100; int tickSize = 1; int largeTickSize = 3; void setup() { size(500, 500); stroke(255); } void draw() { background(0);
Page 197 of 412 jimyoung.ca/learnToProgram © James Young, 2016
Example: Strings
Let’s make a quick example to loop through a string, and put out each character at a given spacing. Let’s first setup our globals:
then in our draw loop, let’s use a for loop to go through each index of the string. Pay very careful attention to the for loop condition here. We loop i from index 0, to the last index, which is length -1. Therefore, we go while index is less than the length. Look at the following three, only the last one is correct
float angle; float x; float y; // draw tick marks for (int i = 0; i < 60; i++) { angle = i/60.0 * 2 * PI; // angle to dot // center these on canvas x = cos(angle)*clockRadius + width/2; y = sin(angle)*clockRadius + height/2; if (i%5 == 0) { ellipse(x, y, largeTickSize, largeTickSize) } else { ellipse(x, y, tickSize, tickSize); } } // calculate and draw the second hand angle = second()/60.0*PI*2; x = cos(angle)*clockRadius + width/2; y = sin(angle)*clockRadius + height/2; line(width/2, height/2, x, y); }
final int SPACE = 10; final String message = "howdy!";
for (int i=0; i<=message.length(); i++) // 0..length for (int i=0; i<message.length()-1; i++) // 0..length-2
Page 198 of 412 jimyoung.ca/learnToProgram © James Young, 2016
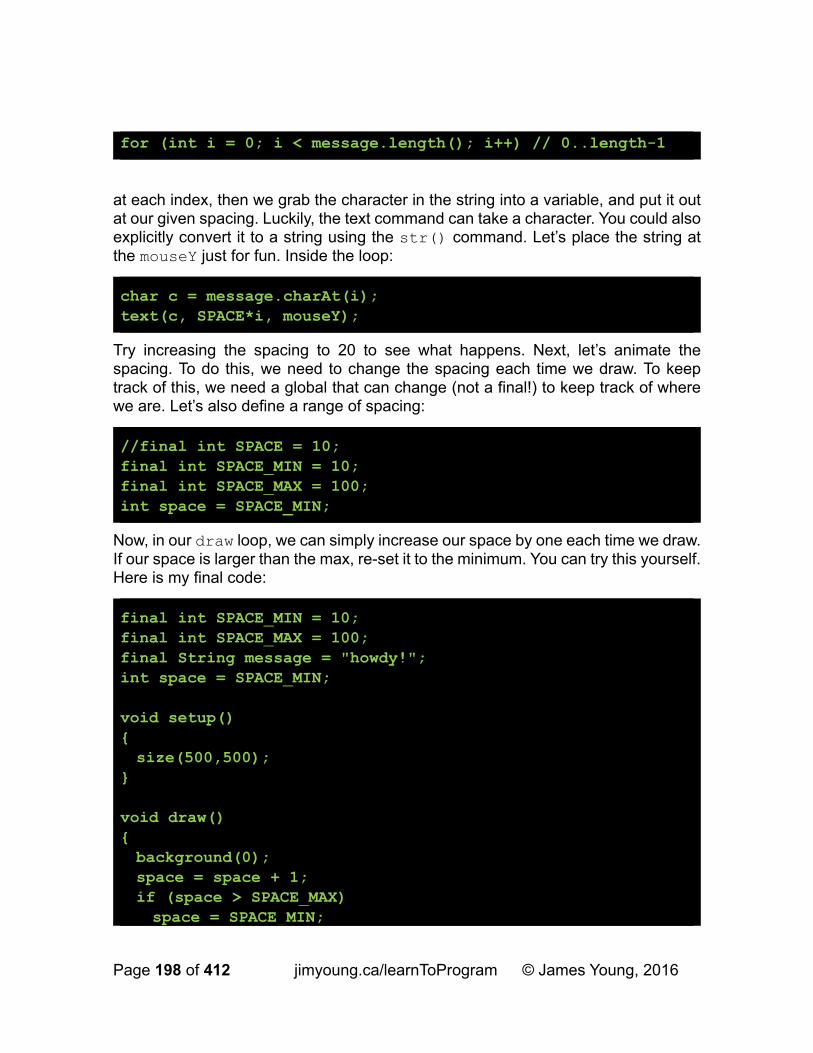
at each index, then we grab the character in the string into a variable, and put it out at our given spacing. Luckily, the text command can take a character. You could also explicitly convert it to a string using the str() command. Let’s place the string at the mouseY just for fun. Inside the loop:
Try increasing the spacing to 20 to see what happens. Next, let’s animate the spacing. To do this, we need to change the spacing each time we draw. To keep track of this, we need a global that can change (not a final!) to keep track of where we are. Let’s also define a range of spacing:
Now, in our draw loop, we can simply increase our space by one each time we draw. If our space is larger than the max, re-set it to the minimum. You can try this yourself. Here is my final code:
for (int i = 0; i < message.length(); i++) // 0..length-1
char c = message.charAt(i); text(c, SPACE*i, mouseY);
//final int SPACE = 10; final int SPACE_MIN = 10; final int SPACE_MAX = 100; int space = SPACE_MIN;
final int SPACE_MIN = 10; final int SPACE_MAX = 100; final String message = "howdy!"; int space = SPACE_MIN; void setup() { size(500,500); } void draw() { background(0); space = space + 1; if (space > SPACE_MAX) space = SPACE_MIN;
Page 199 of 412 jimyoung.ca/learnToProgram © James Young, 2016
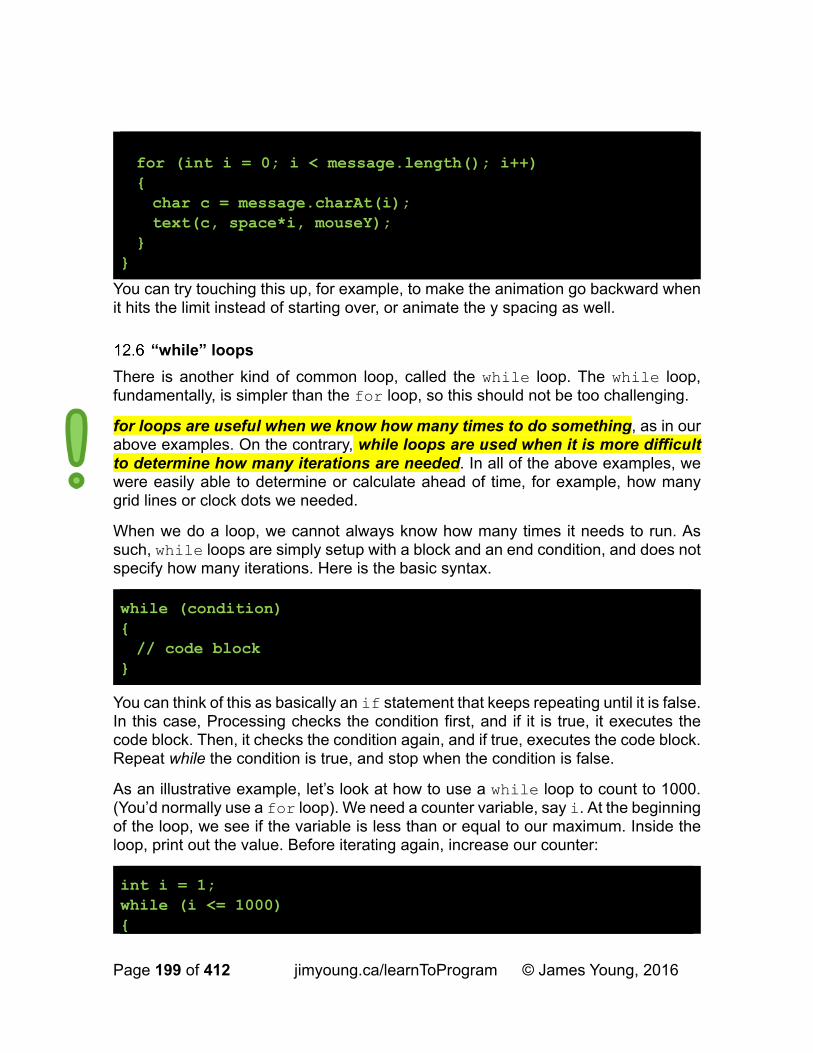
You can try touching this up, for example, to make the animation go backward when it hits the limit instead of starting over, or animate the y spacing as well.
“while” loops
There is another kind of common loop, called the while loop. The while loop, fundamentally, is simpler than the for loop, so this should not be too challenging.
for loops are useful when we know how many times to do something, as in our above examples. On the contrary, while loops are used when it is more difficult to determine how many iterations are needed. In all of the above examples, we were easily able to determine or calculate ahead of time, for example, how many grid lines or clock dots we needed.
When we do a loop, we cannot always know how many times it needs to run. As such, while loops are simply setup with a block and an end condition, and does not specify how many iterations. Here is the basic syntax.
You can think of this as basically an if statement that keeps repeating until it is false. In this case, Processing checks the condition first, and if it is true, it executes the code block. Then, it checks the condition again, and if true, executes the code block. Repeat while the condition is true, and stop when the condition is false.
As an illustrative example, let’s look at how to use a while loop to count to 1000. (You’d normally use a for loop). We need a counter variable, say i. At the beginning of the loop, we see if the variable is less than or equal to our maximum. Inside the loop, print out the value. Before iterating again, increase our counter:
for (int i = 0; i < message.length(); i++) { char c = message.charAt(i); text(c, space*i, mouseY); } }
while (condition) { // code block }
int i = 1; while (i <= 1000) {
Page 200 of 412 jimyoung.ca/learnToProgram © James Young, 2016
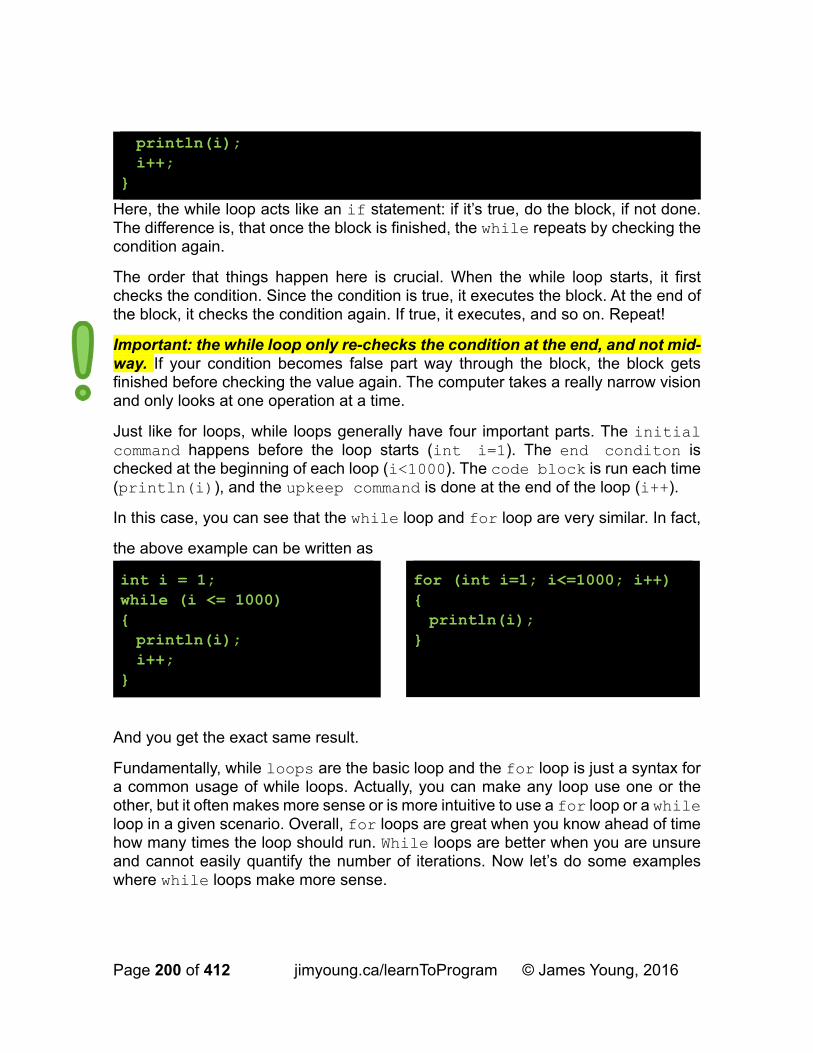
Here, the while loop acts like an if statement: if it’s true, do the block, if not done. The difference is, that once the block is finished, the while repeats by checking the condition again.
The order that things happen here is crucial. When the while loop starts, it first checks the condition. Since the condition is true, it executes the block. At the end of the block, it checks the condition again. If true, it executes, and so on. Repeat!
Important: the while loop only re-checks the condition at the end, and not mid-way. If your condition becomes false part way through the block, the block gets finished before checking the value again. The computer takes a really narrow vision and only looks at one operation at a time.
Just like for loops, while loops generally have four important parts. The initial command happens before the loop starts (int i=1). The end conditon is checked at the beginning of each loop (i<1000). The code block is run each time (println(i)), and the upkeep command is done at the end of the loop (i++).
In this case, you can see that the while loop and for loop are very similar. In fact,
the above example can be written as
And you get the exact same result.
Fundamentally, while loops are the basic loop and the for loop is just a syntax for a common usage of while loops. Actually, you can make any loop use one or the other, but it often makes more sense or is more intuitive to use a for loop or a while loop in a given scenario. Overall, for loops are great when you know ahead of time how many times the loop should run. While loops are better when you are unsure and cannot easily quantify the number of iterations. Now let’s do some examples where while loops make more sense.
println(i); i++; }
int i = 1; while (i <= 1000) { println(i); i++; }
for (int i=1; i<=1000; i++) { println(i); }
Page 201 of 412 jimyoung.ca/learnToProgram © James Young, 2016
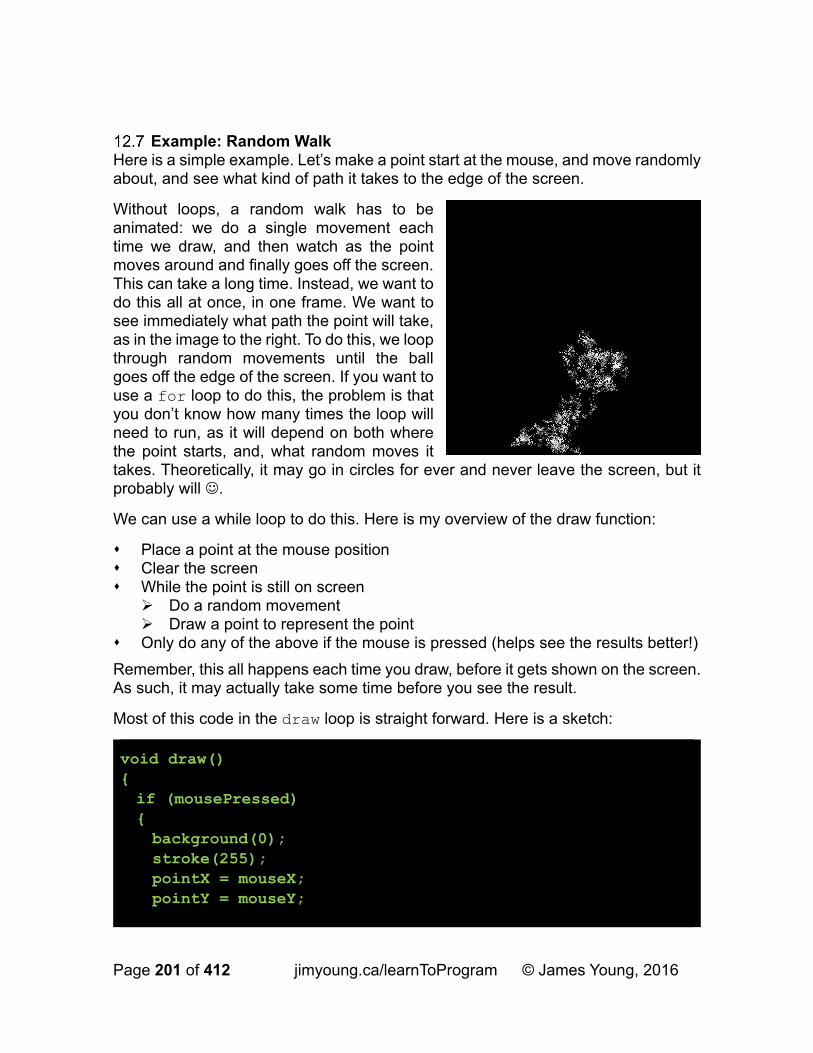
Example: Random Walk Here is a simple example. Let’s make a point start at the mouse, and move randomly about, and see what kind of path it takes to the edge of the screen.
Without loops, a random walk has to be animated: we do a single movement each time we draw, and then watch as the point moves around and finally goes off the screen. This can take a long time. Instead, we want to do this all at once, in one frame. We want to see immediately what path the point will take, as in the image to the right. To do this, we loop through random movements until the ball goes off the edge of the screen. If you want to use a for loop to do this, the problem is that you don’t know how many times the loop will need to run, as it will depend on both where the point starts, and, what random moves it takes. Theoretically, it may go in circles for ever and never leave the screen, but it probably will .
We can use a while loop to do this. Here is my overview of the draw function:
Place a point at the mouse position Clear the screen While the point is still on screen Do a random movement Draw a point to represent the point
Only do any of the above if the mouse is pressed (helps see the results better!)
Remember, this all happens each time you draw, before it gets shown on the screen. As such, it may actually take some time before you see the result.
Most of this code in the draw loop is straight forward. Here is a sketch:
void draw() { if (mousePressed) { background(0); stroke(255); pointX = mouseX; pointY = mouseY;
Page 202 of 412 jimyoung.ca/learnToProgram © James Young, 2016
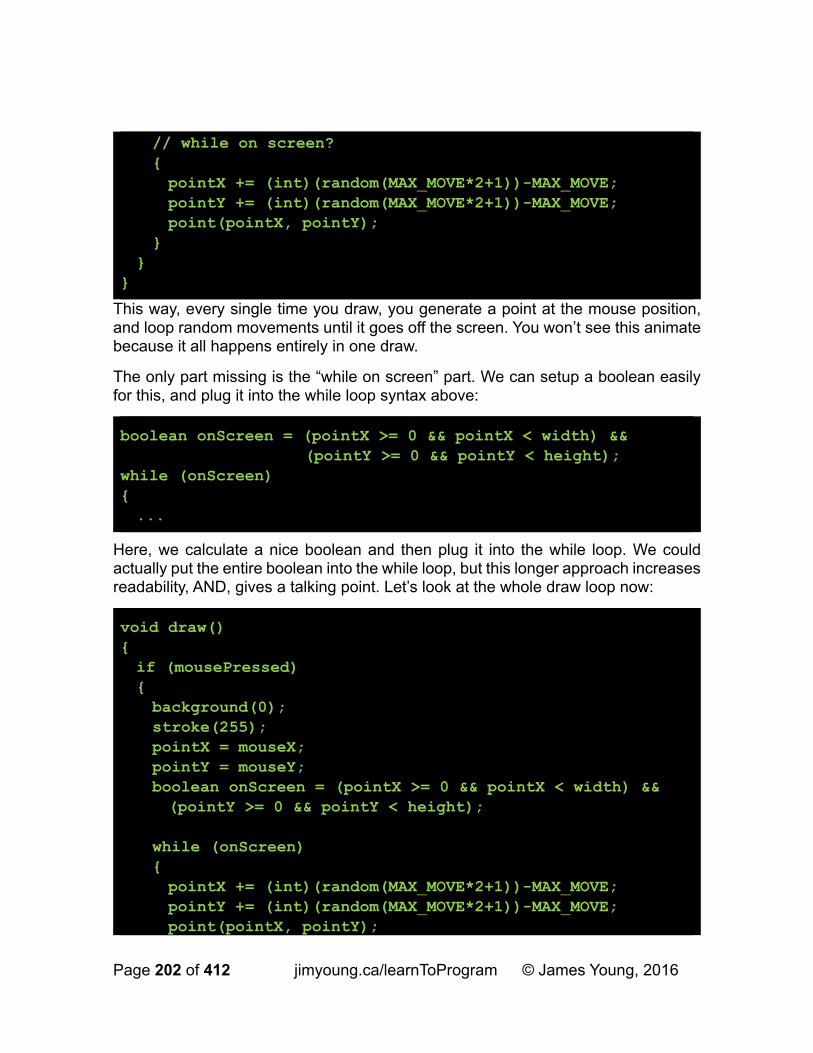
This way, every single time you draw, you generate a point at the mouse position, and loop random movements until it goes off the screen. You won’t see this animate because it all happens entirely in one draw.
The only part missing is the “while on screen” part. We can setup a boolean easily for this, and plug it into the while loop syntax above:
Here, we calculate a nice boolean and then plug it into the while loop. We could actually put the entire boolean into the while loop, but this longer approach increases readability, AND, gives a talking point. Let’s look at the whole draw loop now:
// while on screen? { pointX += (int)(random(MAX_MOVE*2+1))-MAX_MOVE; pointY += (int)(random(MAX_MOVE*2+1))-MAX_MOVE; point(pointX, pointY); } } }
boolean onScreen = (pointX >= 0 && pointX < width) && (pointY >= 0 && pointY < height); while (onScreen) { ...
void draw() { if (mousePressed) { background(0); stroke(255); pointX = mouseX; pointY = mouseY; boolean onScreen = (pointX >= 0 && pointX < width) && (pointY >= 0 && pointY < height); while (onScreen) { pointX += (int)(random(MAX_MOVE*2+1))-MAX_MOVE; pointY += (int)(random(MAX_MOVE*2+1))-MAX_MOVE; point(pointX, pointY);
Page 203 of 412 jimyoung.ca/learnToProgram © James Young, 2016
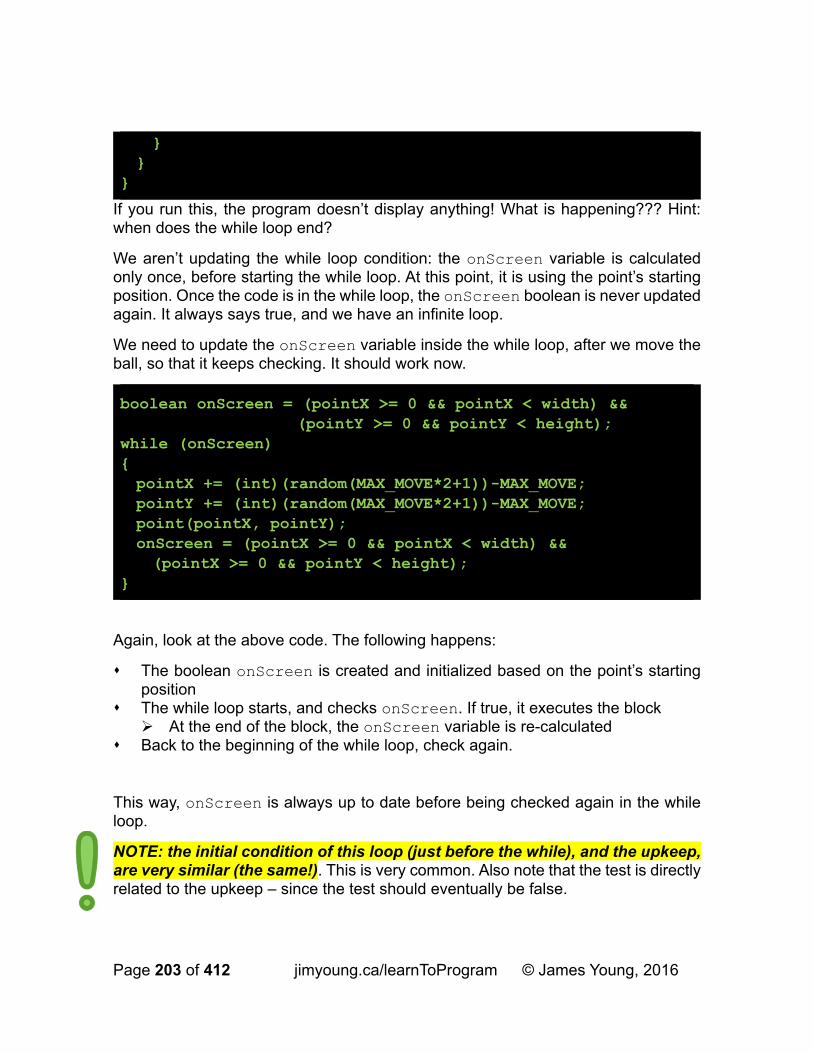
If you run this, the program doesn’t display anything! What is happening??? Hint: when does the while loop end?
We aren’t updating the while loop condition: the onScreen variable is calculated only once, before starting the while loop. At this point, it is using the point’s starting position. Once the code is in the while loop, the onScreen boolean is never updated again. It always says true, and we have an infinite loop.
We need to update the onScreen variable inside the while loop, after we move the ball, so that it keeps checking. It should work now.
Again, look at the above code. The following happens:
The boolean onScreen is created and initialized based on the point’s starting position
The while loop starts, and checks onScreen. If true, it executes the block At the end of the block, the onScreen variable is re-calculated
Back to the beginning of the while loop, check again.
This way, onScreen is always up to date before being checked again in the while loop.
NOTE: the initial condition of this loop (just before the while), and the upkeep, are very similar (the same!). This is very common. Also note that the test is directly related to the upkeep – since the test should eventually be false.
} } }
boolean onScreen = (pointX >= 0 && pointX < width) && (pointY >= 0 && pointY < height);
while (onScreen) { pointX += (int)(random(MAX_MOVE*2+1))-MAX_MOVE; pointY += (int)(random(MAX_MOVE*2+1))-MAX_MOVE; point(pointX, pointY); onScreen = (pointX >= 0 && pointX < width) && (pointX >= 0 && pointY < height); }
Page 204 of 412 jimyoung.ca/learnToProgram © James Young, 2016
Example: count digits in a number If you are drawing a number on screen, it can help to know how many digits there are. For example, a number with more digits either requires more space, or should use smaller letters, than a number with fewer digits. We will make a program where the font size shrinks as the number gets larger.
Given a number n, we will calculate how many digits are in n, and then set the text size to 1.5*width/digits. Then draw the number using the text command, at 0,height:
For this example, what we will do is initially set the number to 0. Then, we increase it by mouseX at the end of the draw loop. This way, the number keeps getting larger.
The hard part here is, given a number, how do we know how many digits are in it? One way to do this is to convert the number to a string, and then get the length of the string. However, we can do it purely numerically, but it requires a bit of trickery. Notice that for a number n, if we divide by 10 using integer division, we effectively remove the right-most digit:
If we keep doing this, what happens? Eventually, the number reaches zero. Each time we divide, one digit comes off. If we count how many times we had to do the division before hitting zero, this tell us how many digits the original number had.
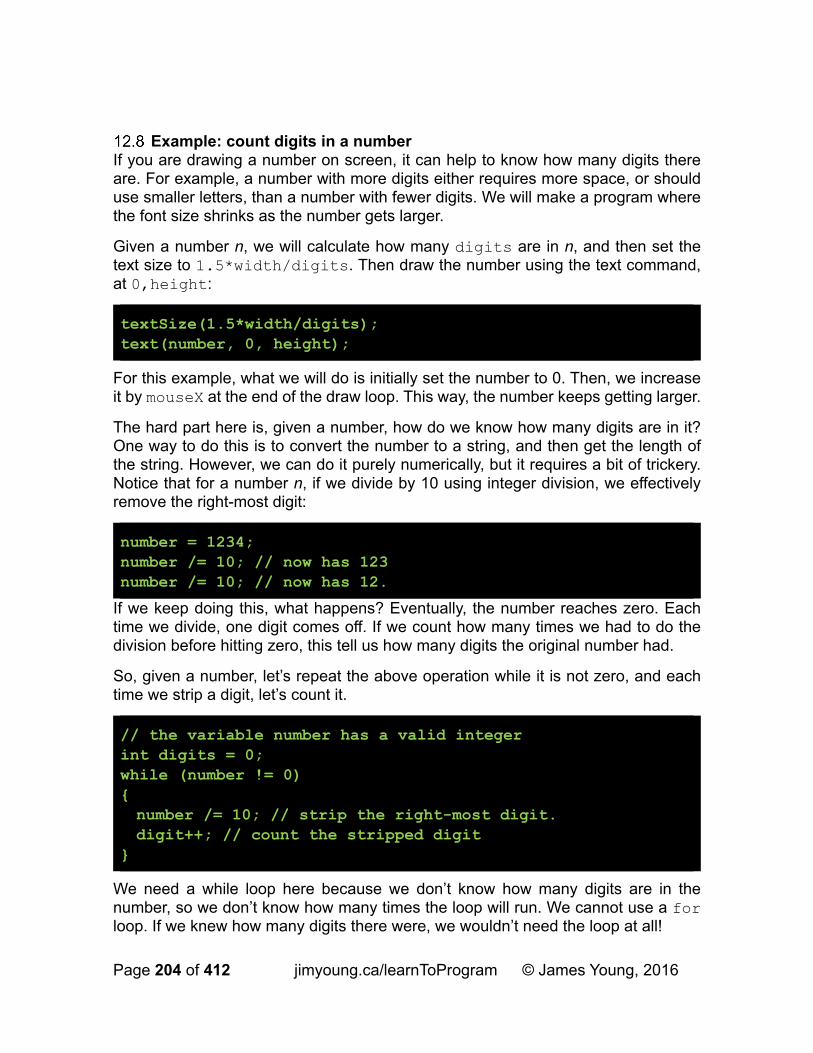
So, given a number, let’s repeat the above operation while it is not zero, and each time we strip a digit, let’s count it.
We need a while loop here because we don’t know how many digits are in the number, so we don’t know how many times the loop will run. We cannot use a for loop. If we knew how many digits there were, we wouldn’t need the loop at all!
textSize(1.5*width/digits); text(number, 0, height);
number = 1234; number /= 10; // now has 123 number /= 10; // now has 12.
// the variable number has a valid integer int digits = 0; while (number != 0) { number /= 10; // strip the right-most digit. digit++; // count the stripped digit }
Page 205 of 412 jimyoung.ca/learnToProgram © James Young, 2016
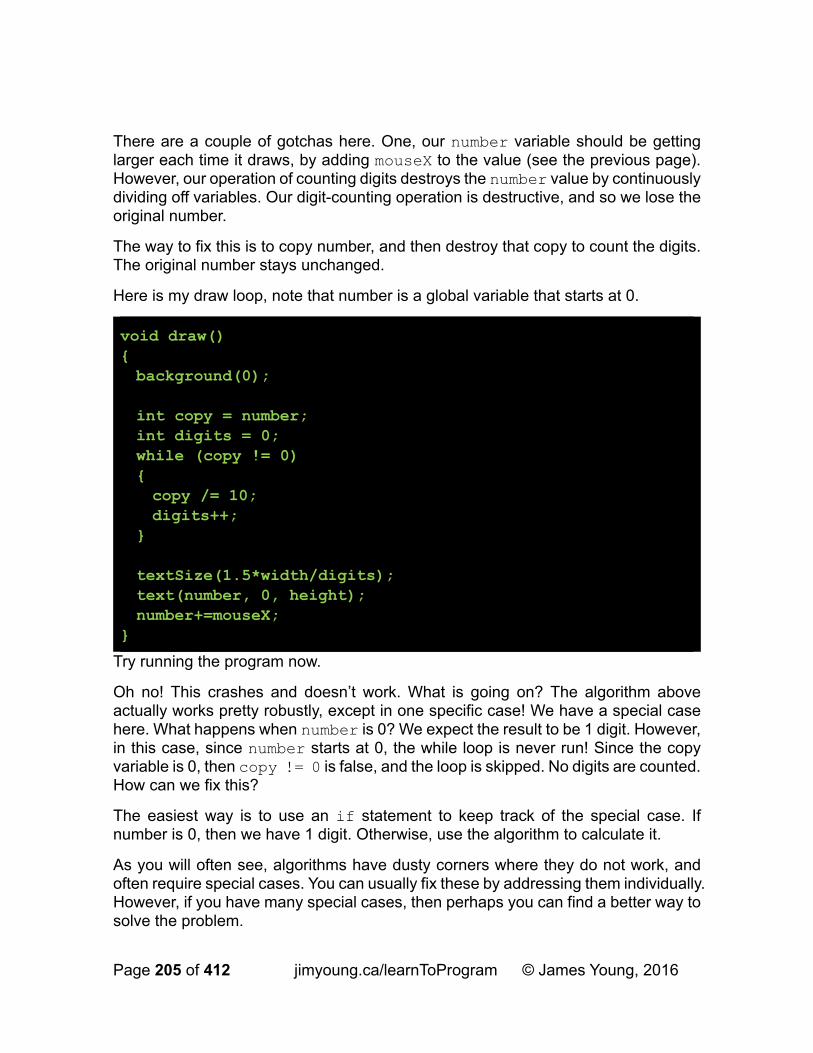
There are a couple of gotchas here. One, our number variable should be getting larger each time it draws, by adding mouseX to the value (see the previous page). However, our operation of counting digits destroys the number value by continuously dividing off variables. Our digit-counting operation is destructive, and so we lose the original number.
The way to fix this is to copy number, and then destroy that copy to count the digits. The original number stays unchanged.
Here is my draw loop, note that number is a global variable that starts at 0.
Try running the program now.
Oh no! This crashes and doesn’t work. What is going on? The algorithm above actually works pretty robustly, except in one specific case! We have a special case here. What happens when number is 0? We expect the result to be 1 digit. However, in this case, since number starts at 0, the while loop is never run! Since the copy variable is 0, then copy != 0 is false, and the loop is skipped. No digits are counted. How can we fix this?
The easiest way is to use an if statement to keep track of the special case. If number is 0, then we have 1 digit. Otherwise, use the algorithm to calculate it.
As you will often see, algorithms have dusty corners where they do not work, and often require special cases. You can usually fix these by addressing them individually. However, if you have many special cases, then perhaps you can find a better way to solve the problem.
void draw() { background(0); int copy = number; int digits = 0; while (copy != 0) { copy /= 10; digits++; } textSize(1.5*width/digits); text(number, 0, height); number+=mouseX; }
Page 206 of 412 jimyoung.ca/learnToProgram © James Young, 2016
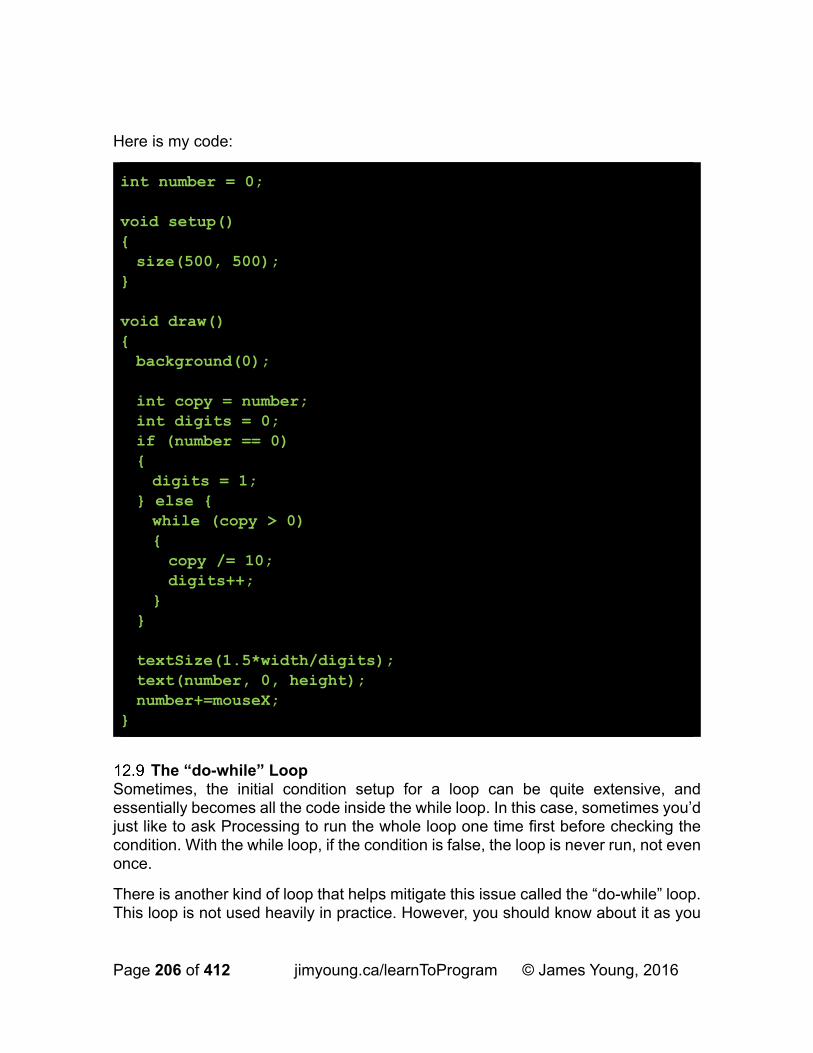
Here is my code:
The “do-while” Loop Sometimes, the initial condition setup for a loop can be quite extensive, and essentially becomes all the code inside the while loop. In this case, sometimes you’d just like to ask Processing to run the whole loop one time first before checking the condition. With the while loop, if the condition is false, the loop is never run, not even once.
There is another kind of loop that helps mitigate this issue called the “do-while” loop. This loop is not used heavily in practice. However, you should know about it as you
int number = 0; void setup() { size(500, 500); } void draw() { background(0); int copy = number; int digits = 0; if (number == 0) { digits = 1; } else { while (copy > 0) { copy /= 10; digits++; } } textSize(1.5*width/digits); text(number, 0, height); number+=mouseX; }

Page 207 of 412 jimyoung.ca/learnToProgram © James Young, 2016
may come across it in other people’s code.
This loop always runs at least once. In a while loop, if the condition is false, it is never run. Since the loop is run at least once you can put the priming and upkeep as one block just before the test.
Do while loops have some issues. What if the loop never should be run, not even once, e.g., if the condition is false from the get go? Too bad, it runs at least once. Also, since they are used less often, people can find them confusing, which can lead to bugs.
Loops and Scope Consider the following code:
What will the output be? Well, i starts at 0, and gets larger, and the loop runs while i<999. So, if i=998, then it’s still true... if i=999, it becomes false, and the loop stops. So, the output should be 999, right?
Kind of. That would be the output if this code actually ran. Remember scoping rules? A variable that is created inside a block only exists inside of that block. When you declare a variable inside the for-loop initializer, as in this case, it becomes part of the for loop’s local scope. That is, once the for loop has ended, the variable is destroyed and cannot be accessed anymore.
The same goes for the while loop. While you do not create a variable inside the while loop condition, any variables you make inside the block get destroyed at the end of that block.
What about the following example? We know that we cannot have more than one variable with a given name…
do { // statement; // priming / upkeep } while (condition);
for (int i = 0; i < 999; i++) { do some stuff; } println(i);
Page 208 of 412 jimyoung.ca/learnToProgram © James Young, 2016
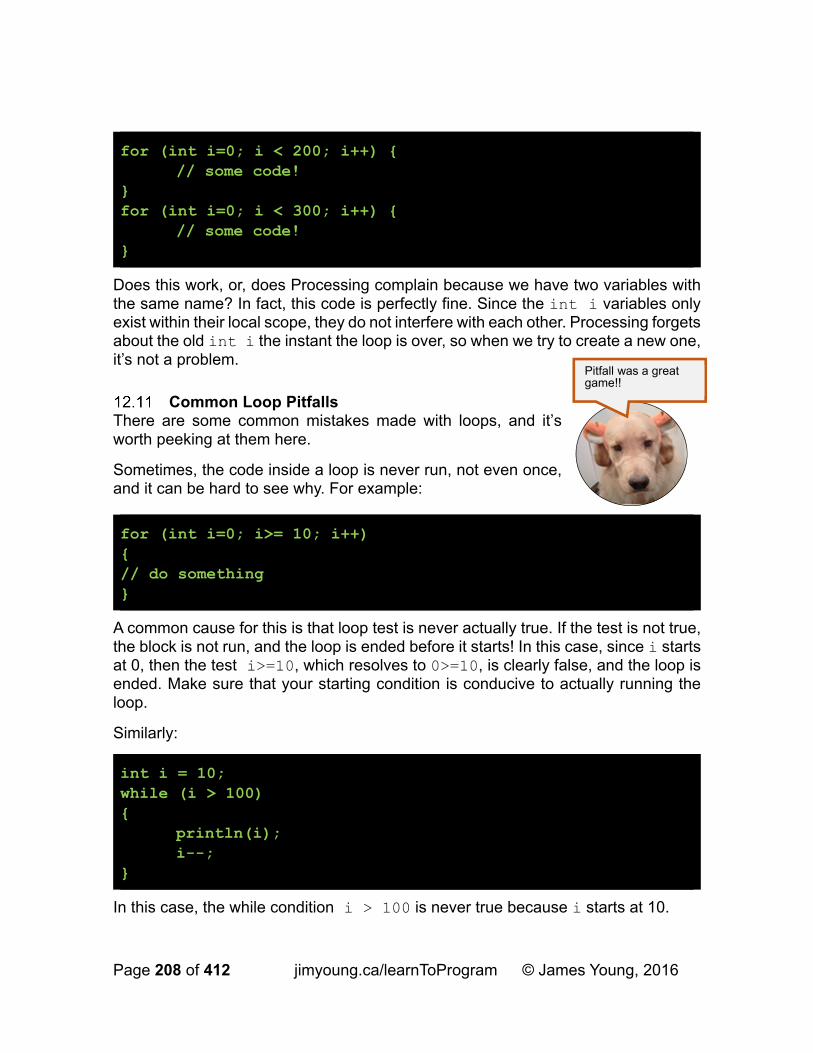
Does this work, or, does Processing complain because we have two variables with the same name? In fact, this code is perfectly fine. Since the int i variables only exist within their local scope, they do not interfere with each other. Processing forgets about the old int i the instant the loop is over, so when we try to create a new one, it’s not a problem.
Common Loop Pitfalls There are some common mistakes made with loops, and it’s worth peeking at them here.
Sometimes, the code inside a loop is never run, not even once, and it can be hard to see why. For example:
A common cause for this is that loop test is never actually true. If the test is not true, the block is not run, and the loop is ended before it starts! In this case, since i starts at 0, then the test i>=10, which resolves to 0>=10, is clearly false, and the loop is ended. Make sure that your starting condition is conducive to actually running the loop.
Similarly:
In this case, the while condition i > 100 is never true because i starts at 10.
for (int i=0; i < 200; i++) { // some code! } for (int i=0; i < 300; i++) { // some code! }
for (int i=0; i>= 10; i++) { // do something }
int i = 10; while (i > 100) { println(i); i--; }
Pitfall was a great game!!
Page 209 of 412 jimyoung.ca/learnToProgram © James Young, 2016
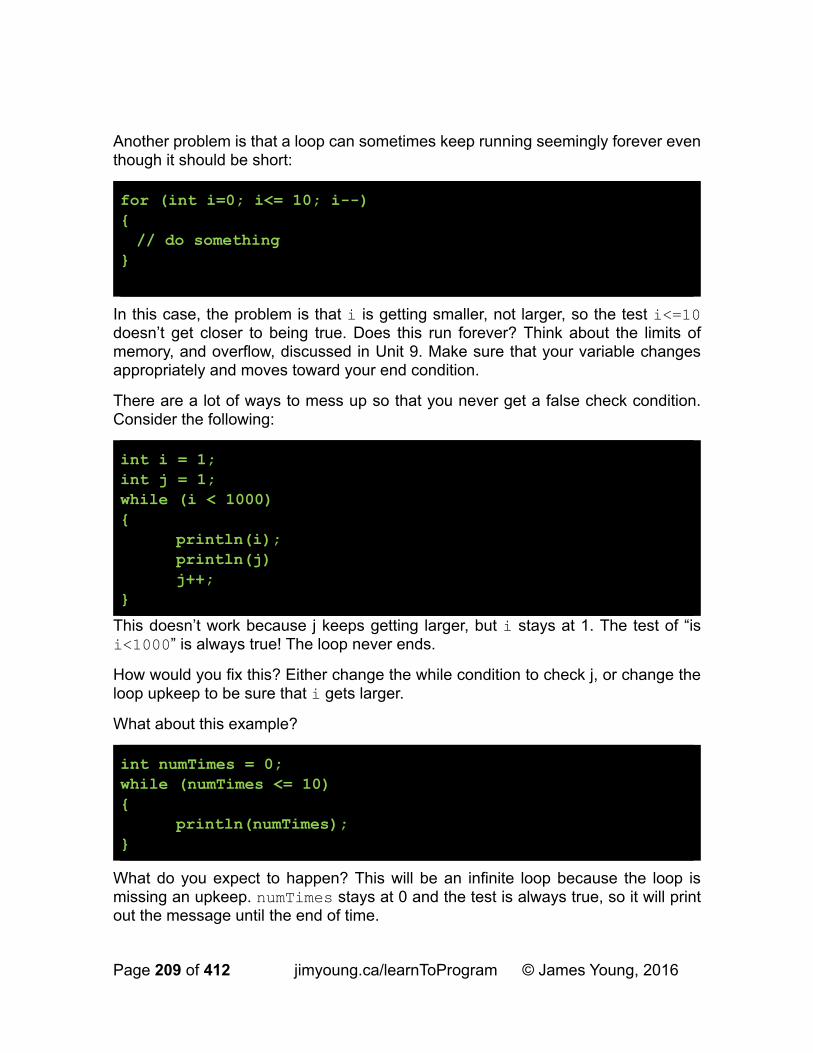
Another problem is that a loop can sometimes keep running seemingly forever even though it should be short:
In this case, the problem is that i is getting smaller, not larger, so the test i<=10 doesn’t get closer to being true. Does this run forever? Think about the limits of memory, and overflow, discussed in Unit 9. Make sure that your variable changes appropriately and moves toward your end condition.
There are a lot of ways to mess up so that you never get a false check condition. Consider the following:
This doesn’t work because j keeps getting larger, but i stays at 1. The test of “is i<1000” is always true! The loop never ends.
How would you fix this? Either change the while condition to check j, or change the loop upkeep to be sure that i gets larger.
What about this example?
What do you expect to happen? This will be an infinite loop because the loop is missing an upkeep. numTimes stays at 0 and the test is always true, so it will print out the message until the end of time.
for (int i=0; i<= 10; i--) { // do something
}
int i = 1; int j = 1; while (i < 1000) { println(i); println(j) j++; }
int numTimes = 0; while (numTimes <= 10) { println(numTimes); }
Page 210 of 412 jimyoung.ca/learnToProgram © James Young, 2016
Sometimes, your loop simply won’t compile:
The onScreen variable is created at the loop priming spot, and then it is checked right away. Is the value true or false? Does the loop start or not? We have no idea. No data has been placed into the variable, so the while loop cannot even check it. This doesn’t work. Similarly:
While everything here looks reasonable, the variable i was never declared, and as such Processing doesn’t know what to do with it. Don’t forget to declare your variables!
Important: There is one more pitfall with loops. Be careful when using floating point variables. In fact, I will go as far as saying that you should never use a floating point as a counter in a loop, particularly for loops.
Consider the following example:
What do you expect to happen? If you did this on paper, you would get 11 lines output: 0, 0.1, 0.2, 0.3, 0.4, 0.5, 0.6, 0.7, 0.8, 0.9, 1.0. However, since floating point numbers cannot be trusted to be accurate, we get rounding error. This loop only outputs 10 lines, not 11, and 1.0 is never output. Try it. Never use floating point variables in a for loop.
How would you fix this? Use an integer to iterate, and then a simple calculation to get what you want. This way, any error does not accumulate, and you get an exact count of iterations.
boolean onScreen; while (onScreen) { … onScreen = (ballX >= 0 && ballX < width) && (ballY >= 0 && ballY < height); }
for (i=0; i<= 10; i++) { // do something }
for (float f = 0; f<=1; f+=0.1) { println(f); }
Page 211 of 412 jimyoung.ca/learnToProgram © James Young, 2016
Try it out. As you can see, you still get precision error. However, it does not accumulate. Further, you get exactly 11 lines of output as you expected.
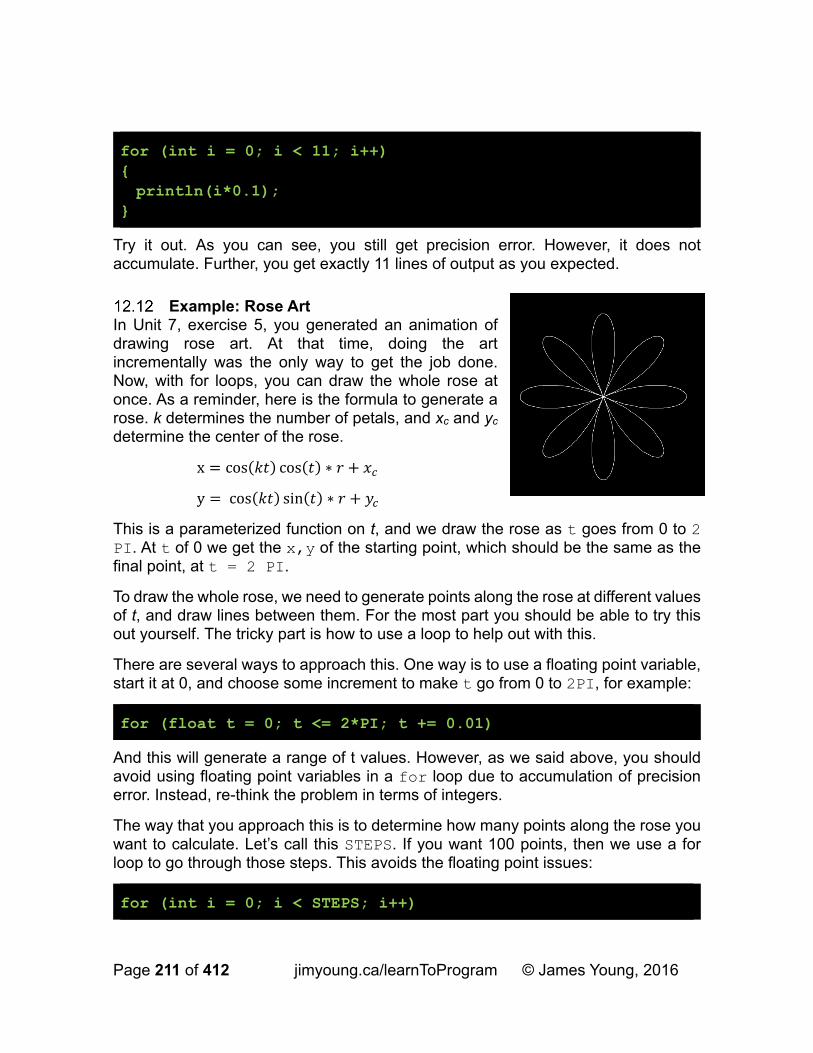
Example: Rose Art In Unit 7, exercise 5, you generated an animation of drawing rose art. At that time, doing the art incrementally was the only way to get the job done. Now, with for loops, you can draw the whole rose at once. As a reminder, here is the formula to generate a rose. k determines the number of petals, and xc and yc determine the center of the rose.
x cos cos ∗
y cos sin ∗
This is a parameterized function on t, and we draw the rose as t goes from 0 to 2 PI. At t of 0 we get the x,y of the starting point, which should be the same as the final point, at t = 2 PI.
To draw the whole rose, we need to generate points along the rose at different values of t, and draw lines between them. For the most part you should be able to try this out yourself. The tricky part is how to use a loop to help out with this.
There are several ways to approach this. One way is to use a floating point variable, start it at 0, and choose some increment to make t go from 0 to 2PI, for example:
And this will generate a range of t values. However, as we said above, you should avoid using floating point variables in a for loop due to accumulation of precision error. Instead, re-think the problem in terms of integers.
The way that you approach this is to determine how many points along the rose you want to calculate. Let’s call this STEPS. If you want 100 points, then we use a for loop to go through those steps. This avoids the floating point issues:
for (int i = 0; i < 11; i++) { println(i*0.1); }
for (float t = 0; t <= 2*PI; t += 0.01)
for (int i = 0; i < STEPS; i++)

Page 212 of 412 jimyoung.ca/learnToProgram © James Young, 2016
Then, you use the value of i to calculate a t somewhere along the range of 0…2PI. This is called linear scaling, and the simplest way to do it is to a) convert i into a percentage along your range, and the b) take that percentage of your target range.
Why do we add -1 to STEPS? Think that one through. If you use it or not, changes the distribution, and the final value of t in the last loop.
You can finish this example on your own.
Check Your Understanding: Exercises
Make for loops to output the following series of numbers to the console, using println. All ranges are inclusive of the start and end number Make sure to run them to test them, as you will often have off-by-one errors. The only command inside the for loop should be the println, with everything else happening in either the initial condition, upkeep, or test. Hint: these often show up on tests.
a. 1..20 b. 25..30 c. 10..0 d. 1..100, even numbers only e. -50..50
Make a program, like in the inset, which draws lines from the top and bottom edges of the screen, to the mouse. Space them 50 pixels apart. Make sure to use a for loop to save work, don’t draw each line command individually.
Update the clock example from 12.4.
a. add minute and hour hands. You will have some confusion to make sure that, e.g., 12:00 is straight up. Remember that 0 degrees is right along the positive x axis
for (int i = 0; i < STEPS; i++) { float percent = i / (STEPS-1); float t = percent * 2*PI; }
Check your Understanding
CuSn
CuSn
CuSn
Page 213 of 412 jimyoung.ca/learnToProgram © James Young, 2016
b. make the second hand move smoothly between the tick marks using the millis() command, which gives the number of milliseconds from the clock. Warning: this is the number if milliseconds since the program started, not within the current minute or second, so you have some tricky math to solve.
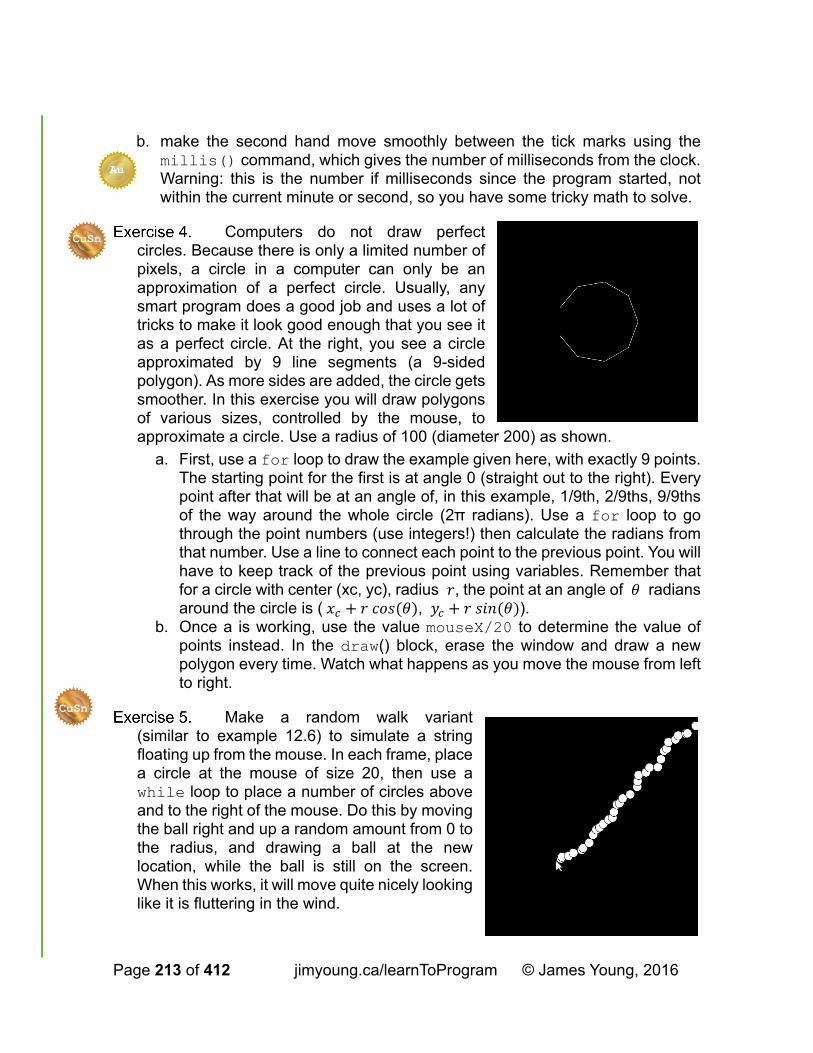
Computers do not draw perfect circles. Because there is only a limited number of pixels, a circle in a computer can only be an approximation of a perfect circle. Usually, any smart program does a good job and uses a lot of tricks to make it look good enough that you see it as a perfect circle. At the right, you see a circle approximated by 9 line segments (a 9-sided polygon). As more sides are added, the circle gets smoother. In this exercise you will draw polygons of various sizes, controlled by the mouse, to approximate a circle. Use a radius of 100 (diameter 200) as shown.
a. First, use a for loop to draw the example given here, with exactly 9 points. The starting point for the first is at angle 0 (straight out to the right). Every point after that will be at an angle of, in this example, 1/9th, 2/9ths, 9/9ths of the way around the whole circle (2π radians). Use a for loop to go through the point numbers (use integers!) then calculate the radians from that number. Use a line to connect each point to the previous point. You will have to keep track of the previous point using variables. Remember that for a circle with center (xc, yc), radius , the point at an angle of radians around the circle is ( , ).
b. Once a is working, use the value mouseX/20 to determine the value of points instead. In the draw() block, erase the window and draw a new polygon every time. Watch what happens as you move the mouse from left to right.
Make a random walk variant (similar to example 12.6) to simulate a string floating up from the mouse. In each frame, place a circle at the mouse of size 20, then use a while loop to place a number of circles above and to the right of the mouse. Do this by moving the ball right and up a random amount from 0 to the radius, and drawing a ball at the new location, while the ball is still on the screen. When this works, it will move quite nicely looking like it is fluttering in the wind.
CuSn
CuSn
Au
Page 214 of 412 jimyoung.ca/learnToProgram © James Young, 2016
Update exercise 7 from unit 8 (the random dot example), and use a for loop to generate 20 random dots.
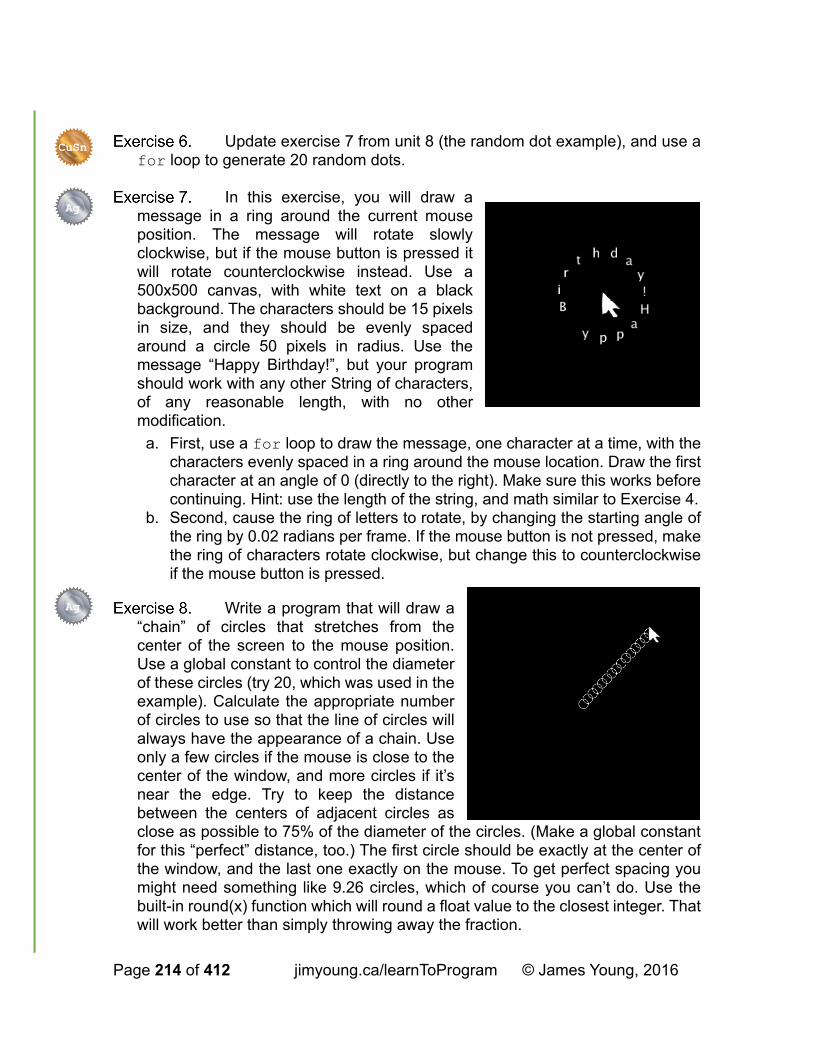
In this exercise, you will draw a message in a ring around the current mouse position. The message will rotate slowly clockwise, but if the mouse button is pressed it will rotate counterclockwise instead. Use a 500x500 canvas, with white text on a black background. The characters should be 15 pixels in size, and they should be evenly spaced around a circle 50 pixels in radius. Use the message “Happy Birthday!”, but your program should work with any other String of characters, of any reasonable length, with no other modification.
a. First, use a for loop to draw the message, one character at a time, with the characters evenly spaced in a ring around the mouse location. Draw the first character at an angle of 0 (directly to the right). Make sure this works before continuing. Hint: use the length of the string, and math similar to Exercise 4.
b. Second, cause the ring of letters to rotate, by changing the starting angle of the ring by 0.02 radians per frame. If the mouse button is not pressed, make the ring of characters rotate clockwise, but change this to counterclockwise if the mouse button is pressed.
Write a program that will draw a “chain” of circles that stretches from the center of the screen to the mouse position. Use a global constant to control the diameter of these circles (try 20, which was used in the example). Calculate the appropriate number of circles to use so that the line of circles will always have the appearance of a chain. Use only a few circles if the mouse is close to the center of the window, and more circles if it’s near the edge. Try to keep the distance between the centers of adjacent circles as close as possible to 75% of the diameter of the circles. (Make a global constant for this “perfect” distance, too.) The first circle should be exactly at the center of the window, and the last one exactly on the mouse. To get perfect spacing you might need something like 9.26 circles, which of course you can’t do. Use the built-in round(x) function which will round a float value to the closest integer. That will work better than simply throwing away the fraction.
CuSn
Ag
Ag

Page 215 of 412 jimyoung.ca/learnToProgram © James Young, 2016
a. Use a for loop to draw the appropriate number of equally-spaced circles from the window’s center to the mouse position. Do this in the draw() block and erase the window every time.
b. Instead of using a fill color, you can tell Processing to not fill the circle at all (make the circle see through) using the command noFill(); . Now it really looks like a chain.
You don’t need to use any trigonometry in this question (although you do need to find the distance from the center of the window to the mouse). The x values for the centers of the circles will be equally spaced, and so will the y values. Find the correct spacing to use in each direction with simple arithmetic, and you won’t need anything else. Watch out for off-by-one errors!
A lot of fancy cursors are used these days, with cool animations, to keep you from getting impatient while you wait for your computer to do something. (I’m not sure it really works.) Here’s one for you to try to implement.
a. Make a ball that circles the mouse. We have seen this before. You do not need a for loop for this.
b. Use a for loop to draw n balls behind (in a circle shape) that ball. Just calculate the changing angle at some delta and draw the new ball at that location
c. Change the ball size as you go along the for loop to make it shrink
d. Change the ball color as you go along the for loop to make it fade out
Here is another mouse cursor to implement. A static picture is shown on the right. There are N small circles (dots) in a ring around the mouse cursor. All of them are moving slowly clockwise. N-1 of them are in a tight group, touching each other, and moving at the same speed. One of them (the white one) is not with the others, and is moving twice as fast. When this “rogue” dot catches up to the group of dots, then it should join onto the trailing end of the group. The leading dot should now break away and become the “rogue” dot, moving twice as fast. This will repeat forever. The effect is like “Newton’s cradle” (look it up in Wikipedia), except in a circle. This might keep you entertained while you wait for that huge file to download.
Ag
Au

Page 216 of 412 jimyoung.ca/learnToProgram © James Young, 2016
a. Use constants to define the number of dots (2 or more), the diameter of the dots, the radius of their orbit around the mouse, their speed (change in angle per frame), and the angle between the dots in the connected group. You can experiment to get good values. The posted example uses 5, 8, 32, PI/60, and PI/12, respectively.
b. You might want to use a multiplier other than 2 for the rogue dot’s speed, relative to the others, but this is not required.
c. First try to get N-1 dots moving correctly around the mouse, without the “rogue” one. Your program should handle any value of N (≥2) without changing any other code at all. This is important.
d. Then add one “rogue” dot moving twice as fast (but just passing right through the others).
e. Then try to detect when the “rogue” dot hits the others, and implement the required effect. That’s the tricky bit, but it shouldn’t take much code. Good luck!
Drawing nice rounded curves on computer screens is actually quite challenging, and there are a lot of problems and a lot of ways to do it. You will implement a parametric quadratic curve – a curve that uses a quadratic function to try and fit three different points on the screen to a curve. This is quite a challenging exercise.
The way that parametric curves work is to define a variable, called t, that specifies how far along the curve you are (e.g., as a percentage), and then to use some formula to calculate an x and y for that t. As you move along the curve (as the t goes from 0...1), you get x,y points. If you draw lines between these points, you get an approximated curve.
How smooth the curve is depends on how many points you draw. This, in turn, depends on how small your steps of t are. For example, you could imagine large steps of t only giving you four points: t=0, t=.25, t=.75, t=1. This is not a smooth curve.
First, we need to define what are called control points of the curve. These are the three dots in the image shown, and they define points along the curve. We will call these pt0 (start point), pt1 (some mid-point), and pt2 (end point). In your program, you will have two variables for each point: one for the x component, and one for y. In my example, pt0 is (0,height/2), pt1 is (mouseX,mouseY), and pt2 is (width-1,height/2). Make sure to update pt1 each draw as the mouse moves!
Once you have your control points, we need to first solve for a quadratic function (a
Au
Page 217 of 412 jimyoung.ca/learnToProgram © James Young, 2016
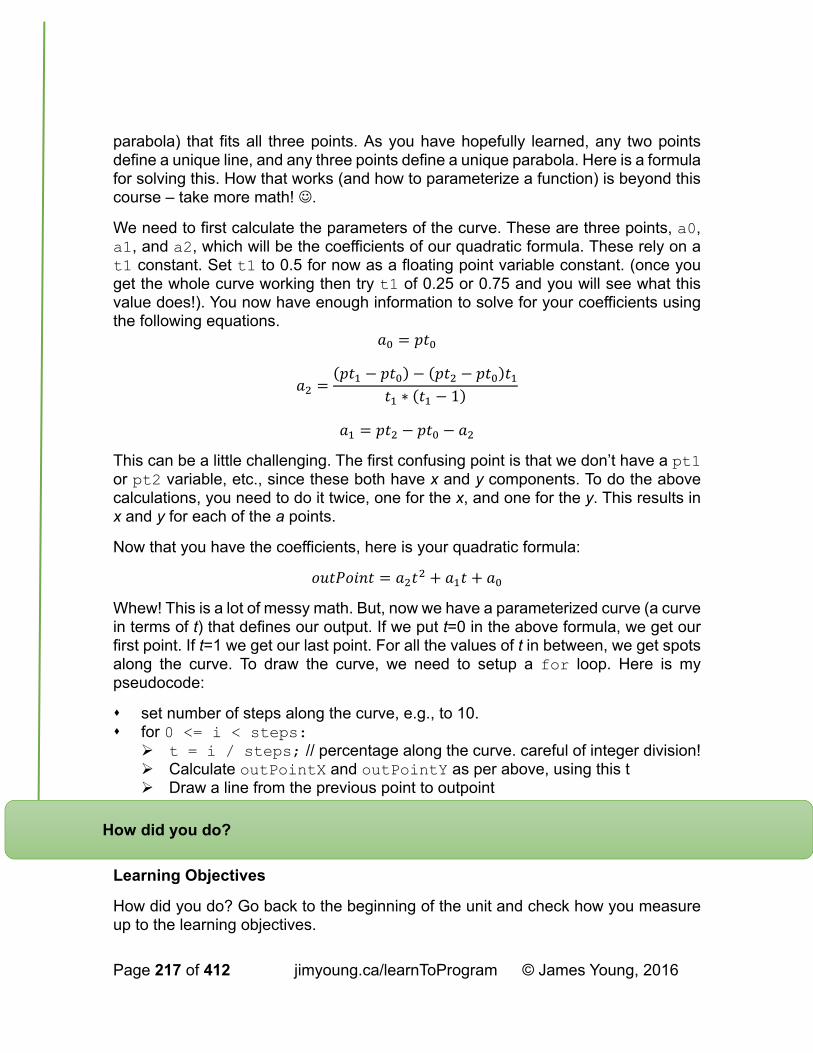
parabola) that fits all three points. As you have hopefully learned, any two points define a unique line, and any three points define a unique parabola. Here is a formula for solving this. How that works (and how to parameterize a function) is beyond this course – take more math! .
We need to first calculate the parameters of the curve. These are three points, a0, a1, and a2, which will be the coefficients of our quadratic formula. These rely on a t1 constant. Set t1 to 0.5 for now as a floating point variable constant. (once you get the whole curve working then try t1 of 0.25 or 0.75 and you will see what this value does!). You now have enough information to solve for your coefficients using the following equations.
∗ 1
This can be a little challenging. The first confusing point is that we don’t have a pt1 or pt2 variable, etc., since these both have x and y components. To do the above calculations, you need to do it twice, one for the x, and one for the y. This results in x and y for each of the a points.
Now that you have the coefficients, here is your quadratic formula:
Whew! This is a lot of messy math. But, now we have a parameterized curve (a curve in terms of t) that defines our output. If we put t=0 in the above formula, we get our first point. If t=1 we get our last point. For all the values of t in between, we get spots along the curve. To draw the curve, we need to setup a for loop. Here is my pseudocode:
set number of steps along the curve, e.g., to 10. for 0 <= i < steps: t = i / steps; // percentage along the curve. careful of integer division! Calculate outPointX and outPointY as per above, using this t Draw a line from the previous point to outpoint
Learning Objectives
How did you do? Go back to the beginning of the unit and check how you measure up to the learning objectives.
How did you do?

Page 218 of 412 jimyoung.ca/learnToProgram © James Young, 2016
(page intentionally left blank)