ktm 990s high fender conversion - gordo.eclipse.co.uk 99… · ktm 990s high fender conversion the...
TRANSCRIPT
KTM 990S High Fender Conversion
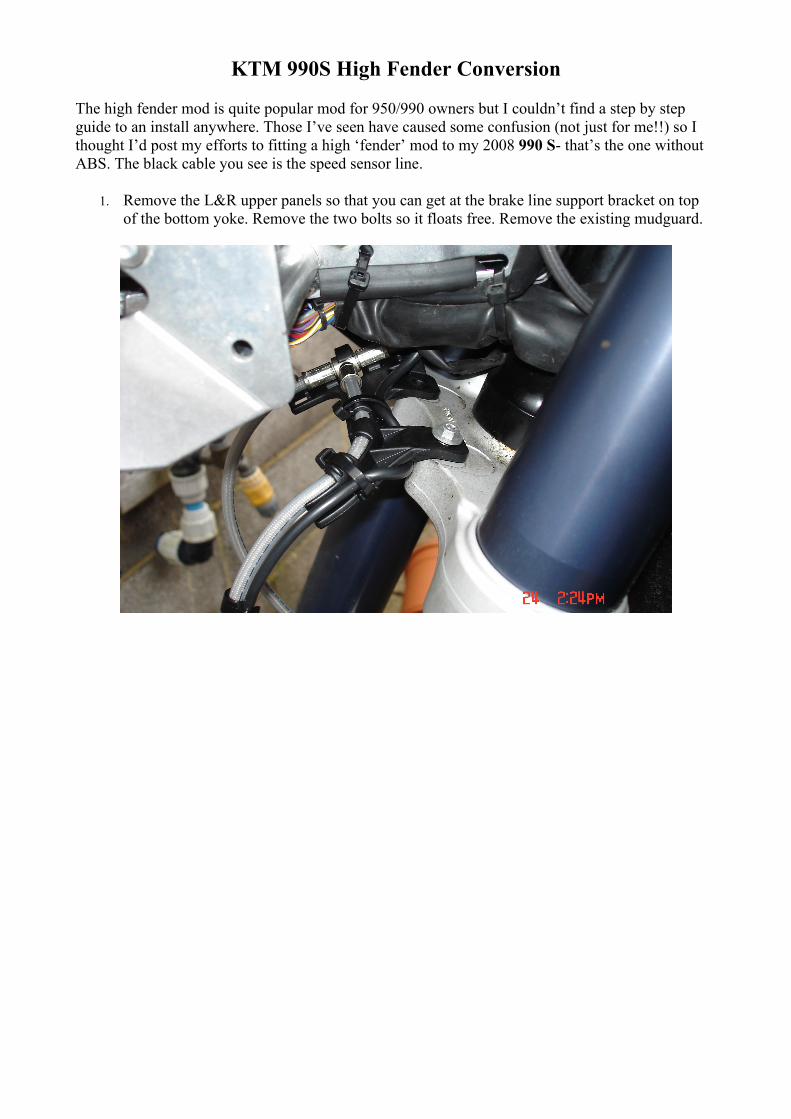
The high fender mod is quite popular mod for 950/990 owners but I couldn’t find a step by step guide to an install anywhere. Those I’ve seen have caused some confusion (not just for me!!) so I thought I’d post my efforts to fitting a high ‘fender’ mod to my 2008 990 S- that’s the one without ABS. The black cable you see is the speed sensor line.
1. Remove the L&R upper panels so that you can get at the brake line support bracket on top of the bottom yoke. Remove the two bolts so it floats free. Remove the existing mudguard.
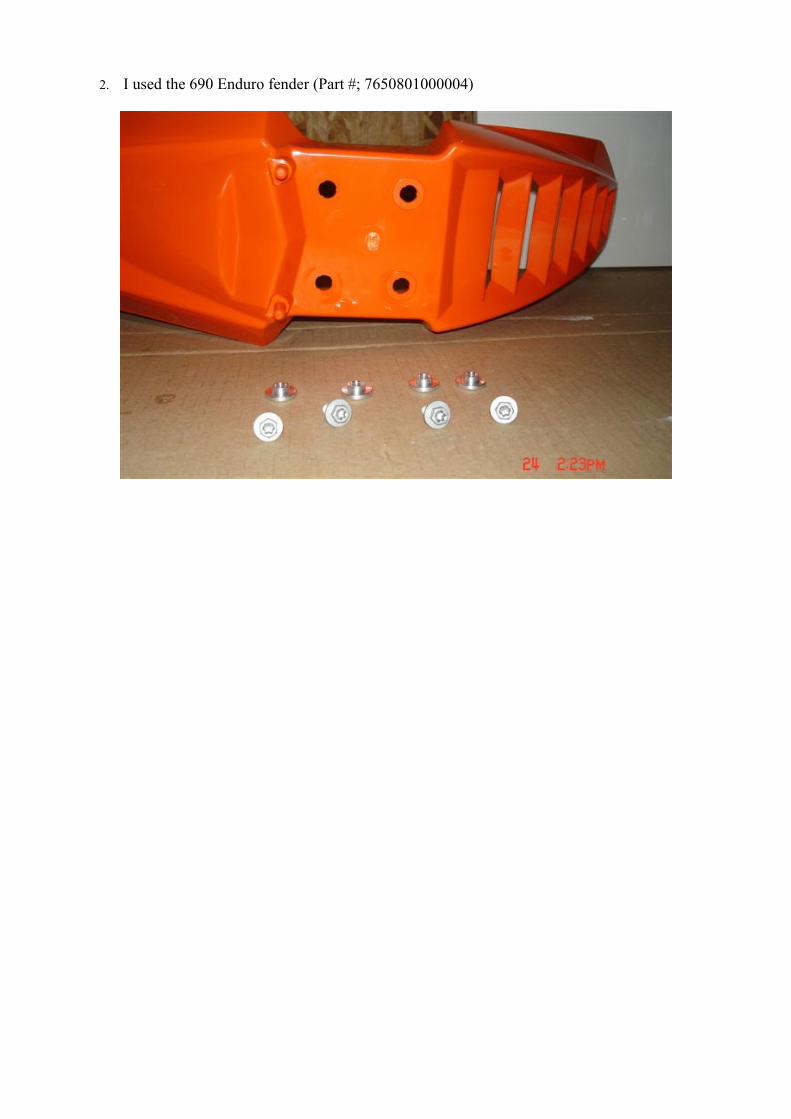
2. I used the 690 Enduro fender (Part #; 7650801000004)
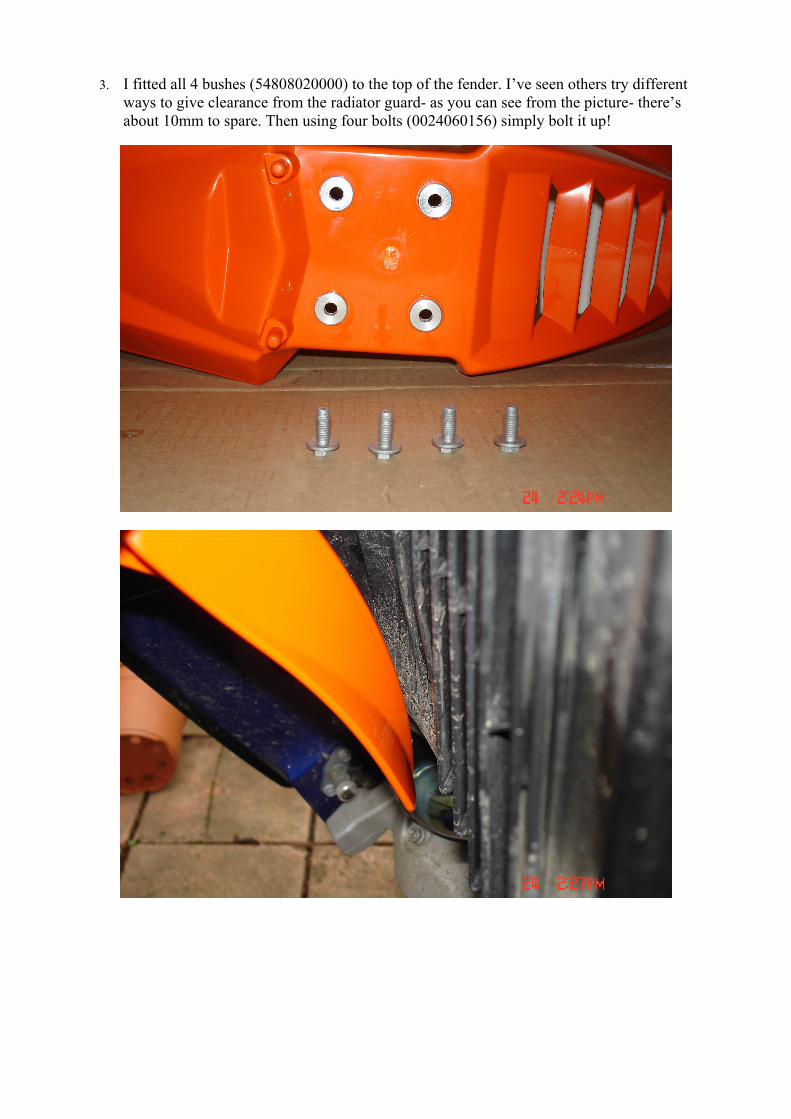
3. I fitted all 4 bushes (54808020000) to the top of the fender. I’ve seen others try different ways to give clearance from the radiator guard- as you can see from the picture- there’s about 10mm to spare. Then using four bolts (0024060156) simply bolt it up!
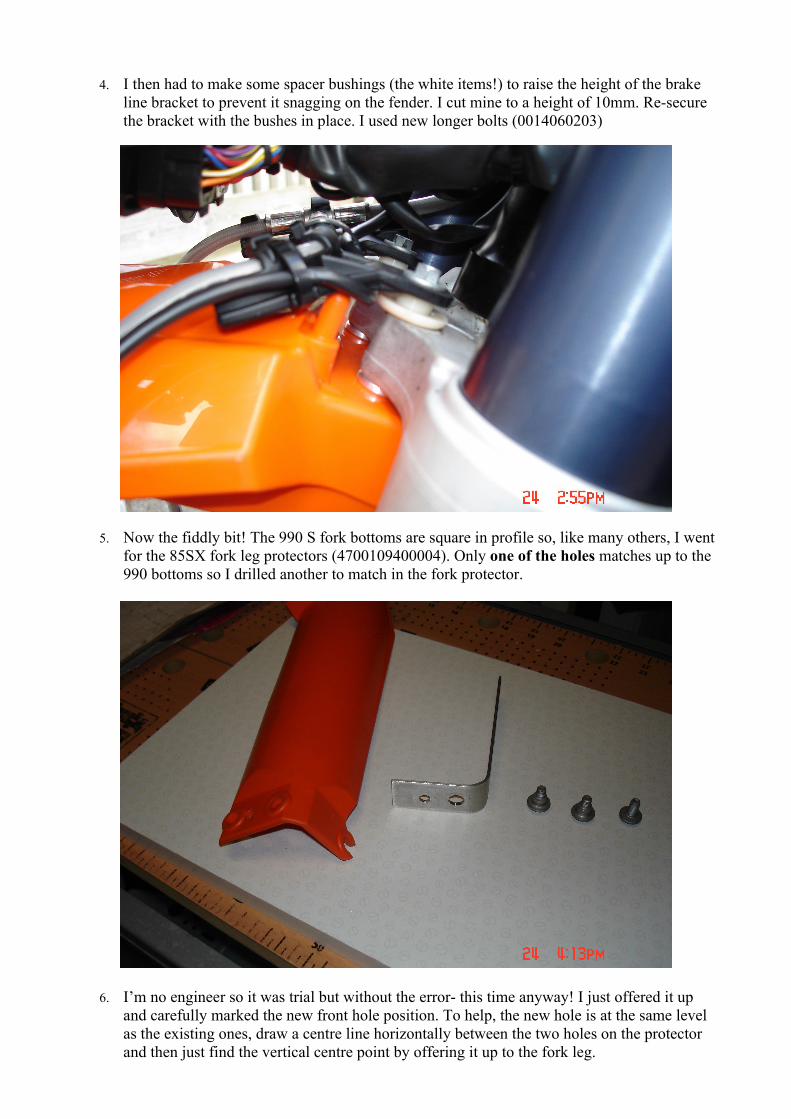
4. I then had to make some spacer bushings (the white items!) to raise the height of the brake line bracket to prevent it snagging on the fender. I cut mine to a height of 10mm. Re-secure the bracket with the bushes in place. I used new longer bolts (0014060203)
5. Now the fiddly bit! The 990 S fork bottoms are square in profile so, like many others, I went for the 85SX fork leg protectors (4700109400004). Only one of the holes matches up to the 990 bottoms so I drilled another to match in the fork protector.
6. I’m no engineer so it was trial but without the error- this time anyway! I just offered it up and carefully marked the new front hole position. To help, the new hole is at the same level as the existing ones, draw a centre line horizontally between the two holes on the protector and then just find the vertical centre point by offering it up to the fork leg.
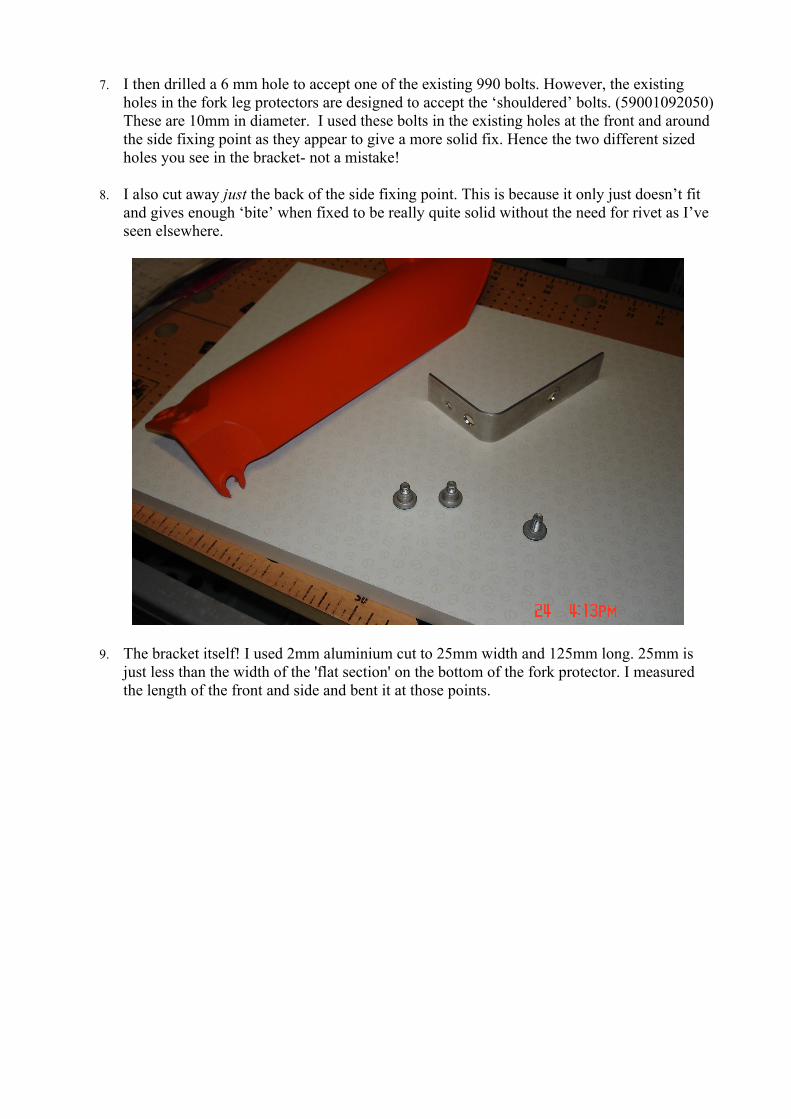
7. I then drilled a 6 mm hole to accept one of the existing 990 bolts. However, the existing holes in the fork leg protectors are designed to accept the ‘shouldered’ bolts. (59001092050) These are 10mm in diameter. I used these bolts in the existing holes at the front and around the side fixing point as they appear to give a more solid fix. Hence the two different sized holes you see in the bracket- not a mistake!
8. I also cut away just the back of the side fixing point. This is because it only just doesn’t fit and gives enough ‘bite’ when fixed to be really quite solid without the need for rivet as I’ve seen elsewhere.
9. The bracket itself! I used 2mm aluminium cut to 25mm width and 125mm long. 25mm is just less than the width of the 'flat section' on the bottom of the fork protector. I measured the length of the front and side and bent it at those points.
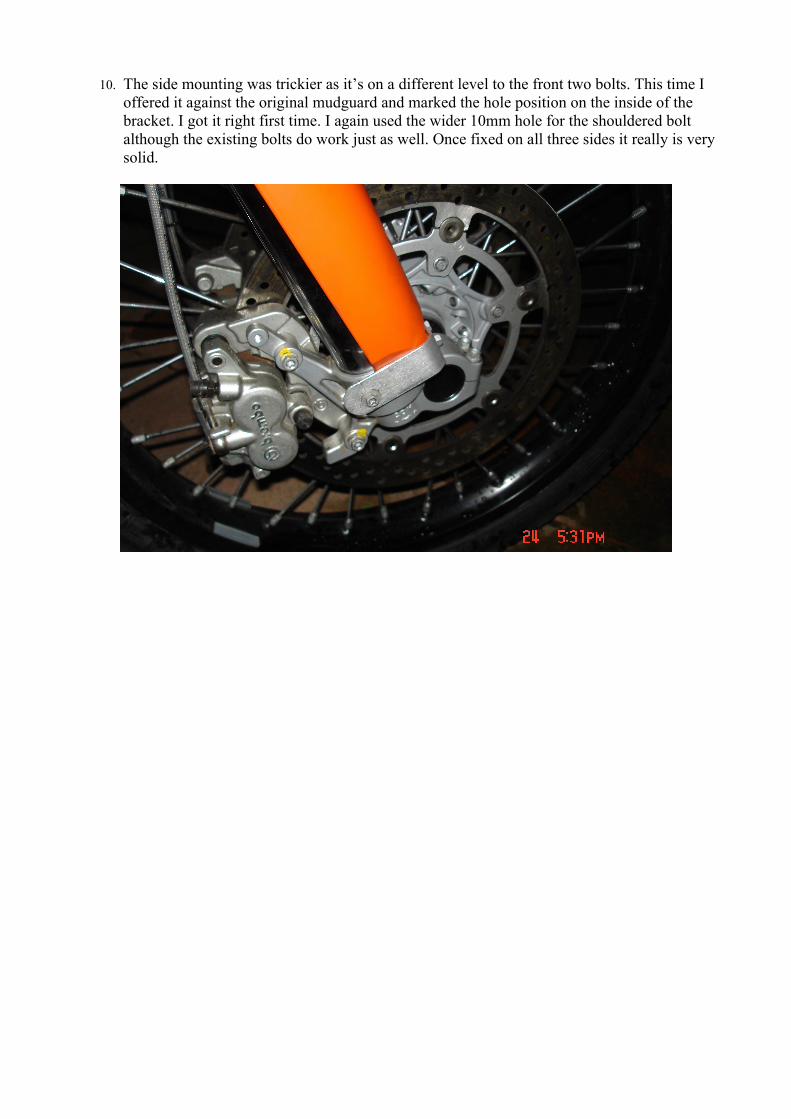
10. The side mounting was trickier as it’s on a different level to the front two bolts. This time I offered it against the original mudguard and marked the hole position on the inside of the bracket. I got it right first time. I again used the wider 10mm hole for the shouldered bolt although the existing bolts do work just as well. Once fixed on all three sides it really is very solid.
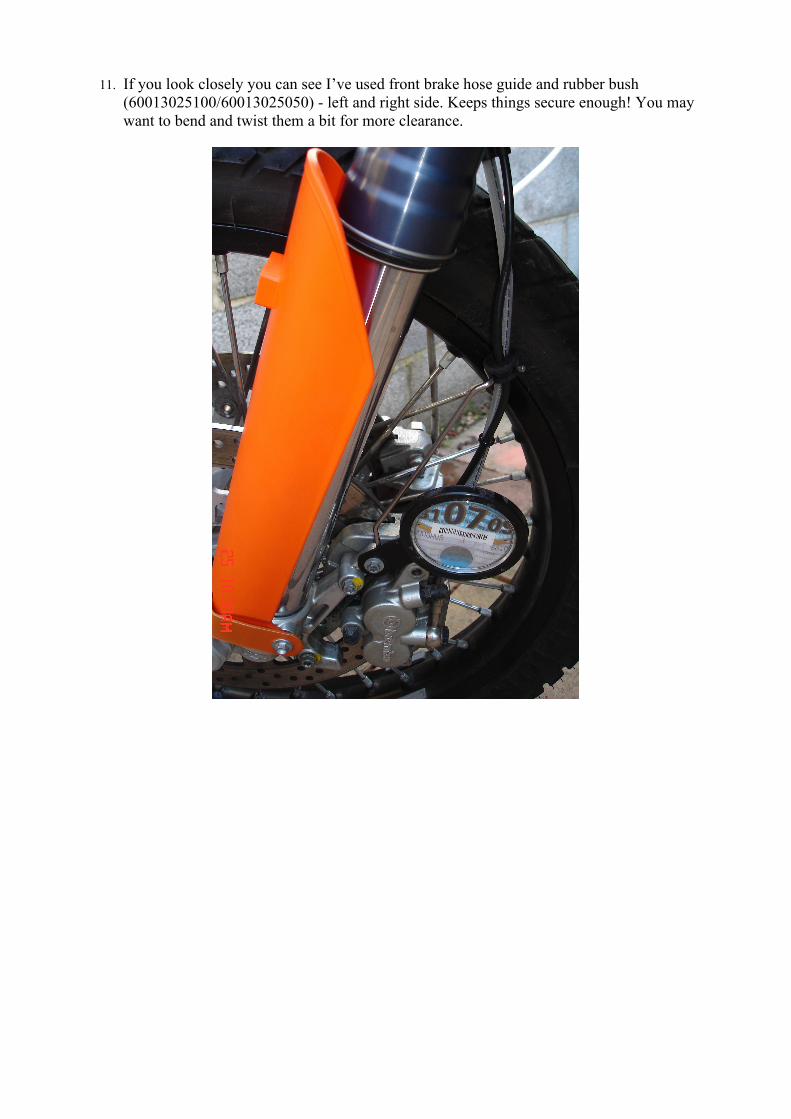
11. If you look closely you can see I’ve used front brake hose guide and rubber bush (60013025100/60013025050) - left and right side. Keeps things secure enough! You may want to bend and twist them a bit for more clearance.
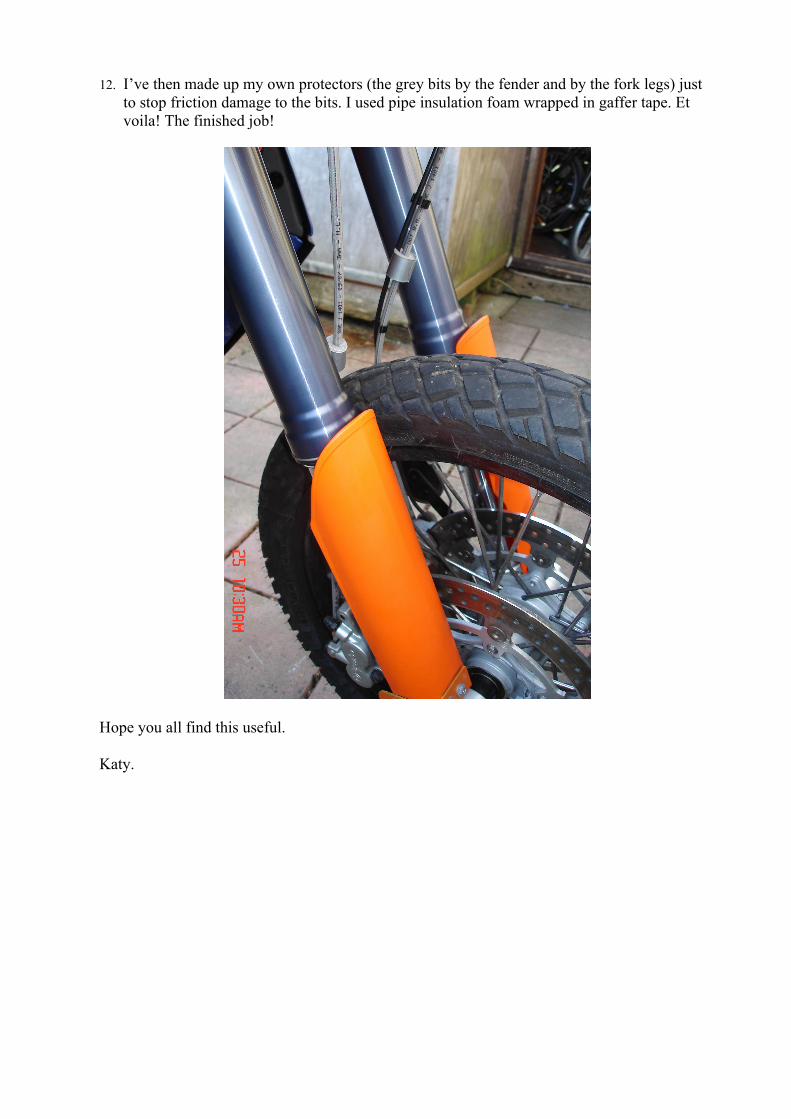
12. I’ve then made up my own protectors (the grey bits by the fender and by the fork legs) just to stop friction damage to the bits. I used pipe insulation foam wrapped in gaffer tape. Et voila! The finished job!
Hope you all find this useful.
Katy.