kontakt instrument and sound library.... · psycho acoustics is a collaboration between sound...
TRANSCRIPT

PSYCHO ACOUSTICS
Kontakt Instrument and Sound Library.
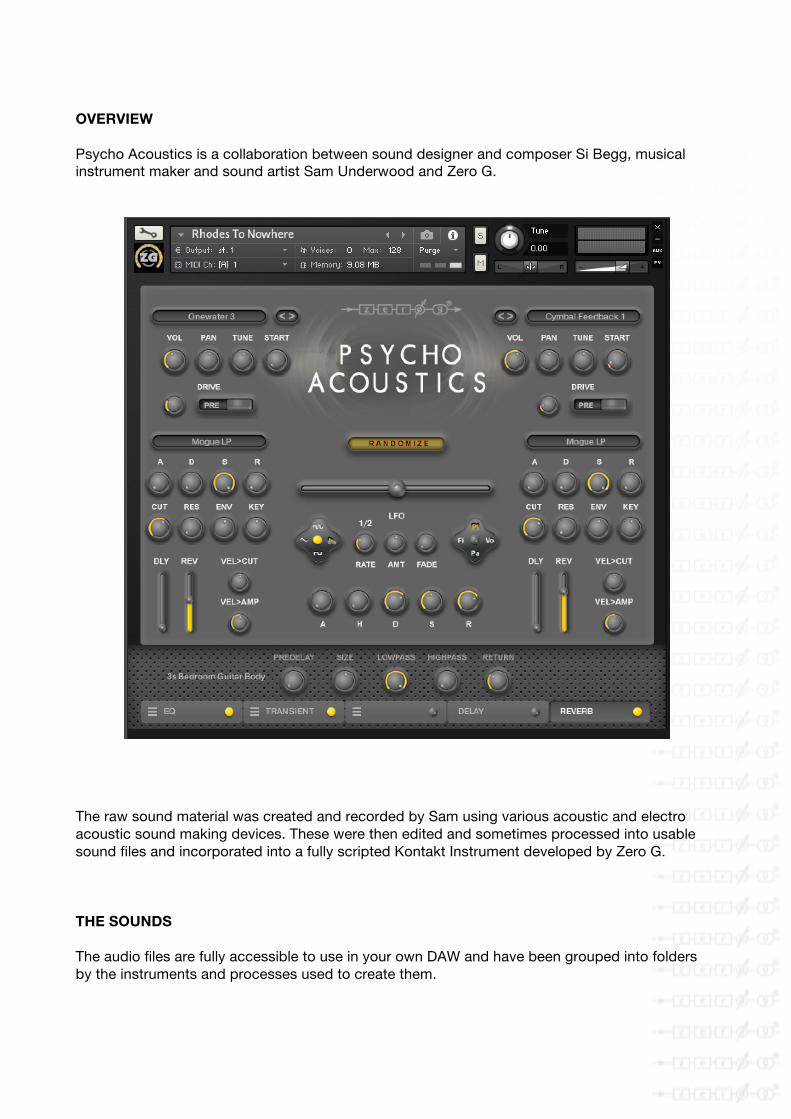
OVERVIEW Psycho Acoustics is a collaboration between sound designer and composer Si Begg, musical instrument maker and sound artist Sam Underwood and Zero G.
The raw sound material was created and recorded by Sam using various acoustic and electro acoustic sound making devices. These were then edited and sometimes processed into usable sound files and incorporated into a fully scripted Kontakt Instrument developed by Zero G. THE SOUNDS The audio files are fully accessible to use in your own DAW and have been grouped into folders by the instruments and processes used to create them.
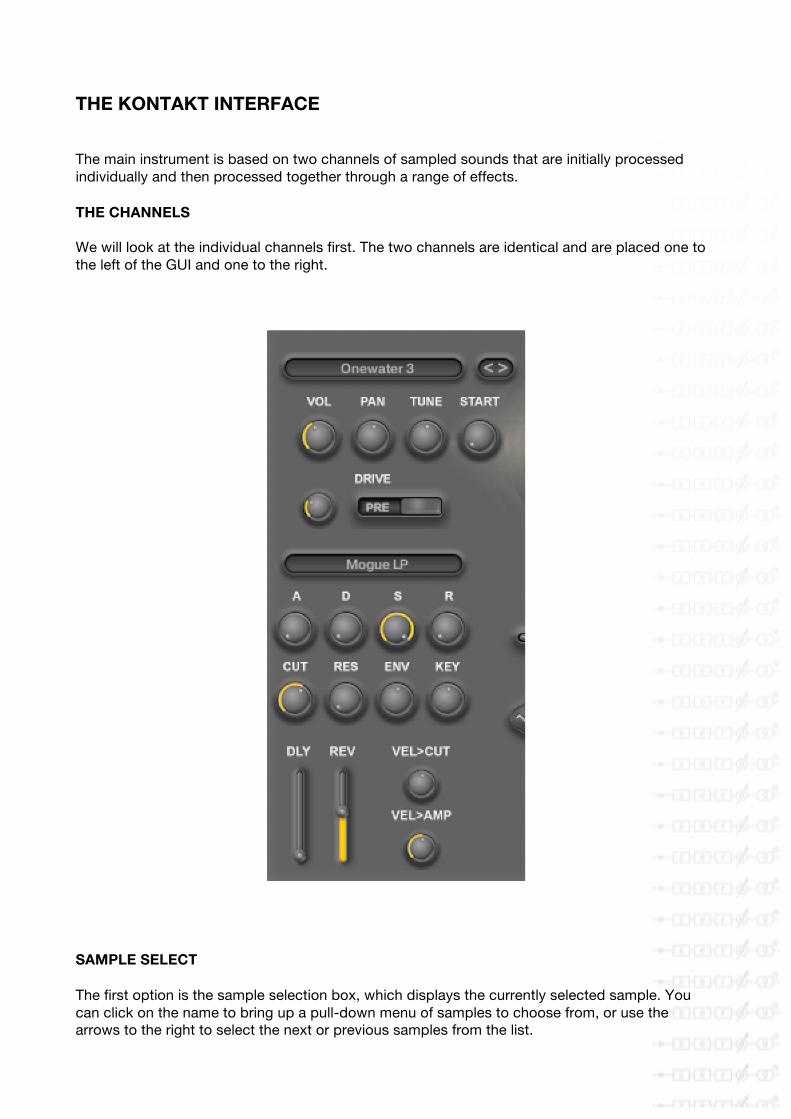
THE KONTAKT INTERFACE The main instrument is based on two channels of sampled sounds that are initially processed individually and then processed together through a range of effects. THE CHANNELS We will look at the individual channels first. The two channels are identical and are placed one to the left of the GUI and one to the right.
SAMPLE SELECT The first option is the sample selection box, which displays the currently selected sample. You can click on the name to bring up a pull-down menu of samples to choose from, or use the arrows to the right to select the next or previous samples from the list.

VOL, PAN, TUNE and START VOL (short for VOLUME), PAN and TUNE are pretty self-explanatory. It is worth noting that, as with all the controls in Psycho Acoustics, if you Command-Click on the control it will revert to its default setting. Also, if you Option-Click on the TUNE knob it adjusts the tuning in steps of one semitone. The START knob controls the start point at which the sample plays from. This is especially useful with some of the longer evolving sounds, allowing you to pick exactly which bit of the sound you want to use. DRIVE The DRIVE control adds a distortion effect to the sound. The PRE / POST button next to it allows you to choose whether the sound is distorted before or after the FILTER in the effects chain. FILTER SELECT Clicking on the name in the filter box brings up a menu where you can choose from one of the many filters in this Kontakt instrument. ADSR These controls allow you to shape the filter envelope. ADSR stands for ATTACK, DECAY, SUSTAIN and RELEASE. CUT, RES, ENV and KEY CUT (cutoff) sets the cut-off frequency of the filter and RES (resonance) the amount of resonance. ENV sets how much the envelope, set using the ADSR controls above, is applied to the filter frequency. KEY sets how much the note value of the keyboard is applied to the filter frequency. DLY, REV, VEL>CUT, VEL>AMP DLY (DELAY) sets how much of the signal is sent to the delay effect and REV (REVERB) how much to the convolution reverb. It is worth noting that both of these are independent of the VOL control above. So, for example, you can have just the sound of the convolution reverb with no dry signal heard. VEL>CUT and VEL>AMP control how much of the midi velocity is sent to the cutoff frequency and amplitude (volume) respectively.

GLOBAL CONTROLS First we will focus on the controls in the centre of the GUI.
RANDOMIZE This selects a random sample from each channel, leaving all the other controls intact. We HIGHLY recommend using this feature as a quick, fun way to create your own patches or as a starting point to stimulate your creativity. LAYER BALANCE The slider under the RANDOMIZE button can be moved from left to right to quickly hear each channel separately or mixed. LFO There are four LFOs assigned to modulate 4 different attributes. Using the buttons on the right, you can choose which one to edit. PI, at the top, is for PITCH, then below that FI for FILTER. VO is for VOLUME (amplitude) and PA stands for PAN. These all operate individually. Once you have chosen your attribute you can then edit the LFO’s properties as follows. On the left there is a button with four different LFO waveforms to choose from. Then in the centre there are three further controls. RATE, which defines the speed of the LFO, can also by synced to your DAW’s tempo by pressing the button in the centre of the waveform selector. The AMT (AMOUNT) control sets how much modulation is sent and finally FADE which defines how long before the
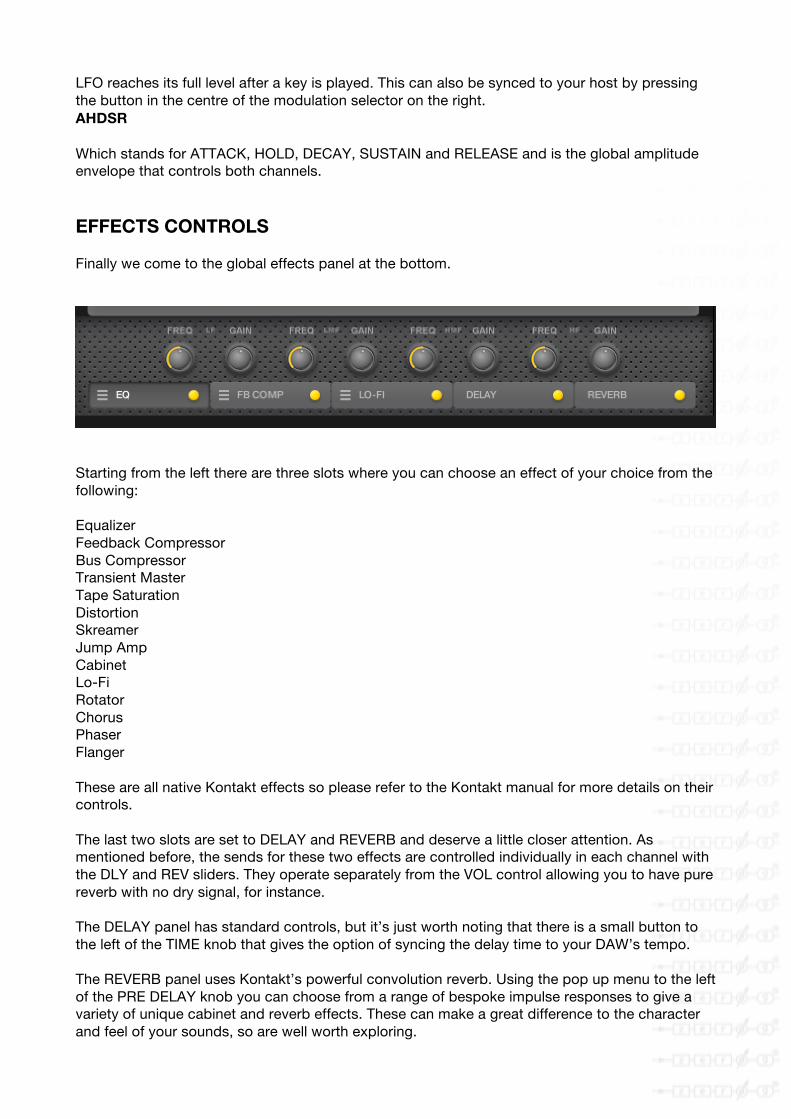
LFO reaches its full level after a key is played. This can also be synced to your host by pressing the button in the centre of the modulation selector on the right. AHDSR Which stands for ATTACK, HOLD, DECAY, SUSTAIN and RELEASE and is the global amplitude envelope that controls both channels. EFFECTS CONTROLS Finally we come to the global effects panel at the bottom.
Starting from the left there are three slots where you can choose an effect of your choice from the following: Equalizer Feedback Compressor Bus Compressor Transient Master Tape Saturation Distortion Skreamer Jump Amp Cabinet Lo-Fi Rotator Chorus Phaser Flanger These are all native Kontakt effects so please refer to the Kontakt manual for more details on their controls. The last two slots are set to DELAY and REVERB and deserve a little closer attention. As mentioned before, the sends for these two effects are controlled individually in each channel with the DLY and REV sliders. They operate separately from the VOL control allowing you to have pure reverb with no dry signal, for instance. The DELAY panel has standard controls, but it’s just worth noting that there is a small button to the left of the TIME knob that gives the option of syncing the delay time to your DAW’s tempo. The REVERB panel uses Kontakt’s powerful convolution reverb. Using the pop up menu to the left of the PRE DELAY knob you can choose from a range of bespoke impulse responses to give a variety of unique cabinet and reverb effects. These can make a great difference to the character and feel of your sounds, so are well worth exploring.

The second Kontakt Instrument is used to create kits of sounds, where a range of different sounds are spread across the keyboard. For this the controls are identical to the dual channel instrument described above, the only difference being that there is only one channel used as there is no sample select option.
We really hope you enjoy this unique instrument! © 2019 xfonic limited _______________________________________________________________________________________