kintex-7 - uclaicslwebs.ee.ucla.edu/.../images/1/1d/kintex7_tutorial_microblaze.pdf · kintex-7:...
TRANSCRIPT

Kintex-7:
Using MATLAB and Simulink with a Microblaze Processor for Chip Testing and
Prototyping
Version 1.0
May 29, 2014

Kintex-7: Microblaze and MATLAB Tutorial
2
Revision History
Version Date Author Comments
Version
No
Date
Completed
Author(s) Comments on Versions
1.0 5/29/2013 Richard Document created.

Kintex-7: Microblaze and MATLAB Tutorial
3
Table of Contents
Revision History ........................................................................................................................................... 2
Table of Contents .......................................................................................................................................... 3
1 Starting Simulink with Sysgen ............................................................................................................. 4
2 Creating a Simulink Model for Co-simulation ................................................................................... 8
3 Accessing Shared Memories from MATLAB ........................................ Error! Bookmark not defined.
4 Other Resources ...................................................................................................................................17

Kintex-7: Microblaze and MATLAB Tutorial
4
1 Starting
You will need to copy the cable driver plugin to your home directory before you can
program and communicate with the Kintex-7 eval board (KC705):
cp -r /home/rdorrance/.cse/ .
As well the Xilinx license file to use the toolset:
cp -r /home/rdorrance/.Xilinx/Xilinx.lic .Xilinx/
To run Xilinx Platform Studio and System Generator for ISE 14.3 with Simulink in
MATLAB R2011a, you first need to source the Xilinx toolset:
source /opt/Xilinx/14.3/ISE_DS/settings64.sh

Kintex-7: Microblaze and MATLAB Tutorial
5
2 Creating a MicroBlaze Processor Using the Base System Builder
To launch Xilinx Platform Studio type:
xps &
On the “Getting Started” Menu select: Create New Project Using Base System Builder
When the window pops up save the xps project file (system.xmp) to a new folder
called microblaze, and click OK.

Kintex-7: Microblaze and MATLAB Tutorial
6
Select: Create a System for the Following Development Board
Choose the: Xilinx Kintex-7 KC705 Evaluation Platform (Rev. C)
Use a: Single MicroBlaze Processor System
Optimized for: Throughput
Click Next.

Kintex-7: Microblaze and MATLAB Tutorial
7
Check: Enable Floating Point Unit
Change Local Memory Size to: 128KB
Change Instruction Cache Size to: 64KB
Change Data Cache Size to: 64KB
Click Finish.
*NOTE: You can add an modify MicroBlaze peripherals in this menu. For example, you
can change the UART Baud Rate and number of data bits.
Kintex-7: Microblaze and MATLAB Tutorial
8
3 Creating a Microblaze PCORE in Simulink
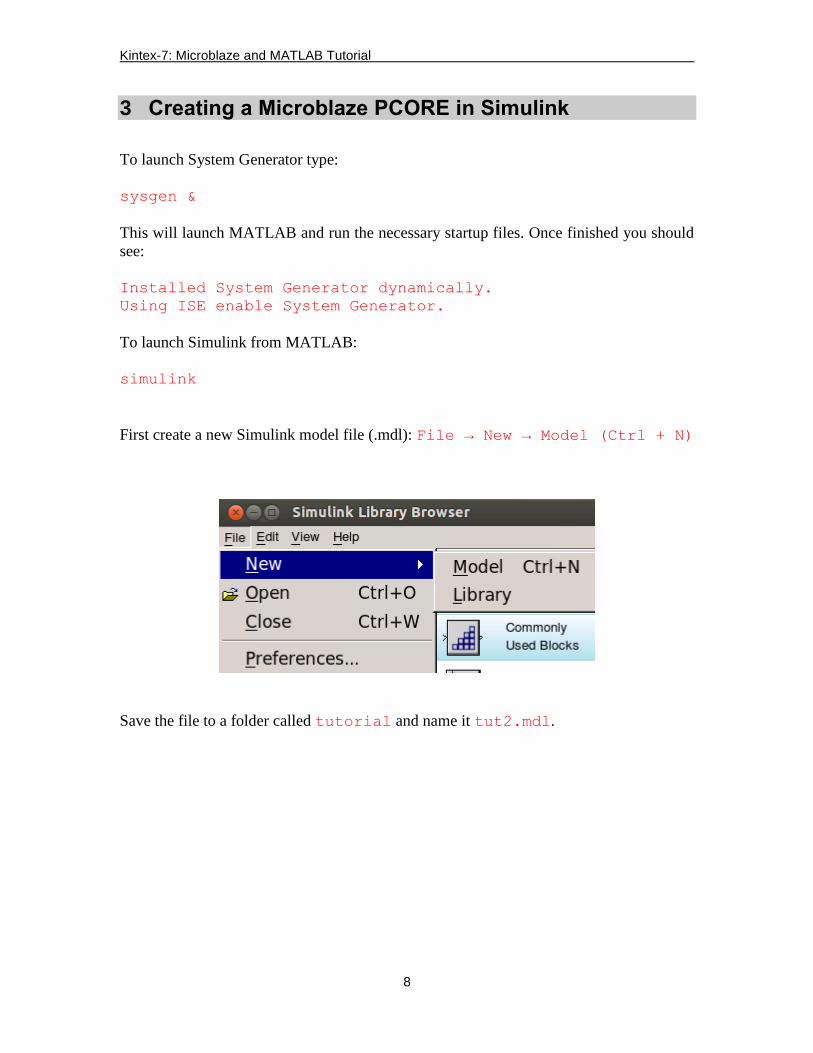
To launch System Generator type:
sysgen &
This will launch MATLAB and run the necessary startup files. Once finished you should
see:
Installed System Generator dynamically.
Using ISE enable System Generator.
To launch Simulink from MATLAB:
simulink
First create a new Simulink model file (.mdl): File → New → Model (Ctrl + N)
Save the file to a folder called tutorial and name it tut2.mdl.

Kintex-7: Microblaze and MATLAB Tutorial
9
Next add the System Generator block to the model file from the library browser:
Xilinx Blockset → Basic Elements → System Generator
Next double click the system generator block to open up the configuration menu. In the
Compilation menu select: Compilation → EDK Export Tool
In the Part menu select: Kintex7 → xc7k325t → -2 → ffg900
Kintex-7: Microblaze and MATLAB Tutorial
10
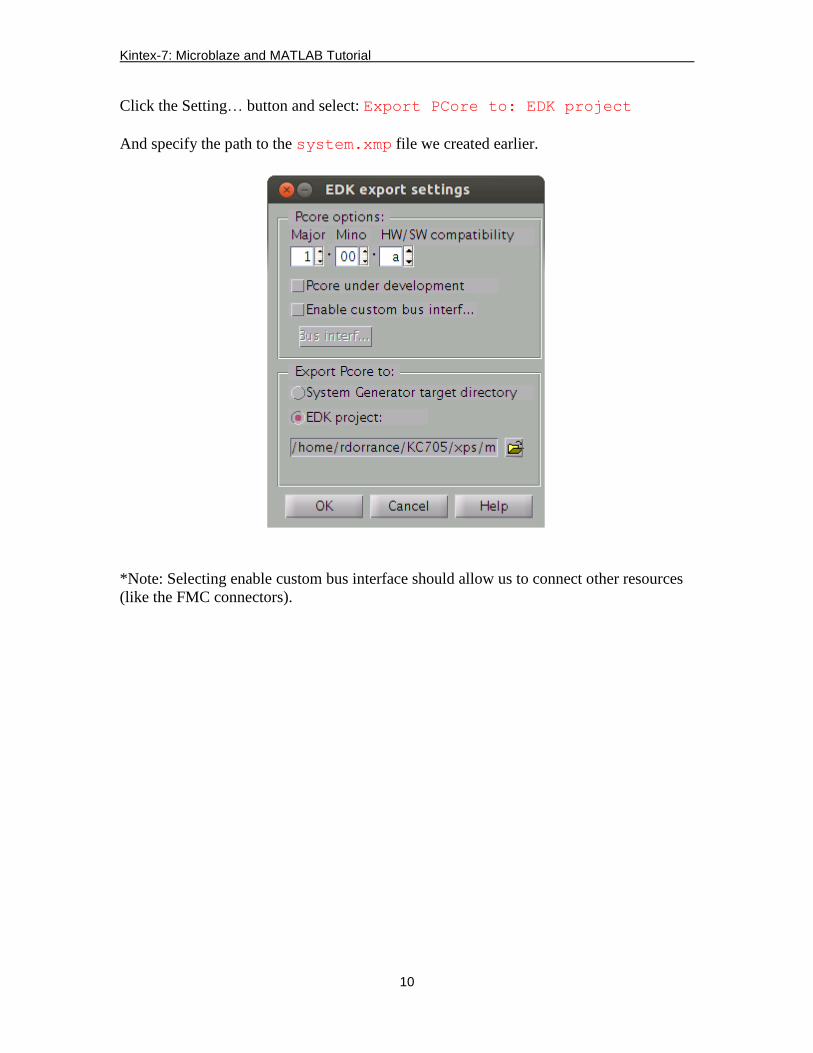
Click the Setting… button and select: Export PCore to: EDK project
And specify the path to the system.xmp file we created earlier.
*Note: Selecting enable custom bus interface should allow us to connect other resources
(like the FMC connectors).

Kintex-7: Microblaze and MATLAB Tutorial
11
Now create the following model using Xilinx blocks.
List of blocks used:
EDK Processor: A MicroBlaze processor.
Shared Memory: A shared BRAM whose memory space is accessible by the host
computer. You can specify the data type, memory size, latency, and read/write
functionality of block.
From Register: This is a shared “software addressable” register that is accessible
by the host computer. Use this to specify data from the host computer to the FPGA.
Register: This is a “hardware” register on the FPGA. You cannot directly access it,
but Simulink needs some physical hardware to clocking timing information.
Constant: There are both Xilinx and MATLAB Simulink version of this block. This
is used to specify a numerical constant.
Convert: This block is used to change the bit width or data type in hardware. In this
case, to reinterpret a 1 bit number as a boolean value.

Kintex-7: Microblaze and MATLAB Tutorial
12
Terminator: Connect this block to unused output ports to prevent
simulation/compilation errors.
Double click the EDK Processor and make sure EDK PCore generation is selected.
You will also need to generate the memory map by adding all of the Available Memories.
Click OK. Save and click the generate button in the System Generator block. This
will generate the PCore in our XPS project.

Kintex-7: Microblaze and MATLAB Tutorial
13
4 Adding the PCore to Xilinx Platform Studio
Go to Project → Rescan User Repositories to refresh the PCore reposity.
The tut2_axiw PCore should now show up under your local PCores menu. Double
click it to add it to the design.
Click OK and assign it to microblaze_0.
Under the Ports menu, select sysgen_clk and connect it to clock_generator_0
CLKOUT3.
Kintex-7: Microblaze and MATLAB Tutorial
14
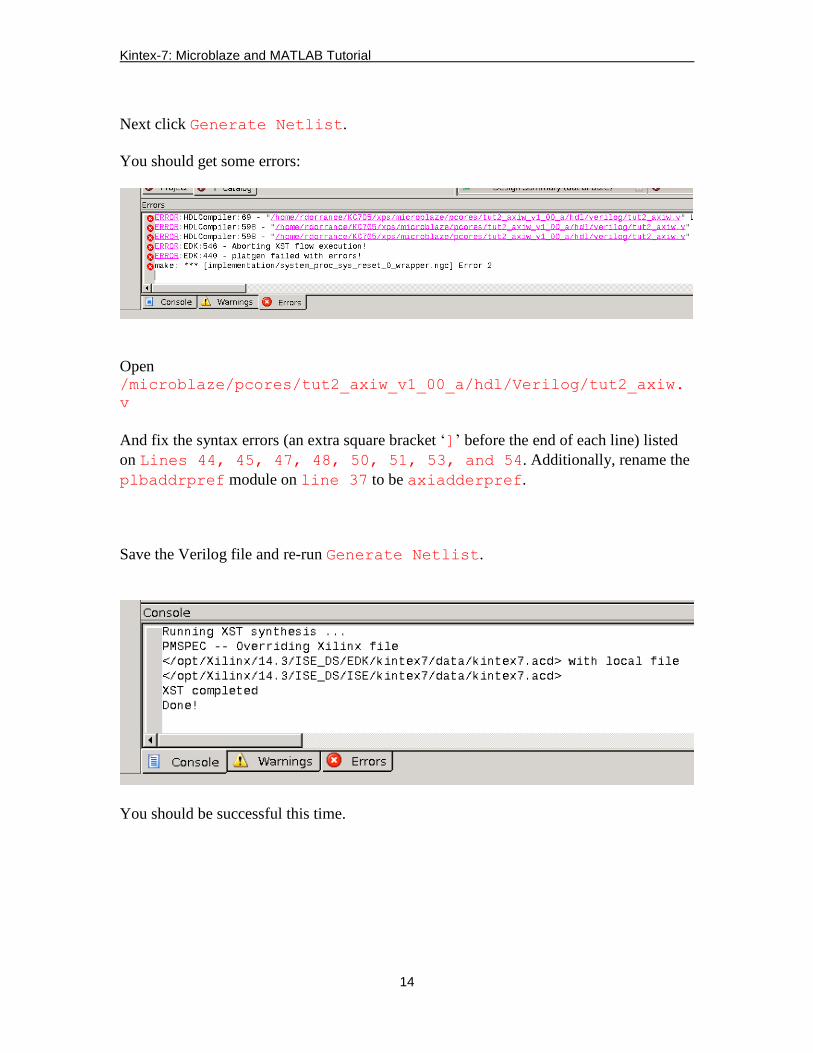
Next click Generate Netlist.
You should get some errors:
Open /microblaze/pcores/tut2_axiw_v1_00_a/hdl/Verilog/tut2_axiw.
v
And fix the syntax errors (an extra square bracket ‘]’ before the end of each line) listed
on Lines 44, 45, 47, 48, 50, 51, 53, and 54. Additionally, rename the
plbaddrpref module on line 37 to be axiadderpref.
Save the Verilog file and re-run Generate Netlist.
You should be successful this time.
Kintex-7: Microblaze and MATLAB Tutorial
15
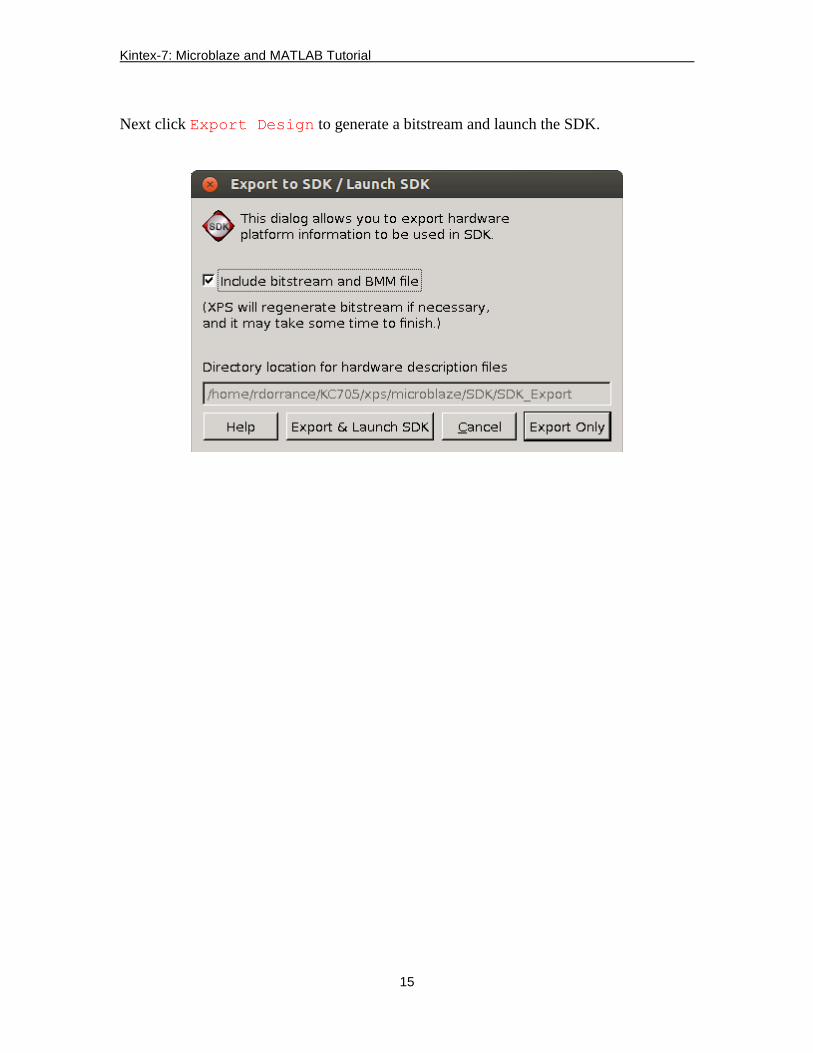
Next click Export Design to generate a bitstream and launch the SDK.

Kintex-7: Microblaze and MATLAB Tutorial
16
Once finished the Xilinx SDK will launch:
Click OK.

Kintex-7: Microblaze and MATLAB Tutorial
17
Here are a few tutorials about getting started with the SDK:
1. http://www.fpgadeveloper.com/2011/06/write-a-software-application-with-sdk.html
2. http://www.fpgadeveloper.com/2014/02/create-an-application-using-the-sdk.html
3. http://ece.wpi.edu/~rjduck/Microblaze%20MCS%20Tutorial%20v2.pdf
4. http://www.ece.iit.edu/~/ecasp/tutorials/microblaze_tutorial.pdf
5 Other Resources
Kintex-7 FPGA Embedded Kit on the Wiki