john deere devices module - s3-eu-west-1.amazonaws.com · 3 introduction the john deere devices...
TRANSCRIPT

www.farmplan.co.uk 01594 545022 [email protected]
John Deere Devices Setup & Quick Start Guide Gatekeeper Devices Gatekeeper Version 3.5 – June 2017

2
Contents
Introduction ..................................................................................................................................... 3
Setup ................................................................................................................................................ 3
Linking Gatekeeper crops with John Deere ........................................................................... 3
Tractor Units .......................................................................................................................... 4
Implements and Settings ....................................................................................................... 4
Exporting a Work Plan to the 2600/2630 displays ........................................................................ 6
Creating a combining work plan ............................................................................................ 6
Creating your John Deere Device........................................................................................... 8
Importing Data from the 2600/2630 displays into Gatekeeper ................................................. 11
Importing Data from the data storage device. ................................................................ 11
Viewing Imported Variable Maps ................................................................................................. 15
Editing Imported Job Data ............................................................................................................ 18
Filtering Plot Data ................................................................................................................ 18
Calibrating Yield Data .................................................................................................................... 22
Annexe A ........................................................................................................................................ 25
Gatekeeper Tractor Unit Settings and the John Deere Displays ......................................... 25
Annexe B ........................................................................................................................................ 28
Linking Gatekeeper and John Deere Crop Types ................................................................. 28
Annexe C…………………………………………………………………………………………………………………………….28
Linking Gatekeeper to My John Deere
Annexe D……………………………………………………………………………………………………………………………29
GK & JD nomenclature…………………………………………………………………………………………………

3
Introduction
The John Deere Devices Module is an optional extra to the Gatekeeper system which provides John
Deere compatibility with Gatekeeper. If applied on its own, it will support basic documentation, with
the GS2 2600 and GS3 2630 displays. When applied to Gatekeeper with the mapping module
enabled, it will support mapping on the displays as well as documentation.
The GS2 1800 display is also compatible with Gatekeeper but this compatibility is limited to
integrating with your Field, Product & Machine lists as well as Boundaries and Guidance through the
mapping module.
Setup Linking Gatekeeper crops with John Deere The crops that are listed on your Gatekeeper Business list must be linked in with the John Deere
equivalent. Un-linked crops will not be exported to the displays.
On the main Gatekeeper screen, click on Setup>Crops and Varieties to bring up the Setup Crops and
Varieties window. The example below assumes that crops have already been setup.
Annexe B at the rear of this guide contains a list of Gatekeeper crop names listed against the John
Deere equivalents for comparison.
1. Expand the Crop Group
node and highlight the
Crop name underneath.
2. Once the crop is highlighted,
there is the option to select a John
Deere Linked Crop. Tick the box to
activate and scroll down the list to
find the equivalent crop.
3. Gatekeeper’s “Wheat Winter” would equate
to John Deere’s “Wheat (Euro Wtr)” for example.

4
Tractor Units When exporting work plans to the 2600/2630 displays, it is possible to export Machinery Settings
from Gatekeeper which consist of the Tractor Unit settings. The Machine and Implement details on
the displays require completion and so storing and exporting the settings from Gatekeeper will save
time and maintain continuity.
Not only is this important for traceability purposes but also for the GPS receiver offsets. This will be
of particular importance if you are mapping field boundaries with the tractor unit.
Click on Setup>Tractor Units from the Gatekeeper main screen.
Highlight the appropriate tractor heading from the Tree view and click Add.
The name of the tractor unit, category and reference will be shown on the setup screen. Work through the Definition tab in conjunction with Annexe A (GPS receiver offset diagram) at the rear of this guide.
NB. It is advised that if possible these settings are created on the tractor unit screen and imported into Gatekeeper and stored against the tractor unit settings.
Implements and Settings

5
Once the Implement has been
setup, settings can be added to it.
When an implement is setup, the
setting will be Standard as default.
Highlight the setting underneath
the Implement name and rename
if required (e.g. Extension).
Tick box to allocate a machinery cost to the
implement. Browse the list to find the relevant cost.
E.g. Fixed Costs> Machinery Costs> Harvest>
Wheat. NB. Fixed costs are created in
Setup>Products>Fixed Costs.
Highlight the Implement type in
the tree view or add a new one by
clicking on the Add Implement
button
Work through the tabs to enter
the relevant implement
details.
As with the Tractor settings, the Implement details and settings can also be exported to the displays
preventing double data entry. The Implement settings will hold the details for the Implement that is
to be used in the job (e.g. Combine Header) and is setup through Setup>Implements and Settings on
the Gatekeeper main screen.
The Implement details ensure the correct work recording and guidance for the job. Please refer to
your GS2/GS3 Operators Manual.

6
Exporting a Work Plan to the 2600/2630 displays Data is exported to the John Deere Displays and imported back to Gatekeeper via a data storage
device. In the case of the GS2 displays, the data storage device is an SD data card. GS3 displays store
the data on a USB stick. Alternatively, if equipped the Tractor unit can receive work plans via John
Deere’s Wireless Data Transfer. This guide will refer to both of these as data storage devices, plus
WDT.
Work plans created and exported to the displays for completion provide the most efficient and
simple way of recording field job data back to Gatekeeper. The work plan structure is maintained on
the displays allowing the operator to work through the plan that was exported. This allows the
recorded data to be imported back into Gatekeeper in a recognised format that populates the Field
records, adjusts Stock and remains easily editable including calibrating Yield data.
Work plans can be created on Gatekeeper and exported to the 2600/2630 displays for completion
for a range of operations, including Drilling, Spreading, Spraying and Harvest.
Field Groups, Product and Machinery Pick lists (including Tractor units, Implements and settings) can
also be exported to the displays. If a work plan has not been exported, the Gatekeeper pick lists can
be used to populate a ‘Task’ that can be imported into Gatekeeper as a new Recording on the Device
Synchronisation screen.
The work plans are exported onto a storage device, which is inserted into the display unit.
The worked example that follows will look at the creation and export of a combining work plan to
the 2600/2630 displays and the completed work plan’s subsequent import back to Gatekeeper.
Creating a combining work plan
Within the Planning module, create a work plan relevant for the task, entering the Name of
the plan and then adding a Field Operations Job. You can have many jobs within a single
plan. We would recommend that there should be one crop type and one farm per job.
Once you have added the Field Operations Job, select the fields on the Field Selector screen.
On the Product Selector screen, add the product from the Primary Output heading for the
crop you wish to harvest. If the product has not been created, go to Setup> Products>
Output> Primary Output.
Select the Implement to be used on the Implement Setting Selector screen. When the
Implement setting has been highlighted in the Tree view, the details will be displayed on the
right hand side of the screen. This will also detail if a machinery cost has been associated
with it (if not a red caution warning will appear at the bottom of the page. Associate a
machinery cost by clicking on the Setup Implement Setting button, ticking the Use
Machinery Cost box for the appropriate setting and browsing and selecting the appropriate
Fixed Cost> Machinery cost from the drop down list. These costs are setup under the
Products option).

7
Once created, Issue the plan, it can then be exported to the 2600/2630 displays via the data
storage device. This is achieved via the Devices module.
2. Ensure that a Tractor Unit is selected by
ticking the box and selecting from the drop
down list. The 2600/2630 displays require a
tractor unit (i.e. combine) to have been
selected for the export to work.
1. Click on the Job tab to bring up the job summary
information.

8
Creating your John Deere Device All precision farming data is exported and imported via the Devices module on the Gatekeeper main
screen. With the John Deere Devices module applied, you will have the ability to export work plans,
boundaries and target maps to the displays and import completed work plans, boundaries and as
applied maps back into Gatekeeper. A device can be created to distinguish between different
operators or machines. This heading allows you to manage the data that is imported. This can be of
benefit if you are importing lots of data.
If this is the first time that you are exporting information from Gatekeeper to the display, you will
need create a Device in the Devices module.
Click on the Devices module.
In the main Tree view, browse to and highlight the correct controller type (i.e. John Deere
GS2 2600). Click on the Add Device button at the top of the page.
The Device Synchronisation screen will appear with a New device name listed under the
selected device type. Change the name of the device by overtyping the name in the Name
box. Click Save to display the device name in the Tree view.
NB. You can have several device names listed under the same type e.g. Combine & Sprayer.
(For WDT it is best practice to link the Tractor unit to a separate device. Each device name
will list any imported operation details (where applicable) when highlighted in the Tree view
on the Device module main screen.
Click on the Export tab.
1. Click on the Devices
module
2. Within Devices select
the correct display type
from the tree view
3. Next, click on the
Add Device button

9
On the Export page, work through the options, completing as required (see screen shot
below).
Once you click on the Export button, a Device Synchronisation warning notice will appear on
the screen (see below). Click Yes to continue.

10
The Device Export Log screen will be displayed detailing the saved location of the exported
work plan. Close the Export Logs window to return to the Device Synchronisation Page and
view the card data.
On the main Device Synchronisation screen, click on the View Card Data button to confirm
the exported data. This will list the data that has been written to the data storage device (SD
card or USB stick) including Jobs, Fields, Machinery and Implement settings etc. It is
recommended that this is checked before commencing work.
If the data storage device has been populated with the correct data, the export process is complete
and you are ready to load the data via the data storage device onto the displays, or upload to the
Operations Centre.
1. Click on the View Card Data button to confirm the exported
data.
2. On the View Card
Setup Data screen,
expand the relevant
nodes to view the
exported data that
has been written to
the data storage
device.

11
Importing Data from the 2600/2630 displays into
Gatekeeper Following on from the previous section where a work plan was created and exported to the
2600/2630 displays for completion, this section focuses on importing the completed plan back into
Gatekeeper. This is the simplest and most effective way of recording completed data back into the
field records.
Importing Data from the data storage device.
First of all, ensure that the data storage device has been removed from the display and has been
inserted into a card/USB reader connected to the PC.
Click on the Devices module.
In the main tree view, browse to and highlight the correct controller type (e.g. John Deere o GS2 2600). NB This should be the device that the work plan was exported to.
Click on the Device Sync button. The number of Import Option tick boxes displayed will
depend on the type of device the data is being imported from. NB. Once set, these are
remembered. Select the options as required;
o Preview Imported Data - allows you to preview the imported data in a recorded
plan format. Each separate plan will be viewed once imported
o Job maps NOT to be saved - job data such as field names, products, rates etc. will be
imported from your Device but any associated map data will not. This option is Off
by default.
o Move source to archive after import - the data imported from the device is always
copied to an archive folder on your hard-drive. With this option ticked the imported
data is also removed from the source data device thus clearing the card for future
use. Data can be re-imported from the archive folder if required.
o Clip job plots to field boundary - any plots that fall outside the Gatekeeper field
boundary for the selected year will be disregarded and therefore not included in the
processed map. This option is Off by default.
o Keep all out of work plots - any plots that were recorded when the machine was out
of work e.g. travelling between fields will be included within the data for the
selected field.

12
o Auto find job field by boundary - the data being imported is checked to see if its
plots fall within any field boundaries that exist within Gatekeeper for the selected
business and year. If a match is found then that field will automatically be
allocated to the relevant job data in the Data to Import grid within the Import
tab. This option is Off by default.
o Historic yield maps import mode – allows you to import a yield map to a previously
recorded job record without quantities being affected.
o Work done uses outstanding field area – uses the field’s original working area. If the
recording is only for part of the field, the applied rates will decrease as the field area
is based upon original field area. Conversely, recordings that have an applied area
greater than the original field area (e.g. Yield map including overlap) will have the
rates increased as the applied area decreases to use the original field area.
Import Product Matching Mode – allows you to ensure the correct products are recorded
by;
o Using the device (recorded) file product matched to the Gatekeeper product by their
name i.e. uses the product as recorded on the file.
o Destination (Gatekeeper) job products matched by their order override the device
file product names i.e. if importing the data into a Gatekeeper Work Plan/Recording,
the product in the job will be used.
o Use this single selected product i.e. switch the import product to one from the drop
down list that appears when this option is activated.
John Deere AB lines – updates any previously stored guidance lines ensuring all are stored at
the highest accuracy possible
Next, click on the Import tab.
Select the path to the data using the selector button at the end of the Path box (the Path is
the location of the data on the data storage device).
At the top of the Device Synchronisation page, the Do not show in the import grid options
will prevent either Field Boundaries, Machinery Settings and/or Field Guidance data from
being displayed in the grid. Select as appropriate.
13
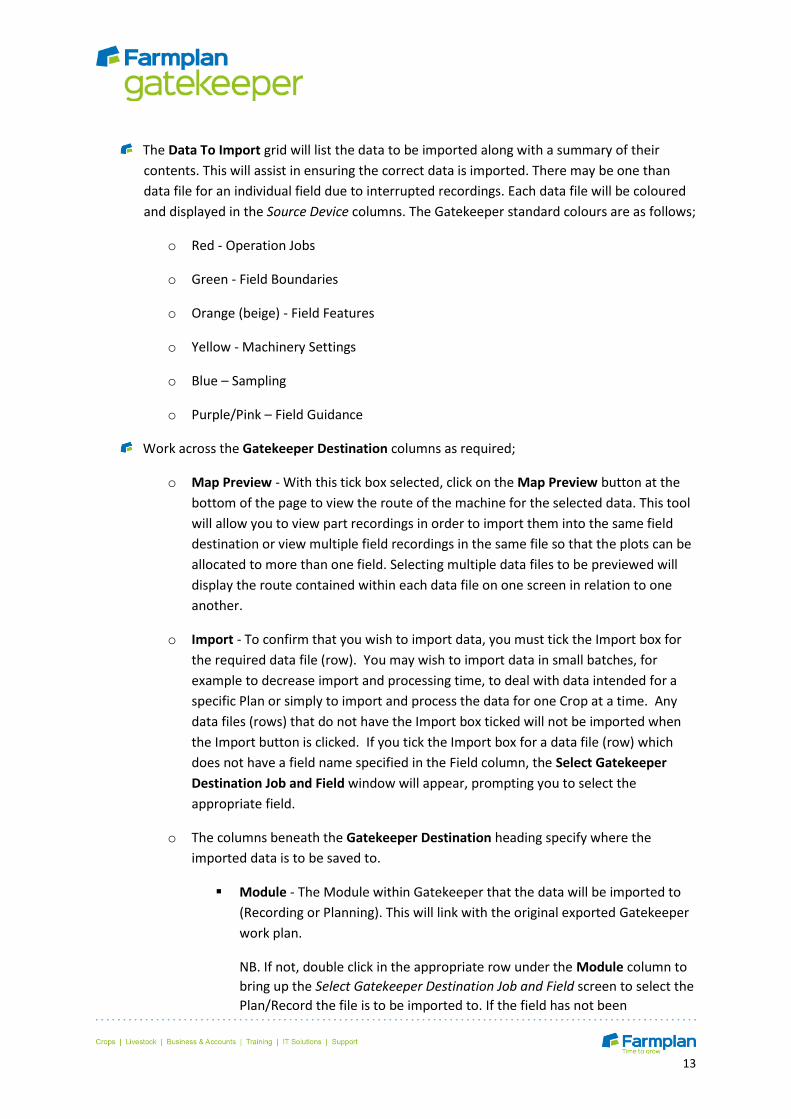
The Data To Import grid will list the data to be imported along with a summary of their
contents. This will assist in ensuring the correct data is imported. There may be one than
data file for an individual field due to interrupted recordings. Each data file will be coloured
and displayed in the Source Device columns. The Gatekeeper standard colours are as follows;
o Red - Operation Jobs
o Green - Field Boundaries
o Orange (beige) - Field Features
o Yellow - Machinery Settings
o Blue – Sampling
o Purple/Pink – Field Guidance
Work across the Gatekeeper Destination columns as required;
o Map Preview - With this tick box selected, click on the Map Preview button at the
bottom of the page to view the route of the machine for the selected data. This tool
will allow you to view part recordings in order to import them into the same field
destination or view multiple field recordings in the same file so that the plots can be
allocated to more than one field. Selecting multiple data files to be previewed will
display the route contained within each data file on one screen in relation to one
another.
o Import - To confirm that you wish to import data, you must tick the Import box for
the required data file (row). You may wish to import data in small batches, for
example to decrease import and processing time, to deal with data intended for a
specific Plan or simply to import and process the data for one Crop at a time. Any
data files (rows) that do not have the Import box ticked will not be imported when
the Import button is clicked. If you tick the Import box for a data file (row) which
does not have a field name specified in the Field column, the Select Gatekeeper
Destination Job and Field window will appear, prompting you to select the
appropriate field.
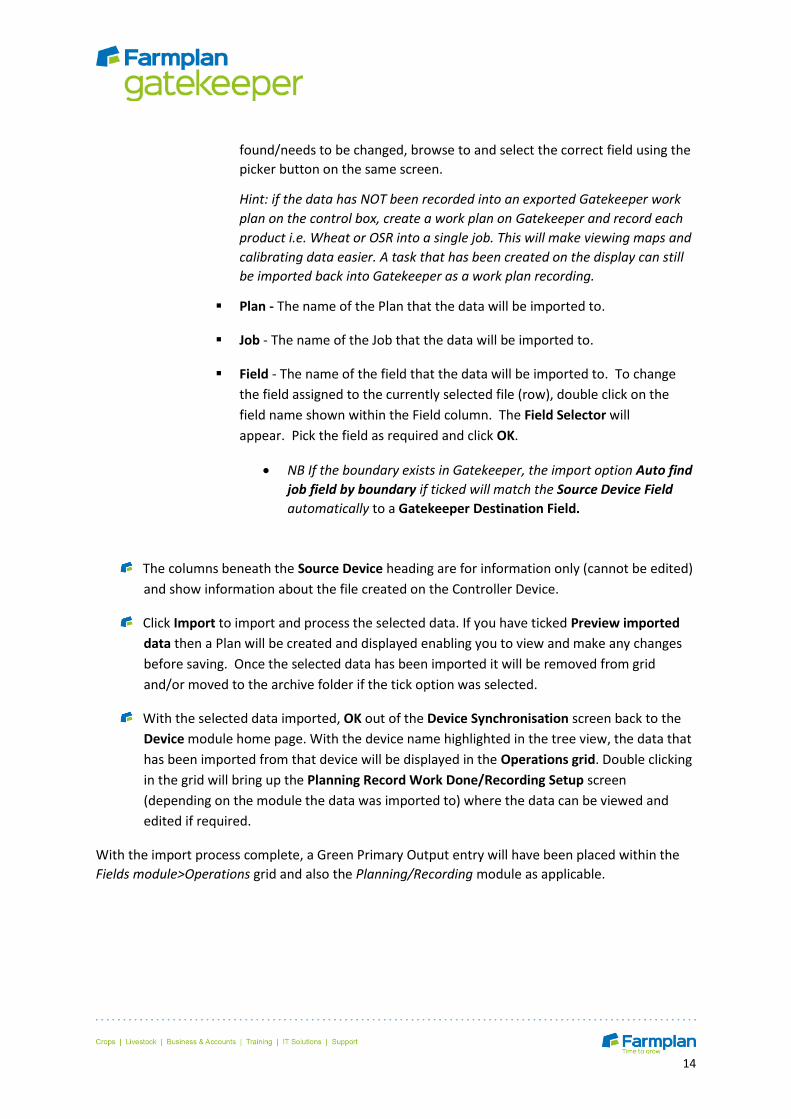
o The columns beneath the Gatekeeper Destination heading specify where the
imported data is to be saved to.
Module - The Module within Gatekeeper that the data will be imported to
(Recording or Planning). This will link with the original exported Gatekeeper
work plan.
NB. If not, double click in the appropriate row under the Module column to
bring up the Select Gatekeeper Destination Job and Field screen to select the
Plan/Record the file is to be imported to. If the field has not been
14
found/needs to be changed, browse to and select the correct field using the
picker button on the same screen.
Hint: if the data has NOT been recorded into an exported Gatekeeper work
plan on the control box, create a work plan on Gatekeeper and record each
product i.e. Wheat or OSR into a single job. This will make viewing maps and
calibrating data easier. A task that has been created on the display can still
be imported back into Gatekeeper as a work plan recording.
Plan - The name of the Plan that the data will be imported to.
Job - The name of the Job that the data will be imported to.
Field - The name of the field that the data will be imported to. To change
the field assigned to the currently selected file (row), double click on the
field name shown within the Field column. The Field Selector will
appear. Pick the field as required and click OK.
NB If the boundary exists in Gatekeeper, the import option Auto find
job field by boundary if ticked will match the Source Device Field
automatically to a Gatekeeper Destination Field.
The columns beneath the Source Device heading are for information only (cannot be edited)
and show information about the file created on the Controller Device.
Click Import to import and process the selected data. If you have ticked Preview imported
data then a Plan will be created and displayed enabling you to view and make any changes
before saving. Once the selected data has been imported it will be removed from grid
and/or moved to the archive folder if the tick option was selected.
With the selected data imported, OK out of the Device Synchronisation screen back to the
Device module home page. With the device name highlighted in the tree view, the data that
has been imported from that device will be displayed in the Operations grid. Double clicking
in the grid will bring up the Planning Record Work Done/Recording Setup screen
(depending on the module the data was imported to) where the data can be viewed and
edited if required.
With the import process complete, a Green Primary Output entry will have been placed within the
Fields module>Operations grid and also the Planning/Recording module as applicable.

15
Viewing Imported Variable Maps
Once imported, mapping data can be viewed through either Field Records (under the
operations tab) or within the Planning/Recording module (depending on how it was
imported). The easiest way is through Field records.
Within the Fields module, browse to and select the appropriate field to be viewed from the
tree view.
Click on the Operations tab and then double click on the Globe symbol that will appear in
the first column in the grid adjacent to the appropriate job entry that you wish to view map
data for.

16
The Field Map screen will appear (see below)
1. Click on the Job Data icon to view the job field list.
All fields in the same job will be viewable (one
advantage of importing fields into the same plan)
2. Select the Displayed Job Data type to be viewed on the map
including Yield (as plots or contours), Relief, Moisture and Dry Matter.

17
The other icon option on the left hand side of the mapping screen is the Visible Layers icon.
Within the Visible Layers option, you can select which layers are visible on the screen and in which order. The layers include field boundaries, job data (yield) and also zone grids (soil types etc.). The MS Bing backdrop browsers can also be selected on as a visible layer.
With the Field and Displayed Job Data chosen, click on the Tools icon.
Once the Tools icon is displayed, the Key for the job
will be displayed. The key can be changed by
selecting from the drop down list.
A Dynamic key will fit to the lower and higher values
that have been recorded for the selected field i.e.
2.72 – 13.90 T/Ha. The number of bands indicates
the numbers of colours that will be used for the key
within the dynamic value range. Alternatively, you
are able to create your own key through
setup>mapping>keys
By ticking the Display Data tick box, you can move your cursor to a point on the field and the
captured information (plot rate, implement width, moisture, dry matter etc.) will be displayed.

18
Editing Imported Job Data
After importing a yield job, it may be necessary to edit the plot data. This could be due to spurious
plot values (e.g. high values due to stones hitting the mass flow sensor), header overlap (missing a
small strip of the crop between normal passes) or even where the combine speed is slow or fast
(headland or short work). When editing or filtering recorded plot data, the field totals will remain
the same.
Plot filter templates can be created in order for certain filtering criteria to be applied to one or more
yield maps.
If the yield job is to be the base for a variable rate application, filtering any unwanted plots will
prevent a variable application plan being based on ‘inaccurate’ data. The grid generator will look to
the yield data in the form of grid cells as opposed to plots.
Filtering Plot Data The field selected for this example has two telegraph poles in the middle. Due to the combine going
around the infield obstacles, it has resulted in header overlap and consequently the yield intake for
those plots is lower. If this data was used for a variable application as it is, these low plot readings
could have an adverse bearing on the application rate of the product when the grid generator is
applied.
Enlarged section of the example field with the yield displayed in Actual Plots.
The same area of the example field with the yield displayed as Filled Contours.
The low yield plots can be seen,
showing where the combine has
navigated around the telegraph
poles. This has affected the
contour map, indicating areas
or poor yield.

19
To filter the data:
Once the Yield map has been imported into Gatekeeper, double click on the job entry within
the Fields module operation grid (the job entry will have a globe symbol indicating the
presence of a map) to bring up either the Recording/Planning Setup screen (depending on if
the map was imported via the recording or Planning module).
Once on the Record Work Done screen, click on the Fields tab and Map sub-tab. The yield
map will be displayed for the first field within the job.
Click on the Filter Plots button to bring up the Filter Plots screen.
Create a new filter by clicking Add Filter and providing it with a relevant name. The example
filter has been named “Min-max and overlap discard”.
Work through the page ticking the boxes to initialise the permissible criteria and entering
any values where applicable (see screen shot overleaf).
The fields to be filtered will be displayed on the left of the screen. Ensure they are
highlighted blue to have the filters applied.
You will need to go back into
the recording setup of the yield
job to filter the plots.
Click on the Map sub-tab on the
Field page to bring up the map
options.

20
Click on the Filter Plots button at the bottom of the page. This will then apply the filter to all
of the plots for the selected fields. If the resulting filter is not correct, click Use All Plots to
restore the plots to their original recorded state.
A Filter Plots notice will appear informing you of how many plots have been filtered out. Click
OK and you will be returned to the Recording Work Done page.
Click on the Field Map button to display the filtered yield map. Any plots that have been
filtered out will be displayed on the map as a hollow grey circle.
Filter Plots button.
When clicked, a
message display
informing how
many plots have been filtered out.
The maximum plot overlap has
been set at 1m. This will remove
where the header has
overlapped around the
telegraph pole greater than 1m.
The Minimum
/Maximum rate
allow you to filter
out abnormally
low/high plots.
Highlight the fields
to receive the filter
The Start of pass delay will remove
plots where the combine is not fully in
work e.g. where the flow of crop
through the machine at the start of the
pass is not at capacity
The plots can also be filtered
where the speed of the
combine is either at a
minimum or maximum speed,
as can the change in speed.
Select to filter plots
recorded outside of the
field boundary and
therefore not
attributed to this field.

21
Now the data has been filtered, a variable application map based on this yield data will not be
influenced by the filtered plots.
The same enlarged section of the example field with
the yield displayed in Actual Plots. The low yield plots
around the telegraph poles have now been filtered
out.
Filtering
With the plots around
the telegraph poles
filtered out, the
contour map displays
the yield off-take in a
more ‘realistic’ map.
The same area of the example field with the yield
displayed as Filled Contours with the plots filtered.

22
Calibrating Yield Data
Within the recorded job information, imported yield data can be calibrated. This may be necessary
due to a more accurate figure coming from the weigh bridge for the weight recorded from an
individual recording, field or fields within the harvest job.
The yield quantities can be adjusted for individual fields or total job quantities (if more than one field
was recorded into a job) either by altering the plot quantity (t/kg) or by adjusting the calibration
factor (John Deere 2600/2630 displays yield imports only).
To Calibrate the Yield Data:
Bring up the completed job details within the Planning or Recording module (depending on
how the job was imported).
Browse to the Fields tab and Map sub-tab. The yield map will be displayed for the first field
within the job.
Click on the Calibrate Job button.
Click on the Calibrate
Job button. Click on the Map sub-tab on the
Field page to bring up the map
options.

23
On the Calibrate Job Map Plots screen, the product that has been recorded will be displayed
along with the individual recordings.
To change the ‘Job total quantity used’, click on the New subtotal quantity method option
and ensure the Update job total quantity used tick box is selected. Then enter the ‘New
subtotal quantity’ figure in the box provided. Click Calibrate Plots. The total quantity will
now be adjusted and will also affect the stock records for the primary output.
o NB. This will automatically provide an Adjustment Factor.
To provide a new subtotal quantity for individual fields or part field recordings, select the
New subtotal quantity method and then select the field recordings from the grid that the
new quantity is to be applied to.
Enter the new subtotal quantity and then select the Update job total quantity used tick box
for the new subtotal to affect the total quantity used if applicable. Click the Calibrate Plots
button.
Ensure the New subtotal quantity
method is selected.
The Job total used is displayed at the
top of the page.
Tick the Update job total quantity
used box.
Click on Calibrate Plots.

24
To reset the quantities, ensure the Reset to original method option is selected, tick the
Update job total quantity used tick box and click Calibrate Plots.
Ensure the New
subtotal quantity
method is
selected.
The selected
fields total plot
quantity is
displayed at the
top of the page
and reflects the
selected fields.
Tick the
Update job
total quantity
used if
applicable.
Click on Calibrate Plots. Enter the new subtotal.

25
Annexe A Gatekeeper Tractor Unit Settings and the John Deere Displays
You have the ability to setup your Tractor Unit Definition Settings on Gatekeeper. When you export
to your data storage device, these Tractor Unit Definition Settings will be used within Machine
Offsets on your John Deere Displays.
Any data already on the data storage device, will be overwritten by exported data saved in the
Gatekeeper Tractor Unit Definition Settings. If you do not have anything entered within the Tractor
Unit Definition Settings then the Machine Offsets will be overwritten with zero values and they will
have to be re-entered on the displays.
Setting up your Tractor Unit Definition Settings
To setup your Tractor Unit Definition Settings so that they are exported to your data storage device
please follow these instructions;
Within Gatekeeper go to the Setup menu (above all the module icons).
Within the Setup menu choose Tractor Units.
In the tree view on the left, select the Tractor Unit (i.e. your Combine or Tractor) that you wish to add Settings to. Use the Add button to add new Tractor Units as required.
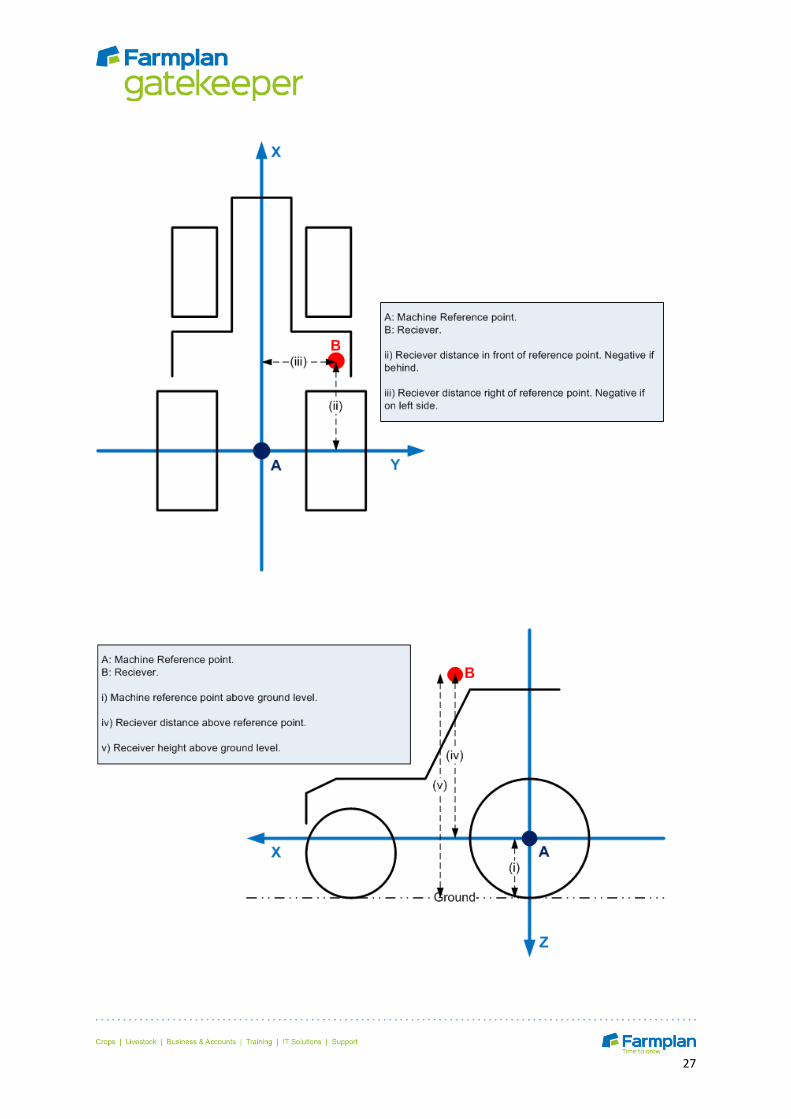
The name of the Tractor Unit and its Category, together with any reference will be shown on the right. Beneath this a Precision Farming Definition frame will be displayed. Enter the appropriate values into the relevant boxes, using the diagram overleaf for guidance, as follows;
Non Steering axle
The Non Steering axle defines the Machine Reference point referred to next
Select Front (for example, for a Combine) or Rear (for example, for a Tractor) from the drop down
list.
Machine reference point above ground level (m)
See Fig (i) in the diagram overleaf. This must always be a positive value.

26
Receiver distance in front of machine centre (m)
See Fig (ii) in the diagram overleaf. In the John Deere Display, Machine Offsets window this is setting
B. Use a negative value if the receiver is behind the reference point, i.e. .
Receiver distance right of machine centre (m)
See Fig (iii) in the diagram overleaf. In the John Deere Display, Machine Offsets window this is
setting A. Use a negative value if the receiver is left of the reference point, i.e. .
Receiver distance above machine centre (m)
See Fig (iv) in the diagram overleaf. Use a negative value if the receiver is below the reference point,
i.e. .
Receiver height above ground level (m)
See Fig (v) in the diagram overleaf. This is calculated by summing the Machine reference point
above ground level (m) and the Receiver distance above machine centre (m) and is not editable. In
the John Deere Display, Machine Offsets window this is setting D.
Turn Radius (m)
The machine turn radius.
Turn sensitivity (JD specific)
The turning sensitivity required for the machine. This is currently only used for John Deere and has a
default value set of 70. This can be edited.
Default hitch type
From the drop down list select the default hitch type for the machine, i.e. ‘Front Three Point’ for a
Combine or ‘Rear Three Point’ for a Self-Propelled Sprayer.
27

28
Annexe B Linking Gatekeeper and John Deere Crop Types
Gatekeeper Crop JD Crop Storage Moisture
Wheat Winter Wheat (Euro Wtr) 14.50%
Wheat (Euro Feed)
Wheat (Durum)
Wheat Spring Wheat (Hrd Rd Spr)
Wheat (Hrd Rd Wtr)
Wheat (Sft Rd Wtr)
Rape Winter / Rape Spring Rape Seed (E Oil) 8.00%
Rape Seed (E Ind)
Peas Dried / Pease Vining Peas (Euro) 10 - 12%
Barley Winter Barley (Euro Wtr) 14.50%
Barley Spring Barley (Euro Spr)
Barley (Euro 6)
Oats Winter/Oats Spring Oats (Euro) 12%
Maize Grain Corn (Euro) 15%
Rye Winter / Rye Spring Rye (Euro) 14.50%
Linseed Winter / Linseed Spring Flax >11%
Beans Dried Winter / Beans Dried Spring Castor Beans Depends on customer
Edible Beans
French Beans
Green Beans
Haricot Beans
Lima Beans
Navy Beans
Red Kidney Beans
Soybeans
Tick Beans
White Beans
Lucerne (Alfalfa) Alfalfa N/A
Grass Grass Forage N/A
Maize Forage Corn Silage N/A

29
Annexe C Using MyJohnDeere with Gatekeeper
Gatekeeper now integrates with the MyJohnDeere web portal facilitating wireless data
exchange between Gatekeeper and GreenStar displays. Functionality remains the same as
the current integration with GS3 displays. The changes mean that data is exported locally to
the PC before being uploaded to the MyJohnDeere web portal. Conversely when completed
records are imported back to Gatekeeper, they are downloaded locally to the PC before
being imported in the conventional way.
When setting up your device for the first time,
turn on the Cloud Credentials and click on the
Green icon to link to MyJohnDeere in order to
gain external authorisation.

30
Enter your MyJohnDeere
credentials to connect and
Gatekeeper will retain the
established link.

31
Once authorised your Cloud
Credentials will populate this
screen and you Organisation and
Devices will show.

32
Please note, integration with John Deere devices is possible through the Farm Mapping and
John Deere Devices modules in Gatekeeper. Existing modules users will have access to the
new functionality.
When data comes back from the in-cab controller to the MyJohnDeere account Gatekeeper has the
ability to download the last 10 dated files and import them.
Should you wish to import more files then via the MyJohnDeere account the user will need to delete
the last 10 data files from the list. Then the next 10 latest files awill be able to be downloaded.
Once your cloud credentials have been entered, data can be
exchanged with MyJohnDeere.
Before data can be uploaded. It must be exported as per
normal to a local location using the Path locator and Profile
selector. It is exported from your PC to MyJohnDeere by
clicking on the Upload button. If the Cloud is unavailable,
data can be exchanged from Gatekeeper (fields, boundaries,
guidance, work plans) in the normal way via USB.

33
Annexe D Implement nomenclature in GK and John Deere
John Deere GS3 2630 Gatekeeper Software
Implement Type Implement Model Implement Name Implement Heading Implement Name Implement Sub-Category
Air Cart N/A Air Cart Drill/Planter Air Cart Air Cart
Baler N/A Baler Baler Baler Other
Belt Pickup N/A Belt Pickup Combine Header Belt Pickup Belt Pickup
Boom N/A Boom Application Boom Sprayer (Self Propelled Boom)
Cane Harvester N/A Cane Harvester Other Cane Harvester Other
Cart N/A Cart Other Cart Other
Chopping Corn Head N/A Chopping Corn Head Combine Header Chopping Corn Head Chopping Maize Header
Corn Head N/A Corn Head Combine Header Corn Head Maize Header
Cotton Stripper N/A Cotton Stripper Other Cotton Stripper Other
Draper N/A Draper Combine Header Draper Draper
Dry Spreader N/A Dry Spreader Application Dry Spreader Spreader (Dry)
Flex Platform N/A Flex Platform Combine Header Flex Platform Flex Combine Header
Flexible Draper N/A Flexible Draper Combine Header Flexible Draper Flexible Draper
Grain Drill N/A Grain Drill Drill/Planter Grain Drill Box Drill
Hydraflex Platform N/A Hydraflex Platform Combine Header Hydraflex Platform Hydraflex Combine Header
Liquid Fert. Tool N/A Liquid Fert. Tool Other Liquid Fert. Tool Other
NH3 Tool N/A NH3 Tool Other NH3 Tool Other
Other N/A Other Other Other Other
Pickup N/A Pickup Forage Header Pickup Pickup
Planter N/A Planter Drill/Planter Planter Precision Drill
Platform N/A Platform Combine Header Platform Combine Header
Pull Behind Sprayer N/A Pull Behind Sprayer Application Pull Behind Sprayer Sprayer
Rigid Platform N/A Rigid Platform Combine Header Rigid Platform Other
Rotary N/A Rotary Other Rotary Other
Rotary Ditcher N/A Rotary Ditcher Other Rotary Ditcher Other
Row Crop Head N/A Row Crop Head Combine Header Row Crop Head Other
Row Dependent N/A Row Dependent Forage Header Row Dependent Row Dependent
Row Independent N/A Row Independent Forage Header Row Independent Row Independent
Row Units N/A Row Units Other Row Units Other
Scraper N/A Scraper Other Scraper Other
Seeder N/A Seeder Drill/Planter Seeder Air Drill
Tillage N/A Tillage Tillage Tillage Other
Unknown Header N/A Unknown Header Other Unknown Header Other