jdlink™ - cross implement: your john deere dealer deere jdlink.pdf · component mtg – modular...
TRANSCRIPT

JDLink™VALUE AND WALK AROUND GUIDE
CLICK THE ARROW TO GET STARTED
2 | JDLink Value Guide
JDLink™
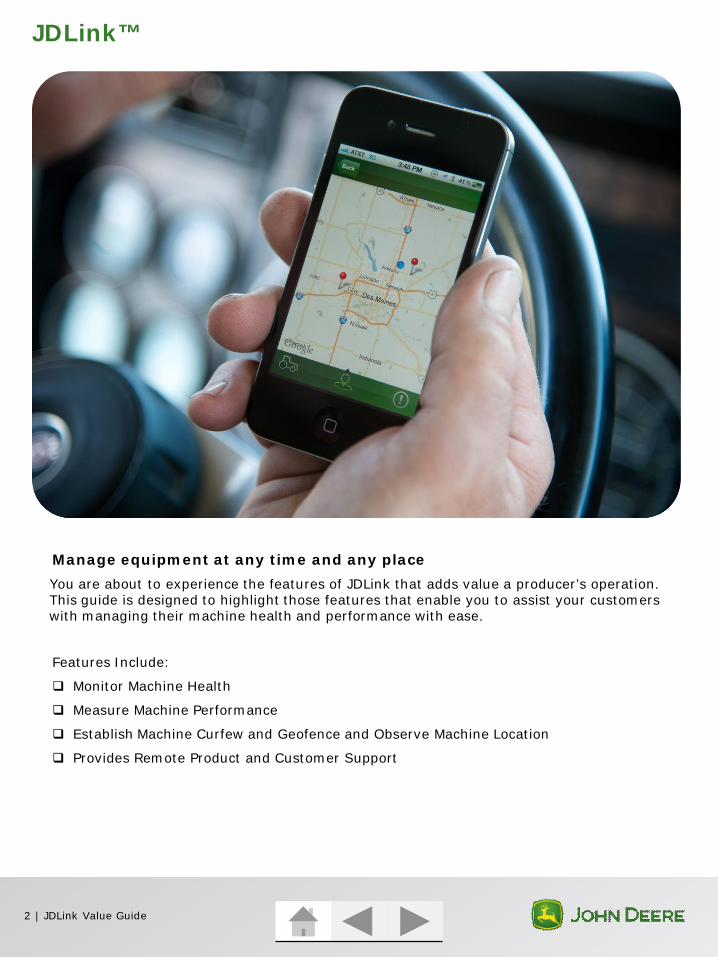
Manage equipment at any time and any place
You are about to experience the features of JDLink that adds value a producer’s operation. This guide is designed to highlight those features that enable you to assist your customers with managing their machine health and performance with ease.
Features Include:
Monitor Machine Health
Measure Machine Performance
Establish Machine Curfew and Geofence and Observe Machine Location
Provides Remote Product and Customer Support

3
To get started, choose a section to review or explore all the new features by using the arrows below
JDLink™ Value Guide MenuJDLink™ Value Guide Menu
Operation-Mobile Device
Operation-Reports
Required Components
Operation-DashboardSelect Data
Operation-Ultimate
Data Pod Use
Account Setup
Product OverviewWeb User Roles
Operation-Admin/ Settings
Resources
Frequently Asked Questions
| JDLink Value Guide

Component
MTG – Modular Telematics Gateway Controller
SIM – Subscriber Identity Module Plug
Molex CMC Connector(Satellite Only)
Hi Profile/Low Profile Antenna
All Makes Universal Field Install Harness (JDLink Select Only)
JDLink™ Required Components
4 | JDLink Value Guide

JDLink™ Account Setup
5 | JDLink Value Guide
•Customer will go through the following steps:
•1. On Stellar Support Homepage, click on Profile Maintenance.
•2. On Login Page, select Need to Register in parenthesis under User Name
•3. Fill out questions to create a profile
LDAP ID Account Registration
•Dealer will create a JDLink account for customer:
•1. In Dealer JDLink Account, go to Customer Accounts and select “Create New Account”
•2. Customer decides what the Organization Name for their account will be. Put this in Organization Name Box and then click Continue.
•3. A LDAP ID search window will appear. Type in all or part of customer information and click search.
•4. After finding customer’s LDAP ID, select it and click Save and Close to finish creating customer’s JDLink Account
JDLink Account Registration
•1. Customer logs onto JDLink Account at: http://www.jdlink.com.•Screen prompts customer for User ID and Password – LDAP ID customer just created
•2. Customer must accept end user license agreement (EULA) in order to access account•NECESSARY STEP for customers to do even if they don’t intend to use the JDLink account
•3. If customer doesn’t want dealer to have third party access, they must delete the dealer’s profile from their account in the Users & Groups Tab.
Customer Access to JDLink Account
Customer Account Setup v. Dealer Account SetupWith a dealer account, the account administrator grants JDLink access to employees through Pathways. Dealer employees then use their RACF ID to access JDLink. The process for setting up a customer account is very different. Take time to explain the benefits and process to setting up a JDLink Account to new customers. This not only benefits the customer, but also limits your liability with data security. This page gives instructions on how to properly set up a customer account.

JDLink™ User Settings
6 | JDLink Value Guide
Determine the right role for right personOnce a JDLink Account is activated, the account administrator must determine who will have access to the account and what level of accessibility that user will have. This table can help account administrators determine what access level to assign to each account user.
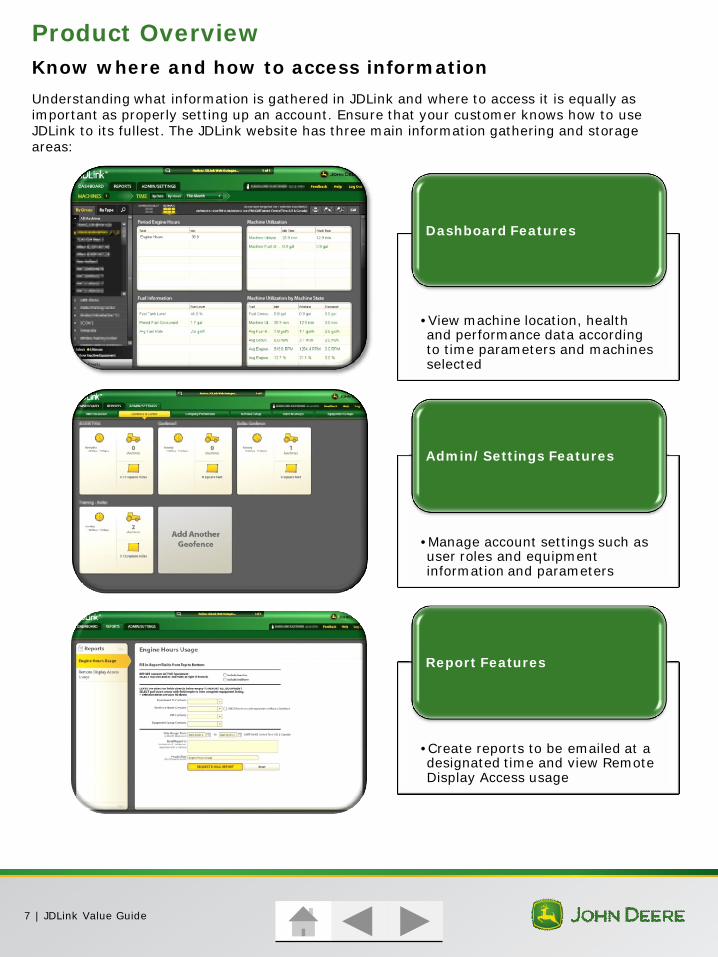
Product Overview
•View machine location, health and performance data according to time parameters and machines selected
Dashboard Features
•Manage account settings such as user roles and equipment information and parameters
Admin/Settings Features
•Create reports to be emailed at a designated time and view Remote Display Access usage
Report Features
7 | JDLink Value Guide
Know where and how to access information
Understanding what information is gathered in JDLink and where to access it is equally as important as properly setting up an account. Ensure that your customer knows how to use JDLink to its fullest. The JDLink website has three main information gathering and storage areas:

Operation – Dashboard Features
8 | JDLink Value Guide
Sidebar
Select machine or equipment group by clicking on drop down arrow (equipment IDs turn yellow)Search for machines by type or group and add or select customized landmarks
Time Filters
At least one machine must be selected to adjust time filtersTo adjust time range of data displayed in Dashboard Pods:
Select time “By Date” from drop down menuSelect time “By Hours” to display a range of engine hours
After selecting the appropriate time, select “Update Data”
Data Pods
Each data pod can be enlarged by clicking on pod nameData from pods can be printed and exported to Excel or PDF
Select Data Pods
•Function: Shows latitudinal/longitudinal coordinate location of machine(s) and can provide driving directions to machine
•Top Right Corner of Map provides different Map Views – Road/Street Map, Satellite, Hybrid and Terrain Map
•To generate driving directions to a machine:• 1. Click on Machine’s Information Balloon• 2. Select Directions To• 3. In directions tab at bottom left corner of Map, insert address or latitude and longitude coordinates for starting destination and click Get Directions
•Follow the same process for Directions From a designated place to a machine.
Map Pod
•Function: Shows any diagnostic trouble codes and allows user to acknowledge alerts•Filter Alerts by selecting the Filter button at the bottom of left corner of pod•Use the Alert Type, Priority and Status drop down boxes to set filters•To acknowledge an alert, click on Acknowledge•Clicking on the machine’s ID will automatically show machine in map location
Alerts Pod
•Function: Displays engine hours based on the time filter and the total hours of operation•To see hours of operation by date and time, click on machine ID•Maintenance log and RDA can also be accessed by clicking on machine ID
Engine Hours Pod
•Function: Displays number of hours a machine has until its next service interval based on a maintenance plan set up by customer
•To set up a maintenance plan, click on “Configure Now”•Key Note: There is no fee associated with maintenance plan
•Users receive alerts based on the services intervals set up in maintenance plan
Maintenance Pod
•Function: Shows if a machine failed to call in during a scheduled time•Possible causes of a missed call:•Machine in Hibernate Mode•Machine is out of Cellular Coverage Area
Missed Calls Pod

Ultimate Data Pod
Function: Measures various machine performance points
A critical part to using JDLink successfully is being able to make changes based on the data. This section looks at how to analyze machine performance data.
Ultimate data is available for tractors, combines and sprayers. The following list shows pods commonly found in JDLink for equipment from all three platforms.
9 | JDLink Value Guide
Operation – Ultimate Data Pod Use
Pod Name Function/Data Shown Ways To Use This Data
AutoTrac On Time
How often AutoTrac was used compared to when it is unused
Beneficial for customers to ensure operators are using the machine guidance to perform field work
Average System Voltage
Voltage levels for a machine Good starting place to troubleshoot power transfer issues or bad wire connections
EngineInformation(not on SPFHs)
Number of times a machine completed and aborted a filter cleaning (Also includes Engine RPM set point for Field Cruise in tractors)
If numerous aborted cleanings, explain to customer how important these filter cleanings are to a machine’s overall health
Fuel Information
Average fuel consumption, total amount of fuel consumed during time period selected and fuel tank full level
Useful to look back on for rental fleet work
Indicate periods of fuel inefficiencies that could be eliminated
Machine Utilization by Machine State
Machine engine performance and fuel consumption during speed-determined on time periods: Idle, Working and Transport
Analyze this data for machine performance efficiency Compare:
-Fuel consumption to engine RPM, ground speed and load applied to a machine
-Idle time to working and transport time
Period Engine Hours
Number of hours the machine ran during timeperiod selected
Useful for customers keeping track of operator hours logged
Temperature Machine oils and coolant average and maximum temperatures
Use this as a starting point for basic troubleshooting
Additional Ultimate Data Pods by Platform:Tractors: Auto Exhaust Filter Cleaning, Auto/Efficiency Manager™ On Time, Rear Hitch Command, SCV Flow Rate, SCV Detent TimeTractors and Sprayers: OnTime

Operation – Admin/Settings Features
•Function: Allows user to create notification groups for equipment •Notification groups send “alerts” or error codes/problems occurring with a machine to a user or group of users in an account.
•A notification group is very useful for various account users in charge of different pieces of equipment.
Alert Escalation Tab
•1. Click on People in notification group•2. With Escalation 1 highlighted on sidebar, click Add Contact•3. Click on Pencil in box in top right corner of contact box•4. Select user from drop-down box and select alert categories and types that user should receive •Multiple people can be alerted at each Escalation Level
•5. Go to sidebar and select how long JDLink system needs to wait for Escalation 1 Person(s) to acknowledge alert before sending it to Escalation 2 Person(s)•Alert will be resent to Escalation 1 Person(s) if no Escalation 2 Person(s)
•6. Repeat these steps for each Escalation Level and save changes
To set up alert escalations for a notification group:
•1. Select the Machine Icon in top right corner of Notification Page•2. Click on box in top left corner of equipment’s box to select which equipment should be added to the notification group. Click Save.
To add a piece of equipment to a notification group:
10 | JDLink Value Guide

Operation – Admin/Settings Features
11 | JDLink Value Guide
•Function: Set up time- and geographic-based parameters for equipment •JDLink sends alert if equipment is operating outside of the geofence and/or curfew
•The following steps can be used to help train customers how to set up a geofence and curfew for their machines.
Geofence and Curfew Tab
•1. Click Add A Geofence box•2. Click on Machines in box and select equipment to be included in Geofence
•3. Next click on Time portion in Geofence box•4. Click on Pencil in Machine Curfew box’s top right corner. Under define operating hours, check days and hours during which equipment is NOTapproved to be running. (i.e. 5:00 PM Fri. – 6:00 AM Mon.)
•5. If different curfews are needed for each day of the week, click Add New Time Span.
•6. In this box, determine what level of alert this should be – red, yellow, or info. Also indicate what trigger the alert should be based on (i.e. Engine Starting or Machine Moving a Certain Distance outside of the Geofence.
•7. Click on the Pencil in the Geofence box. Click on Attach Geofence.•8. Zoom in on the map to narrow down area where equipment’s geofenceshould be placed. (Geofence must be greater that 0.31 square miles). On top left corner of the toolbar, click on Draw Geofence button. (It’s the gold box that has a square with a dot in each corner).
•9. Drag mouse across the piece(s) of equipment and resize Geofence until it’s in the correct spot. Click Apply and Close when done.
•10. In Geofence box, select the date range where fence should be activated and what level of alert it should be escalated to if the equipment exits or enters the Geofence. Then click Save.
To create a Geofence and Curfew:
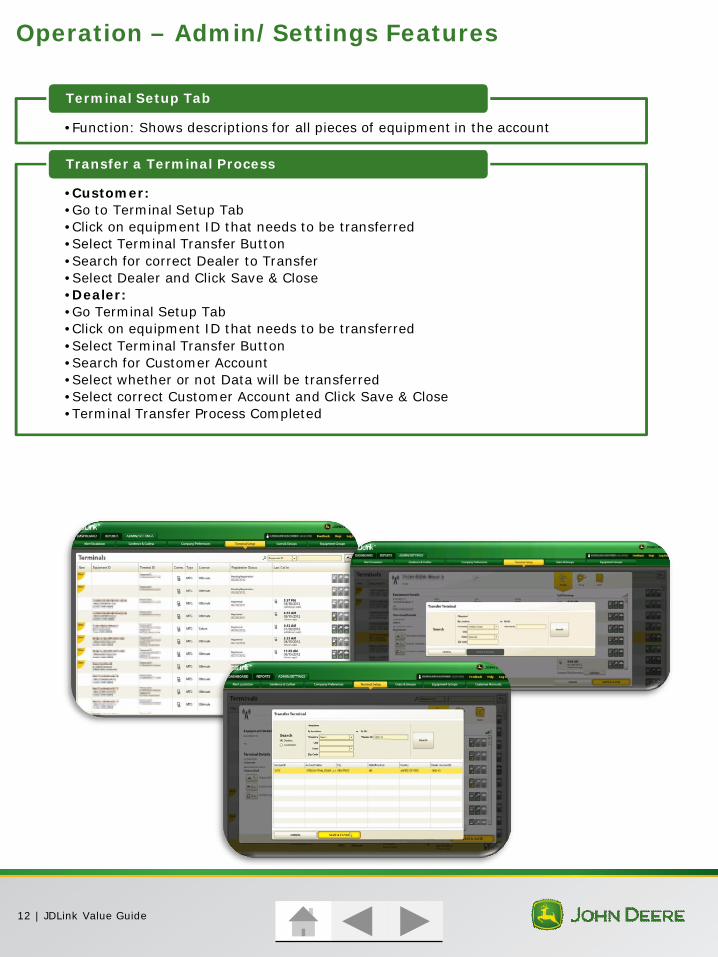
Operation – Admin/Settings Features
•Function: Shows descriptions for all pieces of equipment in the account
Terminal Setup Tab
•Customer:•Go to Terminal Setup Tab •Click on equipment ID that needs to be transferred•Select Terminal Transfer Button•Search for correct Dealer to Transfer•Select Dealer and Click Save & Close•Dealer:•Go Terminal Setup Tab •Click on equipment ID that needs to be transferred•Select Terminal Transfer Button•Search for Customer Account •Select whether or not Data will be transferred•Select correct Customer Account and Click Save & Close•Terminal Transfer Process Completed
Transfer a Terminal Process
12 | JDLink Value Guide

Operation – Admin/Settings Features
• On sidebar, select intervals for a cellular report to be generated • User determines whether or not dealers can access their machine with Service ADVISOR Remote.
• Terminal Power Savings Settings allows user to adjust length of time equipment stays awake in JDLink after it is keyed off
• Energy Conservation shows the voltage of the battery. The “Automatically determine voltage thresholds” box should be selected.
Terminal Setup Page
•Add any notes regarding this equipment here
Notes Tab
13 | JDLink Value Guide

Operation – Admin/Settings Features
•Function: Stores account information for the user’s company
•This is also where automatic email data reports can be set up
Company Preference Tab
•Function: Create groups (click Add New Group at bottom of sidebar) for user IDs. Double click on user ID cards and drag to appropriate group
•In customer account, account admin can edit a user’s role by clicking on the edit pencil next to the user’s ID
•To adjust dealer user roles or add new users to the account, the dealer account administrator must make this change in Pathways•To change a dealer account role:•1. Go to www.pathways.deere.com•2. Click on Systems Tab•3. On left sidebar, select Profile Administration
•4. Select Profile Administrator Application•5. Make changes as necessary
Users & Groups Tab
•Function: Create groups (click Add New Group at bottom of sidebar) for equipment. Double click on equipment ID cards and drag to appropriate group.
Equipment Groups Tab
•Function: Dealers create JDLink Organization Account here for customer
•Dealer searches for customer’s LDAP ID here and adds customer to customer’s Stellar Support ID to customer’s JDLink account.
Customer Accounts Tab
14 | JDLink Value Guide

• All equipment in account • Individual equipment • Equipment by group• Equipment by partial PIN or equipment ID • Reports may be sent to up to 5 email addresses• Report time span• Review Engine Hours by date from previous months• Time Span must not exceed 4 months
Engine Hour Reports can be created for:
• If machines with RDA capability are in a JDLink account, the user can click on the “View Report” button to see when and for how long RDA was used per machine.• “View Report” button takes users to their MyJohnDeere.com page
Remote Display Access Report
15 | JDLink Value Guide
Operation – Reports Features

•View and Acknowledge Alerts•View Machine Location•Access Driving Directions to Machine•Ping Machine•Share Machine Location•Perform Remote Display Access
Functionality
•Free App•Accessible from iOS or Android Devices
Availability
16 | JDLink Value Guide
Operation – Mobile Devices

Resources
Dealer Corner on Stellar Support:
https://stellarsupport.deere.com/StellarSupport/en_US/Dealer/
The Information and Logistics Category on this page lists numerous, current resources to help keep you up-to-date with JDLink information.
Find JDLink Machine Compatibility Document Here
Find How to Request Cellular Coverage in Your Area
Subscription Reports:
https://stellarsupport.deere.com/stellar/servlet/com.deere.ams.stellarsupport.view.servlets.ReportServlet
This site allows you to generate a report to see which of your customers have JDLink subscriptions expiring during a customizable date range.
JDLink Updates:
http://stellarsupport.deere.com/en_US/products/jdlink/
Stay current on what changes have been made to JDLink by reading the Release Notes listed on this page.
DTAC Solution 88602:
http://dtac.deere.com/Solutions/English/88602.htm
Solution 88602 is the all-encompassing case number for JDLink Related DTAC Solutions
17 | JDLink Value Guide

18 | JDLink Value Guide
Frequently Asked Questions
Q: What machines are JDLink™ Ultimate Compatible?
A: See the JDLink Compatibility Chart listed on the Stellar Support website under the Dealer Corner’s Information and Logistics Category.
Q: What happens when a customer’s JDLink Subscription Expires?
A: When JDLink subscription expires, JDLink system will be deactivated. Customer will be notified of expiration via E-mail. Expiration means all data collection on all machines and groups will stop. Machines and terminals will show as inactive on your company's JDLink website. If more than one license exists between an account and a device of the same license type and one of those licenses expires, data collection for measurements and any related features will continue on the device
Q: How can I view JDLink cellular coverage for my area?
A: Review the LINK for cellular coverage maps for JDLink. Coverage maps are cellular coverage maps used as a reference. There is no easy correlation to go between a common hand held cell phone and JDLink as each cell phone has different capabilities. Most individuals associate cell signal with capability to make a voice phone call. JDLink communicates data and not voice. Data can be sent in a brief intermittent connection where voice requires constant connection.
Q: Why can’t I create a geofence for a customer’s machine from my dealer account?
A: The customer already has a geofence set up for this machine. A machine can’t have two geofences.
Q: Do customers set up their own maintenance plan for a machine, or is that my role as a dealer?
A: The customer sets up their own maintenance plan for their machine. The maintenance calculator that they use provides more high-level maintenance options in comparison to the PM Maintenance Calculator that a dealer sees when the he/she clicks on “Configure Now” in the maintenance pod in dealer account.

JDLink™VALUE AND WALK AROUND GUIDE
Unpublished work © 2012 Deere & Company. All Worldwide Rights Reserved.THIS MATERIAL IS THE PROPERTY OF DEERE & COMPANY.
ALL USE, ALTERATIONS, DISCLOSURE, DISSEMINATION AND/OR REPRODUCTION
NOT SPECIFICALLYAUTHORIZED BY DEERE & COMPANY IS PROHIBITED.