isatel mds21 clamp sw operation manual
DESCRIPTION
Isatel MDS21 Clamp SW Operation ManualTRANSCRIPT

ISATEL MDS21 clamp application ISATEL Emitec AG (switzerland)
Plff) /}01ft;
N'tJOb-o
kl1 S S "''"'0
Otfb7 fO g;8
Software Operation .. Manual
ISATEL Emitec AG "a.d.30.11.1994 page 1 / 18

Index
Chapter Discription Page
1.1 Installation Software 3
1.2 Installation Hardware 3
1.3 Parameter Setup 4 ... 5
2. New Functions 6 ... 7 ".
3. Discriptions of commands 8 ... 11
5.1 Application DEISEL 12 ... 14
5.2 Application with macro 15 ... 18
ISA TEL Emitec AG ©a.d.30.11.1994 page 2/18
1.1 Installation Software
Copy all files from Disk to a directory of the harddisk. For example:
1.) "md ISATEL" (to make Directory on Harddisk
2.) "Copy a:\*. * c:\ISATEL"
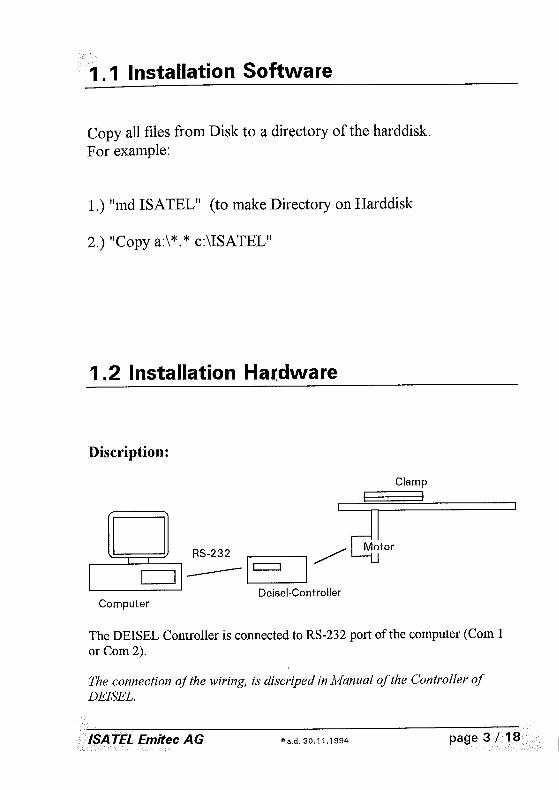
1.2 Installation Ha(dware
Discription:
I
D RS-232 /' ~to, 1 c=J 1--1 c::::J 1
'---------' Deisel-Controller Computer
Clamp I
The DEISEL Controller is connected to RS-232 port of the computer (Com 1 or Com 2).
The connection of the wiring, is discriped in lvfanual o.fthe Controller of DEISEL.
ISA TEL Emitec AG @a.d. 30.11.1994 page 3/18
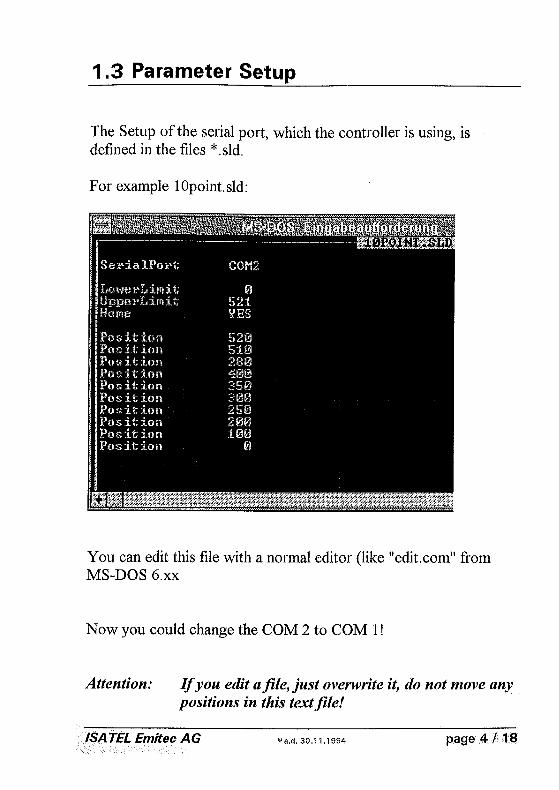
1.3 Parameter Setup
The Setup of the serial port, which the controller is using, is defined in the files * .sld.
For example lOpoint.sld:
You can edit this file with a normal editor (like "edit.com" from MS-DOS 6.xx
Now you could change the COM 2 to COM I!
Attention: If you edit a file, just ovenvrite it, do not move any positions in this text file!
ISATEL Emitec AG @a.d. 30.11.1994 page 4/18

Also in this file you can edit the following parameters:
- Default limits for start and stop positions
- To move the clamp back, after the measurement is done, to start position to save time! To be ready for the next measurement. (HOME Position Yes/ No)
- To edit the positions, where the clamp has to drive!
Use a normal DOS editor (or compatible). If you need help for that, look in your DOS Manual, how do use it!
If you have to make a new file, just rename the old one (save with an other name!)
Edit limits: Lower Limit is normal by 0 (cm) Upper Limit is at least the last position + 2cm
Home (Position): YES or NO
Positions: There are Max. 10 Positions, which can be defined. The Positions are entered in cm I s
Important: Before you run the Software, you have setup the mode Com of the port you are using (Coml or Com2) with the same serial parameters as the DEISEL Controller has! (see also the PMM8030-Manual, Plotter). Also contact the DOS-Manual.
ISA TEL Emitec AG "a.d.30.11.1994 page 5 / 18

2. New Functions
2.1.1 Save Setups
To store complet settings of the Software, like: - Start- / Stop - Frequencies - Limit Lines - Detectors - Default settings - and more
2.1.2 Preprogramm the positions ofthe clamp
- Define the Positions, whe~e the clamp has to be automaticly moved.
- Display of the clamp position.
2.1. 3 Macro - Functions
- Loads automaticly 2 Setups and then making measurements. - Writes automaticly frequencies, which are above the limit lin, into
the table.
2.1.4 New Displays
- Shows the preprogrammed clamp positions - New graphic for the Bar-Display, to see the bar also from a
distance of Sm, away from the Computer-Monitor.
ISA TEL Emitec AG @a.d.30.11.1994 page 6/18

2.1. 5 Qpeakdelay Measurement
Makes several independent Quasi-Peak measurements in one sequence. If the value is 05, than it makes 5 measurements and stores the measurement with the highest value.
2.1. 6 Printout through Win Word
For better quality of a Test-Report, it is now possible to import the data (measurement curve) into WinWord, as a Plot-File. So it is also simple to manage all the Test-Reports, just in using the FileManager of WinWord. Also, it is possible to have Logos in the report and create a WinWord,macro for the test-report.
[SA TEL Emitec AG @a.d. 30.11.1994 page 7/18

3. Discriptions of commands
2.1.1 Save / load Setups
Through the MENU "File":
"Save Panel" to store settings
"Load Panel" to load stored settings
2.1.2 Preprogramm the positions of the clamp
Look under the chapter 1.3 Parameter Setup
2.1.4 New Displays
See in the Manual Mode Menu or when you are usmg the "Qpeakdelay" Function
ISA TEL Emftec AG "a.d.30.11.1994 page 8 / 18

Shows the display, when the clamp is moved automatic:
Clamp Position
Preflroorammed Clamp-Positions
2.1.3 Macro - Functions
The macro ( automatic sequence) is executed by pressing the function Key "FS"
AUTOSEQ.MAC is the file, which defines the sequence.
Again, use a normal DOS-Editor to edit the File.
The 1. line (FirstSetup) loads the setting with the name "First"
ISA TEL Emitec AG "a.d.30.11.1994 page 9 / 18
and starts the measurement and when this is done, it loads the next setting
The 2. line (SecondSetup) loads the setting, with the name "Second" and after this measurement the sequence is finish.
Sound is an option to turn the beep on when writing to the table (YES or NO).
Note: Do only edit the second column !
2.1.5 Opeakdelav Measurement
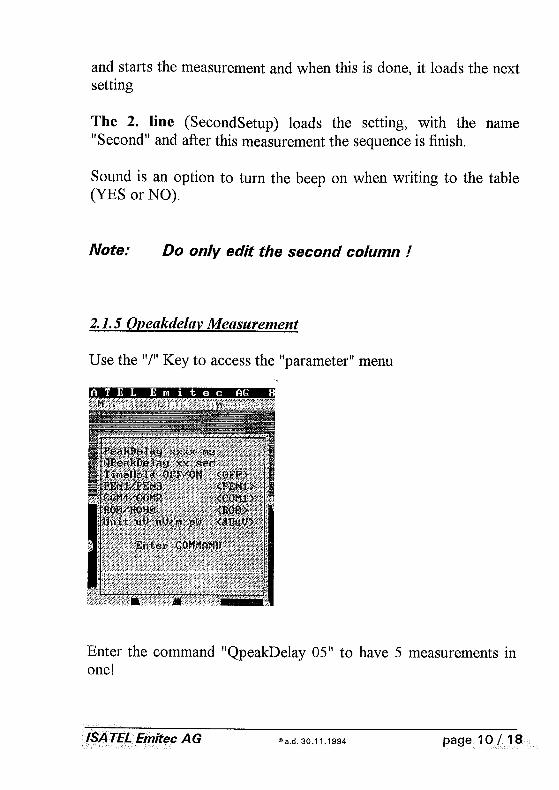
Use the "/" Key to access the "parameter" menu
ATE L E mit e c AG
Enter the command "QpeakDelay 05" to have 5 measurements in one!
ISA TEL Emitec AG @a.d. 30.11.1994 page 10/18

This works only when the CISPR detector IS activated m the Sweep Menu.
Is the value less then 02, there will be no Bar-Display to look for the maximum in clamp measurement mode!
2.1.6 Printout through WinWord
File "Plot" use the command "PlotFile" to store the graphic file on Harddisk, which you can import into WinWord.
In WinWord, use the Command "Graphic" in the Menu "Insert".
PMM 8030 ombientol noise
30
: e--------· -.-~~ ----_. ;.--
----_. ~--, -----L-: __ l ___ : _____ .c __ : :
r:::::::::r T : ,
100
,
:
Ii.~ e--------·
i~J'" f--------·
1.1
MHz
-------- l ____________ .
' , , , , , w _______ ~ __ ---_------_~-
-j -,I 11.,1./. I lUll LII,~1 I,ILI ,j.JJJ
,: : I. Ii ill,
,jJ 11.11111111.
dBuV 1000
120
i--- i--· [---i--'
i---I--· 90
~--- j_¥'
60
I IIIUI.I !.l 30 lWm
j--,-iJ ~------- ,------lJi. :JY -~"II" .... ",
._1 _.1
f-------, , : o
Limit: CISPR83M Tille: NOISE Dote: 12-06-1994
If you have any problems with importing the graphics, make sure that WinWord has the PLT-Filter installed!
ISA TEL Emitec AG @a.d. 30.11.1994 page 11 / 18

4. Applications
4. 1 with DEISEL Controller
Two ways to make the measurement : - a.) Using the sweep or - b.) Using the frequency table function
With Sweep Function
- Takes longer - Very accurate
Clamp drives to the 1.Position
Makes the 1.Sweep (from start to stop)
Clamp drives to the 2.Position
Makes the 2.Sweep (from start to stop)
At the End Worstcase of all measurements
[SATEL Emftec AG
With Frequency Table Function
- Very fast - Difficult to find the frequencies - See also next application
Clamp drives to the 1.Position
Stepping through frequency table
Clamp drives to the 2.Position
Stepping through frequency table
At the End Worstcase of all measurements
@a.d.30.11.1994 page 12/ 18

How to Setup the Parameters:
1.) To setup the table or the sweep menu, look in the Operational Manual of the PMM 8030 EMC Receiver.
2.) Activate the right table for the positions of the clamp. Use the command "Slide Bar" in the Tab Menu and choose the file. (see below).
When you have chosen the file, it shows the parameters of it! (see below)
E Mit e c AG B 0 3 0
ISA TEL Emitec AG @a.d.30.11.1994 . page 13/ 18
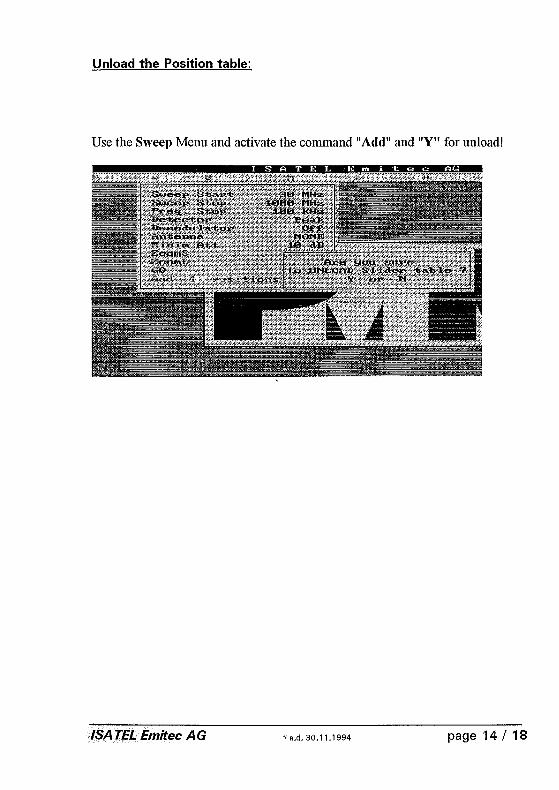
Unload the Position table:
Use the Sweep Menu and activate the command "Add" and "Y" for unload!
ISA TEL Emitec AG "a.d.30.11.1994 page 14/ 18
4. 1 Macro function application
We would like to make an Emission-Measurement with the MDS-Clamp, as simple as possible. To do that, we use the macro.
Principle:
1.) First we have to find all the interference Emission-Signals of the EUT, which are above the Limit.
2.) Then we write all this frequency into the table.
3.) Then we measure again, but with the frequency table and moving the clamp over the cable to find the maximum level of all the signals.
1.) We have to place the MDS-Cfamp as near as possible to the EUT, so that we can also measure the high frequencies.
2.) If we place the Clamp near the EUT, we make a measurement Error at low frequencies (from 30 ... 100MHz).
Solution: We have modified a limit, which takes care about that (MDS]RE)
3.) So we have to change the Limits. One Limit for the Pre-Sweep and the normal Limit.
4.) To find the peaks we use the Peak-Detector and for accurate measurment we have to use the CISPR-Detector.
5.) To make the allover Error as low as possible, we have to think, that the normal measurement only takes the value at this time now (like a photograph). If we have an EUT like a machine, which has a lot of different Cycluses, then perhaps we measure at the wrong moment. For this purpose we have the "QpeakDelay" Function, which takes, at the same frequency, as many complet measurements, as you have setuped. Each measurement takes around 2 seconds.
ISA TEL Emitec AG @a.d.30.11.1994 page 15/ 18

Procedure with the Macro:
Name: Tabel: Setups:
Limits:
Step Action
AUTOSEQ.MAC AUTOTAB First Second MDS PRE MDS2l
What happens ?
1 Press "FS" It starts the macro, Setup first will be loaded: - Start/Stop Frequency and Frequency-Step - Limit MDS Pre - Peak Detector
2 The measurement starts
,
3 Every frequency, which above the limit we be edit into the "Frequency-Table"
4 Sweep is - New Limit line will be loaded (MDS21) finish - QpeakDelay will be set to OS
- The Frequency-Table will be loaded - The CISPR Detector will be used
S Stops at the -Now the Bar is shown frequencies - Move the c1map, until you reach the maximum
- Then press "ENTER"
See attached pictuture!
ISA TEL Emitec AG @a.d.30.11.1994 page 16/ 18

All the frequencies, which are above the limit, are automaticly entered into the Table.
Below you see the Bar-Display, which shows you the measurement-signal, while moving the clamp for the highest value.
"a.d.30.11.1994 page 17 / 18

Example for Plot-File:
PMM 8030
On the left side: The blue part of the signal, is the variation of all the measurements, which were taken at the same frequency. The stored value is the maximum of all measurements!
EUT is switched on, looking for the Maximum with the clamp
85.9 100
, , , , , ,
. MHz dBuV 187.7
120 ______ J. _______________ .I _______________________________________________________________________________________________ _
, , , , , , -----_ .. _-------------_ .. _-----------------------------------------------------------------------------.----- .. ----------
I I 90 ------f---------------~------------------------------~----------.-----.----------------------------------------.-.----- -------f---------------1------------------------------------------------------------------------------------------------------1---------- ---+----------------------------------------------------------------------------------------------- 60 ______ 1 ____________ J ________________________________________________________________________________________________ _
------1 -------- ----~----- ------------------------------------------------------------------------------------- ----
~1 ~~ ~~ ::: :::::::::::::::::: :::::::::::::::::::::: ::::. :C
Title: NOISE Oote: 12-06-1994
© ISATEL Emitec AG (Switzerland)
ISA TEL Emitec AG @a.d. 30.11.1994 page 18/ 18