introduction to html and css -...
TRANSCRIPT

Introduction to HTML and CSSLesson 1: Int ro duct io n
Working in CodeRunner
Using the CodeRunner® Editor and Saving Your PageSaving and Retrieving Your PageMaking the Page More InterestingYou're Ready to Go!
Lesson 2: T he BasicsThe Basic Structure o f HTML
The HeadThe BodyThe Font TagLists
Lesson 3: XHT MLUsing XHTML
Lesson 4: LinksPutting Links on Your Page
Linking Your Pages TogetherThe NAME Attribute
Lesson 5: ImagesAdding Images to Your Page
Positioning Your ImageContro lling Image SizeUsing the alt attributeUsing Images as linksPutting Images In Your BackgroundUploading Images To Your OST Account
Lesson 6 : Fo rmsGetting Input from the User
CheckboxesRadio ButtonsSelect BoxTextareaIf the mailto action is not working...
Lesson 7: T ablesCreating Tables
<table> Attributes<td> AttributesOther Table TagsWhat are Tables Good For?Looking Forward
Lesson 8 : if rames
Using iframesCreating your own iframesAttributes o f <iframes>Targeting a frame
Lesson 9 : Cascading St yle Sheet sCSS Introduction
The DIV and SPAN tagsUsing the style tag
Lesson 10: Mo re Cascading St yle Sheet sThe style tag with o ther elements
Background PropertiesImporting Styles with an External CSS FileViewing External Style Sheets
Lesson 11: CSS-P: Po sit io ning wit h St yle Sheet sPositioning Properties
Lesson 12: CSS Classif icat io n
The float PropertyThe visibility propertyThe display property
Lesson 13: HT ML W3C St andards
Doctype declarationsMeta tagsBrowser compatibilityAccessibility standardsKeeping your pages up-to-date
Lesson 14: CSS Bo x Pro pert iesBorders
Margins and Padding
Dimensions
Lesson 15: CSS MenusCSS Menus
Pseudo-ClassesBasic CSS Menus
Lesson 16: Final Pro jectFinal Pro ject
Copyright © 1998-2014 O'Reilly Media, Inc.
This work is licensed under a Creative Commons Attribution-ShareAlike 3.0 Unported License.See http://creativecommons.org/licenses/by-sa/3.0/legalcode for more information.

Introduction
Welcome to the O'Reilly School o f Technology course on HTML and CSS!
Course ObjectivesWhen you complete this course, you will be able to :
use HTML and CSS to create a website from scratch.use an external CSS file to create uniformity.use a CSS menu for navigation.create a website that is consistent across both browsers, as well as across the Mac and Windows operatingplatforms.
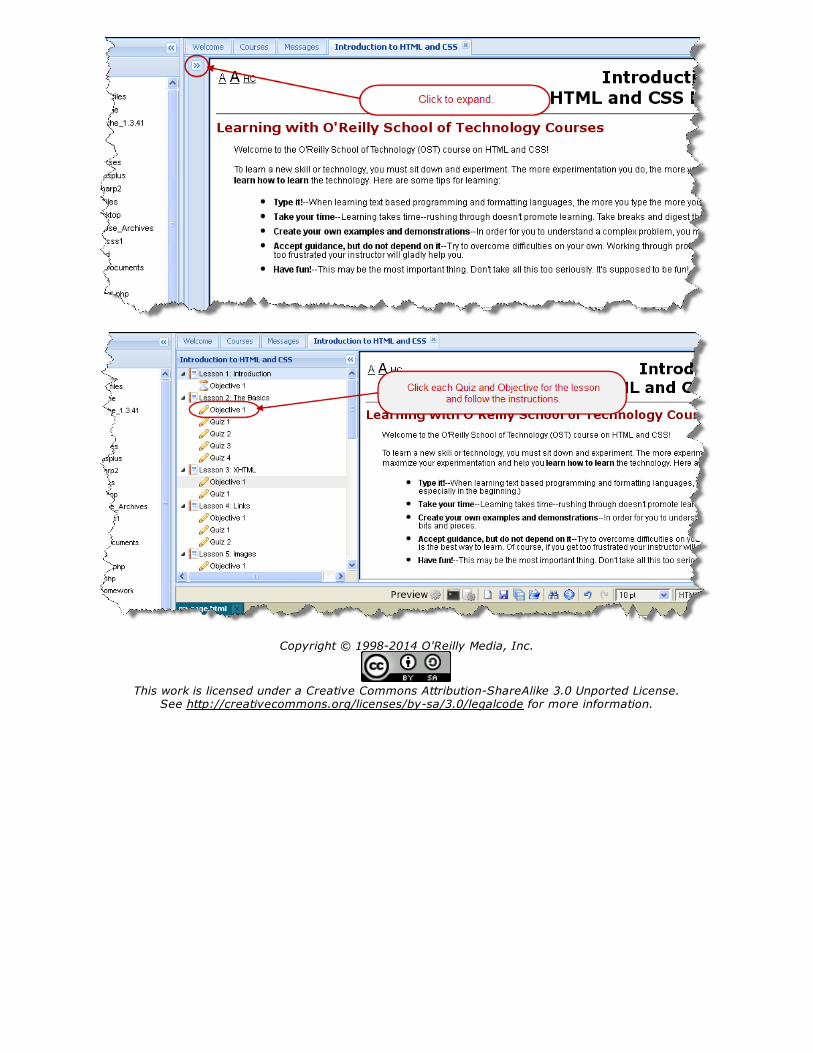
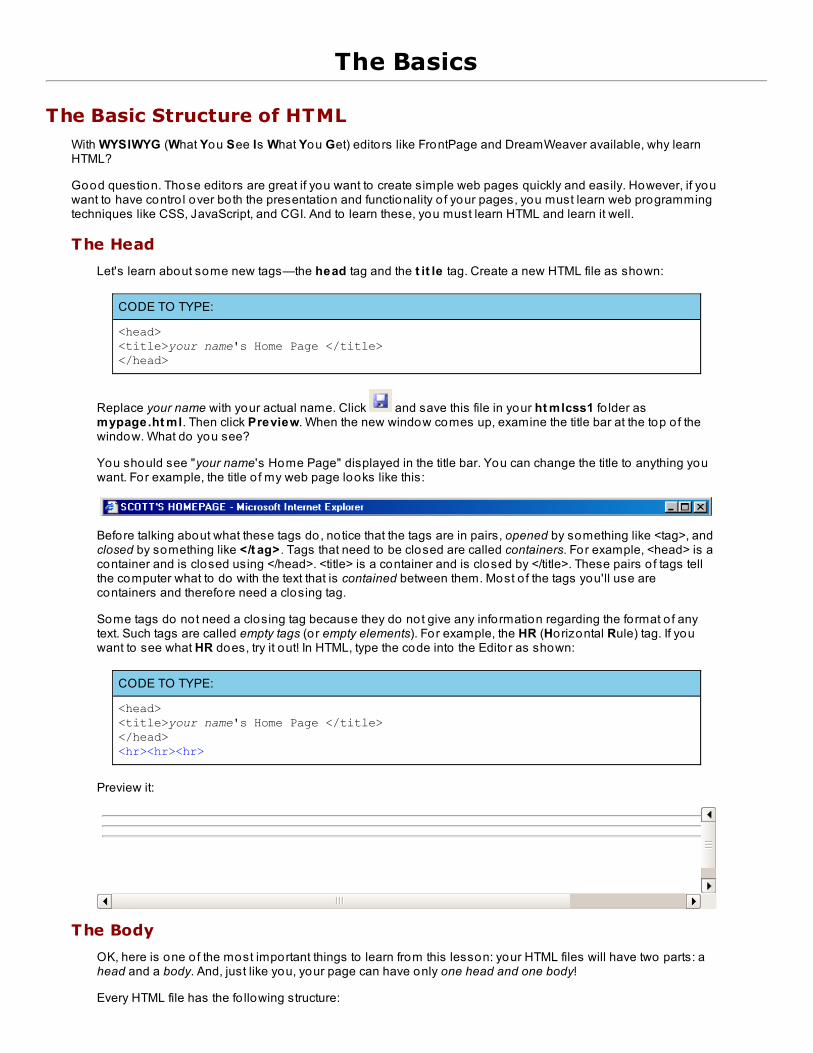
Learning with O'Reilly School of Technology CoursesAs with every O'Reilly School o f Technology course, we'll take a user-active approach to learning. This means that you(the user) will be active! You'll learn by do ing, building live programs, testing them and experimenting with them—hands-on!
To learn a new skill o r techno logy, you have to experiment. The more you experiment, the more you learn. Our systemis designed to maximize experimentation and help you learn to learn a new skill.
We'll program as much as possible to be sure that the principles sink in and stay with you.
Each time we discuss a new concept, you'll put it into code and see what YOU can do with it. On occasion we'll evengive you code that doesn't work, so you can see common mistakes and how to recover from them. Making mistakesis actually another good way to learn.
Above all, we want to help you to learn to learn. We give you the too ls to take contro l o f your own learning experience.
When you complete an OST course, you know the subject matter, and you know how to expand your knowledge, soyou can handle changes like software and operating system updates.
Here are some tips for using O'Reilly School o f Technology courses effectively:
T ype t he co de. Resist the temptation to cut and paste the example code we give you. Typing the codeactually gives you a feel fo r the programming task. Then play around with the examples to find out what elseyou can make them do, and to check your understanding. It's highly unlikely you'll break anything byexperimentation. If you do break something, that's an indication to us that we need to improve our system!T ake yo ur t ime. Learning takes time. Rushing can have negative effects on your progress. Slow down andlet your brain absorb the new information thoroughly. Taking your time helps to maintain a relaxed, positiveapproach. It also gives you the chance to try new things and learn more than you o therwise would if youblew through all o f the coursework too quickly.Experiment . Wander from the path o ften and explore the possibilities. We can't anticipate all o f yourquestions and ideas, so it's up to you to experiment and create on your own. Your instructor will help if yougo completely o ff the rails.Accept guidance, but do n't depend o n it . Try to so lve problems on your own. Going frommisunderstanding to understanding is the best way to acquire a new skill. Part o f what you're learning isproblem so lving. Of course, you can always contact your instructor fo r hints when you need them.Use all available reso urces! In real- life problem-so lving, you aren't bound by false limitations; in OSTcourses, you are free to use any resources at your disposal to so lve problems you encounter: the Internet,reference books, and online help are all fair game.Have f un! Relax, keep practicing, and don't be afraid to make mistakes! Your instructor will keep you at ituntil you've mastered the skill. We want you to get that satisfied, "I'm so coo l! I did it!" feeling. And you'll havesome pro jects to show off when you're done.
Lesson FormatWe'll try out lo ts o f examples in each lesson. We'll have you write code, look at code, and edit existing code. The codewill be presented in boxes that will indicate what needs to be done to the code inside.
Whenever you see white boxes like the one below, you'll type the contents into the editor window to try the example
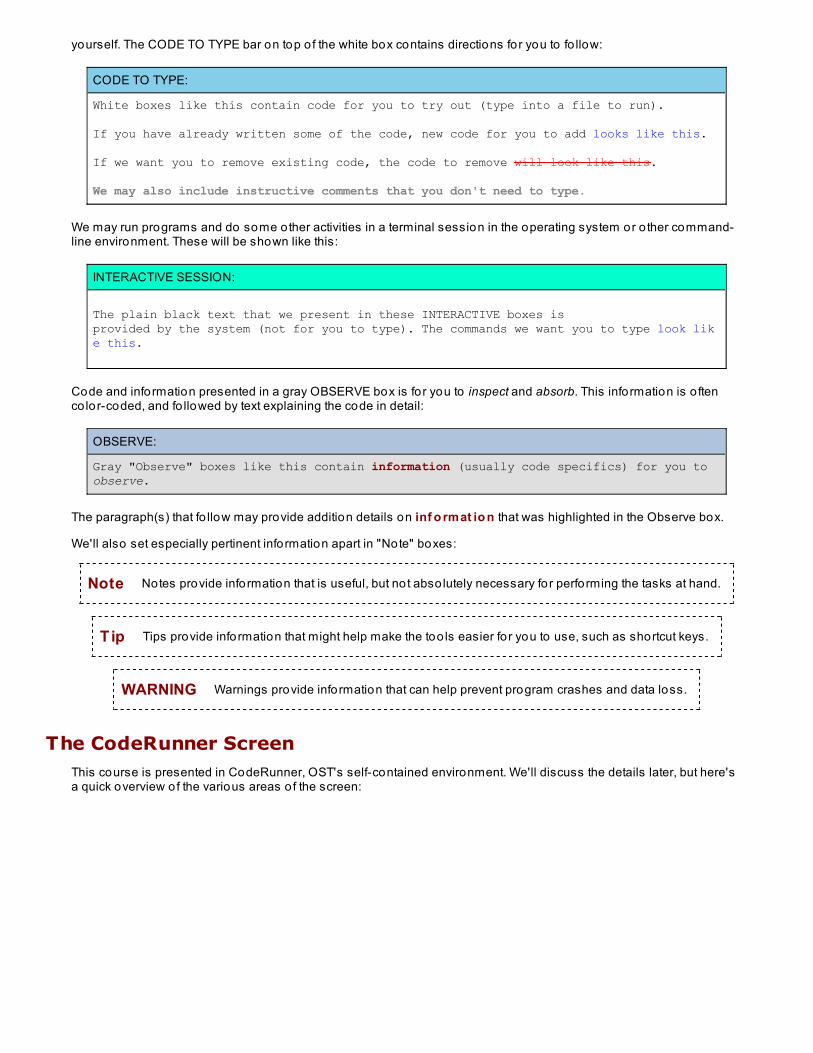
yourself. The CODE TO TYPE bar on top o f the white box contains directions for you to fo llow:
CODE TO TYPE:
White boxes like this contain code for you to try out (type into a file to run).
If you have already written some of the code, new code for you to add looks like this. If we want you to remove existing code, the code to remove will look like this. We may also include instructive comments that you don't need to type.
We may run programs and do some other activities in a terminal session in the operating system or o ther command-line environment. These will be shown like this:
INTERACTIVE SESSION:
The plain black text that we present in these INTERACTIVE boxes is provided by the system (not for you to type). The commands we want you to type look like this.
Code and information presented in a gray OBSERVE box is fo r you to inspect and absorb. This information is o ftenco lor-coded, and fo llowed by text explaining the code in detail:
OBSERVE:
Gray "Observe" boxes like this contain information (usually code specifics) for you to observe.
The paragraph(s) that fo llow may provide addition details on inf o rmat io n that was highlighted in the Observe box.
We'll also set especially pertinent information apart in "Note" boxes:
Note Notes provide information that is useful, but not abso lutely necessary for performing the tasks at hand.
Tip Tips provide information that might help make the too ls easier fo r you to use, such as shortcut keys.
WARNING Warnings provide information that can help prevent program crashes and data loss.
The CodeRunner ScreenThis course is presented in CodeRunner, OST's self-contained environment. We'll discuss the details later, but here'sa quick overview of the various areas o f the screen:
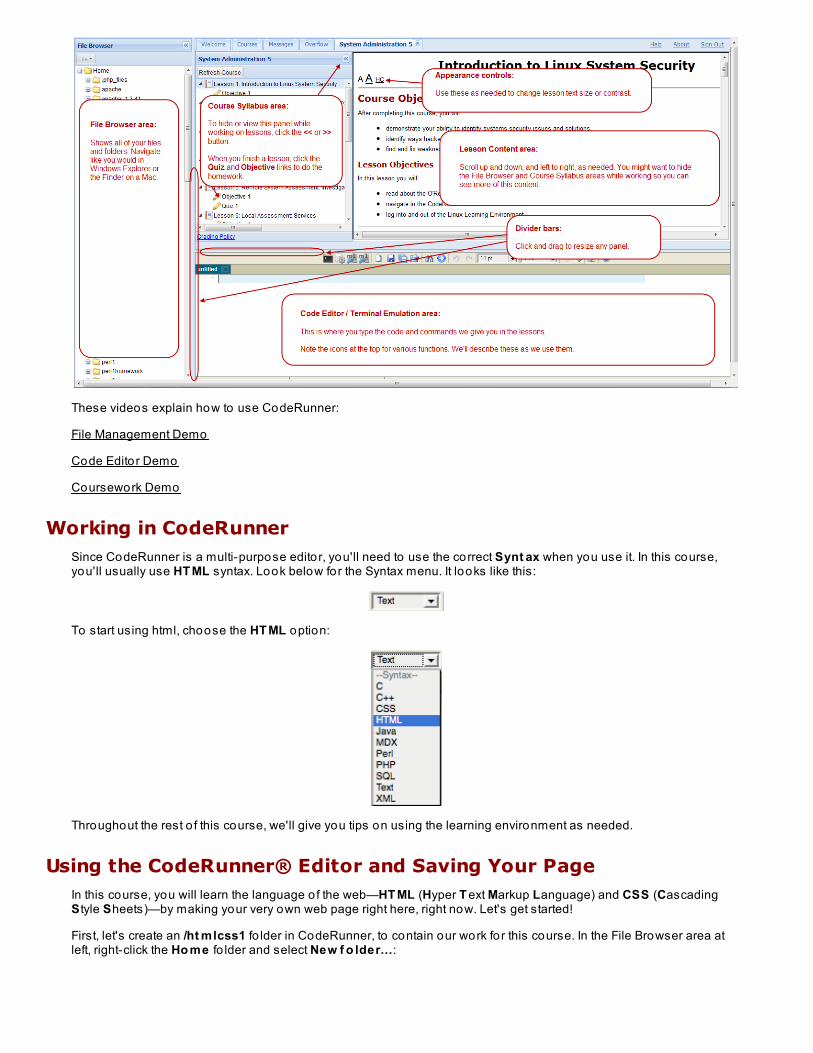
These videos explain how to use CodeRunner:
File Management Demo
Code Editor Demo
Coursework Demo
Working in CodeRunnerSince CodeRunner is a multi-purpose editor, you'll need to use the correct Synt ax when you use it. In this course,you'll usually use HT ML syntax. Look below for the Syntax menu. It looks like this:
To start using html, choose the HT ML option:
Throughout the rest o f this course, we'll give you tips on using the learning environment as needed.
Using the CodeRunner® Editor and Saving Your PageIn this course, you will learn the language o f the web—HT ML (Hyper T ext Markup Language) and CSS (CascadingS tyle Sheets)—by making your very own web page right here, right now. Let's get started!
First, let's create an /ht mlcss1 fo lder in CodeRunner, to contain our work for this course. In the File Browser area atleft, right-click the Ho me fo lder and select New f o lder...:
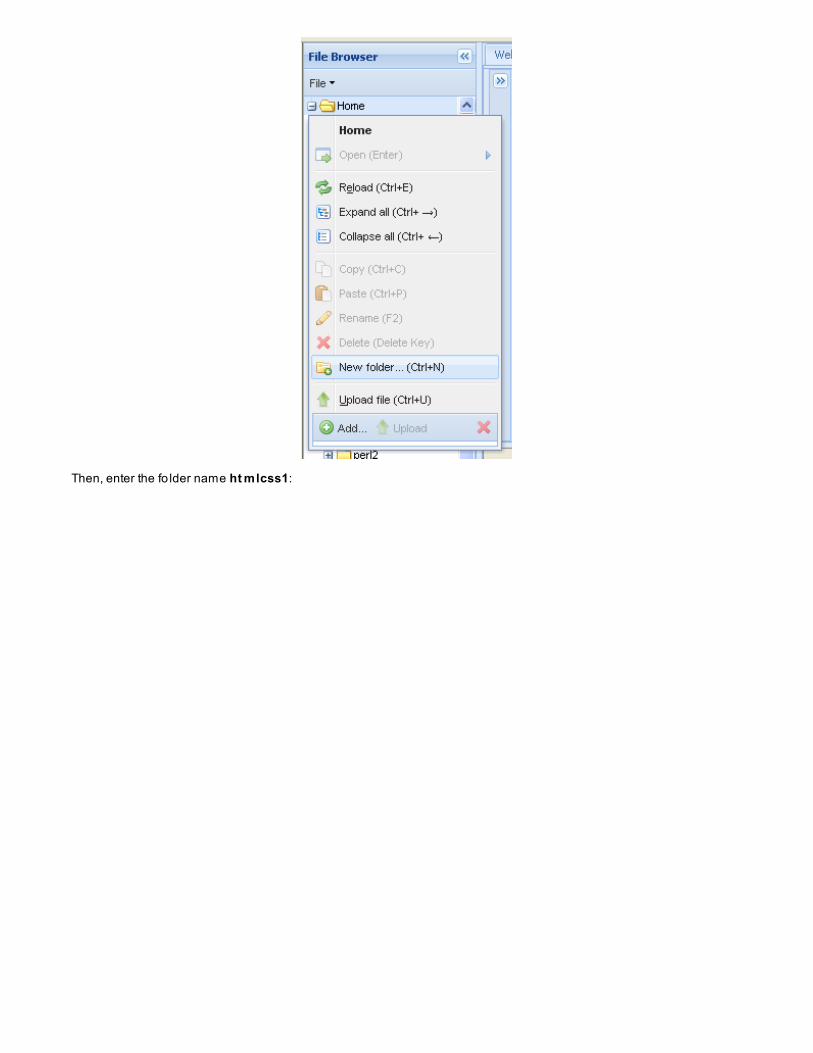
Then, enter the fo lder name ht mlcss1:
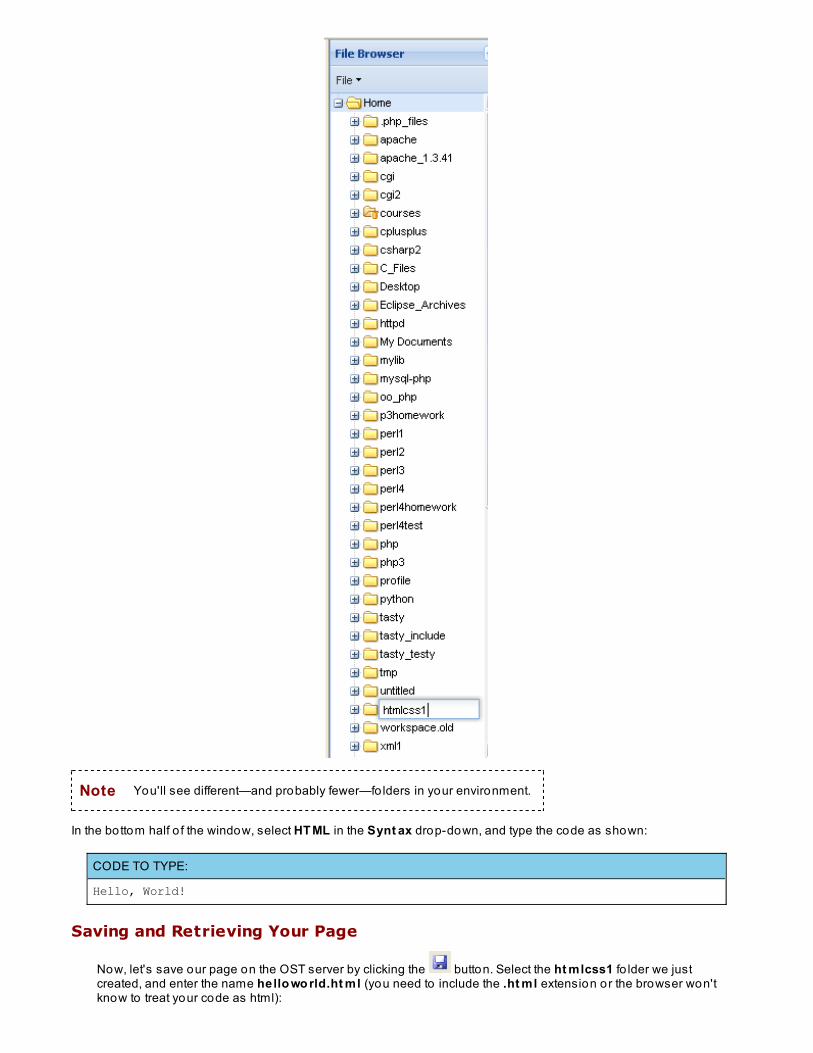
Note You'll see different—and probably fewer—fo lders in your environment.
In the bottom half o f the window, select HT ML in the Synt ax drop-down, and type the code as shown:
CODE TO TYPE:
Hello, World!
Saving and Retrieving Your Page
Now, let's save our page on the OST server by clicking the button. Select the ht mlcss1 fo lder we justcreated, and enter the name hello wo rld.ht ml (you need to include the .ht ml extension or the browser won'tknow to treat your code as html):
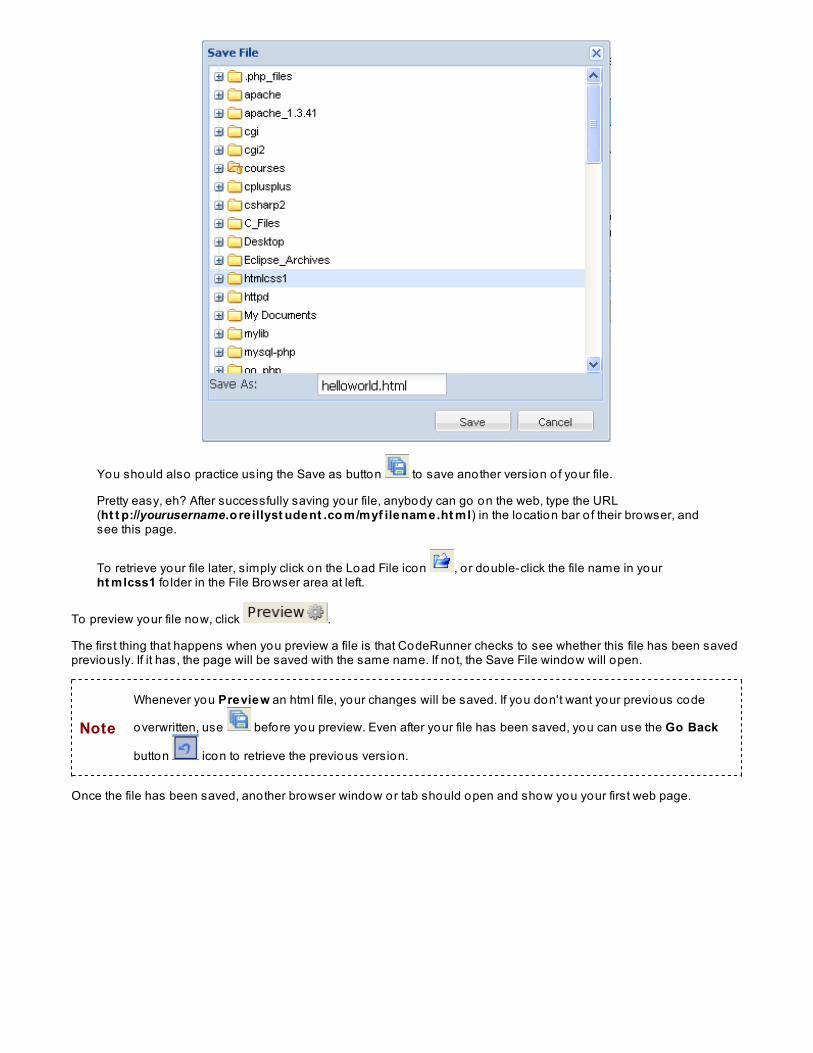
You should also practice using the Save as button to save another version o f your file.
Pretty easy, eh? After successfully saving your file, anybody can go on the web, type the URL(ht t p://yourusername.o re illyst udent .co m/myf ilename.ht ml) in the location bar o f their browser, andsee this page.
To retrieve your file later, simply click on the Load File icon , o r double-click the file name in yourht mlcss1 fo lder in the File Browser area at left.
To preview your file now, click .
The first thing that happens when you preview a file is that CodeRunner checks to see whether this file has been savedpreviously. If it has, the page will be saved with the same name. If no t, the Save File window will open.
Note
Whenever you Preview an html file, your changes will be saved. If you don't want your previous code
overwritten, use before you preview. Even after your file has been saved, you can use the Go Back
button icon to retrieve the previous version.
Once the file has been saved, another browser window or tab should open and show you your first web page.
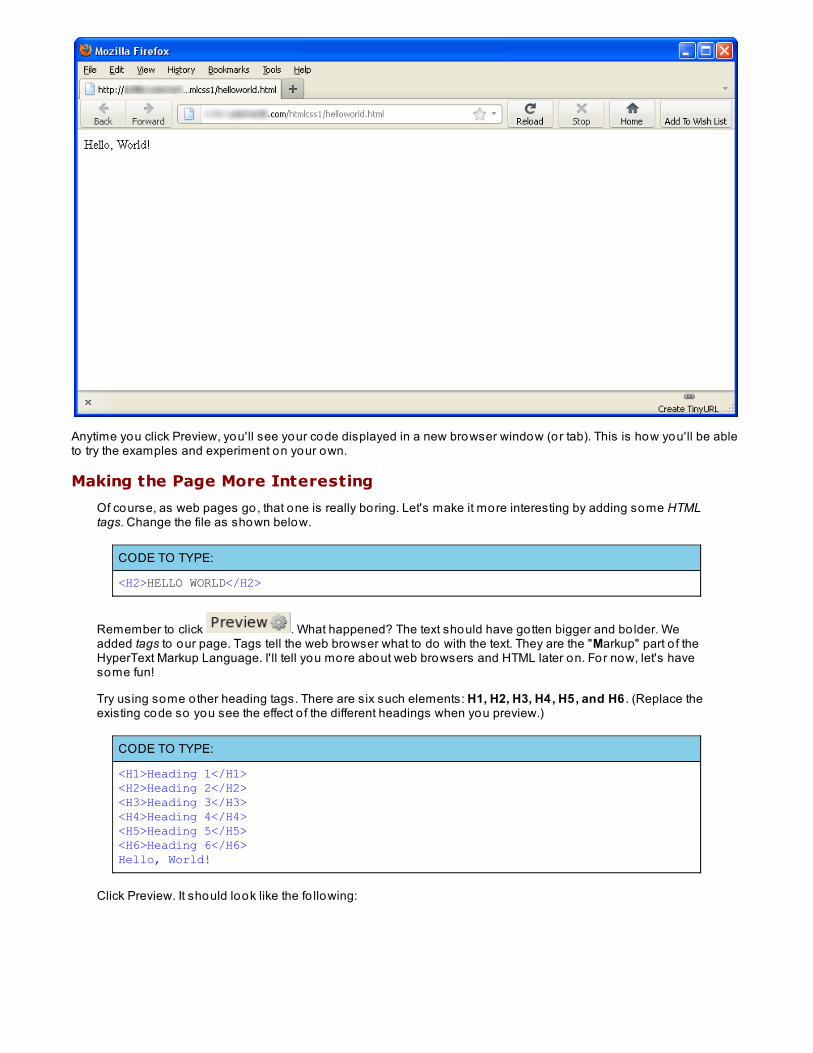
Anytime you click Preview, you'll see your code displayed in a new browser window (or tab). This is how you'll be ableto try the examples and experiment on your own.
Making the Page More Interesting
Of course, as web pages go, that one is really boring. Let's make it more interesting by adding some HTMLtags. Change the file as shown below.
CODE TO TYPE:
<H2>HELLO WORLD</H2>
Remember to click . What happened? The text should have gotten bigger and bo lder. Weadded tags to our page. Tags tell the web browser what to do with the text. They are the "Markup" part o f theHyperText Markup Language. I'll tell you more about web browsers and HTML later on. For now, let's havesome fun!
Try using some other heading tags. There are six such elements: H1, H2, H3, H4, H5, and H6 . (Replace theexisting code so you see the effect o f the different headings when you preview.)
CODE TO TYPE:
<H1>Heading 1</H1><H2>Heading 2</H2><H3>Heading 3</H3><H4>Heading 4</H4><H5>Heading 5</H5><H6>Heading 6</H6>Hello, World!
Click Preview. It should look like the fo llowing:
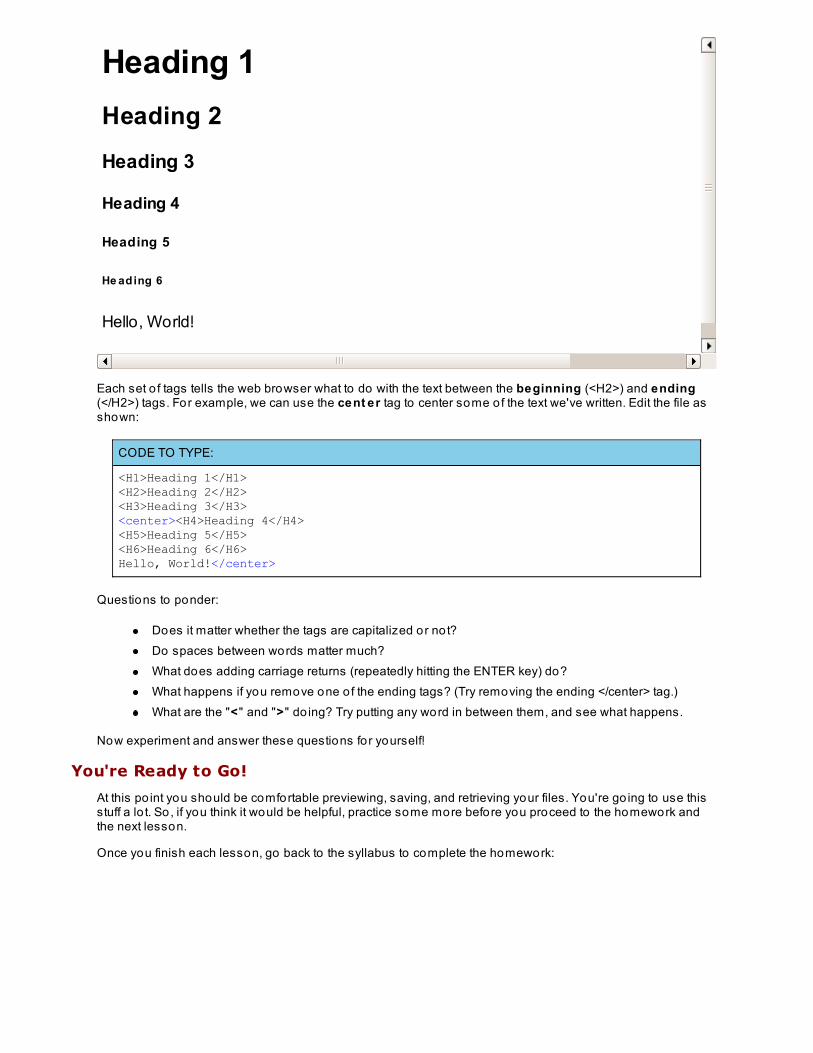
Heading 1Heading 2
Heading 3
Heading 4
Heading 5
He ading 6
Hello, World!
Each set o f tags tells the web browser what to do with the text between the beginning (<H2>) and ending(</H2>) tags. For example, we can use the cent er tag to center some of the text we've written. Edit the file asshown:
CODE TO TYPE:
<H1>Heading 1</H1><H2>Heading 2</H2><H3>Heading 3</H3><center><H4>Heading 4</H4><H5>Heading 5</H5><H6>Heading 6</H6>Hello, World!</center>
Questions to ponder:
Does it matter whether the tags are capitalized or not?Do spaces between words matter much?What does adding carriage returns (repeatedly hitting the ENTER key) do?What happens if you remove one o f the ending tags? (Try removing the ending </center> tag.)What are the "<" and ">" do ing? Try putting any word in between them, and see what happens.
Now experiment and answer these questions for yourself!
You're Ready to Go!
At this po int you should be comfortable previewing, saving, and retrieving your files. You're go ing to use thisstuff a lo t. So, if you think it would be helpful, practice some more before you proceed to the homework andthe next lesson.
Once you finish each lesson, go back to the syllabus to complete the homework:
Copyright © 1998-2014 O'Reilly Media, Inc.
This work is licensed under a Creative Commons Attribution-ShareAlike 3.0 Unported License.See http://creativecommons.org/licenses/by-sa/3.0/legalcode for more information.
The Basics
The Basic Structure of HTMLWith WYSIWYG (What You See Is What You Get) edito rs like FrontPage and DreamWeaver available, why learnHTML?
Good question. Those editors are great if you want to create simple web pages quickly and easily. However, if youwant to have contro l over both the presentation and functionality o f your pages, you must learn web programmingtechniques like CSS, JavaScript, and CGI. And to learn these, you must learn HTML and learn it well.
The Head
Let's learn about some new tags—the head tag and the t it le tag. Create a new HTML file as shown:
CODE TO TYPE:
<head><title>your name's Home Page </title></head>
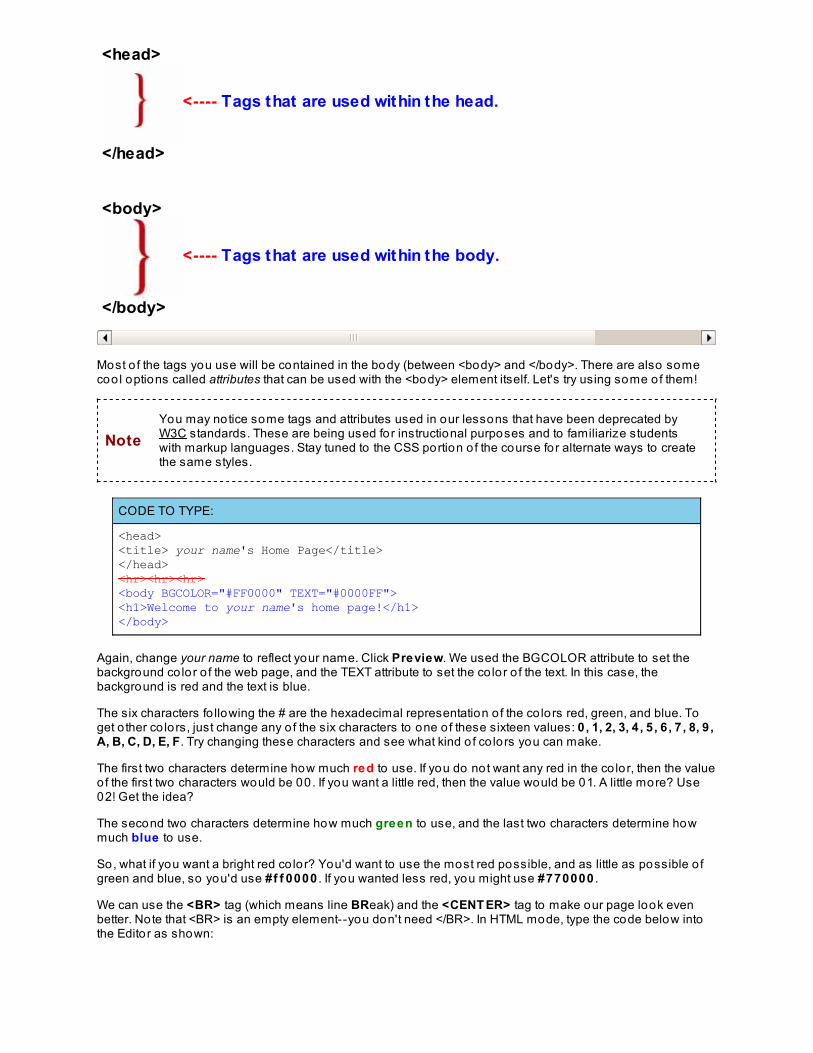
Replace your name with your actual name. Click and save this file in your ht mlcss1 fo lder asmypage.ht ml. Then click Preview. When the new window comes up, examine the title bar at the top o f thewindow. What do you see?
You should see "your name's Home Page" displayed in the title bar. You can change the title to anything youwant. For example, the title o f my web page looks like this:
Before talking about what these tags do, notice that the tags are in pairs, opened by something like <tag>, andclosed by something like </t ag> . Tags that need to be closed are called containers. For example, <head> is acontainer and is closed using </head>. <title> is a container and is closed by </title>. These pairs o f tags tellthe computer what to do with the text that is contained between them. Most o f the tags you'll use arecontainers and therefore need a closing tag.
Some tags do not need a closing tag because they do not give any information regarding the format o f anytext. Such tags are called empty tags (o r empty elements). For example, the HR (Horizontal Rule) tag. If youwant to see what HR does, try it out! In HTML, type the code into the Editor as shown:
CODE TO TYPE:
<head><title>your name's Home Page </title></head><hr><hr><hr>
Preview it:
The Body
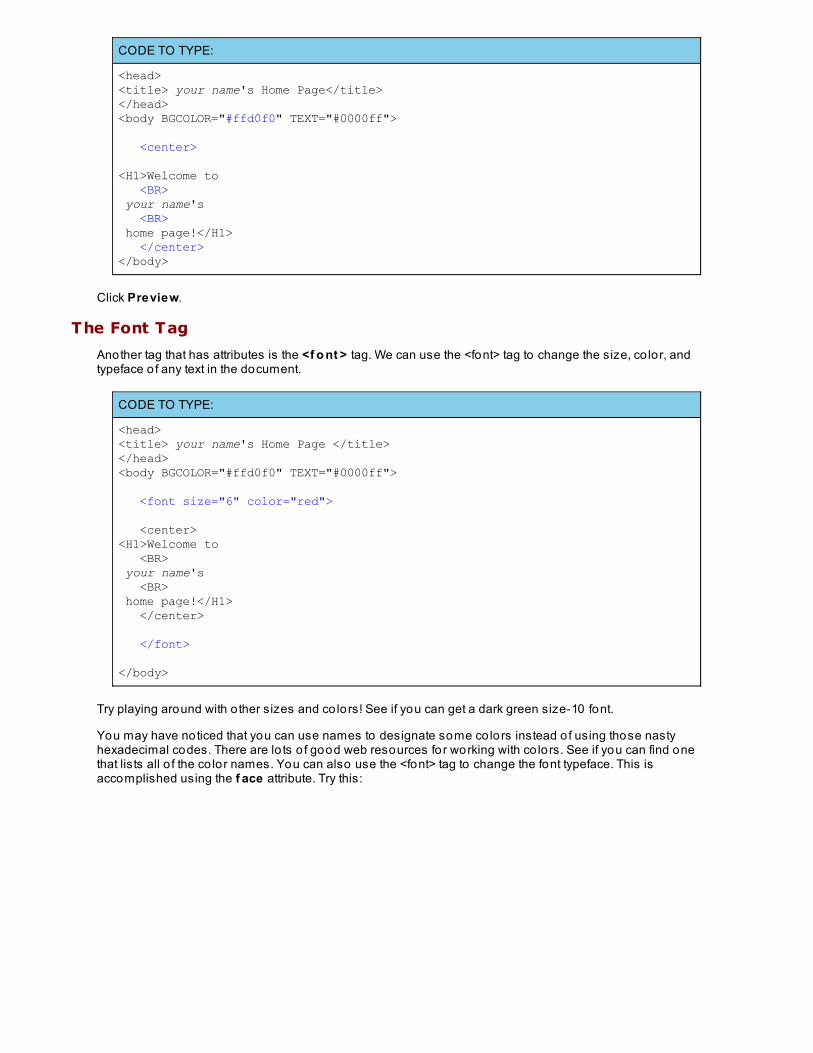
OK, here is one o f the most important things to learn from this lesson: your HTML files will have two parts: ahead and a body. And, just like you, your page can have only one head and one body!
Every HTML file has the fo llowing structure:
<head>
<---- Tags that are used within the head.
</head>
<body>
<---- Tags that are used within the body.
</body>
Most o f the tags you use will be contained in the body (between <body> and </body>. There are also somecool options called attributes that can be used with the <body> element itself. Let's try using some of them!
NoteYou may notice some tags and attributes used in our lessons that have been deprecated byW3C standards. These are being used for instructional purposes and to familiarize studentswith markup languages. Stay tuned to the CSS portion o f the course for alternate ways to createthe same styles.
CODE TO TYPE:
<head><title> your name's Home Page</title></head><hr><hr><hr><body BGCOLOR="#FF0000" TEXT="#0000FF"><h1>Welcome to your name's home page!</h1></body>
Again, change your name to reflect your name. Click Preview. We used the BGCOLOR attribute to set thebackground co lor o f the web page, and the TEXT attribute to set the co lor o f the text. In this case, thebackground is red and the text is blue.
The six characters fo llowing the # are the hexadecimal representation o f the co lors red, green, and blue. Toget o ther co lors, just change any o f the six characters to one o f these sixteen values: 0, 1, 2, 3, 4 , 5 , 6 , 7 , 8, 9 ,A, B, C, D, E, F. Try changing these characters and see what kind o f co lors you can make.
The first two characters determine how much red to use. If you do not want any red in the co lor, then the valueof the first two characters would be 00. If you want a little red, then the value would be 01. A little more? Use02! Get the idea?
The second two characters determine how much green to use, and the last two characters determine howmuch blue to use.
So, what if you want a bright red co lor? You'd want to use the most red possible, and as little as possible o fgreen and blue, so you'd use #f f 0000 . If you wanted less red, you might use #770000 .
We can use the <BR> tag (which means line BReak) and the <CENT ER> tag to make our page look evenbetter. Note that <BR> is an empty element--you don't need </BR>. In HTML mode, type the code below intothe Editor as shown:
CODE TO TYPE:
<head><title> your name's Home Page</title></head><body BGCOLOR="#ffd0f0" TEXT="#0000ff">
<center>
<H1>Welcome to <BR> your name's <BR> home page!</H1> </center></body>
Click Preview.
The Font Tag
Another tag that has attributes is the <f o nt > tag. We can use the <font> tag to change the size, co lor, andtypeface o f any text in the document.
CODE TO TYPE:
<head><title> your name's Home Page </title></head><body BGCOLOR="#ffd0f0" TEXT="#0000ff">
<font size="6" color="red">
<center><H1>Welcome to <BR> your name's <BR> home page!</H1> </center>
</font>
</body>
Try playing around with o ther sizes and co lors! See if you can get a dark green size-10 font.
You may have noticed that you can use names to designate some co lors instead o f using those nastyhexadecimal codes. There are lo ts o f good web resources for working with co lors. See if you can find onethat lists all o f the co lor names. You can also use the <font> tag to change the font typeface. This isaccomplished using the f ace attribute. Try this:
CODE TO TYPE:
<head><title> your name's Home Page </title></head><body BGCOLOR="#ffd0f0" TEXT="#0000ff">
<font size="6" color="red">
<center><H1>Welcome to <BR> your name's <BR> home page!</H1> </center>
</font>
<br>
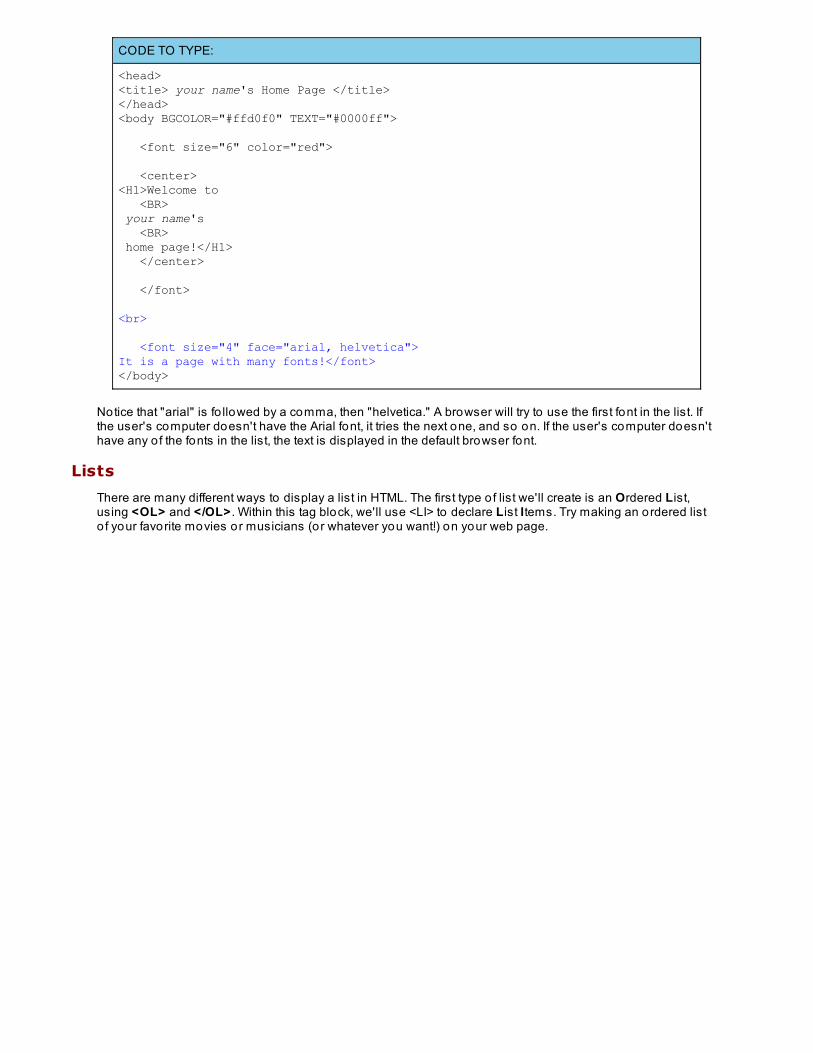
<font size="4" face="arial, helvetica">It is a page with many fonts!</font></body>
Notice that "arial" is fo llowed by a comma, then "helvetica." A browser will try to use the first font in the list. Ifthe user's computer doesn't have the Arial font, it tries the next one, and so on. If the user's computer doesn'thave any o f the fonts in the list, the text is displayed in the default browser font.
Lists
There are many different ways to display a list in HTML. The first type o f list we'll create is an Ordered List,using <OL> and </OL> . Within this tag block, we'll use <LI> to declare List Items. Try making an ordered listo f your favorite movies or musicians (or whatever you want!) on your web page.

CODE TO TYPE:
<HEAD><TITLE> your name's Home Page</TITLE></HEAD>
<BODY BGCOLOR="#ffd0f0" TEXT="#0000ff">
<font size="6" color="red">
<center><H1>Welcome to <BR> your name's <BR> home page!</H1> </center>
</font>
<br>
<font size="4" face="arial, helvetica">It is a page with many fonts!</font>Favorite Live Rock Bands: <OL> <LI>Phish <LI>Blues Traveler <LI>Widespread Panic <LI>Pink Floyd <LI>Rolling Stones </OL></body>
Experiment a bit! What happens if you remove the <LI>?
We can use o ther tags to make the list look more interesting. Experiment a bit more! What tags would you useto make it look like this:
Favorite Live Rock Bands:
1. Phish2. Blues Traveler3. Widespread Panic4. Pink Floyd5. Rolling Stones
Think about it before you click here for the answer!
In an ordered list, you can contro l the type o f bullets in front o f the list items, using the type attribute. There arefive possibilities: uppercase Latin letters, lowercase Latin letters, uppercase Roman numerals, lowercaseRoman numerals, and regular numerals. Try these examples:
Order T ype OL t ype= co de
Uppercase Latin letters <o l type="A">
Lowercase Latin letters <o l type="a">
Uppercase Roman Numerals <o l type="I">
Lowercase Roman Numerals <o l type="i">
Regular Numbers <o l>
The syntax for Unordered Lists is the same as ordered lists. The only difference is that we use <UL> and</UL> instead o f <OL> and </OL>. There are three types o f bullets available for unordered lists: square, disc,
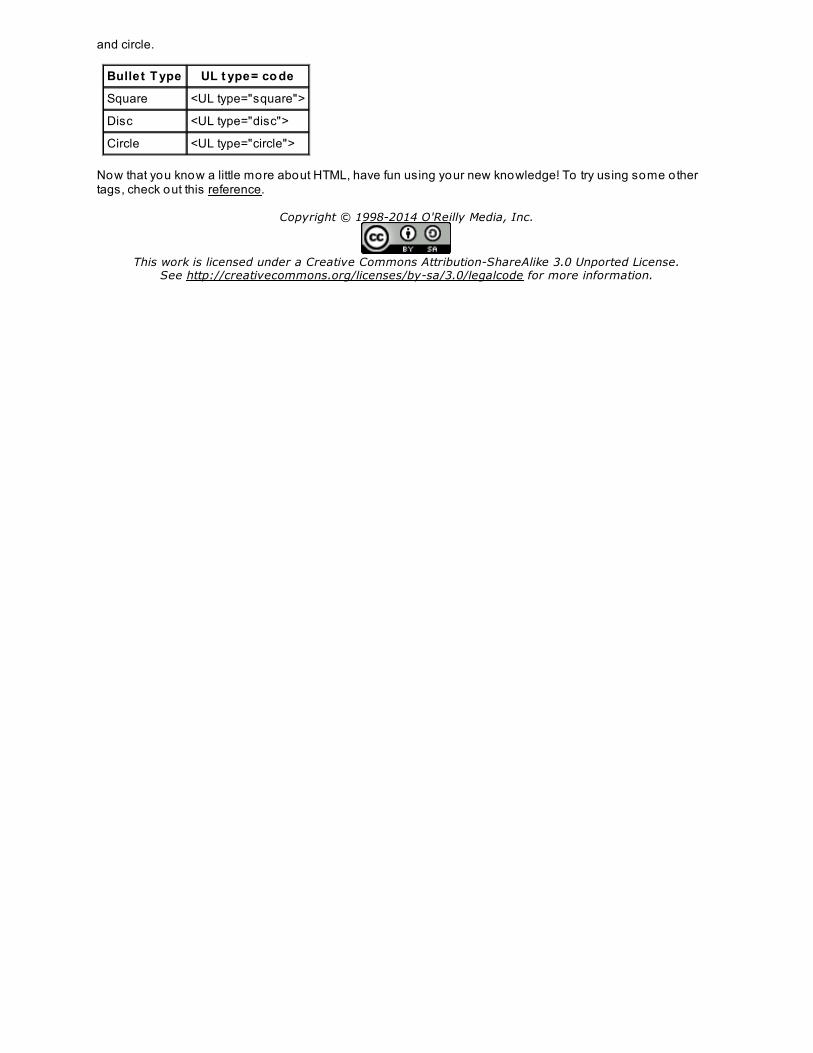
and circle.
Bullet T ype UL t ype= co de
Square <UL type="square">
Disc <UL type="disc">
Circle <UL type="circle">
Now that you know a little more about HTML, have fun using your new knowledge! To try using some othertags, check out this reference.
Copyright © 1998-2014 O'Reilly Media, Inc.
This work is licensed under a Creative Commons Attribution-ShareAlike 3.0 Unported License.See http://creativecommons.org/licenses/by-sa/3.0/legalcode for more information.
XHTML
Using XHTMLUp to this po int, you've learned a lo t about HTML basics, and hopefully you've experimented without adhering to strictsyntax rules. Now that you know the basics, it's time to learn a little about XHTML.
XHTML stands for EXtensible HyperT ext Markup Language. XHTML is a stricter and cleaner version o f HTML, and it'smeant to eventually replace HTML, recommended by the World Wide Web Consortium (W3C). The goal o f the (W3C) isto develop interoperable techno logies (specifications, guidelines, so ftware, and too ls) to access the full po tential o fthe Web. The idea is fo r browsers to be developed according to these specifications so that web pages can be viewedsimilarly across all platfo rms.
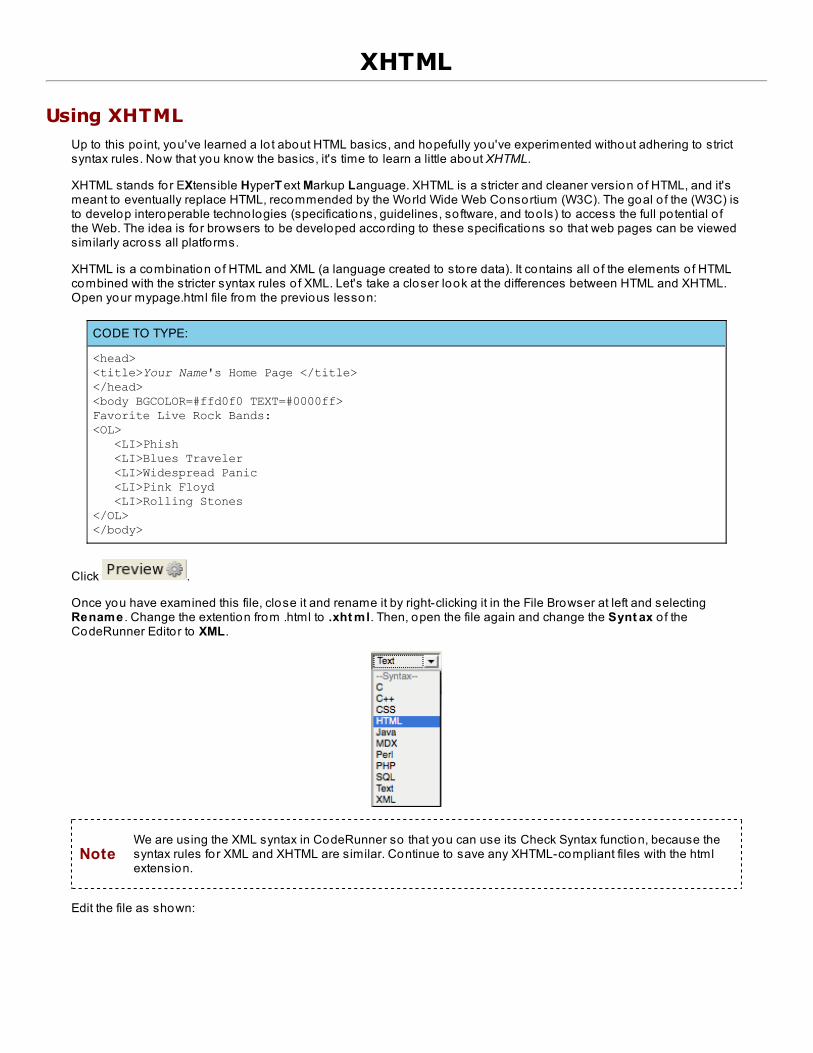
XHTML is a combination o f HTML and XML (a language created to store data). It contains all o f the elements o f HTMLcombined with the stricter syntax rules o f XML. Let's take a closer look at the differences between HTML and XHTML.Open your mypage.html file from the previous lesson:
CODE TO TYPE:
<head><title>Your Name's Home Page </title></head><body BGCOLOR=#ffd0f0 TEXT=#0000ff> Favorite Live Rock Bands: <OL> <LI>Phish <LI>Blues Traveler <LI>Widespread Panic <LI>Pink Floyd <LI>Rolling Stones </OL></body>
Click .
Once you have examined this file, close it and rename it by right-clicking it in the File Browser at left and selectingRename . Change the extention from .html to .xht ml. Then, open the file again and change the Synt ax o f theCodeRunner Editor to XML.
NoteWe are using the XML syntax in CodeRunner so that you can use its Check Syntax function, because thesyntax rules for XML and XHTML are similar. Continue to save any XHTML-compliant files with the htmlextension.
Edit the file as shown:
CODE TO TYPE:
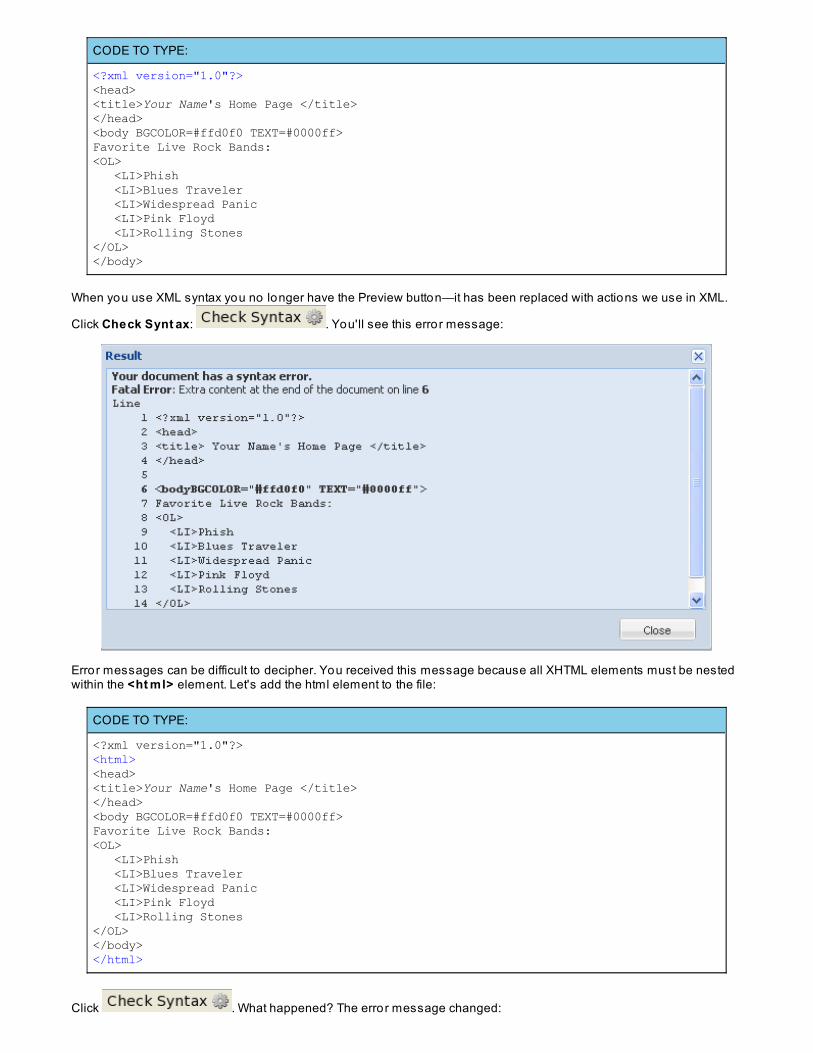
<?xml version="1.0"?><head><title>Your Name's Home Page </title></head><body BGCOLOR=#ffd0f0 TEXT=#0000ff> Favorite Live Rock Bands: <OL> <LI>Phish <LI>Blues Traveler <LI>Widespread Panic <LI>Pink Floyd <LI>Rolling Stones </OL></body>
When you use XML syntax you no longer have the Preview button—it has been replaced with actions we use in XML.
Click Check Synt ax: . You'll see this error message:
Error messages can be difficult to decipher. You received this message because all XHTML elements must be nestedwithin the <ht ml> element. Let's add the html element to the file:
CODE TO TYPE:
<?xml version="1.0"?><html><head><title>Your Name's Home Page </title></head><body BGCOLOR=#ffd0f0 TEXT=#0000ff> Favorite Live Rock Bands: <OL> <LI>Phish <LI>Blues Traveler <LI>Widespread Panic <LI>Pink Floyd <LI>Rolling Stones </OL></body></html>
Click . What happened? The error message changed:

Let's take this one step at a time. In XHTML, all attribute values must be contained within quotes. You can use single ordouble quotes, but they have to match. Edit the file as shown:
CODE TO TYPE:
<?xml version="1.0"?><html><head><title>Your Name's Home Page </title></head><body BGCOLOR="#ffd0f0" TEXT="#0000ff"> Favorite Live Rock Bands: <OL> <LI>Phish <LI>Blues Traveler <LI>Widespread Panic <LI>Pink Floyd <LI>Rolling Stones </OL></body></html>
That fixes the first two errors.
In XHTML, it is fo rbidden to open a tag without closing it. In fact, even empty tags must be closed. That is, if you want tocreate a line break in your document, you must use either <BR></BR> o r <BR/> . You cannot use <BR> without somekind o f closure. Our document has a series o f LI tags that are not closed. Let's go ahead and close them now:
CODE TO TYPE:
<?xml version="1.0"?><html><head><title>Your Name's Home Page </title></head><body BGCOLOR="#ffd0f0" TEXT="#0000ff"> Favorite Live Rock Bands: <OL> <LI>Phish</LI> <LI>Blues Traveler</LI> <LI>Widespread Panic</LI> <LI>Pink Floyd</LI> <LI>Rolling Stones</LI></OL></body></html>
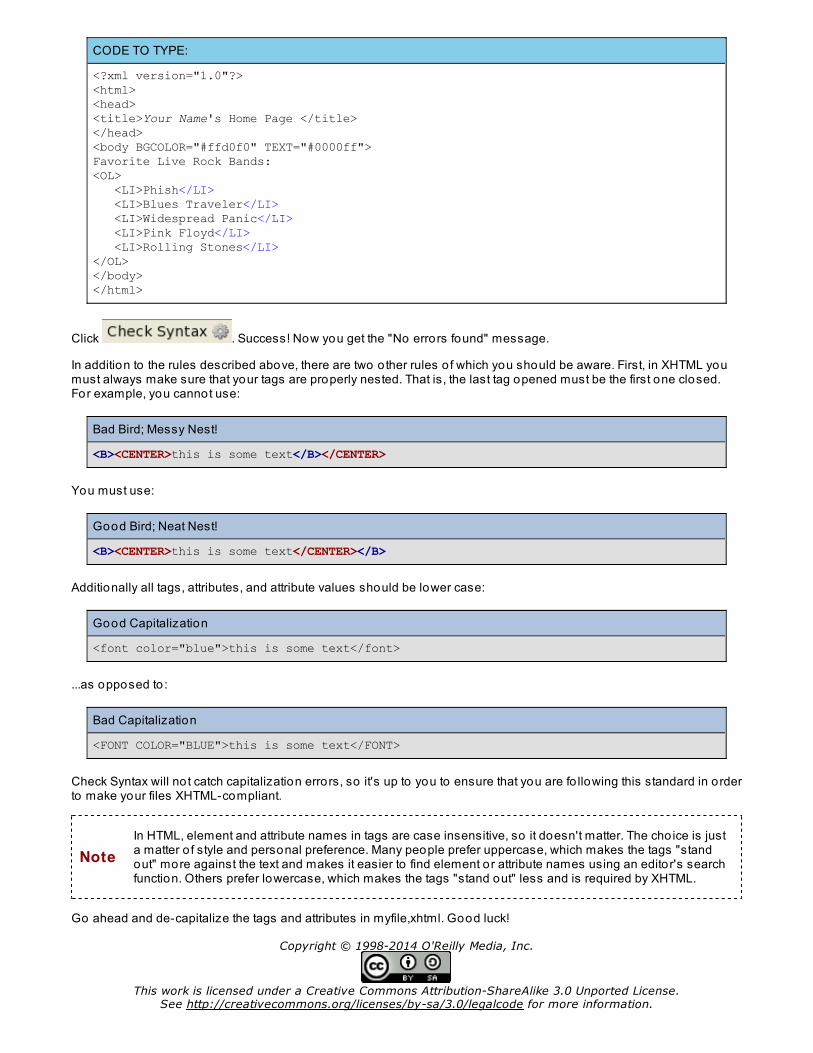
Click . Success! Now you get the "No errors found" message.
In addition to the rules described above, there are two o ther rules o f which you should be aware. First, in XHTML youmust always make sure that your tags are properly nested. That is, the last tag opened must be the first one closed.For example, you cannot use:
Bad Bird; Messy Nest!
<B><CENTER>this is some text</B></CENTER>
You must use:
Good Bird; Neat Nest!
<B><CENTER>this is some text</CENTER></B>
Additionally all tags, attributes, and attribute values should be lower case:
Good Capitalization
<font color="blue">this is some text</font>
...as opposed to :
Bad Capitalization
<FONT COLOR="BLUE">this is some text</FONT>
Check Syntax will no t catch capitalization errors, so it's up to you to ensure that you are fo llowing this standard in orderto make your files XHTML-compliant.
NoteIn HTML, element and attribute names in tags are case insensitive, so it doesn't matter. The cho ice is justa matter o f style and personal preference. Many people prefer uppercase, which makes the tags "standout" more against the text and makes it easier to find element or attribute names using an editor's searchfunction. Others prefer lowercase, which makes the tags "stand out" less and is required by XHTML.
Go ahead and de-capitalize the tags and attributes in myfile,xhtml. Good luck!
Copyright © 1998-2014 O'Reilly Media, Inc.
This work is licensed under a Creative Commons Attribution-ShareAlike 3.0 Unported License.See http://creativecommons.org/licenses/by-sa/3.0/legalcode for more information.

Links
Putting Links on Your PageIn this lesson, you'll learn one o f the most important features o f HTML—linking documents using hypertext. You'reprobably very familiar with hypertext. When you see those underlined, co lored pieces o f text that you click on to surf theweb, that's hypertext.
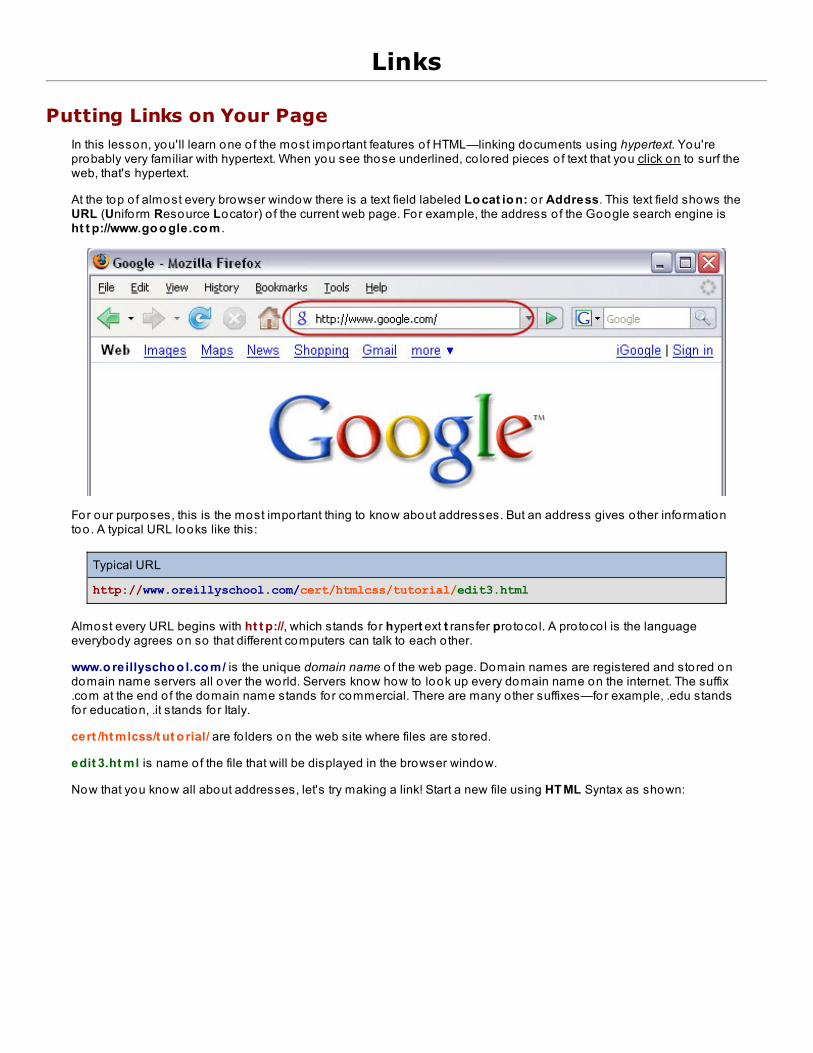
At the top o f almost every browser window there is a text field labeled Lo cat io n: o r Address. This text field shows theURL (Uniform Resource Locator) o f the current web page. For example, the address o f the Google search engine isht t p://www.go o gle.co m .
For our purposes, this is the most important thing to know about addresses. But an address gives o ther informationtoo. A typical URL looks like this:
Typical URL
http://www.oreillyschool.com/cert/htmlcss/tutorial/edit3.html
Almost every URL begins with ht t p://, which stands for hypert ext t ransfer pro toco l. A pro toco l is the languageeverybody agrees on so that different computers can talk to each o ther.
www.o reillyscho o l.co m/ is the unique domain name o f the web page. Domain names are registered and stored ondomain name servers all over the world. Servers know how to look up every domain name on the internet. The suffix.com at the end o f the domain name stands for commercial. There are many o ther suffixes—for example, .edu standsfor education, .it stands for Italy.
cert /ht mlcss/t ut o rial/ are fo lders on the web site where files are stored.
edit 3.ht ml is name of the file that will be displayed in the browser window.
Now that you know all about addresses, let's try making a link! Start a new file using HT ML Syntax as shown:
In HTML, type the fo llowing into the Editor below:
<html><head><title>Links</title></head><body>
One of the places I like to visit is<a href="http://www.google.com">Google</a>
</body></html>
Save this in your /ht mlcss1 fo lder as linkt est .ht ml, and click . When the new window opens, click theword Go o gle . This will take you to the Google home page. (Click the browser's Back button to return to your page.)
Let's analyze this line o f code:
Anatomy of a Link
<a href="http://www.google.com">Google</a>
First we start an ancho r (<a>) tag. The anchor tag identifies a place in an HTML document. The href attribute withinthe anchor tag defines a hypertext ref erence. You should set this attribute equal to a URL. The t ext bet ween t heancho r t ags is the actual hypertext you will see underlined and in blue on your web page.
You can use attributes o f the body tag in order to make your links any co lor you want—let's see these attributes inaction! Modify your code as shown:
In HTML, type the fo llowing into the Editor below:
<html><head><title>Links</title></head><body text="yellow" link="red" alink="green" vlink="aqua">
One of the places I like to visit is<a href="http://www.yahoo.com">Google</a>
</body></html>
Click , observe the changed text and link co lors, and the momentary alink co lor change when you clickthe link (and note that even though the link text is "Google," it took you to the Yahoo web page because o f our changedhref URL). Click the browser's Back button to return to your page and observe the visited link co lor.
Link Coloring for the Artistic Web Designer
<body text="yellow" link="red" alink="green" vlink="aqua">
link="co lo r" sets the default text co lor o f unvisited links (ones that have not been clicked yet) in the document.
alink="co lo r" specifies the co lor to which the link briefly changes when clicked.
vlink="co lo r" specifies the text co lor o f visited (fo llowed) links. After flashing the alink co lor, a visited link changes tothe vlink co lor if it has been specified; o therwise it changes to the browser's default visited link co lor.
Notice that there are quotes around the URL. It is good programming practice to get in the habit o f using quotes around
the value o f ALL attributes. As you know, quotes are required for XHTML, but they are not necessary in HTML. If youdecide to use quotation marks and forget to close them, some nasty things can result. Try removing the closing quotehere to see for yourself!
Go find something interesting on the Internet that you might want to share with the visito rs o f your page. Replaceht t p://www.go o gle.co m with the URL and Go o gle with any text you want.
In HTML, type the fo llowing into the Editor below:
<html><head><title>Links</title></head>
<body text="yellow" link="red" alink="green" vlink="aqua">
One of the places I like to visit is<a href="any address you want">any text you want</a>
</body></html>
Linking Your Pages Together
You may want to make several pages and link them together. Let's find out how to do it!
NoteWhere it says your domain in the example below, use the login that you received when yousigned up for your OST account, plus ".oreillystudent.com." For instance, if your login isjo hndo e , use jo hndo e.o reillyst udent .co m .
In HTML, type the fo llowing into the Editor below:
<html><head><title>Links</title></head>
<body text="yellow" link="red" alink="green" vlink="aqua">
<a href="http://your domain/anotherpage.html">Click here</a>
</body></html>
Save this page in your /ht mlcss1 fo lder as page.ht ml
.
Now, make another page, and save it in your /ht mlcss1 fo lder as ano t herpage.ht ml. Put any code you
want on this page! When you are finished, open page.html again and click . You should be ableto link to anotherpage.html!
What do you think would happen if you tried to use:
Link Without a Domain
<a href="anotherpage.html">Click here</a>
Go ahead and try it...
It works! If you are linking to a file that resides in the same location as the file from which you are linking, youcan set the href attribute to only the file name. This is called a relative link. (When you set the href attribute tothe full URL, you are using an absolute link.) It's good programming practice to use relative links whenever
possible. It's also important to note that your relative links may not work when you click unless you have saved the file at least one time, so be sure to do that.
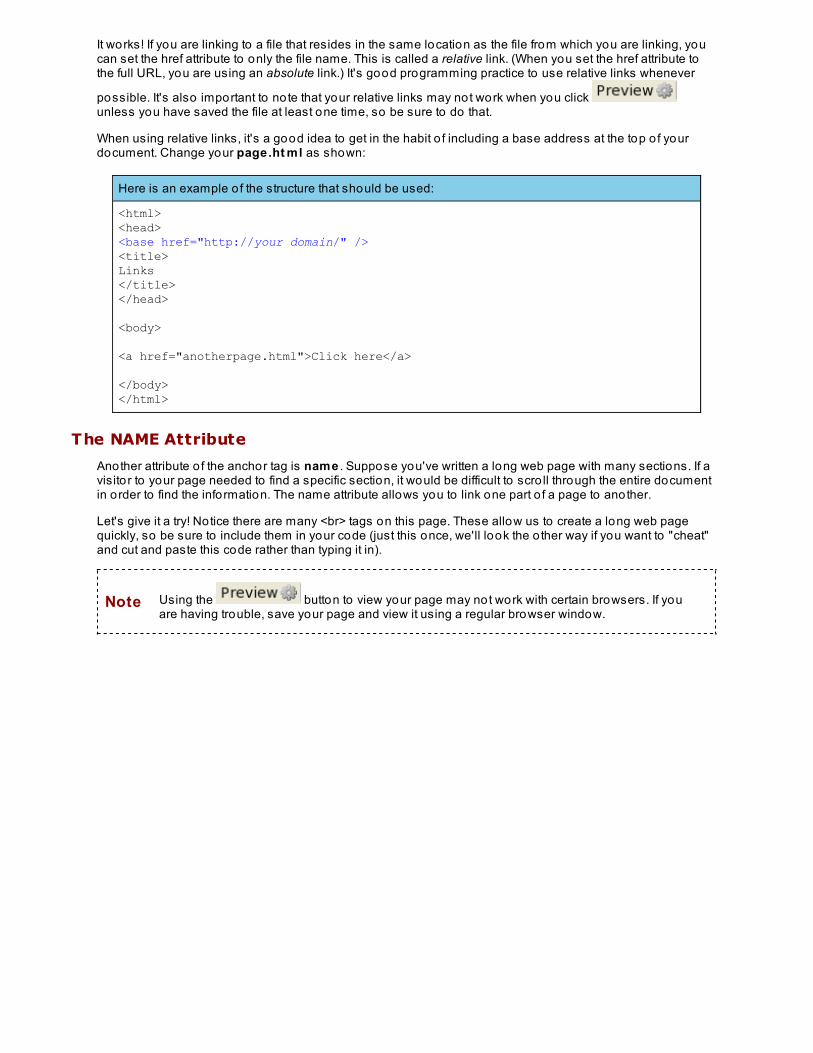
When using relative links, it's a good idea to get in the habit o f including a base address at the top o f yourdocument. Change your page.ht ml as shown:
Here is an example o f the structure that should be used:
<html><head><base href="http://your domain/" /><title>Links</title></head>
<body>
<a href="anotherpage.html">Click here</a>
</body></html>
The NAME Attribute
Another attribute o f the anchor tag is name . Suppose you've written a long web page with many sections. If avisito r to your page needed to find a specific section, it would be difficult to scro ll through the entire documentin order to find the information. The name attribute allows you to link one part o f a page to another.
Let's give it a try! Notice there are many <br> tags on this page. These allow us to create a long web pagequickly, so be sure to include them in your code (just this once, we'll look the o ther way if you want to "cheat"and cut and paste this code rather than typing it in).
Note Using the button to view your page may not work with certain browsers. If youare having trouble, save your page and view it using a regular browser window.

In HTML, type the fo llowing into the Editor below:
<html><head><title>Links</title></head><body>
<a href="#COOL">Cool people</a>
<br/><br/><br/><br/><br/><br/><br/><br/><br/><br/><br/><br/><br/><br/><br/><br/><br/><br/><br/><br/><br/><br/><br/><br/><br/><br/><br/><br/><br/><br/><br/><br/><br/><br/><br/><br/><br/><br/><br/><br/><br/><br/><br/><br/><br/>
<a name="COOL">James Dean<br/></a>Miles Davis<br/>Mr. Frosty...<br/></body></html>
Save it in your /ht mlcss1 fo lder as name.ht ml, and then click . See, you can send visito rs toany section o f your document this way!
The value o f the href attribute must begin with #. The href #COOL links to the name COOL farther down in thedocument. What do you think would happen if you set the value o f the name attribute to COOL and the valueof the href attribute to co o l? Try it and see for yourself!
Copyright © 1998-2014 O'Reilly Media, Inc.
This work is licensed under a Creative Commons Attribution-ShareAlike 3.0 Unported License.See http://creativecommons.org/licenses/by-sa/3.0/legalcode for more information.
Images
Adding Images to Your PageThe <img> tag is used to display an image on your web page. Let's take a closer look at how it's used.
In HTML, type the fo llowing into the Editor below:
<html><head><title>Images</title></head>
<body>
<img src="https://oreillyschool.com/images/OST_Logo.gif" />
</body></html>
Save the file in your /ht mlcss1 fo lder as imaget est .ht ml, and click . You should see the OST logo.
In the last lesson, you used URLs to access html files. Just like html files, any image file stored on a server has anaddress that you can use to access it.In the img tag, the src attribute defines the URL of the image to display.
You probably don't want the OST logo on your page, so try replacing it with an image that you like. Surf around the webuntil you find one.
If you're using Firef o x, move your mouse over the image and right-click. You should see a list like this:
If you're using Int ernet Explo rer, move your mouse over the image and right-click. You should see a list like this:
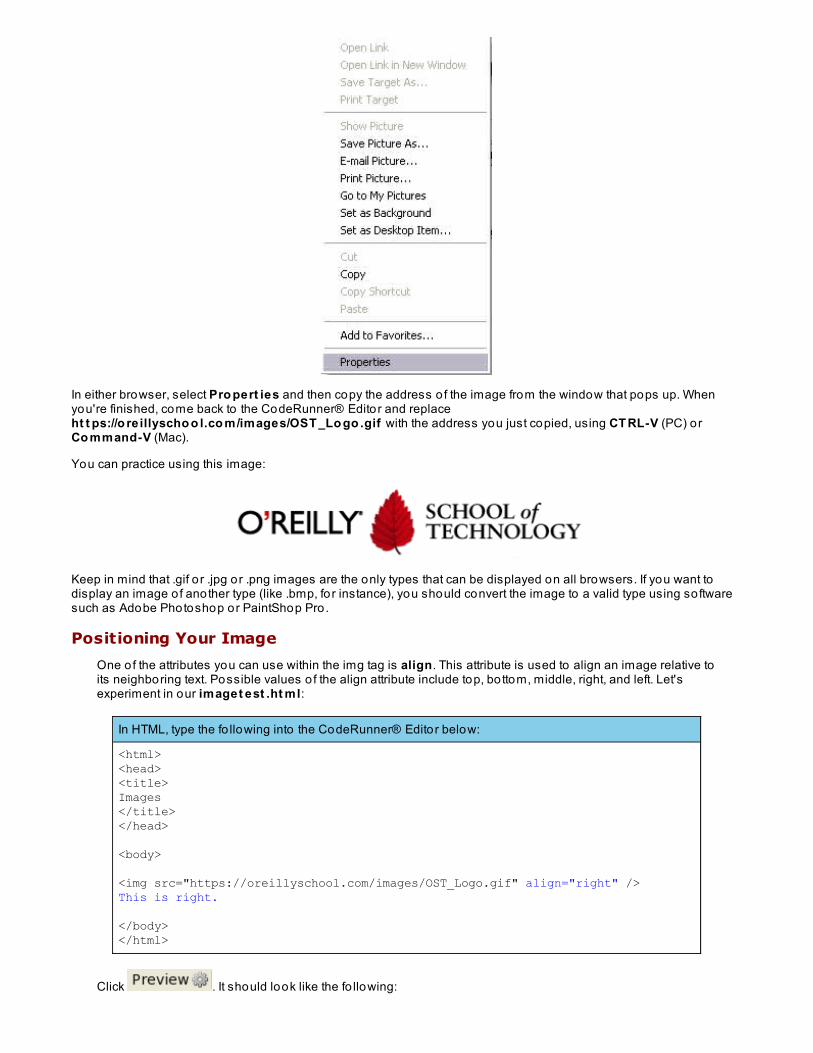
In either browser, select Pro pert ies and then copy the address o f the image from the window that pops up. Whenyou're finished, come back to the CodeRunner® Editor and replaceht t ps://o re illyscho o l.co m/images/OST _Lo go .gif with the address you just copied, using CT RL-V (PC) orCo mmand-V (Mac).
You can practice using this image:
Keep in mind that .gif o r .jpg or .png images are the only types that can be displayed on all browsers. If you want todisplay an image o f another type (like .bmp, fo r instance), you should convert the image to a valid type using softwaresuch as Adobe Photoshop or PaintShop Pro.
Positioning Your Image
One of the attributes you can use within the img tag is align. This attribute is used to align an image relative toits neighboring text. Possible values o f the align attribute include top, bottom, middle, right, and left. Let'sexperiment in our imaget est .ht ml:
In HTML, type the fo llowing into the CodeRunner® Editor below:
<html><head><title>Images</title></head>
<body>
<img src="https://oreillyschool.com/images/OST_Logo.gif" align="right" />This is right.
</body></html>
Click . It should look like the fo llowing:
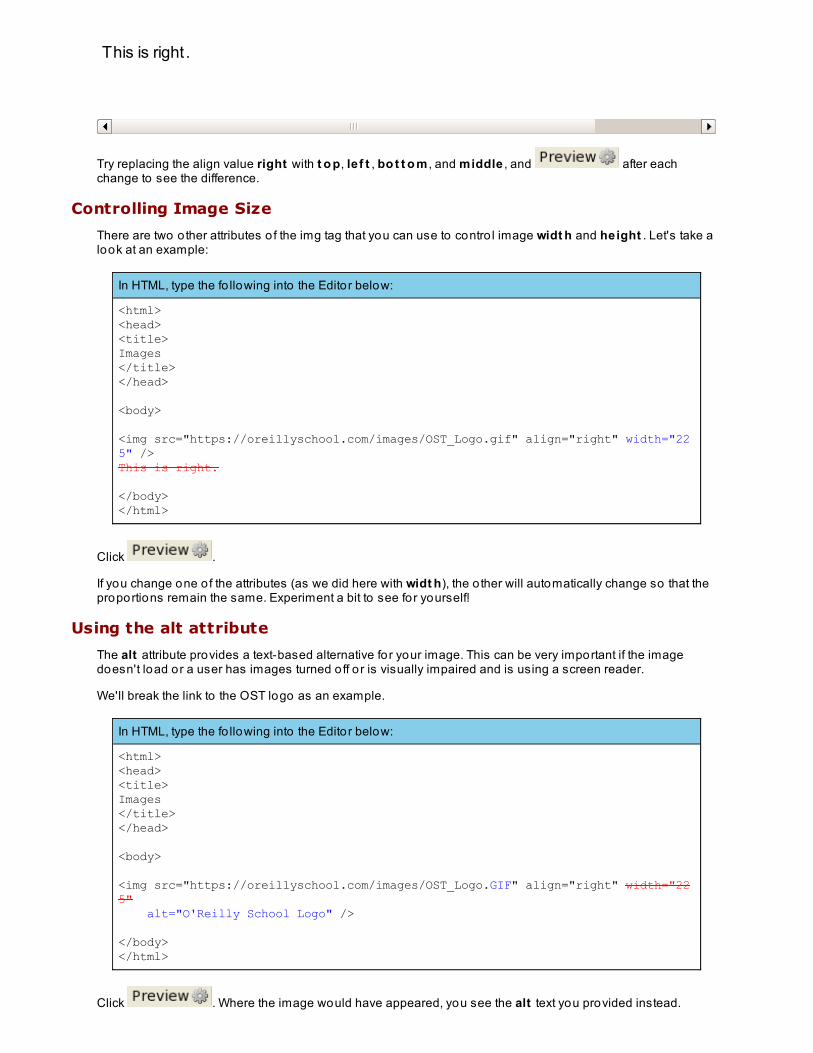
This is right .
Try replacing the align value right with t o p, le f t , bo t t o m , and middle , and after eachchange to see the difference.
Controlling Image Size
There are two o ther attributes o f the img tag that you can use to contro l image widt h and height . Let's take alook at an example:
In HTML, type the fo llowing into the Editor below:
<html><head><title>Images</title></head>
<body>
<img src="https://oreillyschool.com/images/OST_Logo.gif" align="right" width="225" />This is right.
</body></html>
Click .
If you change one o f the attributes (as we did here with widt h), the o ther will automatically change so that theproportions remain the same. Experiment a bit to see for yourself!
Using the alt attribute
The alt attribute provides a text-based alternative for your image. This can be very important if the imagedoesn't load or a user has images turned o ff o r is visually impaired and is using a screen reader.
We'll break the link to the OST logo as an example.
In HTML, type the fo llowing into the Editor below:
<html><head><title>Images</title></head> <body> <img src="https://oreillyschool.com/images/OST_Logo.GIF" align="right" width="225" alt="O'Reilly School Logo" /> </body></html>
Click . Where the image would have appeared, you see the alt text you provided instead.
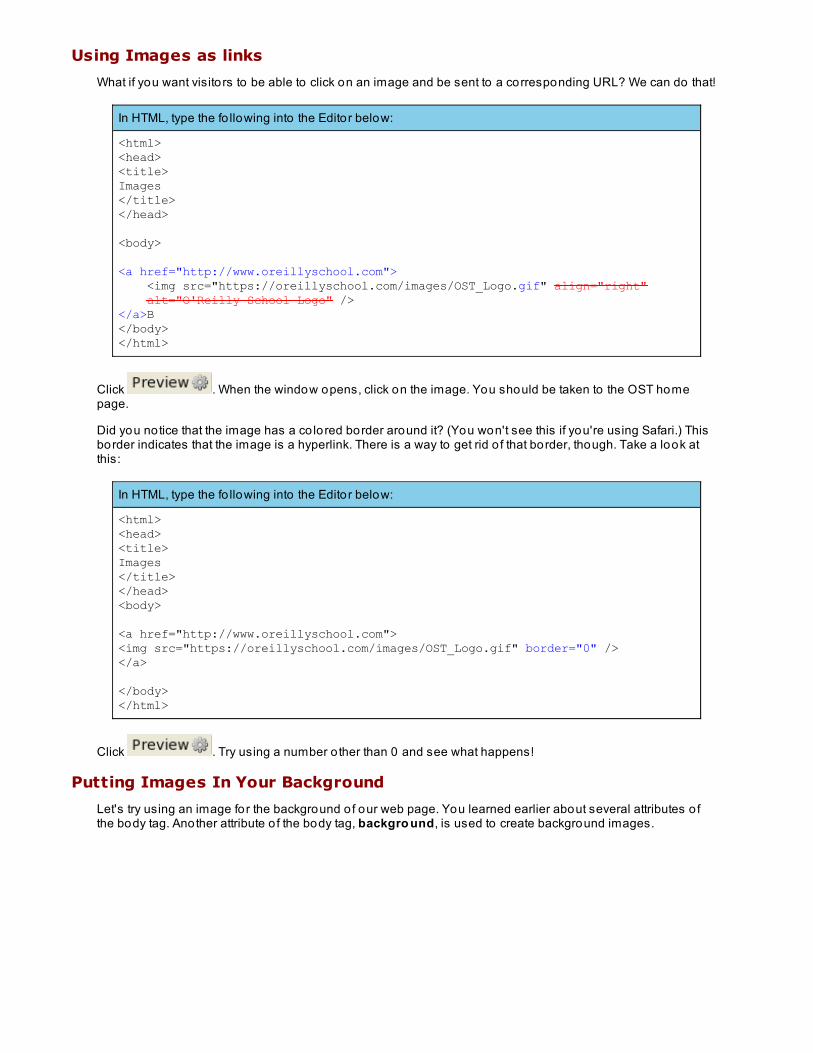
Using Images as links
What if you want visito rs to be able to click on an image and be sent to a corresponding URL? We can do that!
In HTML, type the fo llowing into the Editor below:
<html><head><title>Images</title></head>
<body>
<a href="http://www.oreillyschool.com"> <img src="https://oreillyschool.com/images/OST_Logo.gif" align="right" alt="O'Reilly School Logo" /></a>B</body></html>
Click . When the window opens, click on the image. You should be taken to the OST homepage.
Did you notice that the image has a co lored border around it? (You won't see this if you're using Safari.) Thisborder indicates that the image is a hyperlink. There is a way to get rid o f that border, though. Take a look atthis:
In HTML, type the fo llowing into the Editor below:
<html><head> <title>Images</title></head><body>
<a href="http://www.oreillyschool.com"><img src="https://oreillyschool.com/images/OST_Logo.gif" border="0" /></a>
</body></html>
Click . Try using a number o ther than 0 and see what happens!
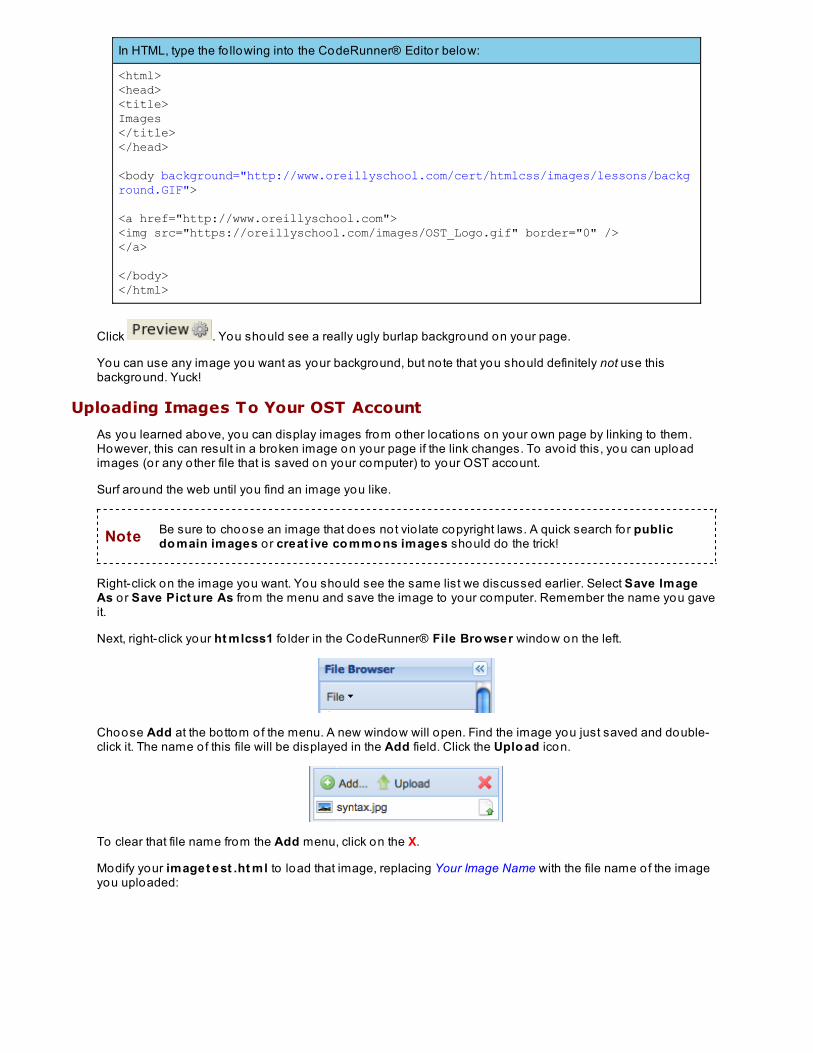
Putting Images In Your Background
Let's try using an image for the background o f our web page. You learned earlier about several attributes o fthe body tag. Another attribute o f the body tag, backgro und, is used to create background images.
In HTML, type the fo llowing into the CodeRunner® Editor below:
<html><head><title>Images</title></head>
<body background="http://www.oreillyschool.com/cert/htmlcss/images/lessons/background.GIF">
<a href="http://www.oreillyschool.com"><img src="https://oreillyschool.com/images/OST_Logo.gif" border="0" /></a>
</body></html>
Click . You should see a really ugly burlap background on your page.
You can use any image you want as your background, but note that you should definitely not use thisbackground. Yuck!
Uploading Images To Your OST Account
As you learned above, you can display images from other locations on your own page by linking to them.However, this can result in a broken image on your page if the link changes. To avo id this, you can uploadimages (or any o ther file that is saved on your computer) to your OST account.
Surf around the web until you find an image you like.
Note Be sure to choose an image that does not vio late copyright laws. A quick search for publicdo main images o r creat ive co mmo ns images should do the trick!
Right-click on the image you want. You should see the same list we discussed earlier. Select Save ImageAs o r Save Pict ure As from the menu and save the image to your computer. Remember the name you gaveit.
Next, right-click your ht mlcss1 fo lder in the CodeRunner® File Bro wser window on the left.
Choose Add at the bottom of the menu. A new window will open. Find the image you just saved and double-click it. The name of this file will be displayed in the Add field. Click the Uplo ad icon.
To clear that file name from the Add menu, click on the X.
Modify your imaget est .ht ml to load that image, replacing Your Image Name with the file name of the imageyou uploaded:
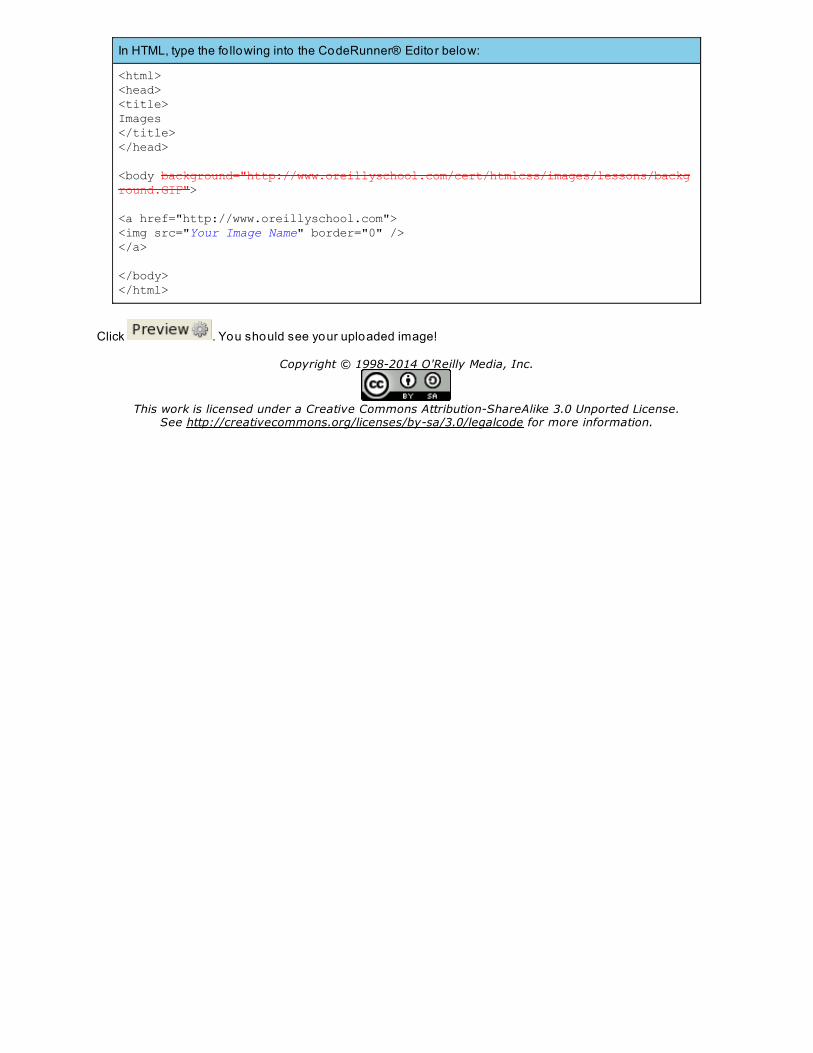
In HTML, type the fo llowing into the CodeRunner® Editor below:
<html><head><title>Images</title></head>
<body background="http://www.oreillyschool.com/cert/htmlcss/images/lessons/background.GIF">
<a href="http://www.oreillyschool.com"><img src="Your Image Name" border="0" /></a>
</body></html>
Click . You should see your uploaded image!
Copyright © 1998-2014 O'Reilly Media, Inc.
This work is licensed under a Creative Commons Attribution-ShareAlike 3.0 Unported License.See http://creativecommons.org/licenses/by-sa/3.0/legalcode for more information.
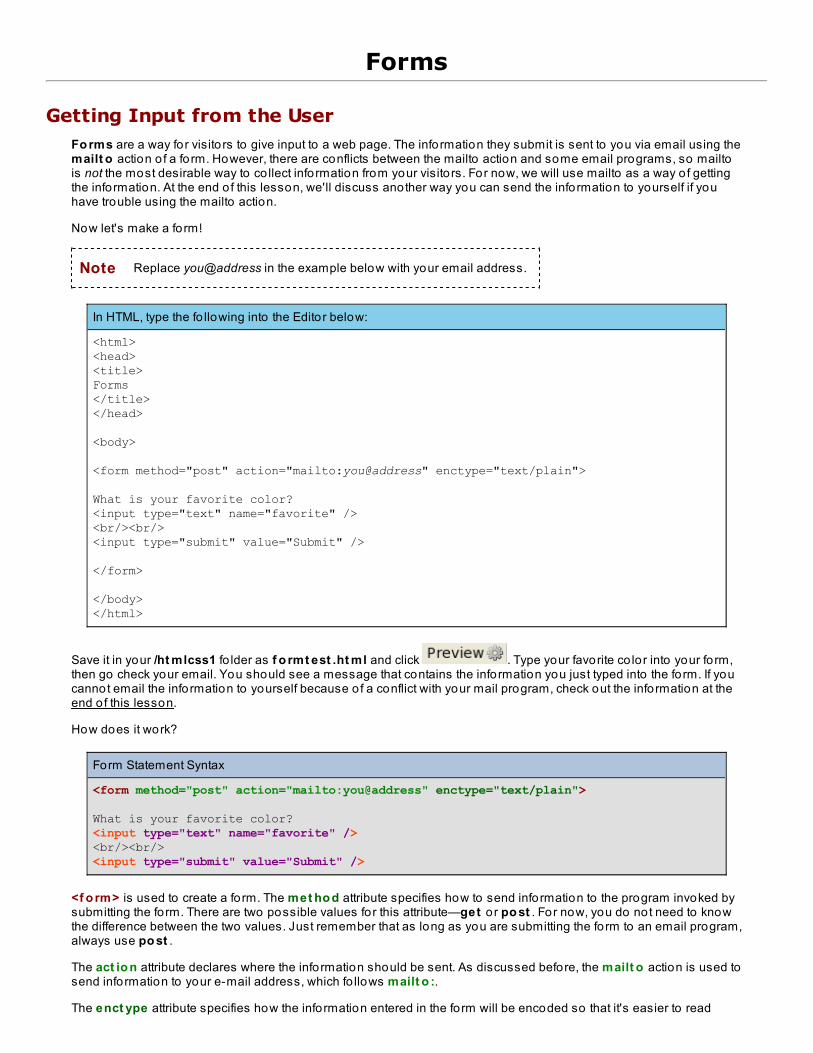
Forms
Getting Input from the UserFo rms are a way for visito rs to give input to a web page. The information they submit is sent to you via email using themailt o action o f a fo rm. However, there are conflicts between the mailto action and some email programs, so mailtois not the most desirable way to co llect information from your visito rs. For now, we will use mailto as a way o f gettingthe information. At the end o f this lesson, we'll discuss another way you can send the information to yourself if youhave trouble using the mailto action.
Now let's make a form!
Note Replace you@address in the example below with your email address.
In HTML, type the fo llowing into the Editor below:
<html><head><title>Forms</title></head>
<body>
<form method="post" action="mailto:you@address" enctype="text/plain">
What is your favorite color?<input type="text" name="favorite" /><br/><br/><input type="submit" value="Submit" />
</form>
</body></html>
Save it in your /ht mlcss1 fo lder as f o rmt est .ht ml and click . Type your favorite co lor into your fo rm,then go check your email. You should see a message that contains the information you just typed into the form. If youcannot email the information to yourself because o f a conflict with your mail program, check out the information at theend o f this lesson.
How does it work?
Form Statement Syntax
<form method="post" action="mailto:you@address" enctype="text/plain">
What is your favorite color?<input type="text" name="favorite" /><br/><br/><input type="submit" value="Submit" />
<f o rm> is used to create a form. The met ho d attribute specifies how to send information to the program invoked bysubmitting the form. There are two possible values for this attribute—get o r po st . For now, you do not need to knowthe difference between the two values. Just remember that as long as you are submitting the form to an email program,always use po st .
The act io n attribute declares where the information should be sent. As discussed before, the mailt o action is used tosend information to your e-mail address, which fo llows mailt o :.
The enct ype attribute specifies how the information entered in the form will be encoded so that it's easier to read
when you receive it. Try deleting this attribute and mail the form to yourself again, and notice the difference this attributemakes.
Once the form is defined, the next step is to create some inputs so information can be entered. <input > is one o f themost commonly used tags to accomplish this. The t ype attribute determines the specific sort o f fo rm element to becreated.
In the first input tag, type is set to t ext . This will place a single-line text field on the page. The text field is given a name .Although the name is not displayed on the web page, it's important to include it because the name will be paired withthe information in your email.
In the second input tag, type is set to <submit > . This places a button on the web page. When the button is clicked, theform is submitted, which means that the act io n specified for the form is invoked. In o ther words, the information isemailed to you! The value fo r the submit button is the text displayed on the button. Try changing the value to see theeffect!
You can create many types o f inputs, some that use the input tag and some that do not. Let's take a closer look:
Checkboxes
Checkboxes allow you to select one or more items in a list.
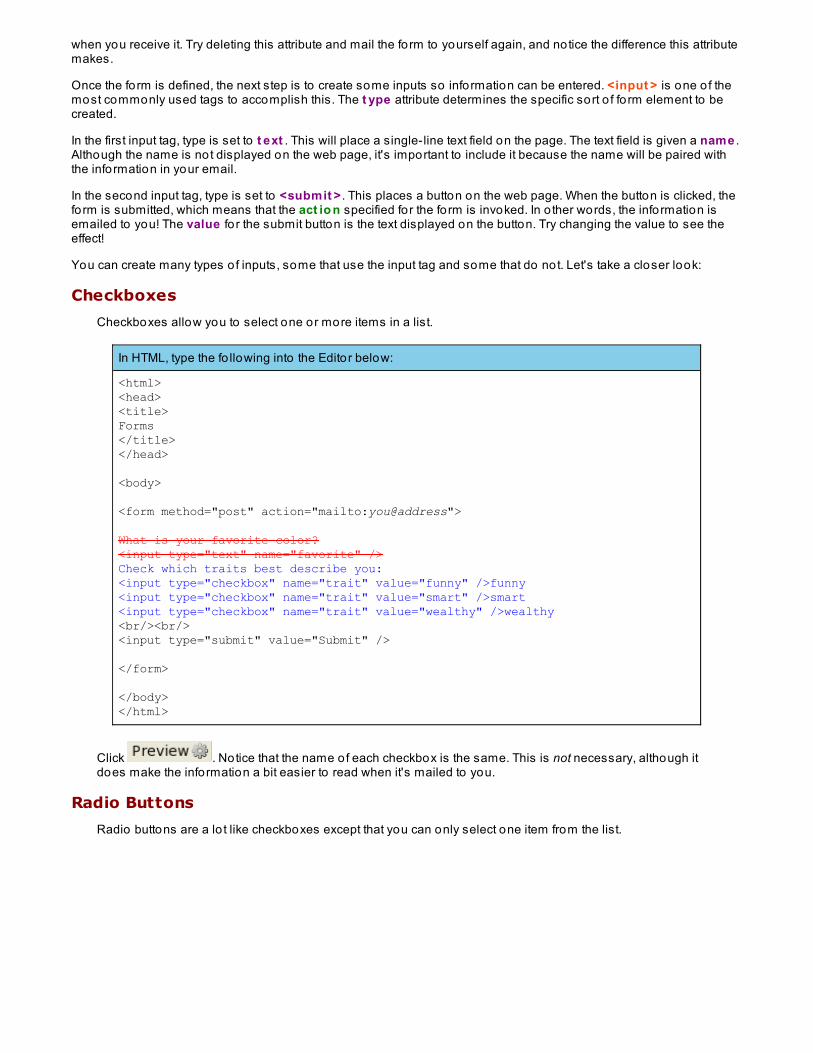
In HTML, type the fo llowing into the Editor below:
<html><head><title>Forms</title></head>
<body>
<form method="post" action="mailto:you@address">
What is your favorite color?<input type="text" name="favorite" />Check which traits best describe you:<input type="checkbox" name="trait" value="funny" />funny<input type="checkbox" name="trait" value="smart" />smart<input type="checkbox" name="trait" value="wealthy" />wealthy<br/><br/><input type="submit" value="Submit" />
</form>
</body></html>
Click . Notice that the name of each checkbox is the same. This is not necessary, although itdoes make the information a bit easier to read when it's mailed to you.
Radio Buttons
Radio buttons are a lo t like checkboxes except that you can only select one item from the list.
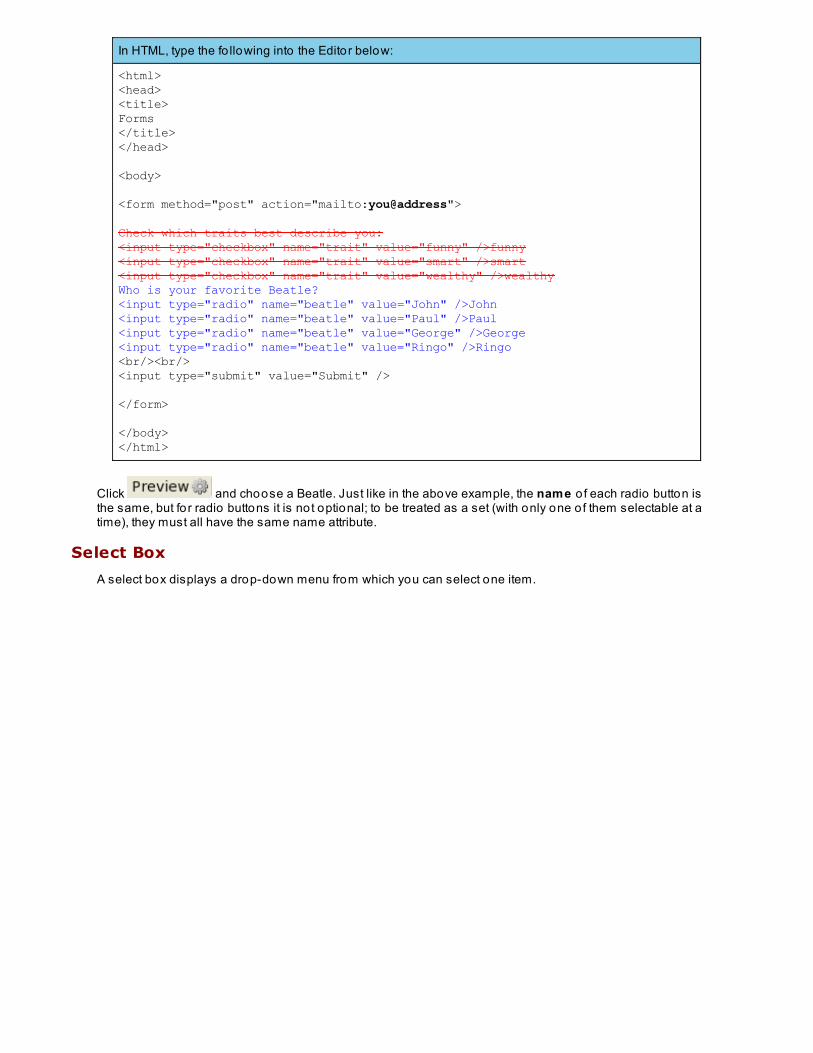
In HTML, type the fo llowing into the Editor below:
<html><head><title>Forms</title></head>
<body>
<form method="post" action="mailto:you@address">
Check which traits best describe you:<input type="checkbox" name="trait" value="funny" />funny<input type="checkbox" name="trait" value="smart" />smart<input type="checkbox" name="trait" value="wealthy" />wealthyWho is your favorite Beatle?<input type="radio" name="beatle" value="John" />John<input type="radio" name="beatle" value="Paul" />Paul<input type="radio" name="beatle" value="George" />George<input type="radio" name="beatle" value="Ringo" />Ringo<br/><br/><input type="submit" value="Submit" />
</form>
</body></html>
Click and choose a Beatle. Just like in the above example, the name o f each radio button isthe same, but fo r radio buttons it is not optional; to be treated as a set (with only one o f them selectable at atime), they must all have the same name attribute.
Select Box
A select box displays a drop-down menu from which you can select one item.
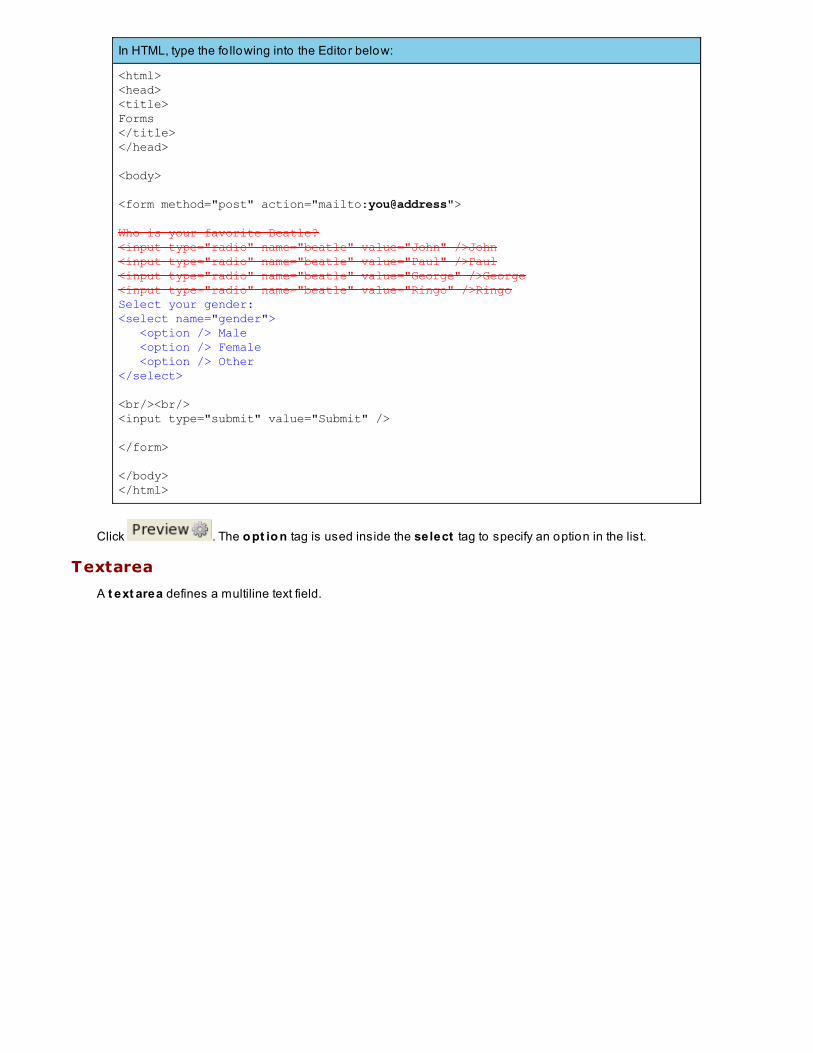
In HTML, type the fo llowing into the Editor below:
<html><head><title>Forms</title></head>
<body>
<form method="post" action="mailto:you@address">
Who is your favorite Beatle?<input type="radio" name="beatle" value="John" />John<input type="radio" name="beatle" value="Paul" />Paul<input type="radio" name="beatle" value="George" />George<input type="radio" name="beatle" value="Ringo" />RingoSelect your gender:<select name="gender"> <option /> Male <option /> Female <option /> Other</select>
<br/><br/><input type="submit" value="Submit" />
</form>
</body></html>
Click . The o pt io n tag is used inside the select tag to specify an option in the list.
Textarea
A t ext area defines a multiline text field.
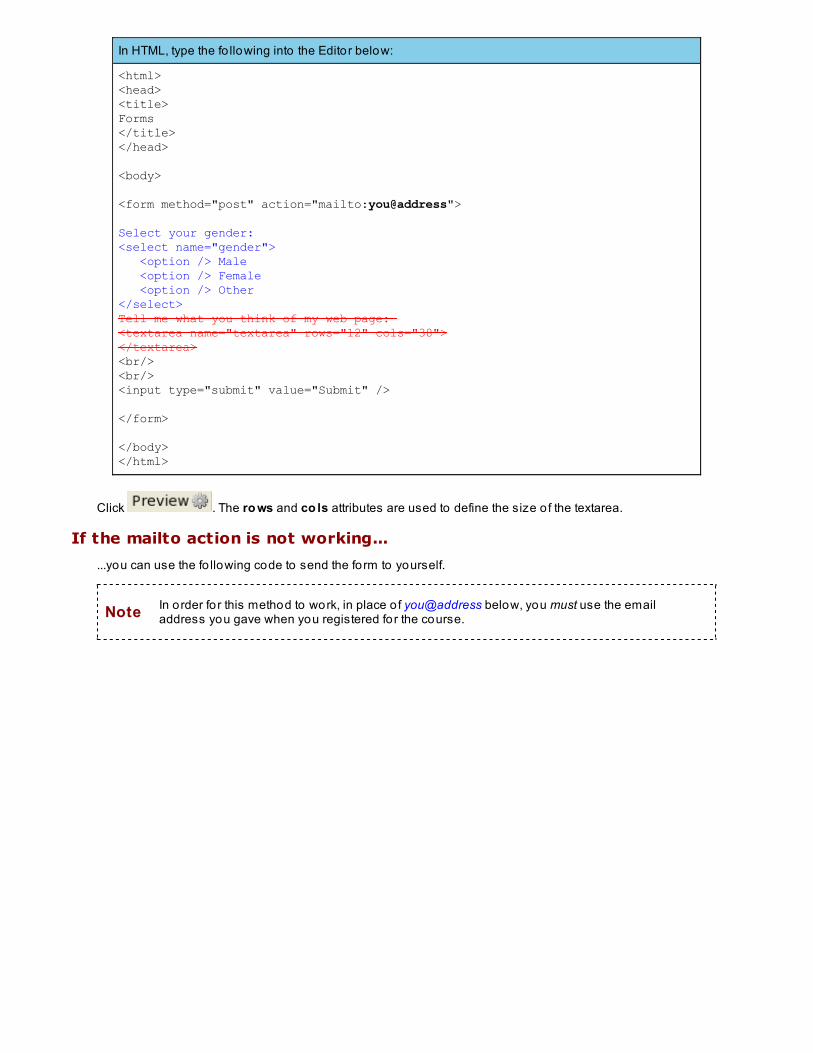
In HTML, type the fo llowing into the Editor below:
<html><head><title>Forms</title></head>
<body>
<form method="post" action="mailto:you@address">
Select your gender:<select name="gender"> <option /> Male <option /> Female <option /> Other</select>Tell me what you think of my web page: <textarea name="textarea" rows="12" cols="38"></textarea><br/><br/><input type="submit" value="Submit" />
</form>
</body></html>
Click . The ro ws and co ls attributes are used to define the size o f the textarea.
If the mailto action is not working...
...you can use the fo llowing code to send the form to yourself.
Note In order fo r this method to work, in place o f you@address below, you must use the emailaddress you gave when you registered for the course.
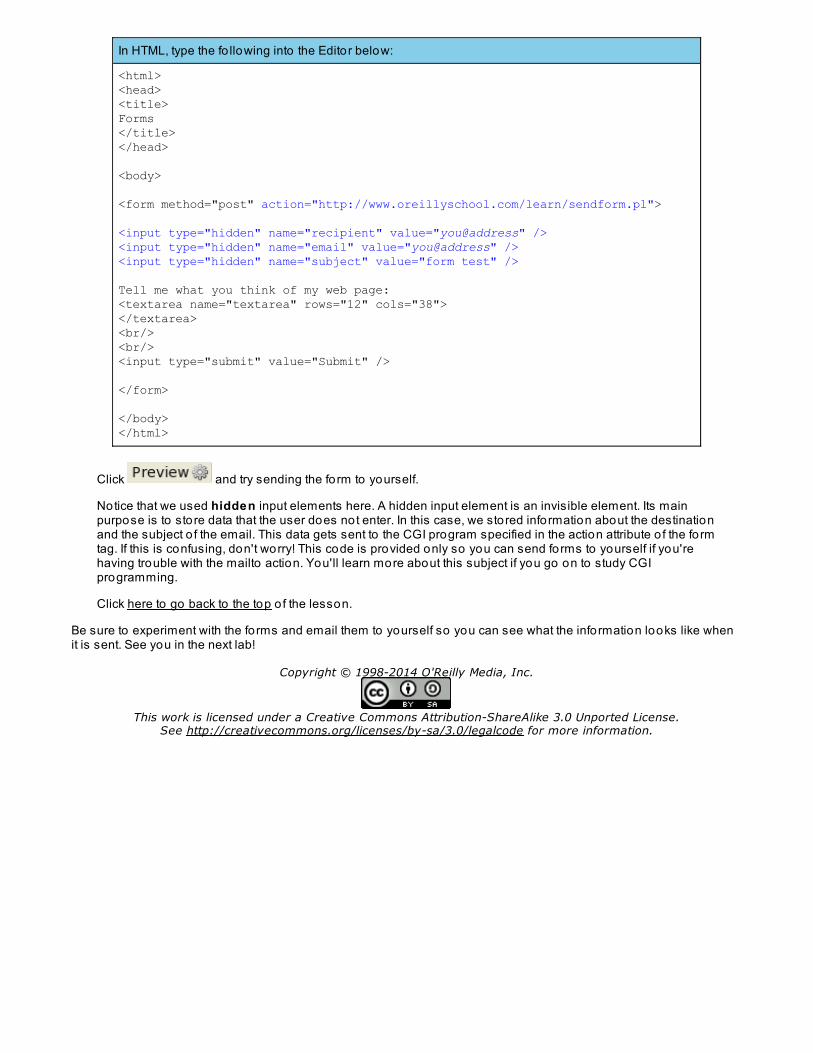
In HTML, type the fo llowing into the Editor below:
<html><head><title>Forms</title></head>
<body>
<form method="post" action="http://www.oreillyschool.com/learn/sendform.pl">
<input type="hidden" name="recipient" value="you@address" /><input type="hidden" name="email" value="you@address" /><input type="hidden" name="subject" value="form test" />
Tell me what you think of my web page: <textarea name="textarea" rows="12" cols="38"></textarea><br/><br/><input type="submit" value="Submit" />
</form>
</body></html>
Click and try sending the form to yourself.
Notice that we used hidden input elements here. A hidden input element is an invisible element. Its mainpurpose is to store data that the user does not enter. In this case, we stored information about the destinationand the subject o f the email. This data gets sent to the CGI program specified in the action attribute o f the formtag. If this is confusing, don't worry! This code is provided only so you can send forms to yourself if you'rehaving trouble with the mailto action. You'll learn more about this subject if you go on to study CGIprogramming.
Click here to go back to the top o f the lesson.
Be sure to experiment with the forms and email them to yourself so you can see what the information looks like whenit is sent. See you in the next lab!
Copyright © 1998-2014 O'Reilly Media, Inc.
This work is licensed under a Creative Commons Attribution-ShareAlike 3.0 Unported License.See http://creativecommons.org/licenses/by-sa/3.0/legalcode for more information.

Tables
Creating TablesSo far, we've learned the fundamental elements that make up an html document, but we haven't learned much aboutpositioning these elements. Tables are extremely useful fo r this purpose.
In HTML, type the fo llowing text into the Editor below:
<html><head><title>Tables</title></head>
<body>
<table border="8">
<tr> <td>row 1<br/>column 1</td> <td>row 1<br/>column 2</td></tr>
<tr> <td>row 2<br/>column 1</td> <td>row 2<br/>column 2</td></tr>
<tr> <td>row 3<br/>column 1</td></tr>
</table>
</body></html>
Save this file in your /ht mlcss1 fo lder as t ablet est .ht ml and click . It should look something like this:
row 1column 1
row 1column 2
row 2column 1
row 2column 2
row 3column 1
Let's take a closer look at this code.
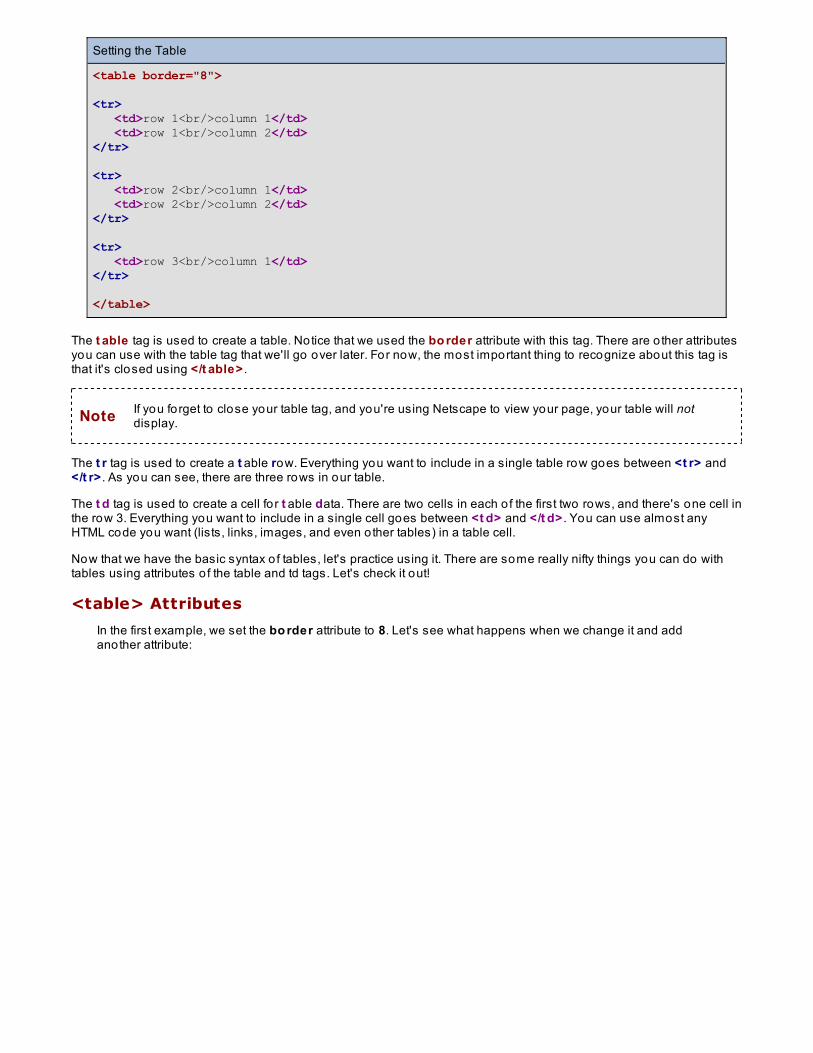
Setting the Table
<table border="8">
<tr> <td>row 1<br/>column 1</td> <td>row 1<br/>column 2</td></tr>
<tr> <td>row 2<br/>column 1</td> <td>row 2<br/>column 2</td></tr>
<tr> <td>row 3<br/>column 1</td></tr>
</table>
The t able tag is used to create a table. Notice that we used the bo rder attribute with this tag. There are o ther attributesyou can use with the table tag that we'll go over later. For now, the most important thing to recognize about this tag isthat it's closed using </t able> .
Note If you forget to close your table tag, and you're using Netscape to view your page, your table will notdisplay.
The t r tag is used to create a t able row. Everything you want to include in a single table row goes between <t r> and</t r> . As you can see, there are three rows in our table.
The t d tag is used to create a cell fo r t able data. There are two cells in each o f the first two rows, and there's one cell inthe row 3. Everything you want to include in a single cell goes between <t d> and </t d> . You can use almost anyHTML code you want (lists, links, images, and even o ther tables) in a table cell.
Now that we have the basic syntax o f tables, let's practice using it. There are some really nifty things you can do withtables using attributes o f the table and td tags. Let's check it out!
<table> Attributes
In the first example, we set the bo rder attribute to 8. Let's see what happens when we change it and addanother attribute:
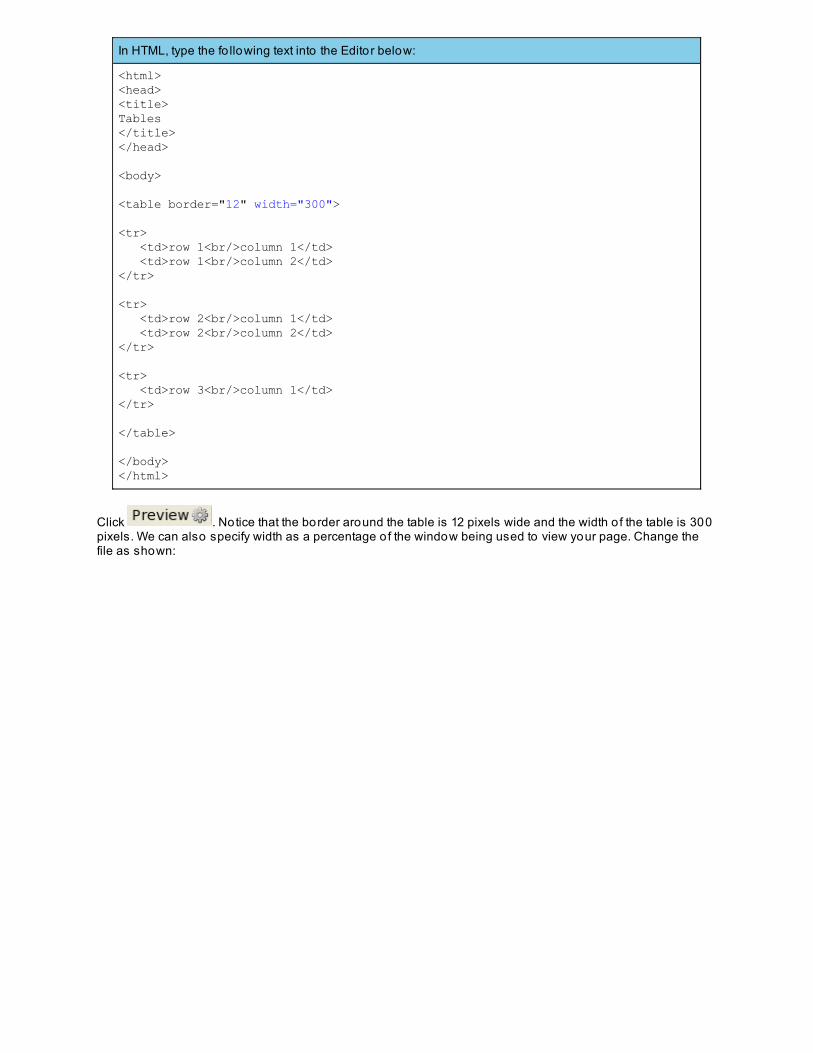
In HTML, type the fo llowing text into the Editor below:
<html><head><title>Tables</title></head>
<body>
<table border="12" width="300">
<tr> <td>row 1<br/>column 1</td> <td>row 1<br/>column 2</td></tr>
<tr> <td>row 2<br/>column 1</td> <td>row 2<br/>column 2</td></tr>
<tr> <td>row 3<br/>column 1</td></tr>
</table>
</body></html>
Click . Notice that the border around the table is 12 pixels wide and the width o f the table is 300pixels. We can also specify width as a percentage o f the window being used to view your page. Change thefile as shown:
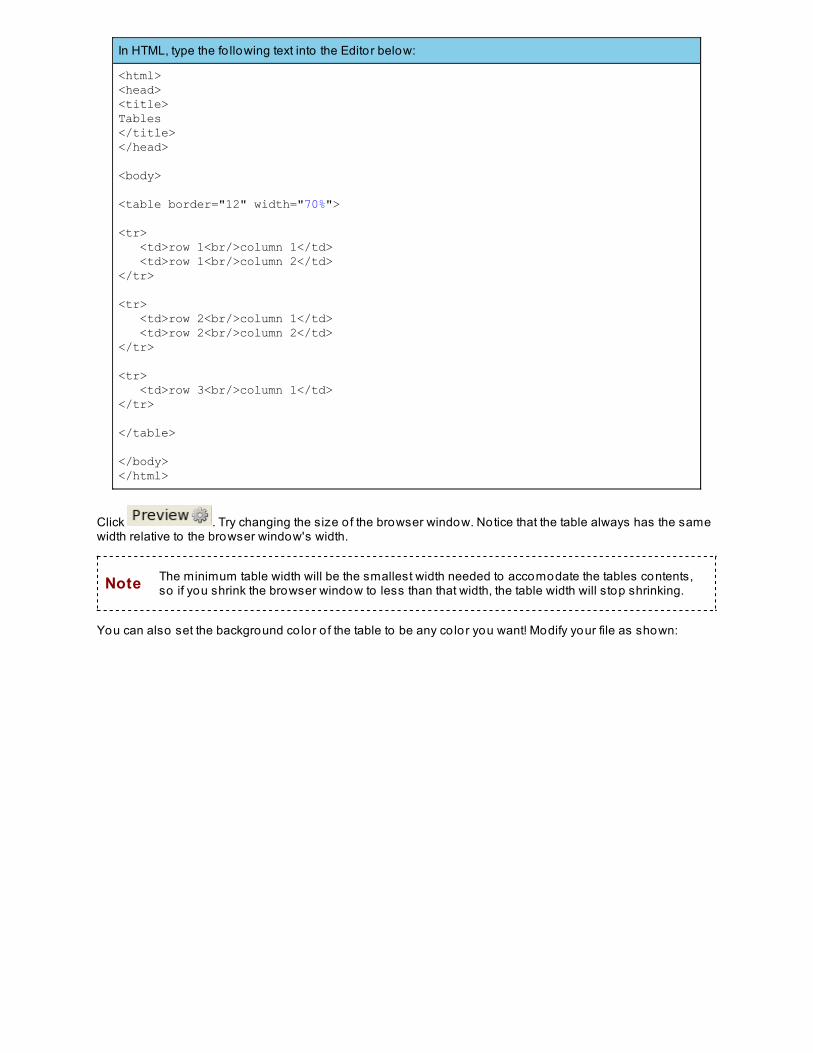
In HTML, type the fo llowing text into the Editor below:
<html><head><title>Tables</title></head>
<body>
<table border="12" width="70%">
<tr> <td>row 1<br/>column 1</td> <td>row 1<br/>column 2</td></tr>
<tr> <td>row 2<br/>column 1</td> <td>row 2<br/>column 2</td></tr>
<tr> <td>row 3<br/>column 1</td></tr>
</table>
</body></html>
Click . Try changing the size o f the browser window. Notice that the table always has the samewidth relative to the browser window's width.
Note The minimum table width will be the smallest width needed to accomodate the tables contents,so if you shrink the browser window to less than that width, the table width will stop shrinking.
You can also set the background co lor o f the table to be any co lor you want! Modify your file as shown:
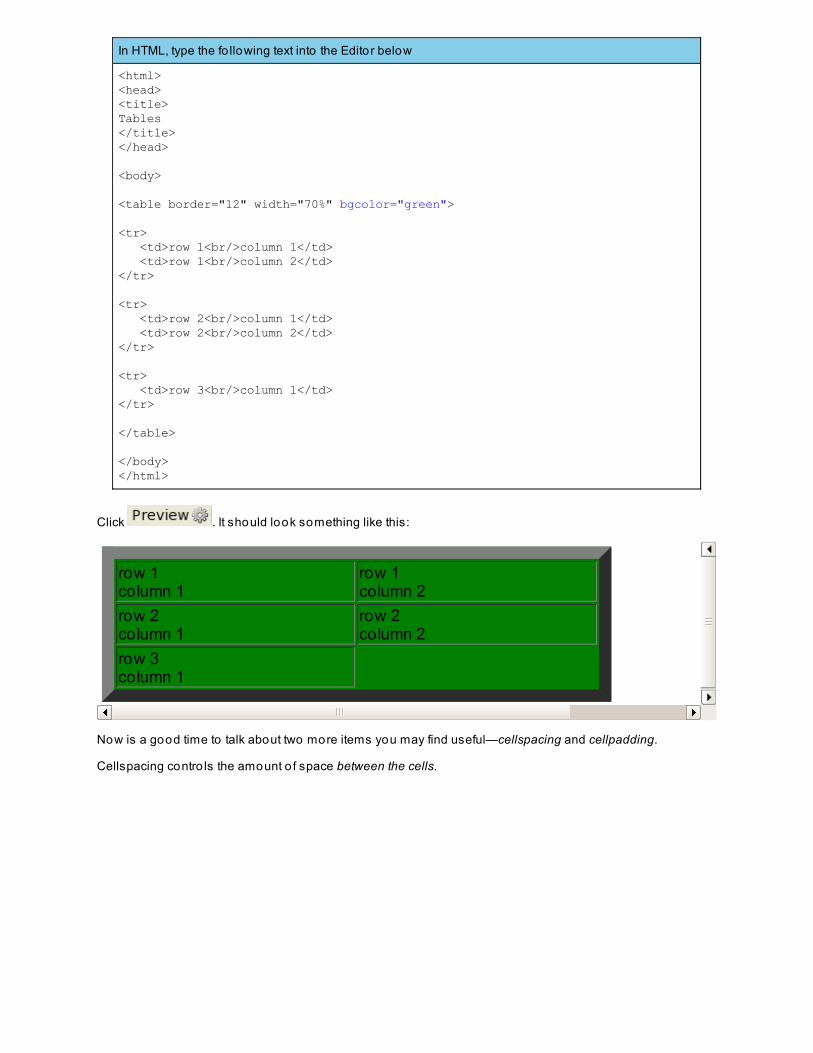
In HTML, type the fo llowing text into the Editor below
<html><head><title>Tables</title></head>
<body>
<table border="12" width="70%" bgcolor="green">
<tr> <td>row 1<br/>column 1</td> <td>row 1<br/>column 2</td></tr>
<tr> <td>row 2<br/>column 1</td> <td>row 2<br/>column 2</td></tr>
<tr> <td>row 3<br/>column 1</td></tr>
</table>
</body></html>
Click . It should look something like this:
row 1column 1
row 1column 2
row 2column 1
row 2column 2
row 3column 1
Now is a good time to talk about two more items you may find useful—cellspacing and cellpadding.
Cellspacing contro ls the amount o f space between the cells.
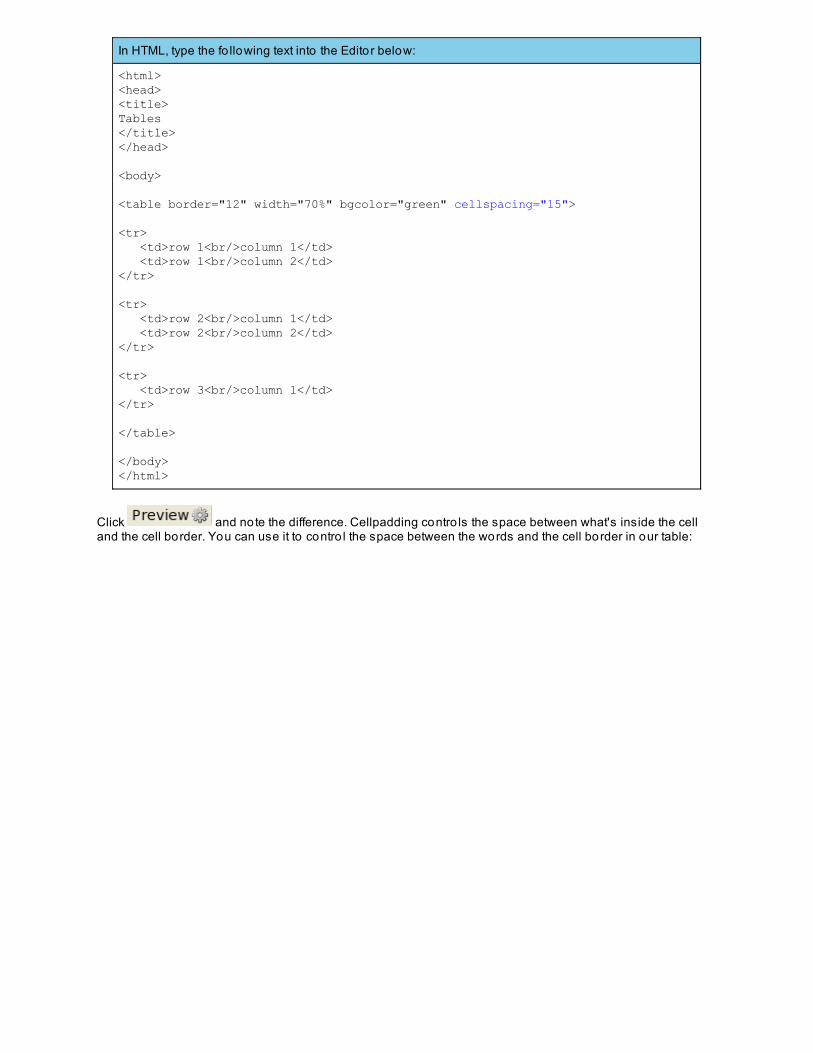
In HTML, type the fo llowing text into the Editor below:
<html><head><title>Tables</title></head>
<body>
<table border="12" width="70%" bgcolor="green" cellspacing="15">
<tr> <td>row 1<br/>column 1</td> <td>row 1<br/>column 2</td></tr>
<tr> <td>row 2<br/>column 1</td> <td>row 2<br/>column 2</td></tr>
<tr> <td>row 3<br/>column 1</td></tr>
</table>
</body></html>
Click and note the difference. Cellpadding contro ls the space between what's inside the celland the cell border. You can use it to contro l the space between the words and the cell border in our table:
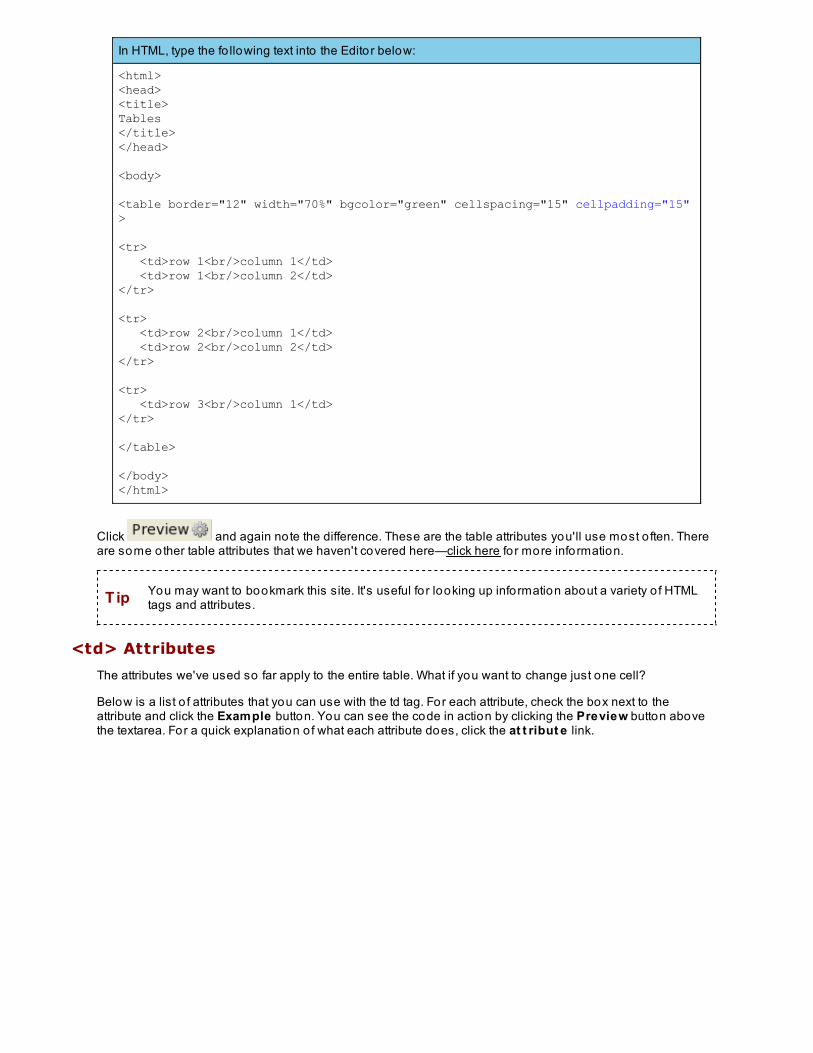
In HTML, type the fo llowing text into the Editor below:
<html><head><title>Tables</title></head>
<body>
<table border="12" width="70%" bgcolor="green" cellspacing="15" cellpadding="15">
<tr> <td>row 1<br/>column 1</td> <td>row 1<br/>column 2</td></tr>
<tr> <td>row 2<br/>column 1</td> <td>row 2<br/>column 2</td></tr>
<tr> <td>row 3<br/>column 1</td></tr>
</table>
</body></html>
Click and again note the difference. These are the table attributes you'll use most o ften. Thereare some other table attributes that we haven't covered here—click here for more information.
Tip You may want to bookmark this site. It's useful fo r looking up information about a variety o f HTMLtags and attributes.
<td> Attributes
The attributes we've used so far apply to the entire table. What if you want to change just one cell?
Below is a list o f attributes that you can use with the td tag. For each attribute, check the box next to theattribute and click the Example button. You can see the code in action by clicking the Preview button abovethe textarea. For a quick explanation o f what each attribute does, click the at t ribut e link.
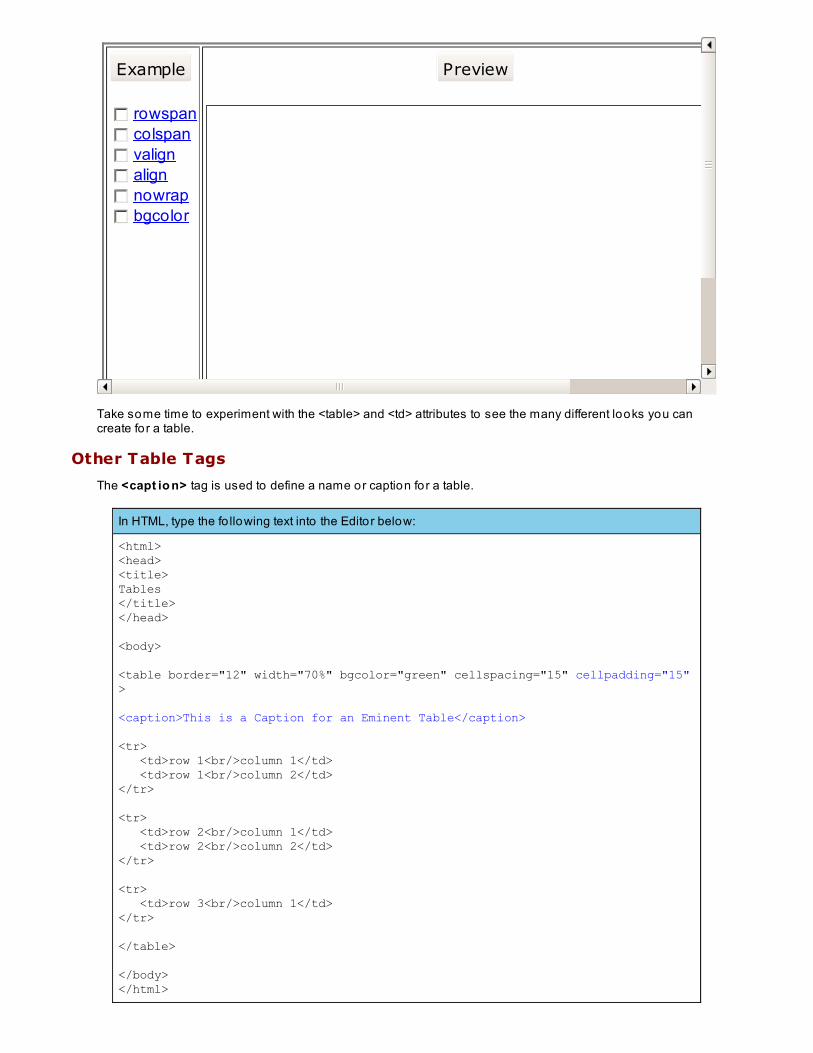
Example
rowspan colspan valign align nowrap bgcolor
Preview
Take some time to experiment with the <table> and <td> attributes to see the many different looks you cancreate for a table.
Other Table Tags
The <capt io n> tag is used to define a name or caption for a table.
In HTML, type the fo llowing text into the Editor below:
<html><head><title>Tables</title></head>
<body>
<table border="12" width="70%" bgcolor="green" cellspacing="15" cellpadding="15">
<caption>This is a Caption for an Eminent Table</caption>
<tr> <td>row 1<br/>column 1</td> <td>row 1<br/>column 2</td></tr>
<tr> <td>row 2<br/>column 1</td> <td>row 2<br/>column 2</td></tr>
<tr> <td>row 3<br/>column 1</td></tr>
</table>
</body></html>
Click . The caption appears above the table.
The t h tag is used to create a t able heading. You can use it in place o f a td tag to display that table cell'scontents centered, and in a bo lder font than regular td table cells, typically fo r co lumn or row headings.Replace a td tag with a th tag in your table to see what it does.
What are Tables Good For?
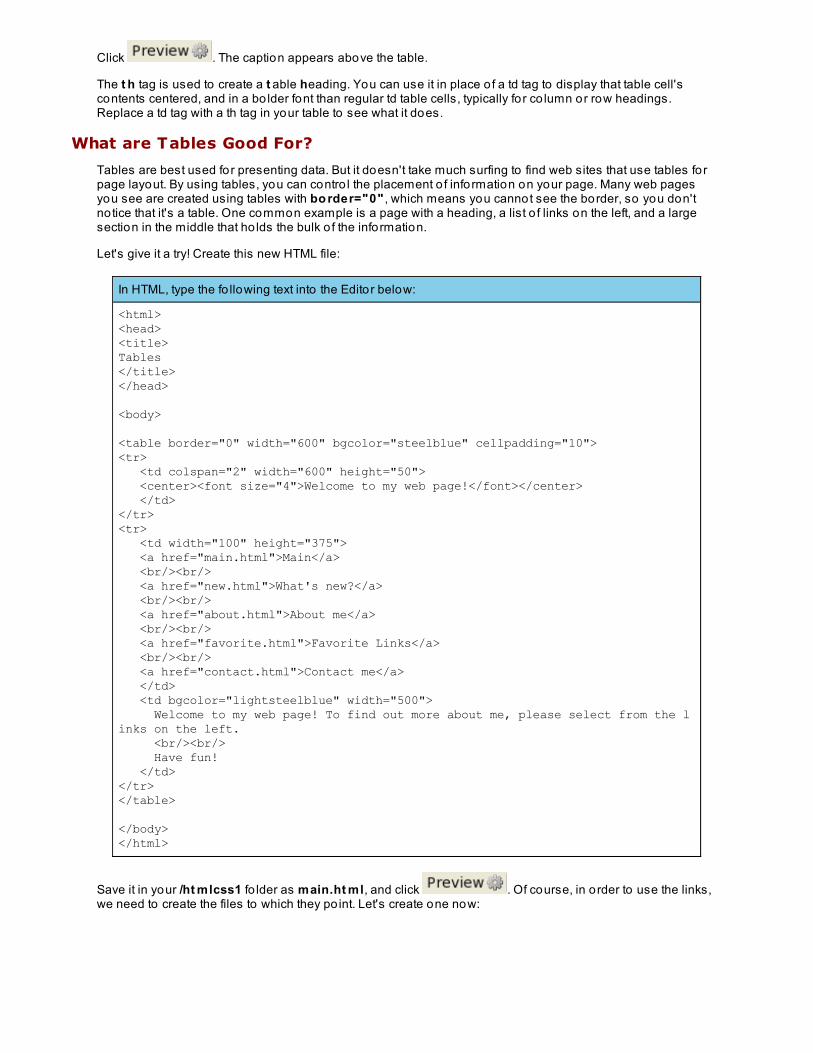
Tables are best used for presenting data. But it doesn't take much surfing to find web sites that use tables forpage layout. By using tables, you can contro l the placement o f information on your page. Many web pagesyou see are created using tables with bo rder="0" , which means you cannot see the border, so you don'tnotice that it's a table. One common example is a page with a heading, a list o f links on the left, and a largesection in the middle that ho lds the bulk o f the information.
Let's give it a try! Create this new HTML file:
In HTML, type the fo llowing text into the Editor below:
<html><head><title>Tables</title></head>
<body>
<table border="0" width="600" bgcolor="steelblue" cellpadding="10"><tr> <td colspan="2" width="600" height="50"> <center><font size="4">Welcome to my web page!</font></center> </td></tr><tr> <td width="100" height="375"> <a href="main.html">Main</a> <br/><br/> <a href="new.html">What's new?</a> <br/><br/> <a href="about.html">About me</a> <br/><br/> <a href="favorite.html">Favorite Links</a> <br/><br/> <a href="contact.html">Contact me</a> </td> <td bgcolor="lightsteelblue" width="500"> Welcome to my web page! To find out more about me, please select from the links on the left. <br/><br/> Have fun! </td></tr></table>
</body></html>
Save it in your /ht mlcss1 fo lder as main.ht ml, and click . Of course, in order to use the links,we need to create the files to which they po int. Let's create one now:
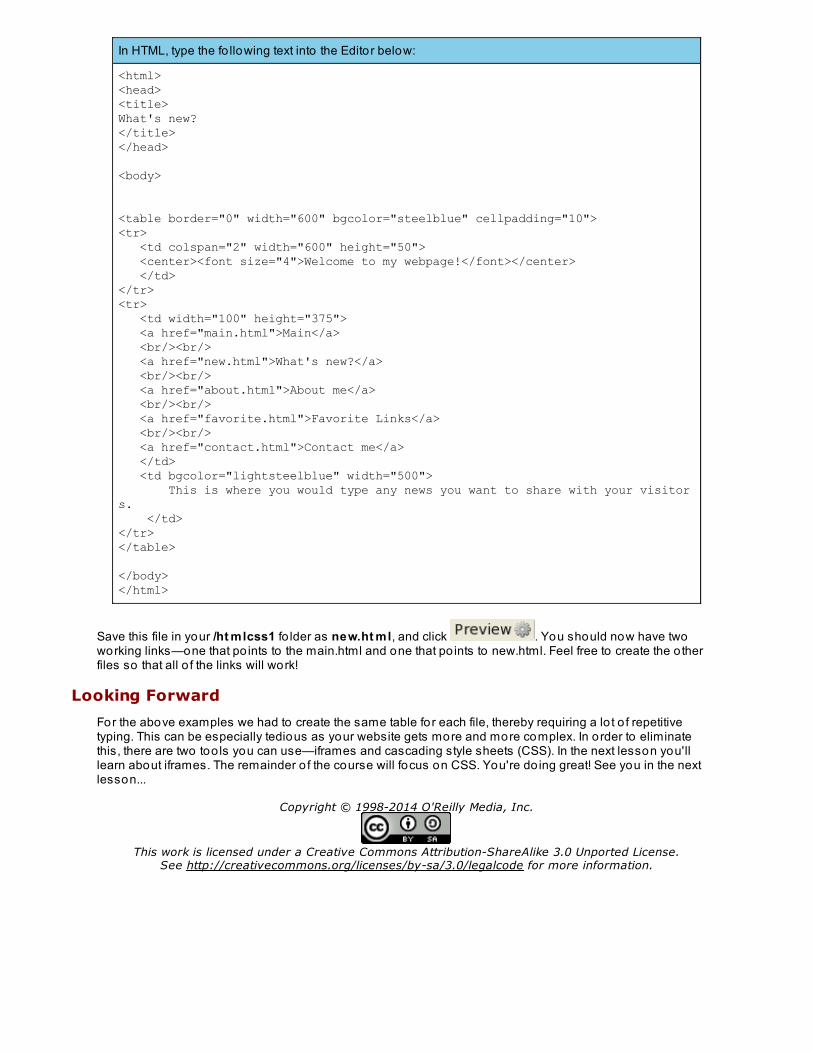
In HTML, type the fo llowing text into the Editor below:
<html><head><title>What's new?</title></head>
<body>
<table border="0" width="600" bgcolor="steelblue" cellpadding="10"><tr> <td colspan="2" width="600" height="50"> <center><font size="4">Welcome to my webpage!</font></center> </td></tr><tr> <td width="100" height="375"> <a href="main.html">Main</a> <br/><br/> <a href="new.html">What's new?</a> <br/><br/> <a href="about.html">About me</a> <br/><br/> <a href="favorite.html">Favorite Links</a> <br/><br/> <a href="contact.html">Contact me</a> </td> <td bgcolor="lightsteelblue" width="500"> This is where you would type any news you want to share with your visitors. </td></tr></table>
</body></html>
Save this file in your /ht mlcss1 fo lder as new.ht ml, and click . You should now have twoworking links—one that po ints to the main.html and one that po ints to new.html. Feel free to create the o therfiles so that all o f the links will work!
Looking Forward
For the above examples we had to create the same table for each file, thereby requiring a lo t o f repetitivetyping. This can be especially tedious as your website gets more and more complex. In order to eliminatethis, there are two too ls you can use—iframes and cascading style sheets (CSS). In the next lesson you'lllearn about iframes. The remainder o f the course will focus on CSS. You're do ing great! See you in the nextlesson...
Copyright © 1998-2014 O'Reilly Media, Inc.
This work is licensed under a Creative Commons Attribution-ShareAlike 3.0 Unported License.See http://creativecommons.org/licenses/by-sa/3.0/legalcode for more information.
iframes
Using iframesAn iframe (inline frame) is an element that creates a section in a web page where you can load the contents o f anotherweb page.
In order to create a page that uses iframes we will have to create two separate files. Let's get started!
Creating your own iframes
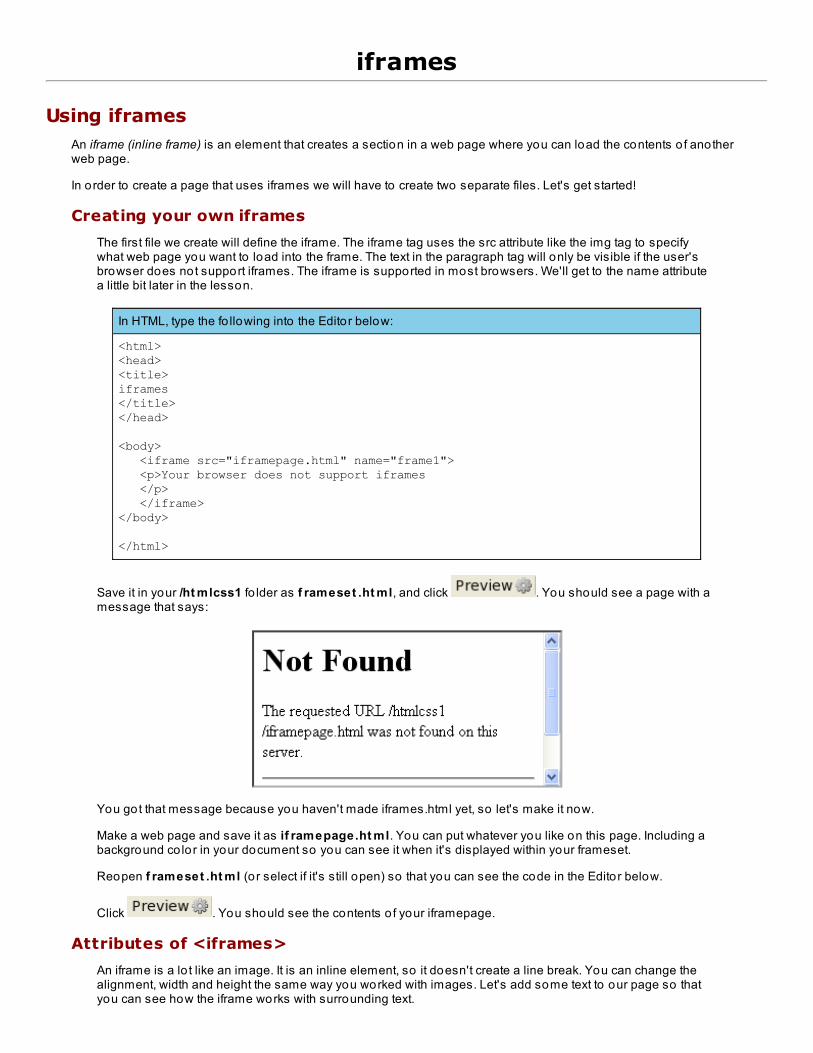
The first file we create will define the iframe. The iframe tag uses the src attribute like the img tag to specifywhat web page you want to load into the frame. The text in the paragraph tag will only be visible if the user'sbrowser does not support iframes. The iframe is supported in most browsers. We'll get to the name attributea little bit later in the lesson.
In HTML, type the fo llowing into the Editor below:
<html> <head><title>iframes</title></head>
<body> <iframe src="iframepage.html" name="frame1"> <p>Your browser does not support iframes </p> </iframe></body>
</html>
Save it in your /ht mlcss1 fo lder as f rameset .ht ml, and click . You should see a page with amessage that says:
You got that message because you haven't made iframes.html yet, so let's make it now.
Make a web page and save it as if ramepage.ht ml. You can put whatever you like on this page. Including abackground co lor in your document so you can see it when it's displayed within your frameset.
Reopen f rameset .ht ml (o r select if it's still open) so that you can see the code in the Editor below.
Click . You should see the contents o f your iframepage.
Attributes of <iframes>
An iframe is a lo t like an image. It is an inline element, so it doesn't create a line break. You can change thealignment, width and height the same way you worked with images. Let's add some text to our page so thatyou can see how the iframe works with surrounding text.
In HTML, type the fo llowing into the Editor below:
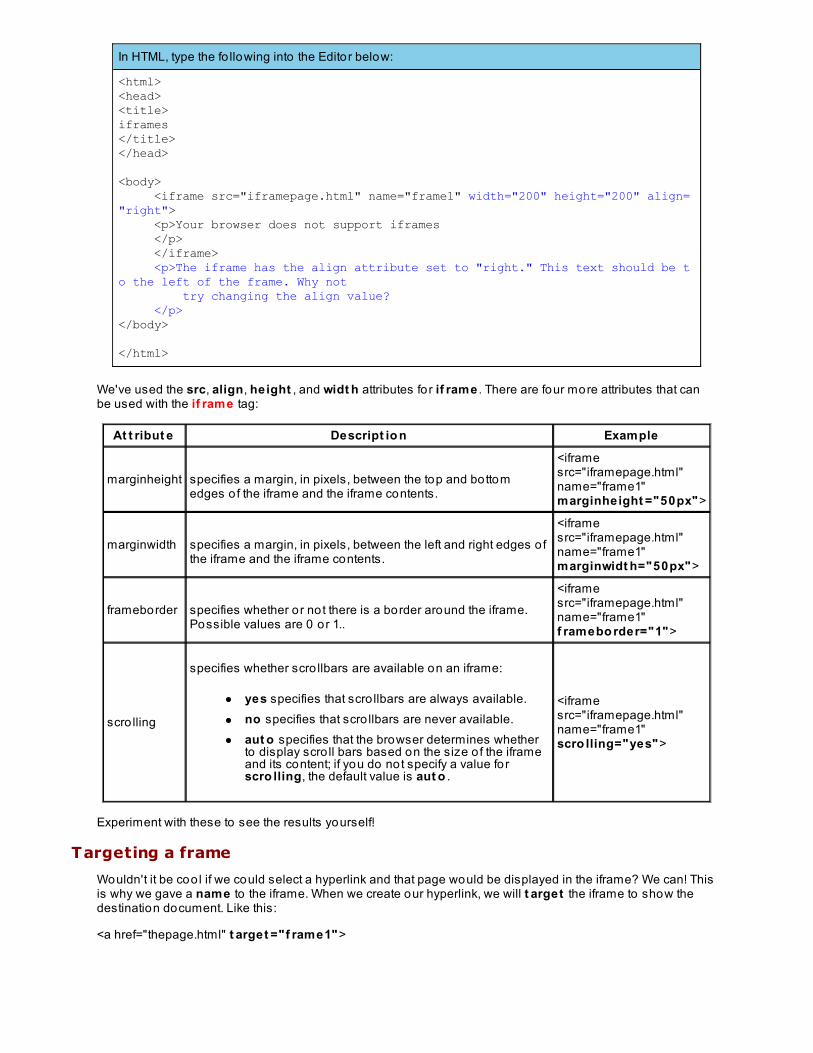
<html> <head><title>iframes</title></head> <body> <iframe src="iframepage.html" name="frame1" width="200" height="200" align="right"> <p>Your browser does not support iframes </p> </iframe> <p>The iframe has the align attribute set to "right." This text should be to the left of the frame. Why not try changing the align value? </p></body> </html>
We've used the src, align, height , and widt h attributes for if rame . There are four more attributes that canbe used with the if rame tag:
At t ribut e Descript io n Example
marginheight specifies a margin, in pixels, between the top and bottomedges o f the iframe and the iframe contents.
<iframesrc="iframepage.html"name="frame1"marginheight ="50px">
marginwidth specifies a margin, in pixels, between the left and right edges o fthe iframe and the iframe contents.
<iframesrc="iframepage.html"name="frame1"marginwidt h="50px">
frameborder specifies whether or not there is a border around the iframe.Possible values are 0 or 1..
<iframesrc="iframepage.html"name="frame1"f ramebo rder="1">
scro lling
specifies whether scro llbars are available on an iframe:
yes specifies that scro llbars are always available.no specifies that scro llbars are never available.aut o specifies that the browser determines whetherto display scro ll bars based on the size o f the iframeand its content; if you do not specify a value forscro lling, the default value is aut o .
<iframesrc="iframepage.html"name="frame1"scro lling="yes">
Experiment with these to see the results yourself!
Targeting a frame
Wouldn't it be coo l if we could select a hyperlink and that page would be displayed in the iframe? We can! Thisis why we gave a name to the iframe. When we create our hyperlink, we will t arget the iframe to show thedestination document. Like this:
<a href="thepage.html" t arget ="f rame1">
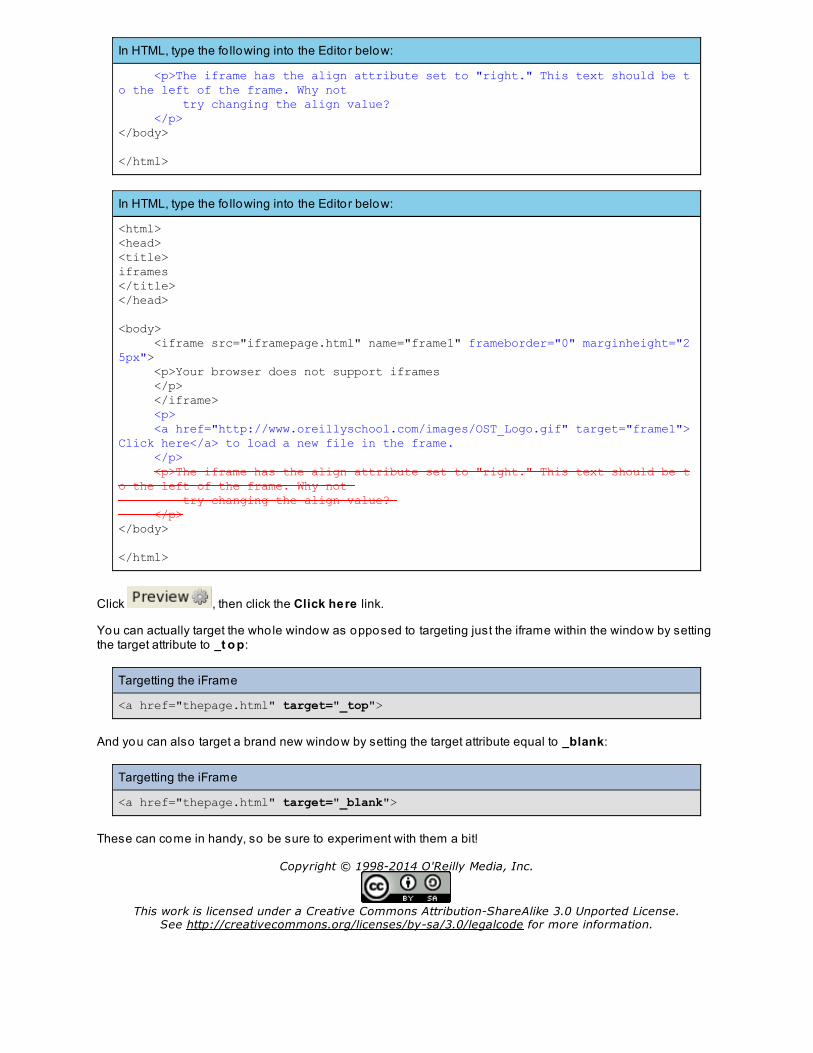
In HTML, type the fo llowing into the Editor below:
<p>The iframe has the align attribute set to "right." This text should be to the left of the frame. Why not try changing the align value? </p></body> </html>
In HTML, type the fo llowing into the Editor below:
<html> <head><title>iframes</title></head> <body> <iframe src="iframepage.html" name="frame1" frameborder="0" marginheight="25px"> <p>Your browser does not support iframes </p> </iframe> <p> <a href="http://www.oreillyschool.com/images/OST_Logo.gif" target="frame1">Click here</a> to load a new file in the frame. </p> <p>The iframe has the align attribute set to "right." This text should be to the left of the frame. Why not try changing the align value? </p></body> </html>
Click , then click the Click here link.
You can actually target the whole window as opposed to targeting just the iframe within the window by settingthe target attribute to _t o p:
Targetting the iFrame
<a href="thepage.html" target="_top">
And you can also target a brand new window by setting the target attribute equal to _blank:
Targetting the iFrame
<a href="thepage.html" target="_blank">
These can come in handy, so be sure to experiment with them a bit!
Copyright © 1998-2014 O'Reilly Media, Inc.
This work is licensed under a Creative Commons Attribution-ShareAlike 3.0 Unported License.See http://creativecommons.org/licenses/by-sa/3.0/legalcode for more information.
Cascading Style Sheets
CSS Introduction
Now that your webpages are starting to become more complex, you probably have several HTML files with the samebasic fo rmatting. That is, they all have the same text co lor and size, and present content in the same way, using eithertables or frames. So what happens when you want to change the formatting o f all o f these pages without changing thecontent? Well, if you used only HTML to code these files, then you would have to edit each one o f these filesindividually, a process that could take days. Fortunately, there is another too l you can use—CSS.
CSS stands for Cascading Style Sheets. Cascading Style Sheets give you the ability to separate the content o f HTMLdocuments from their presentation layout. Style sheets define how HTML elements are to be displayed. Using CSSyou will be able contro l and change the style o f multiple elements more easily.
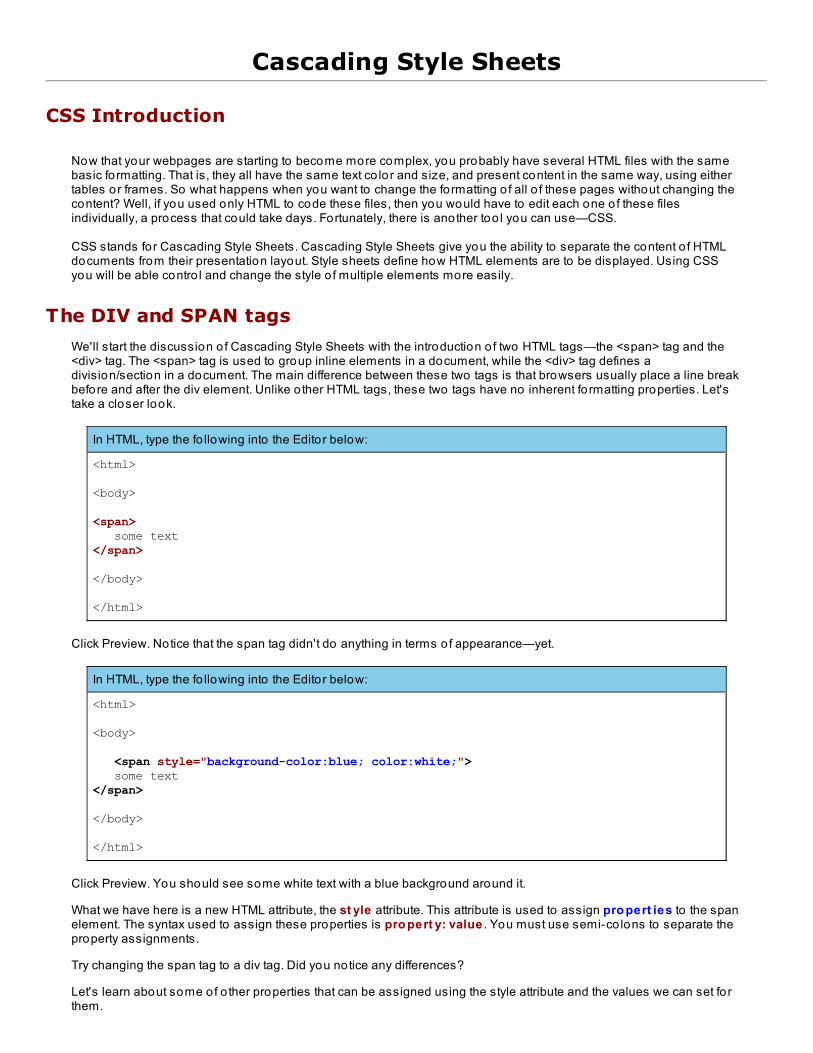
The DIV and SPAN tags
We'll start the discussion o f Cascading Style Sheets with the introduction o f two HTML tags—the <span> tag and the<div> tag. The <span> tag is used to group inline elements in a document, while the <div> tag defines adivision/section in a document. The main difference between these two tags is that browsers usually place a line breakbefore and after the div element. Unlike o ther HTML tags, these two tags have no inherent fo rmatting properties. Let'stake a closer look.
In HTML, type the fo llowing into the Editor below:
<html>
<body>
<span> some text</span>
</body>
</html>
Click Preview. Notice that the span tag didn't do anything in terms o f appearance—yet.
In HTML, type the fo llowing into the Editor below:
<html>
<body>
<span style="background-color:blue; color:white;"> some text</span>
</body>
</html>
Click Preview. You should see some white text with a blue background around it.
What we have here is a new HTML attribute, the st yle attribute. This attribute is used to assign pro pert ies to the spanelement. The syntax used to assign these properties is pro pert y: value . You must use semi-co lons to separate theproperty assignments.
Try changing the span tag to a div tag. Did you notice any differences?
Let's learn about some of o ther properties that can be assigned using the style attribute and the values we can set fo rthem.
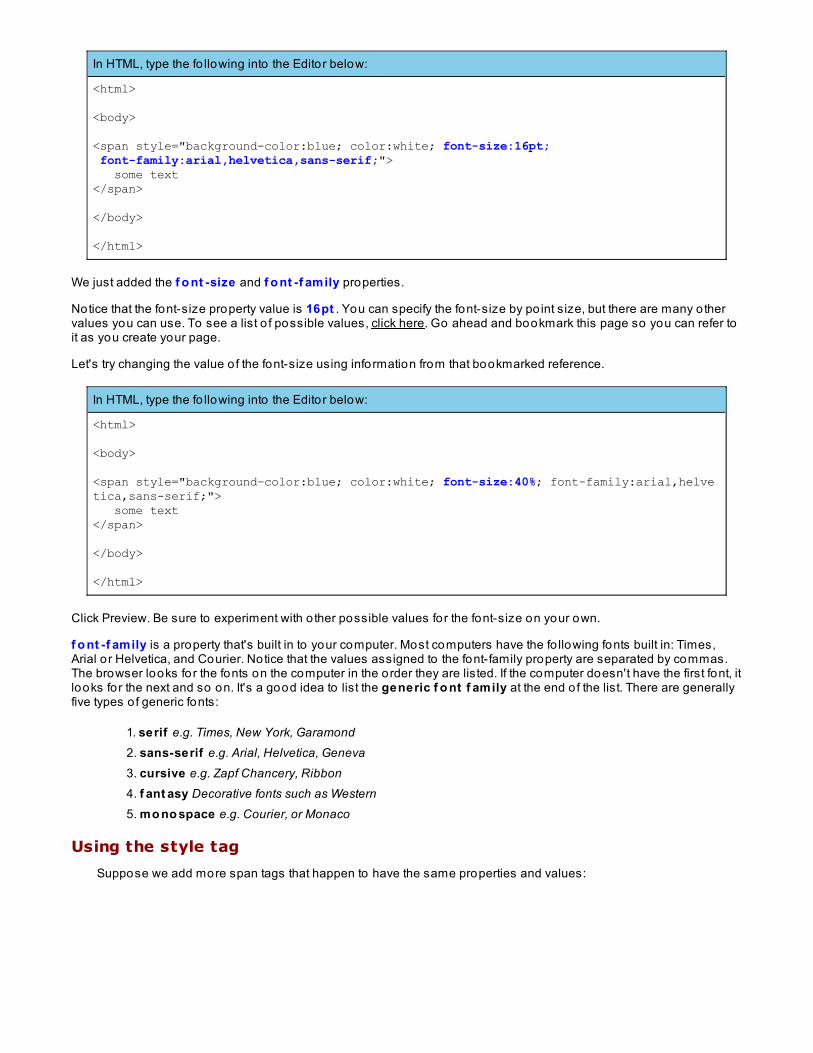
In HTML, type the fo llowing into the Editor below:
<html>
<body>
<span style="background-color:blue; color:white; font-size:16pt; font-family:arial,helvetica,sans-serif;"> some text</span>
</body>
</html>
We just added the f o nt -size and f o nt -f amily properties.
Notice that the font-size property value is 16pt . You can specify the font-size by po int size, but there are many o thervalues you can use. To see a list o f possible values, click here. Go ahead and bookmark this page so you can refer toit as you create your page.
Let's try changing the value o f the font-size using information from that bookmarked reference.
In HTML, type the fo llowing into the Editor below:
<html>
<body>
<span style="background-color:blue; color:white; font-size:40%; font-family:arial,helvetica,sans-serif;"> some text</span>
</body>
</html>
Click Preview. Be sure to experiment with o ther possible values for the font-size on your own.
f o nt -f amily is a property that's built in to your computer. Most computers have the fo llowing fonts built in: Times,Arial o r Helvetica, and Courier. Notice that the values assigned to the font-family property are separated by commas.The browser looks for the fonts on the computer in the order they are listed. If the computer doesn't have the first font, itlooks for the next and so on. It's a good idea to list the generic f o nt f amily at the end o f the list. There are generallyfive types o f generic fonts:
1. serif e.g. Times, New York, Garamond2. sans-serif e.g. Arial, Helvetica, Geneva3. cursive e.g. Zapf Chancery, Ribbon4. f ant asy Decorative fonts such as Western5. mo no space e.g. Courier, or Monaco
Using the style tag
Suppose we add more span tags that happen to have the same properties and values:
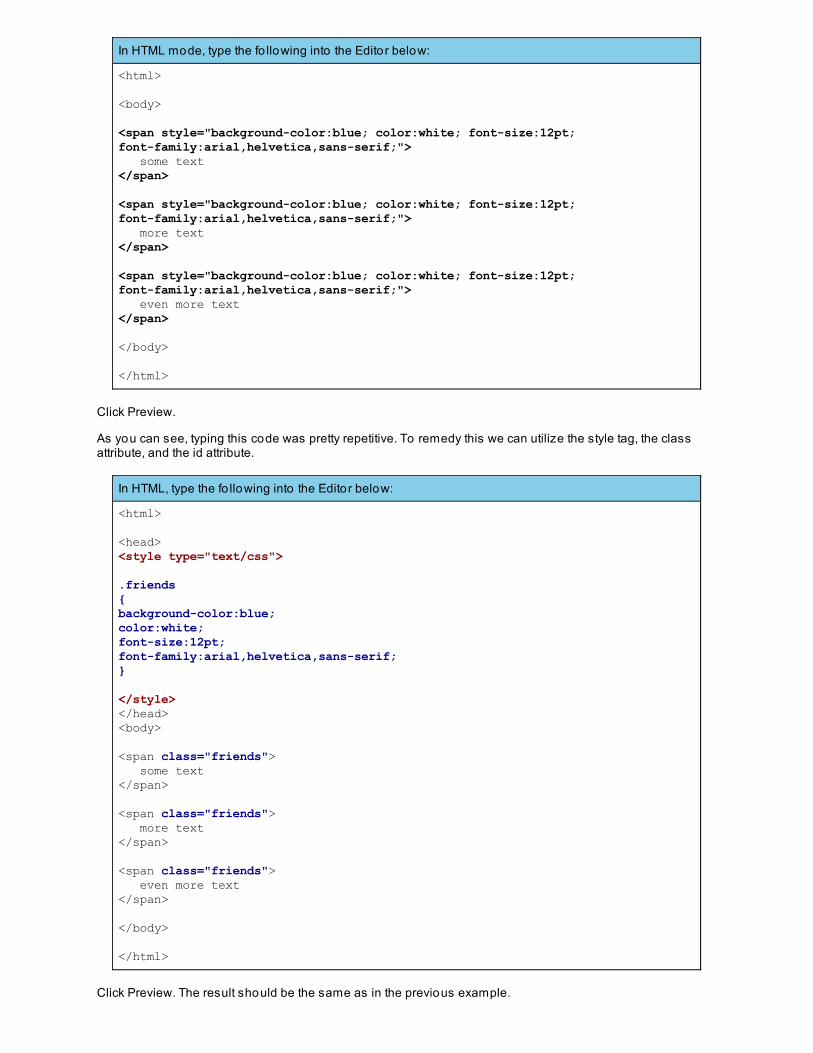
In HTML mode, type the fo llowing into the Editor below:
<html>
<body>
<span style="background-color:blue; color:white; font-size:12pt;font-family:arial,helvetica,sans-serif;"> some text</span>
<span style="background-color:blue; color:white; font-size:12pt;font-family:arial,helvetica,sans-serif;"> more text</span>
<span style="background-color:blue; color:white; font-size:12pt;font-family:arial,helvetica,sans-serif;"> even more text</span>
</body>
</html>
Click Preview.
As you can see, typing this code was pretty repetitive. To remedy this we can utilize the style tag, the classattribute, and the id attribute.
In HTML, type the fo llowing into the Editor below:
<html>
<head><style type="text/css">
.friends{background-color:blue; color:white; font-size:12pt;font-family:arial,helvetica,sans-serif;}
</style></head><body>
<span class="friends"> some text</span>
<span class="friends"> more text</span>
<span class="friends"> even more text</span>
</body>
</html>
Click Preview. The result should be the same as in the previous example.
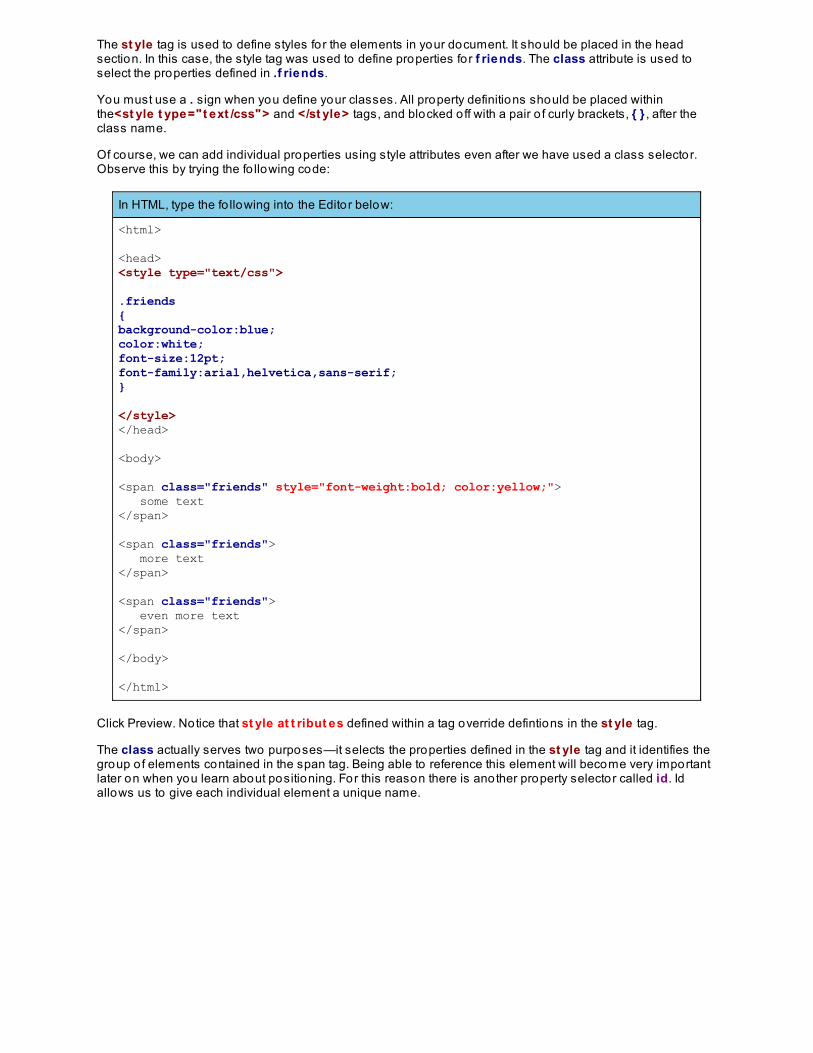
The st yle tag is used to define styles for the elements in your document. It should be placed in the headsection. In this case, the style tag was used to define properties for f riends. The class attribute is used toselect the properties defined in .f riends.
You must use a . sign when you define your classes. All property definitions should be placed withinthe<st yle t ype="t ext /css"> and </st yle> tags, and blocked o ff with a pair o f curly brackets, { } , after theclass name.
Of course, we can add individual properties using style attributes even after we have used a class selector.Observe this by trying the fo llowing code:
In HTML, type the fo llowing into the Editor below:
<html>
<head><style type="text/css">
.friends {background-color:blue; color:white; font-size:12pt; font-family:arial,helvetica,sans-serif;}
</style></head>
<body>
<span class="friends" style="font-weight:bold; color:yellow;"> some text</span>
<span class="friends"> more text</span>
<span class="friends"> even more text</span>
</body>
</html>
Click Preview. Notice that st yle at t ribut es defined within a tag override defintions in the st yle tag.
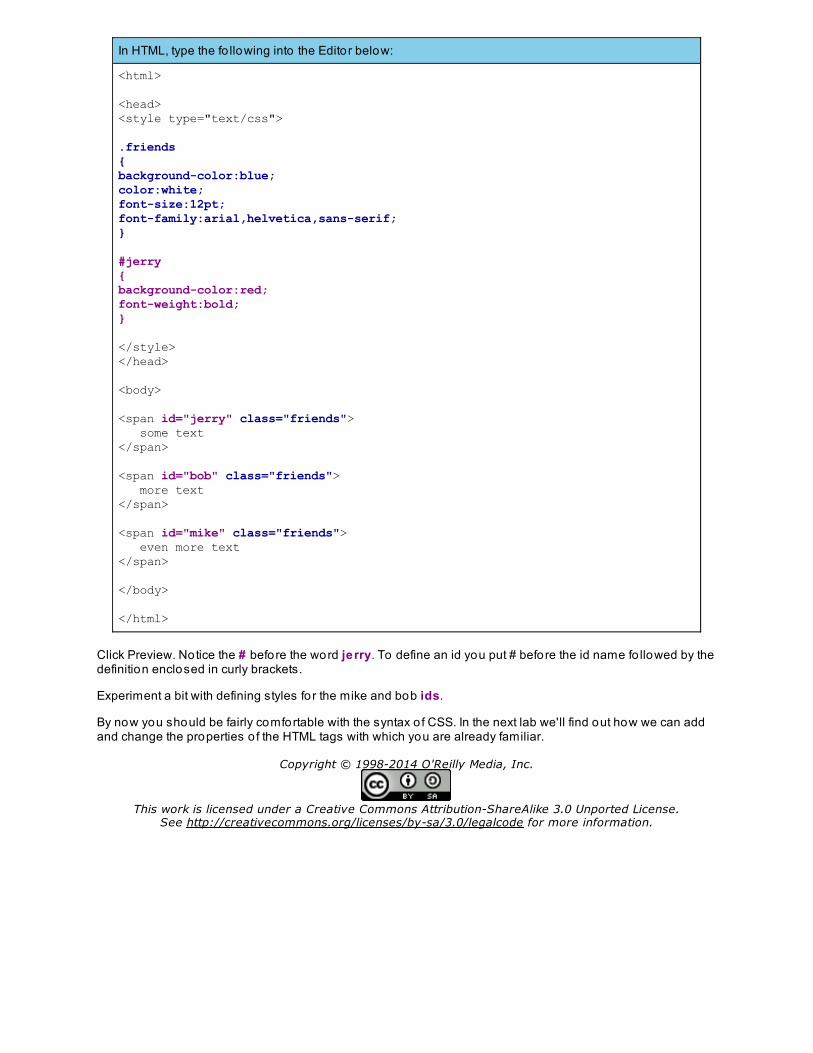
The class actually serves two purposes—it selects the properties defined in the st yle tag and it identifies thegroup o f elements contained in the span tag. Being able to reference this element will become very importantlater on when you learn about positioning. For this reason there is another property selector called id. Idallows us to give each individual element a unique name.
In HTML, type the fo llowing into the Editor below:
<html>
<head><style type="text/css">
.friends {background-color:blue; color:white; font-size:12pt; font-family:arial,helvetica,sans-serif;} #jerry {background-color:red; font-weight:bold;}
</style></head>
<body>
<span id="jerry" class="friends"> some text</span>
<span id="bob" class="friends"> more text</span>
<span id="mike" class="friends"> even more text</span>
</body>
</html>
Click Preview. Notice the # before the word jerry. To define an id you put # before the id name fo llowed by thedefinition enclosed in curly brackets.
Experiment a bit with defining styles for the mike and bob ids.
By now you should be fairly comfortable with the syntax o f CSS. In the next lab we'll find out how we can addand change the properties o f the HTML tags with which you are already familiar.
Copyright © 1998-2014 O'Reilly Media, Inc.
This work is licensed under a Creative Commons Attribution-ShareAlike 3.0 Unported License.See http://creativecommons.org/licenses/by-sa/3.0/legalcode for more information.
More Cascading Style Sheets
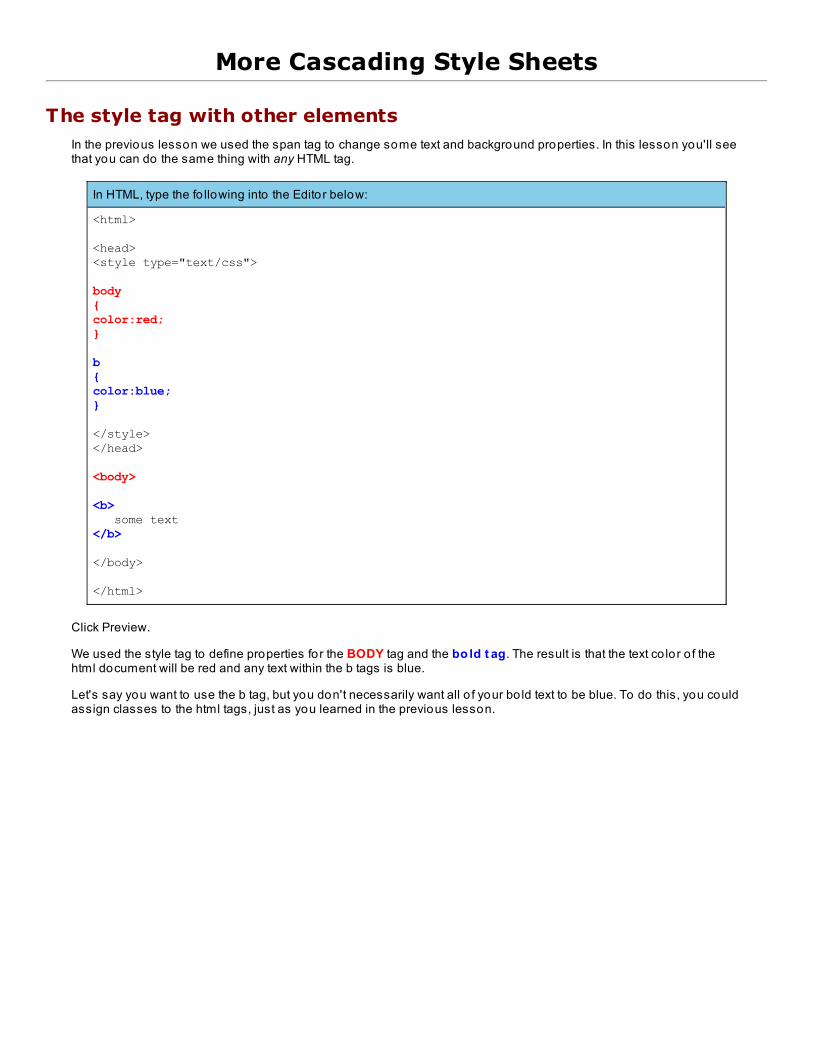
The style tag with other elementsIn the previous lesson we used the span tag to change some text and background properties. In this lesson you'll seethat you can do the same thing with any HTML tag.
In HTML, type the fo llowing into the Editor below:
<html>
<head><style type="text/css">
body{ color:red;}
b { color:blue; }
</style></head>
<body>
<b> some text</b>
</body>
</html>
Click Preview.
We used the style tag to define properties for the BODY tag and the bo ld t ag. The result is that the text co lor o f thehtml document will be red and any text within the b tags is blue.
Let's say you want to use the b tag, but you don't necessarily want all o f your bo ld text to be blue. To do this, you couldassign classes to the html tags, just as you learned in the previous lesson.
In HTML, type the fo llowing into the Editor below:
<html>
<head><style type="text/css">
body { color:red; }
b.blueone { color:blue;}
</style></head>
<body>
<b> some text</b>
<b class="blueone"> other text</b>
</body>
</html>
Click Preview.
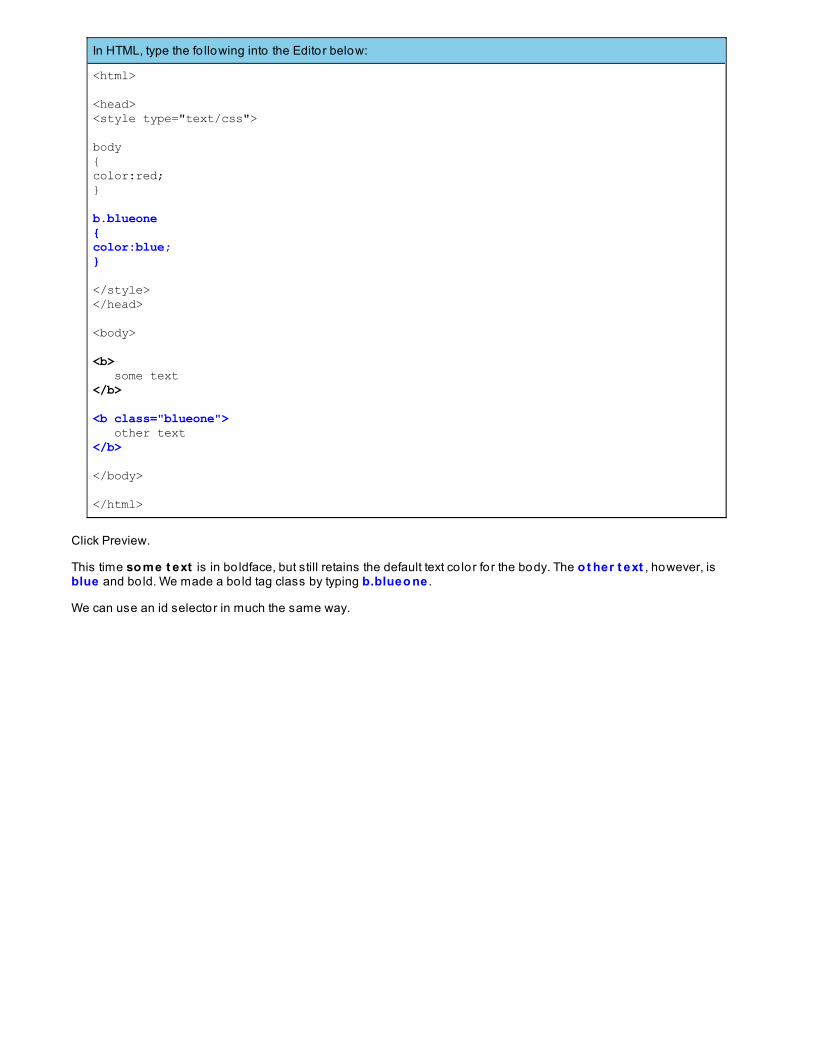
This time so me t ext is in bo ldface, but still retains the default text co lor fo r the body. The o t her t ext , however, isblue and bo ld. We made a bo ld tag class by typing b.blueo ne .
We can use an id selector in much the same way.
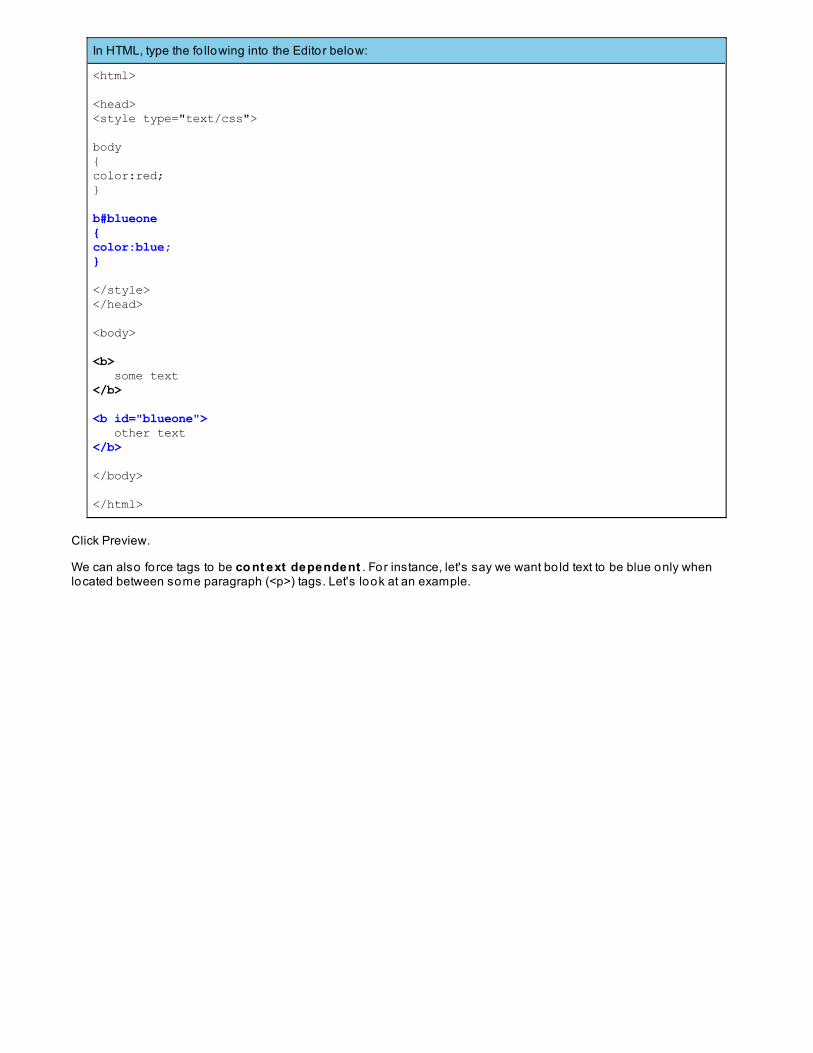
In HTML, type the fo llowing into the Editor below:
<html>
<head><style type="text/css">
body{color:red;}
b#blueone{color:blue;}
</style></head>
<body>
<b> some text</b>
<b id="blueone"> other text</b>
</body>
</html>
Click Preview.
We can also force tags to be co nt ext dependent . For instance, let's say we want bo ld text to be blue only whenlocated between some paragraph (<p>) tags. Let's look at an example.
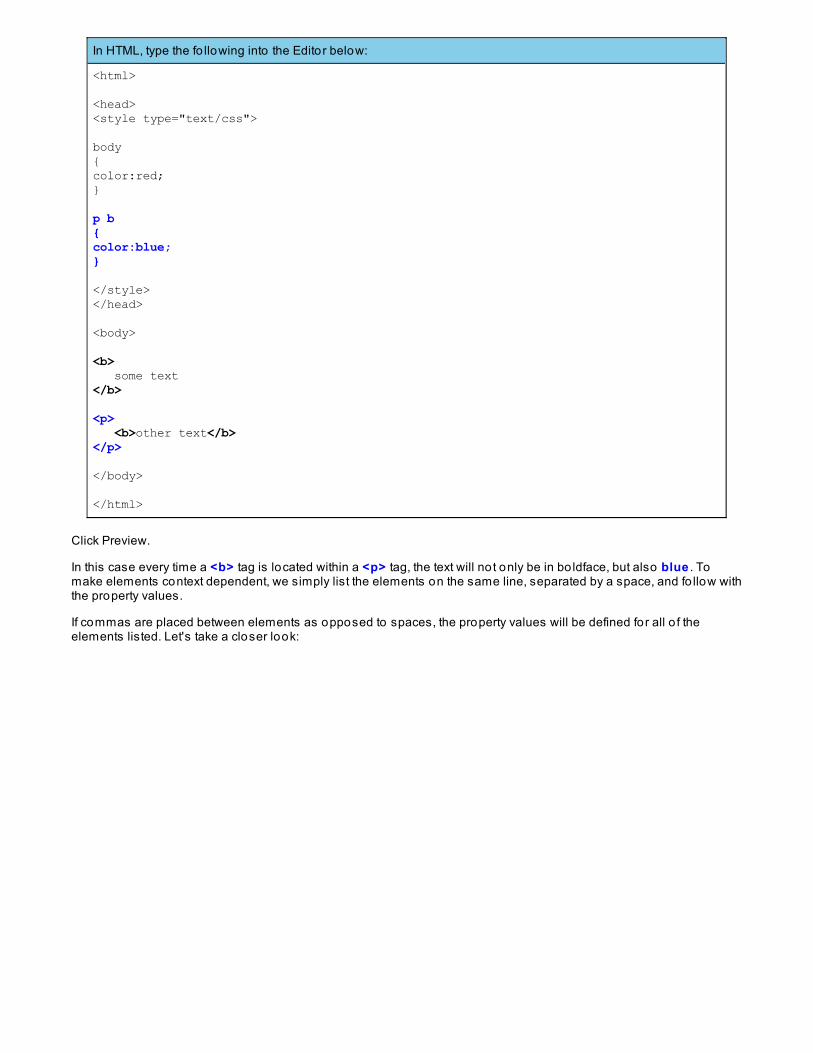
In HTML, type the fo llowing into the Editor below:
<html>
<head><style type="text/css">
body { color:red; }
p b{color:blue;}
</style></head>
<body>
<b> some text</b>
<p> <b>other text</b></p>
</body>
</html>
Click Preview.
In this case every time a <b> tag is located within a <p> tag, the text will no t only be in bo ldface, but also blue . Tomake elements context dependent, we simply list the elements on the same line, separated by a space, and fo llow withthe property values.
If commas are placed between elements as opposed to spaces, the property values will be defined for all o f theelements listed. Let's take a closer look:
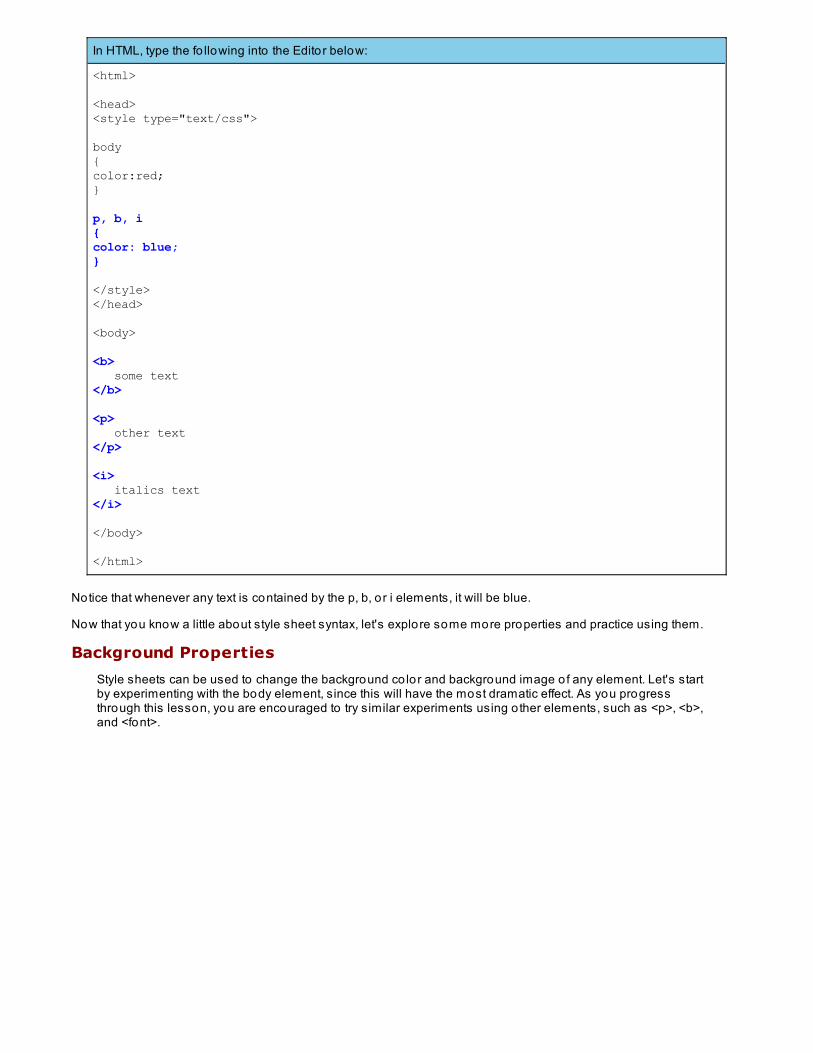
In HTML, type the fo llowing into the Editor below:
<html>
<head><style type="text/css">
body { color:red;}
p, b, i{ color: blue; }
</style></head>
<body>
<b> some text</b>
<p> other text</p>
<i> italics text</i>
</body>
</html>
Notice that whenever any text is contained by the p, b, o r i elements, it will be blue.
Now that you know a little about style sheet syntax, let's explore some more properties and practice using them.
Background Properties
Style sheets can be used to change the background co lor and background image o f any element. Let's startby experimenting with the body element, since this will have the most dramatic effect. As you progressthrough this lesson, you are encouraged to try similar experiments using o ther elements, such as <p>, <b>,and <font>.
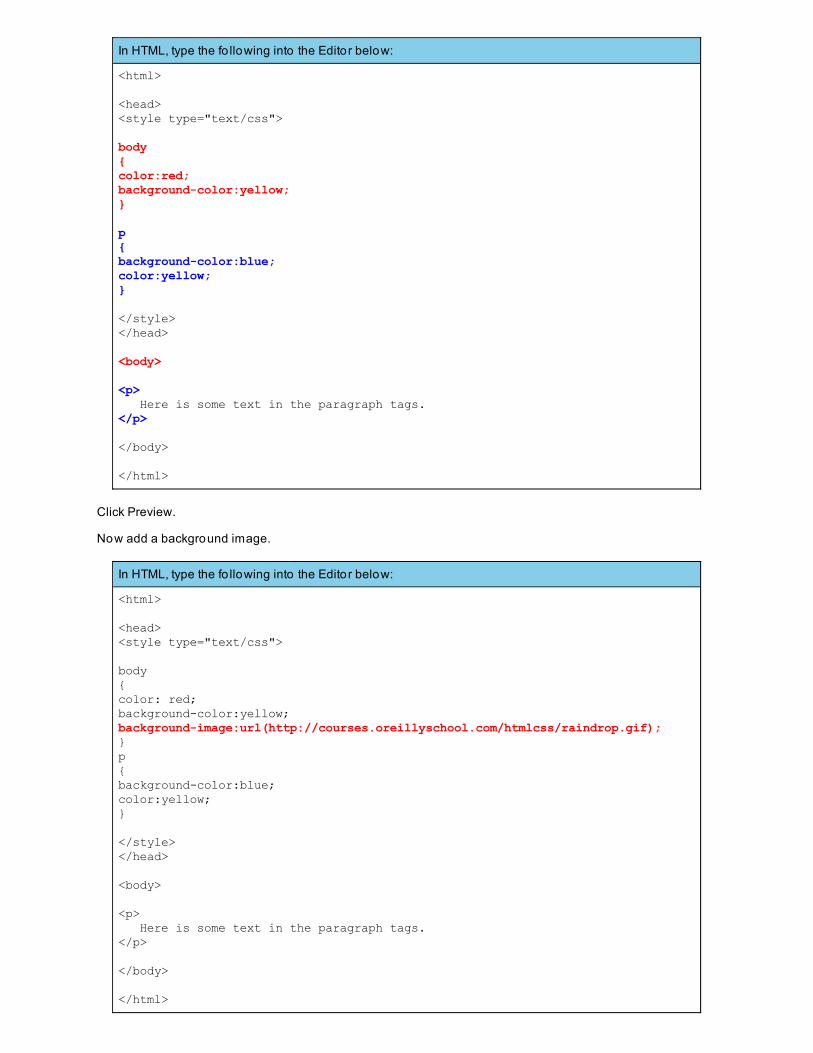
In HTML, type the fo llowing into the Editor below:
<html>
<head><style type="text/css">
body{color:red;background-color:yellow; }
p { background-color:blue; color:yellow;}
</style></head>
<body>
<p> Here is some text in the paragraph tags.</p>
</body>
</html>
Click Preview.
Now add a background image.
In HTML, type the fo llowing into the Editor below:
<html>
<head><style type="text/css">
body{color: red;background-color:yellow;background-image:url(http://courses.oreillyschool.com/htmlcss/raindrop.gif);}p{ background-color:blue;color:yellow;}
</style></head>
<body>
<p> Here is some text in the paragraph tags.</p>
</body>
</html>
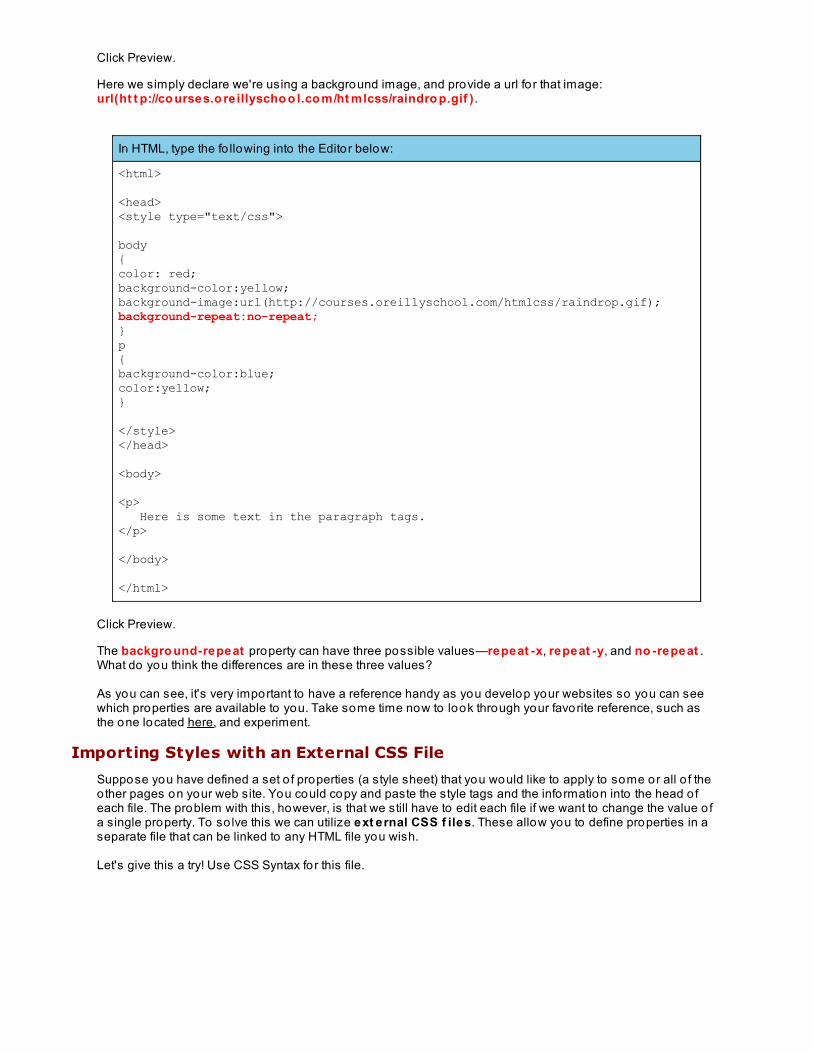
Click Preview.
Here we simply declare we're using a background image, and provide a url fo r that image:url(ht t p://co urses.o reillyscho o l.co m/ht mlcss/raindro p.gif ) .
In HTML, type the fo llowing into the Editor below:
<html>
<head><style type="text/css">
body{color: red;background-color:yellow;background-image:url(http://courses.oreillyschool.com/htmlcss/raindrop.gif);background-repeat:no-repeat;}p { background-color:blue; color:yellow;}
</style></head>
<body>
<p> Here is some text in the paragraph tags.</p>
</body>
</html>
Click Preview.
The backgro und-repeat property can have three possible values—repeat -x, repeat -y, and no -repeat .What do you think the differences are in these three values?
As you can see, it's very important to have a reference handy as you develop your websites so you can seewhich properties are available to you. Take some time now to look through your favorite reference, such asthe one located here, and experiment.
Importing Styles with an External CSS File
Suppose you have defined a set o f properties (a style sheet) that you would like to apply to some or all o f theother pages on your web site. You could copy and paste the style tags and the information into the head o feach file. The problem with this, however, is that we still have to edit each file if we want to change the value o fa single property. To so lve this we can utilize ext ernal CSS f iles. These allow you to define properties in aseparate file that can be linked to any HTML file you wish.
Let's give this a try! Use CSS Syntax for this file.
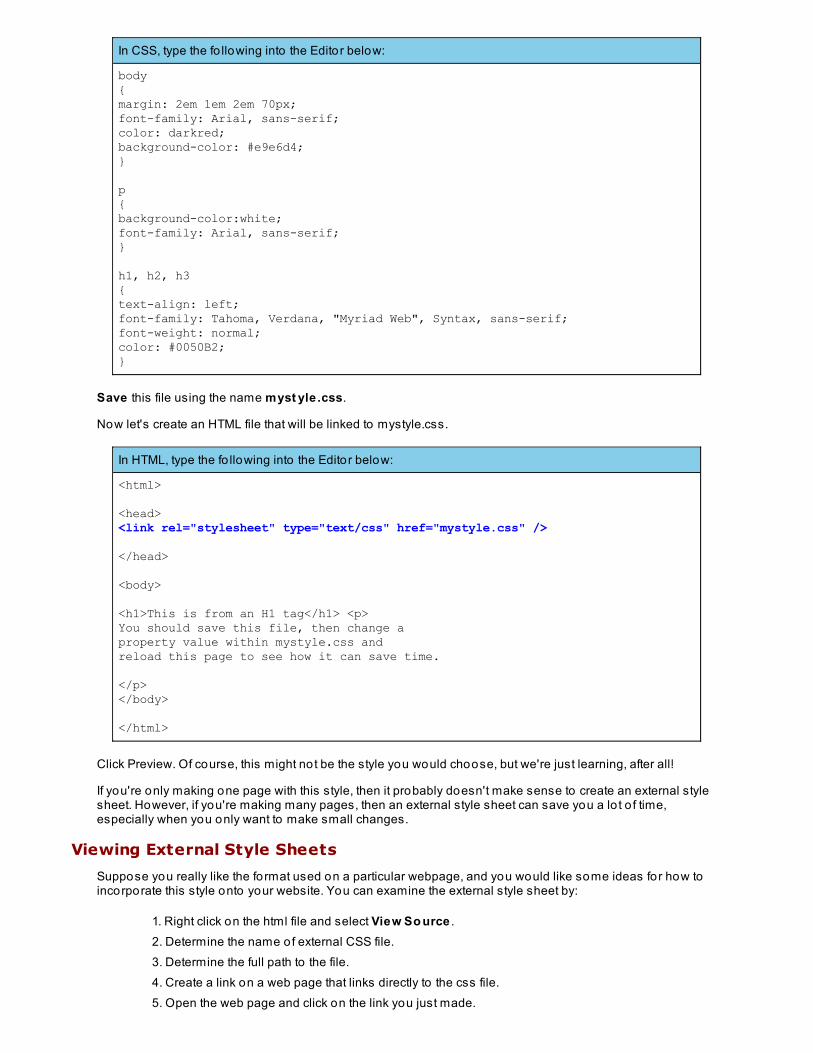
In CSS, type the fo llowing into the Editor below:
body{margin: 2em 1em 2em 70px;font-family: Arial, sans-serif; color: darkred; background-color: #e9e6d4;}
p{background-color:white; font-family: Arial, sans-serif;}
h1, h2, h3{text-align: left; font-family: Tahoma, Verdana, "Myriad Web", Syntax, sans-serif; font-weight: normal; color: #0050B2; }
Save this file using the name myst yle .css.
Now let's create an HTML file that will be linked to mystyle.css.
In HTML, type the fo llowing into the Editor below:
<html>
<head><link rel="stylesheet" type="text/css" href="mystyle.css" />
</head>
<body>
<h1>This is from an H1 tag</h1> <p>You should save this file, then change a property value within mystyle.css and reload this page to see how it can save time.
</p></body>
</html>
Click Preview. Of course, this might not be the style you would choose, but we're just learning, after all!
If you're only making one page with this style, then it probably doesn't make sense to create an external stylesheet. However, if you're making many pages, then an external style sheet can save you a lo t o f time,especially when you only want to make small changes.
Viewing External Style Sheets
Suppose you really like the format used on a particular webpage, and you would like some ideas for how toincorporate this style onto your website. You can examine the external style sheet by:
1. Right click on the html file and select View So urce .2. Determine the name of external CSS file.3. Determine the full path to the file.4. Create a link on a web page that links directly to the css file.5. Open the web page and click on the link you just made.
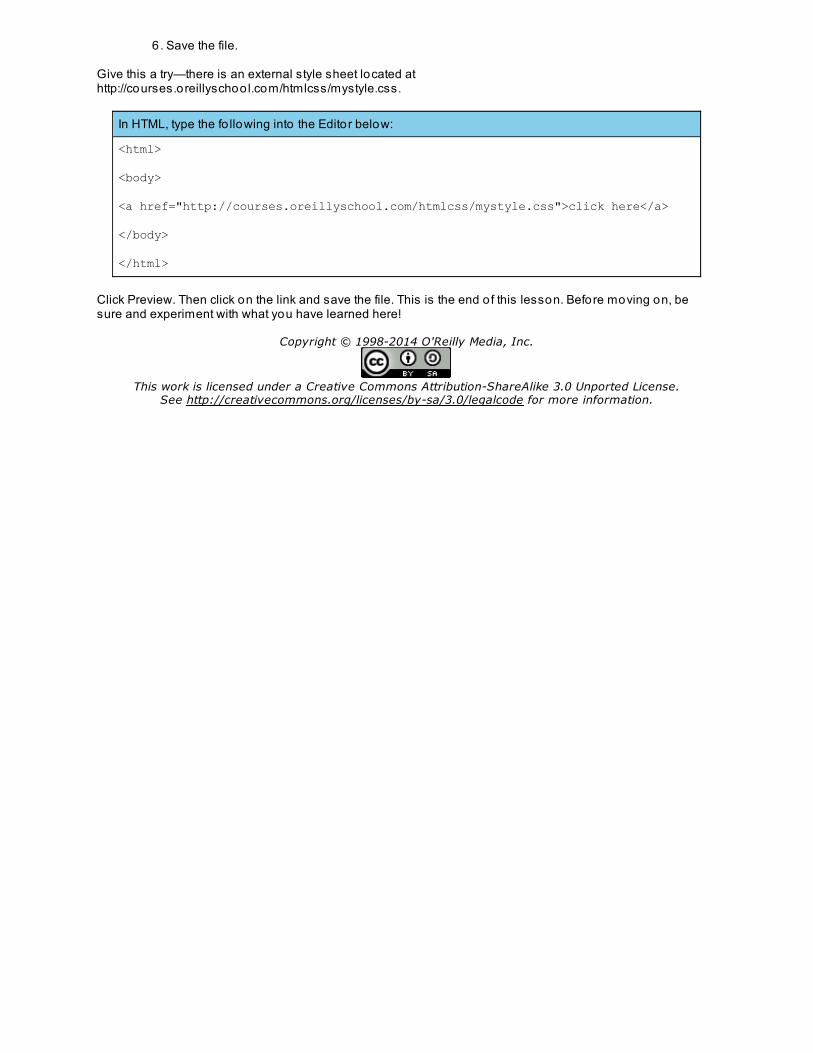
6. Save the file.
Give this a try—there is an external style sheet located athttp://courses.oreillyschoo l.com/htmlcss/mystyle.css.
In HTML, type the fo llowing into the Editor below:
<html>
<body>
<a href="http://courses.oreillyschool.com/htmlcss/mystyle.css">click here</a>
</body>
</html>
Click Preview. Then click on the link and save the file. This is the end o f this lesson. Before moving on, besure and experiment with what you have learned here!
Copyright © 1998-2014 O'Reilly Media, Inc.
This work is licensed under a Creative Commons Attribution-ShareAlike 3.0 Unported License.See http://creativecommons.org/licenses/by-sa/3.0/legalcode for more information.
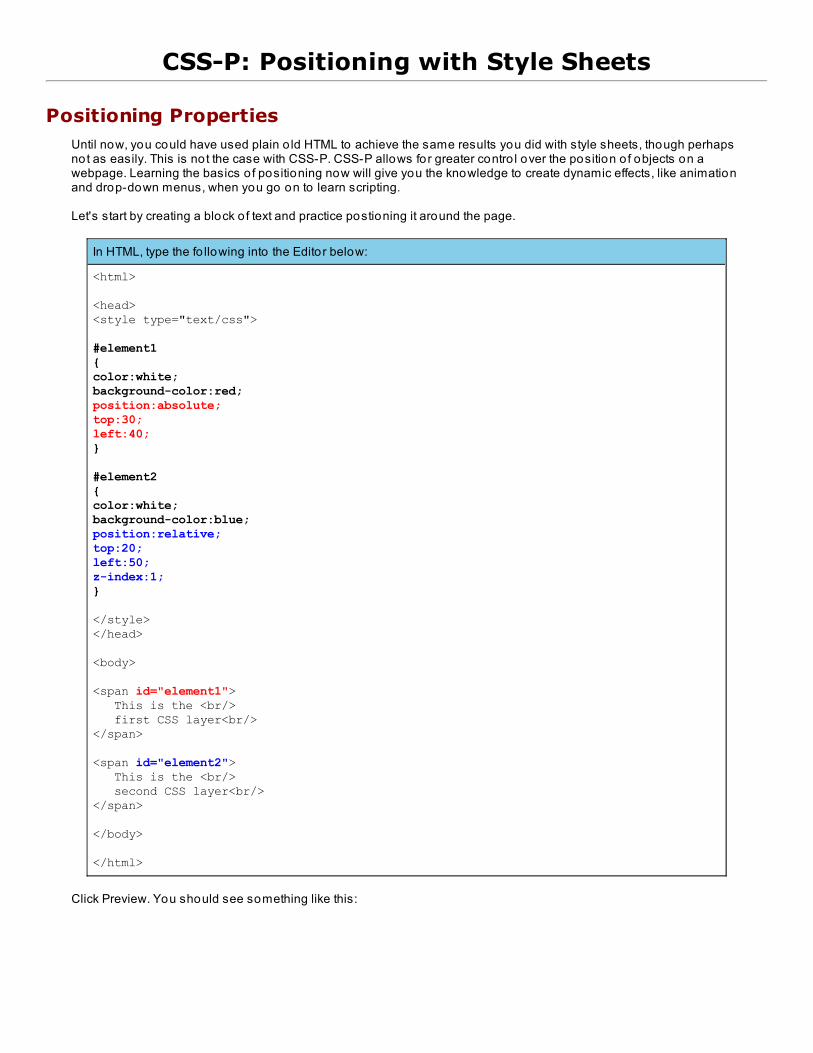
CSS-P: Positioning with Style Sheets
Positioning PropertiesUntil now, you could have used plain o ld HTML to achieve the same results you did with style sheets, though perhapsnot as easily. This is not the case with CSS-P. CSS-P allows for greater contro l over the position o f objects on awebpage. Learning the basics o f positioning now will give you the knowledge to create dynamic effects, like animationand drop-down menus, when you go on to learn scripting.
Let's start by creating a block o f text and practice postioning it around the page.
In HTML, type the fo llowing into the Editor below:
<html>
<head><style type="text/css">
#element1{color:white;background-color:red; position:absolute; top:30; left:40;}
#element2 {color:white;background-color:blue; position:relative; top:20; left:50; z-index:1;}
</style></head>
<body>
<span id="element1"> This is the <br/> first CSS layer<br/></span>
<span id="element2"> This is the <br/> second CSS layer<br/></span>
</body>
</html>
Click Preview. You should see something like this:
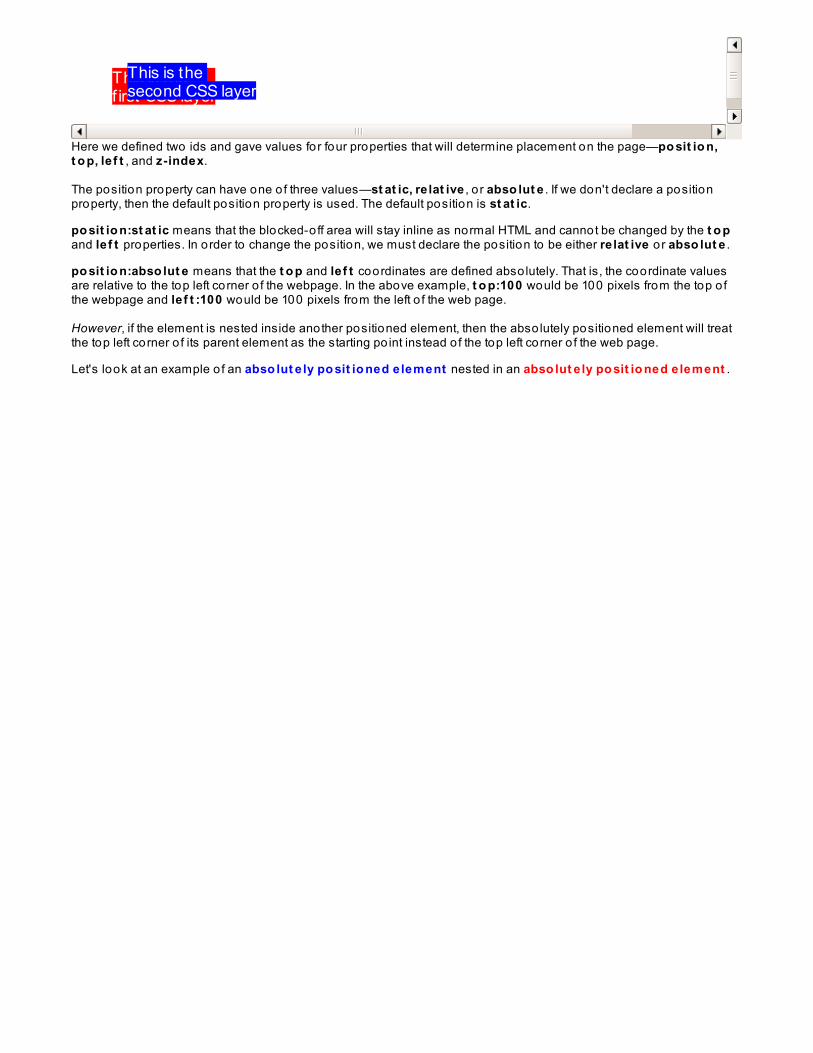
This is the f irst CSS layer
This is the second CSS layer
Here we defined two ids and gave values for four properties that will determine placement on the page—po sit io n,t o p, le f t , and z-index.
The position property can have one o f three values—st at ic, re lat ive , o r abso lut e . If we don't declare a positionproperty, then the default position property is used. The default position is st at ic.
po sit io n:st at ic means that the blocked-off area will stay inline as normal HTML and cannot be changed by the t o pand le f t properties. In order to change the position, we must declare the position to be either re lat ive o r abso lut e .
po sit io n:abso lut e means that the t o p and le f t coordinates are defined abso lutely. That is, the coordinate valuesare relative to the top left corner o f the webpage. In the above example, t o p:100 would be 100 pixels from the top o fthe webpage and le f t :100 would be 100 pixels from the left o f the web page.
However, if the element is nested inside another positioned element, then the abso lutely positioned element will treatthe top left corner o f its parent element as the starting po int instead o f the top left corner o f the web page.
Let's look at an example o f an abso lut e ly po sit io ned element nested in an abso lut e ly po sit io ned element .
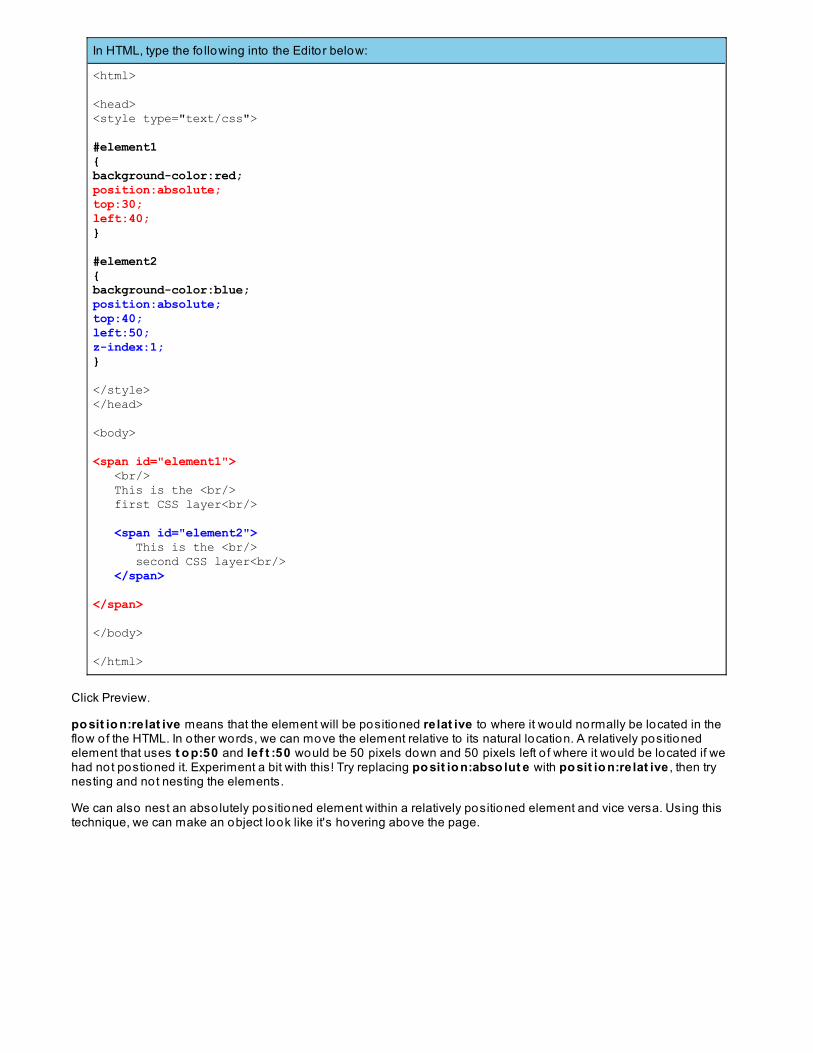
In HTML, type the fo llowing into the Editor below:
<html>
<head><style type="text/css">
#element1 {background-color:red; position:absolute; top:30; left:40;}
#element2 {background-color:blue; position:absolute; top:40; left:50; z-index:1;}
</style></head>
<body>
<span id="element1"> <br/> This is the <br/> first CSS layer<br/>
<span id="element2"> This is the <br/> second CSS layer<br/> </span>
</span>
</body>
</html>
Click Preview.
po sit io n:re lat ive means that the element will be positioned re lat ive to where it would normally be located in theflow o f the HTML. In o ther words, we can move the element relative to its natural location. A relatively positionedelement that uses t o p:50 and le f t :50 would be 50 pixels down and 50 pixels left o f where it would be located if wehad not postioned it. Experiment a bit with this! Try replacing po sit io n:abso lut e with po sit io n:re lat ive , then trynesting and not nesting the elements.
We can also nest an abso lutely positioned element within a relatively positioned element and vice versa. Using thistechnique, we can make an object look like it's hovering above the page.
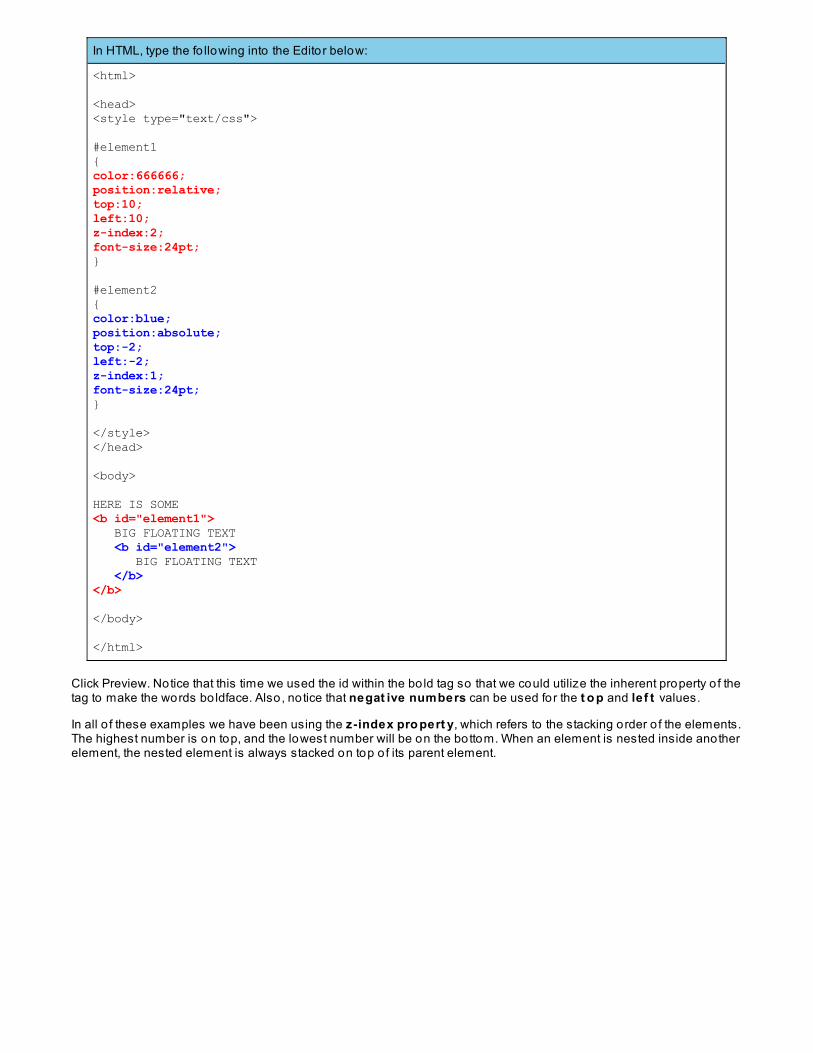
In HTML, type the fo llowing into the Editor below:
<html>
<head><style type="text/css">
#element1 {color:666666; position:relative; top:10; left:10; z-index:2; font-size:24pt;}
#element2 {color:blue; position:absolute; top:-2; left:-2; z-index:1; font-size:24pt;}
</style></head>
<body>
HERE IS SOME <b id="element1"> BIG FLOATING TEXT <b id="element2"> BIG FLOATING TEXT </b></b>
</body>
</html>
Click Preview. Notice that this time we used the id within the bo ld tag so that we could utilize the inherent property o f thetag to make the words bo ldface. Also, notice that negat ive numbers can be used for the t o p and le f t values.
In all o f these examples we have been using the z-index pro pert y, which refers to the stacking order o f the elements.The highest number is on top, and the lowest number will be on the bottom. When an element is nested inside anotherelement, the nested element is always stacked on top o f its parent element.
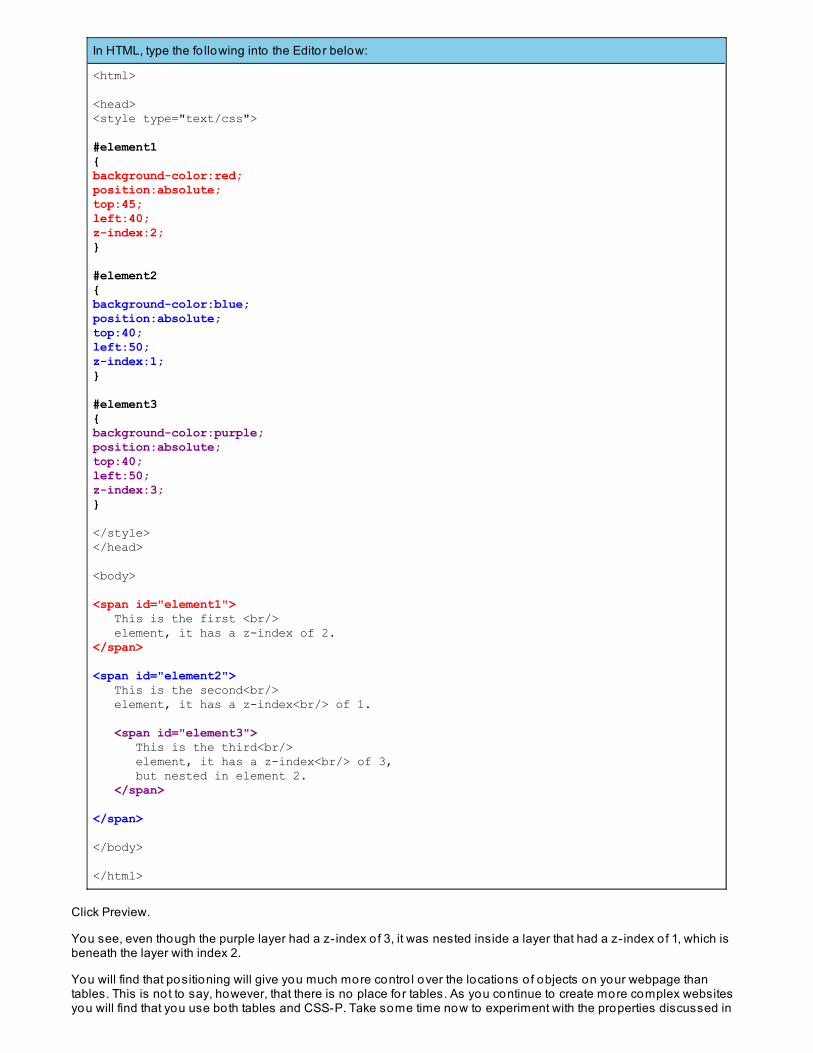
In HTML, type the fo llowing into the Editor below:
<html>
<head><style type="text/css">
#element1 {background-color:red; position:absolute; top:45; left:40; z-index:2;}
#element2 {background-color:blue; position:absolute; top:40; left:50; z-index:1;}
#element3 {background-color:purple; position:absolute; top:40; left:50; z-index:3;}
</style></head>
<body>
<span id="element1"> This is the first <br/> element, it has a z-index of 2.</span>
<span id="element2"> This is the second<br/> element, it has a z-index<br/> of 1.
<span id="element3"> This is the third<br/> element, it has a z-index<br/> of 3, but nested in element 2. </span>
</span>
</body>
</html>
Click Preview.
You see, even though the purple layer had a z-index o f 3, it was nested inside a layer that had a z-index o f 1, which isbeneath the layer with index 2.
You will find that positioning will give you much more contro l over the locations o f objects on your webpage thantables. This is not to say, however, that there is no place for tables. As you continue to create more complex websitesyou will find that you use both tables and CSS-P. Take some time now to experiment with the properties discussed in

this lesson.
Copyright © 1998-2014 O'Reilly Media, Inc.
This work is licensed under a Creative Commons Attribution-ShareAlike 3.0 Unported License.See http://creativecommons.org/licenses/by-sa/3.0/legalcode for more information.
CSS Classification
In the last lesson you learned how to use CSS Positioning to place objects on a web page. In this lesson you will learnhow to use CSS Classif icat io n to gain even greater contro l o f object positioning. There are also some neat thingsyou can do to affect the appearance o f your objects.
The float Property
The f lo at property is used to contro l where an element will appear in relation to another element. Possiblevalues include le f t , right , o r no ne .
Let's take a closer look.
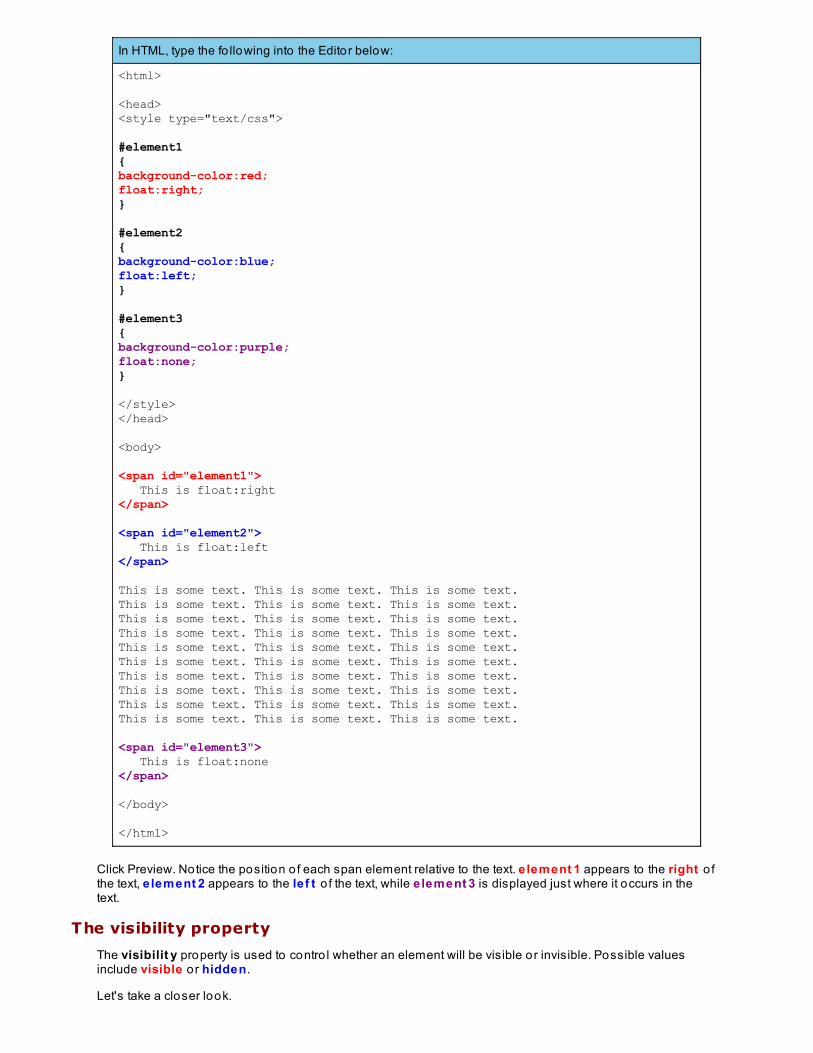
In HTML, type the fo llowing into the Editor below:
<html>
<head><style type="text/css">
#element1 {background-color:red; float:right;}
#element2 {background-color:blue; float:left;}
#element3 {background-color:purple; float:none;}
</style></head>
<body>
<span id="element1"> This is float:right</span>
<span id="element2"> This is float:left</span>
This is some text. This is some text. This is some text.This is some text. This is some text. This is some text.This is some text. This is some text. This is some text.This is some text. This is some text. This is some text.This is some text. This is some text. This is some text.This is some text. This is some text. This is some text.This is some text. This is some text. This is some text.This is some text. This is some text. This is some text.This is some text. This is some text. This is some text.This is some text. This is some text. This is some text.
<span id="element3"> This is float:none</span>
</body>
</html>
Click Preview. Notice the position o f each span element relative to the text. element 1 appears to the right o fthe text, element 2 appears to the le f t o f the text, while element 3 is displayed just where it occurs in thetext.
The visibility property
The visibilit y property is used to contro l whether an element will be visible or invisible. Possible valuesinclude visible o r hidden.
Let's take a closer look.
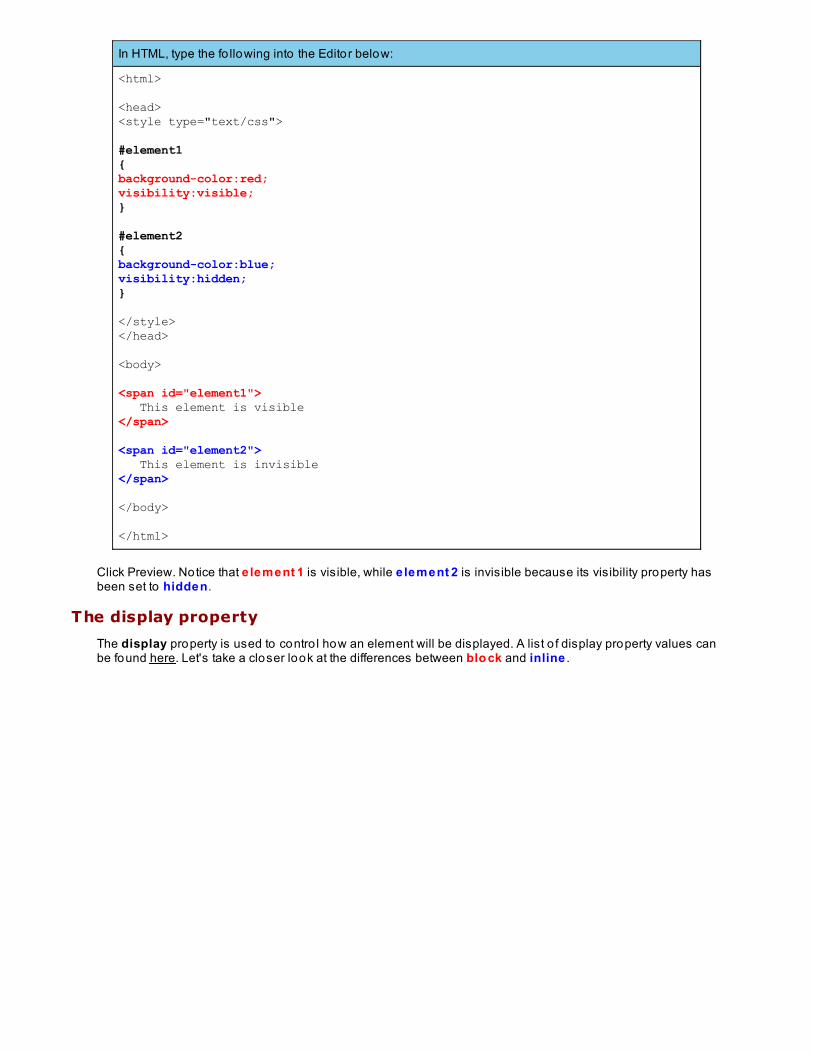
In HTML, type the fo llowing into the Editor below:
<html>
<head><style type="text/css">
#element1 {background-color:red; visibility:visible;}
#element2 {background-color:blue; visibility:hidden;}
</style></head>
<body>
<span id="element1"> This element is visible</span>
<span id="element2"> This element is invisible</span>
</body>
</html>
Click Preview. Notice that element 1 is visible, while element 2 is invisible because its visibility property hasbeen set to hidden.
The display property
The display property is used to contro l how an element will be displayed. A list o f display property values canbe found here. Let's take a closer look at the differences between blo ck and inline .
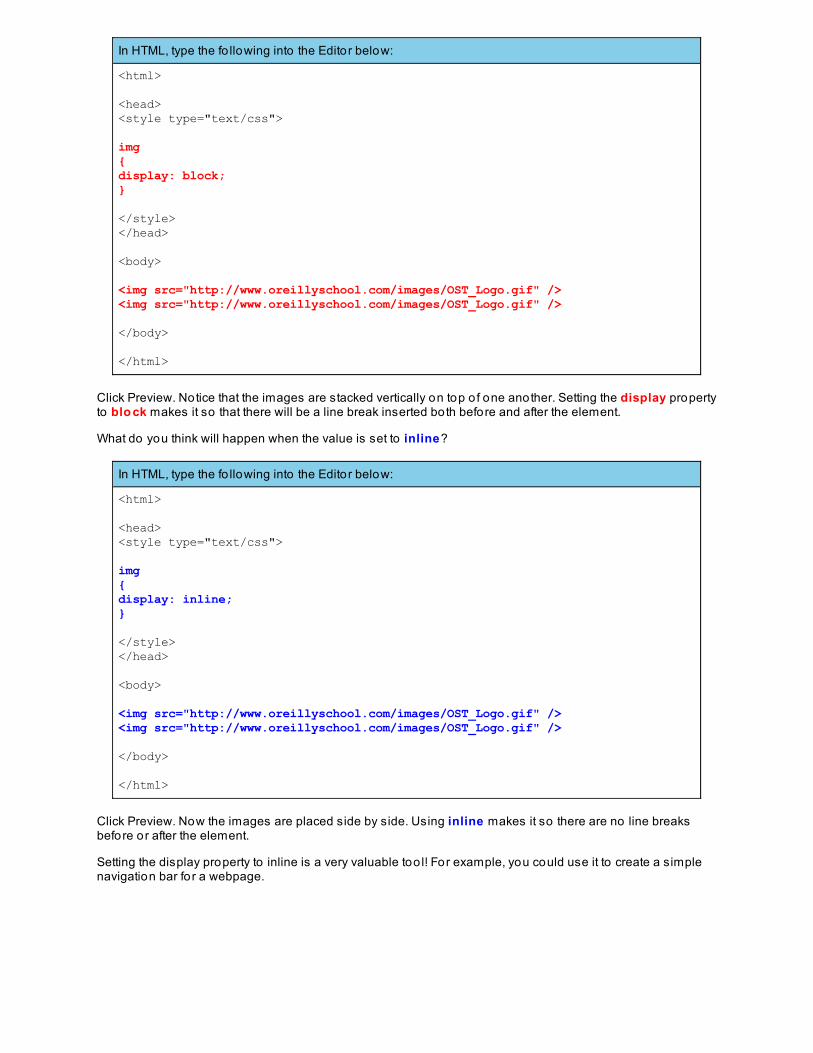
In HTML, type the fo llowing into the Editor below:
<html>
<head><style type="text/css">
img {display: block;}
</style></head>
<body>
<img src="http://www.oreillyschool.com/images/OST_Logo.gif" /><img src="http://www.oreillyschool.com/images/OST_Logo.gif" />
</body>
</html>
Click Preview. Notice that the images are stacked vertically on top o f one another. Setting the display propertyto blo ck makes it so that there will be a line break inserted both before and after the element.
What do you think will happen when the value is set to inline?
In HTML, type the fo llowing into the Editor below:
<html>
<head><style type="text/css">
img {display: inline;}
</style></head>
<body>
<img src="http://www.oreillyschool.com/images/OST_Logo.gif" /><img src="http://www.oreillyschool.com/images/OST_Logo.gif" />
</body>
</html>
Click Preview. Now the images are placed side by side. Using inline makes it so there are no line breaksbefore or after the element.
Setting the display property to inline is a very valuable too l! For example, you could use it to create a simplenavigation bar fo r a webpage.
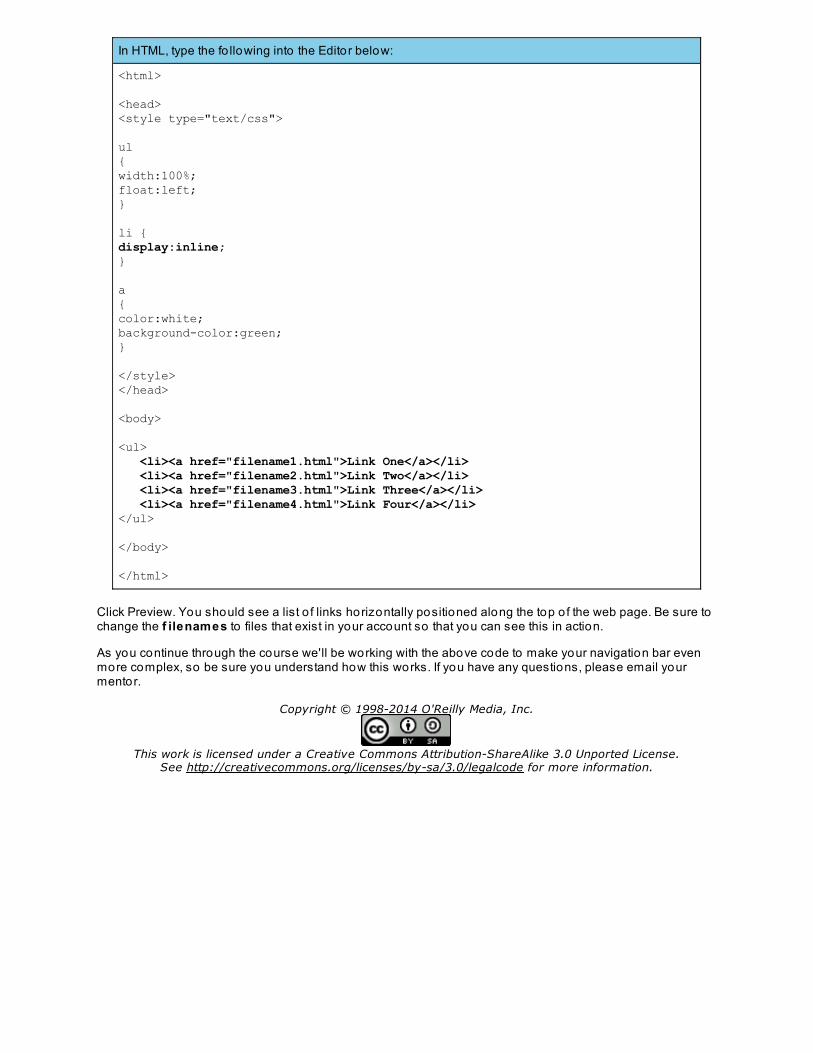
In HTML, type the fo llowing into the Editor below:
<html>
<head><style type="text/css">
ul{width:100%;float:left;}
li {display:inline;}
a{color:white;background-color:green;}
</style></head>
<body>
<ul> <li><a href="filename1.html">Link One</a></li> <li><a href="filename2.html">Link Two</a></li> <li><a href="filename3.html">Link Three</a></li> <li><a href="filename4.html">Link Four</a></li></ul>
</body>
</html>
Click Preview. You should see a list o f links horizontally positioned along the top o f the web page. Be sure tochange the f ilenames to files that exist in your account so that you can see this in action.
As you continue through the course we'll be working with the above code to make your navigation bar evenmore complex, so be sure you understand how this works. If you have any questions, please email yourmentor.
Copyright © 1998-2014 O'Reilly Media, Inc.
This work is licensed under a Creative Commons Attribution-ShareAlike 3.0 Unported License.See http://creativecommons.org/licenses/by-sa/3.0/legalcode for more information.
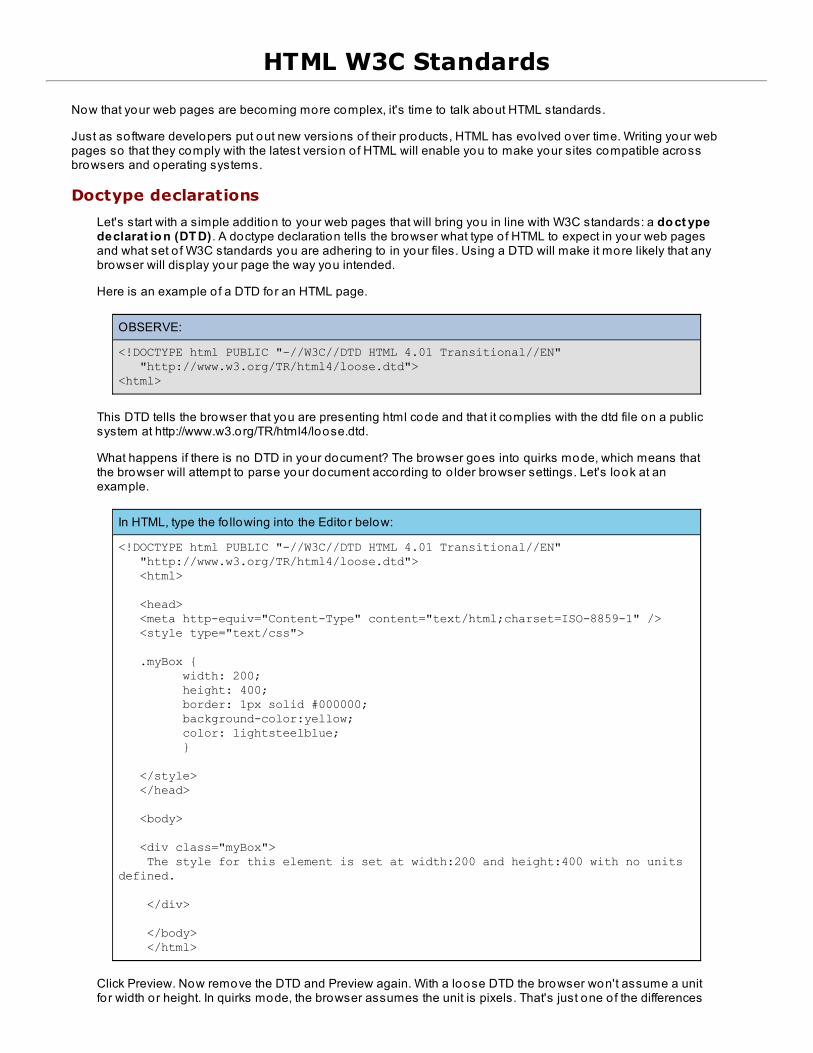
HTML W3C Standards
Now that your web pages are becoming more complex, it's time to talk about HTML standards.
Just as software developers put out new versions o f their products, HTML has evo lved over time. Writing your webpages so that they comply with the latest version o f HTML will enable you to make your sites compatible acrossbrowsers and operating systems.
Doctype declarations
Let's start with a simple addition to your web pages that will bring you in line with W3C standards: a do ct ypedeclarat io n (DT D) . A doctype declaration tells the browser what type o f HTML to expect in your web pagesand what set o f W3C standards you are adhering to in your files. Using a DTD will make it more likely that anybrowser will display your page the way you intended.
Here is an example o f a DTD for an HTML page.
OBSERVE:
<!DOCTYPE html PUBLIC "-//W3C//DTD HTML 4.01 Transitional//EN" "http://www.w3.org/TR/html4/loose.dtd"> <html>
This DTD tells the browser that you are presenting html code and that it complies with the dtd file on a publicsystem at http://www.w3.org/TR/html4/loose.dtd.
What happens if there is no DTD in your document? The browser goes into quirks mode, which means thatthe browser will attempt to parse your document according to o lder browser settings. Let's look at anexample.
In HTML, type the fo llowing into the Editor below:
<!DOCTYPE html PUBLIC "-//W3C//DTD HTML 4.01 Transitional//EN" "http://www.w3.org/TR/html4/loose.dtd"> <html> <head> <meta http-equiv="Content-Type" content="text/html;charset=ISO-8859-1" /> <style type="text/css"> .myBox { width: 200; height: 400; border: 1px solid #000000; background-color:yellow; color: lightsteelblue; }
</style> </head> <body> <div class="myBox"> The style for this element is set at width:200 and height:400 with no units defined.
</div> </body> </html>
Click Preview. Now remove the DTD and Preview again. With a loose DTD the browser won't assume a unitfo r width or height. In quirks mode, the browser assumes the unit is pixels. That's just one o f the differences
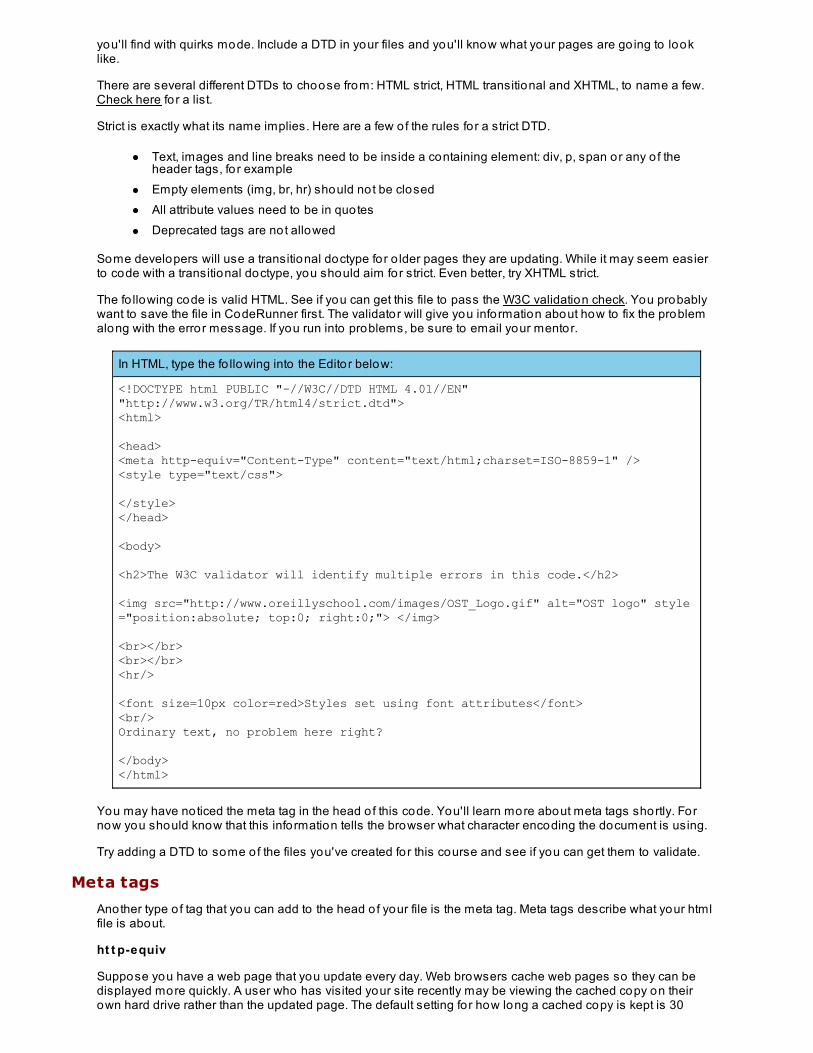
you'll find with quirks mode. Include a DTD in your files and you'll know what your pages are go ing to looklike.
There are several different DTDs to choose from: HTML strict, HTML transitional and XHTML, to name a few.Check here for a list.
Strict is exactly what its name implies. Here are a few of the rules for a strict DTD.
Text, images and line breaks need to be inside a containing element: div, p, span or any o f theheader tags, fo r exampleEmpty elements (img, br, hr) should not be closedAll attribute values need to be in quotesDeprecated tags are not allowed
Some developers will use a transitional doctype for o lder pages they are updating. While it may seem easierto code with a transitional doctype, you should aim for strict. Even better, try XHTML strict.
The fo llowing code is valid HTML. See if you can get this file to pass the W3C validation check. You probablywant to save the file in CodeRunner first. The validator will give you information about how to fix the problemalong with the error message. If you run into problems, be sure to email your mentor.
In HTML, type the fo llowing into the Editor below:
<!DOCTYPE html PUBLIC "-//W3C//DTD HTML 4.01//EN""http://www.w3.org/TR/html4/strict.dtd"><html> <head><meta http-equiv="Content-Type" content="text/html;charset=ISO-8859-1" /> <style type="text/css"> </style></head> <body> <h2>The W3C validator will identify multiple errors in this code.</h2> <img src="http://www.oreillyschool.com/images/OST_Logo.gif" alt="OST logo" style="position:absolute; top:0; right:0;"> </img> <br></br><br></br><hr/> <font size=10px color=red>Styles set using font attributes</font><br/>Ordinary text, no problem here right? </body></html>
You may have noticed the meta tag in the head o f this code. You'll learn more about meta tags shortly. Fornow you should know that this information tells the browser what character encoding the document is using.
Try adding a DTD to some of the files you've created for this course and see if you can get them to validate.
Meta tags
Another type o f tag that you can add to the head o f your file is the meta tag. Meta tags describe what your htmlfile is about.
ht t p-equiv
Suppose you have a web page that you update every day. Web browsers cache web pages so they can bedisplayed more quickly. A user who has visited your site recently may be viewing the cached copy on theirown hard drive rather than the updated page. The default setting for how long a cached copy is kept is 30
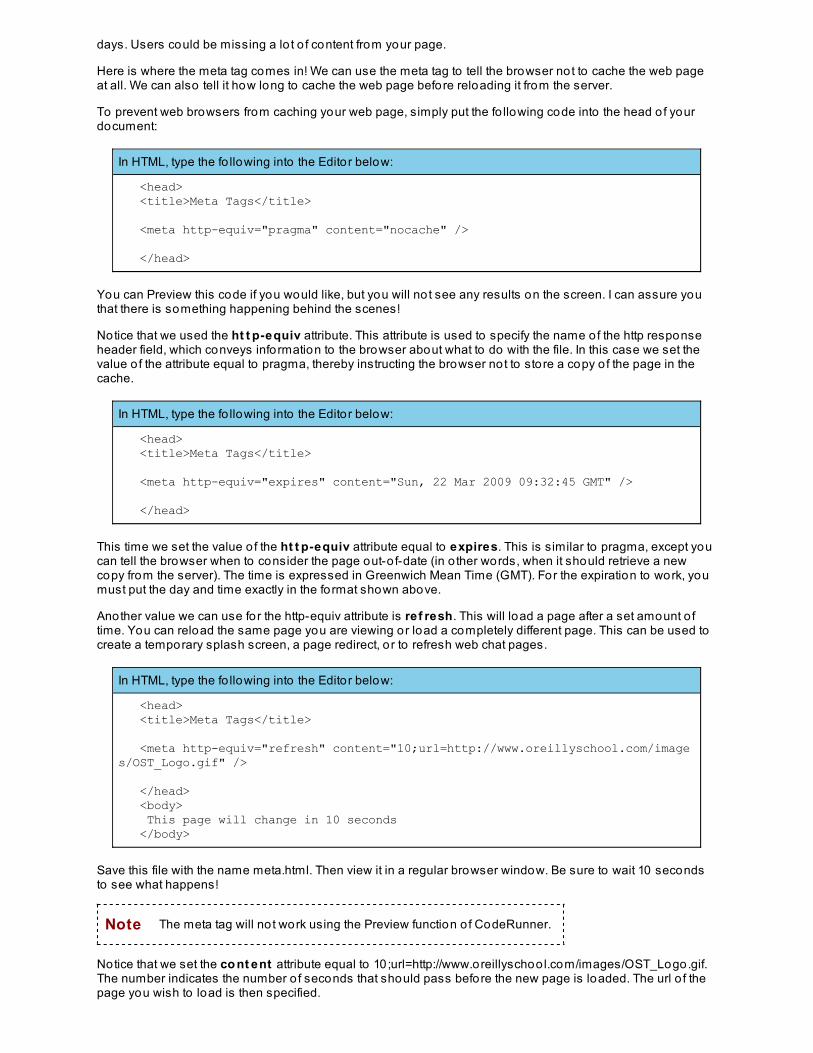
days. Users could be missing a lo t o f content from your page.
Here is where the meta tag comes in! We can use the meta tag to tell the browser not to cache the web pageat all. We can also tell it how long to cache the web page before reloading it from the server.
To prevent web browsers from caching your web page, simply put the fo llowing code into the head o f yourdocument:
In HTML, type the fo llowing into the Editor below:
<head> <title>Meta Tags</title> <meta http-equiv="pragma" content="nocache" /> </head>
You can Preview this code if you would like, but you will no t see any results on the screen. I can assure youthat there is something happening behind the scenes!
Notice that we used the ht t p-equiv attribute. This attribute is used to specify the name of the http responseheader field, which conveys information to the browser about what to do with the file. In this case we set thevalue o f the attribute equal to pragma, thereby instructing the browser not to store a copy o f the page in thecache.
In HTML, type the fo llowing into the Editor below:
<head> <title>Meta Tags</title> <meta http-equiv="expires" content="Sun, 22 Mar 2009 09:32:45 GMT" /> </head>
This time we set the value o f the ht t p-equiv attribute equal to expires. This is similar to pragma, except youcan tell the browser when to consider the page out-o f-date (in o ther words, when it should retrieve a newcopy from the server). The time is expressed in Greenwich Mean Time (GMT). For the expiration to work, youmust put the day and time exactly in the format shown above.
Another value we can use for the http-equiv attribute is ref resh. This will load a page after a set amount o ftime. You can reload the same page you are viewing or load a completely different page. This can be used tocreate a temporary splash screen, a page redirect, o r to refresh web chat pages.
In HTML, type the fo llowing into the Editor below:
<head> <title>Meta Tags</title> <meta http-equiv="refresh" content="10;url=http://www.oreillyschool.com/images/OST_Logo.gif" /> </head> <body> This page will change in 10 seconds </body>
Save this file with the name meta.html. Then view it in a regular browser window. Be sure to wait 10 secondsto see what happens!
Note The meta tag will no t work using the Preview function o f CodeRunner.
Notice that we set the co nt ent attribute equal to 10;url=http://www.oreillyschoo l.com/images/OST_Logo.gif.The number indicates the number o f seconds that should pass before the new page is loaded. The url o f thepage you wish to load is then specified.
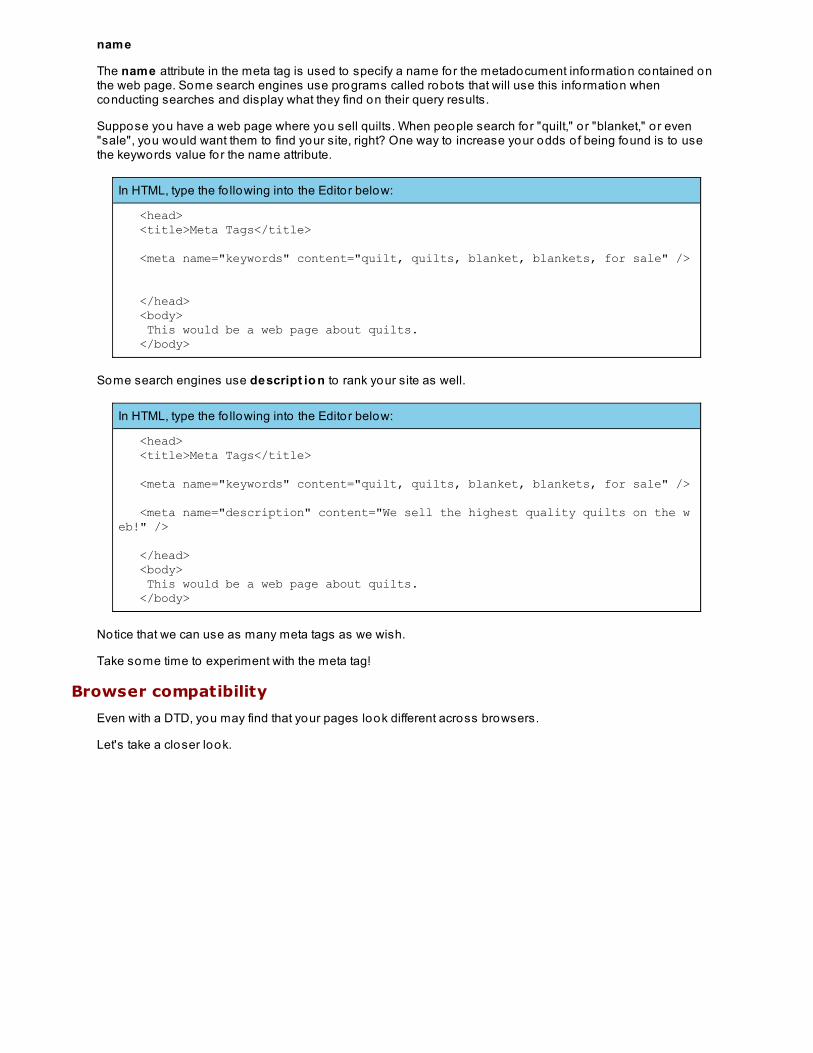
name
The name attribute in the meta tag is used to specify a name for the metadocument information contained onthe web page. Some search engines use programs called robots that will use this information whenconducting searches and display what they find on their query results.
Suppose you have a web page where you sell quilts. When people search for "quilt," o r "blanket," o r even"sale", you would want them to find your site, right? One way to increase your odds o f being found is to usethe keywords value for the name attribute.
In HTML, type the fo llowing into the Editor below:
<head> <title>Meta Tags</title> <meta name="keywords" content="quilt, quilts, blanket, blankets, for sale" /> </head> <body> This would be a web page about quilts. </body>
Some search engines use descript io n to rank your site as well.
In HTML, type the fo llowing into the Editor below:
<head> <title>Meta Tags</title> <meta name="keywords" content="quilt, quilts, blanket, blankets, for sale" /> <meta name="description" content="We sell the highest quality quilts on the web!" /> </head> <body> This would be a web page about quilts. </body>
Notice that we can use as many meta tags as we wish.
Take some time to experiment with the meta tag!
Browser compatibility
Even with a DTD, you may find that your pages look different across browsers.
Let's take a closer look.
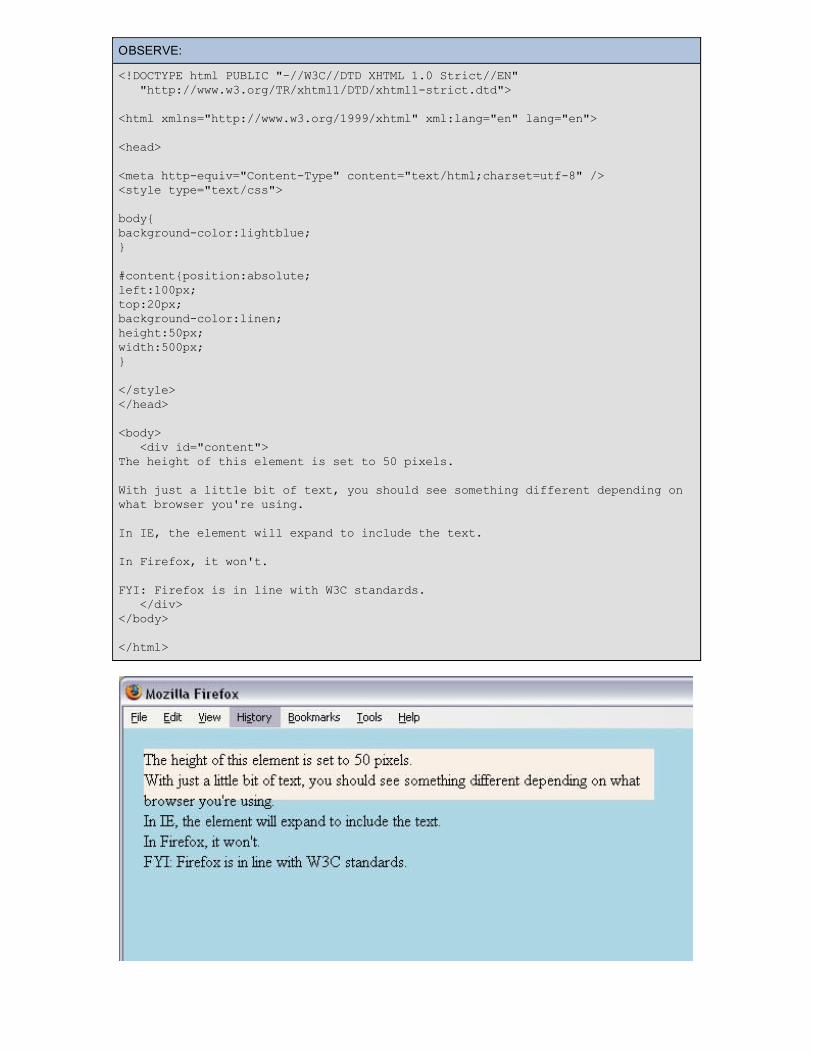
OBSERVE:
<!DOCTYPE html PUBLIC "-//W3C//DTD XHTML 1.0 Strict//EN" "http://www.w3.org/TR/xhtml1/DTD/xhtml1-strict.dtd"> <html xmlns="http://www.w3.org/1999/xhtml" xml:lang="en" lang="en">
<head> <meta http-equiv="Content-Type" content="text/html;charset=utf-8" /><style type="text/css">
body{background-color:lightblue;}
#content{position:absolute;left:100px;top:20px;background-color:linen; height:50px; width:500px;}
</style></head> <body> <div id="content">The height of this element is set to 50 pixels.
With just a little bit of text, you should see something different depending on what browser you're using.
In IE, the element will expand to include the text.
In Firefox, it won't.
FYI: Firefox is in line with W3C standards. </div></body>
</html>
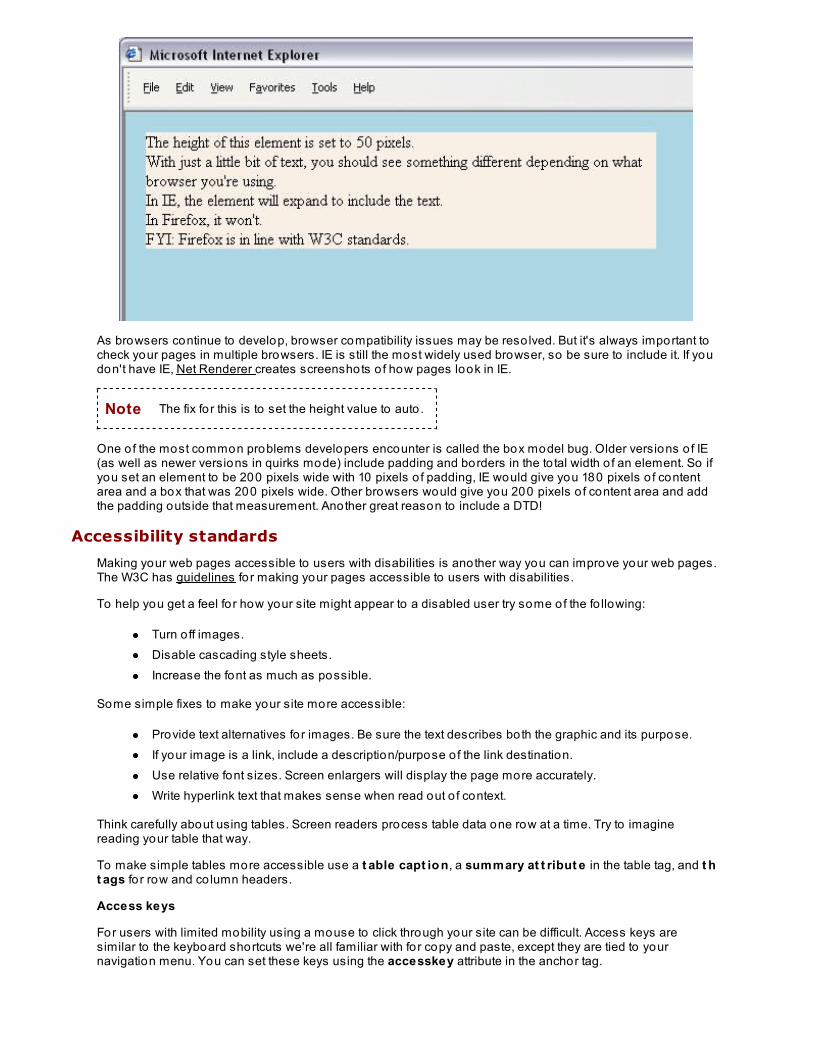
As browsers continue to develop, browser compatibility issues may be reso lved. But it's always important tocheck your pages in multiple browsers. IE is still the most widely used browser, so be sure to include it. If youdon't have IE, Net Renderer creates screenshots o f how pages look in IE.
Note The fix fo r this is to set the height value to auto .
One o f the most common problems developers encounter is called the box model bug. Older versions o f IE(as well as newer versions in quirks mode) include padding and borders in the to tal width o f an element. So ifyou set an element to be 200 pixels wide with 10 pixels o f padding, IE would give you 180 pixels o f contentarea and a box that was 200 pixels wide. Other browsers would give you 200 pixels o f content area and addthe padding outside that measurement. Another great reason to include a DTD!
Accessibility standards
Making your web pages accessible to users with disabilities is another way you can improve your web pages.The W3C has guidelines for making your pages accessible to users with disabilities.
To help you get a feel fo r how your site might appear to a disabled user try some of the fo llowing:
Turn o ff images.Disable cascading style sheets.Increase the font as much as possible.
Some simple fixes to make your site more accessible:
Provide text alternatives for images. Be sure the text describes both the graphic and its purpose.If your image is a link, include a description/purpose o f the link destination.Use relative font sizes. Screen enlargers will display the page more accurately.Write hyperlink text that makes sense when read out o f context.
Think carefully about using tables. Screen readers process table data one row at a time. Try to imaginereading your table that way.
To make simple tables more accessible use a t able capt io n, a summary at t ribut e in the table tag, and t ht ags fo r row and co lumn headers.
Access keys
For users with limited mobility using a mouse to click through your site can be difficult. Access keys aresimilar to the keyboard shortcuts we're all familiar with fo r copy and paste, except they are tied to yournavigation menu. You can set these keys using the accesskey attribute in the anchor tag.
OBSERVE:
<a href="http://www.oreillyschool.com" accesskey="h">Home</a>
Access keys on a Windows-based machine using IE, Safari, Konqueror or Chrome are activated by usingALT+Accesskey. Internet Explorer users may also need to use Enter to activate a link. Firefox for Windows,Shift+Alt+Accesskey. Firefox on a Mac, CTRL+Accesskey. Safari, CTRL+Option+Accesskey (Mac).
Think about how you might let users know what your access keys are. Ideas include listing them on yourpage, including a separate page where they are listed and using css styles to change only the access keyletter.
Keeping your pages up-to-dateBro ken links
What happens if you link to an external site and they change their pages? You'll end up with a broken link. Toavo id that, be sure to check your external links regularly. You can do that manually or run your pages throughW3C's link checker.
Favico ns
Have you ever wondered what the little icon is in the title bar fo r some web sites? That's called a favicon. It's a16 x 16 pixel image associated with web pages. Maybe you'd like to include one for your site. Here's how.
First you'll need to create and upload your graphic. Then add this code to the head o f your web pages:
<link rel="icon" type="image/***" href="location/favicon_name.***"/>
Replace the *** with the type o f file you're using (jpg, gif, png, etc.) and the href value with the location andname of your favicon file. The favicon won't show in the Preview window, so be sure to save your file andview it online.
Copyright © 1998-2014 O'Reilly Media, Inc.
This work is licensed under a Creative Commons Attribution-ShareAlike 3.0 Unported License.See http://creativecommons.org/licenses/by-sa/3.0/legalcode for more information.
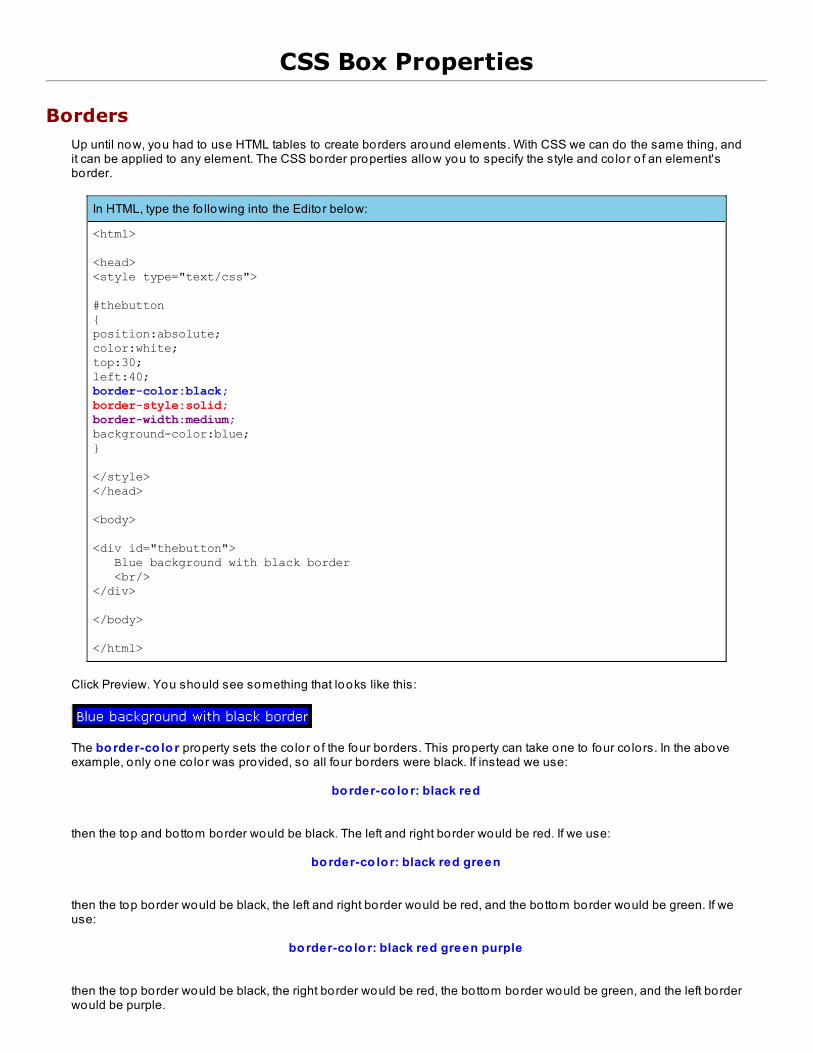
CSS Box Properties
BordersUp until now, you had to use HTML tables to create borders around elements. With CSS we can do the same thing, andit can be applied to any element. The CSS border properties allow you to specify the style and co lor o f an element'sborder.
In HTML, type the fo llowing into the Editor below:
<html>
<head><style type="text/css">
#thebutton{position:absolute; color:white; top:30; left:40; border-color:black; border-style:solid;border-width:medium; background-color:blue;}
</style></head>
<body>
<div id="thebutton"> Blue background with black border <br/></div>
</body>
</html>
Click Preview. You should see something that looks like this:
The bo rder-co lo r property sets the co lor o f the four borders. This property can take one to four co lors. In the aboveexample, only one co lor was provided, so all four borders were black. If instead we use:
bo rder-co lo r: black red
then the top and bottom border would be black. The left and right border would be red. If we use:
bo rder-co lo r: black red green
then the top border would be black, the left and right border would be red, and the bottom border would be green. If weuse:
bo rder-co lo r: black red green purple
then the top border would be black, the right border would be red, the bottom border would be green, and the left borderwould be purple.
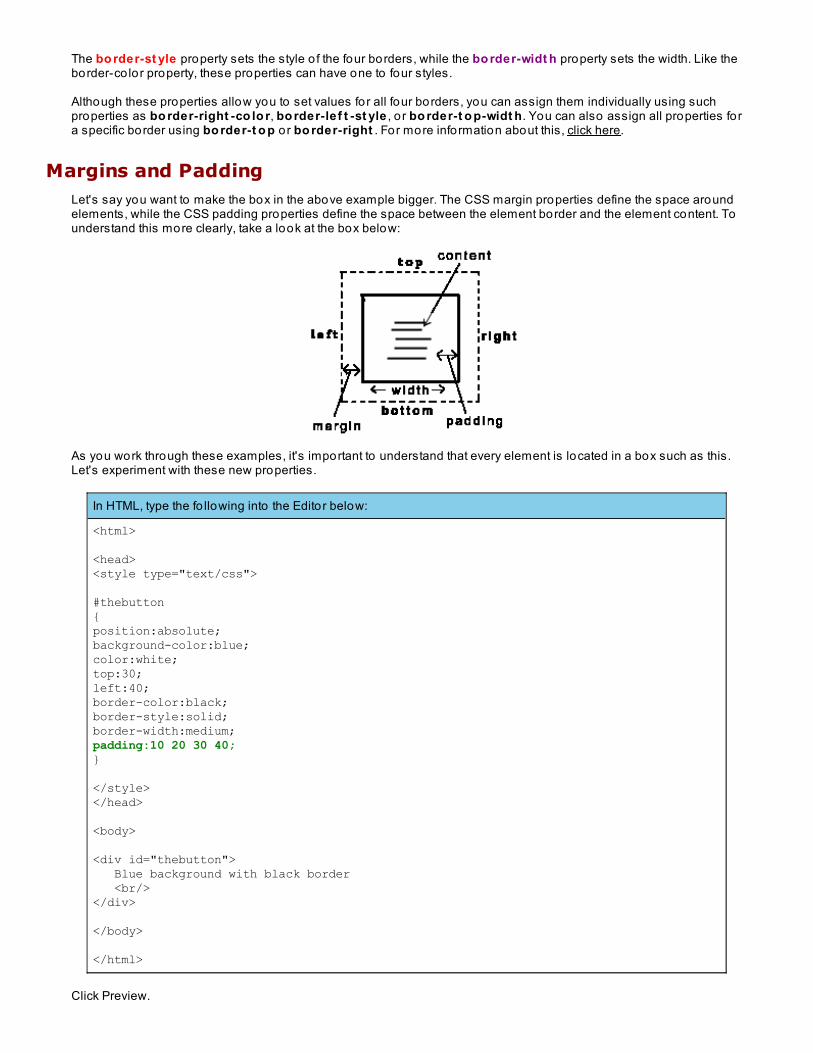
The bo rder-st yle property sets the style o f the four borders, while the bo rder-widt h property sets the width. Like theborder-co lor property, these properties can have one to four styles.
Although these properties allow you to set values for all four borders, you can assign them individually using suchproperties as bo rder-right -co lo r, bo rder-lef t -st yle , o r bo rder-t o p-widt h. You can also assign all properties fora specific border using bo rder-t o p o r bo rder-right . For more information about this, click here.
Margins and PaddingLet's say you want to make the box in the above example bigger. The CSS margin properties define the space aroundelements, while the CSS padding properties define the space between the element border and the element content. Tounderstand this more clearly, take a look at the box below:
As you work through these examples, it's important to understand that every element is located in a box such as this.Let's experiment with these new properties.
In HTML, type the fo llowing into the Editor below:
<html>
<head><style type="text/css">
#thebutton {position:absolute; background-color:blue; color:white; top:30; left:40;border-color:black; border-style:solid; border-width:medium; padding:10 20 30 40;}
</style></head>
<body>
<div id="thebutton"> Blue background with black border <br/></div>
</body>
</html>
Click Preview.
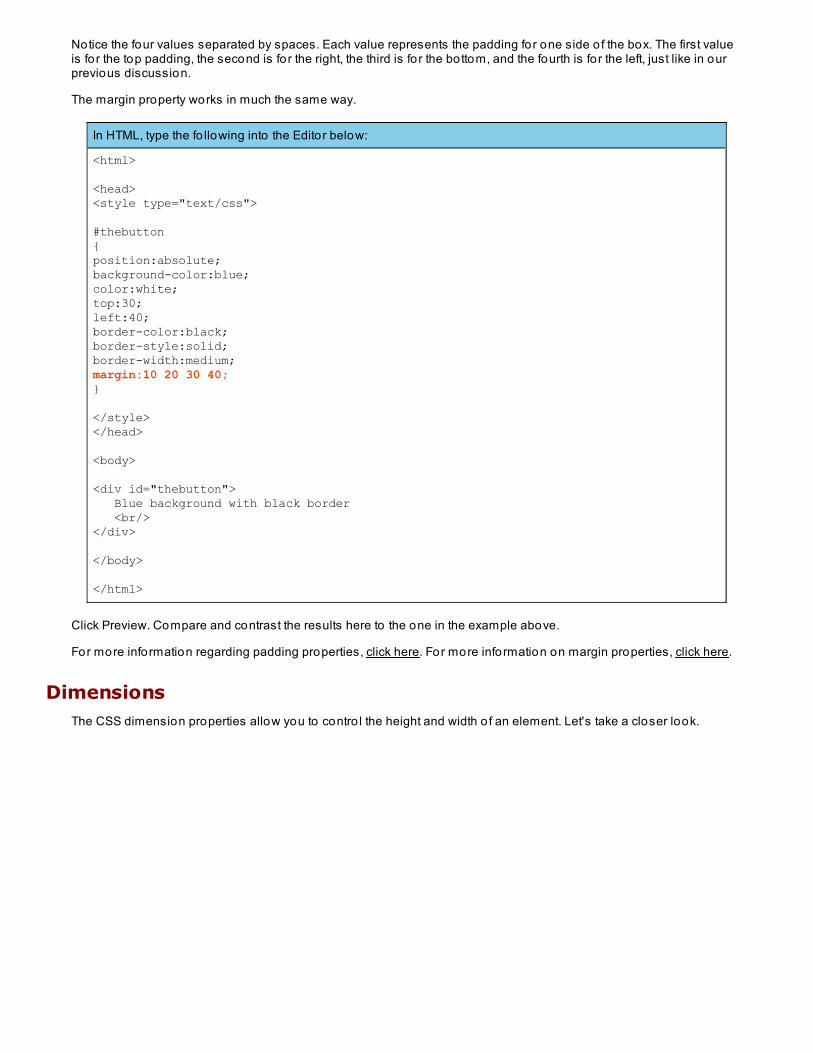
Notice the four values separated by spaces. Each value represents the padding for one side o f the box. The first valueis fo r the top padding, the second is fo r the right, the third is fo r the bottom, and the fourth is fo r the left, just like in ourprevious discussion.
The margin property works in much the same way.
In HTML, type the fo llowing into the Editor below:
<html>
<head><style type="text/css">
#thebutton {position:absolute; background-color:blue; color:white; top:30; left:40;border-color:black; border-style:solid; border-width:medium; margin:10 20 30 40;}
</style></head>
<body>
<div id="thebutton"> Blue background with black border <br/></div>
</body>
</html>
Click Preview. Compare and contrast the results here to the one in the example above.
For more information regarding padding properties, click here. For more information on margin properties, click here.
DimensionsThe CSS dimension properties allow you to contro l the height and width o f an element. Let's take a closer look.
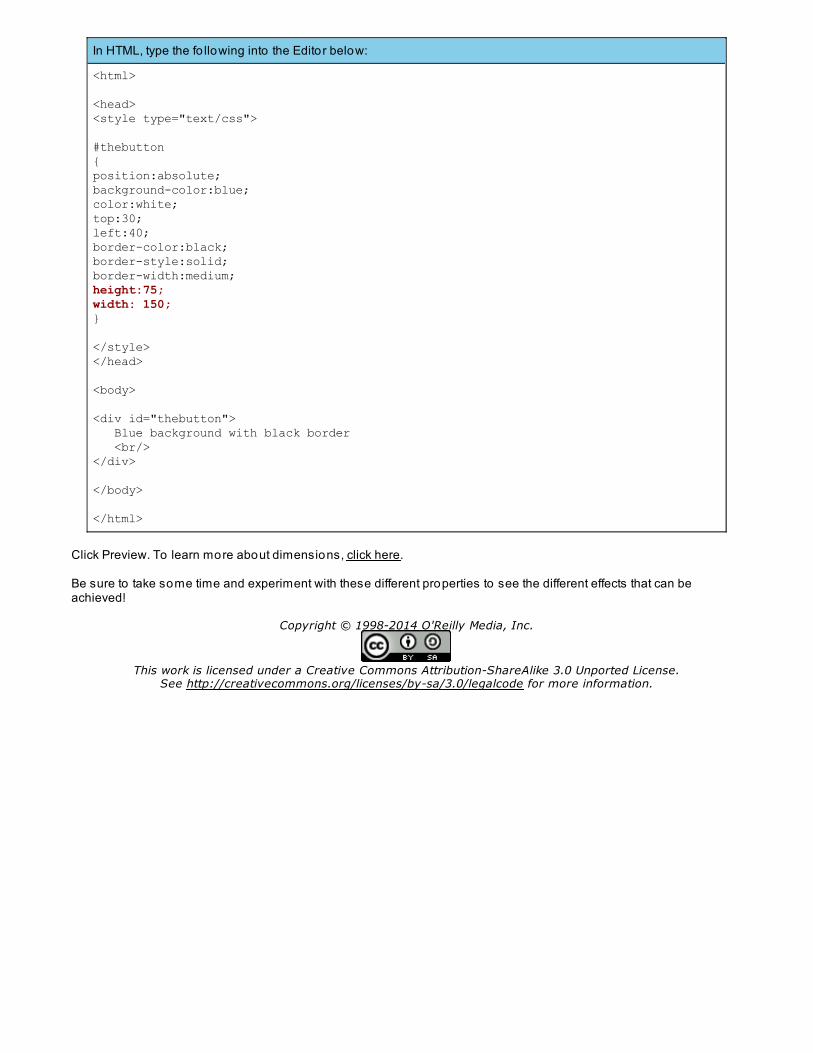
In HTML, type the fo llowing into the Editor below:
<html>
<head><style type="text/css">
#thebutton {position:absolute; background-color:blue; color:white; top:30; left:40;border-color:black; border-style:solid; border-width:medium; height:75;width: 150;}
</style></head>
<body>
<div id="thebutton"> Blue background with black border <br/></div>
</body>
</html>
Click Preview. To learn more about dimensions, click here.
Be sure to take some time and experiment with these different properties to see the different effects that can beachieved!
Copyright © 1998-2014 O'Reilly Media, Inc.
This work is licensed under a Creative Commons Attribution-ShareAlike 3.0 Unported License.See http://creativecommons.org/licenses/by-sa/3.0/legalcode for more information.
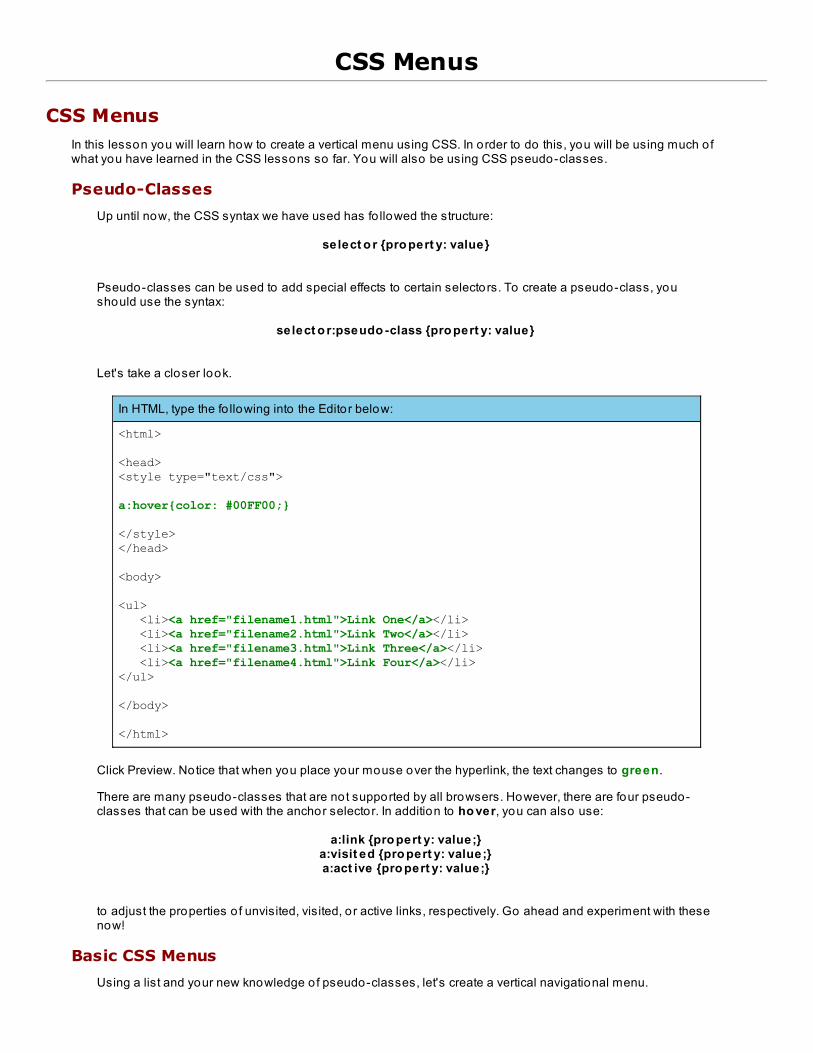
CSS Menus
CSS MenusIn this lesson you will learn how to create a vertical menu using CSS. In order to do this, you will be using much o fwhat you have learned in the CSS lessons so far. You will also be using CSS pseudo-classes.
Pseudo-Classes
Up until now, the CSS syntax we have used has fo llowed the structure:
select o r {pro pert y: value}
Pseudo-classes can be used to add special effects to certain selectors. To create a pseudo-class, youshould use the syntax:
select o r:pseudo -class {pro pert y: value}
Let's take a closer look.
In HTML, type the fo llowing into the Editor below:
<html>
<head><style type="text/css">
a:hover{color: #00FF00;}
</style></head>
<body>
<ul> <li><a href="filename1.html">Link One</a></li> <li><a href="filename2.html">Link Two</a></li> <li><a href="filename3.html">Link Three</a></li> <li><a href="filename4.html">Link Four</a></li></ul>
</body>
</html>
Click Preview. Notice that when you place your mouse over the hyperlink, the text changes to green.
There are many pseudo-classes that are not supported by all browsers. However, there are four pseudo-classes that can be used with the anchor selector. In addition to ho ver, you can also use:
a:link {pro pert y: value;}a:visit ed {pro pert y: value;}a:act ive {pro pert y: value;}
to adjust the properties o f unvisited, visited, or active links, respectively. Go ahead and experiment with thesenow!
Basic CSS Menus
Using a list and your new knowledge o f pseudo-classes, let's create a vertical navigational menu.

In HTML, type the fo llowing into the Editor below:
<html>
<head><style type="text/css">
ul{padding:0;margin:0;list-style-type:none;}
ul li{padding:0;margin:0;}
a{width:100;text-decoration:none;color:white;background-color:green;padding:10;display:block;}
</style></head>
<body>
<ul> <li><a href="filename1.html">Link One</a></li> <li><a href="filename2.html">Link Two</a></li> <li><a href="filename3.html">Link Three</a></li> <li><a href="filename4.html">Link Four</a></li></ul>
</body>
</html>
Click Preview.
The properties set fo r the ul tag cause the list to be displayed all the way to the left o f the page, with no bulletsdisplayed next to the list items. Try playing with these values and/or removing them to see their effects moreclearly.
The properties set fo r the li tags cause the list items to stack without overlapping. Try playing with thesevalues and/or removing them to see their effects more clearly.
The properties set fo r the ancho r tag cause the "buttons" to have a green background, white text, and auniform width. Additionally, the t ext -deco rat io n property is set to no ne so that the hyperlinks will no t beunderlined. Again, try playing with these values and/or removing them.
Now that we have the basic structure in place, let's add a pseudo-class that will change the background co loro f the items upon hovering over them.
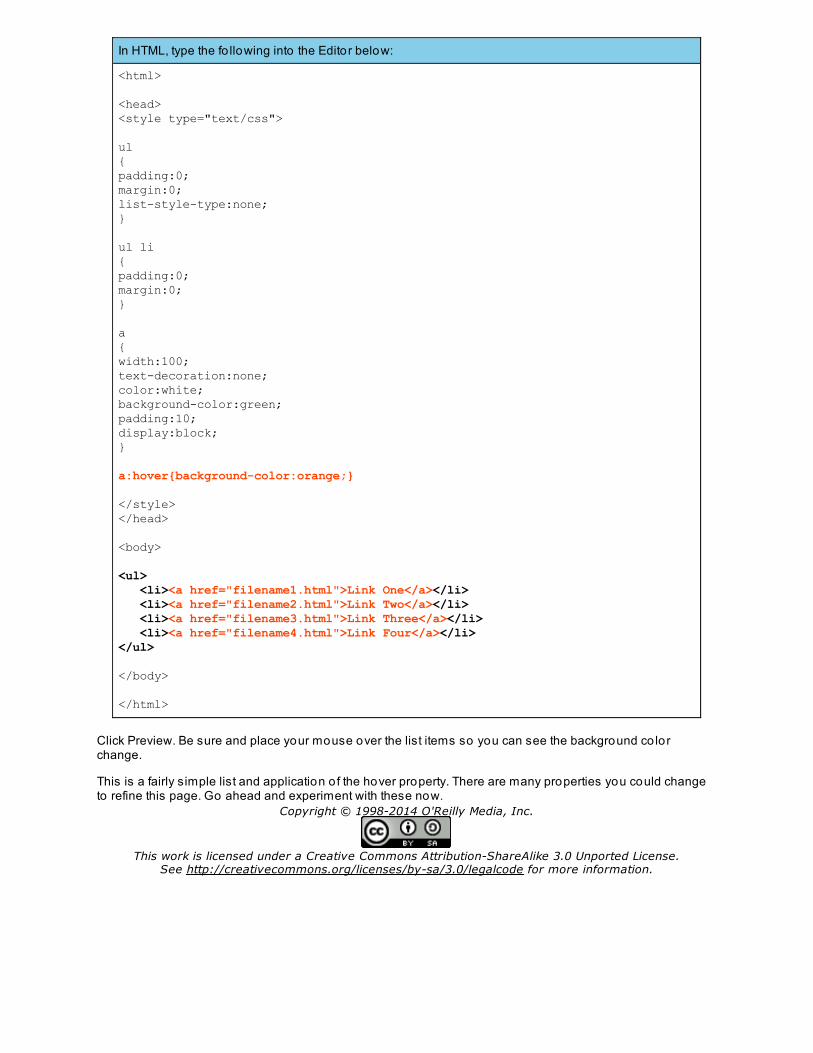
In HTML, type the fo llowing into the Editor below:
<html>
<head><style type="text/css">
ul{padding:0;margin:0;list-style-type:none;}
ul li{padding:0;margin:0;}
a{width:100;text-decoration:none;color:white;background-color:green;padding:10;display:block;}
a:hover{background-color:orange;}
</style></head>
<body>
<ul> <li><a href="filename1.html">Link One</a></li> <li><a href="filename2.html">Link Two</a></li> <li><a href="filename3.html">Link Three</a></li> <li><a href="filename4.html">Link Four</a></li></ul>
</body>
</html>
Click Preview. Be sure and place your mouse over the list items so you can see the background co lorchange.
This is a fairly simple list and application o f the hover property. There are many properties you could changeto refine this page. Go ahead and experiment with these now.
Copyright © 1998-2014 O'Reilly Media, Inc.
This work is licensed under a Creative Commons Attribution-ShareAlike 3.0 Unported License.See http://creativecommons.org/licenses/by-sa/3.0/legalcode for more information.
Final Project
Final ProjectIn this lesson you will learn what to include in your final pro ject fo r this course. The goal o f this pro ject is to create anentire website. You can make this website fo r any subject you wish. If you are having trouble coming up with an idea,you might consider creating an online portfo lio and resume. Such a website might include:
A main page with general information about youLinks to pages with the fo llowing information about you:
work experienceeducationinterestspast and current websites - you can include the pages you created throughout this courselinks to your favorite websites
For the sake o f evaluation, your website must include elements discussed in both the HTML and CSS portions o f thiscourse. You should use an external CSS file to create uniformity, and you must include a CSS menu for navigation.You are encouraged to create files that observe good programming practices, like closing all tags, and using pagebreaks and indentation to make your code as readable as possible.
The web site should be well-o rganized, pro fessional, easy to navigate, and aesthetically pleasing, with no typos orsyntax errors. The site should also be consistent across both browsers, as well as across the Mac and Windowsoperating platforms.
Note NO WYSIWYG EDITORS. This means no FrontPage, MSWord, or Dreamweaver. If you cannot useCodeRunner, you must use a plain text edito r (like WordPad) to create your pages.
Be creative and have fun! You want to present yourself in a pro fessional yet friendly way, so feel free to expressyourself!
Copyright © 1998-2014 O'Reilly Media, Inc.
This work is licensed under a Creative Commons Attribution-ShareAlike 3.0 Unported License.See http://creativecommons.org/licenses/by-sa/3.0/legalcode for more information.