introduction to amazon web services – a code4lib 2011 ... · pdf fileintroduction to...
TRANSCRIPT
Code 4 Lib Amazon AWS tutorial – 02 /11 1
Introduction to Amazon Web Services – a Code4Lib 2011 Preconference
1. REGISTER FOR AMAZON WEB SERVICES AND CREATE YOUR PRIVATE KEY 3
REGISTRATION 3 GETTING YOUR SECURITY CREDENTIALS 3 SETTING UP YOUR KEY 3
MAC / LINUX USERS 3 WINDOWS USERS 4
2. LAUNCH YOUR FIRST INSTANCE AND CONNECT 5
LAUNCH AN INSTANCE ON AMAZON 5 EBS VERSUS INSTANCE STORE. 5 TAGS 6 SECURITY GROUPS 7
CONNECT TO YOUR INSTANCE 7 SPECIAL INSTRUCTIONS OSX / LINUX USERS ( WINDOWS USERS SEE BELOW) 8 WHAT DOES THAT COMMAND MEAN? 8 SPECIAL INSTRUCTIONS WINDOWS USERS 8 LINUX / WINDOWS / OSX USERS 8 SUDO? 8
SERVER UPDATES 8 APT-GET? UPDATE? UPGRADE? 9
GET A STATIC IP ADDRESS 9
3. SERVER CONFIGURATION 10
TOUR YOUR SERVER 10 INSTALLING YOUR FIREWALL – UFW THE “UNCOMPLICATED FIRE WALL” 10 SETUP A BASIC WEBSERVER 11 ADDING A USER, UPDATING SUDO & ENABLING PASSWORD BASED ACCESS 11
MORE ON SUDO? 12 INSTALL A FEW APPLICATIONS (DO WHAT YOU LIKE OR SKIP) 12
VUFIND 12 WORDPRESS 12
TAKING AN IMAGE OF YOUR SERVER 13
4. MANAGING DISKS – ADDING, RESIZING AND TAKING SNAPSHOTS 14
RESIZING YOUR ROOT PARTITION 14 ADDING AN APPLICATION VOLUME 15 MOVING MYSQL 17
5. BACKING UP YOUR SERVER 19
SAMPLE BACKUP SCRIPT 20 RECOVERING YOUR SERVER WHEN YOU MESS UP 21 FIXING SMALL PROBLEMS 21 RECOVERING FROM DISK SNAPSHOTS (MASSIVE FAILURE) 22 SNAPSHOT RECOVERY EXERCISE 23 RECOVERY USING AMANDA 23

Code 4 Lib Amazon AWS tutorial – 02 /11 2
6. SERVER MONITORING AND AMAZON NOTIFICATION SERVICE 24
USING THE AMAZON MONITORING PLATFORM 24
7. USING CLIENT-BASED TOOLS TO MANAGE AWS SERVICES 26
MOBILE MANAGEMENT APPLICATIONS 26 BROWSER PLUG-IN TOOLS 26 STAND-ALONE CLIENTS 26 TOOL DIRECTORIES 26
8. CLEANING UP – MAKING SURE YOU DON’T LEAVE DATA / SERVERS 27
9. MORE FUN THINGS TO TRY 28
PUPPET CONFIGURATION OF EC2 28 USING BEANSTALK TO DEPLOY WEB APPLICATIONS 28 RUNNING DATABASES USING THE RDS SERVICE 28 INSTALLING OTHER SERVER APPLICATIONS 28
Code 4 Lib Amazon AWS tutorial – 02 /11 3
1. Register for Amazon web services and create your private key
Lets start today by registering for Amazon web services. Registering for AWS will involve giving them a credit card and use of these services during this workshop may involve some charges but given the short term of this workshop the charges should be less than a few dollars (if that).
Registration
1. Register for Amazon. Go to http://aws.amazon.com 2. Click Sign Up Now and complete the registration process 3. Once you have completed the registration process visit http://aws.amazon.com again and
sign in. 4. Click on the EC2 tab and click on the Sign up for Amazon EC2.
a. To complete this process you will have to enter a Credit Card b. This process may also include an Identity Verification step via Phone.
5. Signing up for EC2 should also get your registration complete for S3
Getting your security credentials After we get our account setup you need to generate and download your Key Pairs so you can login to instances that we create. Your keypair includes both a private and public key. The private key sits on your laptop and is used to connect to your server instance. You should not share your private key with anyone.
6. Go to https://console.aws.amazon.com/ec2/home 7. On the left hand side of the screen find the link to Key Pairs 8. Click the Create Key Pair Button 9. Enter a Key Pair Name 10. Download and save your private key (it does not matter where at the moment) 11. We will use this key pair to connect to our instances
Setting up your key
Mac / Linux Users All you need to do to use your private key is to move it to a secure location and set permissions on it. On OSX (Mac) /Linux this process is similar.
12. Open the program Terminal (command spacebar to open search and type in terminal) 13. Change to your home directory (cd ~) 14. Check to see if you have a .ssh directory (ls –al) 15. If you do not, create it (mkdir .ssh) 16. Set permissions on that directory if neccesary (chmod 700 .ssh) 17. Move the private key that you downloaded from amazon to this folder

Code 4 Lib Amazon AWS tutorial – 02 /11 4
a. (mv ~/Downloads/MYKEYNAME.pem ~/.ssh/) 18. Set the permissions on this file in your .ssh directory (chmod 600 mykey.pem) 19. You might as well leave terminal open – you will be using it quite a bit today!
Windows Users You may need to convert your pem key file to a format that putty or another program can support. These instructions are based on using putty as your ssh program.
20. Download and install putty and puttygen http://www.chiark.greenend.org.uk/~sgtatham/putty/download.html
21. Launch PuttyGen 22. Load the private key (.pem) file you downloaded 23. Save your new private key (ppk file format). Saving it in your user documents somewhere is
probably a good idea. 24. Launch putty 25. Click on SSH >> Authority >> Browse for the ppk key you created. 26. You can leave putty running but background it. In the next tutorial we will use this key to
connect to our server.
In this tutorial we created an Amazon AWS account, signed up for Amazon Elastic Computing Cloud (EC2) and generated our Private access Key. In our next tutorial we will launch our first instance and connect to it.

Code 4 Lib Amazon AWS tutorial – 02 /11 5
2. Launch your first instance and connect This series of tutorials uses the Alestic Ubuntu server images. When running a server on Amazon EC2 you can select one of a number of machine image sources including:
a. Images maintained by organizations (e.g. Alestic, Rightscale, Microsoft) b. Images maintained by Amazon (e.g. Amazon Linux) c. Images maintained by individuals (e.g. Jim-bob)
Clearly, images created and maintained by an organization are preferable. Many machine images, particularly linux images, are available without cost. Other images including Windows, Red Hat Linux and SUSE Linux come with additional hourly CPU charges on top of the base CPU charges Amazon charges. This can have a significant impact on the cost of your EC2 environment. You access these pre-built images using unique AMI ids. For this tutorial we will get our AMI ID from a company called Alestic. We will then find the image that corresponds to this AMI by searching for the ID in the Amazon community instance database. Once we launch this instance however the server belongs to us and when we take an image of it later we will create a new AMI ID.
Launch an instance on Amazon
1. Open a new tab in your web browser and visit the Alestic website (http://alestic.com/) and click on the us-east-1 tab. We are going to use a pre-built AMI (Amazon Machine Image) from Alestic as the base for our server.
2. Highlight and copy the EBS Boot 32-bit server ami (ami-ccf405a5) for example for the
Ubuntu 10.10 Maverick EBS Boot
EBS versus Instance Store.
Amazon offers two type of instance foundations – EBS-based images that use the Amazon Elastic Block Store system and Instance-Store images. The primary difference between EBS and Instance store is that you can stop an EBS instance and retain your server while stopping an instance store

Code 4 Lib Amazon AWS tutorial – 02 /11 6
server means that the entire server and all of the data on it goes away. Typically you should use EBS machine images unless instance termination is not an issue
3. Go back to your Amazon web console and follow the link to instances (https://console.aws.amazon.com/ec2/home#s=Instances)
4. Click on the Launch Instance button
You will see a screen that allows you to select an instance. We want to head over to community AMIs. Before you go there, take note of the Amazon Linux AMIs that are available. This platform is part of the base Amazon offering and includes regular security updates. If you are looking for a solid Linux system to base your images on this could be a good route to go.
5. Click on Community AMIs and paste the ami-id that you copied into the search box. Hit enter to tell the system to make it search.
6. Click Select to begin the image launching process.
Over the course of the next few screens we will make decisions about the size, location, and security settings for our instance
7. Select US-East-1B for your instance (you can choose any region but you need to remember this region for when we begin to add disk resources in later tutorials)
8. Leave your server size at small (you can switch it to Micro if you like but Vufind will not install). Amazon also supports 64 Bit instances that use a different AMI.
9. Make sure Launch Instances is selected and click Continue 10. Accept the defaults on the Instance Details Screen (Kernel ID and Ram Disk ID) and click
continue 11. On the Tagging screen, assign a name to your instance. This will help you keep track of
your instances. You can name it anything you like. The Key column contains the label “Name.” Leave that alone. Under the Value column enter the actual name of your instance.
Tags
You can add as many tags to your instance as you would like. Name is particularly useful as your instances and EBS volumes grow. It can be helpful to adopt a consistent naming strategy that you will use on your Instance Name Tags, your EBS Name Tags, your Snapshots, and Server Images.

Code 4 Lib Amazon AWS tutorial – 02 /11 7
You can assign tags to instances, volumes (disks), snapshots (backups), and various other AWS items. If you want to assign another tag, come up with a tag label for the first column (date) and a tag value for the second column (today’s date)
12. On the Create Key Pair screen, select “Choose from your existing Key Pair” and select the key pair we created in our previous tutorial. Click Continue
13. On the Configure Firewall Tab click on “Create New Security Group.” On the next screen in item 1 you can name your security group anything you like. You can even create multiple security groups if you want to set different access levels for different servers.
Security Groups
Security Groups are Amazon EC2 level firewalls that live outside of your server. These firewalls are a good first defense against intrusion and should be used to keep your server safe. In this tutorial we will open up two ports 22, and 80 so that we can ssh to our server and run a web service on it. In later tutorials we will add more complex rules to enable other services. Amazon Security Group rules follow the CIDR notation. For more information on using CIDR to limit access to your campus or other IP range, you can read http://en.wikipedia.org/wiki/Classless_Inter-Domain_Routing.
14. Using the drop down menu at the bottom of the screen add rules that are open to the whole internet.
15. For this tutorial we want to enable HTTP (80) and SSH (22) to “all internet” (0.0.0.0). If you are feeling courageous, figure out what the external IP address of your client machine is and restrict SSH access to that range (e.g. 152.18.0.0/16). Note that in a production environment you would not want SSH (22) open to the whole internet!
16. Click Continue and review your server parameters. If ready to proceed, click Launch. 17. Wait for your instance to launch. You can use the Refresh button on the Instances screen to
update your view of the screen. When you instance shows the green “running” button, you are ready to connect!
Connect to your instance The first time we connect to our instance it will be using the key pair. During our first connection we will simply verify that we are connected and that we can sudo to root. In the following tutorial we will do some basic setup on our server to get it ready for an application.
18. Right click on your instance name in the AWS console, choose “Connect” 19. Copy the Amazon public DNS name (e.g. ec2-50-16-179-191.compute-1.amazonaws.com) –
see figure below

Code 4 Lib Amazon AWS tutorial – 02 /11 8
Special instructions OSX / Linux Users ( Windows users see below)
20. Launch terminal and enter the following command: a. ssh –i ~/.ssh/myprivatekey.pem ubuntu@SERVERNAME
What does that command mean?
In the above command myprivatekey.pem is the name of the key you downloaded and SERVERNAME is the public DNS name of your server. The –i parameter tells ssh to use your private key You will notice that we switched the user to ubuntu from root. On Ubuntu systems this is required because remote login as root is disabled by default. On other Linux systems your mileage may vary.
Special instructions Windows Users
21. Using your popular ssh application (e.g. putty), add the server name to your connection window and ubuntu as your username. Remember that private key you setup back in the first tutorial? You still need that. If you did not save the key file from the previous tutorial add it in again here. If you are prompted for a username type in “ubuntu.”
Linux / Windows / OSX users
22. You will be asked to confirm the RSA keyprint of the server. This will add the keyprint to a known_hosts file on your client computer.
23. Become root (sudo su -). Congratulations, you are connected!
Sudo?
Sudo is a process by which you can grant elevated access to users without giving them access to specific user accounts. For the most part we will use sudo in these tutorials to become root or use root’s credentials.
Server updates Let’s do one simple process, server updating. Updating an Ubuntu server is done by utilizing the apt-get package management process.
24. After becoming root (sudo su -), run the update process a. apt-get update b. apt-get upgrade
25. These two commands gather updates from the Ubuntu update servers and prompt you to install them. The process typically goes without issue but should only be done in production environments if you have a good backup / restore procedure
After updating you may need to restart your server. Lets get this process out of the way.

Code 4 Lib Amazon AWS tutorial – 02 /11 9
apt-get? update? upgrade?
Most linux systems have a set of programs that help install and manage programs. On Ubuntu apt-get is one of way of doing updates. The advantage of installing programs this way is that when updates are posted to the apt servers and you run apt-get update /apt-get upgrade those packages get updated. It is important to note that this can be good and bad. Sometimes a package update breaks something that works! Lots more on Ubuntu management can be found at http://ubuntu.com
26. Head back to the Amazon AWS console and right click on your instance. Select reboot. You will notice that you lose your terminal session.
27. Watch the AWS console until your server switches from “rebooting” to “running” 28. Login again to make sure that everything is ok. How you do this depends on your platform.
On Mac / OSX you can return to your terminal window. On Windows you should re-launch putty & connect.
Get a static IP address Before we go much further we should go ahead and allocate and assign a static IP address for our server. Static IP addresses are an excellent way to identify your “production” box and are easily reassigned. You are charged for each static IP that you allocate but do not assign to a server so keeping multiple IP addresses in reserve can cost. In a production environment, once you allocated this static IP address you would want to communicate it to your campus IT and other cloud-based service providers to enable access to and from this machine.
29. You might as well log out and re-connect to your instance as assigning an IP address will change both your internal and external IP addresses
30. In the Amazon EC2 web console 31. Click on the Elastic IPs link on the left hand side 32. Click the “Allocate new Address” button 33. Once the address is allocated, right click and choose “Associate Address” 34. Choose your running instance ID and click “Associate” 35. Reconnect to your server using the external IP address you just allocated. Note, your old
connection string will not work. a. Mac users ssh –i ~/.ssh/KEY.pem [email protected]
36. You will also have to accept your RSA key fingerprint again.
In this tutorial we have launched, connected to, and updated our first server. In our next exercise we will do some basic server setup and take an image of our server.

Code 4 Lib Amazon AWS tutorial – 02 /11 10
3. Server configuration In this tutorial we will complete some basic server configuration and prepare our server for taking a base image. This will include setting up an internal firewall, installing apache, php and mysql, adding a user, and modifying ssh parameters to allow password-based login. If you are game you can also install vufind and wordpress as some sample applications.
Tour your server Before we get started lets take a quick tour. If you are new to linux you might want to take a few minutes and read an introduction (http://vic.gedris.org/Manual-ShellIntro/1.2/ShellIntro.pdf ). We will not do too much with the command line but it will be confusing if it is foreign.
1. type df –h. You will see the disk devices connected to your machine and their capacity.
Amazon advertises each server with a certain capacity. On small and large servers that capacity tends to connected to the server as /dev/sda2 and mounted as /mnt (at least for Alestic servers). You will notice no other mounted disks other than sda1 on your micro server.
2. If linux is new, here are a few interesting commands: a. ls –l – how you look at a directory b. cd – change directory c. pwd – what directory am I in? d. top – shows you a process list e. ps –a – show all processes f. man (command) e.g. man ps – gives a how to on commands g. du –h – disk usage in human readable format h. df –h – disk information in human readable format i. uptime – server load j. who – who is on your bo k. netstat – who is connected over the network to your box
Our Ubuntu server is very standard:
3. Server configs tend to be in /etc/ 4. Restarting services is done via /etc/init.d/service name start|stop|restart 5. Logs are in /var/log 6. Apache document root is /var/www
Installing your firewall – UFW the “Uncomplicated Fire Wall” Lets start by setting up a server based firewall. Server firewalls are good additions to your Amazon AWS firewall as a second level of security. Unlike the Amazon firewall which will always rely on external IP addresses, a server level firewall may also need to be programmed to allow IP addresses internal to the Amazon EC2 system.

Code 4 Lib Amazon AWS tutorial – 02 /11 11
7. Connect to your server using the command from the previous tutorial. 8. Become root (sudo su -) 9. apt-get install ufw 10. ufw status - this shows us what the current status of the firewall is. It should say inactive 11. ufw default deny (deny all connections by default) 12. ufw logging on (enable logging) 13. ufw allow 80 (lets enable the webserver) 14. ufw allow 22 (ssh to our box is important!)
a. feeling courageous? ufw allow from EXTERNALIPRANGE/16 to any port 22 15. ufw enable 16. ufw status – if you don’t see port 22 here you will not be able to ssh to your box 17. Launch a new ssh session (do not kill your old one yet!) and connect to the server - did it
work? 18. Check out the logs for ufw - tail -f /var/log/syslog (this looks at the tail end of a file Ctrl-C
to get out of it) 19. Lets play around by deleting access to port 22
a. ufw delete allow 22 b. ufw reload c. ufw status d. tail -f /var/log/syslog (this looks at the tail end of a file Ctrl-C to get out of it)
20. try to connect on ssh with a new terminal window - what happens in syslog? 21. Be sure to re-enable port 22 before moving on!
Setup a basic webserver In order to get us ready for an application install, lets get our base system setup. In order to keep us focused on Amazon issues we will use the simplest approach possible.
22. Run tasksel to setup your server (tasksel --section server) 23. Choose LAMP server from the menu 24. Run through the automated installers for Mysql, Apache and PHP. Remember your
passwords! 25. Go to a web-browser and hit your IP address. Do you get a stock Apache “It works!”
screen? 26. Keep going – lets install phpmyadmin (apt-get install phpmyadmin) 27. Once phpmyadmin is installed it your weberver http://myaddress/phpmyadmin
a. configure phpmyadmin to work with apache
Adding a user, updating sudo & enabling password based access You may or may not want to add additional users and enable password access to your server. There are numerous opinions about the best way to approach user management and access on your server (for example you might view added users as unnecessary complications and passwords as insecure).
28. In Ubuntu you can use the adduser command (as root, adduser username) 29. Once you have the user added you can add them to a group that has sudo access.

Code 4 Lib Amazon AWS tutorial – 02 /11 12
More on sudo?
Sudo is a method by which we can grant the ability to act as a user without knowing their password. You will use sudo regularly on your system to become the user root. Lets take a quick look at our sudoers file (more /etc/sudoers). Your file should contain the following line: %admin ALL=(ALL) ALL. Without getting into the particulars of sudo, this file controls how sudo works on your machine. You can edit the file with a specific program (visudo). The line referenced above tells us that members of the admin group can run any program on the server.
30. Lets give our new user the ability to do this by adding them to the admin group a. usermod –a –G admin username
Now that our user has access, we should enable password access to the server
31. Edit the sshd_config file (vi /etc/ssh/sshd_config) 32. Find the line “PasswordAuthentication no”, change no to yes 33. Find the line “PermitRootLogin” change yes to no 34. Exit vi ( ESC : x) 35. restart the sshd service 36. /etc/init.d/ssh restart 37. Without stopping your current ssh session, open a new session and connect with your new
user
Install a few applications (do what you like or skip) Lets install a few applications on our server. Feel free to do as many or as few as you like!
Vufind Vufind is a good example of a system to run on Amazon. It has all of the components of a web service, needs scalable server resources, and ultimately can be deleted without loss of primary library data! Full instructions on installing vufind are at http://vufind.org/wiki/installation_ubuntu
38. Change to your tmp directory and download the vufind 1.0.1 debian package: a. wget
http://sourceforge.net/projects/vufind/files/VuFind/1.0.1/vufind_1.0.1.deb/download
b. Install the vufind package (sudo dpkg –I PACKAGE) c. when it fails – sudo apt-get install –f d. run the vufind installer in /usr/local/vufind e. Once Vufind is installed move it to /m1 (mv /usr/local/vufind /m1/vufind) f. Update vufind configurations (grep –R “/var/www/” /m1/vufind/*)
Wordpress
39. Setup wordpress using the instructions at wordpress.org 40. http://codex.wordpress.org/Installing_WordPress

Code 4 Lib Amazon AWS tutorial – 02 /11 13
Taking an image of your server Amazon allows you to create server images that are snapshots of all of the resources connected to a server. To take a snapshot we will have to be prepared to have our server reboot. Depending on the size of your server and the time it has been since your last snapshot, taking an image could take some time (e.g. 30 minutes). During this time your server is unavailable.
41. Go to the AWS console, click on Instances 42. Right click on your image and select “Create Image EBS AMI.” 43. Enter a descriptive image name (e.g. 020411_testingserver_baseimage) and click “Create
this Image” 44. Your server will reboot and an image will be created. You can monitor the image creation
process on the AMIs tab in the Amazon Web Console 45. Once the server image says “available” you can login to your server again
In this tutorial we installed a firewall, setup a LAMP environment, added a user and enabled password access. We finished up by taking a server image. In our next tutorial we will begin working with external EBS volumes.

Code 4 Lib Amazon AWS tutorial – 02 /11 14
4. Managing disks – adding, resizing and taking snapshots
In this tutorial we will begin working with external EBS volumes on our Amazon server. EBS volumes are externally mounted network disks that have a number of advantages over locally used storage. They persist outside of server instances, can be easily backed up through snapshots, and can attached, detached, and re-attached easily. In this tutorial we will use external disks for three purposes 1)resizing the root partition, 2) creating an application disk space outside of our server and 3) moving our mysql data files so that they are not tied to a specific server.
One of the challenges or opportunities in working with Amazon EC2 servers is that you need to be prepared to migrate your system to a new server instance. We will cover this in detail in the coming tutorials but for the time being it is worthwhile pointing out that regular snapshots of data stored on external EBS volumes provides the fastest way to recover a server when something goes wrong. The alternative, keeping data on an instance-store or using the built-in storage with an EBS server makes backup and recovery more complicated and less fault tolerant.
Resizing your root partition We are going to begin this process by taking a snapshot of our root partition. We will then create a new volume from that snapshot (with a larger size) and connect it to our server. These instructions rely on the web console but if you want to use command line tools there is an excellent tutorial at Alestic (http://alestic.com/2010/02/ec2-resize-running-ebs-root)
1. Take a snapshot of your root partition by first navigating to your instance window in the Amazon Web Console (http://aws.amazon.com).
2. Take note of your instance ID 3. Click on the Volumes Tab on the left hand side of your console. 4. Find the volume that is attached to this instance as /dev/sda1
5. Right click on the instance and choose “Create Snapshot” 6. Be sure to give your snapshot a descriptive name! 7. Head over to the Snapshots tab in your console and watch the snapshot create.
Now that we have a snapshot of our root partition we will stop our server, create a new volume from the snapshot and swap it with our existing device attached as /dev/sda1.
8. Stop your server (Instances >> instance >> stop server) 9. Create a new volume from your snapshot 10. Click on snapshots, find your root partition snapshot, right click and choose “Create volume
from snapshot.” 11. Make sure that the availability zone matches your server! 12. Add in a new size for your partition. Once you size up you cannot go down so add space
judiciously!

Code 4 Lib Amazon AWS tutorial – 02 /11 15
13. Go to volumes and watch your snapshot create 14. Once it is created, find your old volume that is currently attached as /dev/sda1 and detach
it from your server (right click in volumes >> Detach Volume) 15. Attach your new volume (right click, choose attach, select your instance and attach it as
/dev/sda1 16. Start your server and connect to it. Note – When you stop your server you lose your IP
address association. Visit the static IP address list and re-associate it with your server.
The last thing that we need to do here is resize our root partition. This is done with the command resize2fs.
17. As root or sudo run the command “resize2fs /dev/sda1” 18. Verify that you have a larger root partition (df –h)
Adding an application volume After resizing root, the addition of an application volume should seem pretty simple. The goal behind this is to add an EBS volume that you will use to store all of your added applications. In this exercise, we will create a new volume, add it to the server, format and mount it and then configure Apache to use it as its home directory.
Running applications on external volumes means that you can easily disconnect / reconnect them to different servers if needed. It also means that you can easily snapshot them as standalone units.
19. Create a new volume (In AWS Volumes >> Create Volume) 20. Set a size (perhaps 10 GB) and an availability zone that matches your server (e.g. us-east-
1b). You do not need a snapshot. 21. Watch the disk create

Code 4 Lib Amazon AWS tutorial – 02 /11 16
22. Connect the disk to your server (Right click >> Attach Volume), select your proper instance and assign a devce name (start with /dev/sdf)
23. Login to your server and look at your attached disks (df –h). You probably don’t see
/dev/sdf yet! 24. Lets format our new disk with the ext4 file system (mkfs –t ext4 /dev/sdf) 25. Lets mount our new disk by editing fstab
a. vi /etc/fstab b. add the following line: c. /dev/sdf /m1 auto defaults 0 0 d. Make the directory you just referred to (mkdir /m1) e. make sure you have fstab right by running mount –a
i. If you are running a micro instance you may get a /dev/sda2 device not found.
Now that we have a new disk mounted to our system we need to adjust Apache to work with it. We have two methods of doing this. One way would be to use symbolic links from /var/www to /m1/website (our library website directory). The second is to adjust Apache configurations to address that area directly. These instructions focus on option 2.
26. Make a directory on /m1 to hold your website (mkdir /m1/website) 27. Relocate the index.html file from /var/www to this space (mv /var/www/*.html
/m1/website 28. Edit apache configuration to point to this new location
a. cd /etc/apache2/sites-enabled b. vi 000-default c. replace “DocumentRoot /var/www” with “DocumentRoot /m1/website”
29. We need to set permissions on this folder in /m1 chown -R www-data:www-data website) 30. Lets restart apache and see how we did (as root or sudo /etc/init.d/apache2 restart)
Now that we have our application volume we can add new apps to it while updating central configuration files as necessary. Lets test our server configuration by rebooting the whole server. Did your disk reconnect properly? Does Apache still work?

Code 4 Lib Amazon AWS tutorial – 02 /11 17
Moving MySQL
31. Running MySQL on your root partition can be risky. MySQL contains frequently updated data. The fact that MySQL can be difficult to snapshot while it is running means that keeping it on a core disk can create issues with taking regular snapshots. To move Mysql we will create and attach another volume, stop mysql, move mysql folders to this new disk, create entries in fstab to redirect mysql and then start and test.
32. Start by creating a new volume about 10GB large in the same availability zone 33. Attach the drive to your server as (/dev/sdg), format and mount it. as /m2. Create an entry
in /etc/fstab 34. Stop mysql (/etc/init.d/mysql stop) 35. Create directories in /m2 to hold lib, etc and log directories for mysql
a. mkdir /m2/etc, mkdir /m2/lib, mkdir /m2/log 36. Move Mysql directories to their new locations
b. mv /etc/msyql /m2/etc c. mv /var/lib/mysql /m2/lib d. mv /var/log/mysql /m2/log
37. Recreate those directories e. mkdir /etc/mysql f. mkdir /var/lib/mysql g. mkdir /var/log/mysql
38. Add entries to fstab for these volumes h. /m2/etc/mysql /etc/mysql none bind i. /m2/lib/mysql /var/lib/mysql none bind j. /m2/log/mysql /var/log/mysql none bind
39. Mount these entries k. mount /etc/mysql l. mount /var/lib/mysql m. mount /var/log/mysql
40. start mysql n. /etc/init.d/mysql start
By moving MySQL to a new disk you get many of the benefits of an abstracted database service (e.g. Amazon’s RDS) without the added expense. Amazon RDS is a good option for organizations who want automated backup of Mysql or who want to approach cloud computing from a SAAS/PAAS approach rather than an IAAS approach.
Finishing up
Lets finish this tutorial by restarting our server, making sure that everything works and taking a snapshot.
41. reboot your box, test it a. Did it come online? Is apache running? Is Mysql up?
42. Take a server images b. Note that the image now contains all of the disks that we have mounted

Code 4 Lib Amazon AWS tutorial – 02 /11 18
Ultimately, how you decide to allocate disk space is up to you. There is a tradeoff between disk complexity, server management comfort/time and needed redundancy. I have found that at the least, making sure that my applications, database and root partition reside on separate disks makes system recovery simple.

Code 4 Lib Amazon AWS tutorial – 02 /11 19
5. Backing up your server This tutorial covers how to setup a quick and easy backup routine using a program built on top of the Amazon ec2 server tools. This tutorial is largely adopted from (http://alestic.com/2010/10/ec2-consistent-snapshot-035). Your best bet is to follow instructions there as they are more complete and up to date. For the sake of simplicity, quick install instructions are below
This process consists of two programs using the consistent snapshot tool. The first program automatically produces EBS snapshots with a date/time stamp and volume description. For extra security rather than trying to snapshot the mysql disk, I have chosen to use the Mysql-ZRM backup application (part of the Amanda toolkit – see below). This portion of the tutorial covers how to snapshot all disks. The next tutorial covers adding MysqlZRM backups
1. Download and install the ec2-consistent-snapshot tools a. sudo add-apt-repository ppa:alestic b. sudo apt-get update c. sudo apt-get install ec2-consistent-snapshot
2. Go ahead and make sure that your PERL modules are installed properly a. sudo PERL_MM_USE_DEFAULT=1 cpan Net::Amazon::EC2
3. run man ec2-consistent-snapshot for full documentation
Before we get started with running this program interactively we need to gather some data. This data includes your AWS Access Keys and your Volume IDs.
4. Get your Access keys. a. Visit http://aws.amazon.com b. Click on Account >>then Security Credentials in the center of the screen c. Login d. Scroll Down. Under Access Keys you want to copy your Access Key ID and your
Secret Access Key. 5. Store them somewhere safe
a. Create a directory called .awssecret in the home directory of root on your server b. (as root) mkdir ~/.awssecret c. Make a file called awsaccesskey (vi ~/.awssecret/awsaccesskey) d. Save your Access key and secret key on separate lines to the file e. Set restrictive permissions (chmod –r 600 /root/.awssecret)
6. Assemble a list of the volumeIDs of the disks attached to your server. The easy way to do this is to use the AWS Console
a. Aws >> volumes >> copy down the volume IDs
Now we are ready to try out taking a snapshot of some disks via the command line
7. Assemble your command line for the ec2-consistent-snapshot

Code 4 Lib Amazon AWS tutorial – 02 /11 20
8. ec2-consistent-snapshot --aws-credentials-file /root/.awssecret/awsaccesskey --region "us-east-1" --description "testing initial backup" vol-6e7ce006
a. –aws-credentials-file – where your keys are stored b. –region “us-east-1”, any region works here c. –description – simple for now, we will add date/time stamp in a minute d. volumeID
9. Run the command as root – you should get a snapshot id returned to you. Check out the AWS console to see if it created. When it is done, delete the snapshot.
10. If you are feeling adventurous, try snapshotting your MySQL database device. Add the following parameters to your command line:
e. --mysql --mysql-host localhost --mysql-username root --mysql-password mypassword f. This works better on XFS file systems – your mileage may vary!
Now that we have the consistent snapshot routine working, lets build a simple script that gets date/time and automated snapshot creation. You can either copy the script below or come up with something better.
11. Create a directory called /backups (or something else) 12. Create a script called disk_snapshot.bsh and save it in /backups
Sample backup script #!/bin/bash
#get date stuff, parse it out
mydate=$(date '+%m%d%y.%H%M')
dayofmonth=$(date '+%d')
dayofweek=$(date '+%w')
if [ "$dayofmonth" == "1" ]; then
term="monthly"
elif [ "$dayofweek" == "7" ]; then
term="weekly"
else
term="daily"
fi
echo $term
#Backup Each connected disk
echo "Root Partition"

Code 4 Lib Amazon AWS tutorial – 02 /11 21
# /dev/sda1 - / Add your root volume here
ec2-consistent-snapshot --aws-credentials-file /root/.awssecret/awsaccesskey --region "us-east-1" --description "$mydate.Backup-cloud.lib.wfu.edu/root" YOURVOLUMEID
# /dev/sdf - /m1 vol-00991468
echo "/m1"
ec2-consistent-snapshot --aws-credentials-file /root/.awssecret/awsaccesskey --region "us-east-1" --description "$mydate.Backup-cloud.lib.wfu.edu/m1" vol-YOURVOLUMEID
# /dev/sdg - /m2 (mysql) vol-0499146c
echo "skipping - /m2"
#ec2-consistent-snapshot --aws-credentials-file /root/.awssecret/awsaccesskey --region "us-east-1" --mysql --mysql-host localhost --mysql-username root --mysql-password mypassword --description "$mydate.Backup-cloud.lib.wfu.edu/m2" vol- YOURVOLUMEID
#todo - write find based on date/timestamp with daily, monthly, weekly and hose files from backup dir
13. Run the program – does it work? 14. If you feel like making it official add it to root’s cron
a. crontab –e b. 0 4 * * * /backups/disk_snapshots.bsh >> /dev/null
Recovering your server when you mess up One of the issues that we run into with Amazon EC2 servers is that when they reboot and fail to start we have to be creative with how we recover. You have a few ways of debugging a server issue in Amazon but the easiest way if it does not boot is to look at the console (right click on the instance and select show console). If it is something you can fix, you can stop the server, move the disk that contains the offending configuration to a different server and fix it. For larger problems snapshots are the best way to recover from server failures. This means that snapshots of your root partition before you do system updates and it means being prepared to mount your root volume on a recovery server if needed.
The following tutorial involves messing up your server enough so that it will not boot and fixing it.
Fixing small problems While preparing for this tutorial I mis-typed a command in fstab and failed to test it before rebooting. This means that when the server restarted I got the following message:

Code 4 Lib Amazon AWS tutorial – 02 /11 22
I found this message by right clicking on my instance in the Amazon AWS Web Console and choosing “Get System Log.”
Lets replicate this error
15. In /etc/fstab, edit the line mounting /m2 to have a clear error (e.g audo instead of auto) 16. reboot – fail. 17. Stop your server 18. Detach your volume 19. Lets use our backup from our first image to serve as a quick instance to fix this issue: 20. Go to AMIs in The Amazon web console, find your server image, right click and choose
launch. 21. Set your preferences and wait for the server to launch. 22. When the server is running, connect your root partition as /dev/sdh 23. connect to your recovery server and make a directory (e.g. mkdir /recovery) 24. mount /dev/sdh /recovery 25. Edit your fstab in /recovery/etc 26. Save, exit, unmount, shut down your server, disconnect the drive, reconnect the drive to
your old server (as /dev/sda1), start your old server. Remember to associate your IP address again
This approach could be used in conjunction with a number of other backup mechanisms including Bacula, Amanda, rsync, svn, etc. The important thing would be to have a server that had access to your other backup routines that you could use to help fix the issues in the file system.
Recovering from disk snapshots (massive failure) After going through the previous exercise this may seem pretty simple. To recover by rolling back to a previous snapshot you can “hot swap” devices or do it by stopping your server. The main risk of trying a hot-swap is that you position yourself for failures the next time you reboot your system.
This approach is particularly important (especially cold-swapping) if your server bricks following a system update. Having a recent snapshot of your root partition is the easiest way to avoid significant downtime in this type of environment. In many ways this structure is even faster than using a server management system like Puppet or CFEngine..
27. Hot-swapping volumes a. Create a new volume from a recent snapshot

Code 4 Lib Amazon AWS tutorial – 02 /11 23
b. Attach it to your server c. update fstab to point to your new device d. run mount –a e. Verify that things work correctly f. Detach your old device from the server
28. Cold-swap volumes g. Create a new volume from a recent snapshot h. Stop your server i. Detach your old volume j. Attach your new volume using the same information k. Start your server l. Verify that everything works correctly
Snapshot recovery exercise Want to try it out? After taking a successful series of system snapshots using the program developed in the first part of this tutorial we are ready to really mess things up.
29. As root cd to / 30. execute “rm –r *” 31. Wait for your server to fail. 32. Reboot – fail. 33. Follow the cold-swap procedures outlined above
Recovery using Amanda I mention using a backup tool like Amanda (http://amanda.org) here because Amanda is an effective backup strategy for Amazon based systems. Amanda supports writing directly to S3 (Simple Storage Service) . While these tutorials do not replicate the Amanda instructions for setting up Amanda to write to S3, there is an excellent white paper hosted at Amanda that discusses this process.
The benefit of Amanda is that it is capable of performing very detailed data backup and includes automatic mechanisms such as backup rotation, full vs incremental backups etc. These can be very important for server redundancy, and archiving. In my experience, the downside of Amanda on the EC2 platform is that the tools are slower and more complicated to work with than volume and server snapshots. For that reason this tutorial focuses on automating volume snapshots instead of backing up with Amanda.
Code 4 Lib Amazon AWS tutorial – 02 /11 24
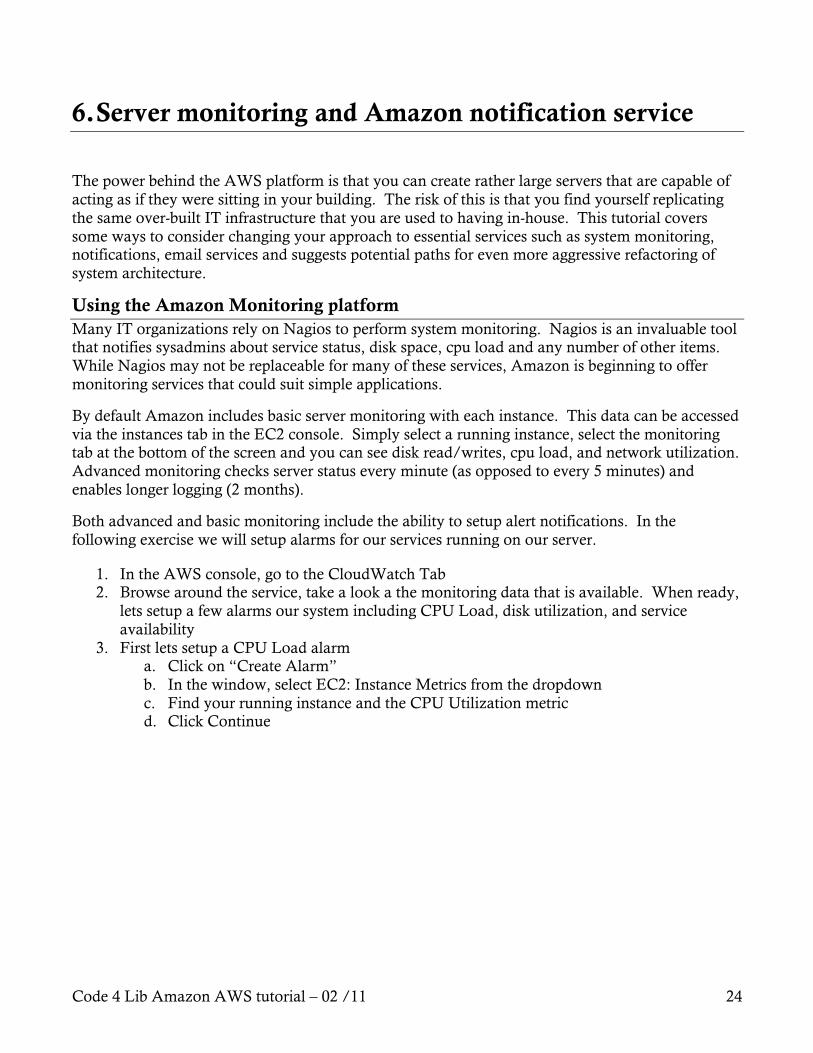
6. Server monitoring and Amazon notification service
The power behind the AWS platform is that you can create rather large servers that are capable of acting as if they were sitting in your building. The risk of this is that you find yourself replicating the same over-built IT infrastructure that you are used to having in-house. This tutorial covers some ways to consider changing your approach to essential services such as system monitoring, notifications, email services and suggests potential paths for even more aggressive refactoring of system architecture.
Using the Amazon Monitoring platform Many IT organizations rely on Nagios to perform system monitoring. Nagios is an invaluable tool that notifies sysadmins about service status, disk space, cpu load and any number of other items. While Nagios may not be replaceable for many of these services, Amazon is beginning to offer monitoring services that could suit simple applications.
By default Amazon includes basic server monitoring with each instance. This data can be accessed via the instances tab in the EC2 console. Simply select a running instance, select the monitoring tab at the bottom of the screen and you can see disk read/writes, cpu load, and network utilization. Advanced monitoring checks server status every minute (as opposed to every 5 minutes) and enables longer logging (2 months).
Both advanced and basic monitoring include the ability to setup alert notifications. In the following exercise we will setup alarms for our services running on our server.
1. In the AWS console, go to the CloudWatch Tab 2. Browse around the service, take a look a the monitoring data that is available. When ready,
lets setup a few alarms our system including CPU Load, disk utilization, and service availability
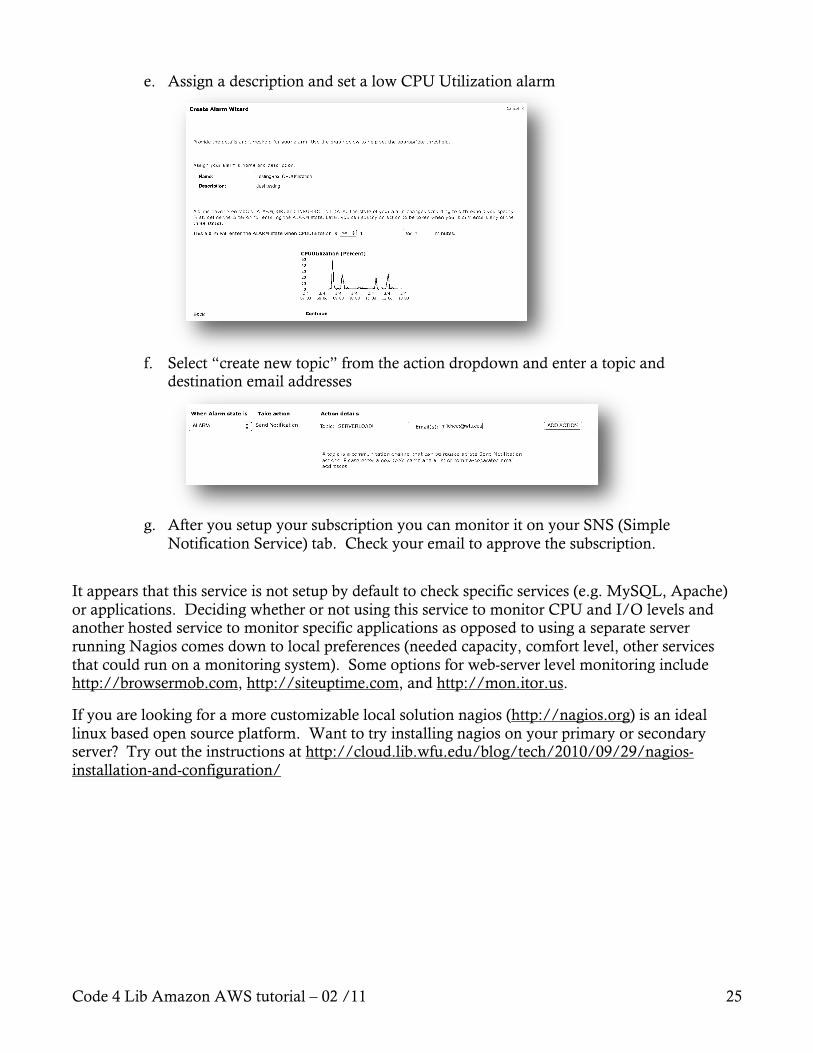
3. First lets setup a CPU Load alarm a. Click on “Create Alarm” b. In the window, select EC2: Instance Metrics from the dropdown c. Find your running instance and the CPU Utilization metric d. Click Continue
Code 4 Lib Amazon AWS tutorial – 02 /11 25
e. Assign a description and set a low CPU Utilization alarm
f. Select “create new topic” from the action dropdown and enter a topic and
destination email addresses
g. After you setup your subscription you can monitor it on your SNS (Simple
Notification Service) tab. Check your email to approve the subscription.
It appears that this service is not setup by default to check specific services (e.g. MySQL, Apache) or applications. Deciding whether or not using this service to monitor CPU and I/O levels and another hosted service to monitor specific applications as opposed to using a separate server running Nagios comes down to local preferences (needed capacity, comfort level, other services that could run on a monitoring system). Some options for web-server level monitoring include http://browsermob.com, http://siteuptime.com, and http://mon.itor.us.
If you are looking for a more customizable local solution nagios (http://nagios.org) is an ideal linux based open source platform. Want to try installing nagios on your primary or secondary server? Try out the instructions at http://cloud.lib.wfu.edu/blog/tech/2010/09/29/nagios-installation-and-configuration/

Code 4 Lib Amazon AWS tutorial – 02 /11 26
7. Using client-based tools to manage AWS services The AWS community has developed a number of client-based tools that facilitate access to and management of the AWS platform. These tools include mobile phone based management applications, web-browser plug-ins to manage EC2, S3 and EBS resources and stand-alone clients that integrate with S3 as a remote data storage service. This guide documents a few of the applications that might be of interest.
Mobile management applications
1. Decaf a. Android - http://www.androidguys.com/2010/02/11/manage-amazon-ec2-cloud-
decaf/ 2. iAWSManager (Lite):
a. iOS – Launch, manage, terminate instances on AWS/EC2/S3 3. S3 Cloud
a. iOS - browse, manage, download files located in Amazon S3
Browser plug-in tools
1. Amazon S3 Organizer a. https://addons.mozilla.org/en-US/firefox/addon/amazon-s3-organizers3fox/
2. ElasticFox firefox EC2 extension a. http://aws.amazon.com/developertools/609?_encoding=UTF8&jiveRedirect=1 b.
Stand-alone clients
1. Jungledisk a. http://jungledisk.com - Operating System Plug in that facilitates syncing of data
from local computers to Amazon S3 2. s3browser
a. http://s3browser.com - freeware that enables user management and ftp operations for s3
Tool directories
1. http://www.aboutonlinetips.com/amazon-s3-tools/

Code 4 Lib Amazon AWS tutorial – 02 /11 27
8. Cleaning Up – Making sure you don’t leave data / servers
Although Amazon AWS is fairly inexpensive you are charged for servers that are running and for all data that exists on the S3 and EBS systems. Luckily, cleaning up is fairly easy –
1. Terminate all instances 2. Delete all snapshots 3. Remove any remaining EBS volumes 4. Remove any service alerts
That should cover everything we did in this set of tutorials.

Code 4 Lib Amazon AWS tutorial – 02 /11 28
9. More fun things to try
Puppet configuration of EC2 Using Puppet to configure your EC2 systems. I have only just started working on this. If the first set of tutorials was easy and you are wondering what to do with the rest of your time you could try to setup an EC2 server running puppet. Puppet is an automatic server configuration platform. There are some interesting websites that talk about deploying Puppet on the web.
Using Beanstalk to deploy web applications Beanstalk is a new platform offered by Amazon that uses AWS (EC2, S3, ElasticCloud) resources to automatically deploy and scale Tomcat based applications. The service is somewhat limited at the moment but offers some interesting opportunities to run applications without the server management overhead
Running databases using the RDS service Amazon RDS is a relational database service (MySQL only) that supports continuous data protection, automatic full/incremental backups and other database management features. RDS offers you the ability to reduce the services hosted on your amazon EC2 systems. With proper planning, you could move your permanent resources out of EC2 (via RDS and EBS), making your AWS platform more resistant to server issues.
Installing other server applications We only touched the tip of the iceberg of server configuration this morning. There is a lot of configuration and software installation to take care of if you want to see how suitable the AWS platform is for general computing.