instructions to fill section-1 of form i-9 through email
TRANSCRIPT

Instructions to fill Section-1 of Form I-9 through
Email Invitation
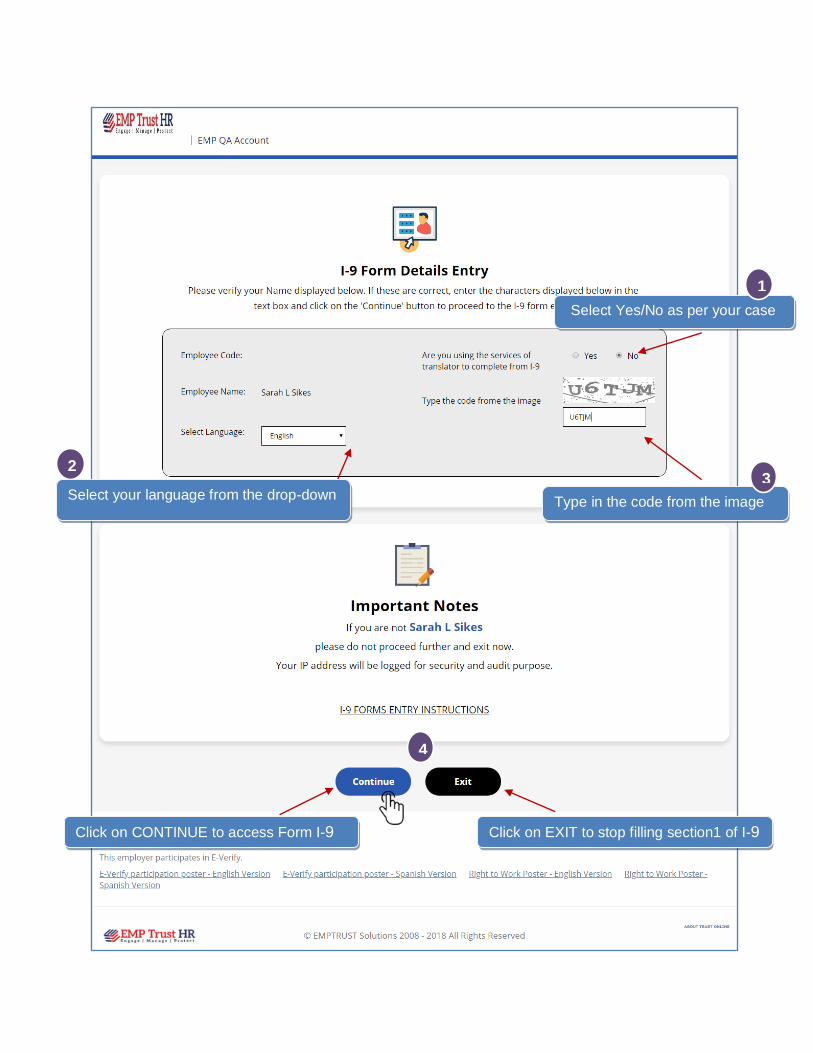
Click on CONTINUE to access Form I-9
2
Click on EXIT to stop filling section1 of I-9
Select your language from the drop-down
Select Yes/No as per your case
1
Type in the code from the image
3
4

Enter your name, address and other
details in the corresponding boxes.
All fields are mandatory.
1 Check the N/A box, only, if any of
the data field is Not Applicable by
you.
2
Click and select your citizenship
status from the options given.
3
Click on SAVE & CONTINUE to
proceed further
4
Click CANCEL to exit
without filling
Section1 of Form I-9

Click here to
view the page
in Spanish
Click here to alter
any details
already entered
Draw your signature here using mouse & click on ‘Save Signature’
Save the signature. To redo, clear the signature and draw again.
1
2
The saved signature
is displayed here.
3

Click to view the I-9
receipt saved
Click to send I-9
Receipt to your
mail Inbox.
Click here to convert
the receipt to PDF,
which can be printed
To upload your proof documents, check the box Click to Exit
from I-9 if not
uploading docs

Once the box is checked, you may select the appropriate proof document type from the list. Then
select the Document file from your system and then upload it. The document type which is not
compatible to the application would be notified.
Click on the down arrow and select
the document type from the pop up list
1
Click on ‘Select’ to choose the
document from your system
2
Close the current window to
successfully complete I-9
section1.
4
Click on UPLOAD to upload the
selected proof document
3
Your selected proof
document is displayed.