instruction manual s500.10 mechanical … fileinstruction manual s500.10 mechanical autobirthing...
TRANSCRIPT
INSTRUCTION MANUAL
S500.10 MECHANICAL AUTOBIRTHING SYSTEM FOR USE WITH THE S-500
ADVANCED CHILDBIRTH SIMULATOR
Gaumard® Scientific 14700 SW 136 St. Miami, FL 33196-5691 e-mail: [email protected] ©2000-2005 Gaumard Scientific All Rights Reserved
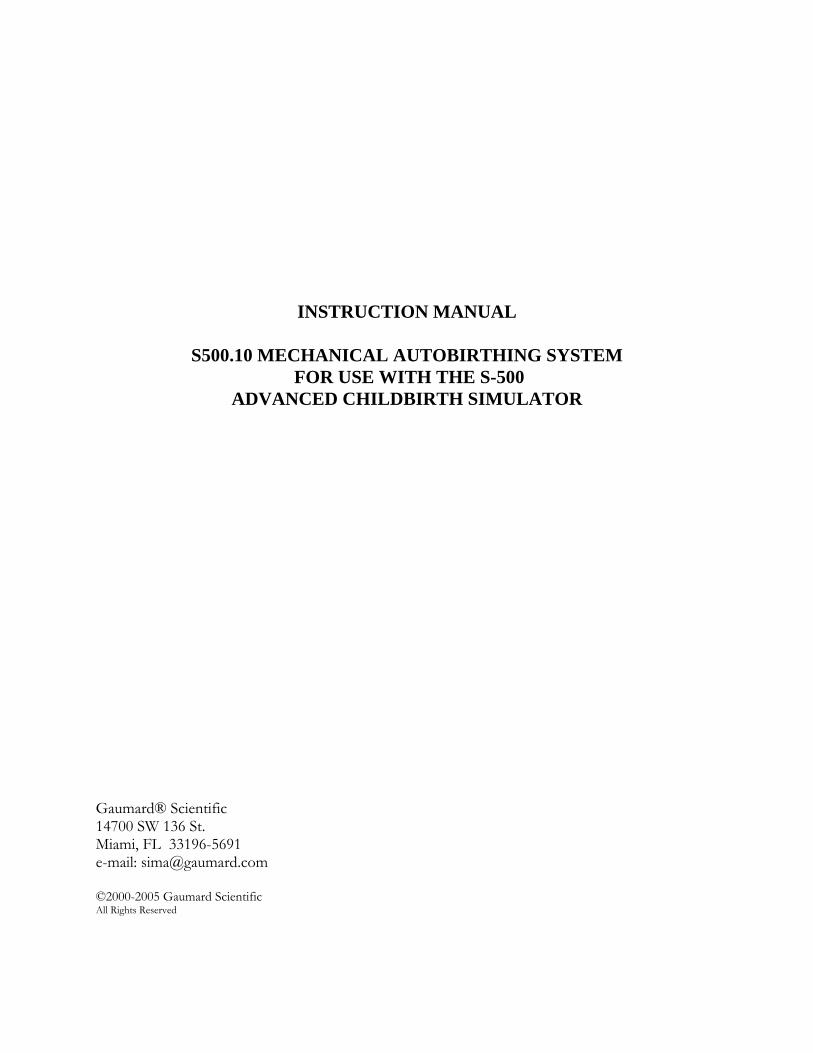
SECTION 1 – PREPARATION FOR USE This AUTOBIRTHING SYSTEM may be used with any S500 GAUMARD Childbirth Simulator purchased since 1989. IT IS PROVIDED WITH THE FOLLOWING:
Removable endplate for attachment of the Mechanical Autobirthing System Mechanical Autobirthing System providing translation and rotation of the fetus Water-based silicone lubricant Two (2) removable cervices that automatically dilate during birth exercises Birthing fetus adapted to accept the Mechanical Autobirthing System Replaceable vulval insert 2 Self-tapping Male Button Snaps Carrying bag
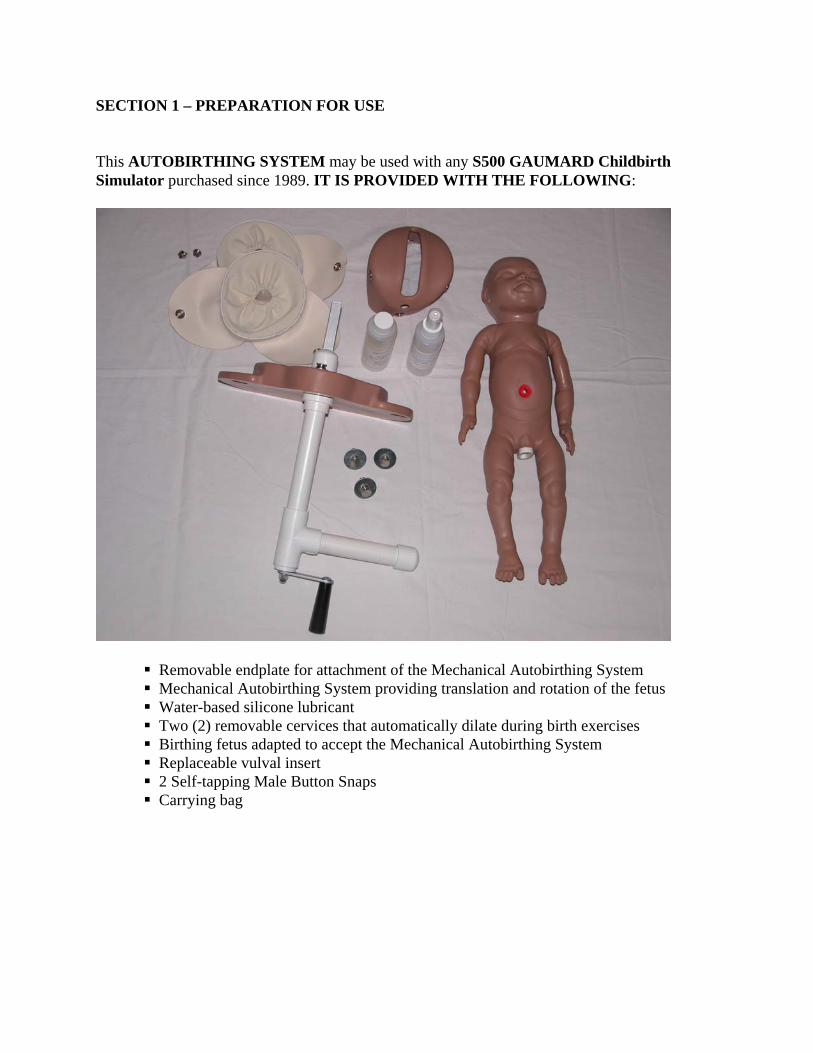
MODIFYING YOUR GAUMARD S500 CHILDBIRTH SIMULATOR Select one of the two dilating cervices provided and place it at the entrance of the birth canal with the "ears" facing into the pelvic cavity NOT into the birthing canal. Note that the dilating cervix is secured to the floor of the pelvic cavity with two snaps. Mark the position of the snaps on the pelvic cavity using a pencil. Select the two mating screw snaps provided in this kit. Position each mating screw snap at the marked locations and screw the snaps into the pelvic cavity. Now snap the dilating cervix into place.
Remove the endplate on your S500 Childbirth Simulator and replace it with the NEW endplate.
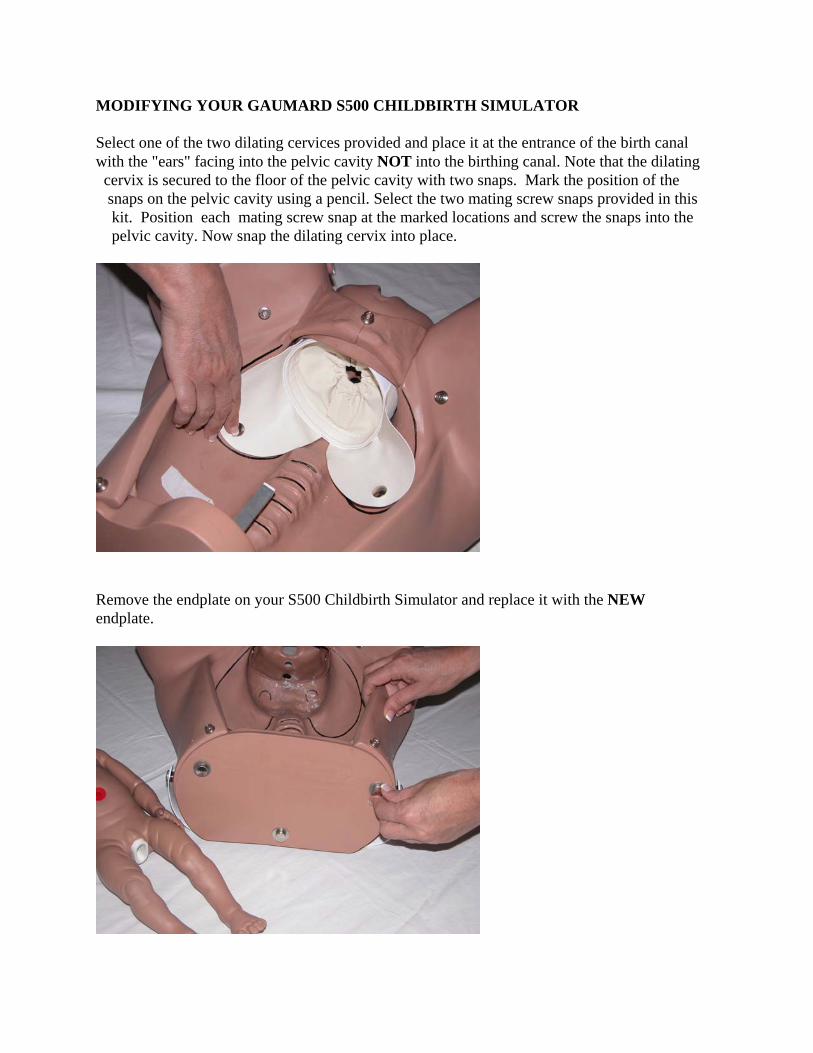
Select the Mechanical Autobirthing device and note that the mechanical crank advances the drive by turning the crank COUNTERCLOCKWISE. Also note that the "tee" handle on the crank provides any desired amount of ROTATION of the fetus at any point during the birthing process. The Mechanical Autobirthing device can be removed from the new endplate and secured with the large locking "C" insert provided.
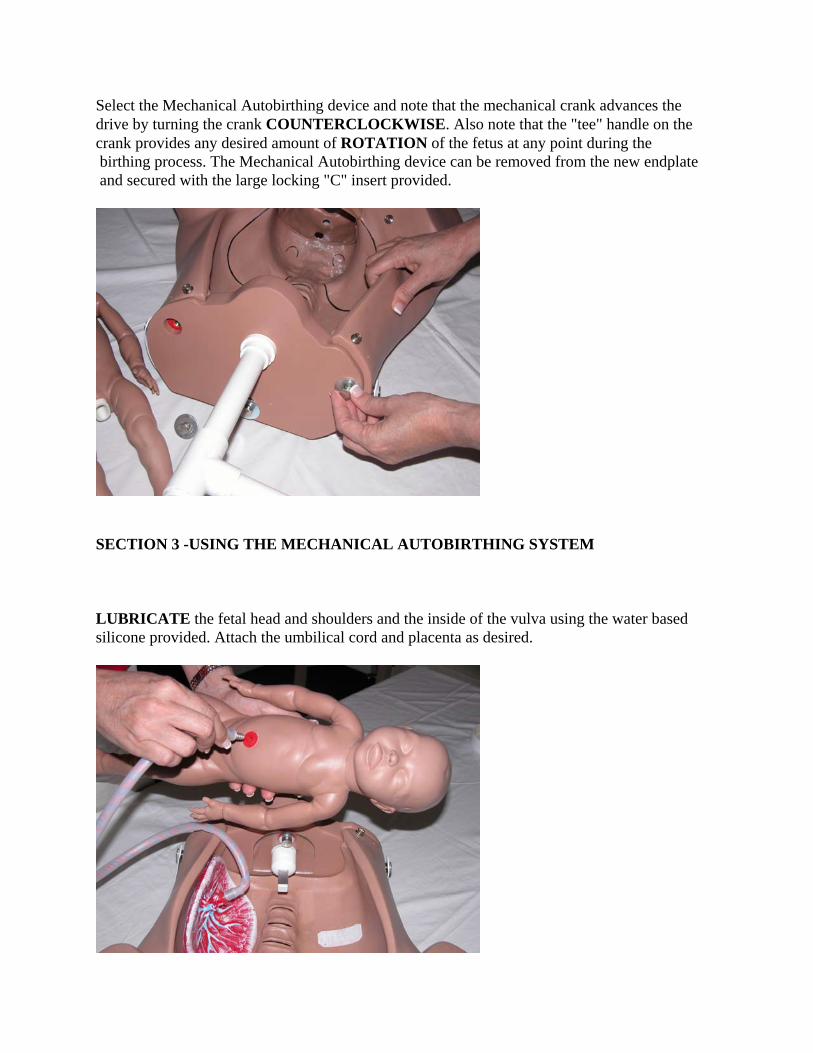
SECTION 3 -USING THE MECHANICAL AUTOBIRTHING SYSTEM LUBRICATE the fetal head and shoulders and the inside of the vulva using the water based silicone provided. Attach the umbilical cord and placenta as desired.
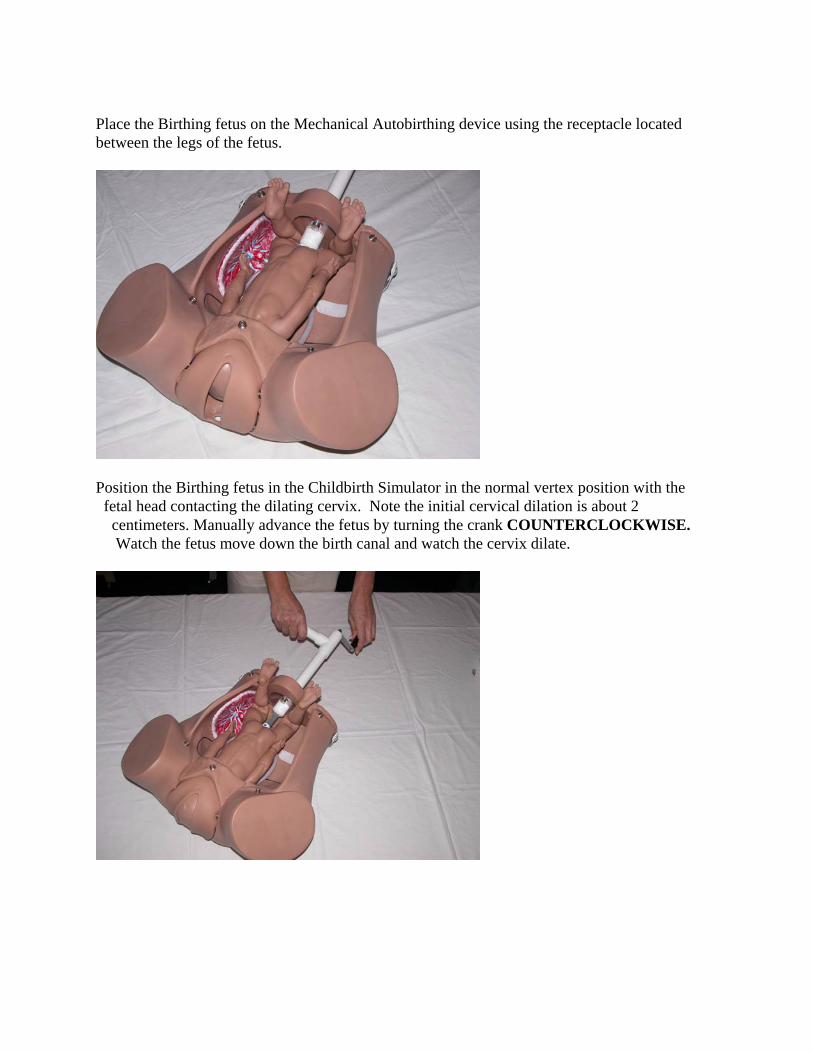
Place the Birthing fetus on the Mechanical Autobirthing device using the receptacle located between the legs of the fetus.
Position the Birthing fetus in the Childbirth Simulator in the normal vertex position with the fetal head contacting the dilating cervix. Note the initial cervical dilation is about 2 centimeters. Manually advance the fetus by turning the crank COUNTERCLOCKWISE. Watch the fetus move down the birth canal and watch the cervix dilate.
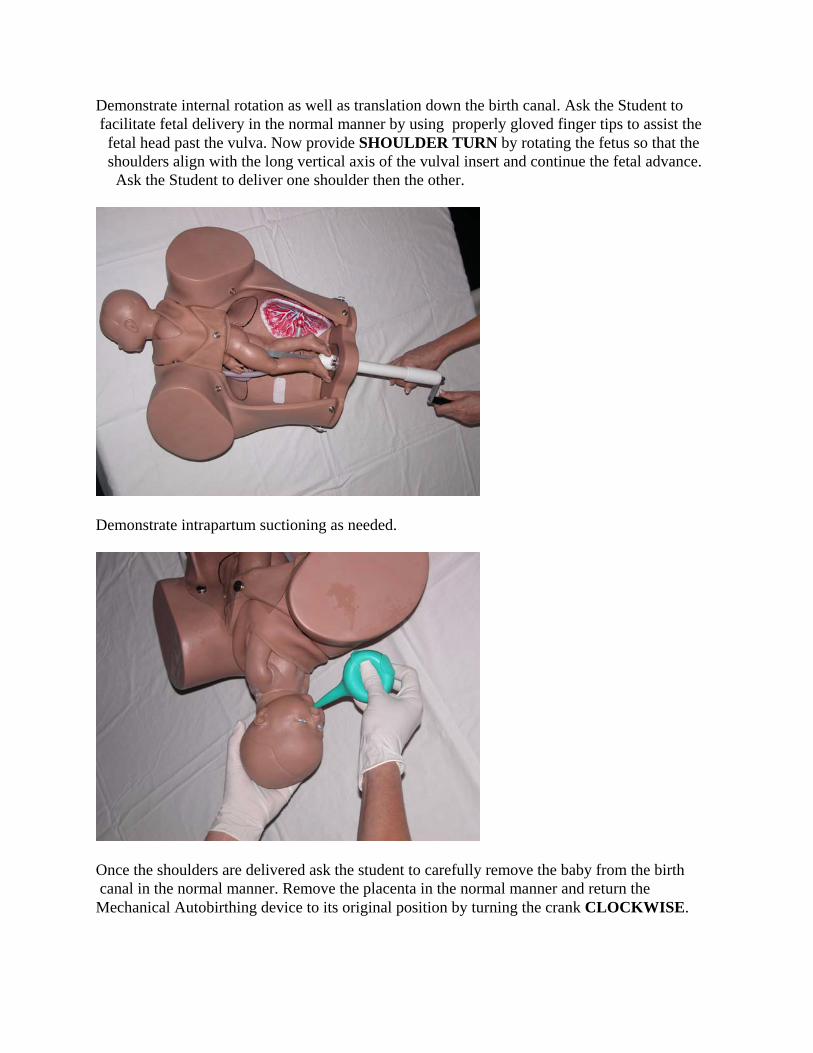
Demonstrate internal rotation as well as translation down the birth canal. Ask the Student to facilitate fetal delivery in the normal manner by using properly gloved finger tips to assist the fetal head past the vulva. Now provide SHOULDER TURN by rotating the fetus so that the shoulders align with the long vertical axis of the vulval insert and continue the fetal advance. Ask the Student to deliver one shoulder then the other.
Demonstrate intrapartum suctioning as needed.
Once the shoulders are delivered ask the student to carefully remove the baby from the birth canal in the normal manner. Remove the placenta in the normal manner and return the Mechanical Autobirthing device to its original position by turning the crank CLOCKWISE.
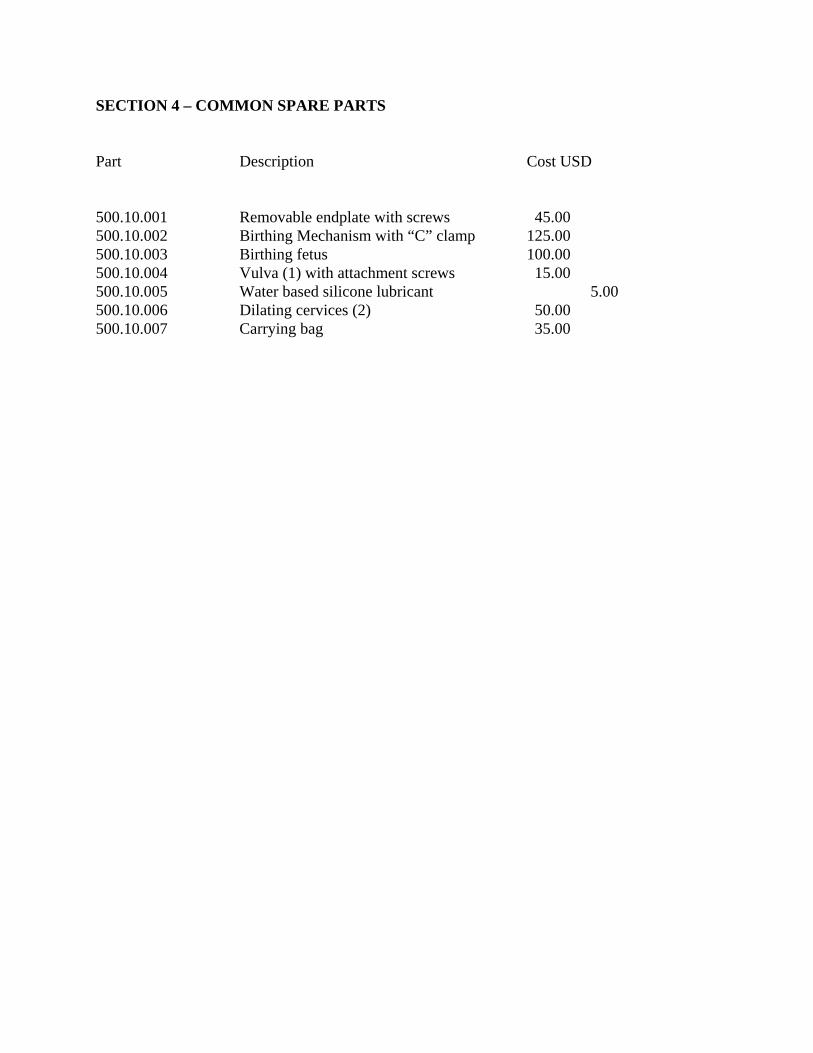
SECTION 4 – COMMON SPARE PARTS Part Description Cost USD 500.10.001 Removable endplate with screws 45.00 500.10.002 Birthing Mechanism with “C” clamp 125.00 500.10.003 Birthing fetus 100.00 500.10.004 Vulva (1) with attachment screws 15.00 500.10.005 Water based silicone lubricant 5.00 500.10.006 Dilating cervices (2) 50.00 500.10.007 Carrying bag 35.00
SECTION 5 - CARE AND MAINTENANCE After use, clean the simulator, removing all traces of any powder. The simulator may be cleaned with a mild detergent or with soap and water. Do not clean with harsh abrasives. Dry thoroughly.
Store the simulator in the provided carrying case Store the manikin in a cool area Do not stack or keep heavy material on the carrying case or box provided by Gaumard Indelible marks made with ballpoint pens, ink, or markers will remain Do not wrap the simulator or any GAUMARD product in newsprint Do not use povidone iodine on this or any other GAUMARD product Replacement parts are available from the manufacturer or from your distributor
SHOULD YOU HAVE ANY QUESTIONS AFTER READING THIS INSTRUCTION MANUAL, PLEASE CONTACT OUR CUSTOMER SERVICE DEPARTMENT FOR FURTHER ASSISTANCE:
(800)882-6655 (Toll Free USA) (305)971-3790/(305)666-8548 (Worldwide)
(305) 667-6085 (Fax)
Internet: www.gaumard.com