installing cisco telepresence manager...installing cisco telepresence manager revised: , ol-13673-04...
TRANSCRIPT

Cisco TelePresence Manager Rele
OL-13673-04
C H A P T E R 6
Installing Cisco TelePresence ManagerRevised: , OL-13673-04First Published: November 27, 2006
Contents• Introduction, page 6-1
• Overview, page 6-2
• Important Considerations, page 6-2
• Installing Cisco TelePresence Manager from DVD, page 6-3
– Required Information and Equipment, page 6-3
– Installation Procedure, page 6-4
– Installation Field Values Defined, page 6-4
• Completing the Initialization Prerequisites, page 6-7
– Changing Unified CM server names to IP addresses, page 6-7
– Configuring Microsoft Exchange for CTS-Manager, page 6-8
– Migrating from Exchange 2003 to Exchange 2007, page 6-12
– Configuring IBM Domino for CTS-Manager, page 6-13
– Configuring Cisco Unified CM for CTS-Manager, page 6-14
• Initializing Cisco TelePresence Manager After Installation, page 6-16
– Required Information and Equipment, page 6-16
– Initialization for Microsoft Exchange Deployments, page 6-17
– Initialization for IBM Domino Deployments, page 6-26
IntroductionThis document explains how to install the Cisco TelePresence Manager software in your network. You will then be able to schedule Cisco TelePresence system meetings through existing Microsoft Outlook messaging software, receive reminders, and connect to a remote meeting site with the touch of a button.
6-1ase 1.5 Administration and Installation Guide

Chapter 6 Installing Cisco TelePresence Manager Overview
To enable these features, you must provide Cisco TelePresence Manager with the contact and access information it requires to connect to and talk with your network. The purpose of this guide is to walk you through each step using the Cisco TelePresence Manager installation DVD and the accompanying wizard help windows.
The tasks for installing the Cisco TelePresence Manager software are described in the following sections:
OverviewSetting up Cisco TelePresence Manager for the first time consists of three procedures, covered in this guide:
• Installing Cisco TelePresence Manager from DVD, page 6-3
The first procedure consists of installing the Cisco TelePresence Manager program files from DVD. The installation requires information about your network and the rules for finding and exchanging information.
• Completing the Initialization Prerequisites, page 6-7
Following installation, you must verify that Cisco Unified Communications Manager and other resources are configured properly for Cisco TelePresence Manager. This section describes adding parameters to Cisco Unified Communications Manager and researching information from the current installation of Cisco Unified Communications Manager that will be used to initialize the Cisco TelePresence Manager installation. For more information refer to Cisco Unified Communications Manager Installation Guide for Cisco TelePresence System.
This section also covers the steps needed to configure Microsoft Exchange and Active Directory, or IBM Domino and Domino Directory Server.
• Initializing Cisco TelePresence Manager After Installation, page 6-16
The final process is initializing Cisco TelePresence Manager to enable access to information sources such as Microsoft Exchange Server for meeting requests from Microsoft Outlook, Active Directory for accessing user and conference room information, and Cisco Unified Communications Manager for conference room availability and telephone support.
Important ConsiderationsBefore you proceed with the installation of Cisco TelePresence Manager, review the following requirements and recommendations:
• Your Cisco TelePresence System endpoints (CTS 1000 and CTS 3000) should be fully installed and configured before installing Cisco TelePresence Manager.
• Cisco Unified Communications Manager (Version 5.1 or 6.0) should already be installed and configured. For more information refer to Cisco Unified Communications Manager Installation Guide for Cisco TelePresence System.
• Microsoft Exchange versions—The following versions are supported by Cisco TelePresence Manager 1.5
– 2003 SP1 or 2003 SP2
– 2007 (Version: 08.00.0685.018) with or without SP1 NOTE: 2007 is supported only with WebDAV
6-2Cisco TelePresence Manager Release 1.5 Administration and Installation Guide
OL-13673-04
Chapter 6 Installing Cisco TelePresence Manager Installing Cisco TelePresence Manager from DVD
– Active Directory 2003 (Version 5.2.3790.3959) on Microsoft Windows 2003 (64-bit edition)
• IBM Domino (Version 7.0, 8.0)
– Domino Directory Version 7.0
• Scheduling Clients supported
– Outlook Version 2003
– Lotus Notes Version 6.5.x, Version 7.0.x, and Version 8.0
• MCS-7845-H2-CTS1 or MCS-7845-I2-CTS1 can be used as your Cisco Media Convergence Server.
• When you install Cisco TelePresence Manager, the Model 7835 Cisco Media Convergence Server hard drive is formatted, and any existing data on the drive is overwritten.
• This release of Cisco TelePresence Manager is designed to work with Microsoft Internet Explorer version 6.0 or later. Cisco cannot guarantee correct system behavior using unsupported browsers.
• Cisco recommends you configure the system using static IP addressing so it will be easy to manage.
• Carefully read the instructions that follow before you proceed with the installation.
Caution Remove the DVD from the DVD drive after the installation/upgrade is complete. Leaving the DVD in the drive can prevent Cisco TelePresence Manager from restarting properly after rebooting the server.
Installing Cisco TelePresence Manager from DVDThis section contains the following topics covering installation:
• Required Information and Equipment, page 6-3
• Installation Procedure, page 6-4
• Installation Field Values Defined, page 6-4
Required Information and EquipmentTo install the Cisco TelePresence Manager system files, the following equipment and malformation needed:
• The Model 7845 Cisco Media Convergence Server that came with Cisco TelePresence Manager, installed and connected to a Domain Name System (DNS) server and your network.
• A management console able to access the Model 7845 Cisco Media Convergence Server.
• The DVD included in your Cisco TelePresence Manager documentation and installation packet. Use the Installation Wizard included on this disk.
• The information, listed in Table 6-1, “Installation Field Definitions”, that includes your system-specific values and parameters.
6-3Cisco TelePresence Manager Release 1.5 Administration and Installation Guide
OL-13673-04

Chapter 6 Installing Cisco TelePresence Manager Installing Cisco TelePresence Manager from DVD
Installation Procedure
Step 1 Insert the Cisco TelePresence Manager installation DVD .
There may be a short delay while the installer validates the integrity of the files on the DVD and configures the server for the operating system and the Cisco TelePresence Manager software.
Caution Remove the DVD from the DVD drive after the installation/upgrade is complete. Leaving the DVD in the drive can prevent Cisco TelePresence Manager from restarting properly after rebooting the server.
Step 2 The installer checks for a prior installation of Cisco TelePresence Manager software. Choose Yes to continue, or No to abort the installation.
Step 3 If you choose Yes to continue the installation, the Installation Wizard opens in the next window. Read and become familiar with the wizard conventions.
Step 4 Click Proceed.
Step 5 Fill in each window with the information defined in Table 6-1, “Installation Field Definitions”.
Step 6 When you are satisfied that the information is correct, click OK in the Configuration Confirmation window to begin the installation process. Be patient while the process takes place.
When the installation is complete, the server reboots. The installer then checks for network connectivity and access to a DNS server. If it cannot find these connections, an error message is displayed. If the installation process completes successfully, the message “The Installation of the Cisco TelePresence Manager Has Completed Successfully” is displayed.
Installation Field Values Defined
Table 6-1 explains in detail the field definitions of the Cisco TelePresence Manager installation process in detail.
Table 6-1 Installation Field Definitions
Installation Fields Description and Usage
Installation Wizard
Proceed: The installation wizard requests necessary configuration information before installing Cisco TelePresence Manager files.
Skip: Skip this wizard and install Cisco TelePresence Manager files without configuration information. After the files are installed and the system reboots, the installation program will request configuration information.
Cancel: Cancel this installation.
6-4Cisco TelePresence Manager Release 1.5 Administration and Installation Guide
OL-13673-04

Chapter 6 Installing Cisco TelePresence Manager Installing Cisco TelePresence Manager from DVD
Autonegotiation Configuration
NIC Speed The speed of the server network interface card (NIC), in megabits per second.
• The possible speeds are 10, 100, and 1000 mbps. Default is 100 mbps.
Note Cisco recommends a NIC speed of at least 100 mbps for best performance.
Duplex Configuration The duplex setting of the server NIC.
• The possible settings are Half and Full. Default is Full.
Note Cisco recommends full duplex for best performance.
DHCP Configuration
Host Name A hostname is an alias that is assigned to an IP address to help identify it.
• Enter a hostname that is unique to your network.
• The hostname can consist of up to 64 characters and can contain alphanumeric characters and hyphens.
IP Address The IP address uniquely identifies a server on your network.
• Enter the IP address in the form ddd.ddd.ddd.ddd, where ddd can have a value from 0 to 255 (except 0.0.0.0).
IP Mask The IP subnet mask of this machine. The subnet mask together with the IP address defines the network address and the host address.
• Enter the IP mask in the form ddd.ddd.ddd.ddd, where ddd can have a value from 0 to 255 (except 0.0.0.0).
Valid example: 255.255.240.0.
Invalid example: 255.255.240.240.
GW Address A network point that acts as an entrance to another network. Outbound packets are sent to the gateway that will forward them to their final destination.
• Enter the IP address of the gateway in the format ddd.ddd.ddd.ddd, where ddd can have a value from 0 to 255 (except 0.0.0.0).
Note If you do not have a gateway, you must still fill in this field by setting it to 255.255.255.255. Not having a gateway may limit you to communicating only with devices on your subnet.
DNS Client Configuration You will be prompted to enter DNS server information. A DNS server is a device that resolves a hostname into an IP address or an IP address into a hostname.
• If you do not have a DNS server, choose No. When DNS is disabled, you should enter only IP addresses (not hostnames) for all network devices in your Cisco TelePresence Manager network.
Note If you have a DNS server, Cisco recommends choosing Yes to enable DNS. Disabling DNS limits the system’s ability to resolve some domain names.
Table 6-1 Installation Field Definitions (continued)
Installation Fields Description and Usage
6-5Cisco TelePresence Manager Release 1.5 Administration and Installation Guide
OL-13673-04

Chapter 6 Installing Cisco TelePresence Manager Installing Cisco TelePresence Manager from DVD
Primary DNS Cisco TelePresence Manager contacts this DNS server first when attempting to resolve hostnames. This field is mandatory if DNS is set to yes.
When a primary DNS server fails, Cisco TelePresence Manager will attempt to connect to the secondary DNS server.
• Enter the IP address in dotted decimal format as ddd.ddd.ddd.ddd, where ddd can have a value from 0 to 255 (except 0.0.0.0).
Secondary DNS (optional)
Domain A sequence of case-insensitive ASCII labels separated by dots (for example, “cisco.com”)—defined for subtrees in the Internet Domain Name System and used in other Internet identifiers, such as hostnames, mailbox names, and URLs.
Administrative Login Configuration
Admin ID The username for the Cisco TelePresence Manager Administrator. This is the administrator login that includes superuser permissions.
• Ensure that the name is unique. It must start with a lowercase alphanumeric character and can contain alphanumeric characters (uppercase and lowercase), hyphens, and underscores.
Caution The admin ID cannot be changed after installation without reinstalling Cisco TelePresence Manager. Record it for safekeeping.
Password / Confirm A password that allows the administrator to log into Cisco TelePresence Manager.
• The password must be at least six characters long and maximun of 31 characters. It must start with a lowercase alphanumeric character, using English characters only. International characters are not supported in this version.
This field can be changed at Cisco TelePresence Manager web interface. Record it for safekeeping.
Caution If this password is lost, you must reinstall Cisco TelePresence Manager to regain access.
Certificate Signing Request Configuration
A certificate signing request (CSR) is a message sent from an applicant to a certificate authority in order to apply for a digital identity certificate.
• These values create a CSR for the server where the certificate will be installed.
Organization Your company or organization name.
Unit Your business unit, group, or organizational unit name.
Location The physical location of the organization, most often a city.
State The region, state, province, or other region where the organization resides.
Country Your company or organization country of record.
Table 6-1 Installation Field Definitions (continued)
Installation Fields Description and Usage
6-6Cisco TelePresence Manager Release 1.5 Administration and Installation Guide
OL-13673-04

Chapter 6 Installing Cisco TelePresence Manager Completing the Initialization Prerequisites
Completing the Initialization PrerequisitesOnce installation is completed, you must initialize the installation. Before you proceed with initialization, the servers and applications within your telecommunications network must be configured so that Cisco TelePresence Manager can find the resources and information needed to initialize the installation. These servers and applications may include one or more of the following:
• Microsoft Exchange 2003
• Microsoft Exchange 2007
• Active Directory on Windows server 2003
• Microsoft Internet Explorer 6.x or higher
• Cisco Unified Communications Manager 6.0 or higher
• IBM Domino version 7.0 or 8.0
• Domino Directory server version 7.0, 8.0
Note When you run the Initialization wizard, network connections are tested. A test connection may fail if you install Cisco TelePresence Manager in a sub-net that does not have access to your DNS server.
If you see the test connection failure message you may need to specify IP addresses for your Cisco Unified Communications Manager server(s), as well as other network devices. You can change any server name values in Cisco Unified Communications Manager using the following procedure:
Changing Unified CM server names to IP addresses
Step 1 Log into Cisco Unified Communications Manager as an Administrator.
Step 2 Choose the Server option from the System menu.
Step 3 Click Find to discover all the servers in your Cisco Unified Communications Manager cluster.
Network Time Protocol Client Configuration
NTP is used to synchronize the clocks on Cisco IP telephony servers with an external network time server that uses NTP.
NTP Server 1 Enter the hostname or IP address of one or more NTP server.
• NTP Server 1 value is mandatory; NTP Servers 2–5 are optional.
Tip Cisco strongly recommends that you enter the NTP server by which Cisco Unified CM synchronizes its clock as the primary NTP server. If these servers are out of synchronization, Cisco TelePresence Manager will not operate properly.
NTP Servers 2–5
Database Access Security Configuration
Cisco TelePresence Manager uses the security password to communicate with its database.
Security Password / Confirm • The password must be at least six characters long and a maximum of 31 characters; it must start with a lowercase alphanumeric character., using English characters only.
Table 6-1 Installation Field Definitions (continued)
Installation Fields Description and Usage
6-7Cisco TelePresence Manager Release 1.5 Administration and Installation Guide
OL-13673-04

Chapter 6 Installing Cisco TelePresence Manager Completing the Initialization Prerequisites
Change any hostnames to IP addresses.
Note Be sure you specify an IP address, rather than a hostname in Cisco TelePresence Manager’s System Configuration -> Cisco UCM Host field.
The procedures in the next section must be completed before initializing Cisco TelePresence Manager.
For more information about these prerequisites, refer to Cisco Unified Communications Manager Installation Guide for Cisco TelePresence System.
Configuring Microsoft Exchange for CTS-Manager• If you are using secure mode a certificate request from the Microsoft Exchange Server must exist.
– If a certificate was not requested when Microsoft Exchange was installed, you can follow the procedure described in the tutorial found at the following Microsoft Exchange URL:http://www.msexchange.org/tutorials/Securing-Exchange-Server-2003-Outlook-Web-Access-Chapter5.html
– See the sections “Installing the Microsoft Certificate Service” and “Creating the Certificate Request.”
– Make a copy of the certificate and place it in a folder accessible to the computer with browser access to the Cisco TelePresence Manager server.
• A copy of the certificate for Active Directory exists.
– To request a certificate for Active Directory, you can follow these steps:
1. By default, the certificate file is named _.crt. An enterprise certificate authority (CA) automatically publishes the root certificates, and enterprise domain controllers automatically enroll for all domain controller certificates.
2. Make sure the certificate, the CA, and the CA web interface are all installed on the same server. Using Internet Explorer, connect to https://<CA server>/certsrv.
3. Authenticate as the administrator, making sure you specify the proper domain, for example, demotest\administrator.
4. Choose Download CA Certificate, using Distinguished Encoding Rules and the encoding method.
– Make a copy of the certificate and place it in a folder that is accessible to the computer that has browser access to the Cisco TelePresence Manager server.
Deploying with Microsoft Exchange 2003
Step 1 Create an account in Microsoft Exchange 2003 for CTS-Manager, e.g. ctmmanaccount.
Step 2 Provide an adequate mailbox quota for the ctmmanaccount. Cisco recommends providing at least 1 GB of mailbox quota for a deployment of up to 125 Cisco TelePresence System endpoints. Additional mailbox quota is recommended if feasible.
Step 3 Log into the ctmmanaccount once to verify it is set up correctly.
6-8Cisco TelePresence Manager Release 1.5 Administration and Installation Guide
OL-13673-04

Chapter 6 Installing Cisco TelePresence Manager Completing the Initialization Prerequisites
Step 4 Create an account in Microsoft Exchange for each Cisco TelePresence System endpoint. You can use ‘Active Directory Users and Computers’ to create the room accounts, or use any custom script to create the room account.
Caution In Microsoft Exchange software, some special characters are not supported in Recipient Policy Exchange server name, mailbox name, etc. These special characters will also not be supported by CTS-MAN.Refer to the Microsoft KP for specific information on characters:http://support.microsoft.com/default.aspx?scid=kb;EN-US;841091Exchange 2007 Informationhttp://technet.microsoft.com/en-us/library/dd285491.aspxhttp://technet.microsoft.com/en-us/library/dd285491.aspx
Step 5 Log into the room account once using Outlook Web Access (OWA), or Outlook 2003. This must be done or the room mailbox may not be set up properly in Exchange.
Step 6 The Cisco TelePresence Manager account (e.g. ctmmanaccount) must have read permission on the Calendar folder for each room’s mailbox. You can use Outlook 2003 to set Calendar Properties (the Permissions tab), or use Active Directory (“Full mailbox access” permissions).
Step 7 Verify the Cisco TelePresence Manager account has permissions for all room accounts.
a. Use a supported browser and log onto the room account with OWA (http://<exchange ip address>/exchange/<roomaccountname>)
b. Log in using the Cisco TelePresence Manager account (e.g. ctmmanaccount)
c. Validate the setup by sending a test email to any user in the same domain. Validate the user received the email.
Deploying with Microsoft Exchange 2007
Microsoft Exchange management tools can be found in the start menu in the Exchange server - “Start > All Programs > Microsoft Exchange Server 2007”. There are 2 tools available as options:
• Exchange Management Console – GUI version which has online help.
• Exchange Management Shell – shell version that can be useful for scripting.
Caution In Microsoft Exchange software, some special characters are not supported in Recipient Policy Exchange server name, mailbox name, etc. These special characters will also not be supported by CTS-MAN.Exchange 2007 Informationhttp://technet.microsoft.com/en-us/library/dd285491.aspxhttp://technet.microsoft.com/en-us/library/dd285491.aspx
Step 1 Create a user account in Exchange for CTS-Manager (e.g. ctsmanaccount).
The user account is created from “Exchange Management Console”, by doing the following:
a. Select Recipient Configuration > Mailbox, right-click and select “New Mailbox”
6-9Cisco TelePresence Manager Release 1.5 Administration and Installation Guide
OL-13673-04

Chapter 6 Installing Cisco TelePresence Manager Completing the Initialization Prerequisites
b. Select “User Mailbox” type and follow the dialog to create the mailbox.
Step 2 Provide an adequate mailbox quota for the ctmmanaccount. Cisco recommends providing at least 1 GB of mailbox quota for a deployment of up to 125 Cisco TelePresence System endpoints. Additional mailbox quota is recommended if feasible.
Step 3 Log into the CTS-Manager mailbox once to verify the user mailbox is set up correctly.
Step 4 Create an account in Exchange for each Cisco TelePresence System endpoint. Use one of the following methods:
a. In “Exchange Management Console” (EMC), select “Recipient Configuration > Mailbox”, right-click and select “New Mailbox”. Select “Room Mailbox” type and follow the dialogs to create the mailbox.
b. Run “Exchange Management Shell” (EMS) cmdlet to create a Room mailbox / account
Step 5 The CTS-Manager account needs to have full access on the Calendar folder of each room mailbox, or at minimum it needs to have read permission. Using EMS, run one of the 2 cmdlets in the following based on your preference:
a. Add-mailboxpermission -identity “TelepresenceRoom9” -accessRights FullAccess -user ctmperf\ctsmanaccount
b. Add-mailboxpermission -identity “TelepresenceRoom9” -accessRights ReadPermission -user ctmperf\ctsmanaccount
You can check the current permission setting of a Room by running one of the following cmdlets:
• Get-mailbox -server tsbu-ctmpc19 | get-mailboxpermission
• Get-mailboxpermission –identity TelepresenceRoom9
Step 6 The “DeleteSubject” and “AddOrganizerToSubject” properties in room mailbox calendar setting are set to true by default in Exchange 2007. This means the meeting subject line will be replaced with the organizer's username. Optionally, these parameters can be set to false, in order for the meeting to be displayed on the IP Phone the same way as it was with Exchange 2003. The EMS cmdlets to do these are:
a. Set-MailboxCalendarSettings -Identity TelepresenceRoom9 -DeleteSubject $false
b. Set-MailboxCalendarSettings -Identity TelepresenceRoom9 -AddOrganizerToSubject $false
Step 7 This step is required only if Rooms are to have auto accept configuration.
a. Set Auto-accept using EMS.
Note This works only with room mailbox, not with user mailbox.
Set-MailboxCalendarSettings -Identity TelepresenceRoom9 -AutomateProcessing AutoAccept
b. Check if Auto-accept has been configured for the room.
Get-MailboxCalendarSettings -Identity TelepresenceRoom9 | fl
Step 8 Log into room mailbox once using Outlook Web Access (OWA) or Outlook 2007. This is an important step, until which room mailbox will not be setup appropriately in MS Exchange. In Exchange 2007, you won’t be able to directly log on to the room* mailbox using the room username, because the user account of the room mailbox is disabled by default. There are 2 possible scenarios (based on the decision made in step 5):
6-10Cisco TelePresence Manager Release 1.5 Administration and Installation Guide
OL-13673-04

Chapter 6 Installing Cisco TelePresence Manager Completing the Initialization Prerequisites
Note *Only when mailbox is created as “Room Mailbox” type. If mailbox is created as “User Mailbox” type, then it would be the same step as it is with Exchange 2003 to log on to the mailbox.
a. The CTS-Manager user (e.g. ctsmanaccount) has been given full access to the room mailboxes. In this case, use ctsmanaccount credential to log on to each room mailbox, by using one of these methods below:
• First log into ctsmanaccount mailbox using OWA, using a supported web browser (IE 6.x or above) and typing: http://<exchange ip address>/owa/. Once logged on as ctsmanaccount user, click on the “ctsmanaccount” tab on the top, enter the room account name, and click “Open”. It would open the room mailbox in another window.
• Alternatively, you can log on to room account using either Outlook 2007 or Outlook Web Access:http://<exchange ip address>/owa/<room_name@domain_name>. Again, here you will need to log on using ctsmanaccount credential.
b. The second scenario is where the ctsmanaccount was only given read permission to the room mailboxes. In such case, you need to have a third user account which has “full access” to the room mailboxes, let’s say this user is “Joe Smith”. Use Joe Smith credential to log on to his mailbox using Outlook 2007. See figure 2 as a reference, and follow these steps:
• i. Once logged on, click on the Calendar on the left pane.
• ii Click Open a Shared Calendar … and enter the room name.
• iii The room calendar would show up under People’s Calendar on the left pane. In the screen-shot, the room is TelepresenceRoom10. Right-click on the room name, and select Properties.
• iv. Click Permissions tab
• v. Click on Add and select ctsmanaccount account name.
• vi. In “Permissions” > “Permission Level” drop-down field, select Reviewer.
• vii.In “Permissions” > “Read” section, check Full Details.
• viii. Click OK.
• ix. Repeat step ii to viii for each Room that will be managed by CTS-Manager.
Step 9 Form-based authentication (FBA) is enabled by default in Exchange 2007. In order for Cisco TelePresence Manager to work, we need to disable FBA, perform the following steps:
a. Go to EMC > Server Configuration > Client Access > Outlook Web Access > Exchange (Default Web Site) > Properties > Authentication tab
b. Select “Use one or more standard authentication method.”
c. Check “Integrated Windows Authentication” and/or “Basic Authentication (password is sent in clear text)” boxes.
d. Click OK on the warning dialog box that says IIS restart is required.
e. Run “iisreset /noforce” from a command prompt, or go to “Services Manager” and restart “IIS Admin service.”
Step 10 Open IIS Manager and follow these steps:
a. Go to “Internet Information Services” > [server_name] > “Web Service Extension”
b. Select “WebDAV” and click the “Allow” button, if it is showing “Prohibited” in Status.
6-11Cisco TelePresence Manager Release 1.5 Administration and Installation Guide
OL-13673-04

Chapter 6 Installing Cisco TelePresence Manager Completing the Initialization Prerequisites
Step 11 Open “IIS Manager” and verify that the Web Sites Authentication Method is configured correctly for “Exchange” web site:
a. In “IIS Manager”, go to “Internet Information Services” > [server_name] > “Web Sites” > “Exchange”
b. Right-click on the Exchange and select Properties.
c. Go to “Directory Security” tab
d. In “Authentication and access control” section:
• Click the Edit button
• Check the desired authentication access method - “Integrated Windows Authentication” and/or “Basic Authentication (password is sent in clear text)” boxes.
• Click OK
e. This step is required only if you need to configure CTS- Manager with the non-secure binding to the Exchange server. In “Secure communications” section:
• Click the Edit button
• Uncheck the “Require secure channel (SSL)” box, and click OK.
f. Click OK on all the dialog boxes that follow.
Step 12 Repeat the previous step for the “Default Web Site” setting.
Step 13 Make sure the system clock in the Exchange server is synchronized to the same NTP server used by CTS-Manager.
Migrating from Exchange 2003 to Exchange 2007
In Exchange 2003, there is no distinction between “User Mailbox” and “Room Mailbox” types. All mailboxes are created as “User Mailbox” in Exchange 2003. When you migrate the TelePresence room mailbox accounts from Exchange 2003 to Exchange 2007, you need to convert them into “Room Mailbox” type, especially if they are to be configured with Auto-Accept enabled.
Use the following procedure to migrate from Exchange 2003 to Exchange 2007:
Step 1 Install and configure the Exchange 2007 server.
Step 2 Migrate the CTS-Manager User mailbox to the Exchange 2007 server.
Step 3 Point CTS-Manager to the Exchange 2007 server.
Once step 1-3 are complete the system will reboot.
Step 4 After the system has completed rebooting, shut down the CTS-Manager server.
This is important so that users may not use the system during migration.
Step 5 Migrate all Cisco TelePresence endpoints to the Exchange 2007 server.
Verify that all Cisco TelePresence endpoints are of type RoomMailbox, otherwise AutoAccept cannot be enabled.
After the migration is completed, add full access permission for the delegates to any proxy.
6-12Cisco TelePresence Manager Release 1.5 Administration and Installation Guide
OL-13673-04

Chapter 6 Installing Cisco TelePresence Manager Completing the Initialization Prerequisites
Configuring IBM Domino for CTS-Manager
Step 1 Create an account in IBM Domino for CTS- Manager (e.g. ctm account).
Use information on http://www-12.lotus.com/ldd/doc/domino_notes/7.0/help7_admin.nsf/Main?OpenFrameSet to create user account. Refer to ‘Setting up Notes users’ section for specific details.
Note Internet password for this account MUST be set.
Step 2 Provide an adequate mailbox quota for the CTS-Manager account.
Note Cisco System recommends setting up a CTS-Manager account with at least 1 GB of mailbox quota for a deployment of up to 50 rooms. Additional mailbox quota allocated to this user is recommended if feasible.
Step 3 Log into the CTS-Manager account once to verify it is setup correctly.
The CTS-Manager account needs to have read permission for each resource reservation database which contains any Cisco TelePresence room. Select the specific resource reservation database and right click to select Database>Access Control. Choose the account as specified below and set permissions per the instructions.
The CTS-Manager account also needs to have editor permissions to its own mailbox. This is required to allow storing copies of emails sent out in “Sent Items” folder.
Step 4 Create a room resource in IBM Domino for each TelePresence room. The steps might involve creating a new resource reservation database, creating a new site profile document and adding Cisco TelePresence rooms for Domino.
Note You can create a room resource only using an administrative privilege account.
Step 5 CTS-Manager uses Java Notes API to retrieve schedule information. This requires the following server tasks to be running on the Domino server.
• DIIOP Server
• HTTP Server
• LDAP Server
Directory Assistance in a Domino Deployment
Directory Assistance provides seamless authentication and authorization of Domino users existing outside the Domino directory. In order to support external LDAP users logging into CTS-Manager as an Administrator or Concierge, your Domino Administrator must configure Directory Assistance to authenticate users in the external directory. In addition, users, with login privileges, must have their member groups assigned to the CTS-Manager Access Management roles.
Please refer to your Domino Administration documentation on how to configure Directory Assistance to use an external LDAP directory.
In order to verify that DA is configured correctly, perform an ldap search pointing to the Domino LDAP directory using the search filter and based dn of the external directory. This should return the user details in the external directory.
6-13Cisco TelePresence Manager Release 1.5 Administration and Installation Guide
OL-13673-04

Chapter 6 Installing Cisco TelePresence Manager Completing the Initialization Prerequisites
In addition, if the external directory also has a mail server setup (e.g. Exchange), DA will resolve the email ids of the external users. To verify this, login to the Domino client as a Domino user and try scheduling a meeting with the external user as the invitee. External users should be found in the meeting scheduling view.
Configuring Cisco Unified CM for CTS-Manager
For Deployments Using Microsoft Exchange 2003
• A Cisco Unified Communications Manager certificate must be accessible for CTS-Manager to communicate with Unified CM.
– A Cisco Unified Communications Manager certificate is available from Internet Explorer, with the file extension .der. This certificate was generated when you first installed Cisco Unified Communications Manager.
– Make a copy of the certificate and place it in a folder that is accessible to the computer that has browser access to the Cisco TelePresence Manager server.
Step 1 Create an application user for CTS-Manager. Refer to your Cisco Unified Communications Manager Installation Guide for Cisco TelePresence System for the steps to perform this. Save these credentials for the CTS-Manager initialization procedure that follows.
Assign all TelePresence units/IP phone devices to this user profile. MAC Address of each unit and shared phone should be added to the user profile. Refer the Unified CM Administration Guide for steps.
Step 2 Create a user group for CTS-Manager
Assign the following roles to this user group:
a. Standard AXL API access
b. Standard CTI enabled
c. Standard serviceability
d. Service name Cisco Unified CM is CCM Admin Users.
Step 3 Add the application user created in Step 1 to the new user group.
Step 4 Verify all required services are activated and running on Cisco Unified CM.
It is required to have “Cisco AXL We” should be running on Cisco Unified CM Publisher node. “Cisco CTIManager” should be activated and running, but could be running on any node inside the same CCM Cluster. Please refer to Cisco Unified CM Guide for details on service activation and start/stop.
Step 5 Download the certificate for Cisco Unified CM using IE Browser.
You are prompted with a certificate when your browser is pointed to the Cisco Unified CM server. You can save cert file on your local machine. This is used later when initializing the Cisco Telepresence Manager.
Note If a room’s display name is changed once CTS-Manager is up and running, restart CTS-Manager so that CTS-Manager reads new display name.
If a room is added to CiscoUnified CM first and then to Exchange, restart CTS-Manager so that CTS-Manager can subscribe to the newly added room.
6-14Cisco TelePresence Manager Release 1.5 Administration and Installation Guide
OL-13673-04
Chapter 6 Installing Cisco TelePresence Manager Completing the Initialization Prerequisites
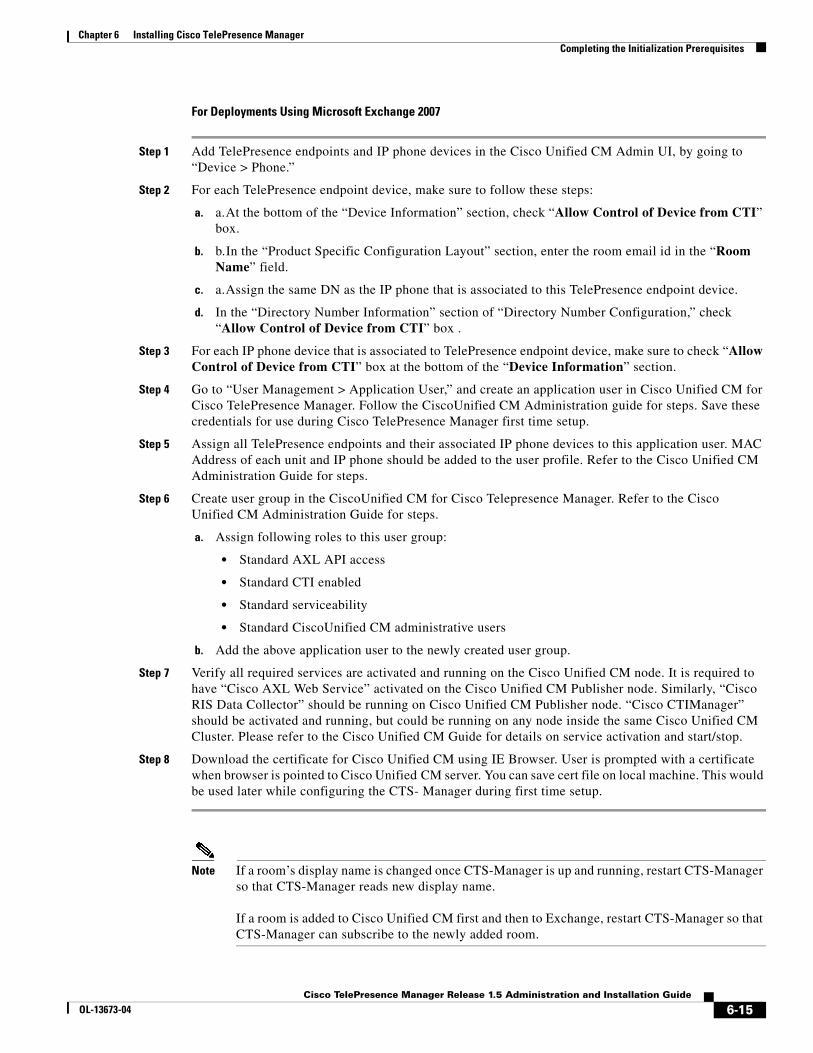
For Deployments Using Microsoft Exchange 2007
Step 1 Add TelePresence endpoints and IP phone devices in the Cisco Unified CM Admin UI, by going to “Device > Phone.”
Step 2 For each TelePresence endpoint device, make sure to follow these steps:
a. a.At the bottom of the “Device Information” section, check “Allow Control of Device from CTI” box.
b. b.In the “Product Specific Configuration Layout” section, enter the room email id in the “Room Name” field.
c. a.Assign the same DN as the IP phone that is associated to this TelePresence endpoint device.
d. In the “Directory Number Information” section of “Directory Number Configuration,” check “Allow Control of Device from CTI” box .
Step 3 For each IP phone device that is associated to TelePresence endpoint device, make sure to check “Allow Control of Device from CTI” box at the bottom of the “Device Information” section.
Step 4 Go to “User Management > Application User,” and create an application user in Cisco Unified CM for Cisco TelePresence Manager. Follow the CiscoUnified CM Administration guide for steps. Save these credentials for use during Cisco TelePresence Manager first time setup.
Step 5 Assign all TelePresence endpoints and their associated IP phone devices to this application user. MAC Address of each unit and IP phone should be added to the user profile. Refer to the Cisco Unified CM Administration Guide for steps.
Step 6 Create user group in the CiscoUnified CM for Cisco Telepresence Manager. Refer to the Cisco Unified CM Administration Guide for steps.
a. Assign following roles to this user group:
• Standard AXL API access
• Standard CTI enabled
• Standard serviceability
• Standard CiscoUnified CM administrative users
b. Add the above application user to the newly created user group.
Step 7 Verify all required services are activated and running on the Cisco Unified CM node. It is required to have “Cisco AXL Web Service” activated on the Cisco Unified CM Publisher node. Similarly, “Cisco RIS Data Collector” should be running on Cisco Unified CM Publisher node. “Cisco CTIManager” should be activated and running, but could be running on any node inside the same Cisco Unified CM Cluster. Please refer to the Cisco Unified CM Guide for details on service activation and start/stop.
Step 8 Download the certificate for Cisco Unified CM using IE Browser. User is prompted with a certificate when browser is pointed to Cisco Unified CM server. You can save cert file on local machine. This would be used later while configuring the CTS- Manager during first time setup.
Note If a room’s display name is changed once CTS-Manager is up and running, restart CTS-Manager so that CTS-Manager reads new display name.
If a room is added to Cisco Unified CM first and then to Exchange, restart CTS-Manager so that CTS-Manager can subscribe to the newly added room.
6-15Cisco TelePresence Manager Release 1.5 Administration and Installation Guide
OL-13673-04

Chapter 6 Installing Cisco TelePresence Manager Initializing Cisco TelePresence Manager After Installation
For Deployments Using IBM Domino
Step 1 Create an application user in CiscoUnified CM for CTS-Manager. Follow the Cisco Unified CM Administration guide steps. Save these credentials for use during CTS-Manager first time setup.
Assign all TelePresence units and IP phone devices to this user profile. MAC Address of each unit and shared phone should be added to the user profile. Refer to Cisco Unified Call Manager Administration Guide for steps.
Step 2 Create user group in Cisco Unified CM for CTS-Manager. Refer to the Cisco Unified CM Administration Guide for steps.
a. Assign the following roles to this user group:
• Standard AXL API access
• Standard CTI enabled
• Standard Serviceability
• Standard CiscoUnified CM administrative users.
b. Add above application user to newly created user group
Step 3 Verify all required services are activated and running on Cisco Unified CM node. It is required to have “Cisco AXL Web Service” activated on CiscoUnified CM Publisher node. Similarly, “Cisco RIS Data Collector” should be running on Cisco Unified CM Publisher node. CTS-Manager must be active and running, but could be running on any node inside the same Cisco Unified CM Cluster. Please refer to the CiscoUnified CM Guide for details on service activation and start/stop.
Step 4 Download the certificate for Cisco Unified CM using IE Browser. User is prompted with a certificate when browser is pointed to the Cisco Unified CM server. You can save cert file on local machine. This would be used later while configuring the CTS-Manager during first time setup.
Initializing Cisco TelePresence Manager After InstallationThis section contains the following topics pertaining to initialization:
• Required Information and Equipment, page 6-16
• Initialization Procedure, page 6-17
To initialize Cisco TelePresence Manager, you must enter contact and access information for your Microsoft Exchange Server, Lightweight Directory Access Protocol (LDAP) server, and Cisco Unified CM in a series of one-time-only, post-installation initialization windows.
Required Information and EquipmentTo set up and initialize Cisco TelePresence Manager, you need the information entered or created in Completing the Initialization Prerequisites, page 6-7.
Additionally, Cisco TelePresence Manager must have network access to a computer running Windows Explorer version 6.0 (or later), Microsoft Exchange Server and Active Directory server or IBM Domino Server and Domino Directory Server, and Cisco Unified Communications Manager.
6-16Cisco TelePresence Manager Release 1.5 Administration and Installation Guide
OL-13673-04

Chapter 6 Installing Cisco TelePresence Manager Initializing Cisco TelePresence Manager After Installation
Initialization ProcedureThe system administrator can access and change the information after initialization from the Configuration tab of the Cisco TelePresence Manager web interface.
Initialization for Microsoft Exchange Deployments
Step 1 At the console running Microsoft Explorer, type the Cisco TelePresence Manager server name or the IP address. See the following example.
https:// server hostname or IP address
Step 2 The Initial Preferences window is displayed. Choose the timezone from the drop-down menu. The timezone you choose should be the one you are located in. Click Continue.
Figure 6-1 Initial Preferences Window
Step 3 At the product page that appears, click on Cisco TelePresence Manager.
Step 4 At the login page, enter the username and password created during installation.
The Cisco TelePresence Manager initial window appears with several fields already populated from the installation process. Review it and click Next.
Step 5 The Calendar Server Selection window is displayed. See .
Choose Microsoft Exchange for this deployment and click Next.
Figure 6-2 Calendar Server Selection Window
Step 6 The LDAP Access Setting window opens. See Figure 6-3. Fill in the fields and click Test Connection.
6-17Cisco TelePresence Manager Release 1.5 Administration and Installation Guide
OL-13673-04

Chapter 6 Installing Cisco TelePresence Manager Initializing Cisco TelePresence Manager After Installation
The system tests the connection information. A popup window opens and displays “Connection .... Verified.” Click OK, then click Next.
Note If the system cannot verify the connection, the popup window directs the user to re-enter the information.
Figure 6-3 LDAP Access Setting Window
Explanation of LDAP Access Setting Fields
Lightweight Directory Access Protocol (LDAP) is a protocol definition for accessing directories. The LDAP Access Settings window specifies LDAP Active Directory server settings that are used by Cisco TelePresence Manager to access the directory information. This window contains the following fields:
• Host
The hostname is an alias that is assigned to an IP address for identification.
– Enter a hostname that is unique to your network.
– The hostname consists of up to 64 characters and can contain alphanumeric characters and hyphens, English characters only.
• Bind Method
The bind method is the type of security required.
– Secure—Secure Socket Layer (SSL) connection requires the Distinguished Encoding Rules (DER) Certificate for the LDAP server. You must complete the Certificate field on this window before you can proceed.
– Normal—The CTS-Manager communicates with the LDAP server in cleartext using HTTP. In normal mode, you do not need to complete the Certificate field.
6-18Cisco TelePresence Manager Release 1.5 Administration and Installation Guide
OL-13673-04

Chapter 6 Installing Cisco TelePresence Manager Initializing Cisco TelePresence Manager After Installation
• Port
– The default port for secure SSL connection is 636.
– The default port for normal SSL connection for multiple servers is 3268.
– The default port for secure SSL connection for multiple servers is 3269.
– The default port for normal connection for a single server is 389.
• Default Context
Default Context is the context from which the LDAP queries are performed. To change the default context, choose it in the Fetch DNs drop-down list adjacent to this field.
• Username
The username provides identification of the user to the LDAP server.
– The format must be in the LDAP fully qualified domain name (FQDN) format.
– Examples: cn=administrator, ch=users, dc=<mydomain>, dc=com
• Append default context
Check this box to avoid typing in the LDAP Access username manually, keeping the requirements of the LDAP FQDN format. If this box is not checked, you must append the information in the Default Context field.
• Password
The user password allows access to the LDAP server.
The password must contain at least six characters and maximun of 31 characters and should be unique. It must start with a lowercase alphanumeric character and be English characters. International characters are not supported.
• Certificate
The certificate is a digital representation of user or device attributes, including a public key, that is signed with an authoritative private key.
Step 7 The LDAP User Auth Setting window is displayed. See Figure 6-4.
Fill in the fields and click Verify Contain DN.
The system tests the container information. A popup window opens and displays “User container <...> validated successfully.” Click OK, then Next.
Note If the system cannot verify the container information, the popup window directs the user to re-enter the information.
6-19Cisco TelePresence Manager Release 1.5 Administration and Installation Guide
OL-13673-04

Chapter 6 Installing Cisco TelePresence Manager Initializing Cisco TelePresence Manager After Installation
Figure 6-4 LDAP User Authorization Settings Window
LDAP User Authorization Setting Fields
The LDAP User Auth Setting window contains the following fields:
• User Containers
The FQDN format name of the LDAP container in which CTS-Manager can find the list of users.
• Append default context
Check this box to meet the requirements of the LDAP FQDN format, or type in the Default Context after the User Container name yourself.
Step 8 The Field Mapping window is displayed. See Figure 6-5.
The fields should be populated with information you have already entered.
6-20Cisco TelePresence Manager Release 1.5 Administration and Installation Guide
OL-13673-04

Chapter 6 Installing Cisco TelePresence Manager Initializing Cisco TelePresence Manager After Installation
Figure 6-5 Field Mappings Window
Explanation of Field Mappings Fields
The CTS-Manager server uses application objects and attributes that are internally mapped to the objects and attributes in the LDAP Directory Server. Most of these mappings are predefined and fixed. However, some of the information required for the Cisco TelePresence system may be stored in different attributes of the LDAP Directory Server, based on the enterprise deployment. The Field Mapping window provides a mechanism to map such objects and attributes used by the CTS-Manager server to the object and attributes defined in the LDAP Directory Server schema.
Note The Login of the user is dependent on the Field Mapping of the EmailID attribute, the administrator must notify users if this Field Mapping has changed.
Caution The object and attribute mappings for Exchange/Directory Server deployments are listed in Table 6-2 and cannot be changed after installing and configuring Cisco TelePresence Manager. Cisco TelePresence Manager might not functions properly if the Object Class fields are changed. SchedulerName should not be changed unless Microsoft Exchange changes their mappings.
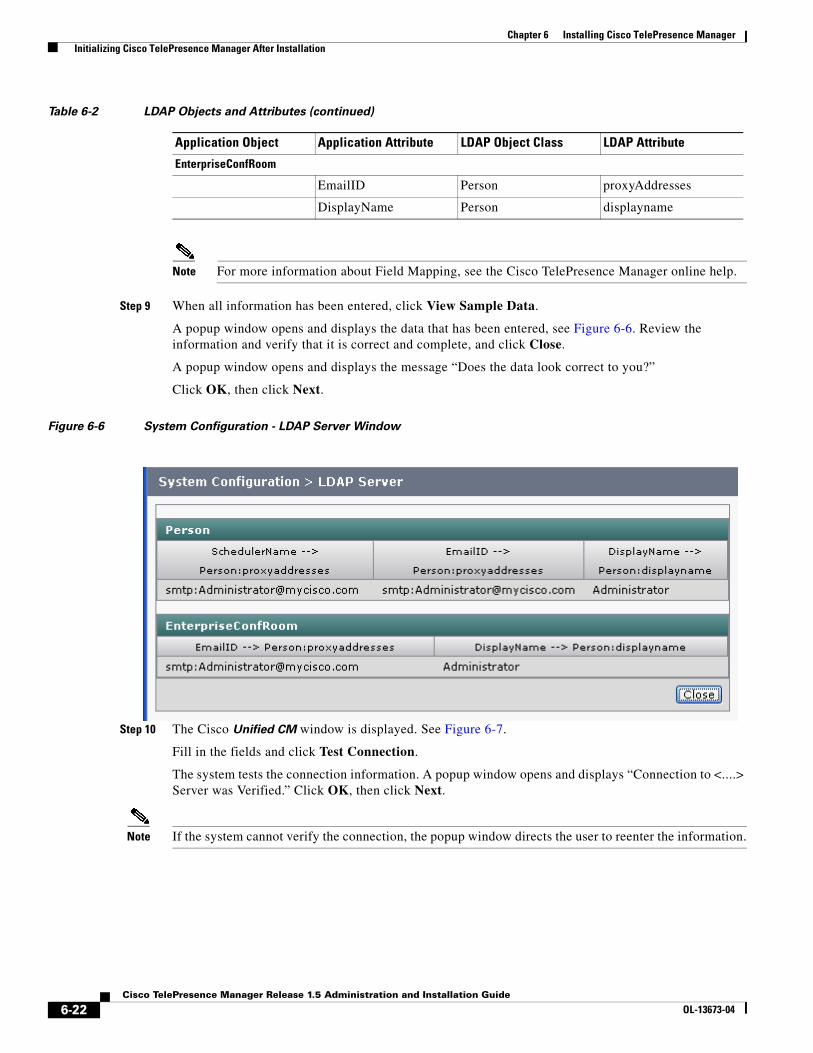
Table 6-2 LDAP Objects and Attributes
Application Object Application Attribute LDAP Object Class LDAP Attribute
Person
SchedulerName Person proxyaddresses
EmailID Person proxyAddresses
DisplayName Person displayname
6-21Cisco TelePresence Manager Release 1.5 Administration and Installation Guide
OL-13673-04
Chapter 6 Installing Cisco TelePresence Manager Initializing Cisco TelePresence Manager After Installation
Note For more information about Field Mapping, see the Cisco TelePresence Manager online help.
Step 9 When all information has been entered, click View Sample Data.
A popup window opens and displays the data that has been entered, see Figure 6-6. Review the information and verify that it is correct and complete, and click Close.
A popup window opens and displays the message “Does the data look correct to you?”
Click OK, then click Next.
Figure 6-6 System Configuration - LDAP Server Window
Step 10 The Cisco Unified CM window is displayed. See Figure 6-7.
Fill in the fields and click Test Connection.
The system tests the connection information. A popup window opens and displays “Connection to <....> Server was Verified.” Click OK, then click Next.
Note If the system cannot verify the connection, the popup window directs the user to reenter the information.
EnterpriseConfRoom
EmailID Person proxyAddresses
DisplayName Person displayname
Table 6-2 LDAP Objects and Attributes (continued)
Application Object Application Attribute LDAP Object Class LDAP Attribute
6-22Cisco TelePresence Manager Release 1.5 Administration and Installation Guide
OL-13673-04

Chapter 6 Installing Cisco TelePresence Manager Initializing Cisco TelePresence Manager After Installation
Figure 6-7 Cisco Unified CM Window
Explanation of Cisco Unified Communications Manager Fields
• Host
Host is the hostname or IP address of the Cisco Unified Communications Manager server host.
• Username
Username is the username for the application user for the Cisco Unified Communications Manager server.
• Password
The password allows the user to access the Cisco Unified Communications Manager.
• Certificate
The certificate is a digital representation of user or device attributes, including a public key, that is signed with an authoritative private key.
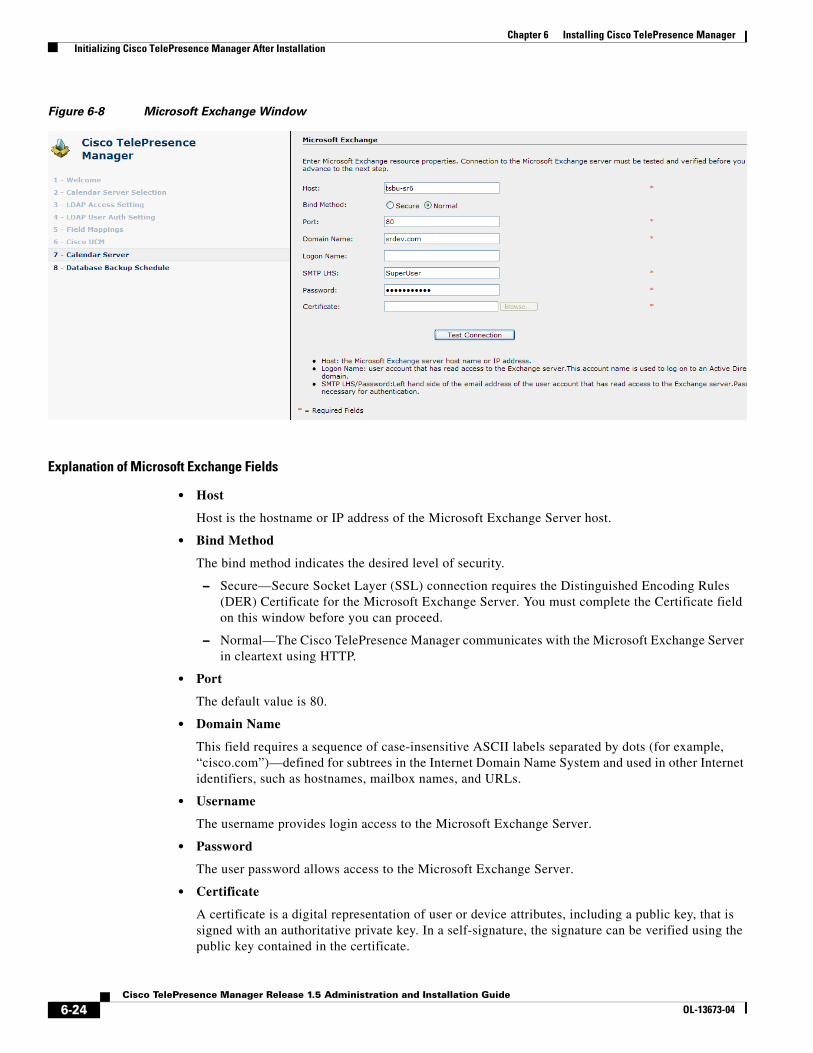
Step 11 The Microsoft Exchange window opens. See Figure 6-8.
Fill in the fields and click Test Connection.
The system tests the connection information. A popup window opens and displays the message “Connection to <....> Server was Verified.” Click OK, then click Next.
Note If the system cannot verify the connection, the popup window directs the user to reenter the information.
6-23Cisco TelePresence Manager Release 1.5 Administration and Installation Guide
OL-13673-04
Chapter 6 Installing Cisco TelePresence Manager Initializing Cisco TelePresence Manager After Installation
Figure 6-8 Microsoft Exchange Window
Explanation of Microsoft Exchange Fields
• Host
Host is the hostname or IP address of the Microsoft Exchange Server host.
• Bind Method
The bind method indicates the desired level of security.
– Secure—Secure Socket Layer (SSL) connection requires the Distinguished Encoding Rules (DER) Certificate for the Microsoft Exchange Server. You must complete the Certificate field on this window before you can proceed.
– Normal—The Cisco TelePresence Manager communicates with the Microsoft Exchange Server in cleartext using HTTP.
• Port
The default value is 80.
• Domain Name
This field requires a sequence of case-insensitive ASCII labels separated by dots (for example, “cisco.com”)—defined for subtrees in the Internet Domain Name System and used in other Internet identifiers, such as hostnames, mailbox names, and URLs.
• Username
The username provides login access to the Microsoft Exchange Server.
• Password
The user password allows access to the Microsoft Exchange Server.
• Certificate
A certificate is a digital representation of user or device attributes, including a public key, that is signed with an authoritative private key. In a self-signature, the signature can be verified using the public key contained in the certificate.
6-24Cisco TelePresence Manager Release 1.5 Administration and Installation Guide
OL-13673-04

Chapter 6 Installing Cisco TelePresence Manager Initializing Cisco TelePresence Manager After Installation
Note Click the Browse... button to choose the Microsoft Exchange Server SSL certificate. If you selected Secure bind method, this value is required.
Step 12 The Database Backup Schedule window opens. See Figure 6-9.
Fill in the fields. If you are setting up a remote backup, click Verify Remote Host to verify the login information.
Note The default is set to a daily backup schedule with the backup information stored to the local drive. Cisco recommends that you back up your data to a different drive.
Figure 6-9 Database Backup Schedule Window
Explanation of Database Backup Schedule Fields
The Cisco Unified Communications Manager uses an Informix Database server to store information. This window allows the administrator to set up regular backup operations of the database.
Note Cisco strongly recommends scheduling regular backups of the database.
The Database Backup Schedule window contains the following fields:
• Schedule
Click Change... to set the backup schedule. The following choices are available:
– Start Time (UTC)
Enter the hour and minute, in UTC 24-hour format, for when you want your backup to begin. UTC is the atomic clock version of Universal Time (UT), formerly known as Greenwich Mean Time. Time zones around the world are expressed as positive and negative offsets from UT. For example, Midnight Pacific Standard Time (+8 UT) is 08:00 UT.
– Frequency
6-25Cisco TelePresence Manager Release 1.5 Administration and Installation Guide
OL-13673-04

Chapter 6 Installing Cisco TelePresence Manager Initializing Cisco TelePresence Manager After Installation
Choose Daily or Weekly database backups. If you choose Weekly, select the radio button beside the day of the week on which you want your backup to occur.
• Number of backup files to keep
From the drop-down menu, choose the number of backup files to keep before deleting. Choices range from 1 (default) to 14 (two week’s worth of daily backups).
• Backup Type
Choose Local or Remote to designate the server for backups. If you choose Remote, you must fill in the following values for the remote server:
– Remote Storage Host (SFTP)
The network path to the remote Secure File Transfer Protocol (SFTP) storage host.
– Port
Port number designated for the backup process. The default is port 22.
– User Name
Username for login of the remote server.
– User Password
Password for login to the remote server.
– Storage Path
The file path to the location where you want to store the backup data.
Step 13 Click Finish, located at the bottom of the window.
The Cisco TelePresence Manager admin window appears at http://server hostname or IP address.
Initialization for IBM Domino Deployments
Step 1 At the console running Microsoft Explorer, type the Cisco TelePresence Manager server name or the IP address. See the following example if upgrading your system to 1.5 release.
https://7835 server hostname or IP address
Note If Installing a new CTS-MAN system, the server hardware version is 7845.
Step 2 The Initial Preferences window is displayed. Choose the timezone from the drop-down menu. The timezone you choose should be the one you are located in. Click Continue.
6-26Cisco TelePresence Manager Release 1.5 Administration and Installation Guide
OL-13673-04

Chapter 6 Installing Cisco TelePresence Manager Initializing Cisco TelePresence Manager After Installation
Figure 6-10 Initial Preferences Window
Step 3 At the product page that appears, click on Cisco TelePresence Manager.
Step 4 At the login page, enter the username and password created during installation.
The Cisco TelePresence Manager initial window appears with several fields already populated from the installation process and click Next.
Step 5 The Calendar Server Selection window is displayed. See Figure 6-11.
Choose IBM Domino for this deployment and click Next.
Figure 6-11 Calendar Server Selection Window
Step 6 The LDAP Access Setting window opens. See Figure 6-12. Fill in the fields and click Test Connection.
The system tests the connection information. A popup window opens and displays “Connection .... Verified.” Click OK, then click Next.
Note If the system cannot verify the connection, the popup window directs the user to re-enter the information.
6-27Cisco TelePresence Manager Release 1.5 Administration and Installation Guide
OL-13673-04

Chapter 6 Installing Cisco TelePresence Manager Initializing Cisco TelePresence Manager After Installation
Figure 6-12 LDAP Access Setting Window
Explanation of LDAP Access Setting Fields
Lightweight Directory Access Protocol (LDAP) is a protocol definition for accessing directories. The LDAP Access Settings window specifies LDAP Active Directory server settings that are used by Cisco TelePresence Manager to access the directory information. This window contains the following fields:
• Host
The hostname is an alias that is assigned to an IP address for identification.
– Enter a hostname that is unique to your network.
– The hostname consists of up to 64 characters and can contain alphanumeric characters and hyphens, using English characters. International characters are not recognized.
• Bind Method
The bind method is the type of security required.
– Secure—Secure Socket Layer (SSL) connection requires the Distinguished Encoding Rules (DER) Certificate for the LDAP server. You must complete the Certificate field on this window before you can proceed.
– Normal—The Cisco TelePresence Manager communicates with the LDAP server in cleartext using HTTP. In normal mode, you do not need to complete the Certificate field.
• Port
– The default port for secure SSL connection is 636.
– The default port for normal SSL connection for multiple servers is 3268.
– The default port for normal SSL connection for multiple servers is 3269.
– The default port for normal connection for a single server is 389.
• Default Context
6-28Cisco TelePresence Manager Release 1.5 Administration and Installation Guide
OL-13673-04

Chapter 6 Installing Cisco TelePresence Manager Initializing Cisco TelePresence Manager After Installation
Default Context is the context from which the LDAP queries are performed. To change the default context, choose it in the Fetch DNs drop-down list adjacent to this field.
• Username
The username provides identification of the user to the LDAP server.
– The format must be in the LDAP fully qualified domain name (FQDN) format.
– Examples: cn=administrator, ch=users, dc=<mydomain>, dc=com
• Append default context
Check this box to avoid typing in the LDAP Access username manually, keeping the requirements of the LDAP FQDN format. If this box is not checked, you must append the information in the Default Context field.
• Password
The user password allows access to the LDAP server.
The password must contain at least six characters and maximun 31 characters and should be unique using English characters only. It must start with a lowercase alphanumeric character. International characters are not valid.
• Certificate
The certificate is a digital representation of user or device attributes, including a public key, that is signed with an authoritative private key.
Step 7 The LDAP User Auth Setting window is displayed. See Figure 6-13.
LDAP user containers should be added so that users are unique in these containers having no user overlap. If users belong to multiple user containers, for example, sales and HR, then only one container should be specified. If not the user, then the login to email link will fail. If the container at the organizational level is specified which with include everyone, then no other user container should be specified for the email link login to work. Fill in the fields and click Verify Contain DN.
The system tests the container information. A popup window opens and displays “User container <...> validated successfully.” Click OK, then Next.
Note If the system cannot verify the container information, the popup window directs the user to re-enter the information.
6-29Cisco TelePresence Manager Release 1.5 Administration and Installation Guide
OL-13673-04
Chapter 6 Installing Cisco TelePresence Manager Initializing Cisco TelePresence Manager After Installation
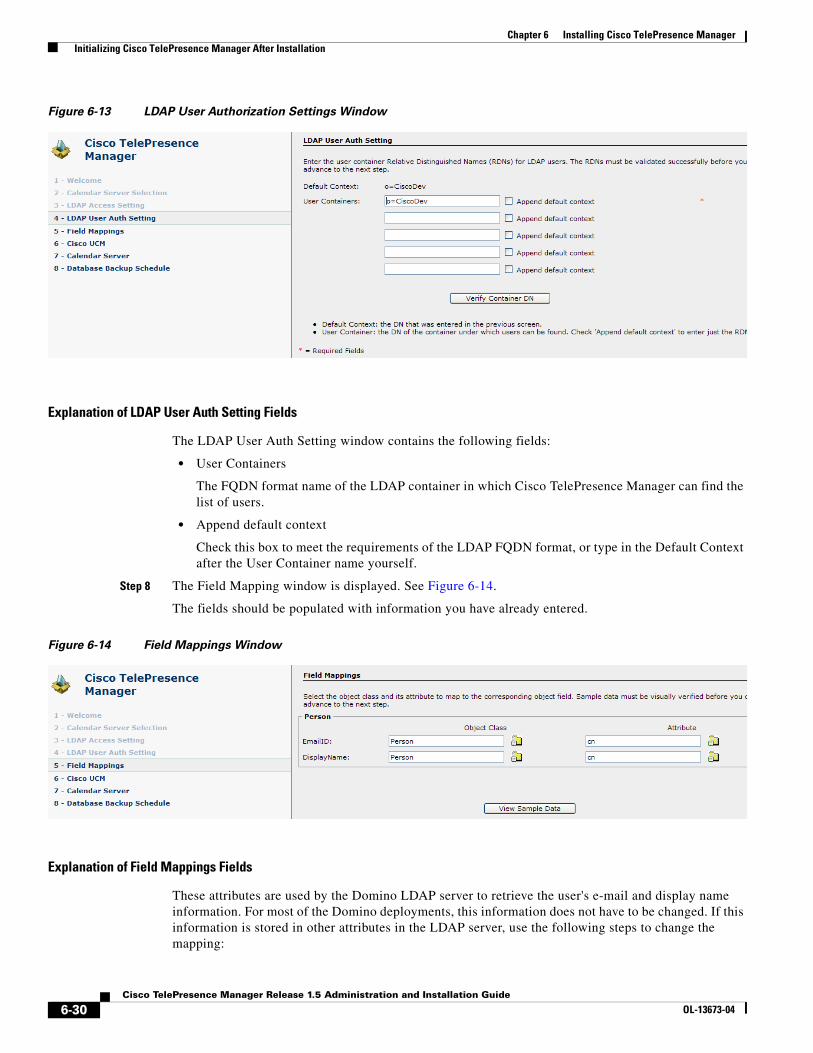
Figure 6-13 LDAP User Authorization Settings Window
Explanation of LDAP User Auth Setting Fields
The LDAP User Auth Setting window contains the following fields:
• User Containers
The FQDN format name of the LDAP container in which Cisco TelePresence Manager can find the list of users.
• Append default context
Check this box to meet the requirements of the LDAP FQDN format, or type in the Default Context after the User Container name yourself.
Step 8 The Field Mapping window is displayed. See Figure 6-14.
The fields should be populated with information you have already entered.
Figure 6-14 Field Mappings Window
Explanation of Field Mappings Fields
These attributes are used by the Domino LDAP server to retrieve the user's e-mail and display name information. For most of the Domino deployments, this information does not have to be changed. If this information is stored in other attributes in the LDAP server, use the following steps to change the mapping:
6-30Cisco TelePresence Manager Release 1.5 Administration and Installation Guide
OL-13673-04

Chapter 6 Installing Cisco TelePresence Manager Initializing Cisco TelePresence Manager After Installation
Caution The object and attribute mappings for Domino/Directory Server deployments are listed in Table 6-3 and cannot be changed after installing and configuring CTS-Manager.
Note For more information about Field Mapping, see the Cisco TelePresence Manager online help.
Step 9 When all information has been entered, click View Sample Data.
A popup window opens and displays the data that has been entered, see Figure 6-15. Review the information and verify that it is correct and complete, and click Close.
A popup window opens and displays the message “Does the data look correct to you?”
Click OK, then click Next.
Figure 6-15 System Configuration - LDAP Server
Step 10 The Cisco Unified CM window is displayed. See Figure 6-16.
Fill in the fields and click Test Connection.
The system tests the connection information. A popup window opens and displays “Connection to <....> Server was Verified.” Click OK, then click Next.
Table 6-3 LDAP Objects and Attributes
Application Object Application Attribute LDAP Object Class LDAP Attribute
Person
EmailID Person cn
DisplayName Person cn
6-31Cisco TelePresence Manager Release 1.5 Administration and Installation Guide
OL-13673-04

Chapter 6 Installing Cisco TelePresence Manager Initializing Cisco TelePresence Manager After Installation
Note If the system cannot verify the connection, the popup window directs the user to reenter the information.
Figure 6-16 Cisco Unified CM Window
Explanation of Cisco Unified Communications Manager Fields
• Host
Host is the hostname or IP address of the Cisco Unified Communications Manager server host.
• Username
Username is the username for the application user for the Cisco Unified Communications Manager server.
• Password
The password allows the user to access the Cisco Unified Communications Manager.
• Certificate
The certificate is a digital representation of user or device attributes, including a public key, that is signed with an authoritative private key.
Step 11 The IBM Domino window opens. See Figure 6-17.
Fill in the fields and click Test Connection.
The system tests the connection information. A popup window opens and displays the message “Connection to <....> Server was Verified.” Click OK, then click Next.
Note If the system cannot verify the connection, the popup window directs the user to reenter the information.
6-32Cisco TelePresence Manager Release 1.5 Administration and Installation Guide
OL-13673-04

Chapter 6 Installing Cisco TelePresence Manager Initializing Cisco TelePresence Manager After Installation
Figure 6-17 IBM Domino Calendar Window
Explanation of IBM Domino Fields
• Host
Host is the hostname or IP address of the IBM Domino host.
• Bind Method
The bind method indicates the desired level of security.
– Secure—Secure Socket Layer (SSL) connection requires the Distinguished Encoding Rules (DER) Certificate for the IBM Domino server. You must complete the Certificate field on this window before you can proceed.
– Normal—The CTS Manager communicates with the IBM Domino server in cleartext using HTTP.
Note If you selected Secure bind method, this value is required.
• Port
The default value is 80.
• Organization Name
This field requires a sequence of case-insensitive ASCII labels separated by dots (for example, “cisco.com”)—defined for subtrees in the Internet Organization Name System and used in other Internet identifiers, such as hostnames, mailbox names, and URLs.
• Username
The username provides login access to the IBM Domino server.
• Password
The user password allows access to the IBM Domino server.
• Polling Interval (minutes)
6-33Cisco TelePresence Manager Release 1.5 Administration and Installation Guide
OL-13673-04

Chapter 6 Installing Cisco TelePresence Manager Initializing Cisco TelePresence Manager After Installation
This is the amount of time between intervals that the CTS-MAN will poll for Calendar information. The interval times for polling are from minimum of 1 to a maximum of 360 minutes.
• Certificate
A certificate is a digital representation of user or device attributes, including a public key, that is signed with an authoritative private key. In a self-signature, the signature can be verified using the public key contained in the certificate.
Note After the Domino server window is set up, the Tentative room meeting process in CTS Manager does not work for the Domino Calendar Server, due to the handling of tentative room reservation in Domino itself.
Note Click the Browse... button to choose the IBM Domino server SSL certificate. If you selected Secure bind method, this value is required.
Step 12 The Database Backup Schedule window opens. See Figure 6-18.
Fill in the fields. If you are setting up a remote backup, click Verify Remote Host to verify the login information.
Note The default is set to a daily backup schedule with the backup information stored to the local drive. Cisco recommends that you back up your data to a different drive.
Figure 6-18 Database Backup Schedule Window
Explanation of Database Backup Schedule Fields
The Cisco Unified Communications Manager uses an Informix Database server to store information. This window allows the administrator to set up regular backup operations of the database.
Note Cisco strongly recommends scheduling regular backups of the database.
6-34Cisco TelePresence Manager Release 1.5 Administration and Installation Guide
OL-13673-04

Chapter 6 Installing Cisco TelePresence Manager Initializing Cisco TelePresence Manager After Installation
The Database Backup Schedule window contains the following fields:
• Schedule
Click Change... to set the backup schedule. The following choices are available:
– Start Time (UTC)
Enter the hour and minute, in UTC 24-hour format, for when you want your backup to begin. UTC is the atomic clock version of Universal Time (UT), formerly known as Greenwich Mean Time. Time zones around the world are expressed as positive and negative offsets from UT. For example, Midnight Pacific Standard Time (+8 UT) is 08:00 UT.
– Frequency
Choose Daily or Weekly database backups. If you choose Weekly, select the radio button beside the day of the week on which you want your backup to occur.
• Number of backup files to keep
From the drop-down menu, choose the number of backup files to keep before deleting. Choices range from 1 (default) to 14 (two week’s worth of daily backups).
• Backup Type
Choose Local or Remote to designate the server for backups. If you choose Remote, you must fill in the following values for the remote server:
– Remote Storage Host (SFTP)
The network path to the remote Secure File Transfer Protocol (SFTP) storage host.
– Port
Port number designated for the backup process. The default is port 22.
– User Name
Username for login of the remote server.
– User Password
Password for login to the remote server.
– Storage Path
The file path to the location where you want to store the backup data.
Step 13 Click Finish, located at the bottom of the window.
The Cisco TelePresence Manager admin window appears at http://server hostname or IP address.
6-35Cisco TelePresence Manager Release 1.5 Administration and Installation Guide
OL-13673-04

Chapter 6 Installing Cisco TelePresence Manager Initializing Cisco TelePresence Manager After Installation
6-36Cisco TelePresence Manager Release 1.5 Administration and Installation Guide
OL-13673-04