installer’s manual - ness...
TRANSCRIPT

Ness R16 Radio Control Panel
INstallatIoN & PRogRammINg maNual
REV 1
R16
InstalleR’s ManUal
“Australia’s largest designer and manufacturer of
high quality security products”
www.ness.com.au
Head office:Ness security Products Pty ltdaBN 28 069 984 3724 / 167 Prospect Hwyseven Hills NsW 2147 australiaPh +61 2 8825 9222admin Fax +61 2 9838 [email protected]
sYDNEYPh 02 8825 9222 Fax 02 9674 [email protected]
mElBouRNEPh 03 9875 6400 Fax 03 9875 [email protected]
BRIsBaNEPh 07 3399 4910 Fax 07 3217 [email protected]
PERtHPh 08 9328 2511 Fax 08 9227 [email protected]
aDElaIDEPh 08 8152 0000 Fax 08 8152 [email protected]
NEss R16 INstallatIoN maNual REV 1. march 2008
Document Part Number: 890-320
For products: 100-690 R16 Control Panel
CoPYRIgHt NotICE
all rights reserved. No part of this publication may be reproduced, transmitted or stored in a retrieval system in any form or by any means, electronic, mechanical, photocopying, recording, or otherwise, without the prior written permission of Ness.
Ness reserves the right to make changes to features and specifications at any time without prior notification in the interest of ongoing product development and improvement.
© 2008 Ness security Products Pty ltd aBN 28 069 984 372
ApprovAlsEMC CoMplIANCEEN 50130-4:1996 Part 4: Electromagnetic compatability. Electrostatic Discharge, Radiated RF Immunity, Electrical Fast transient/burst. surge Immunity, Conducted RF Immunity, Voltage Dips and Interruptions, mains supply Variations.as/NZ CIsPR 22:2002- Class B, Electromagnetic Radiation, terminal Disturbance Voltage.EN61000-6-3:2001, Harmonic Current Emissions, Voltage fluctuations and Flicker.
TElECoMtBR21, Eu. PtC200, NEW ZEalaND tElECom. as aCIF s002, austRalIa
sAFETYEN60950:2000 inc Country Deviations, safety of Information technology Equipmentas/NZ3260-1993 incl. amDts 1,2,3 &4. ts001-1997 aCa australian Communications authority

Introduction ......................................................................................................................4specifications ...................................................................................................................5
INstallatIoN Installation Notices ...........................................................................................................6Installation Procedures ....................................................................................................7Connection Diagram ........................................................................................................8Inputs / outputs ...............................................................................................................9
Keypad ...........................................................................................................................10audible & Visual feedback .......................................................................................10, 11user tests .......................................................................................................................11
oPERatIoN ...................................................................................................................12Keypad memory Display ................................................................................................12operation summary .......................................................................................................13alarm type Descriptions ................................................................................................14system alarm Descriptions ............................................................................................15
Quick start Panel Programming ....................................................................................16Quick start RaDIo Programming ..................................................................................17PRogRammINg ............................................................................................................19How to enter Program mode .........................................................................................19PaNEl PRogRammINg oPtIoNs ..........................................................................20-35DIallER PRogRammINg oPtIoNs .......................................................................37-43
FaCtoRY DEFault oPtIoNs ......................................................................................45
Dialler operation ............................................................................................................46audible Voice Dialling ....................................................................................................47Central station monitoring .............................................................................................48Contact ID reporting codes ...........................................................................................48Remote telephone operation ........................................................................................49Radio accessories ...................................................................................................50, 51
PRogRam oPtIoNs summaRY.............................................................................52-55
Contents

Ness R16 - Installation and Programming manual4
IntroduCtIon
RADIODETECTION
EXTERNALSIREN OUTPUTSTROBETAMPER IN
OUTPUTPUT
ZONE INPUTHARDWIRE
INTERNALPIEZO OUTPUT
PLUGPACK(Supplied)
PHONE LEAD(Supplied)
2
5
8
0
1
4
7
P
3
6
9
E
ARM
MONITOR
EXCLUDE
MEMORY
RADIODOORBELL
RADIO DOORSWITCHES
RADIO KEYS
the Ness R16 is a unique fully self-contained radio control panel.
the panel has a built-in keypad for programming and user operation, a built-in piezo siren, built-in lCD display, built-in radio receiver, built-in battery backup and built-in dialler.
the R16 supports up to 16 Ness Radio PIRs and up to 14 Ness Radio Keys. all Ness supervised and encrypted radio devices are supported. there is even a Doorbell feature with selectable tunes when used with the Ness Radio Doorbell transmitter. (If the radio doorbell is available in the local frequency).
In addition to radio devices, the R16 has 1 hardwired zone and 1 hardwired tamper input for connection of a wired detection device and external siren cover tamper switch.
the built-in piezo siren provides high volume audible warning. the R16 also has siren, Piezo and strobe outputs for additional hardwired noisemakers.
the R16 has a number of sophisticated power saving features designed to provide at least 48 hours service running on the backup battery alone. (this includes one full alarm condition with sirens, strobe and dialler).
the built-in dialler uses Contact ID format for central station monitoring as well as audible monitoring to any telephone. the user can also dial into the system for remote arming and disarming over the telephone line.

Ness R16 - Installation and Programming manual 5
speCIfICatIons
RaDIo ZoNEs 16
HaRDWIRED ZoNEs 1 (operates in series with zone 16)
HaRDWIRED tamPER ZoNEs 1
RaDIo ComPatIBIlItY Ness supervised & encrypted radio devices
DIallER FoRmatContact ID Formataudible Voice Format
oN BoaRD KEYPaD Backlit, programming & user functions
lCD DIsPlaY High contrast icon display
Plug PaCK 220-240V aC 50-60Hz, output 17V aC @300ma
QuIEsCENt CuRRENt DRaW 10 ma (in power save mode if mains is off)
BuIlt-IN BaCKuP BattERY 12 volt 0.8 amp/hour, sealed lead acid
DYNamIC BattERY tEst Every Hour and on arming/disarming
FusEs
siren output, 2a auto-resetstrobe output, 1.5a auto-resetPiez output, 500ma auto-resetBuilt-in Piezo, 500ma auto-reset
sIREN outPut 1 x 8 ohm horn speaker max.
oN BoaRD PIEZo sIREN 110 dB
PIEZ (REsEt) outPut 12V DC 300ma max.
stRoBE outPut 12V DC, 1 strobe light max.
DImENsIoNs 210(w) x 145(h) x 40(d) mm

Ness R16 - Installation and Programming manual6
InstallatIon
WArNING Installation and maintenance shall be performed by qualified service personnel only.
CAUTIoNRisk of explosion if battery is replaced by an incorrect type. Dispose of used batteries according to the instructions on the battery.
ADsl NoTICEaDsl broadband data can interfere with the operation of your alarm dialler.
It is recommended that a quality aDsl filter be installed as per the filter manufacturer's guidelines in all premises with an alarm dialler installed.
EsD WArNING(Electrostatic Discharge).
once properly installed, Ness control panels are well protected from EsD. However, take note of the following precautions during installation.
the human body can generate static electricity when it is insulated from earth - for instance by walk-ing over carpet. EsD occurs (and a small shock is sometimes felt) if an earthed metal object is then touched.
the installer should be aware that if he generates static electricity while installing the panel and then discharges this static electricity into the internal components on the main circuit board or the keypad board, then EsD damage may occur.
the circuit board should not be unwrapped until it is actually ready to be installed.
methods to avoid electrostatic build-up.
1. use a foot strap, a wrist strap, or a grounding mat. the aim is to connect the body to earth to discharge static before it builds up. the connection is a high resistance for personnel safety.
2. If the above is not available, then it is advisable to wear clothing that will minimise the build-up of static.
3. Handle circuit boards by the edges. avoid touching any components on the board as the inte-grated circuits, in particular, are not guaranteed by their manufacturers to be safe from EsD.
4. to minimise the build-up of static, avoid walking around as much as possible while working on the installation.
5. touch an earthed object to discharge any static before working on the installation.
Ness R16 - Installation and Programming manual 7
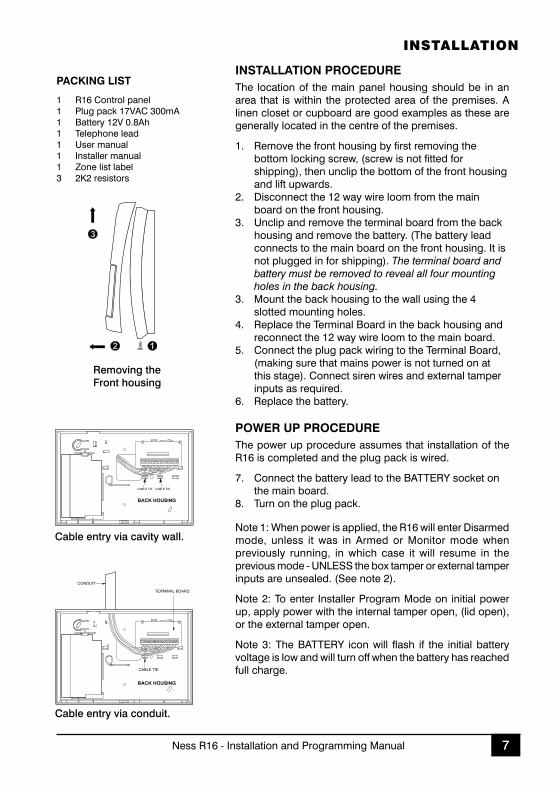
INsTAllATIoN proCEDUrEthe location of the main panel housing should be in an area that is within the protected area of the premises. a linen closet or cupboard are good examples as these are generally located in the centre of the premises.
1. Remove the front housing by first removing the bottom locking screw, (screw is not fitted for shipping), then unclip the bottom of the front housing and lift upwards.
2. Disconnect the 12 way wire loom from the main board on the front housing.
3. unclip and remove the terminal board from the back housing and remove the battery. (the battery lead connects to the main board on the front housing. It is not plugged in for shipping). The terminal board and battery must be removed to reveal all four mounting holes in the back housing.
3. mount the back housing to the wall using the 4 slotted mounting holes.
4. Replace the terminal Board in the back housing and reconnect the 12 way wire loom to the main board.
5. Connect the plug pack wiring to the terminal Board, (making sure that mains power is not turned on at this stage). Connect siren wires and external tamper inputs as required.
6. Replace the battery.
poWEr Up proCEDUrEthe power up procedure assumes that installation of the R16 is completed and the plug pack is wired.
7. Connect the battery lead to the BattERY socket on the main board.
8. turn on the plug pack.
Note 1: When power is applied, the R16 will enter Disarmed mode, unless it was in armed or monitor mode when previously running, in which case it will resume in the previous mode - uNlEss the box tamper or external tamper inputs are unsealed. (see note 2).
Note 2: to enter Installer Program mode on initial power up, apply power with the internal tamper open, (lid open), or the external tamper open.
Note 3: the BattERY icon will flash if the initial battery voltage is low and will turn off when the battery has reached full charge.CABLE TIE
CONDUIT
TERMINAL BOARD
BACK HOUSING
pACkING lIsT
1 R16 Control panel1 Plug pack 17VaC 300ma1 Battery 12V 0.8ah1 telephone lead1 user manual1 Installer manual1 Zone list label3 2K2 resistors
Removing the Front housing
BACK HOUSING
CABLE TIE CABLE TIE
Cable entry via cavity wall.
Cable entry via conduit.
InstallatIon

Ness R16 - Installation and Programming manual8
ConneCtIon dIagram
MOUNTING HOLESSlotted x 4
CABLE ENTRY
BACK HOUSING
FRONT
HOUSING
(rear)
BA
TT
ER
Y
12V 0.8AH BATTERY
TERMINAL
BOARD
Te
lep
ho
ne
Le
ad
Battery
MAIN
BOARD
INTERNAL TAMPERSWITCH
EARTH ACTAMP
STR+PIEZ+
0V ZONE+PIEZ
STRSIREN
SIREN
PIEZ+
STR+
EARTH
PIEZ-
STR-
0V
TAMP
0V
Z1
-
+
AC17V
WIRING
TE
RM
INA
LB
OA
RD
EART
HAC
TAM
PST
R+PI
EZ+
0VZO
NE+
PIEZ
STR
SIRE
N
17V AC
Earth
External Horn Speaker Max. Qty 1.
Strobe Light Max. Qty 1.
Hardwired Zone Input, 2K2 EOL resistor
0V ground for accessories. 100mA max.
External Screamer Max. Qty 1.
Plug Pack 17VAC 300mA (Supplied).
2K2 N.O. Tamper Switch
N.O.
N.C.
Bottom
+12V for accessories. 100mA max.

Ness R16 - Installation and Programming manual 9
Inputs / outputs
INpUTs
ZoNE Zone input for optional hardwired detection devices. operates in series with any radio devices on zone 16. the input must be terminated with a 2K2 (2200 ohm) end of line (Eol) resistor even if unused.
this input is normally used for connecting an optional hardwired reed switch or a 12V powered smoke detector.
TAMp 24hr input for connection of external tamper switches. this input operates in series with the internal tamper switch.
the input must be terminated with a 2K2 (2200 ohm) end of line (Eol) resistor even if unused.
AC / EArTh aC power input and earth connection. use the supplied 17V aC 300ma plug pack.
oUTpUTs
sIrEN timed siren output for connection of maximum one (1) 8 ohm horn speaker. 2a auto-reset fuse protected.
sTr output for connection of 1 x strobe light. as a power saving feature, the strobe output times out after 11 hours. If mains power is off, the output will time out after 1 hour. 1.5a auto-reset fuse protected.
pIEZ timed output for connection of maximum 1 x 12V screamer. 500ma auto-reset fuse protected.
oNBoArD sIrEN (Built-in)
the onboard piezo siren is an integral part of the R16 electronics. It is used for keypad beeps, doorbell chime, arm/disarm chirps and internal siren on alarm. the internal siren can be disabled by program option P60E 8E. When the Internal siren function is disabled, the onboard siren still outputs keypad beeps and other audible features. 500ma auto-reset fuse protected.
12v sUpplY For ACCEssorIEs
If 12V power is required for a device such as a hardwired smoke detector, use Zone Input 0V (negative) and sIREN+ (positive). No more than 100ma should be drawn from these terminals.

Ness R16 - Installation and Programming manual10
r16 Keypad
AUDIBlE & vIsUAl FEEDBACkthe R16 onboard keypad provides the facility for user level and installer level programming and all user operation and emergency functions. the keys are soft-touch silicon rubber and are backlit for high visibility. any keypress will turn on the backlighting for 4 minutes.
2
5
8
0
1
4
7
P
3
6
9
E
ARM
MONITOR
EXCLUDE
MEMORY
PROGRAMFUNCTION BUTTONSONBOARD SIREN/ BEEPER
FIREMEDICALPANIC
BACKLITLCD DISPLAY
ENTER
OUTPUT TYPEOUTPUT DESCRIPTION
Keypad Acknowledge key press
Keypad Valid entry, end of Exit Time
Keypad Invalid entry
Low battery / AC Fail / Medical Alarm
Alarm, Entry Delay, etc
Arm
Disarm
The Doorbell has been pressed.
Alarm condition
Panel Armed or Disarmed
Alarm condition
Keypad beeper
Onboard SirenExternal Siren output
Onboard SirenPiezo outputExternal Siren output
Strobe output
Onboard SirenExternal Siren output
Onboard Siren
SHORT BEEP
3 BEEPS (RAPID)
LONG BEEP
8 BEEPS (RAPID)
CONTINUOUS BEEPS
1 CHIRP*
3 CHIRPS*
DOORBELL TONES**
SIREN CONTINUOUS
STROBE BURST
STROBE CONTINUOUS
SIREN BURST,(Low Volume)
Zone Auto Exclude warning
* arm/disarm chirps must be enabled. P64E 4E.** If the optional Radio Doorbell is available in your region.
Ness R16 - Installation and Programming manual 11
lCd dIsplay
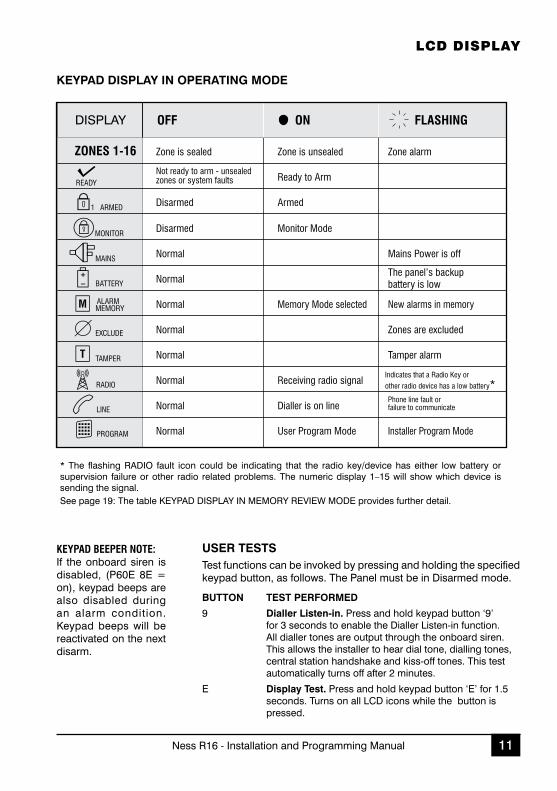
Keypad Beeper Note:If the onboard siren is disabled, (P60E 8E = on), keypad beeps are also disabled during an alarm condition. Keypad beeps will be reactivated on the next disarm.
UsEr TEsTstest functions can be invoked by pressing and holding the specified keypad button, as follows. the Panel must be in Disarmed mode.
BUTToN TEsT pErForMED
9 Dialler listen-in. Press and hold keypad button ‘9’ for 3 seconds to enable the Dialler listen-in function. all dialler tones are output through the onboard siren. this allows the installer to hear dial tone, dialling tones, central station handshake and kiss-off tones. this test automatically turns off after 2 minutes.
E Display Test. Press and hold keypad button ‘E’ for 1.5 seconds. turns on all lCD icons while the button is pressed.
Zone is sealed
Not ready to arm - unsealedzones or system faults
Disarmed
Disarmed
Normal
Normal
Normal
Normal
Normal
Normal
Normal
Normal
Zone is unsealed
Ready to Arm
Armed
Monitor Mode
Memory Mode selected
Receiving radio signal
Dialler is on line
Indicates that a Radio Key or
other radio device has a low battery*
Phone line fault orfailure to communicate
User Program Mode
Zone alarm
Mains Power is off
The panel’s backup
battery is low
New alarms in memory
Zones are excluded
Tamper alarm
Installer Program Mode
ZONES 1-16
OFF ON FLASHINGDISPLAY
kEYpAD DIsplAY IN opErATING MoDE
* the flashing RaDIo fault icon could be indicating that the radio key/device has either low battery or supervision failure or other radio related problems. the numeric display 1–15 will show which device is sending the signal.see page 19: the table KEYPaD DIsPlaY IN mEmoRY REVIEW moDE provides further detail.

Ness R16 - Installation and Programming manual12
operatIon
opErATING MoDEsthe R16 will operate in one of the following modes:
armed. the system is “on” and ready to detect intrusion.
disarmed. the system is “off”. this is the normal mode when the premises are occupied. Day
Zones and 24 Hour Zones (if configured) are active.
day mode. the system is Disarmed and a zone or zones have been setup to create an alarm
when activated. often used as a doorway alert in a shop. (see P53E Day Zones).
moNitor mode. allows the system to be “partially” armed. For example, in a house, to allow
all perimeter zones, doors and windows, to be monitored (armed) at night. (see P51E monitor
Zones).
24Hr ZoNes. Zones that have been setup to be active in any mode. usually used for tamper
switches and Panic buttons. (see P52E 24hr Zones).
doorBell. (If this product is available in your region). the radio Doorbell operates in any panel
mode. the doorbell can be triggered using the Doorbell transmitter. (most Ness transmitters can
be programmed to operate the Doorbell function, see page 25, Extra option for Radio Keys).
see page 21 for doorbell volume and selectable chimes settings.
kEYpAD DIsplAY IN MEMorY rEvIEW MoDE
EvENT DIsplAY ICoNs
arm aRmED
Disarm blank
auto Exclude Zone EXCluDE + 1...16
mains Fail maINs
Panel Panic/medical/Fire EXCluDE
Battery Fail BattERY
line Fault lINE
Dialler Call Fail lINE
Zone alarm 1...16
tamper Panel/siren tamPER
tamper(4th failed attempts) tamPER + PRogRam
Radio Jamming RaDIo
Radio substitution RaDIo
Radio Key low Battery RaDIo + BattERY + 2...15
Radio Key Panic/medical RaDIo + EXCluDE
Detector tamper RaDIo + tamPER + 1...16
Detector low Battery RaDIo + BattERY + 1...16
Detector supervision Fail RaDIo + 1...16
Pendant supervision Fail RaDIo + moNItoR + 1...15

Ness R16 - Installation and Programming manual 13
operatIon summary
ACTIoN kEYpAD opErATIoN rADIo kEY opErATIoN
ArMthe panel must be in the disarmed state first.
arming with a user code.
+ [user Code] +
shortcut method (arming shortcut must be on, P62E 5E).
+
Press the oN button once.
DIsArM [user Code] + Press the oFF button once.
MoNITor MoDEthe panel must be in the disarmed state first.
Note: the panel will ignore monitor mode arming if no monitor zones are selected at P51E.
arming monitor with a user code.
+ [user Code] +
shortcut method (monitor shortcut must be on, P62E 3E).
+
Press the oN button twice within 4 seconds.
pANIC AlArMKeypad Panic is indicated on the lCD display by the EXCluDE icon flashing. Press both star keys together.
Panic shortcut must be on, P62E 3E.
Press the Panic button for at least 2 seconds.
DUrEss AlArMDuress alarm should only used by arrangement with your monitoring station.
+ [user Code] +
to disarm and report a silent Duress alarm to the monitoring station, add the digit 9 before a valid user code when disarming.
option P75E 1E must be on to enable the dialler to report the alarm.
Press the Panic button for at least 2 seconds.
Extra options for the Panic button must be set for Duress. P12E-P25E 2E.
ExClUDING ZoNEsZones can be Excluded in the disarmed state.
+
then enter the zone number/s + E for each zone to be Excluded.
[Zone No.] + [Zone No.] +
then press to exit Exclude mode.
vIEW MEMorYmemory can be viewed in the disarmed state.
shortcut method (arming shortcut must be on, P62E 5E).
+
then press repeatedly to display the last 20 events in memory.
then press to exit memory mode.

Ness R16 - Installation and Programming manual14
alarm type desCrIptIons
AlArM TYpE DEsCrIpTIoN
AlArM, Detector a zone goes unsealed in a mode causing an alarm. Non-restoring detectors which have alarmed will send a Restore report on Disarming, if Restore reporting is enabled. Restoring detectors (e.g. a reed switch programmed with Restore) which have alarmed will report a Restore only when they are sealed, if Restore reporting is enabled.
TAMpEr, Panel/siren
Panel housing tamper switch and external siren housing tamper switch are wired to the same tamper Input. When alarmed, will report a Restore only when sealed, if Restore reporting is enabled.
TAMpEr, Keypad Detect entry of consecutive invalid codes in armed mode, alarm sirens on 4th failed attempt.
TAMpEr, Radio detector
Radio detector housing tamper switch activation. When alarmed, will report a Restore only when sealed, if Restore reporting is enabled.
pANIC, Keypad Instant when both PaNIC buttons pressed together, or (ii) delayed when either PaNIC button is pressed and held for 1.5 seconds.
pANIC, Radio Press and hold the device PaNIC button for the required length of time.
DUrEss, Keypad Enter a valid code prefixed with a 9. the response is the same as for a keypad Panic alarm, but no sirens or strobe are active.
DUrEss, Radio With a radio key programmed as Duress, press and hold the device PaNIC button for the required length of time. No sirens or strobe are active.
MEDICAl, Keypad Press and hold Right Hand keypad * (star) key for 2 seconds.
MEDICAl, Key With a radio key programmed as medical, press and hold the device PaNIC button for the required length of time.
FIrE, Keypad Press and hold left Hand keypad * (star) key for 2 seconds. this triggers the fire siren sound and the dialler reports a Fire alarm, (if enabled by P75E 4E).
rADIo sUBsTITUTIoN
1. CoDE gRaBBER a “code grabber” may be used to capture a transmitted user message and re-transmit a fixed copy of this message in an attempt to defeat the system. If two consecutive identical valid encrypted messages are received a minimum time apart, the alarm is raised. 2. ENCRYPtIoN HaCKINg In this case an attempt is made to “crack” the encrypted, changing part of a message using multiple transmissions. If 20 messages are received with a valid ID but fail decryption, the alarm is raised. arming and disarming resets this count. the dialler reports a radio jamming/radio substitution alarm.
rADIo JAMMING after accumulating a “no radio signal” reference level 10 minutes after power up, the system will raise a radio jamming alarm if 30 seconds of continuous in-band radio signal is detected.
DIAllEr lINE FAUlT
Indicates minimum telephone line DC voltage was not detected for a 2 minute period. If telephone line monitor is enabled, flash the lCD lINE icon and beep keypad.
Ness R16 - Installation and Programming manual 15
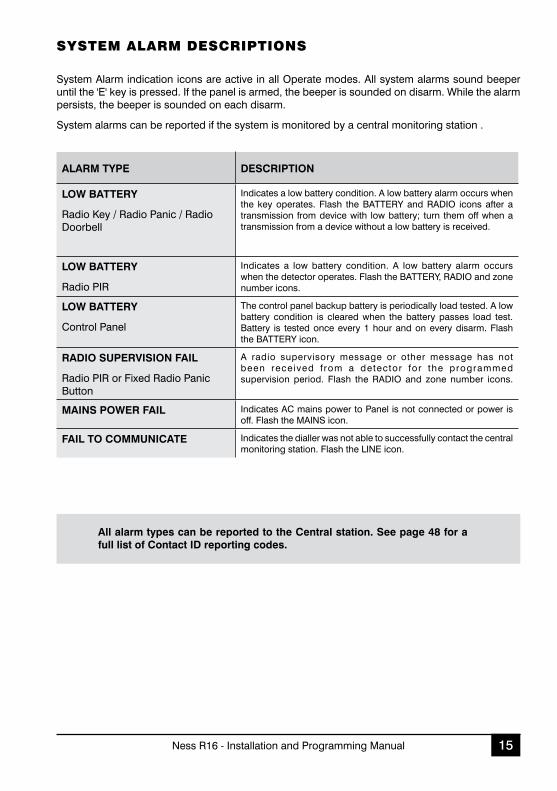
system alarm desCrIptIons
system alarm indication icons are active in all operate modes. all system alarms sound beeper until the 'E' key is pressed. If the panel is armed, the beeper is sounded on disarm. While the alarm persists, the beeper is sounded on each disarm.
system alarms can be reported if the system is monitored by a central monitoring station .
All alarm types can be reported to the Central station. see page 48 for a full list of Contact ID reporting codes.
AlArM TYpE DEsCrIpTIoN
loW BATTErY
Radio Key / Radio Panic / Radio Doorbell
Indicates a low battery condition. a low battery alarm occurs when the key operates. Flash the BattERY and RaDIo icons after a transmission from device with low battery; turn them off when a transmission from a device without a low battery is received.
loW BATTErY
Radio PIR
Indicates a low battery condition. a low battery alarm occurs when the detector operates. Flash the BattERY, RaDIo and zone number icons.
loW BATTErY
Control Panel
the control panel backup battery is periodically load tested. a low battery condition is cleared when the battery passes load test. Battery is tested once every 1 hour and on every disarm. Flash the BattERY icon.
rADIo sUpErvIsIoN FAIl
Radio PIR or Fixed Radio Panic Button
a radio supervisory message or other message has not been received f rom a detector for the programmed supervision period. Flash the RaDIo and zone number icons.
MAINs poWEr FAIl Indicates aC mains power to Panel is not connected or power is off. Flash the maINs icon.
FAIl To CoMMUNICATE Indicates the dialler was not able to successfully contact the central monitoring station. Flash the lINE icon.

Ness R16 - Installation and Programming manual16
QuICK start panel programmIng
the R16 is supplied pre-programmed with factory default values that should suit most installations.
the steps below will show you how to program the master Code (user Code 1), and the Client Code and telephone number for central station monitoring.
to enter Installer Program Mode.To enter Installer Program Mode on initial power up, apply power with the internal tamper open, (lid open), or the external tamper open. Or if you have powered up with all tampers sealed, see below.
PROGRAMPROGRAM
123 is the factory defaultMaster Code.
000000 (six zeros) is the factory defaultInstaller Code.
This is User ProgramMode. The PROGRAMicon is on steady.
This is Installer ProgramMode. The PROGRAMicon is flashing.
Press...then press
1 002 003 00
to program the Master Code.Example, to program the Master Code to be 1234.
P11E is the option forthe Master Code.
Press
Enter the new Master Codefollowed by E.
Enter the new Master Code againfollowed by E.
to program the dialler Client account number.Example Client Code is 9876.
P72E is the option forthe Client Code.
Press
Enter the new Client AccountNumber followed by E.
to program the central station telephone number.Example telephone number is 1234 7890.
P70E is the option forTelephone Number 1.
Press
Enter the new telephone number followed by E.
to exit Installer Program Mode.
The PROGRAM icon will turn off.
tHE PaNEl Is NoW PRogRammED as FolloWs:
master Code: 1234, Dialler Client account Number: 9876, Central station telephone number 1: 1234 7890.Zone 1: Delay, Zone 2: handover, Zones 3–16: Instant, Entry Delay time: 20 seconds, Exit Delay time: 60 seconds, siren Reset time: 5 minutes.
the client code and telephone numbers are supplied by the central station.

Ness R16 - Installation and Programming manual 17
to enter Installer Program Mode.To enter Installer Program Mode on initial power up, apply power with the internal tamper open, (lid open), or the external tamper open. Or if you have powered up with all tampers sealed, see below.
PROGRAMPROGRAM
123 is the factory defaultMaster Code.
000000 (six zeros) is the factory defaultInstaller Code.
This is User ProgramMode. The PROGRAMicon is on steady.
This is Installer ProgramMode. The PROGRAMicon is flashing.
Press...then press
1 002 003 00
to program a Radio PIR.Example, to program a Radio PIR on zone 1.
P09E is the option forprogramming Radio Devices.
'Learn' mode for zone 1.
Press ...then press
The RADIO icon will be on and the number 1 will be flashing.The zone numbers for radio devices already programmed will be ON.
Insert the battery of the Radio PIR to be programmed.Beep, beep + 3 beeps will be heard if the RADIO PIR was successfully ‘learned’. Zone icon 1 will then be on steady.
to program a Radio Key.Example, to program a Radio Key to user slot 2.
P10E is the option forprogramming Radio Keys.
'Learn' mode for User 2.
Press ...then press
The RADIO icon will be on and the number 2 will be flashing.Numbers 2–15 show the status of the user slots. ON = Radio Keys programmed, OFF = blank, flashing = learn mode.
Press and hold the PanIC button for 8 seconds on the Radio Key to be programmed.Beep, beep + 3 beeps will be heard if the RADIO KEY was successfully ‘learned’. Number 2 will then be on steady. A long beep means the Radio Key is already programmed to another user slot. See page 24.
to exit Installer Program Mode
The PROGRAM icon will turn off.
QuICK start radIo programmIng
as a radio system, the R16 can be installed with a minimum of wiring. If an external siren or strobe light is not being used, the only essential wiring is connection of the plug pack.
the steps below will show you how to program one Radio PIR and one Radio Key.

Ness R16 - Installation and Programming manual18
this page is intentionally blank

Ness R16 - Installation and Programming manual 19
programmIng
Factory default master Code: 123
Factory default Installer Code: 000000
proGrAM MoDE lEvEls
hoW To ENTEr proGrAM MoDE
from power Up1. Power-up with the internal box tamper or external tamper open.
the R16 will then be in Installer Program mode.
UsiNg tHe Keypadthe panel must be Disarmed.
1. Press [MASTER CODE]
the keypad will respond with 3 beeps this is user Program mode (PRogRam light is oN).
2. then press [INSTALLER CODE]
the keypad will respond with 3 beeps this is Installer Program mode (PRogRam light is FlasHINg).
How to eXit program mode
1. Press then this is operating mode (PRogRam light is oFF).
UsEr proGrAM MoDEuser Program mode allows the owner to program:• All User Codes• Entry and Exit timesNote: the panel will automatically drop out of user Program mode to operating mode if no keypad buttons are pressed for 4 minutes.
INsTAllEr proGrAM MoDE
Ins ta l le r Program mode allows access to all program options.
Note: the panel will remain in Instal ler P r o g r a m m o d e indefinitely.

Ness R16 - Installation and Programming manual20
programmIng
these phone numbers are used to report alarms in Ness Voice Dialling format and can be programmed from user Program mode or Installer Program mode.
It is not necessary to program a reporting format. Ness Voice Dialling format is automatically selected when alarm reports are sent to the Voice Dialling telephone numbers.
voice Dialling is automatically disabled if Central station telephone number/s are programmed at p70E or p71E.
programmiNg seqUeNce
1. Press: p00E or p01E• The existing telephone number is displayed.• It is not necessary to wait for the display sequence to end. You can interrupt the display by entering the new telephone number.
2. [new telephone number] EThe new telephone number is displayed.
eXample
to program Voice Dialling Phone No.1 to be 03 1234 1234:Press: p00e 0312341234e
to clear a telepHoNe NUmBer
to clear a telephone number, enter the mEmoRY key in place of the telephone number. E.g, to clear Voice Dialling Phone No.2, press: p01E MEMorY E
program mode level:User, Installer, Remote by PC.
factory defaUlt:Both Telephone Numbers = blank.
Notes:These program options can also be accessed by pressing P0E and P1E. The leading zero is not mandatory.
related optioNs:• P70E, P71E, Central Station Telephone Numbers 1 & 2, page 36.
• Ness Voice Dialling format, see page 47.
• Dialling Sequence, page 46.
p00E, p01E voICE DIAllING TElEphoNE NUMBErs 1 & 2
special cHaracters
Special characters such as Pauses, star or hash characters can be included in a telephone number dialling sequence by using the keys in the table below.
spECIAl ChArACTEr
kEYpAD ENTrY
kEYpAD DIsplAYs
PAUSE (1.6sec) ARM Key 10
* (Star) MONITOR Key 11
# (Hash) EXCLUDE Key 12
gENERal NotE.Program options P00E to P09E can also be accessed by pressing P0E to P9E. The leading zero is not necessary.

Ness R16 - Installation and Programming manual 21
programmIng
selects the doorbell volume. Programmable range is volume level 1 (lowest) to 4 (highest).
programmiNg seqUeNce
1. Press: p05E - Existing value is displayed.
2. [ENTEr NEW vAlUE] E - New value is displayed.
eXample
to program Doorbell Volume to be level 2:Press: p05e 2e
program mode level:User, Installer, Remote by PC.
factory defaUlt:3, (Volume level 3).
Notes: • The Doorbell sounds
through the R16 onboard siren.
related optioNs:Doorbell Tune, P06E.
p05E DoorBEll volUME*
the R16 has nine built-in doorbell tunes to choose from. the doorbell is activated by the optional Radio Doorbell transmitter. (most Ness transmitters can be programmed to operate the Doorbell function, see page 25, Extra option for Radio Keys).
programmiNg seqUeNce
1. Press: p06E - Existing value is displayed.
2. [ENTEr NEW vAlUE] E - New value is displayed.
eXample
to program Doorbell tune to be tune 1, Westminster:Press: p06e 1e
availaBle tUNes
1 Westminster2 Westminster (4 notes only)3 Ding Dong4 Ding Dong Repetitive5 star spangled Banner 6 Fur Elise7 Home sweet Home8 greensleeves9 Chime
program mode level:User, Installer, Remote by PC.
factory defaUlt:3, (Ding Dong).
Notes: •
related optioNs:Doorbell Volume, P05E.
p06E DoorBEll TUNE*
* If the optional Radio Doorbell is available in your region.

Ness R16 - Installation and Programming manual22
programmIng
the Radio signal strength test can be used to test the radio signal from any Ness radio device. the strength of the radio signal received is displayed on the zone lights 1–9 and beeped by the keypad.
the higher the number displayed (and beeped) the stronger the signal received.
use p08E 0E to test Radio Keys, (press Panic button). Note that in this mode, the R16 will respond to radio signals from any programmed radio device. to avoid confusion from multiple radio signals, this test is best performed while standing out of range of any programmed radio PIRs.
use p08E 1E–8E to test the signal strength of a specific radio device on zones 1–16.
to reset tHe test
the last signal strength tested remains flashing on the display. Press keypad E or Radio Key oN button to exit from the current test. the panel is then ready for another radio test.
to completely exit the Radio signal strength test, simply go to another programming option or exit Installer Program mode, (P + E).
eXample: to test tHe sigNal streNgtH of a radio pir oN ZoNe 2.
1. Press: p08E 2E Radio icon and numeric icon 2 is flashing - waiting for radio data.
2. trigger the radio device on zone 2.
3. the display will alternate flashing signal strength value and radio key/detector slot number.
E.g., the signal strength will be flashed on the display and the panel will beep signal strength value. then the radio icon and detector/key number will be on steady.
eXample: to test tHe sigNal streNgtH of a radio Key.
1. Press: p08E 0E Radio icon is flashing - waiting for radio data.
2. Press and hold the Panic button for 2 seconds on the Radio Key being tested.
3. the display will alternate flashing signal strength value and radio key slot number.
E.g., the signal strength will be flashed on the display and the panel will beep signal strength value. then the radio icon and detector/key number will be on steady.
program mode level:Installer, Remote by PC.
factory defaUlt:0, Radio Key test.
Notes: • The signal strength beeps
will sound only the first time the radio device is activated. The signal strength and device number remains flashing on the display until E is pressed again or the ON button of a valid radio key is pressed.
p08E rADIo sIGNAl sTrENGTh TEsT
Ness R16 - Installation and Programming manual 23
programmIng
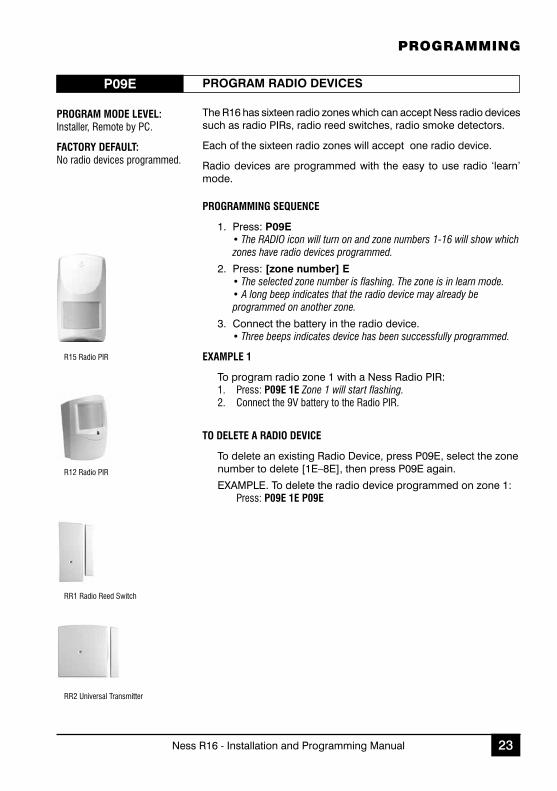
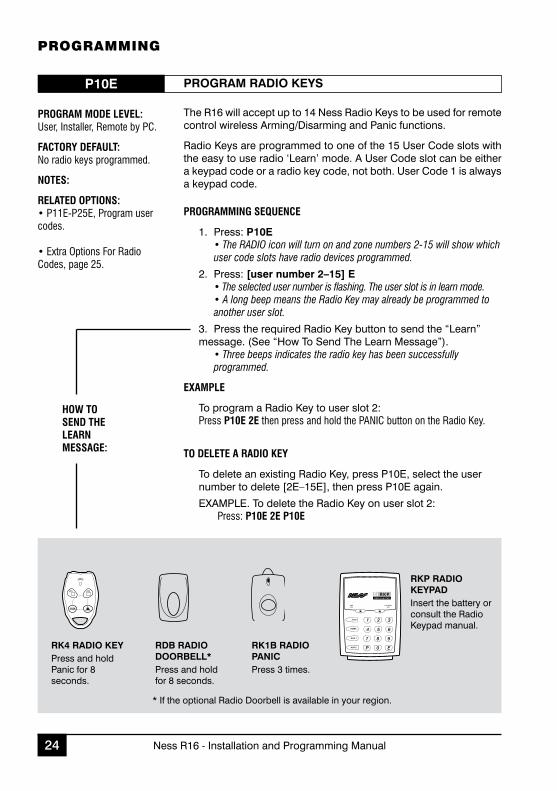
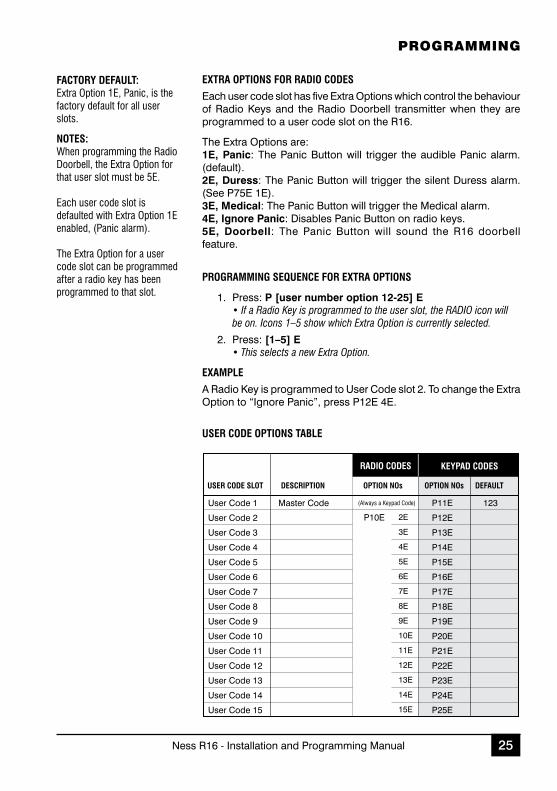
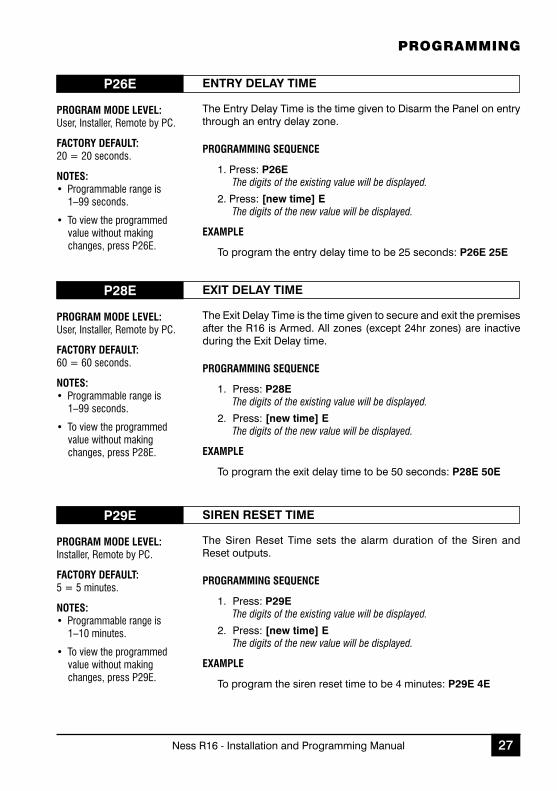
the R16 has sixteen radio zones which can accept Ness radio devices such as radio PIRs, radio reed switches, radio smoke detectors.
Each of the sixteen radio zones will accept one radio device.
Radio devices are programmed with the easy to use radio ‘learn’ mode.
programmiNg seqUeNce
1. Press: p09E • The RADIO icon will turn on and zone numbers 1-16 will show which zones have radio devices programmed.
2. Press: [zone number] E • The selected zone number is flashing. The zone is in learn mode.• A long beep indicates that the radio device may already be programmed on another zone.
3. Connect the battery in the radio device.• Three beeps indicates device has been successfully programmed.
eXample 1
to program radio zone 1 with a Ness Radio PIR:1. Press: p09e 1e Zone 1 will start flashing.2. Connect the 9V battery to the Radio PIR.
to delete a radio device
to delete an existing Radio Device, press P09E, select the zone number to delete [1E–8E], then press P09E again.
EXamPlE. to delete the radio device programmed on zone 1: Press: p09e 1e p09e
program mode level:Installer, Remote by PC.
factory defaUlt:No radio devices programmed.
p09E proGrAM rADIo DEvICEs
R12 Radio PIR
RR1 Radio Reed Switch
R15 Radio PIR
RR2 Universal Transmitter
Ness R16 - Installation and Programming manual24
the R16 will accept up to 14 Ness Radio Keys to be used for remote control wireless arming/Disarming and Panic functions.
Radio Keys are programmed to one of the 15 user Code slots with the easy to use radio ‘learn’ mode. a user Code slot can be either a keypad code or a radio key code, not both. user Code 1 is always a keypad code.
programmiNg seqUeNce
1. Press: p10E • The RADIO icon will turn on and zone numbers 2-15 will show which user code slots have radio devices programmed.
2. Press: [user number 2–15] E • The selected user number is flashing. The user slot is in learn mode.• A long beep means the Radio Key may already be programmed to another user slot.
3. Press the required Radio Key button to send the “learn” message. (see “How to send the learn message”).
• Three beeps indicates the radio key has been successfully programmed.
eXample
to program a Radio Key to user slot 2:Press p10e 2e then press and hold the PANIC button on the Radio Key.
to delete a radio Key
to delete an existing Radio Key, press P10E, select the user number to delete [2E–15E], then press P10E again.
EXamPlE. to delete the Radio Key on user slot 2: Press: p10e 2e p10e
program mode level:User, Installer, Remote by PC.
factory defaUlt:No radio keys programmed.
Notes:
related optioNs:• P11E-P25E, Program user codes.
• Extra Options For Radio Codes, page 25.
p10E proGrAM rADIo kEYs
programmIng
How to seNd tHe learN message:
rk4 rADIo kEYPress and hold Panic for 8 seconds.
rDB rADIo DoorBEll*Press and hold for 8 seconds.
R K PRADIO KEYPAD
100-001Radio Keypad
rkp rADIo kEYpADInsert the battery or consult the Radio Keypad manual.
* If the optional Radio Doorbell is available in your region.
rk1B rADIo pANICPress 3 times.
Ness R16 - Installation and Programming manual 25
programmIng
eXtra optioNs for radio codes
Each user code slot has five Extra options which control the behaviour of Radio Keys and the Radio Doorbell transmitter when they are programmed to a user code slot on the R16.
the Extra options are:1E, panic: the Panic Button will trigger the audible Panic alarm. (default).2E, Duress: the Panic Button will trigger the silent Duress alarm. (see P75E 1E).3E, Medical: the Panic Button will trigger the medical alarm.4E, Ignore panic: Disables Panic Button on radio keys.5E, Doorbell: the Panic Button will sound the R16 doorbell feature.
programmiNg seqUeNce for eXtra optioNs
1. Press: p [user number option 12-25] E • If a Radio Key is programmed to the user slot, the RADIO icon will be on. Icons 1–5 show which Extra Option is currently selected.
2. Press: [1–5] E • This selects a new Extra Option.
eXample
a Radio Key is programmed to user Code slot 2. to change the Extra option to “Ignore Panic”, press P12E 4E.
USER CODE SLOT
KEYPAD CODESRADIO CODES
OPTION NOsDESCRIPTION DEFAULT
User Code 1
P10E
Master Code 123
User Code 2
User Code 3
User Code 4
User Code 5
User Code 6
User Code 7
User Code 8
User Code 9
User Code 10
User Code 11
User Code 12
User Code 13
User Code 14
User Code 15
OPTION NOs
P11E
P12E
P13E
P14E
P15E
P16E
P17E
P18E
P19E
P20E
P21E
P22E
P23E
P24E
P25E
(Always a Keypad Code)
2E
3E
4E
5E
6E
7E
8E
9E
10E
11E
12E
13E
14E
15E
User code optioNs taBle
factory defaUlt:Extra Option 1E, Panic, is the factory default for all user slots.
Notes:When programming the Radio Doorbell, the Extra Option for that user slot must be 5E.
Each user code slot is defaulted with Extra Option 1E enabled, (Panic alarm).
The Extra Option for a user code slot can be programmed after a radio key has been programmed to that slot.

Ness R16 - Installation and Programming manual26
programmIng
program mode level:User, Installer, Remote by PC.
factory defaUlt:User Code 1: 123Installer Code: 000000All other codes: [blank]Extra Option 1, all codes.
Notes: • User Codes can be 3 to 6
digits in length.
• Codes beginning with 0 (zero) can be programmed but they will not operate the panel - this is an alternative method for disabling user codes. The MEMORY E function is recommended for deleting user codes.
• User Code 1 (Master Code) can be changed but it can not be deleted. The MEMORY + E sequence simply reverts User Code 1 back to factory default of 123.
• All codes must be unique to each other. Codes are rejected if already used. Some codes that are similar to existing codes may also be rejected.
• To clear all codes (except the Installer Code), enter P97E 3E in Installer Program mode. See Page 45.
• Open/Close reports are identified by user number when the control panel is central station monitored. Shortcut arming, (ARM + E, (if enabled), is sent as User 25.
related optioNs:P10E, Program Radio Keys
p11E-p25E proGrAM kEYpAD CoDEs
options P11E-P25E allow the programming or deletion of the 15 keypad codes and also setup the Extra options for user code slots programmed with a Radio Key.
programmiNg seqUeNce
1. Press: p [user number option 11-25] E • The existing keypad code will be displayed out one digit at a time on the keypad.
2. Press: [new code] E [new code again] E • The new keypad code will be displayed on the keypad.• One beep will sound on the first entry of the new code, three beeps will sound on the successful second entry of the new code.
eXample
to program user code 2 to be 1234:1. Press: p12e 1234e 1234e
to delete a code
to delete a user Code, enter the mEmoRY key in place of the code. Example: to delete user Code 2: P12E mEmoRY E
For a list of user option numbers, see the usER CoDE oPtIoNs taBlE on page 25.
• Open/Close reports, (if enabled by your installer), are identified by user number if the control panel is central station monitored.
Ness R16 - Installation and Programming manual 27
programmIng
the Entry Delay time is the time given to Disarm the Panel on entry through an entry delay zone.
programmiNg seqUeNce
1. Press: p26E The digits of the existing value will be displayed.
2. Press: [new time] E The digits of the new value will be displayed.
eXample
to program the entry delay time to be 25 seconds: p26E 25E
program mode level:User, Installer, Remote by PC.
factory defaUlt:20 = 20 seconds.
Notes: • Programmable range is
1–99 seconds.
• To view the programmed value without making changes, press P26E.
p26E ENTrY DElAY TIME
the Exit Delay time is the time given to secure and exit the premises after the R16 is armed. all zones (except 24hr zones) are inactive during the Exit Delay time.
programmiNg seqUeNce
1. Press: p28E The digits of the existing value will be displayed.
2. Press: [new time] E The digits of the new value will be displayed.
eXample
to program the exit delay time to be 50 seconds: p28E 50E
program mode level:User, Installer, Remote by PC.
factory defaUlt:60 = 60 seconds.
Notes: • Programmable range is
1–99 seconds.
• To view the programmed value without making changes, press P28E.
p28E ExIT DElAY TIME
the siren Reset time sets the alarm duration of the siren and Reset outputs.
programmiNg seqUeNce
1. Press: p29E The digits of the existing value will be displayed.
2. Press: [new time] E The digits of the new value will be displayed.
eXample
to program the siren reset time to be 4 minutes: p29E 4E
program mode level:Installer, Remote by PC.
factory defaUlt:5 = 5 minutes.
Notes: • Programmable range is
1–10 minutes.
• To view the programmed value without making changes, press P29E.
p29E sIrEN rEsET TIME
Ness R16 - Installation and Programming manual28
programmIng
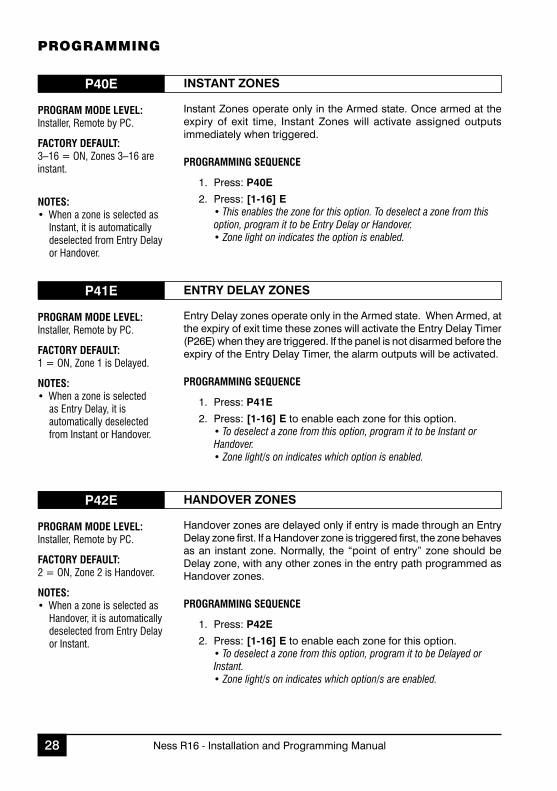
Instant Zones operate only in the armed state. once armed at the expiry of exit time, Instant Zones will activate assigned outputs immediately when triggered.
programmiNg seqUeNce
1. Press: p40E
2. Press: [1-16] E • This enables the zone for this option. To deselect a zone from this option, program it to be Entry Delay or Handover. • Zone light on indicates the option is enabled.
program mode level:Installer, Remote by PC.
factory defaUlt:3–16 = ON, Zones 3–16 are instant.
Notes: • When a zone is selected as
Instant, it is automatically deselected from Entry Delay or Handover.
p40E INsTANT ZoNEs
Entry Delay zones operate only in the armed state. When armed, at the expiry of exit time these zones will activate the Entry Delay timer (P26E) when they are triggered. If the panel is not disarmed before the expiry of the Entry Delay timer, the alarm outputs will be activated.
programmiNg seqUeNce
1. Press: p41E
2. Press: [1-16] E to enable each zone for this option. • To deselect a zone from this option, program it to be Instant or Handover. • Zone light/s on indicates which option is enabled.
program mode level:Installer, Remote by PC.
factory defaUlt:1 = ON, Zone 1 is Delayed.
Notes: • When a zone is selected
as Entry Delay, it is automatically deselected from Instant or Handover.
p41E ENTrY DElAY ZoNEs
Handover zones are delayed only if entry is made through an Entry Delay zone first. If a Handover zone is triggered first, the zone behaves as an instant zone. Normally, the “point of entry” zone should be Delay zone, with any other zones in the entry path programmed as Handover zones.
programmiNg seqUeNce
1. Press: p42E
2. Press: [1-16] E to enable each zone for this option. • To deselect a zone from this option, program it to be Delayed or Instant. • Zone light/s on indicates which option/s are enabled.
program mode level:Installer, Remote by PC.
factory defaUlt:2 = ON, Zone 2 is Handover.
Notes: • When a zone is selected as
Handover, it is automatically deselected from Entry Delay or Instant.
p42E hANDovEr ZoNEs
Ness R16 - Installation and Programming manual 29
programmIng
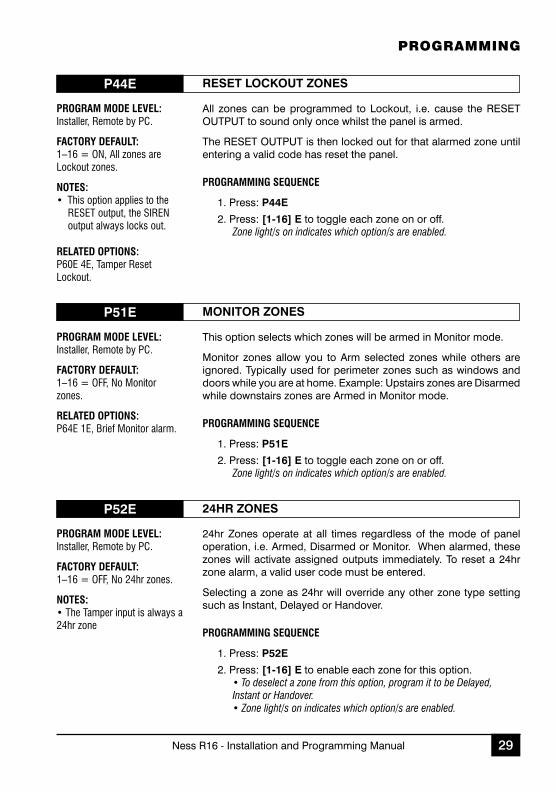
all zones can be programmed to lockout, i.e. cause the REsEt outPut to sound only once whilst the panel is armed.
the REsEt outPut is then locked out for that alarmed zone until entering a valid code has reset the panel.
programmiNg seqUeNce
1. Press: p44E
2. Press: [1-16] E to toggle each zone on or off.Zone light/s on indicates which option/s are enabled.
program mode level:Installer, Remote by PC.
factory defaUlt:1–16 = ON, All zones are Lockout zones.
Notes: • This option applies to the
RESET output, the SIREN output always locks out.
related optioNs:P60E 4E, Tamper Reset Lockout.
p44E rEsET loCkoUT ZoNEs
this option selects which zones will be armed in monitor mode.
monitor zones allow you to arm selected zones while others are ignored. typically used for perimeter zones such as windows and doors while you are at home. Example: upstairs zones are Disarmed while downstairs zones are armed in monitor mode.
programmiNg seqUeNce
1. Press: p51E
2. Press: [1-16] E to toggle each zone on or off.Zone light/s on indicates which option/s are enabled.
program mode level:Installer, Remote by PC.
factory defaUlt:1–16 = OFF, No Monitor zones.
related optioNs:P64E 1E, Brief Monitor alarm.
p51E MoNITor ZoNEs
24hr Zones operate at all times regardless of the mode of panel operation, i.e. armed, Disarmed or monitor. When alarmed, these zones will activate assigned outputs immediately. to reset a 24hr zone alarm, a valid user code must be entered.
selecting a zone as 24hr will override any other zone type setting such as Instant, Delayed or Handover.
programmiNg seqUeNce
1. Press: p52E
2. Press: [1-16] E to enable each zone for this option. • To deselect a zone from this option, program it to be Delayed, Instant or Handover. • Zone light/s on indicates which option/s are enabled.
program mode level:Installer, Remote by PC.
factory defaUlt:1–16 = OFF, No 24hr zones.
Notes: • The Tamper input is always a 24hr zone
p52E 24hr ZoNEs

Ness R16 - Installation and Programming manual30
programmIng
Day Zones operate when the panel is fully disarmed, i.e. when fully disarmed and monitor mode is off. When alarmed, Day Zones will activate the assigned outputs instantly.
this option selects which zones will be Day Zones.
programmiNg seqUeNce
1. Press: p53E
2. Press: [1-16] E to enable each zone for this option. • To deselect a zone from this option, program it to be Delayed, Instant or Handover. • Zone light/s on indicates which option/s are enabled.
program mode level:Installer, Remote by PC.
factory defaUlt:1–16 = OFF, No Day zones.
Notes: Typical uses:
• Instant alert when a delivery door is opened.
• Doorway alert for a shop.
related optioNs:P64E 2E, Brief Day alarm.Programs the behaviour of Day Zone alarms.
p53E DAY ZoNEs
Ness R16 - Installation and Programming manual 31
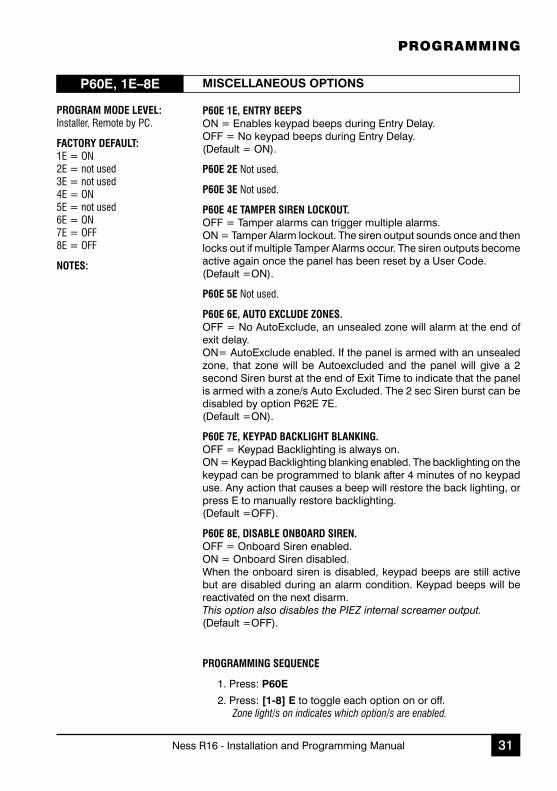
p60e 1e, eNtry BeepsoN = Enables keypad beeps during Entry Delay.oFF = No keypad beeps during Entry Delay.(Default = oN).
p60e 2e Not used.
p60e 3e Not used.
p60e 4e tamper sireN locKoUt.oFF = tamper alarms can trigger multiple alarms.oN = tamper alarm lockout. the siren output sounds once and then locks out if multiple tamper alarms occur. the siren outputs become active again once the panel has been reset by a user Code.(Default =oN).
p60e 5e Not used.
p60e 6e, aUto eXclUde ZoNes.oFF = No autoExclude, an unsealed zone will alarm at the end of exit delay.oN= autoExclude enabled. If the panel is armed with an unsealed zone, that zone will be autoexcluded and the panel will give a 2 second siren burst at the end of Exit time to indicate that the panel is armed with a zone/s auto Excluded. the 2 sec siren burst can be disabled by option P62E 7E.(Default =oN).
p60e 7e, Keypad BacKligHt BlaNKiNg.oFF = Keypad Backlighting is always on.oN = Keypad Backlighting blanking enabled. the backlighting on the keypad can be programmed to blank after 4 minutes of no keypad use. any action that causes a beep will restore the back lighting, or press E to manually restore backlighting.(Default =oFF).
p60e 8e, disaBle oNBoard sireN.oFF = onboard siren enabled.oN = onboard siren disabled.When the onboard siren is disabled, keypad beeps are still active but are disabled during an alarm condition. Keypad beeps will be reactivated on the next disarm.This option also disables the PIEZ internal screamer output.(Default =oFF).
programmiNg seqUeNce
1. Press: p60E
2. Press: [1-8] E to toggle each option on or off.Zone light/s on indicates which option/s are enabled.
program mode level:Installer, Remote by PC.
factory defaUlt:1E = ON2E = not used3E = not used4E = ON5E = not used6E = ON7E = OFF8E = OFF
Notes:
p60E, 1E–8E MIsCEllANEoUs opTIoNs
programmIng

Ness R16 - Installation and Programming manual32
programmIng
some keypad operations can be programmed to operate with or without a user Code.
p62e 1e, memory display sHortcUtto enable or disable the View memory shortcut.oFF = shortcut disabled, (mEmoRY + usER CoDE + E).oN = shortcut enabled, (mEmoRY + E). (Default =oN).
p62e 2e, ZoNe eXclUde sHortcUtto enable or disable the Zone Exclude shortcut.oFF = shortcut disabled, (EXCluDE + usER CoDE + E).oN = shortcut enabled, (EXCluDE + E). (Default =oN).
p62e 3e, moNitor mode sHortcUtto enable or disable the monitor mode shortcut.oFF = shortcut disabled, (moNItoR + usER CoDE + E).oN = shortcut enabled, (moNItoR + E). (Default =oN).
p62e 4e Not used.
p62e 5e, armiNg sHortcUtto enable or disable the arming shortcut.oFF = shortcut disabled, (aRm + usER CoDE + E).oN = shortcut enabled, (aRm + E). (Default =oN).
programmiNg seqUeNce
1. Press: p62E
2. Press: [1-5] E to toggle each option on or off.Zone light/s on indicates which option/s are enabled.
program mode level:Installer, Remote by PC.
factory defaUlt:1E = ON2E = ON3E = ON4E = not used5E = ON
p62E, 1E–5E opErATIoN shorTCUTs
this option enables the 2 second siren burst at end of Exit time which indicates a zone/s has been auto Excluded.
the siren burst is a low volume output from the onboard siren and the external siren.
programmiNg seqUeNce
1. Press: p62E
2. Press: 7E to toggle the option on or off.Zone light on indicates the option is enabled.
program mode level:Installer, Remote by PC.
factory defaUlt:7=ON, Enabled.
related optioNs:P60E 6E, Auto Exclude Zones.
p62E, 7E sIrEN BUrsT oN AUTo ExClUDE

Ness R16 - Installation and Programming manual 33
p64e 1e, Brief moNitor alarmthis option programs the behaviour of alarms in monitor mode. oFF = NoRmal moNItoR alaRms. outputs are on for the siren Reset time and dialler reporting is enabled. oN = BRIEF moNItoR alaRm. outputs are on for 2 seconds, internal piezo at half volume, strobe. there is no dialler report, no external piezo and no external siren.(Default = oFF).
p64e 2e, Brief day alarmthis option programs the behaviour of Day Zone alarms. oFF = NoRmal DaY alaRms. siren & Reset output will be on while a Day Zone is unsealed. oN = BRIEF DaY alaRm. outputs are on for 2 seconds, internal piezo at half volume, strobe. there is no dialler report, no external piezo and no external siren.(Default = oN).
p64e 3e, Not used.
p64e 4e, sireN cHirps, arm/disarmWhen this option is enabled, the external siren output and the onboard siren will ‘chirp’ on arm/disarm by radio key. the strobe output always flashes on arm/disarm by radio key, independent of this program option.1 chirp = arming, 3 chirps = disarming. oFF = siren chirps disabled. oN = siren chirps enabled.(Default = oFF).
p64e 5e, Not used.
p64e 6e, Keypad paNic alarmKeypad Panic can be triggered by pressing both star keys together. the dialler reports a Panic alarm, (if enabled by P75E 3E).oFF = No KEYPaD PaNIC. oN = KEYPaD PaNIC Is ENaBlED.(Default = oN).
p64e 7e, fire alarmthe Fire alarm can be triggered by pressing the FIRE key for at least 2 seconds, (left hand staR key). this triggers the fire siren sound and the dialler reports a Fire alarm, (if enabled by P75E 4E).oFF = No Keypad Fire alarm. oN = Keypad Fire alarm is enabled.(Default = oFF).
p64e 8e, medical alarmthe medical alarm can be triggered by pressing the mEDICal key for at least 2 seconds, (right hand staR key). the keypad beeper will sound 8 warning beeps. the dialler reports a medical alarm, (if enabled by P75E 2E).oFF = No medical alarm. oN = Keypad medical alarm is enabled.(Default = oFF).
program mode level:Installer, Remote by PC.
factory defaUlt:1E = OFF2E = ON3E = not used4E = OFF5E = not used6E = ON7E = OFF8E = OFF
p64E, 1E–8E MIsCEllANEoUs opTIoNs 2
programmIng
programmiNg seqUeNce
1. Press: p64E
2. Press: [1-8] E to toggle each option on or off.Zone light/s on indicates which option/s are enabled.
Ness R16 - Installation and Programming manual34
programmIng
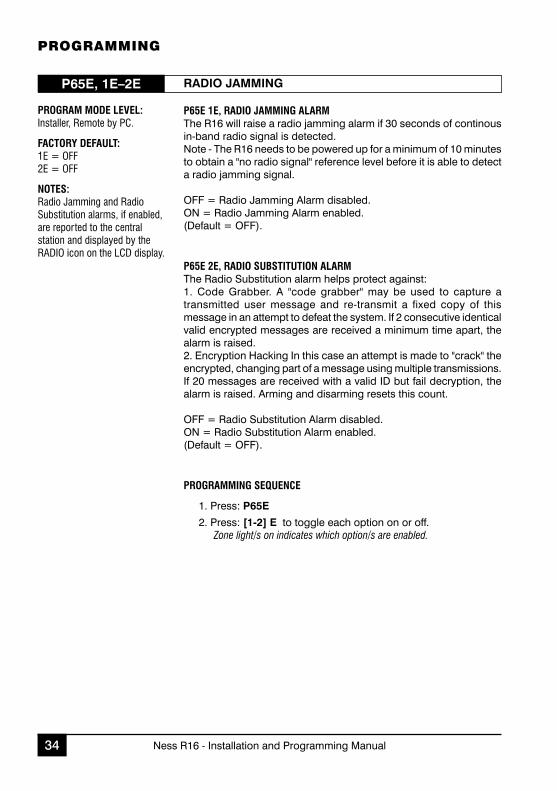
p65e 1e, radio JammiNg alarmthe R16 will raise a radio jamming alarm if 30 seconds of continous in-band radio signal is detected.Note - the R16 needs to be powered up for a minimum of 10 minutes to obtain a "no radio signal" reference level before it is able to detect a radio jamming signal.
oFF = Radio Jamming alarm disabled. oN = Radio Jamming alarm enabled.(Default = oFF).
p65e 2e, radio sUBstitUtioN alarmthe Radio substitution alarm helps protect against:1. Code grabber. a "code grabber" may be used to capture a transmitted user message and re-transmit a fixed copy of this message in an attempt to defeat the system. If 2 consecutive identical valid encrypted messages are received a minimum time apart, the alarm is raised. 2. Encryption Hacking In this case an attempt is made to "crack" the encrypted, changing part of a message using multiple transmissions. If 20 messages are received with a valid ID but fail decryption, the alarm is raised. arming and disarming resets this count. oFF = Radio substitution alarm disabled. oN = Radio substitution alarm enabled.(Default = oFF).
programmiNg seqUeNce
1. Press: p65E
2. Press: [1-2] E to toggle each option on or off.Zone light/s on indicates which option/s are enabled.
program mode level:Installer, Remote by PC.
factory defaUlt:1E = OFF2E = OFF
Notes:Radio Jamming and Radio Substitution alarms, if enabled, are reported to the central station and displayed by the RADIO icon on the LCD display.
p65E, 1E–2E rADIo JAMMING

Ness R16 - Installation and Programming manual 35
the suPERVIsIoN tImE is the time allowed between radio transmissions received by the R16 from any supervised Radio Detector.the suPERVIsIoN tImE setting is from 1 to 168 hours. supervision is disabled by setting time of 0 (zero).
programmiNg seqUeNce
1. Press: p67EThe digits of the existing value will be displayed.
2. Press: [new time] E The digits of the new value will be displayed.
eXample
to program Radio supervision time to be 6 hours: p67E 6E
program mode level:Installer, Remote by PC.
factory defaUlt:0 = disabled
Notes:
related optioNs:P88E 6E, Report Supervision Alarms.
p67E rADIo sUpErvIsIoN TIME
programmIng
setting this option on allows an external siren chirp warning if there is an unsealed zone when the panel is armed by a Radio Key, otherwise only internal beeper warning is given. oFF = Radio Key arming Warning disabled. oN = Radio Key arming Warning enabled. (Default = oFF).
programmiNg seqUeNce
1. Press: p68E
2. Press: 4E to toggle the option on or off.Zone light on indicates the option is enabled.
program mode level:Installer, Remote by PC.
factory defaUlt:4=OFF, disabled.
Notes:
p68E, 4E rADIo kEY ArMING WArNING

Ness R16 - Installation and Programming manual36
programmIng
the telephone numbers programmed at P70E-P71E are used to report alarms to a central station in Contact ID format.
It is not necessary to program a reporting format. Contact ID format is automatically selected when alarm reports are sent to the Central station telephone numbers.
programmiNg seqUeNce
1. Press: p70E or p71E• The existing telephone number is displayed.• It is not necessary to wait for the display sequence to end. You can interrupt the display by entering the new telephone number.
2. [new telephone number] EThe new telephone number is displayed.
eXample
to program Central station telephone No.1 to be 03 1234 1234:Press: p70e 0312341234e
to clear a telepHoNe NUmBer
to clear a telephone number, enter the mEmoRY key in place of the telephone number. E.g, to clear Central station telephone Number 1 press: p70E MEMorY E
program mode level:Installer, Remote by PC.
factory defaUlt:Both Telephone Numbers = blank.
Notes: • If P70E or P71E is
programmed (non-blank), then Ness Voice Dialling format is disabled, (P00E, P01E).
related optioNs:• P00E, P01E, Ness Voice Dialling Format Telephone Numbers 1 & 2, page 20.
• P86E 1E, Disable Dialler, page 41.
• Dialling Sequence, page 46.
p70E, p71E CENTrAl sTATIoN TElEphoNE NUMBErs 1 & 2
special cHaracters
Special characters such as Pauses, star or hash characters can be included in a telephone number dialling sequence by using the keys in the table below.
spECIAl ChArACTEr
kEYpAD ENTrY
kEYpAD DIsplAYs
PAUSE (1.6sec) ARM Key 10
* (Star) MONITOR Key 11
# (Hash) EXCLUDE Key 12

Ness R16 - Installation and Programming manual 37
programmIng
the 4 digit Client account Number identifies the panel to the central station when reporting alarms in Contact ID format. the number can be entered, (and reported), in Decimal or Hex.
programmiNg seqUeNce
1. Press: p72E The digits of the existing value will be displayed.
2. Press: [new account number] E The digits of the new value will be displayed. This is to program the account number in Decimal. See below for Hex.
EXamPlE: to program the account Number to be 1234: p72E 1234E
program mode level:Installer, Remote by PC.
factory defaUlt:0000
p72E ClIENT ACCoUNT NUMBEr
this option selects the zones which will report alarms by dialler.
programmiNg seqUeNce
1. Press: p74E
2. Press: [1-16] E to toggle each zone on or off.Zone light/s on indicates which option/s are enabled.
program mode level:Installer, Remote by PC.
factory defaUlt:1–16 = ON, All zones report Alarms.
related optioNs:P76E, Report Zone Restorals.
p74E rEporT ZoNE AlArMs
see page 38.
p75E rEporT MIsCEllANEoUs AlArMs
this option selects the zones which will report Restorals by dialler.
programmiNg seqUeNce
1. Press: p76E
2. Press: [1-16] E to toggle each zone on or off.Zone light/s on indicates which option/s are enabled.
program mode level:Installer, Remote by PC.
factory defaUlt:1–16 = ON, All zones report Restorals.
related optioNs:P74E, Report Zone Alarms.P82E 1E – 4E, Sending Restorals.
p76E rEporT ZoNE rEsTorAls
HeX accoUNt NUmBerThe Client Account Number is normal entered in Decimal using keypad digits 0-9.
However, if the account number is required in Hex, use this table when programming.
hEx kEYpAD kEYpADDIGIT kEY DIsplAY
B * (star, left or right) 11C aRm 12D moNItoR 13E EXCluDE 14F mEmoRY 15

Ness R16 - Installation and Programming manual38
programmIng
this option selects the non-zone events which will report alarms by dialler.
p75e, 1e, report dUress alarmoFF = Duress alarm reporting is disabled. oN = Duress alarm reporting is enabled.(Default = oFF).
p75e, 2e, report medical alarmoFF = medical alarm reporting is disabled. oN = medical alarm reporting is enabled.(Default = oN).
p75e, 3e, report paNic alarmthis option applies to keypad panic and radio key panic.oFF = Panic alarms reporting is disabled. oN = Panic alarms reporting is enabled.(Default = oN).
p75e, 4e, report fire alarmoFF = Fire alarm reporting is disabled. oN = Fire alarm reporting is enabled.(Default = oN).
p75e, 5e, report tamper alarmthis option applies to panel tamper and external tamper.oFF = tamper alarm reporting is disabled. oN = tamper alarm reporting is enabled.(Default = oN).
p75e, 6e, Not used.
p75e, 7e, report Keypad tamper alarmReports entry of consecutive invalid codes in armed mode, alarm on 4th failed attempt.oFF = Keypad tamper alarm reporting is disabled. oN = Keypad tamper alarm reporting is enabled.(Default = oN).
p75e, 8e, report eXit from iNstaller modeoFF = Exit From Installer mode reporting is disabled. oN = Exit From Installer mode reporting is enabled.(Default = oFF).
programmiNg seqUeNce
1. Press: p75E
2. Press: [1-8] E to toggle each option on or off.Zone light/s on indicates which option/s are enabled.
program mode level:Installer, Remote by PC.
factory defaUlt:1E = OFF2E = ON3E = ON4E = ON5E = ON6E = not used7E = ON8E = OFF
related optioNs:P77E, Report Miscellaneous Restorals.
p75E rEporT MIsCEllANEoUs AlArMs

Ness R16 - Installation and Programming manual 39
this option selects the miscellaneous alarms which will report Restorals by dialler.
see P75E, page 38, for a list of miscellaneous alarms.
programmiNg seqUeNce
1. Press: p77E
2. Press: [1-8] E to toggle each option on or off.Zone light/s on indicates which option/s is enabled.
program mode level:Installer, Remote by PC.
factory defaUlt:1–8 = ON, All Miscellaneous Alarms report Restorals.
related optioNs:P75E, Report Miscellaneous Alarms.
p77E rEporT MIsCEllANEoUs rEsTorAls
programmIng
Zones selected to Report multiple Zone alarms will report each time the zone alarms. the number of reports is a maximum of 15.
Zones not selected will report only once, until reset by an opening or a valid code.
programmiNg seqUeNce
1. Press: p78E
2. Press: [1-16] E to toggle each zone on or off.Zone light/s on indicates which option/s is enabled.
program mode level:Installer, Remote by PC.
factory defaUlt:1–16 = OFF, All zones report alarms once only.
related optioNs:P74E, Report Zone Alarms.
p78E rEporT MUlTIplE ZoNE AlArMs
this option selects when the dialler sends Zone Restoral Reports. only one of the following options may be selected.
Restoral reporting options also apply to 24hr zones.
P82E 1E: send Restoral immediately when resealed.P82E 2E: send Restoral after siren time & resealed.P82E 3E: send Restoral on Disarm & resealed.P82E 4E: send Restoral on Disarm always.
programmiNg seqUeNce
1. Press: p82E
2. Press: [1-4] E to toggle each option on or off.Zone light/s on indicates which option is enabled.
program mode level:Installer, Remote by PC.
factory defaUlt:4E = ON, Send Restoral on Disarm always.
related optioNs:P74E, Report Zone Alarms.
p82E rEsTorAl rEporTING opTIoNs

Ness R16 - Installation and Programming manual40
programmIng
this option sets the time between test Calls to the Central station.
Programmable from 0–255 hours. Enter a value between 0 and 255.
a value of 0 (zero) disables test calls.
programmiNg seqUeNce
1. Press: p83EThe digits of the existing value will be displayed.
2. Press: [new test call interval] E The digits of the new value will be displayed.
program mode level:Installer, Remote by PC.
factory defaUlt:168 = 168hrs (7 days).
Notes:To disable Test Reports, program the test call interval to 0 (zero) hours.
related optioNs:P84E, Time Before Next Test Call.
p83E TEsT CAll INTErvAl
this option sets the time before the next test call and is used to set the preferred time for test Calls.
Programmable from 0–255 hours. Enter a value between 0 and 255.
a value of 0 (zero) triggers the next test call immediately on exit from Installer program mode.
programmiNg seqUeNce
1. Press: p84EThe digits of the existing value will be displayed.
2. Press: [new time before next test call] E The digits of the current value will be displayed.
programmiNg eXample
to set the time before the first test call. E.g., If you are programming the panel at 5pm and you want test calls to be sent at 1am. Enter p84E 8E. (5pm + 8hrs =1am).
program mode level:Installer, Remote by PC.
factory defaUlt:0 = 0hrs (Immediate on exit from installer program mode).
Notes:• The Time Before Next Test Call is constantly updated. When viewed, the current value will be displayed (not the initially entered value).
related optioNs:P83E, Test Call Interval.
p84E TIME BEForE NExT TEsT CAll
HOURSDAYS
241
482
723
964
1205
1446
1687
1928
2169
24010
DAYS/HOURS TABlE
P83E and P84E timers start on exit from Installer program mode.
Ness R16 - Installation and Programming manual 41
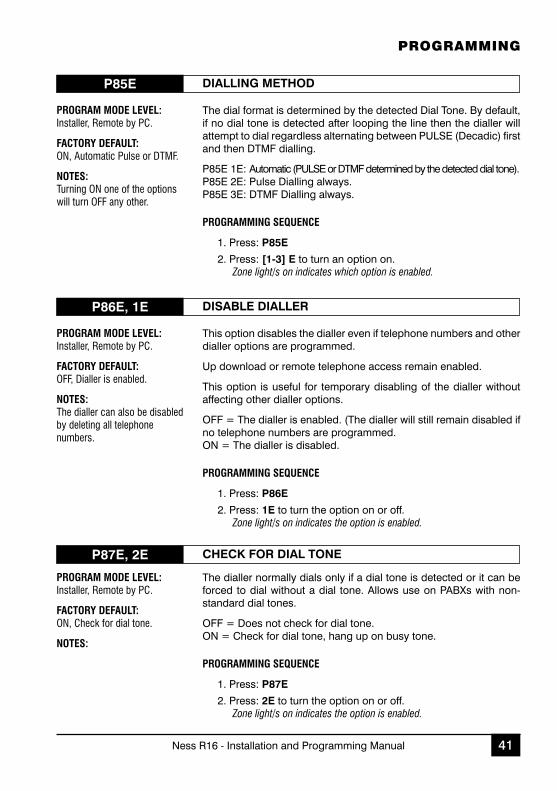
the dial format is determined by the detected Dial tone. By default, if no dial tone is detected after looping the line then the dialler will attempt to dial regardless alternating between PulsE (Decadic) first and then DtmF dialling.
P85E 1E: automatic (PulsE or DtmF determined by the detected dial tone).P85E 2E: Pulse Dialling always.P85E 3E: DtmF Dialling always.
programmiNg seqUeNce
1. Press: p85E
2. Press: [1-3] E to turn an option on.Zone light/s on indicates which option is enabled.
program mode level:Installer, Remote by PC.
factory defaUlt:ON, Automatic Pulse or DTMF.
Notes:Turning ON one of the options will turn OFF any other.
p85E DIAllING METhoD
programmIng
this option disables the dialler even if telephone numbers and other dialler options are programmed.
up download or remote telephone access remain enabled.
this option is useful for temporary disabling of the dialler without affecting other dialler options.
oFF = the dialler is enabled. (the dialler will still remain disabled if no telephone numbers are programmed.oN = the dialler is disabled.
programmiNg seqUeNce
1. Press: p86E
2. Press: 1E to turn the option on or off.Zone light/s on indicates the option is enabled.
program mode level:Installer, Remote by PC.
factory defaUlt:OFF, Dialler is enabled.
Notes:The dialler can also be disabled by deleting all telephone numbers.
p86E, 1E DIsABlE DIAllEr
the dialler normally dials only if a dial tone is detected or it can be forced to dial without a dial tone. allows use on PaBXs with non-standard dial tones.
oFF = Does not check for dial tone.oN = Check for dial tone, hang up on busy tone.
programmiNg seqUeNce
1. Press: p87E
2. Press: 2E to turn the option on or off.Zone light/s on indicates the option is enabled.
program mode level:Installer, Remote by PC.
factory defaUlt:ON, Check for dial tone.
Notes:
p87E, 2E ChECk For DIAl ToNE

Ness R16 - Installation and Programming manual42
programmIng
Enables or disables sending of open/Close reports.
oFF = open/Close reports disabled.oN = open/Close reports enabled.
programmiNg seqUeNce
1. Press: p88E
2. Press: 1E to turn the option on or off.Zone light/s on indicates the option is enabled.
program mode level:Installer, Remote by PC.
factory defaUlt:OFF, Open/Close reports disabled.
Notes:
p88E, 1E ENABlE opEN/ClosE rEporTs
a Cancel Report is sent when a Zone or miscellaneous alarm has been reset (by a valid user Code or Radio Key disarming).
If enabled, a cancel report will be sent after alarm, (Contact ID code 406), even if open/Close reports are disabled.
oFF = Cancel Report disabled.oN = Cancel Report enabled.
programmiNg seqUeNce
1. Press: p88E
2. Press: 5E to turn the option on or off.Zone light/s on indicates the option is enabled.
program mode level:Installer, Remote by PC.
factory defaUlt:ON, Cancel Report enabled.
Notes:• This option is used to indicate to the Central Station that an alarm has been reset by a valid user. • Usually used in cases where Open/Close reports are normally selected OFF.
p88E, 5E AlArM CANCEl rEporT
this option enables the dialler reporting of Radio supervision alarms.
oFF = Report supervision alarms disabled.oN = Report supervision alarms enabled.
programmiNg seqUeNce
1. Press: p88E
2. Press: 6E to turn the option on or off.Zone light/s on indicates the option is enabled.
program mode level:Installer, Remote by PC.
factory defaUlt:OFF, Report Supervision Alarms disabled.
related optioNs:P67E, Radio Supervision Time.
p88E, 6E rEporT sUpErvIsIoN AlArMs

Ness R16 - Installation and Programming manual 43
programmIng
When enabled the panel will test the telephone line every 20 seconds. If the telephone line is not found, the keypad lINE icon will commence flashing. If the line fault continues for 2 minutes then the keypad beeps a warning.
oFF = telephone line monitor disabled.oN = telephone line monitor enabled.
programmiNg seqUeNce
1. Press: p89E
2. Press: 5E to turn the option on or off.Zone light/s on indicates the option is enabled.
program mode level:Installer, Remote by PC.
factory defaUlt:OFF, Telephone Line Monitor disabled.
Notes:
p89E, 5E TElEphoNE lINE MoNITor
these options enable remote upload/download features.
p90e, 1e, remote accessWhen selected on, this option allows the panel to be remotely upload/downloaded by a remote computer.oFF = Remote access is disabled. oN = Remote access is enabled.(Default = oFF).
p90e, 2e, Not used.
p90e, 3e, remote armiNgallows the remote arming of the control panel using a standard DtmF telephone or mobile phone.oFF = Remote arming is disabled. oN = Remote arming is enabled.(Default = oFF).
p90e, 4e, remote disarmiNgallows the remote Disarming of the control panel using a standard DtmF telephone or mobile phone.oFF = Remote Disarming is disabled. oN = Remote Disarming is enabled.(Default = oFF).
programmiNg seqUeNce
1. Press: p90E
2. Press: [1-4] E to toggle each zone on or off.Zone light/s on indicates which option/s are enabled.
program mode level:Installer, Remote by PC.
factory defaUlt:1E = OFF2E = not used3E = OFF4E = OFF
Notes:Option P90E 1E, Remote Access applies only to upload/download by computer and modem.
If P90E 1E is disabled, remote Arm/Disarm is still available if options P90E 3E and/or 4E are on and P91E is not zero.
p90E Up/DoWNloAD opTIoNs
Ness R16 - Installation and Programming manual44
programmIng
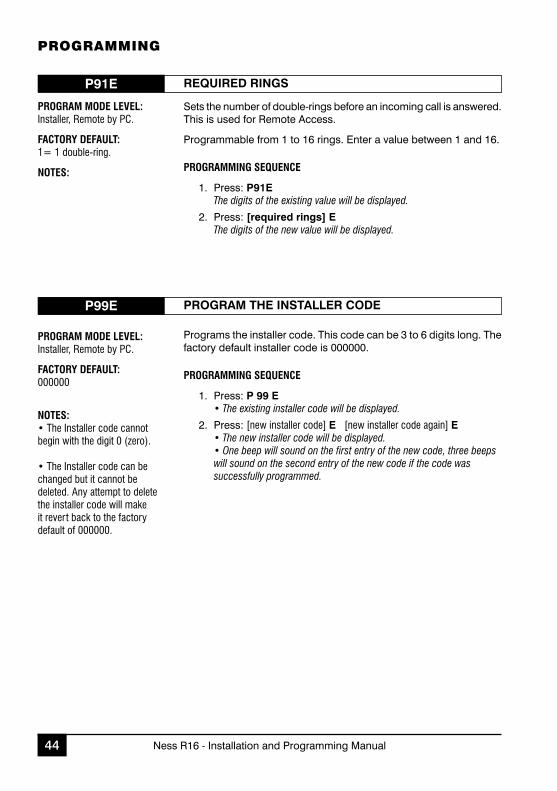
sets the number of double-rings before an incoming call is answered. this is used for Remote access.
Programmable from 1 to 16 rings. Enter a value between 1 and 16.
programmiNg seqUeNce
1. Press: p91EThe digits of the existing value will be displayed.
2. Press: [required rings] E The digits of the new value will be displayed.
program mode level:Installer, Remote by PC.
factory defaUlt:1= 1 double-ring.
Notes:
p91E rEqUIrED rINGs
Programs the installer code. this code can be 3 to 6 digits long. the factory default installer code is 000000.
programmiNg seqUeNce
1. Press: p 99 E • The existing installer code will be displayed.
2. Press: [new installer code] E [new installer code again] E • The new installer code will be displayed.• One beep will sound on the first entry of the new code, three beeps will sound on the second entry of the new code if the code was successfully programmed.
program mode level:Installer, Remote by PC.
factory defaUlt:000000
Notes:• The Installer code cannot begin with the digit 0 (zero).
• The Installer code can be changed but it cannot be deleted. Any attempt to delete the installer code will make it revert back to the factory default of 000000.
p99E proGrAM ThE INsTAllEr CoDE

Ness R16 - Installation and Programming manual 45
programmIng
this option erases the Event memory as well as memory locations where events and time stamps are stored for uploading status.
programmiNg seqUeNce
1. Press: p96EThe Event Memory is erased.
program mode level:Installer, Remote by PC.
factory defaUlt:[not applicable]
p96E ClEAr MEMorY
this option erases all program options and restores the factory default values. (there are no exceptions. this defaults all program options).
programmiNg seqUeNce
1. Press: p97E
2. Press: 1EFactory defaults are restored..
program mode level:Installer, Remote by PC.
factory defaUlt:[not applicable]
p97E 1E FACTorY DEFAUlT pANEl opTIoNs
this option erases all Radio Zones programmed by option P09E.
programmiNg seqUeNce
1. Press: p97E
2. Press: 2EFactory defaults are restored..
program mode level:Installer, Remote by PC.
factory defaUlt:[not applicable]
p97E 2E FACTorY DEFAUlT rADIo ZoNEs
this option erases all Keypad Codes and Radio Key codes.
programmiNg seqUeNce
1. Press: p97E
2. Press: 3EFactory defaults are restored..
program mode level:Installer, Remote by PC.
factory defaUlt:[not applicable]
p97E 3E FACTorY DEFAUlT UsEr CoDEs

Ness R16 - Installation and Programming manual46
DIAllING sEqUENCEthe dialler follows the re-dial procedure shown until the message is successfully reported. the dialler cycles around the Panel telephone numbers, skipping numbers not programmed. If P70E or P71E are programmed, then the Voice Dialling numbers, P00E and P01E are ignored.
a successful report is defined as a report which has been “kissed-off” by the Central station or by a hash (#) tone in the case of audible Format dialling to a private number.
1. Dial Central station Ph No. 1, (P70E) and report alarms in Contact ID format. ...If not kissed off...
2. Dial Central station Ph No. 2, (P71E) and report alarms in Contact ID format.3. If P70E and P71E are blank, dial Voice Dialling Ph No. 1, (P00E) and report alarms in Ness
Voice Dialling format. ...If not kissed off...4. If P70E and P71E are blank, dial Voice Dialling Ph No. 2, (P01E) and report alarms in Ness
Voice Dialling format.4. accumulate maximum of 15 failed attempts.5. attempt to dial unsuccessful numbers a second time after 30 seconds, a total of 10 attempts.6. Wait 5 minutes then subsequent attempts are 1 hour apart.7. a maximum of 15 dial attempts for the same event8. New events re-start the sequence at 1.
No more than 20 dial events will be reported between each disarming of the panel.
MEssAGE qUEUEthe panel places event reports in a queue. multiple simultaneous reports or reports previously unsuccessfully dialled will be included in the current call.
the oldest report on the queue is sent first. If the queue is full (8 messages), a new report will overwrite the oldest report.
the current dialler queue is cancelled and the dialler buffer is erased on entry to installer program mode.
dIaller operatIon

Ness R16 - Installation and Programming manual 47
dIaller operatIon
NEss voICE DIAllINGthe dialler sends alarm reports to a private telephone, (mobile telephone or fixed telephone), using Voice Dialling telephone numbers 1 and 2, (P00E, P01E).
ENaBlINg VoICE DIallINgVoice Dialling Format is enabled simply by programming the Voice Dialling phone number options P00E and P01E. (see side note. Central station monitoring must be disabled to enable Voice Dialling).
oPERatIoNthe word 'alaRm' is repeated for 30 seconds until the alarm is acknowledged (see below).
If the alarm is not acknowledged both telephone numbers will be alternately dialled up to a maximum of 15 attempts per alarm event.
aCKoWlEDgINg tHE alaRmthe person receiving the call can acknowledge the alarm by pressing the # key on their telephone.
Press the # key for 2 seconds during pauses in the audible message. (on mobile phones, press the # key in short bursts. many mobile phones enter sub menus if the # key is pressed continuously).
When the alarm is acknowledged the dialler will hang up and not make any more calls. Further alarms on other zones will restart the dialling sequesnce.
MONITOREDPREMISES
AUDIBLE MONITORING
TELEPHONE LINE ANY TELEPHONE
NotE: the R16 can be monitored by Central station or by Voice Dialling to a private phone, but not by both simultaneously.
any telephone numbers programmed in options P70E & P71E must be erased to allow the Voice Dialling telephone numbers to work. (ask your installer).

Ness R16 - Installation and Programming manual48
dIaller operatIon
CENTrAl sTATIoN MoNITorING
the dialler sends alarm reports to a central station using Central station telephone numbers 1 and 2, (P70E & P71E, Page 36).
It is not necessary to program a reporting format. alarm reports are automatically sent in Contact ID format to the telephone numbers programmed at P70E and/or P71E.
MONITOREDPREMISES
CENTRAL STATION MONITORING
TELEPHONE LINE MONITORINGSTATION
Events are reported to the central station using the Contact ID format as follows: ssss 18 q xYZ GG CCC Essss18 = Client account Number +Contact ID identifier.q = Event qualifier(1 = New Event, 3 = Restore).xYZ = Event code.GG = group Number (always 00). CCC = Qualifier (0-9) + user ID (uu) / Zone ID (zz), or unique Code (030-099)E = Checksum.
REstoRal REPoRts
Restores are always sent for the following alarms when the device alarm condition is physically removed:137 Siren box tamper302 Panel low battery383 Tamper (Detector) 381 Radio device supervision poll fail
Restores are always sent for the following alarms on disarming when a valid code is entered, (if Restores are enabled):101 Radio Key Medical alarm120 Panic alarm121 Duress alarm130 Burglary alarm133 24 hour alarm355 Radio jamming alarm
CoNtaCt ID REPoRts CoNTACT ID CoDE
REPoRt NamE Q XYZ CCCReported in Voice format
Zone alarm q 130 0zz Yes
Zone 24 Hour alarm q 133 0zz Yes
Keypad Panic q 120 032 Yes
Keypad/Radio Key Duress q 121 1uu Yes
Keypad medical q 100 033 Yes
Keypad Fire q 110 034 Yes
Radio Key Panic q 120 1uu Yes
Radio Key medical q 101 1uu Yes
Radio Detector supervision q 381 4zz
Radio Panic Button supervision q 381 1uu
Radio Jamming or substitution q 355 060
Panel/siren tamper q 137 040 Yes
Keypad tamper q 137 042 Yes
Radio sensor tamper q 383 3zz Yes
mains Fail q 301 050
Panel Battery low q 302 052
Radio Detector Battery low q 384 3zz
open/Disarm 1 401 0uu
Close/arm 3 401 0uu
shorcut arm (aRm + E) 3 401 025
Cancel/Disarm 1 406 0uu
Zone manual Exclude q 573 0zz
Zone auto Exclude q 380 0zz
Exit Install mode 1 306 035
test Report 1 602 063
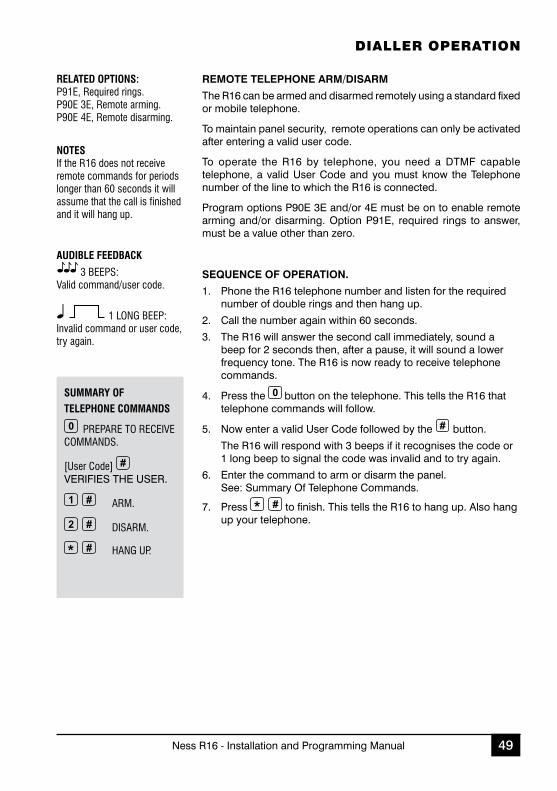
Ness R16 - Installation and Programming manual 49
dIaller operatIon
rEMoTE TElEphoNE ArM/DIsArM
the R16 can be armed and disarmed remotely using a standard fixed or mobile telephone.
to maintain panel security, remote operations can only be activated after entering a valid user code.
to operate the R16 by telephone, you need a DtmF capable telephone, a valid user Code and you must know the telephone number of the line to which the R16 is connected.
Program options P90E 3E and/or 4E must be on to enable remote arming and/or disarming. option P91E, required rings to answer, must be a value other than zero.
aUdiBle feedBacK
3 BEEPS: Valid command/user code.
1 LONG BEEP:Invalid command or user code, try again.
sEqUENCE oF opErATIoN.
1. Phone the R16 telephone number and listen for the required number of double rings and then hang up.
2. Call the number again within 60 seconds.
3. the R16 will answer the second call immediately, sound a beep for 2 seconds then, after a pause, it will sound a lower frequency tone. the R16 is now ready to receive telephone commands.
4. Press the button on the telephone. this tells the R16 that telephone commands will follow.
5. Now enter a valid user Code followed by the button.
the R16 will respond with 3 beeps if it recognises the code or 1 long beep to signal the code was invalid and to try again.
6. Enter the command to arm or disarm the panel. see: summary of telephone Commands.
7. Press to finish. this tells the R16 to hang up. also hang up your telephone.
related optioNs:P91E, Required rings.P90E 3E, Remote arming.P90E 4E, Remote disarming.
Notes If the R16 does not receive remote commands for periods longer than 60 seconds it will assume that the call is finished and it will hang up.
sUmmary of telepHoNe commaNds
PREPARE TO RECEIVE COMMANDS.
[User Code] VERIFIEs tHE usER.
ARM.
DISARM.
HANG UP.

Ness R16 - Installation and Programming manual50
ness radIo optIonal aCCessorIes
100-067 rk4 4 ButtoN RaDIo KEYRK4 Radio Key is a fully sealed and fully waterproof four channel radio key with click action rubber buttons.
Functions: oN, oFF, PaNIC, auX. the RK4 is a sealed unit powered by a lithium battery with an expected life of 10 years, (@ 7 transmissions per day).
100-664 rk3 3 ButtoN RaDIo KEYRK3 Radio Key, fully waterproof radio key.
Functions: oN, oFF, PaNIC. lithium battery supplied.
100-683 rk1B RaDIo KEY PENDaNtFully waterproof pendant style transmitter can be used as a portable wireless Panic button. supplied with a neckchain as well as wristwatch straps. Includes long life lithium battery.
100-056 rDB RaDIo DooR BEllthe Ness Radio Doorbell requires almost no installation. long life lithium battery powered, simply screw it to the wall.
the doorbell chime is heard through the R16 panel onboard siren. Choose from one of 9 doorbell tunes built-in to the R16 panel.
* If the optional Radio Doorbell is available in your region.
100-283 rpB RaDIo EmERgENCY ButtoNthe Ness Radio Emergency Button is designed to be wall mounted as an easy to install alternative to hardwired emergency buttons. long life lithium battery is supplied.
100-001 rkp RaDIo KEYPaDa unique fully portable radio keypad. the Ness Radio Keypad provides totally wireless arming/Disarming of the control panel as well as operating Home mode and provides a Panic alarm.

Ness R16 - Installation and Programming manual 51
ness radIo optIonal aCCessorIes
100-663 r15 RaDIo PIRthe Ness R15 Radio PIR has a detection range of 15m, automatic temperature compensation and vertical creep zones. Features Radio supervision and Encryption when used with a compatible Ness control panel. With Pulse Count, battery saving mode and low battery reports. 9V lithium battery supplied.
100-663pET R15 PEt aWaRE RaDIo PIRthe Ness R15PEt Pet aware model detects humans but is immune to household pets. allows you to protect your home with your pets inside.
100-691 r12 RaDIo PIRRadio PIR with 12m detection range and automatic temperature compensation. Features Radio supervision and Encryption when used with a compatible Ness control panel. With Pulse Count, battery saving mode and low battery reports. 9V lithium battery supplied. Ness Quantum mounting bracket supplied.
100-662 rr1 RaDIo REED sWItCHNess Radio Reed switch for wireless door and window protection. Includes long life lithium battery.
100-527 rr2 multI-PuRPosE tRaNsmIttERthe Ness universal transmitter is a 9V battery operated transmitter with onboard reed switch, an external input and vibration analyser.
the external input can be used to take inputs from normally closed reed switches or emergency buttons. this allows connection of any type of N.C. switch or button to send an alarm signal.
the external input can also be used to connect a Nessensor™ vibration sensor for completely wireless vibration sensing with sensitivity adjustment.
106-040 rsM RaDIo smoKE DEtECtoRthe Ness Radio smoke Detector provides a wireless smoke detection option which can sound the R16 siren/s and dialler if required (or as programmed by your installer.)
the Ness Radio smoke Detector uses Photo-electric smoke detection technology. on board sounder and test button for the sounder and radio transmitter. a single battery powers the smoke detector and the transmitter. Includes 9V lithium battery.

Ness R16 - Installation and Programming manual52
option No. Description Default page
P00E Voice Dialling Format tel. No. 1 none 20
P01E Voice Dialling Format tel. No. 2 none
P05E Doorbell Volume 3 21
P06E Doorbell tune 3
P08E Radio signal strength test 22
P09E Program Radio Devices none 23
• P10E Program Radio Keys none 24
P11E Program master Code (Keypad Code 1) 123 26
P12E-P25E Program Keypad Codes 2-15 none
P26E Entry Delay time 20 sec 27 P28E Exit Delay time 60 sec
P29E siren Reset time 5 min
P40E Instant Zones Zones 3-16 28 P41E Entry Delay Zones Zone 1
P42E Handover Zones Zone 2
P44E Reset lockout Zones all zones 29 P51E monitor Zones No zones
P52E 24hr Zones No zones
P53E Day Zones No zones 30
P60E 1E Entry beeps oN 31
2E [not used] oFF
3E [not used] oFF
4E tamper siren lockout oN
5E [not used] oFF
6E auto Exclude Zones oN
7E Keypad Backlight Blanking oFF
8E Disable onboard siren oFF
r16 opTIoNs sUMMArY page 1 of 4
u
u
u
u
u
u
u
u
u

Ness R16 - Installation and Programming manual 53
option No. Description Default page
P62E 1E memory Display shor tcut oN 32
2E Zone Exclude shortcut oN
3E monitor mode shortcut oN
4E [not used] oFF
5E arming shortcut oN
P62E 7E siren Burst on auto Exclude oN
P64E 1E Brief monitor alarm oFF 33
2E Brief Day alarm oN
3E [not used]
4E siren chirps arm/Disarm oFF
6E Keypad Panic alarm oN
7E Fire alarm oFF
8E medical alarm oFF
P65E 1E Radio Jamming alarm oFF 34
2E Radio substitution alarm oFF
P67E Radio supervision time 0 hrs 35
P68E 4E Radio Key arming Warning oFF
P70E Central station telephone. No. 1 none 36
P71E Central station telephone. No. 2 none
P72E Client account No. 0000 37
r16 opTIoNs sUMMArY page 2 of 4
options marked "u" can be programmed in user Program mode
All options can be programmed in Installer Program mode
u
u

Ness R16 - Installation and Programming manual54
option No. Description Default page
P74E Report Zone alarms 1-16 all zones 37
P75E 1E Report Duress alarm oFF 38
2E Report medical alarm oN
3E Report Panic alarm oN
4E Report Fire alarm oN
5E Report tamper alarm oN
6E [not used] oFF
7E Report Keypad tamper alarm oN
8E Report Exit From Installer mode oFF
P76E Report Zone Restorals 1-16 all zones 37
P77E Report misc. Restorals (see P75E for full list) all oN 39 P78E Report multiple Zone alarms 1-16 all oFF
P82E 1E send Restoral Immediately when Resealed oFF
2E send Restoral after siren time & Resealed oFF
3E send Restoral on Disarm & Resealed oFF
4E send Restoral on Disarm always oN
P83E test Call Interval 168 hrs 40
P84E time Before Next test Call 0 hrs
P85E 1E auto, Pulse or DtmF depending on dial tone oN 41
2E Pulse Dialling always oFF
3E DtmF Dialling always oFF
P86E 1E Disable Dialler oFF
P87E 2E Check For Dial tone oN
P88E 1E open/Close Reports oFF 42 5E alarm Cancel Report oN
6E Report supervision alarms oFF
r16 opTIoNs sUMMArY page 3 of 4

Ness R16 - Installation and Programming manual 55
r16 opTIoNs sUMMArY page 4 of 4
option No. Description Default page
P89E 5E telephone line monitor oFF 43
P90E 1E Remote access oFF 43
2E [not used] oFF 3E Remote arming oFF
4E Remote Disarming oFF
P91E Required Rings to answer incoming calls 1 44
P96E Clear Event memory 45
P97E 1E Factory Default Panel options
2E Factory Default Radio Zones
3E Factory Default user Codes & Radio Keys
P99E Program Installer Code 000000 44

NEss lIMITED WArrANTY:
Ness security Products Pty ltd warrants its products to be free from manufacturing defects in materials or workmanship for the warranty period as detailed in Ness’ terms and Conditions of sale and all other obligations detailed in those terms and Conditions.
Whilst Ness security Products, the manufacturer, is accredited to Iso9001 and all possible care and diligence has been applied during manufacture to ensure the reliable operation of this unit, there are various external factors that maY impede or restrict the operation of this unit in accordance with the product's specification.
these factors include, but are not limited to,
1. Failure to communicate to the monitoring company due to a telephone service provider’s line fault or due to the incorrect configuration of the telephone/Product to the telephone Network. It is the responsibility of a qualified Installer to ensure correct configuration to the telephone network.
2. Erratic or reduced radio range as detailed in the manufacturer’s specifications. Ness’ radio based products are sophisticated low power devices however the presence of in-band radio signals, high power transmissions or interference caused by electrical appliances e.g. computers, televisions etc. maY reduce the range performance. Whilst such occurrences are unusual, they are possible none the less. If a problem such as this is encountered and the performance is unsatisfactory, the installer of the product should be contacted immediately.
3. unauthorised tampering, physical damage, electrical interruptions such as mains failure, electrical spikes or lightning.
Ness security Products is not an insurer of either property or safety of the user and limits its liability for any loss or damage including incidental or consequential damages to Ness' original selling price. there are no warranties, expressed or implied, which extend beyond the description on the face hereof. Ness security Products recommend that the system is tested weekly to confirm reliable operation.