installation pc virtualbox
TRANSCRIPT

WINDOWS 64-BIT INSTALLATION NOTES – ORACLE VIRTUALBOX Micro Planner X-Pert V3.5.1 Digital Download Edition THIS DOCUMENT CONTAINS IMPORTANT INFORMATION REGARDING THE INSTALLATION AND USE OF THIS SOFTWARE. IF AFTER READING THIS DOCUMENT, YOU HAVE REMAINING QUESTIONS, PLEASE CONTACT INSTALLATION SUPPORT AT: Installation Support Email: [email protected] Micro Planning International Asia Pacific Pty Ltd ABN 41 126 858 553 This document is Copyright © 2012 Micro Planning International Asia Pacific Pty Ltd ABN 41 126 858 553 All rights reserved
Software Installation
This digital download edition of Micro Planner X-Pert V3.5.1 has been tested for compatibility with the following 32-bit platforms:
Windows XP (All editions, except 64-bit)
Windows 7 (32-bit editions only)
Windows Server 2003 32-bit
Windows Server 2008 32-bit In addition, we have produced a set of installation notes that should allow you to run Micro Planner X-Pert V3.5.1 on a Windows 64-bit operating system, through a virtualization solution such as VMware Player 4 (freely available), or Oracle VirtualBox 4 (free and open source). Please note that we have tested with Windows 7 XP Mode under Microsoft Virtual PC, with poor results. We recommend you choose VMware Player 4 or Oracle VirtualBox 4 with a Windows 7 32-bit install. In this document, we run you through the steps required to install a Virtual Windows 7 32-bit system using Oracle VirtualBox 4, running on top of Windows 7 64-bit as the base operating system.. After doing so, you will be able to follow the standard Windows installation instructions from within the virtual machine that you create.

Oracle VirtualBox - Detailed Installation Steps The following detailed steps will assist you with the installation of Windows 7 32-bit as a virtual machine under Oracle VirtualBox 4, running under Windows 7 64-bit. STEP 1. Open your web browser and navigate to: http://www.virtualbox.org/wiki/Downloads Select the download for “VirtualBox 4.1.10 for Windows hosts”, as shown below.
STEP 2. You may be prompted as shown below. You may safely select “Run”.

STEP 3. Following download, you will be presented with the Oracle VirtualBox 4 installation wizard. Follow the prompts as instructed. During installation, you may be prompted as shown below. It is safe to select “Always trust software from „Oracle Corporation‟” and then Click Install.
STEP 4. At the end of installation, you should see the following screen, confirming successful installation and prompting you to “Click the Finish button”. You may do so.

STEP 5. Following the automatic launch of Oracle VirtualBox 4, you will be presented with the Oracle VM VirtualBox Manager, as shown below. Click “New”.
STEP 6. When you are prompted, give the new virtual machine a name, e.g. “Windows 7”, check that the “OS Type” and “Version” fields display “Microsoft Windows” and “Windows 7” respectively, as shown below. and click “Next”. You may continue to click “Next” using the defaults provided.
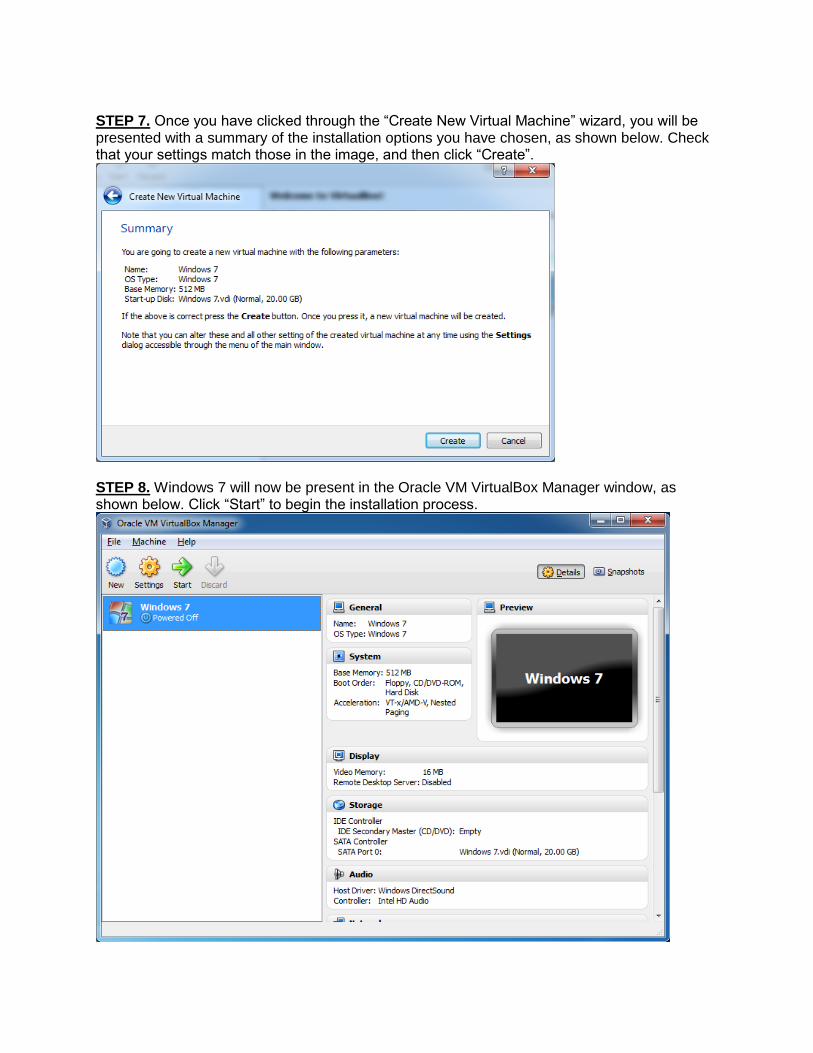
STEP 7. Once you have clicked through the “Create New Virtual Machine” wizard, you will be presented with a summary of the installation options you have chosen, as shown below. Check that your settings match those in the image, and then click “Create”.
STEP 8. Windows 7 will now be present in the Oracle VM VirtualBox Manager window, as shown below. Click “Start” to begin the installation process.
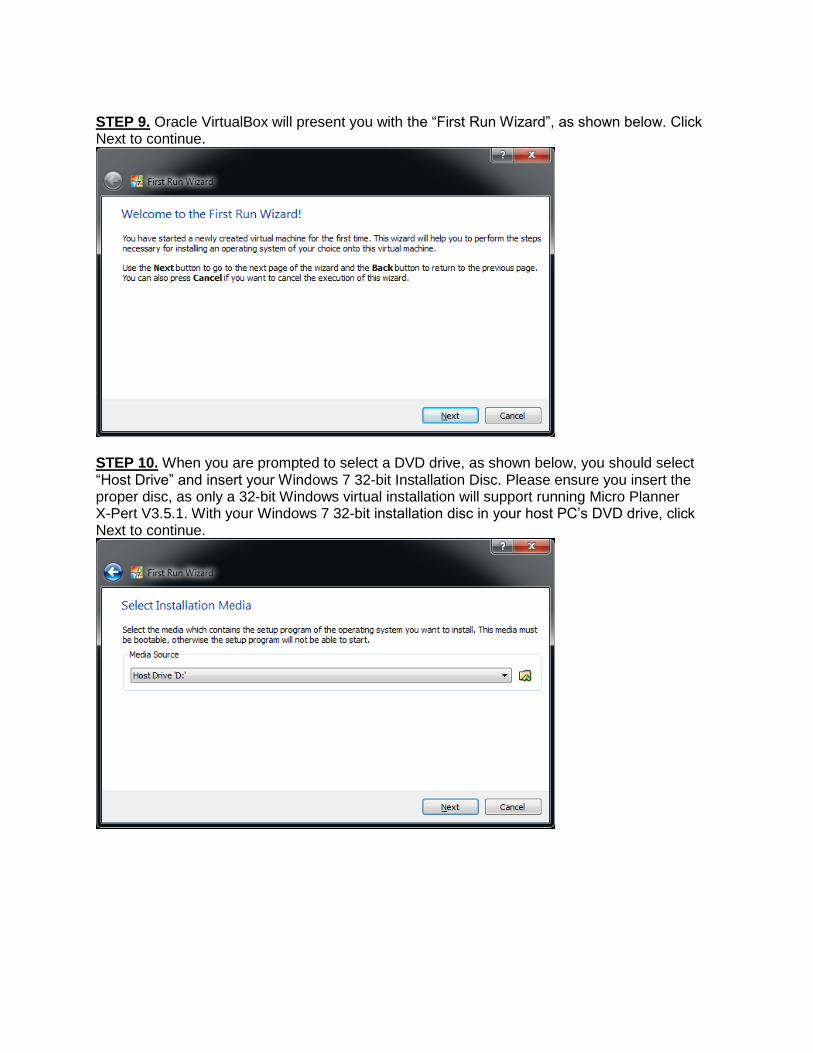
STEP 9. Oracle VirtualBox will present you with the “First Run Wizard”, as shown below. Click Next to continue.
STEP 10. When you are prompted to select a DVD drive, as shown below, you should select “Host Drive” and insert your Windows 7 32-bit Installation Disc. Please ensure you insert the proper disc, as only a 32-bit Windows virtual installation will support running Micro Planner X-Pert V3.5.1. With your Windows 7 32-bit installation disc in your host PC‟s DVD drive, click Next to continue.

STEP 11. When prompted as shown below, you may click “Start”.
STEP 12. The Windows Installation will now proceed, as shown below. Follow the prompts to install Windows 7 32-bit into your Virtual Machine.

STEP 13. Once the installation of the Windows 7 32-bit Virtual Machine is fully complete, you should be presented with a view similar to that shown below. Note how Windows 7 32-bit is shown as an Oracle VirtualBox window within your Windows 7 64-bit desktop.
STEP 14. From within the Oracle VirtualBox window, select “Devices”, and then select “Install Guest Additions” from the drop-down menu, as shown below.
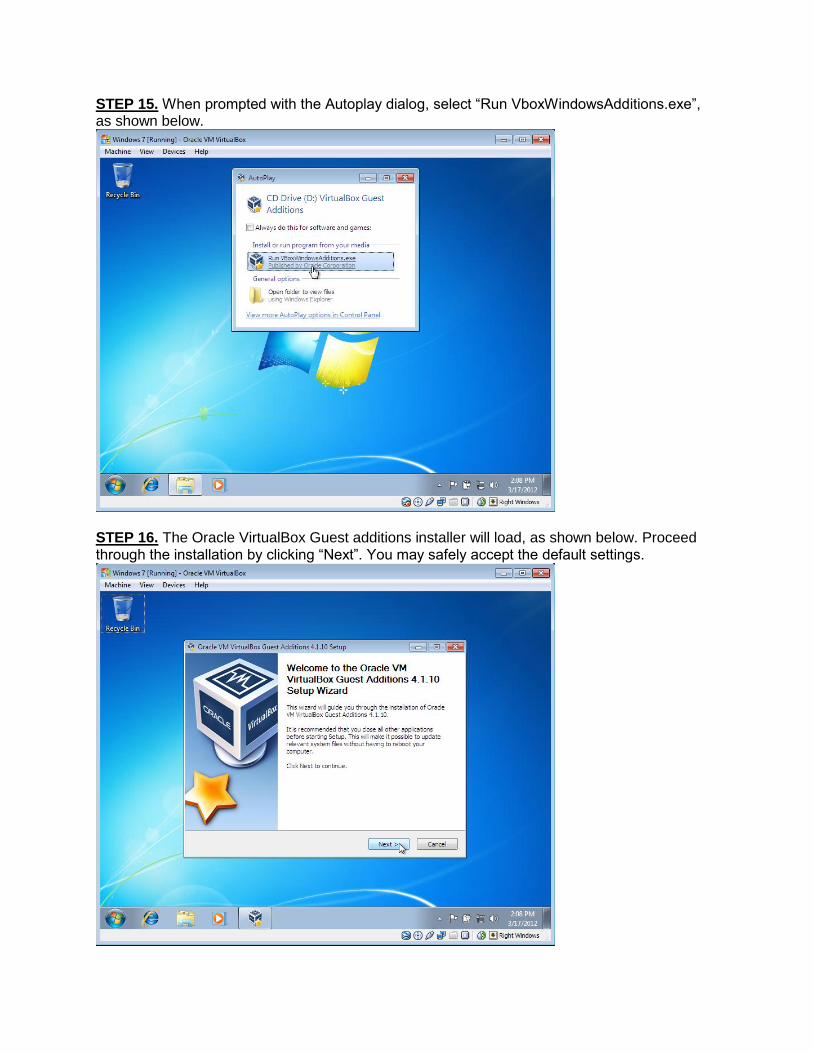
STEP 15. When prompted with the Autoplay dialog, select “Run VboxWindowsAdditions.exe”, as shown below.
STEP 16. The Oracle VirtualBox Guest additions installer will load, as shown below. Proceed through the installation by clicking “Next”. You may safely accept the default settings.

STEP 17. During installation, you may be prompted as shown below. It is safe to select “Always trust software from „Oracle Corporation‟” and then Click Install.
STEP 18. Following successful installation of Oracle VirtualBox Guest Additions, you will be prompted to restart the Virtual Machine (running Windows 7 32-bit), as shown below. You may safely do so. Your Host system (running Windows 7 64-bit) will not be restarted.
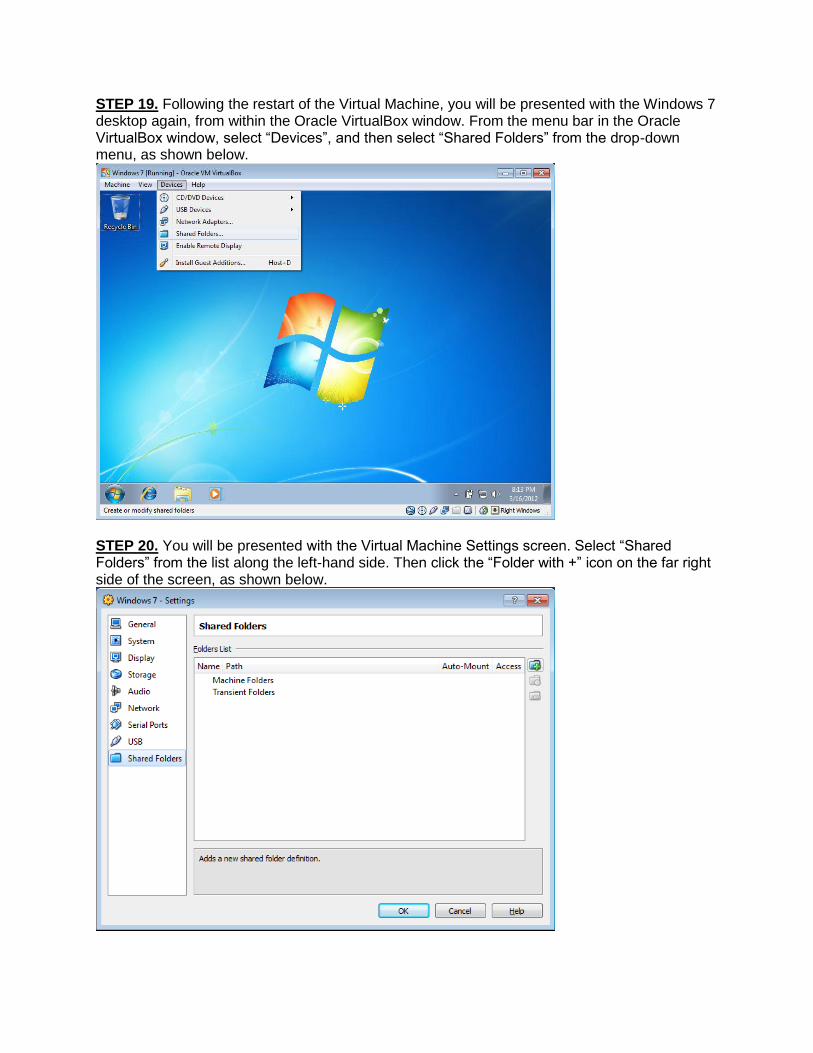
STEP 19. Following the restart of the Virtual Machine, you will be presented with the Windows 7 desktop again, from within the Oracle VirtualBox window. From the menu bar in the Oracle VirtualBox window, select “Devices”, and then select “Shared Folders” from the drop-down menu, as shown below.
STEP 20. You will be presented with the Virtual Machine Settings screen. Select “Shared Folders” from the list along the left-hand side. Then click the “Folder with +” icon on the far right side of the screen, as shown below.

STEP 21. You will be presented with the “Add Share” window, as shown below. Enter the path or browse to the folder where you have located the Micro Planner X-Pert V3.5.1 installation executable. Give this new share a name, as shown below. In this example, the username is „user‟ and the path points to that user‟s Desktop. When you are satisfied with your selection, you may click “OK”.
STEP 22. The list of “Shared Folders” in the Virtual Machine Settings window will be updated to reflect the changes you have made. You may return to this screen at a later date to share additional folders, if necessary, using a similar process. For now, you may click “OK” to continue.

STEP 23. Within the Oracle VirtualBox window, start “Windows Explorer” or, alternatively, navigate to “Computer”. When you are presented with Windows Explorer, select “Network” from the bottom of the left-hand sidebar. If you see a drop-down notification that “Network discovery and File sharing are turned off”, click the notification and select “Turn on network discovery and file sharing”, as shown below.
STEP 24. If you have selected to turn on network discovery and file sharing, you will be prompted to select an option. You may select the top option, as shown below.
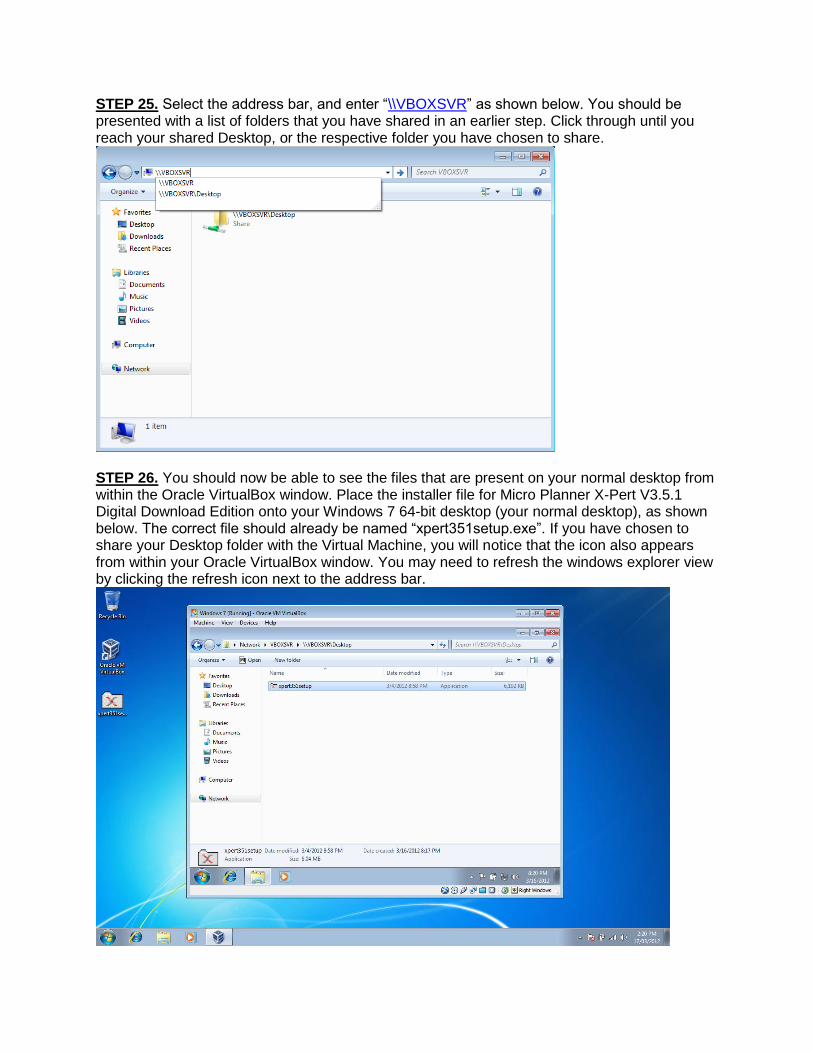
STEP 25. Select the address bar, and enter “\\VBOXSVR” as shown below. You should be presented with a list of folders that you have shared in an earlier step. Click through until you reach your shared Desktop, or the respective folder you have chosen to share.
STEP 26. You should now be able to see the files that are present on your normal desktop from within the Oracle VirtualBox window. Place the installer file for Micro Planner X-Pert V3.5.1 Digital Download Edition onto your Windows 7 64-bit desktop (your normal desktop), as shown below. The correct file should already be named “xpert351setup.exe”. If you have chosen to share your Desktop folder with the Virtual Machine, you will notice that the icon also appears from within your Oracle VirtualBox window. You may need to refresh the windows explorer view by clicking the refresh icon next to the address bar.

STEP 27. You should now be able to double-click and start the installation of Micro Planner X-Pert V3.5.1 from within the Oracle VirtualBox window, as shown below. The installation will now proceed as per the standard installation instructions. After installation, you may launch Micro Planner X-Pert V3.5.1 via the windows start menu, accessed from within the Oracle VirtualBox window. If you shutdown the Windows 7 32-bit virtual machine, you will need to start the Windows 7 virtual machine from within the Oracle VM VirtualBox Manager screen, before you can start Micro Planner X-Pert V3.5.1 again.

Thankyou for reading this document. If you have further questions, please contact Installation Support, by email: [email protected] We would like to congratulate you once again for choosing Micro Planner X-Pert V3.5.1
Copyright © 2012 Micro Planning International Asia Pacific Pty Ltd ABN 41 126 858 553 All rights reserved Other company, product, or service names may be trademarks or service marks of others. These and/or associated processes and systems may be subject to copyright and Micro Planning International Asia Pacific Pty Ltd, cannot be held liable for any misuse of such subject to any jurisdictional specific laws applicable.