installation of sql server 2008 express with …...installation of sql server 2008 express with...
TRANSCRIPT

Installation of SQL Server 2008 Express with Advanced Services on Windows 2008 R2 (64-bit)
Contents
Add Web Server (IIS) Role ............................................................................................................... 2
NET Framework 3.5 ......................................................................................................................... 4
SQL Server Installation ..................................................................................................................... 5
Configuring SQL Server .................................................................................................................. 18
Configuring the Product ................................................................................................................ 24
In Basic Mode ............................................................................................................................ 24
In Full Featured Mode ............................................................................................................... 26
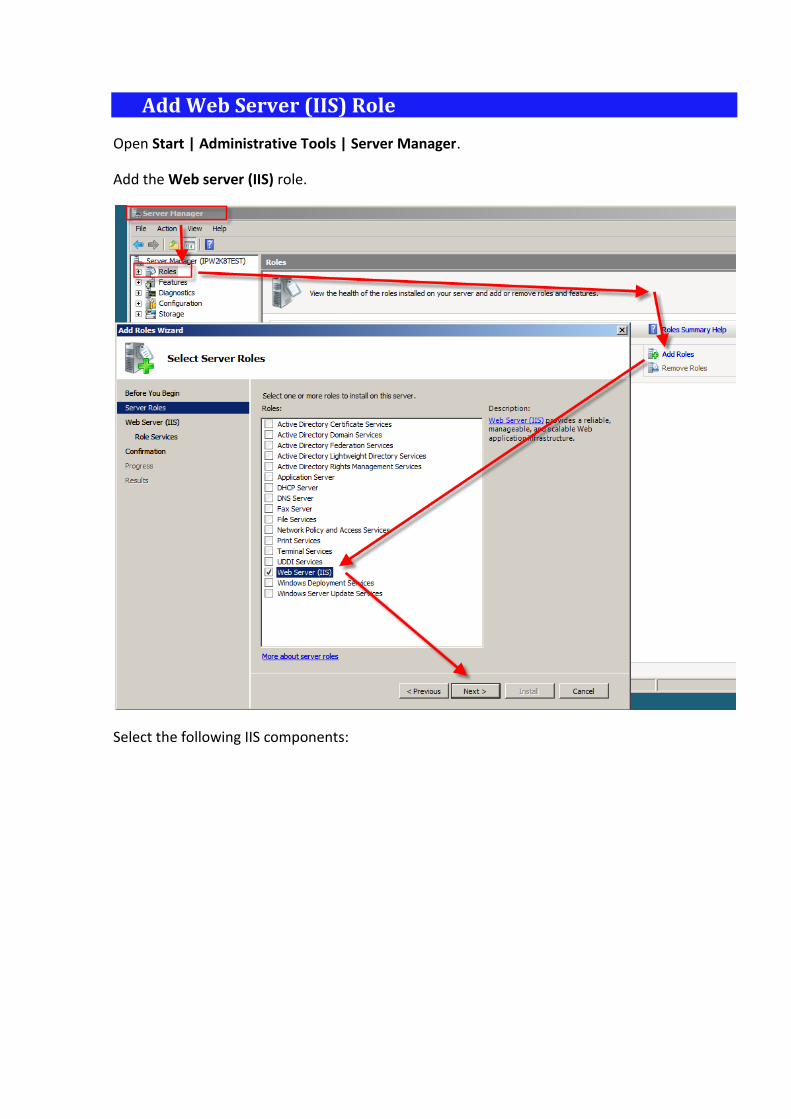
Add Web Server (IIS) Role
Open Start | Administrative Tools | Server Manager.
Add the Web server (IIS) role.
Select the following IIS components:
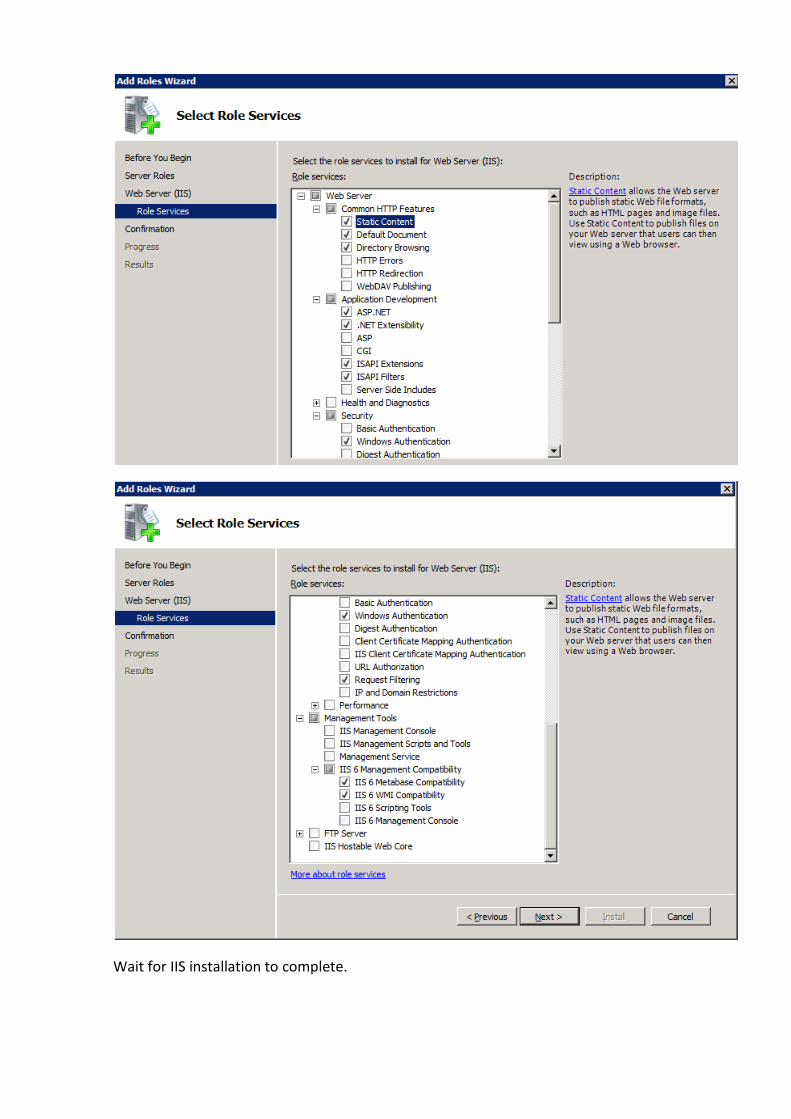
Wait for IIS installation to complete.
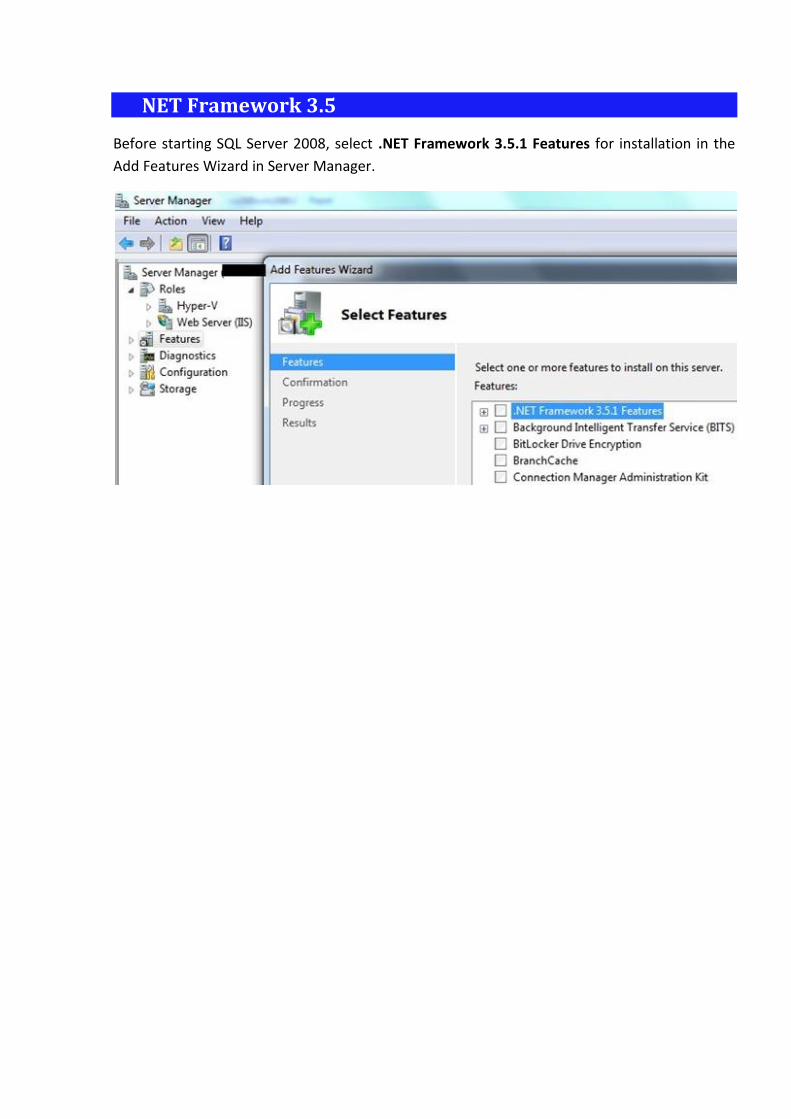
NET Framework 3.5
Before starting SQL Server 2008, select .NET Framework 3.5.1 Features for installation in the
Add Features Wizard in Server Manager.

SQL Server Installation
Download Microsoft SQL Server 2008 Express Edition (Runtime with Advanced Services):
http://www.microsoft.com/express/sql/download/
After downloading, start SQL Server installation.
Select Installation at the left pane.
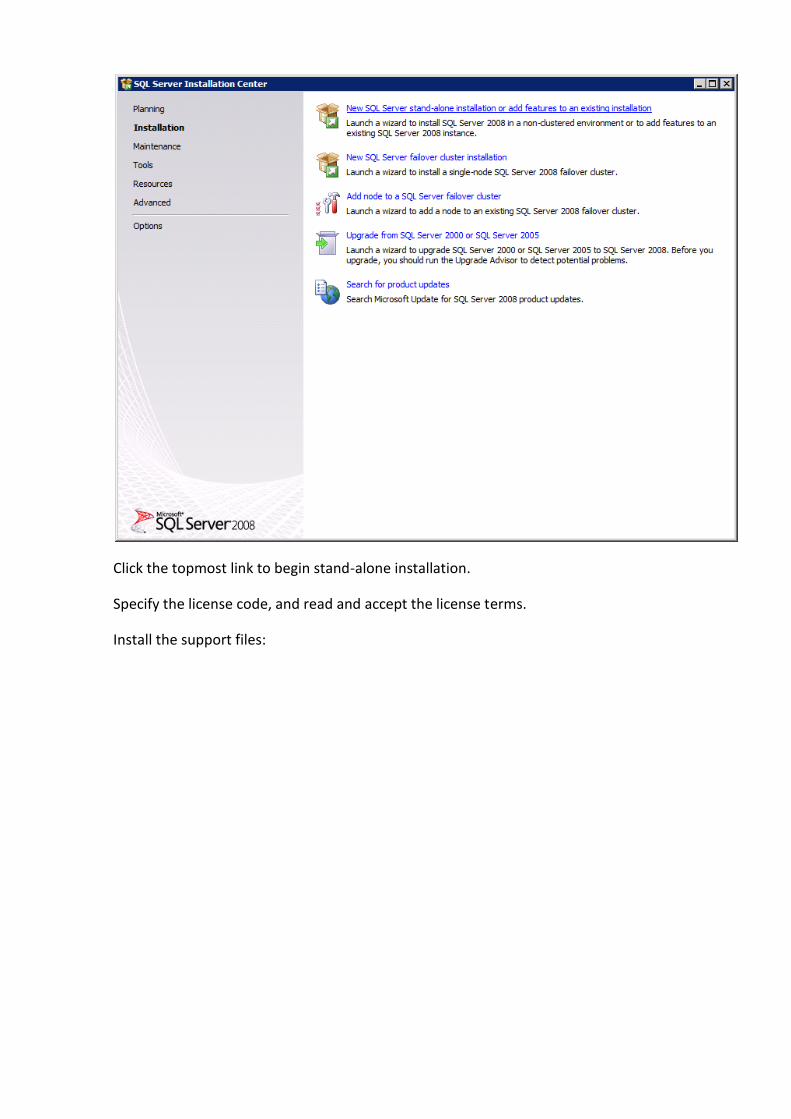
Click the topmost link to begin stand-alone installation.
Specify the license code, and read and accept the license terms.
Install the support files:
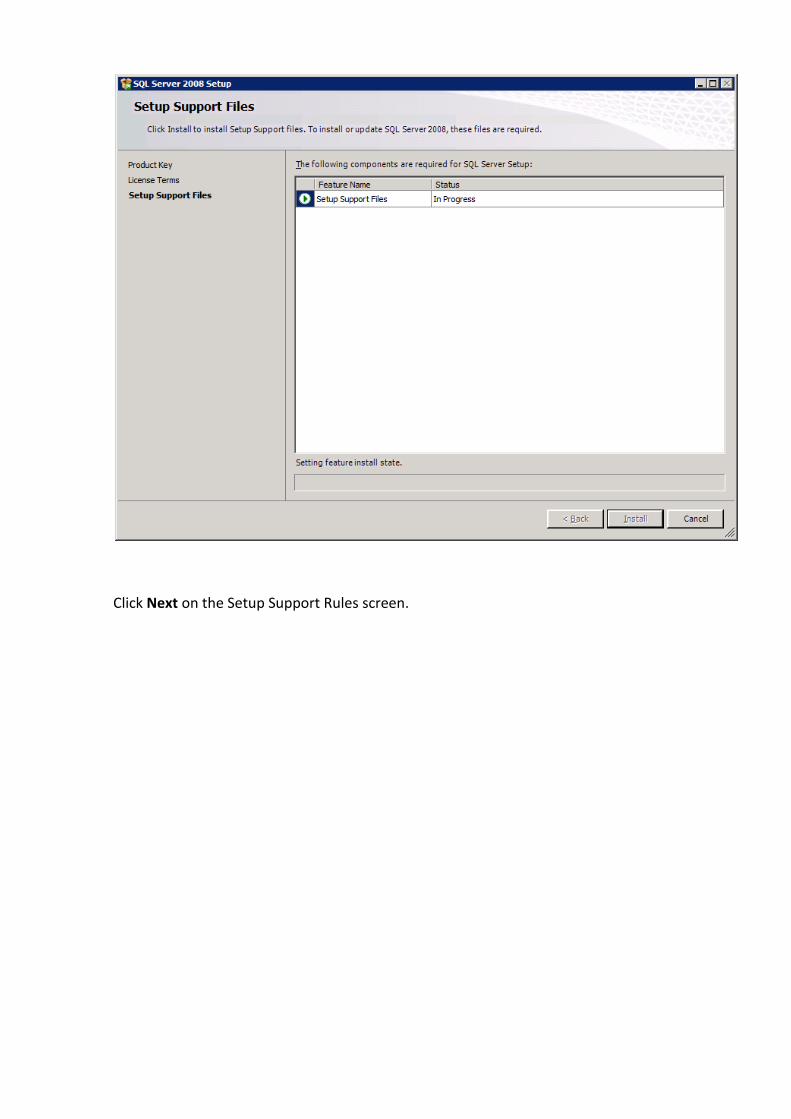
Click Next on the Setup Support Rules screen.
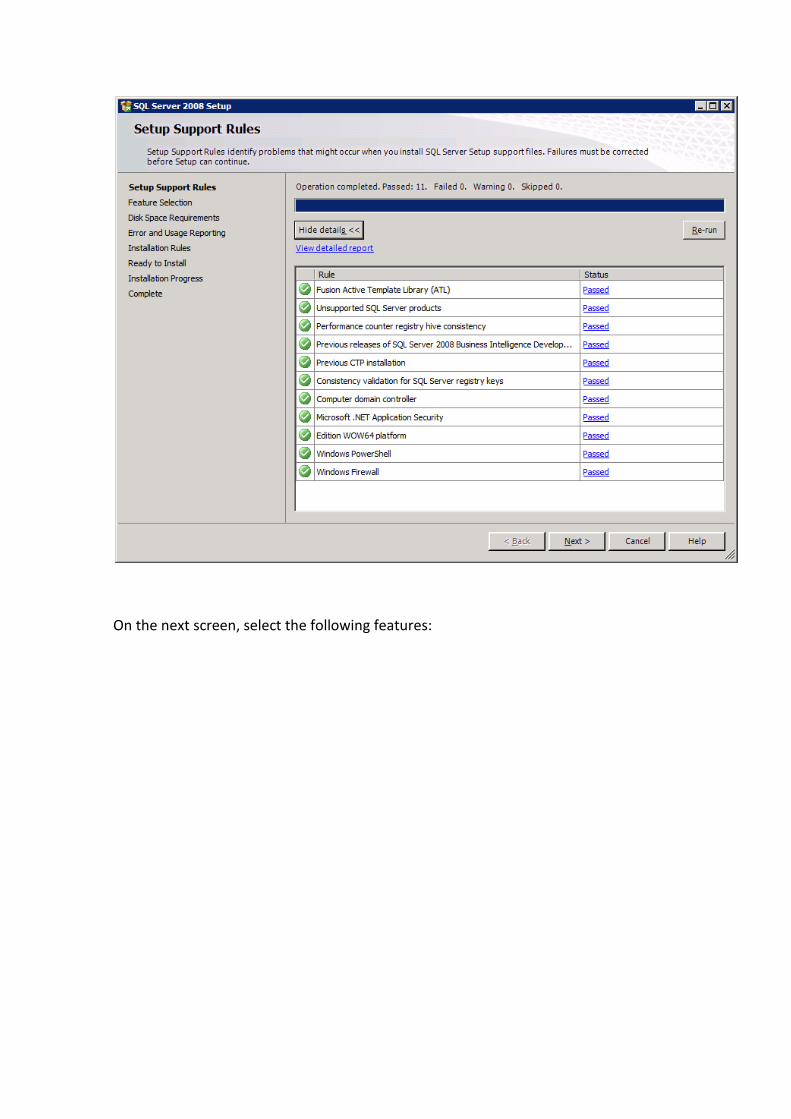
On the next screen, select the following features:
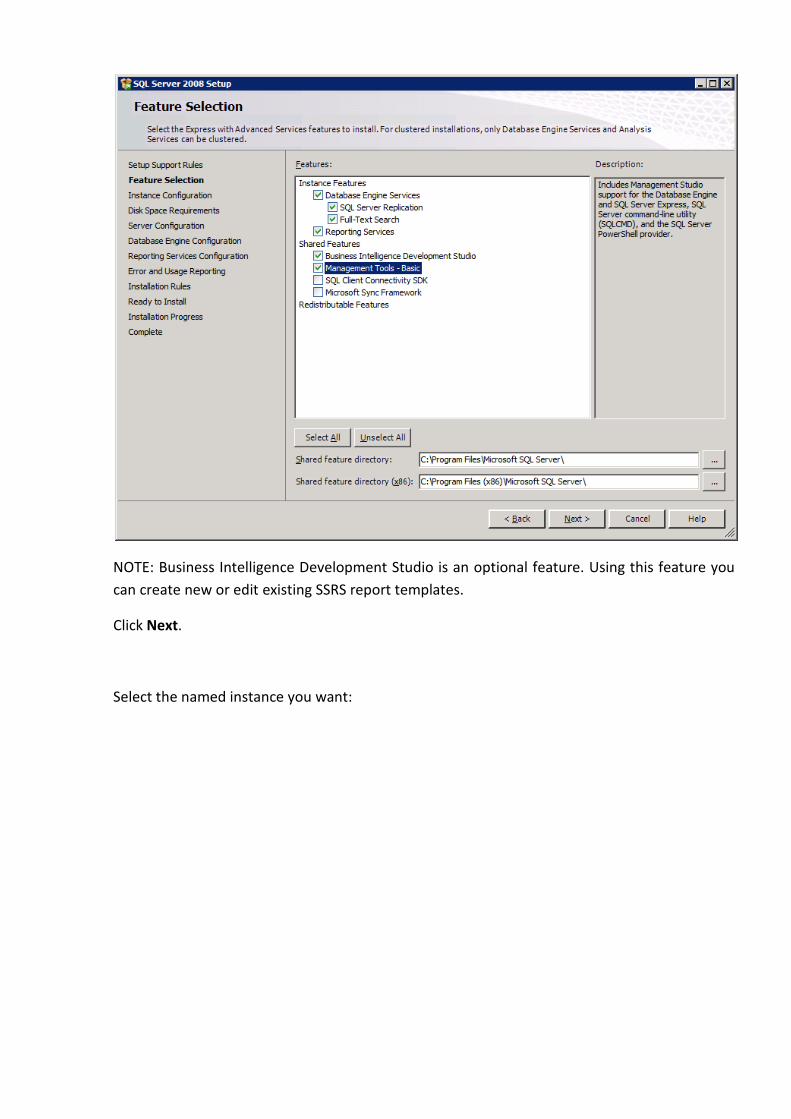
NOTE: Business Intelligence Development Studio is an optional feature. Using this feature you
can create new or edit existing SSRS report templates.
Click Next.
Select the named instance you want:
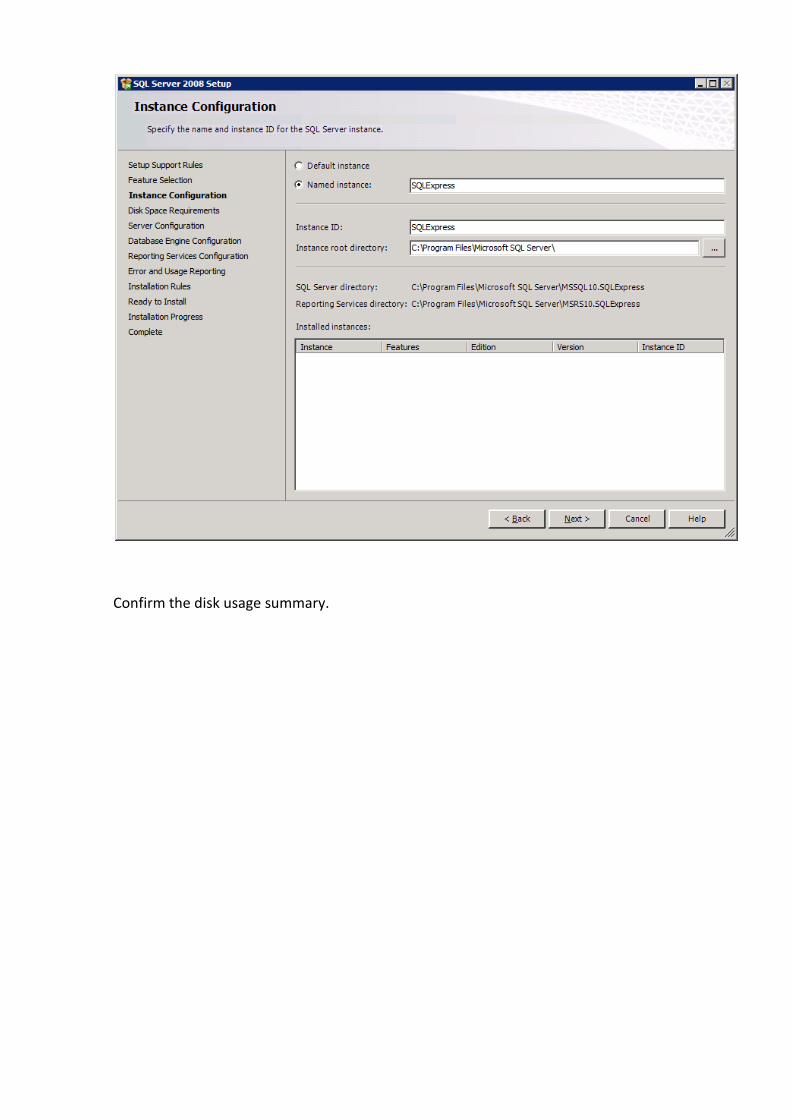
Confirm the disk usage summary.
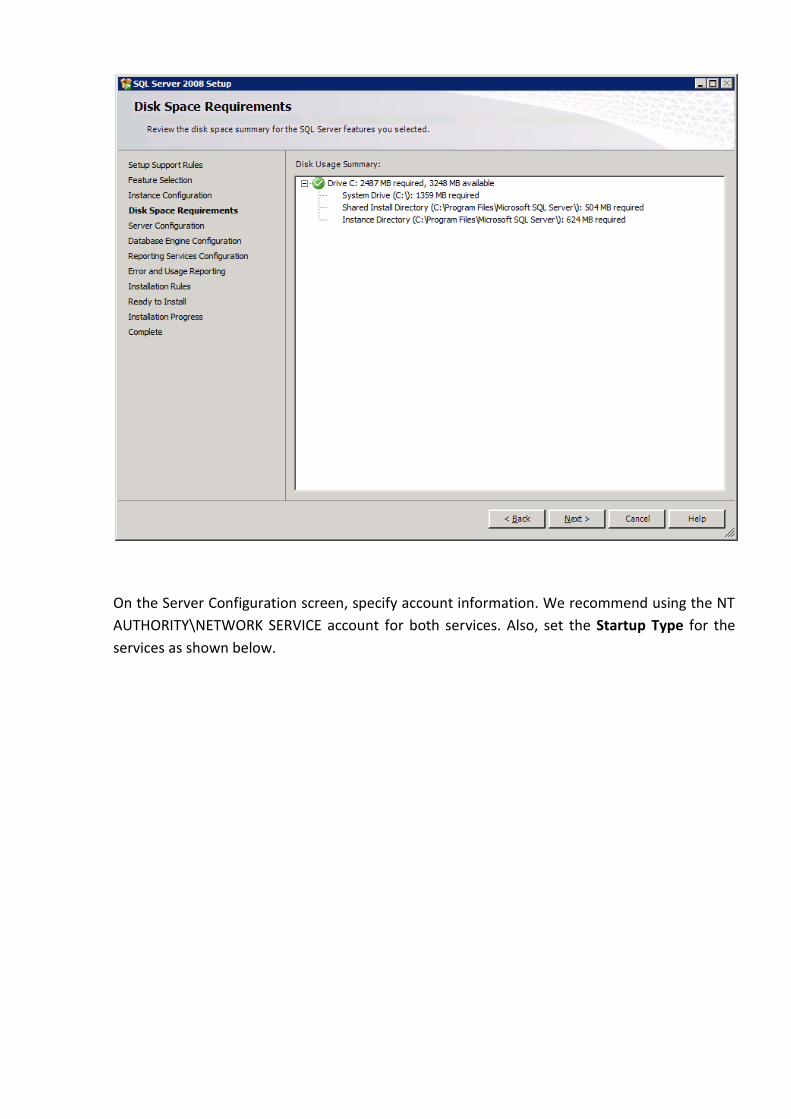
On the Server Configuration screen, specify account information. We recommend using the NT
AUTHORITY\NETWORK SERVICE account for both services. Also, set the Startup Type for the
services as shown below.
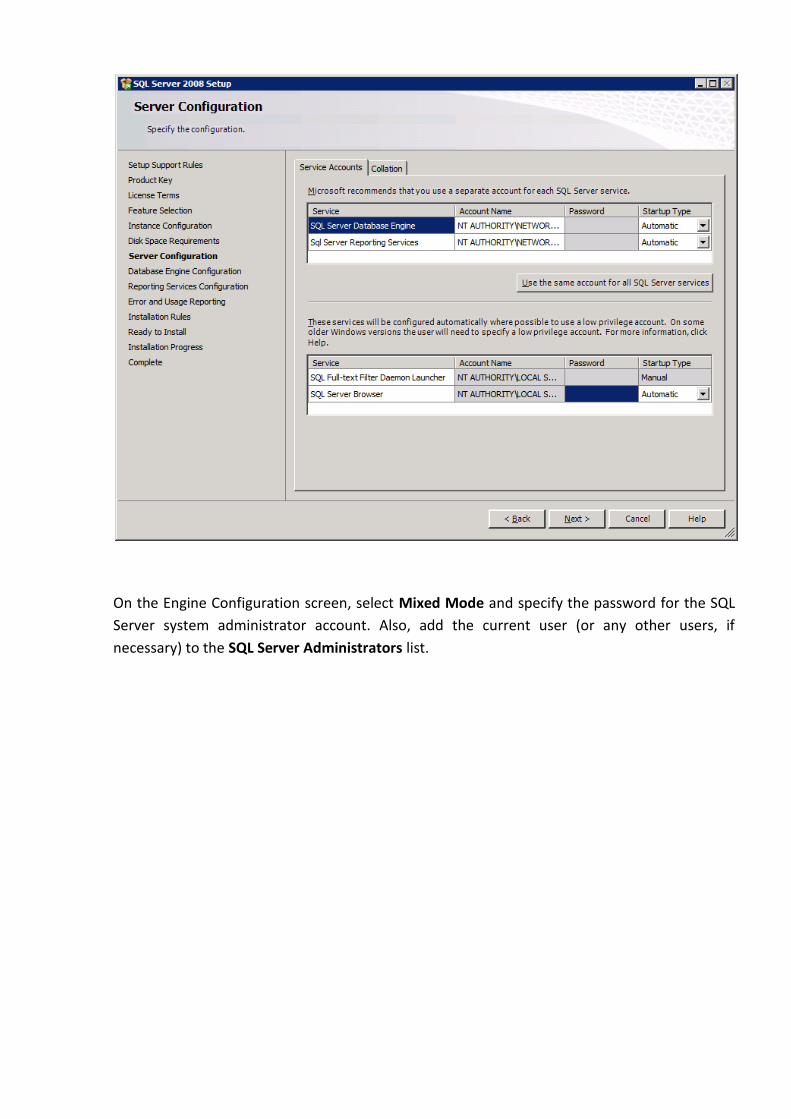
On the Engine Configuration screen, select Mixed Mode and specify the password for the SQL
Server system administrator account. Also, add the current user (or any other users, if
necessary) to the SQL Server Administrators list.
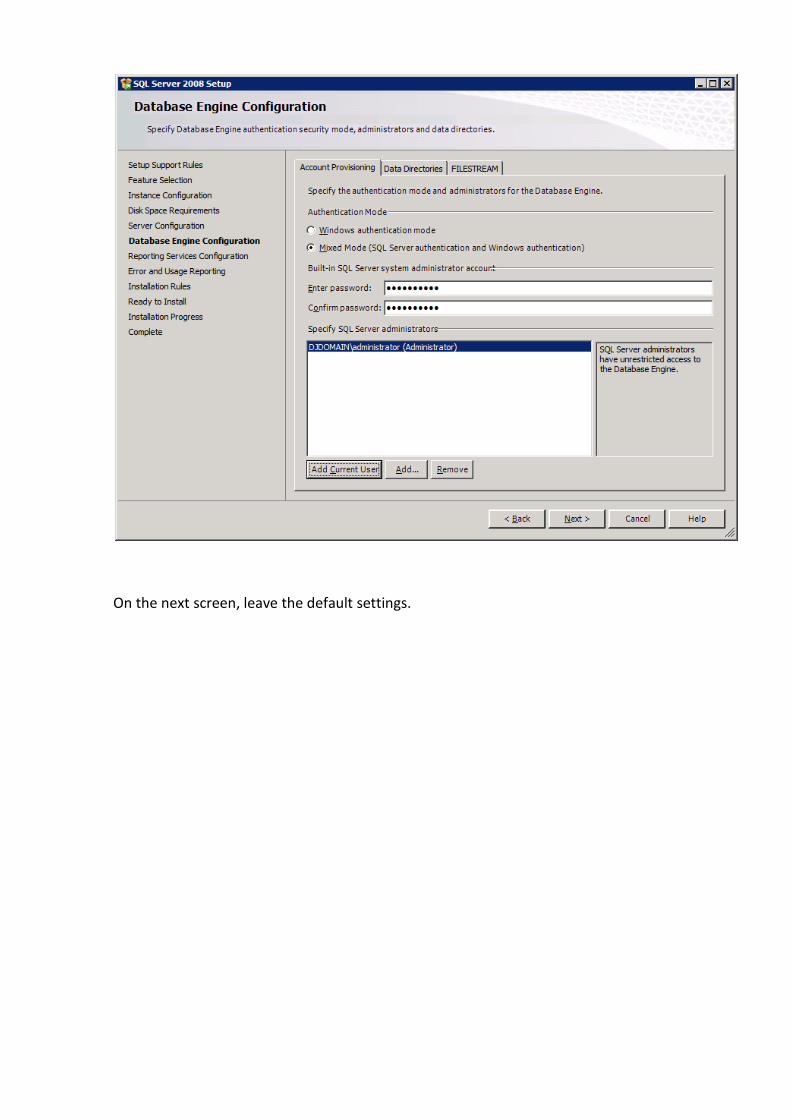
On the next screen, leave the default settings.
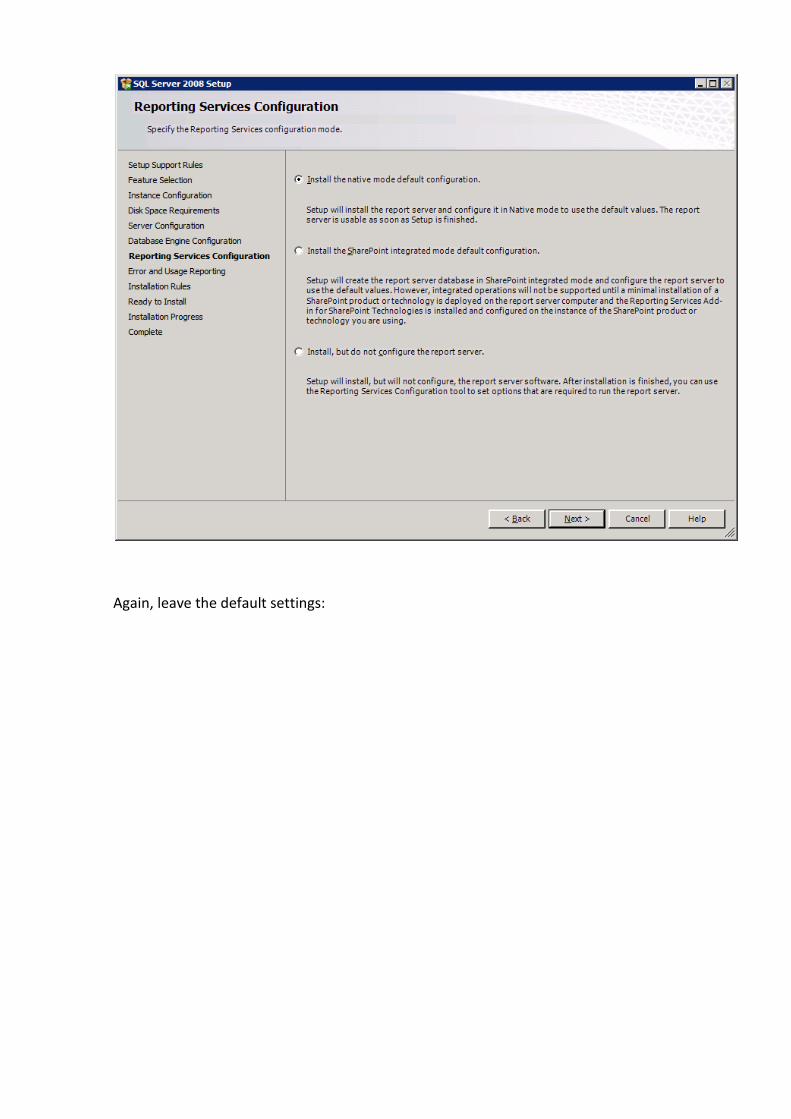
Again, leave the default settings:
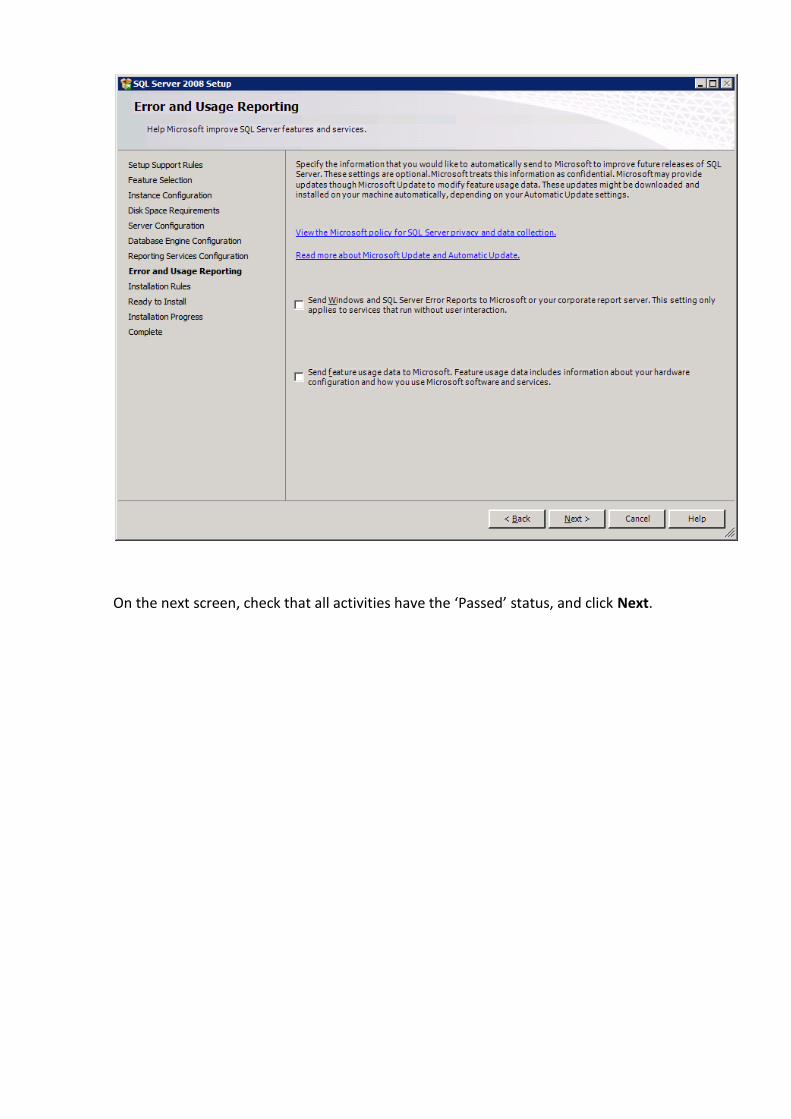
On the next screen, check that all activities have the ‘Passed’ status, and click Next.
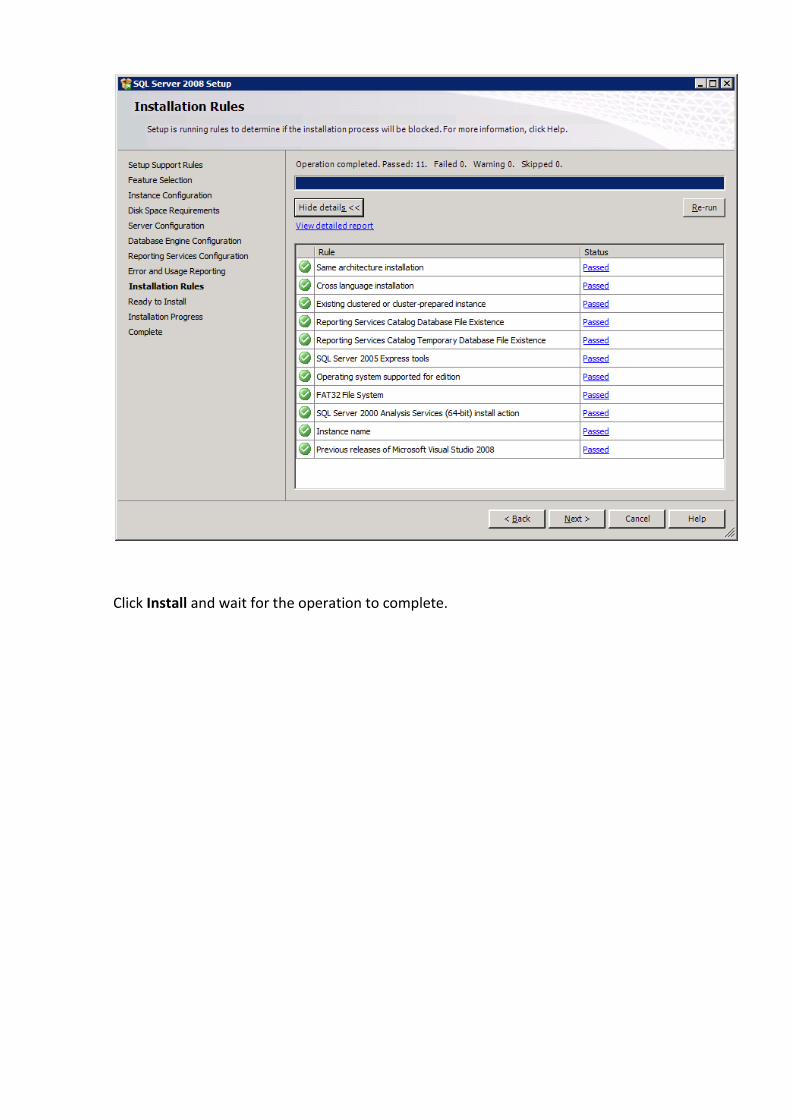
Click Install and wait for the operation to complete.
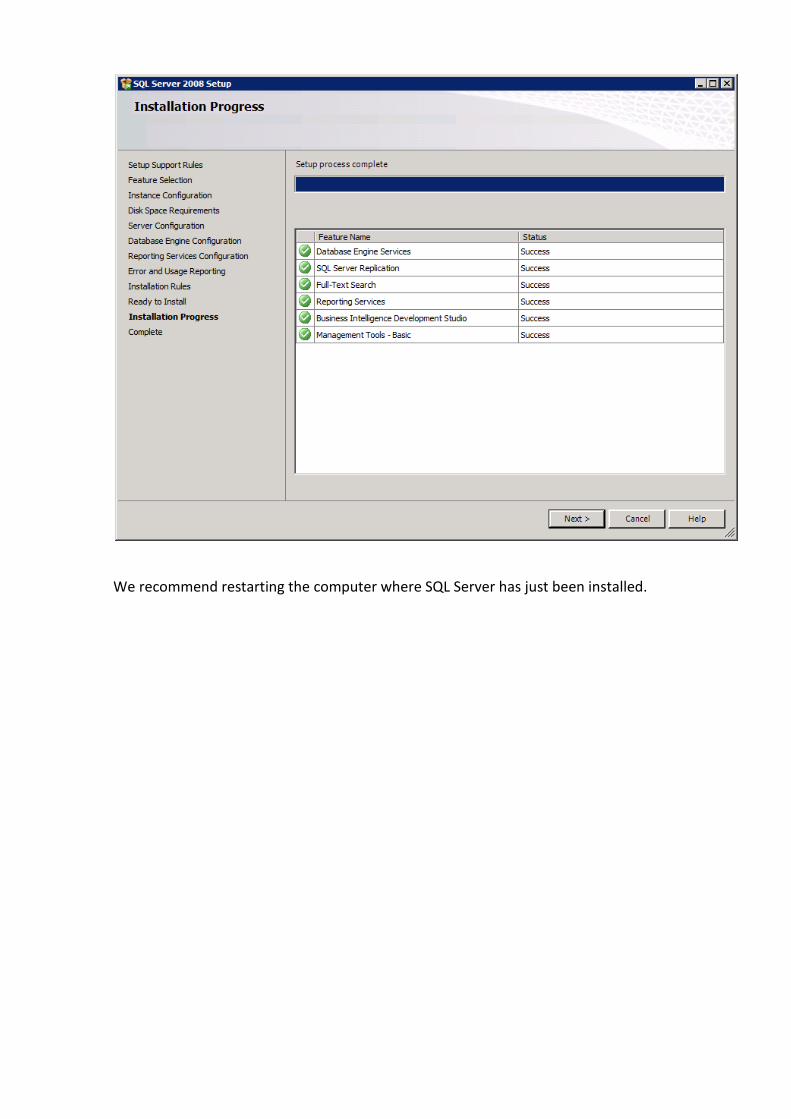
We recommend restarting the computer where SQL Server has just been installed.
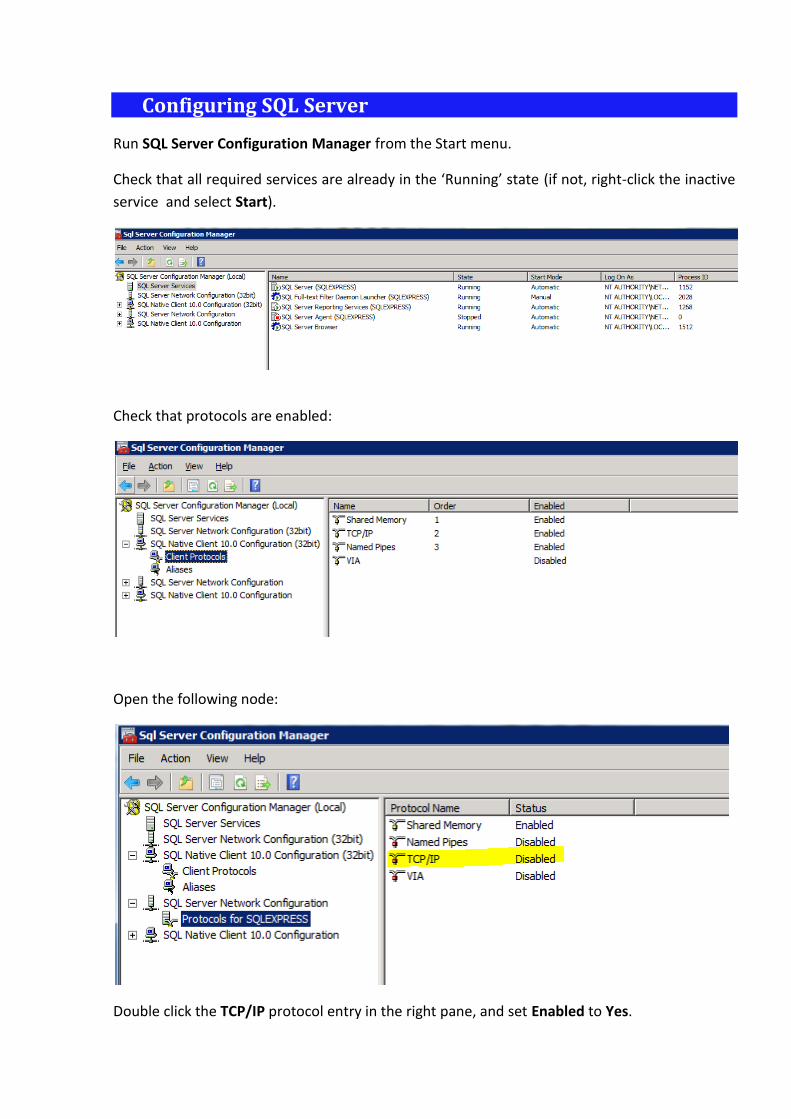
Configuring SQL Server
Run SQL Server Configuration Manager from the Start menu.
Check that all required services are already in the ‘Running’ state (if not, right-click the inactive
service and select Start).
Check that protocols are enabled:
Open the following node:
Double click the TCP/IP protocol entry in the right pane, and set Enabled to Yes.
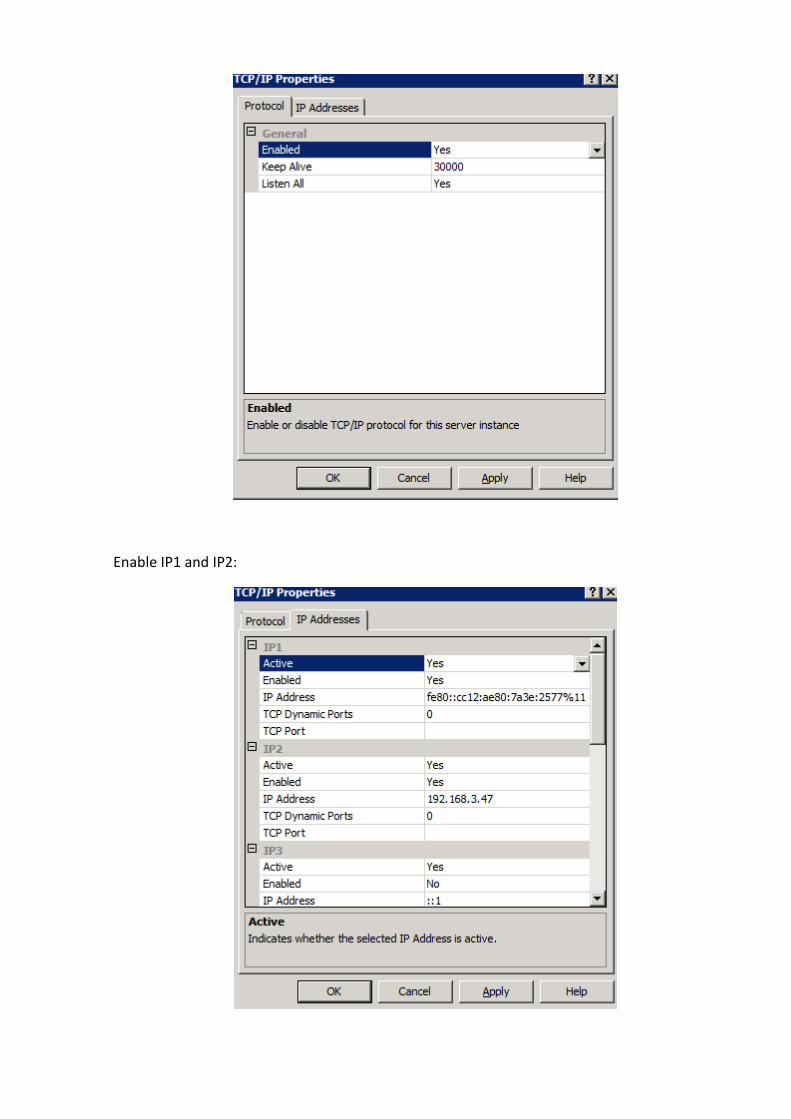
Enable IP1 and IP2:
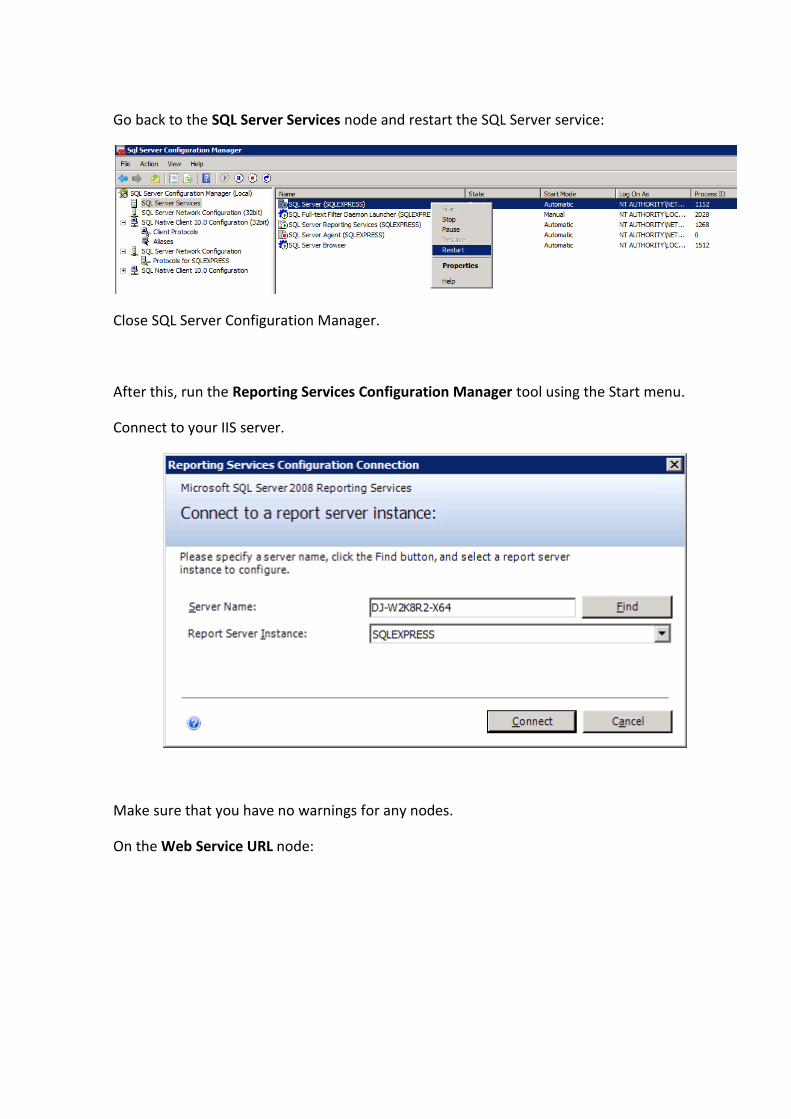
Go back to the SQL Server Services node and restart the SQL Server service:
Close SQL Server Configuration Manager.
After this, run the Reporting Services Configuration Manager tool using the Start menu.
Connect to your IIS server.
Make sure that you have no warnings for any nodes.
On the Web Service URL node:
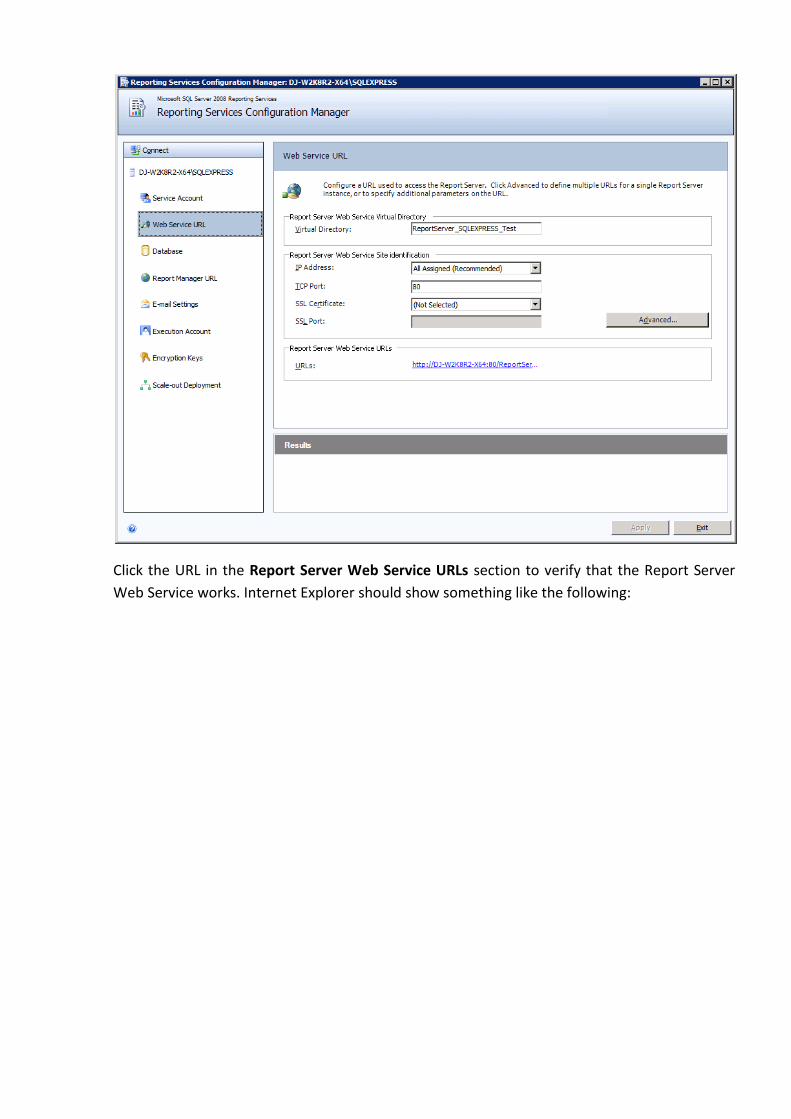
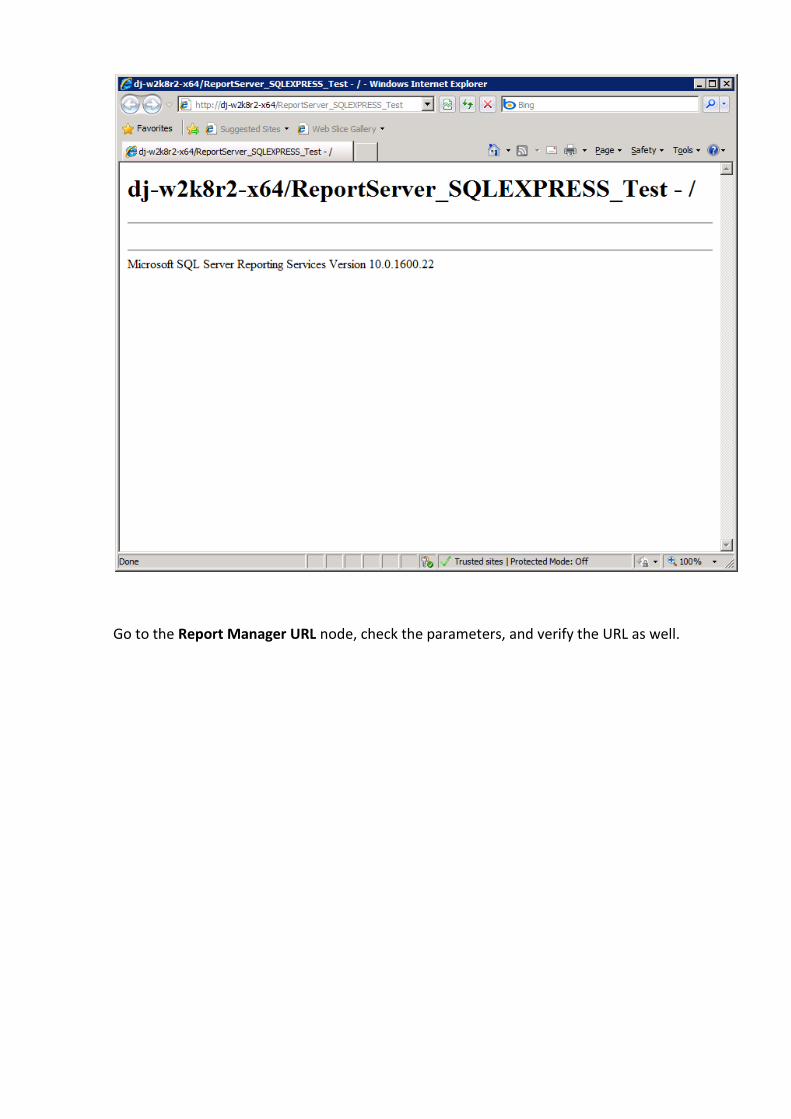
Click the URL in the Report Server Web Service URLs section to verify that the Report Server
Web Service works. Internet Explorer should show something like the following:
Go to the Report Manager URL node, check the parameters, and verify the URL as well.
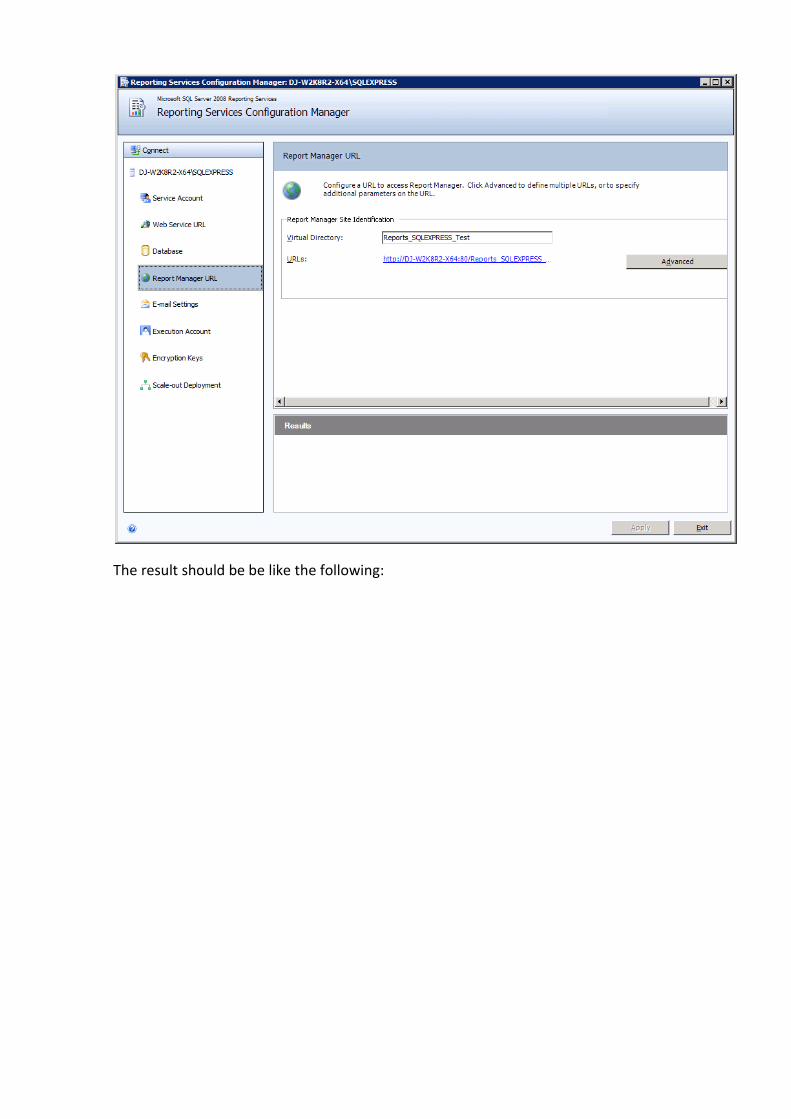
The result should be be like the following:
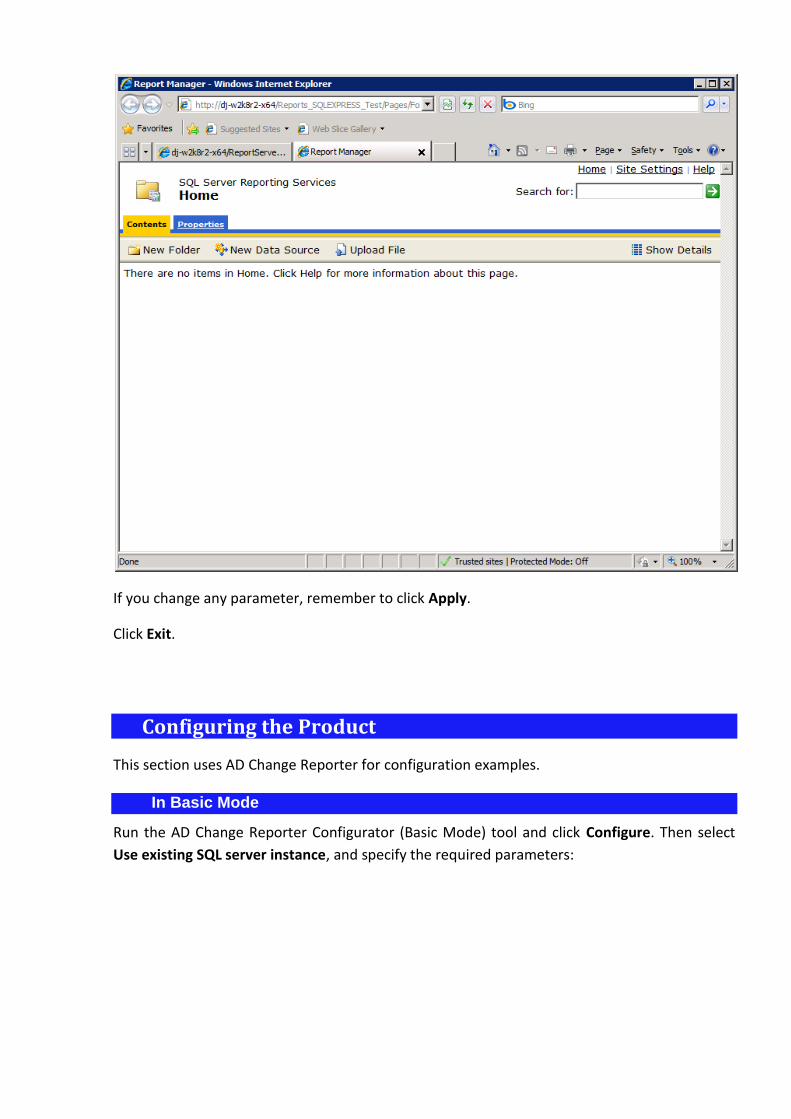
If you change any parameter, remember to click Apply.
Click Exit.
Configuring the Product
This section uses AD Change Reporter for configuration examples.
In Basic Mode
Run the AD Change Reporter Configurator (Basic Mode) tool and click Configure. Then select
Use existing SQL server instance, and specify the required parameters:
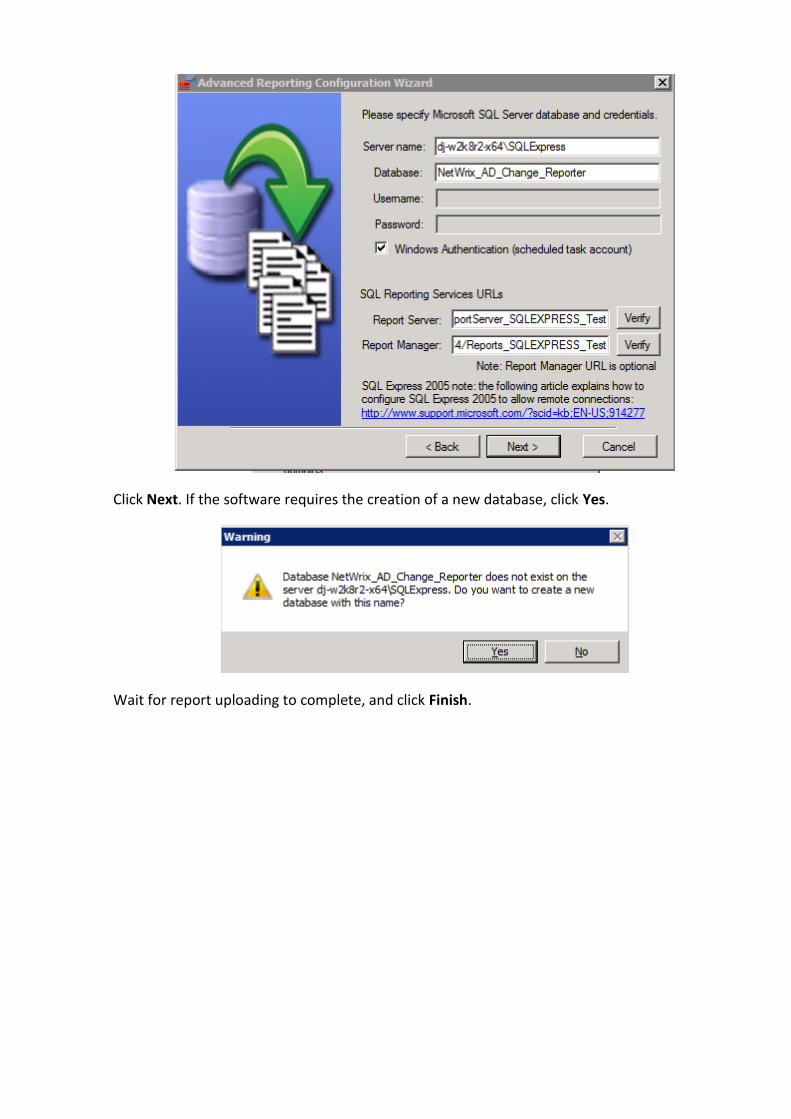
Click Next. If the software requires the creation of a new database, click Yes.
Wait for report uploading to complete, and click Finish.
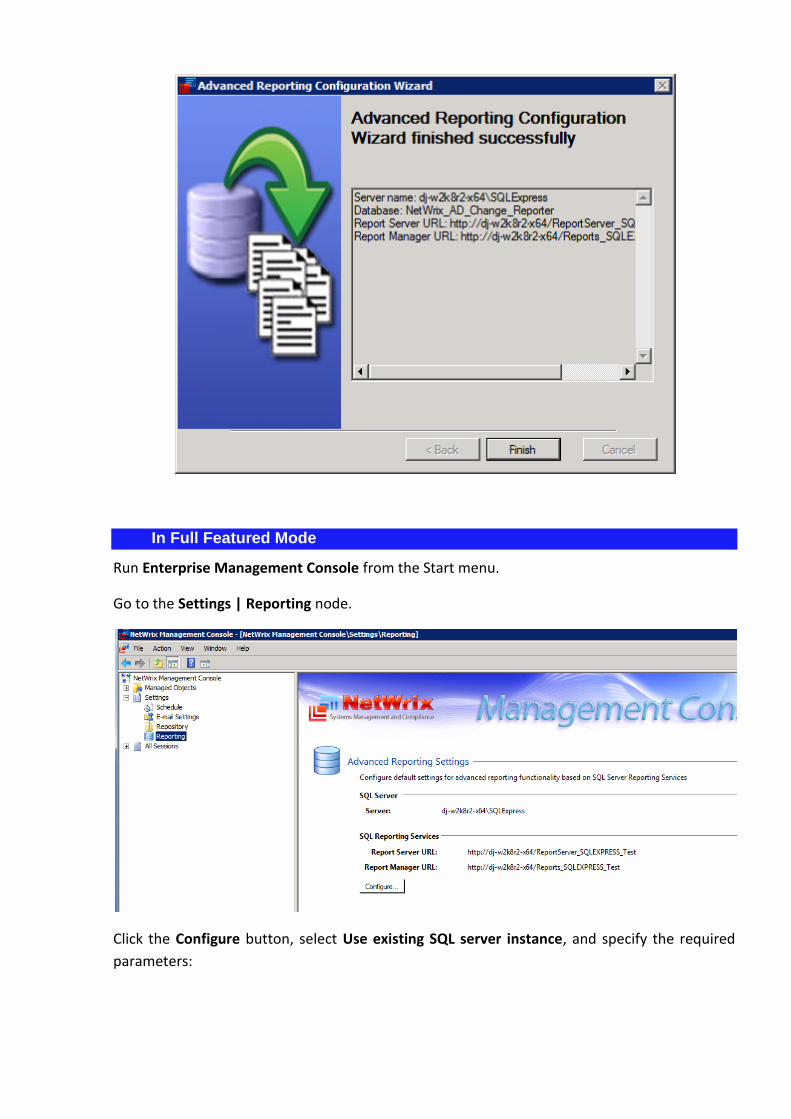
In Full Featured Mode
Run Enterprise Management Console from the Start menu.
Go to the Settings | Reporting node.
Click the Configure button, select Use existing SQL server instance, and specify the required
parameters:
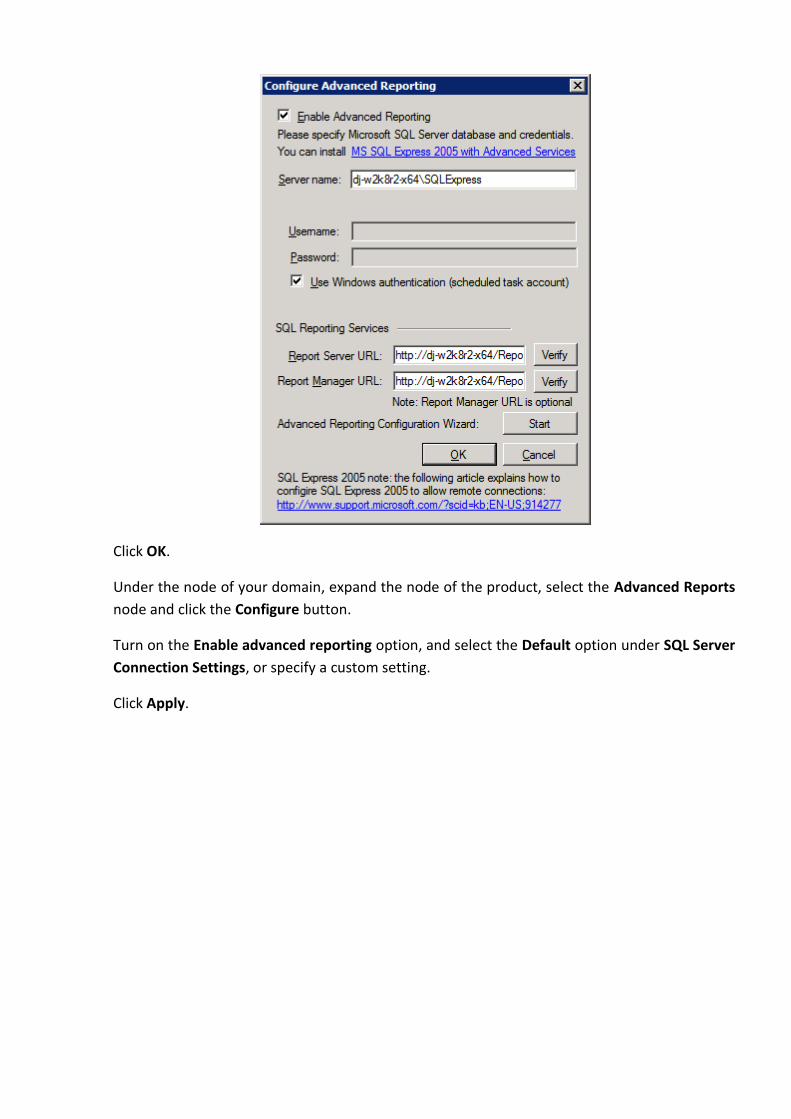
Click OK.
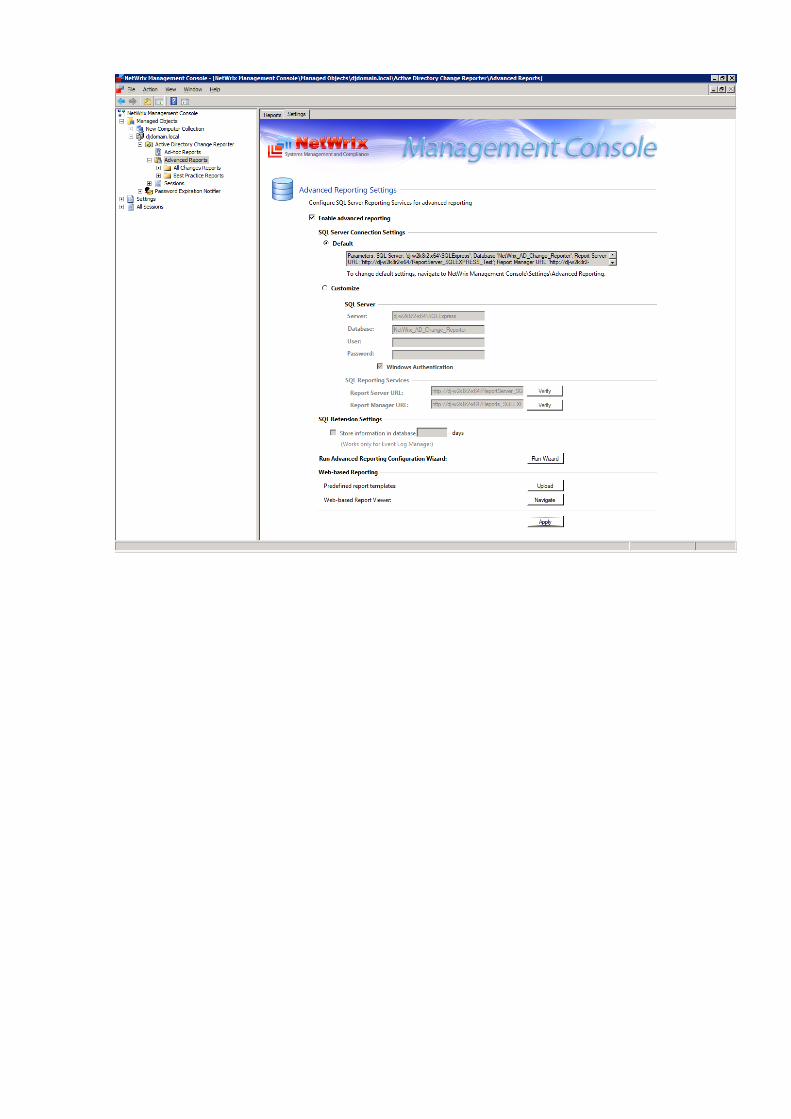
Under the node of your domain, expand the node of the product, select the Advanced Reports
node and click the Configure button.
Turn on the Enable advanced reporting option, and select the Default option under SQL Server
Connection Settings, or specify a custom setting.
Click Apply.