installation instructions for motordrape · parts list motordrape dc 1000 ccm includes: 1) one...
TRANSCRIPT
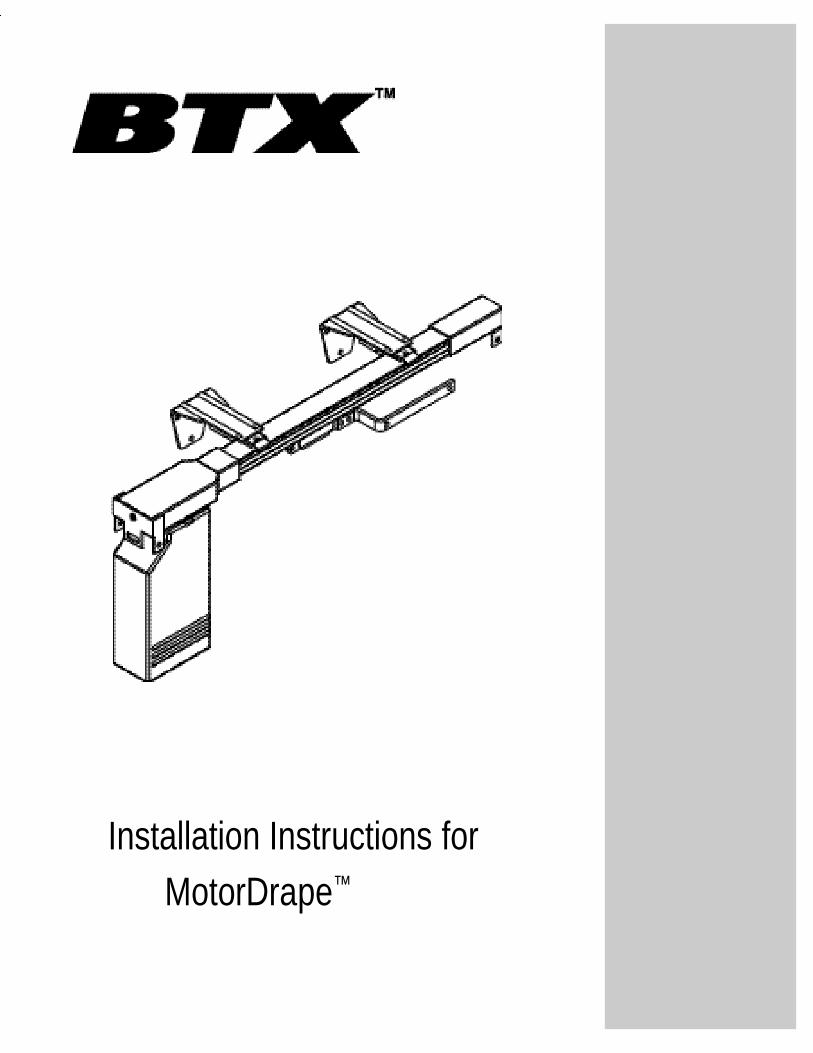
Installation Instructions forMotorDrape™

Table of Contents
Description of MotorDrape™ Systems . . . . . . . . . . . . . . 3
Tools Required:Power Screwdriver w/Phillips
bit
Screws & AnchorsNeedle Nose Pliers Wire
Cutters
Flathead Screwdriver SmallPhillips Small FlatheadTest Cable
Hacksaw (only used forcutting down track)
Parts List . . . . . . . . . . . . . . . . . . . . . . . . . . . . . . . . . . . . . 4
ASSEMBLY INSTRUCTIONSRod Assembly Preparation . . . . . . . . . . . . . . . . . 6One-way Assembly . . . . . . . . . . . . . . . . . . . . . . 7Center Draw Assembly . . . . . . . . . . . . . . . . . . . . 8
Installation Instructions . . . . . . . . . . . . . . . . . . . . . . . . . 9
CONTROL INSTRUCTIONSControl Wiring Connections . . . . . . . . . . . . . . . 101000 . . . . . . . . . . . . . . . . . . . . . . . . . . . . . . . . . 112000 . . . . . . . . . . . . . . . . . . . . . . . . . . . . . . 12-14
Troubleshooting Tips . . . . . . . . . . . . . . . . . . . . . . . . . . 15
Warranty . . . . . . . . . . . . . . . . . . . . . . . . . . . . . . . . . . . . 16

Description of SystemsMotorDrape 1000 CCM MotorSpecialized Motor System with Remote and built-in Contact Closure Interface
The 1000 Switch motor is a unique motor system that allows you to independently operate the motor via the IR handsender, by a low voltage switch or bycontact closure which allows you to interface with most audio/video or home automation systems. This system cannot be integrated with the DC0500 for sheer and overdrape. A complete system includes the headrail system, the motor, an IR receiving eye, an IR handsender, the plug-in powercord and mounting brackets.
The 1000 Series is controlled fully by the handsender. The handsender can operate up to 8 motors independently and is also used to select any of the 10variable speed settings. Motor addresses are set electronically through the handsender and can be changed at any time.
MotorDrape 2000Deluxe Motorized System with Remote and Programmable Control Pad
The 2000 Series MotorDrape™ DC is similar to the 1000 Series except that it features a programmable control pad. This control pad offers the followingfunctions:
• Manual switch operation (open and close) for 2 systems• Programmable timer for up to 8 functions per 24 hours (4 open, 4 close)
The control pad also operates as the IR receiving eye for the handsender and is programmable for 10 different speeds. The handsender can operateup to 5 motors independently, or 10 motors when integrated with a DC 0500 for a sheer and overdrape system.
MotorDrape 0500Secondary System for Sheer and Overdrape Combinations
The 0500 Secondary System allows a sheer and a black-out drapery to be integrated. The second MotorDrape™ drapery rod features a“secondary” motor which plugs directly into the primary 2000 motor. The secondary motor receives all power and signals from the primary motor, via a 6-wire connecting signal cord and a connecting power cord.
Using the 0500 Secondary System allows both tracks to operate independently, but requires only one transformer and one handsender for bothmotors. The 2000 Series utilizes only one wall pad for both motors. In both cases, the wiring and hook-up is simpler and the total cost is less thanwith two independent systems.
MotorDrape 2000BTandem System for Heavy Draperies
Certain situations, such as heavy split-draw draperies, may require two MotorDrape™ motors on the same headrail. Such a tandemconfiguration would allow 120 pounds of drapery to be drawn across a 20 foot, split drawn track. The2000B configuration requires two 2000 motors, two transformers, one wall pad and one 5-wire connecting signal cable, which snaps in with RJ-12jacks (telephone type).
3

Parts List
MotorDrape DC 1000CCM includes:
1) one drapery rod assembly*,2) one DC 1000 drapery drive motor,3) one transformer,4) one DC 1000 IR remote controller,5) external IR receiving eye,6) 3” wall/ceiling brackets,7) one wrench.
MotorDrape DC 2000 includes:1) one drapery rod assembly*,2) one DC 2000 drapery drive motor,3) one transformer,4) one DC 2000 IR remote controller,5) one control pad,6) 3” wall/ceiling brackets,7) one wrench.
MotorDrape DC 1000 or DC 2000with DC 0500 includes:
1) two drapery rod assemblies*,2) one drapery drive motor,3) one DC 0500 drapery non-drive motor,4) one transformer,5) one IR remote controller,6) one control pad (if using DC 2000), or IR Receiving Eye,7) one signal cord,8) one power cord,9) 6” wall/ceiling brackets,10) one wrench.
MotorDrape DC 2000B includes:1) one drapery rod assembly (18 foot),2) two DC 2000 drapery drive motors,3) two transformers,4) one DC 2000 IR remote controller,5) one signal cord,6) 3” wall/ceiling brackets,7) one wrench
*18 foot kits include two 9 foot tracks with a splice.
Rod Assembly
Drive and Non-Drive Motors
IR Remote Controllers
Timer/Wall Control Pad
Transformer
4

Getting StartedWorking AreaAllow ample working area for the assembly of the MotorDrape™ systems. Depending on the operation the drive and non-drive motor gear coverscan be as far as 18’ apart during assembly.
Tools RequiredMotorDrape™ systems are easy to assemble. The only tools required are a pair of pliers, a Phillips head screwdriver, a hack saw, and a crimpingtool. The wrench to tighten the drapery wire is included with your rod assembly purchase.
Cutting Track to SizeDetermine the overall desired length (end to end) of the rod. Deduct 5” from the overall system length to accommodate the end caps, and mark therod at this point. Using a hacksaw, cut the headrail at the marks. Check measurements carefully before cutting track. Do not attach thedrive and non-drive gears until you have cut the track.
***Length of aluminum headrail = Overall length of finished headrail less 5”
Splicing TracksWhen applications require track lengths of 9' or greater, two tracks must be connected using a splice. Tracks should be cut into equal lengths for splitdraw so that the joint is centered on the rod. For one way operation, cut only one track to adjust length and place splice on far side from motor.Tracks should be inserted equally into the splice, butting them together.
Motor PlacementDrapery drive motors can be assembled on either the left or right side.
IR PlacementIR signals require a direct line of sight between the remote control and the IR receiver. Although IR signals may travel through some fabrics,performance varies greatly depending on the application
If using the 1000 motor and the “no wire” receiving diode, be sure to specify either left or right, depending on which side of the track the motor ismounted on. Use of the wrong diode will significantly affect performance.
5

Rod Assembly PreparationRod Assembly
16
14 13 111 10 8 9
3
15 12 267 5 4
1 - Drive Gear2 - Drive Gear Pulley3 - Wire Adjustment Screw4 - Motor Release Button5 - Drive Gear Blocking Screw
6 - Carrier7 - Master Carrier “A”8 - Carrier “A” Wire (Station Board)
9 - Wire Tightening Screw on Carrier “A”10 - Overlap Arm11 - Track12 - Master Carrier “B”13 - Wire Tightening Screw on Carrier “B”14 - Non-Drive Gear15 - Non-Drive Gear Pulley16 - Non Drive Gear Blocking Screw
Rod Assembly Preparation
1. Remove twist ties from drapery wire and carefully uncoil.
2. Loosen screws and remove the drive and non-drive gear blockingscrews from the temporary track.
3. Carefully detach the drive and non-drive gears and pulley housings fromtemporary track.
4. Remove master carrier set from temporary track. Discard temporarytrack.
5. Place the drive and non-drive gears and pulley housings at the fullestdistance the drapery wire will allow. Make sure the drapery wire is nottangled. Position the blocking screws near the corresponding pulleyhousing.
6. With wrench, loosen the wire adjust screw half way. Therod assembly is now ready to be inserted into the aluminum track.
See page 7 for one way applications and page 8 for center drawapplications.
6

One Way Assembly1. Loosen and remove the screw from the master carrier, "B" (closest to the non-drive end). Discard the master
carrier.
(Fig. 1)
(Fig. 2)
(Fig. 3)
(Fig. 4)
(Fig. 5)
2. Beginning at the drive end pulley housing end, place the drapery wire into the track about 4”, making surethe wire is not twisted or tangled. Gently pulling on the drapery wire, insert the master carrier into the track.The drapery wire should be on the outside of the wheels. Attach the drive gear and pulley housing to the track.Make sure the track is butted up to the stop on the inside of the gear housing. Repeat these procedures onthe non-drive end. Install the drive and non-drive blocking screw to the corresponding pulley housings.(Fig. 1)
NOTE: The drapery wire should be fitted into the groove of the pulley in both housings and on the outsideof the wheels on the master carrier.
3. Loosen the screw on the top of the master carrier station board "A" (closest to the drive end). (Fig. 2) Thescrew should be loosened only. Do not remove the screw.
4. With pliers, grab the crimped end of the drapery wire. Gently pull all excess wire through. Keeping tension on thewire, re-tighten the screw. Check that the wire is in position. If not, realign (Fig. 3) and repeat steps. Movethe master carrier by hand to ensure that it moves freely.
Master carrier movement can be hampered by the following: (a) The wire is twisted, (b) The wire is not routedproperly.
5. With the wrench provided in the rod assembly, turn the drapery wire, adjusting bolt clockwise allowing1/16” gap between tension plates. (Fig. 4) Once again, make sure the master carrier moves smoothly.
NOTE: Rod lengths greater than 10 may require more tension in order to prevent slipping of the wire on the pulleygears.
6. Insert appropriate number of carriers at the drive and non-drive in the gear slots. (Fig. 5)
7. Install the blocking screw between the track and gear ends. (Fig. 6)NOTE: If you are going to ship track assembly to your customer,do not ship with carriers in the track. Wiretends to wrap around wheels and impedes operation of track.
8. Push the sleeve on the drapery wire up to the master carrier. Make sure wire is taut. Crimp the sleeve.Use a flame to lightly scorch one small area of wire. (Fig. 7,8) Cut wire where the wire is scorched.
9. The motor is designed to be hidden behind the drapery stack. The rod assembly comes set up for left stackingdraperies. If the application calls for right stack, simply reverse the overlap arm on the master carrier.
10.Attach the overlap arm to the master carrier. The overlap arm should project into the interior of the roomonce the track is installed.
11.The track is ready to be installed onto the ceiling/wall brackets.
(Fig. 6)
7(Fig. 7) (Fig. 8)

Center Draw Assembly
(Fig. 1)
(Fig. 2)
(Fig. 3)
(Fig. 4)
(Fig. 5)
1. Beginning at the drive end pulley housing end, place the drapery wire into the track about4”, making sure the wire is not twisted or tangled. Gently pulling on the drapery wire, insert the mastercarrier into the track. The drapery wire should be on the outside of the wheels. Attach the drive gear andpulley housing to the track. Make sure the track is butted up to the stop on the inside of the gear housing.Repeat these procedures on the non-drive end. Install the drive and non-drive blocking screw to thecorresponding pulley housings. (Fig. 1)
NOTE: The drapery wire should be fitted into the groove of the pulley in both housings and on the outside ofthe wheels on the master carrier.
2. Loosen the screw on the top of the master carrier “A” (closest to the drive end). The screw should beloosened only. Do not remove the screw. (Fig. 2)
3. With pliers, grab the crimped end of the drapery wire. Gently pull all excess wire through. Keeping tension on thewire, retighten the screw. Check that the wire is in position. If not, realign and repeat steps. Move the mastercarrier by hand to ensure that it moves freely.(Fig. 3)Master carrier movement can be hampered by the following: (a) The wire is twisted, (b) The wire is notrouted properly.
4. Adjust center open position of draperies by loosening the screw on the master carrier station board. Loosenthe screw only; do not remove it completely. By loosening this screw, the master carrier will slide on thedrapery wire allowing adjustment for center open draperies. There should be some resistance as the mastercarrier moves along the wire. Retighten the screw. Adjustments to draperies is possible once the draperiesare installed. Simply put the drapery in the closed position and repeat the process.
5. With the wrench provided in the rod assembly, turn the drapery wire (Fig. 4), adjusting bolt clockwiseallowing 1/16” gap between tension plates. Once again, make sure the master carrier moves smoothly.
NOTE: Rod lengths greater than 10 may require more tension in order to prevent slipping of the wire on the pulleygears.
6. Insert appropriate number of carriers at the drive and non-drive in the gear slots. (Fig. 5) NOTE: If you are goingto ship track assembly to your customer, do not ship with carriers in the track. Wire tends to wrap aroundwheels and impedes operation of track.
7. Install the blocking screw between the track and gear ends. (Fig. 6,7)
8. Push the sleeve on the drapery wire up to the master carrier. Make sure wire is taut. Crimp the sleeve.Use a flame to lightly scorch one small area of wire. Cut wire where the wire is scorched. (Fig. 8,9)
9. Attach the overlap arm to the master carrier (if not already attached). The overlap arm should project intothe interior of the room once the track is installed.
10. The track is ready to be installed onto the ceiling/wall brackets.
(Fig. 6)
8 (Fig. 7) (Fig. 8) (Fig. 9)

Installation InstructionsAll MotorDrape™ kits are supplied with wall/ceiling brackets. As various building materials are used in construction, BTX does not supply fasteners.Fasteners can be purchased at all hardware stores. The recommended fasteners for most common applications would be a 1-1/2” slotted hexwasher square drive head screw in conjunction with a 1-1/2” hollow wall anchor. All brackets should be installed in a straight line, approximately every24”.
It is important in operating the system that the track be mounted straight and level. To ease the process of bracket mounting, place awall/ceiling bracket on the track every 24”, making sure that a bracket is close to each end as this is where the most weight will be placed when thedraperies are open.
Position the track in the desired location and mark the bracket mounting holes. Detach the brackets from the track, drill the marked holes to size for thechosen fasteners and attach brackets.
Starting at the center of the track, snap track into brackets. A “click” will be heard when track snaps in place.
Bracket Installation Distance
Note: 23” - 25” is the maximum recommended distance between brackets. For greater weights or more demandinginstallations, additional brackets should be used.
Wall/Ceiling BracketDimensions (Adjustable Range)
Wall/Ceiling BracketDimensions (Adjustable Range)
Ceiling BracketDimensions
3”
2.5” - 3”5.5” - 6.75”
2.5” - 4” 6”
CAUTIONWhen mounting tracks to wall or ceiling, allow extra space for the floor and track clearance. Draperies dragging on the floor or encountering resistance willaffect the performance of the motor system. Typical allowance would be 1-1/2” to 2” greater than drapery length.
Attaching the Motor
With track mounted to either the wall or ceiling, attach the motor to the track.
1. Holding the motor at a 45º angle to the track, press upward into the Drive Gear Housing(red button pressed into housing). Twist motor back 45º. The red button will automatically lock into place. Oncethe red button has locked into place, gently twist the motor to ensure it is securely attached.
2. Connect the transformer to port 1 and the infrared receiving eye into port 2. Position the receiving eye so as tohave the black part facing the room. (See page 10.)
NOTE: All MotorDrape kits are set up for stack left, motor left, diode left. If the application requires stack right,motor right, diode right, please specify when purchasing kit.
3. Hang draperies. Remember to adjust the drapery pins so that the draperies hang just below the bottom ofthe track.
4. Plug transformer into standard 120V receptacle.
NOTE: The infrared receiving eye is designed to be hidden from view and still receive the signal through mostdraperies. However, some applications may call for a cornice board, valance or similar top treatment. BTXoffers optional infrared diodes in these situations.
9

Control Wiring ConnectionsMotorDrape Single System 1000 or 2000
MotorDrape 2000A - Paired Systems - Sheer and Overdrape (A)
MotorDrape 2000B - Tandem System - Simultaneous Operation (B)
MotorDrape 2000C - Multiple Systems - Simultaneous Operation (C)
WARNING
MotorDrape™ transformer is dedicated transformer. Customer should not exchange, extend or use other brands oftransformers with the Drapery Opener System.
10

Control Instructions - 1000Using the Handheld Remote ControlThe 1000 has an eight channel remote control, which gives you the ability to control up to eight different systemsindividually.
To open the 1000, press the channel number (1,2,3...) of the drapery you wish to open. Then press the open button.(Arrows pointing out)
To close the 1000, press the channel number (1,2,3...) of the drapery you wish to close. Then press the close button.(Arrows pointing in)
To stop the 1000 press the stop button. (Square)
Setting the channel number on the 1000To set the channel on your 1000 please make sure motor is plugged in, remote control has batteries and diode is plugged into motor, then followthese steps:
Steps1 - Using the 1000 remote control, press the desired channel number of 1 - 8. Once the light on the remote comes on release thebutton.
2 - Using a paper clip, or pen press and hold the recessed button on the side of the 1000 motor, and at the same time press either the openor the close button on the remote. Release after several seconds.
3 - Press the open or close buttons to test the motor. The motor is now programmed to the selected channel.
Setting the variable drapery speed of the 1000The MotorDrape™ has ten different speeds for you to choose from (0-9, with zero being the slowest and nine being the fastest). To change thespeed of your 1000, follow these steps using the hand held remote control -- Factory preset at speed 9.
Steps to Decrease Speed
1 - Press the “10” button once for eachdecreasing increment.Example: The level is at 7, press 10 twice and the speed is nowat 5.
2 - Using the remote control, open or close the drapery tosee if the speed meets your requirements. Repeat ifnecessary.
Steps to Increase Speed
1 - Press the “9” button once for each increasing increment.Example: The level is at 6, press twice and the speed isnow at 8.
2 - Using the remote control, open or close the drapery tosee if the speed meets your requirements. Repeat ifnecessary.
Switch or Contact Closure Hookup for 1000 Switch MotorUsing a 6-conductor modular cable in conjunction with a RJ-12 plug, cut the Blue, Greenand Red wires and crimp the plug. The Yellow and White are directional wires and the Blackis your common.
NOTE: When cutting the wires, please cut flush with outer jacket.
11

Control Instructions - 2000Using the manual switches on the control pad for the 2000Built onto the control pad are manual switches for both the front drapery (FB-1) and the back drapery (FB-2).Follow these steps to operate the switches.
1. To open, press the “open” button.(Arrows pointing out)
2. To close, press the “close” button.(Arrows pointing in)
3. To stop, press the “stop” button.(Square)
Note: On a double application (Sheer & Blackout), you cannot have both systemsoperating via switch or other functions at the same time.
Using the Handheld Remote ControlThe 2000 has the ability to control up to ten systems individually.
To open the 2000, press the channel number (1,2,3...) of the drapery you wish to open. Then press the open button.(Arrows pointing out)
To close the 2000, press the channel number (1,2,3...) of the drapery you wish to close. Then press the close button.(Arrows pointing in)
To stop the 2000 press the stop button. (Square)
Setting the handsender channel number on the 2000To set the handsender channel on your 2000, please use the control pad, following these steps:
Steps
1 - Press button “9” (SET)
2 - Press button “1” (P/NO)
3 - Press the desired channelnumber (1,3,5,7, or 9 only when using a single 2000 system)
4 - Press “EN” button
When using a double system (Sheer & Blackout), set the front drapery (FB-1) to an “odd” channel number. Example:1,3,5,7,9. The back drapery (FB-2) will automatically become the next “even” channel number. Example: If you select channel 3 for the front, theback will become channel 4.
WARNING • Control pad should not be installed outdoors or in a high temperature area. Temperature cannot exceed 50ºC (122ºF).Avoid direct sunlight.• Control pad should not be installed in low temperature areas. LCD response time may be slowed and the clock maybecome inoperative. Low temperature symptoms are not permanent. Normal function will return after the timer warmsup.• Do not drop or impact the control pad or motor. Do not try to disassemble the unit in any way.• Do not install at locations close to other electrical appliances.• Do not clean the control system with alcohol, benzene or thinner products. Use a nonabrasive soap and damp sponge.
12

Control Instructions - 2000Setting the speed for the 2000To set the speed (increase or decrease) of your 2000 you will use the control pad using the following steps:
Steps1 - Press button “9” (SET)
2 - Press button “2” (SPD)
3 - Press the desired settingExample: (0,1,2 ...,9) - is the slowest, is the fastest
4 - Press “EN” button
Unlike the 1000 where you use the remote, because you are using the control pad, the number you select will be visible on the display.
The MotorDrape 2000 control/timer pad
The MotorDrape™ 2000 is controlled via a technically advanced processor, yet the control pad is extremely easy to program and use. Thecontrol pad features manual open/close buttons, a clock, a fully programmable timer and an integrated infrared receiving eye.
(A) The display panel will show the various functions that you eitherAprogram or have selected to use.
(B) The numerical keypad section allows you to set the programming forBthe timer as well as the settings for any of the operating programs. Example: drapery speed, channel number, etc.
C(C) The manual open/close buttons allow you to open, close or stop the drapery in any position. FB-1 switches the front drapery, FB-2switchesthe back drapery.
The control pad comes standard with a 4 foot modular connecting wire that simply plugs into the side of the motor. The control is activated as soonas the motor’s power supply is plugged into a wall outlet. “12:00” will then begin to flash on the display panel.
Setting the digital clock on the 2000 control padThe control pad for the 2000 includes a highly accurate digital clock. To set the control pad for the actual time of day, follow these easy steps.
Step Action
1 - Press button “0” (CLK) The flashing time will stop
2 - Program desired timeExample: 12:45 - Press buttons , , , then
The display will show the programmed time of 12:45
3 - Press “AU” button to select either AM or PM AM or PM will appear on the left side of the display
4 - Press “EN” button The colon on the display starts to flash; the clock is now working
13

Control Instructions - 2000Programming the timerYour MotorDrape™ can be set to open and close automatically at the time of your choosing. This can be done up to eight times (4 open & 4 close)per day, per drapery (front or back).
Follow these easy steps to set your programmable timer for the times you want the drapes to open or close automatically.
Open Position Setting
Step Action
1 - Press button “5” for front drapery (FB-1) or "7" for backdrapery (FB-2) to activate the control in the open mode The display shows the colon and a dash
2 - Press button “1” to put control in the time set mode The display will be blank or show previously set time command
3 - Program desired timeExample: 11:45 - Press , , then
The display shows 11:45
4 - Press “AU” button to select either AM or PM The display shows either AM or PM
5 - Press “EN” button to save this time setting. The display reverts back to the clock display
NOTE: To set additional open settings repeat steps 1 through 5, pressing '2", "3", or "4" for 2nd, 3rd and 4th time settings in step two.
Close Position Setting
Step Action
1 - Press button “6” for front drapery (FB-1) or "8" for back drapery (FB-2) toactivate the control in the open mode
The display shows the colon and a dash
2 - Press button “1” (P/NO) to put control in the time setmode
The display will be blank or show previously set timecommand
3 - Program desired timeExample: 1:25 - Press , then The display shows 1:25
4 - Press “AU” button to select either AM or PM The display shows either AM or PM
5 - Press “EN” button to save this time setting. The display reverts back to the clock display
NOTE: To set additional open settings repeat steps 1 through 5, pressing '2", "3", or "4" for 2nd, 3rd and 4th time settings in step two.
You must activate the timer!!! Press “AU” button to turn on the “AUTO” function. “Auto” will appear in the lower left corner of thedigital display.
14

Troubleshooting Tips
Problem Cause Solution
Remote control unit doesnot operate.
Power supply is notplugged in properly.
Battery in remotecontrol is dead.
Receiving diode isobstructed.
For 1000, using Right eye in Leftapplicationor Left eye in Rightapplication.
Plug power supply incorrectly.
Replace battery inremote control.
Remove the interferingobject.
Either get a correct eye forcorrect motor location or getanextended eye that works oneither side.
Motor does not stopautomatically at either openor close.
Not enough tension on the cable. Increase tension of thecable by turning wireadjusting screw.
Can operate one drive motor,but not the second or thirddrive motor.
Signal cord is not properlyconnected.
Reconnect cord according toinstructions in this manual.
Drapery stops automaticallybefore it is fully opened orclosed.
Interference with movement ofthe drapery.
Remove object whichrestricts the draperymovement.
Cannot open or close byhand.
Assembly of the drapery track wasincorrect. Cable is probablywrapped around wheels ofcarriers.
Reassemble track accordingto instructions in this manual.
5

Warranty & Return PolicyBTX extends a Three-Year Limited Warranty for MotorDrape™ DC systems and controls. These products are thoroughly inspected andtested before leaving the factory. They are warranted to be free of defects in materials and workmanship for a period of three years from thedate of shipment from the Dallas factory of BTX. Should any trouble develop during the three-year period, contact the factory for a RGA(Return Goods Authorization) number and return the product, freight prepaid. If inspection shows the trouble was caused bydefective materials or workmanship, BTX will repair (or at its option, replace) the nonconforming part without charge.
This warranty does not apply where: 1. Repairs have been made or attempted by persons other than a factory authorized person. 2. Repairs are required because of normal wear and tear. 3. The product has been abused, misused, improperly maintained or malfunctions due to errors in customer assembly or
the installation. 4. Alterations have been made to the unit.
IN NO EVENT SHALL BTX OR HOUSTON AUTOMATED SHADE & DRAPERY (AUTOMATEDSHADE.COM) BE LIABLE FOR ANYINDIRECT, INCIDENTAL, CONSEQUENTIAL OR OTHER DAMAGES IN CONNECTION WITH THIS PRODUCT. THIS DISCLAIMERAPPLIES BOTH DURING AND AFTER THE PERIOD OF THIS WARRANTY.
THE FOREGOING WARRANTY IS EXCLUSIVE AND IN LIEU OF ALL OTHER WARRANTIES, WHETHER WRITTEN, ORAL ORIMPLIED. ALL OTHER WARRANTIES, INCLUDING ANY WARRANTY OF MERCHANTABILITY OR FITNESS FOR APARTICULAR PURPOSE, ARE HEREBY DISCLAIMED. Correction of nonconformities as provided above shall be purchaser’s exclusiveremedy and shall constitute fulfillment of any and all responsibilities of BTX and Houston Automated Shade (AutomatedShade.com),whether in warranty, contract, negligence, tort or otherwise with respect to the equipment or part delivered hereunder. In no event shallBTX, Houston Automated Shade & Drapery (AutomatedShade.com) be responsible for providing working access to the defect, includingdisassembly or reassembly of equipment or parts.
12/99
DisclaimerBTX reserves the right to make changes or improvements on any terms without incurring any obligation and without being required tomake any corresponding changes or improvements on items previously sold, and to discontinue models or accessories at any timewithout notice. BTX reserves the right to make product specification changes without prior notice.