installation instructions - factory five racing instructions front fenders before deciding the cut...
TRANSCRIPT

Controlled Documentation
DO NOT DUPLICATE CONFIDENTIAL INFORMATION AND PROTECTED UNDER U.S. COPYRIGHT LAWS 2012 FACTORY FIVE RACING, INC. company\instructions\Hot Rod bike fenders
1
Part Number: 33923 Revision: B Effective Date: 5/29/12 By: J. INGERSLEV Document Type (indicate): Bill of Material Drawing (may be attached) Specification Assembly Instructions Operating Procedure Other
Hot Rod Bike Fenders Installation Instructions
Tools required ........................................................................................................................................................................ 1 Installation Instructions.......................................................................................................................................................... 2
Front fenders ...................................................................................................................................................................... 2 Rear Fenders .................................................................................................................................................................... 10
Different cut styles of Fenders .............................................................................................................................................. 14
Tools required 3/16”, ¼”, 25/64” Drill bits Rivnut tool
2
5/32” Hex Key White Marker Tape measure Jig or air saw Drill (2) 2x4 or similar blocks Floor jack Jack stands Clamps
Installation Instructions Front fenders Before deciding the cut of the front fenders, align the front front suspension so that the fender
mounts are oriented correctly. See pictures of finished cars at the end of the instructions for ideas on fender trimming Jack the front of the car up and place on jack stands. If the front suspension is assembled, remove the front hubs and the steering arm bolts.

3
Install the long steering arm bolts, spacers and front fender mount bracket. Leave the locknuts loose for now.
Reattach the wheel.

4
Clamp the fender to the mount so that the fender is between the tire and mount and is positioned around the tire as desired.

5
It is recommended to keep the fender low in the back so that any stones or sand that is thrown up is
kept to a minimum.

6
Depending on how the fender is trimmed and the look desired, if necessary add shims to the fender mount so the fender is centered on the tire.
Mark the fender as desired for trimming.

7
Make sure that ther is at least a hand clearance between the fender and tire at all positions under the fender.
Use the fender mount holes as a guide to mark the ¼” bolt holes in the fenders using a ¼” drill bit.
Remove and trim the fenders.

8
Drill the ¼” mounting holes.
Reclamp the fender in place using the ¼” mounting screws to locate the fender.
Insert the screws into the mount holes and make sure the screws do not hit the wheel or tire. Remove the wheel.

9
Check to make sure that the screw will go completely through the locknut. If necessary remove material from the fender.
Attach the fender to the mount.
Remount the wheel.

10
Recheck clearance between the fender and tire.
Remove the fenders for painting. Rear Fenders See pictures of finished cars at the end of the instructions for ideas on fender trimming Place the rear of the car on jack stands and remove the rear wheel.

11
Position the rear fender on the body so it fits tight on the inside, hold it in place with a 2x4 on a jack stand or similar.

12
Mark and trim the fender as desired.
Position the fender on the body making sure the inside flange tight against the body.
Drill a 3/16” hole straight up making sure it goes through the fender and the body.

13
Enlarge the hole to ¼”.
Remove the fender and enlarge the hole in the body to 25/64” Install a rivnut in the body. Remount the fender this time using a ¼”-20 flange head bolt to hold the fender in place. Move 6” towards the front of the fender and repeat the process; drill a 3/16” hole through the fender and the body. Enlarge the hole to ¼”. Remove the fender and enlarge the hole in the body to 25/64”. Install a rivnut in the body. Remount the fender with two screws. Once two screws have been mounted the remaining ¼” holes can be drilled without having to remove the fender after each one. Install remaining mounting rivnuts. Trim the fender using an air saw or jig saw. Attach the fender to the body. Attach the wheel to the axle.
14
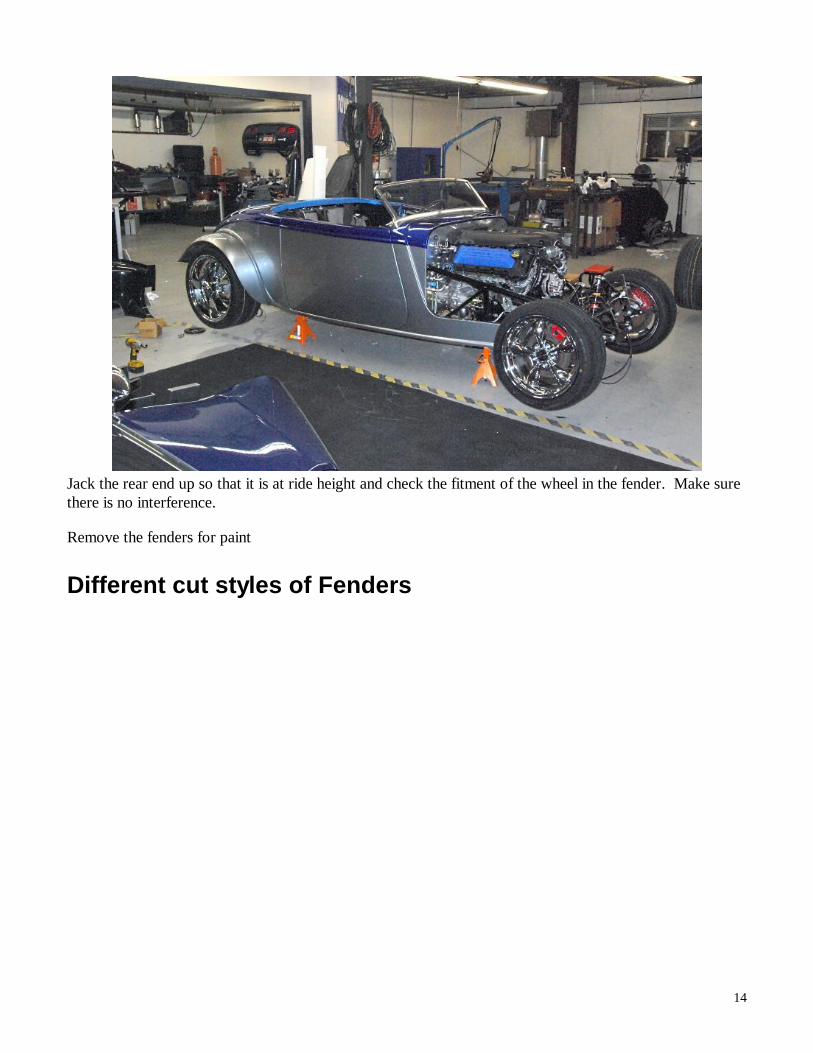
Jack the rear end up so that it is at ride height and check the fitment of the wheel in the fender. Make sure there is no interference.
Remove the fenders for paint
Different cut styles of Fenders

15

16