install best moodle server - webmoodlemoot.orgwebmoodlemoot.org/pluginfile.php/351/mod_page/... ·...
TRANSCRIPT

1
Moodle Macedonia m-r Nikolche Shulevski m-r Zoran Milevski
Install BEST Moodle SERVER
2
Moodle Macedonia m-r Nikolche Shulevski m-r Zoran Milevski
Contents Install Ubuntu server 16.04........................................................................................................................... 4
1. Overview ............................................................................................................................................... 4
2. Requirements ........................................................................................................................................ 5
3. Boot from DVD ...................................................................................................................................... 5
4. Boot from USB flash drive ..................................................................................................................... 5
5. Boot options .......................................................................................................................................... 6
6. Network configuration .......................................................................................................................... 6
7. User configuration ................................................................................................................................ 8
8. Storage configuration ........................................................................................................................... 8
9. Package retrieval ................................................................................................................................... 9
10. Software selection ............................................................................................................................ 10
11. Installation ........................................................................................................................................ 10
12. Installation complete ........................................................................................................................ 11
13. Finding help ....................................................................................................................................... 12
Install Apache 2.4.x ..................................................................................................................................... 12
Install the Latest MySQL 5.7 ....................................................................................................................... 14
Introduction ............................................................................................................................................ 14
Prerequisites ........................................................................................................................................... 14
Step 1 — Adding the MySQL Software Repository ............................................................................. 14
Step 2 — Installing MySQL .................................................................................................................. 16
Step 3 — Securing MySQL ................................................................................................................... 17
Step 4 – Testing MySQL....................................................................................................................... 17
INSTALLING PHP 7.0 OR 7.1 ........................................................................................................................ 18
STEP1: INSTALLING PHP 7.0 ON UBUNTU ............................................................................................... 19
STEP 2: INSTALLING PHP 7.1 ON UBUNTU .............................................................................................. 20
SUMMARY: .............................................................................................................................................. 22
Install and Secure phpMyAdmin 4.7.4 ........................................................................................................ 23
Introduction ............................................................................................................................................ 23
Prerequisites ........................................................................................................................................... 23
Step One — Install phpMyAdmin ........................................................................................................... 24
Step Two — Secure your phpMyAdmin Instance ................................................................................... 26

3
Moodle Macedonia m-r Nikolche Shulevski m-r Zoran Milevski
Configure Apache to Allow .htaccess Overrides ................................................................................. 26
Create an .htaccess File ....................................................................................................................... 27
Create the .htpasswd file for Authentication ..................................................................................... 28
Virtualmin with Webmin 1.850 ................................................................................................................... 29
Introduction ............................................................................................................................................ 29
Prerequisites ........................................................................................................................................... 29
Step 1 — Setting the Hostname and FQDN ............................................................................................ 30
Step 2 — Installing Virtualmin ................................................................................................................ 32
Step 3 — Configuring Webmin's Root Password .................................................................................... 33
Step 4 — Configuring Webmin Using The Post-Installion Wizard .......................................................... 33
Step 5 — Creating A New Virtual Server ................................................................................................. 36
Webmin & Virtualmin Docs ........................................................................................................................ 37
Webmin ................................................................................................................................................... 37
Virtualmin ............................................................................................................................................... 37
MOODLE 3.3 Installation quick guide ......................................................................................................... 37
Basic Requirements................................................................................................................................. 37
Getting Moodle ....................................................................................................................................... 38
Create a database ................................................................................................................................... 38
Create data directory .............................................................................................................................. 38
Install Moodle code ................................................................................................................................ 39
Configure Moodle ................................................................................................................................... 39
Install Moodle ......................................................................................................................................... 39
Set up cron .............................................................................................................................................. 39
Congratulations! ........................................................................................ Error! Bookmark not defined.

4
Moodle Macedonia m-r Nikolche Shulevski m-r Zoran Milevski
Install Ubuntu server 16.041
1. Overview
Ubuntu Server is Ubuntu tailored for networks and services, and it's just as capable sharing files on your home network as it is running within a Hadoop cluster.
Unlike the installation of Ubuntu Desktop, Ubuntu Server does not include a graphical installation program. Instead, it uses a console menu-based process. If you'd rather install the desktop version, take a look at our Install Ubuntu desktoptutorial.
This guide will provide an overview of the installation from either a DVD or a USB flash drive, suitable for anyone with an interest in running their own server. For a more detailed guide on Ubuntu Server's capabilities and its configuration, take a look at our Ubuntu Server help documentation.
1 https://tutorials.ubuntu.com/tutorial/tutorial-install-ubuntu-server#12
5
Moodle Macedonia m-r Nikolche Shulevski m-r Zoran Milevski
2. Requirements
You'll need to consider the following before starting the installation:
• Ensure you have at least 2GB of free storage space.
• Have access to either a DVD or a USB flash drive containing the version of Ubuntu Server you want to install.
• If you're going to install Ubuntu Server alongside data you wish to keep, ensure you have a recent backup.
See Installation/System Requirements for more specific details on hardware requirements. We also have several tutorialsthat explain how to create an Ubuntu DVD or USB flash drive.
3. Boot from DVD
To trigger the installation process, perform the following:
1. Put the Ubuntu DVD into your DVD drive.
2. Restart your computer.
A few moments later, a large ‘Language' menu will appear and selecting your language will take you to the boot menu.
4. Boot from USB flash drive
Most computers will boot from USB automatically. Simply insert the USB flash drive and either power on your computer or restart it. You should see the same language menu we saw in the previous ‘Install from DVD' step, followed by the boot menu.
If your computer doesn't automatically boot from USB, try holding F12 when your computer first starts. With most machines, this will allow you to select the USB device from a system-specific boot menu.
F12 is the most common key for bringing up your system's boot menu, but Escape, F10 and F2
are common alternatives. If you're unsure, look for a brief message when your system starts - this
will often inform you of which key to press to bring up the boot menu.
6
Moodle Macedonia m-r Nikolche Shulevski m-r Zoran Milevski
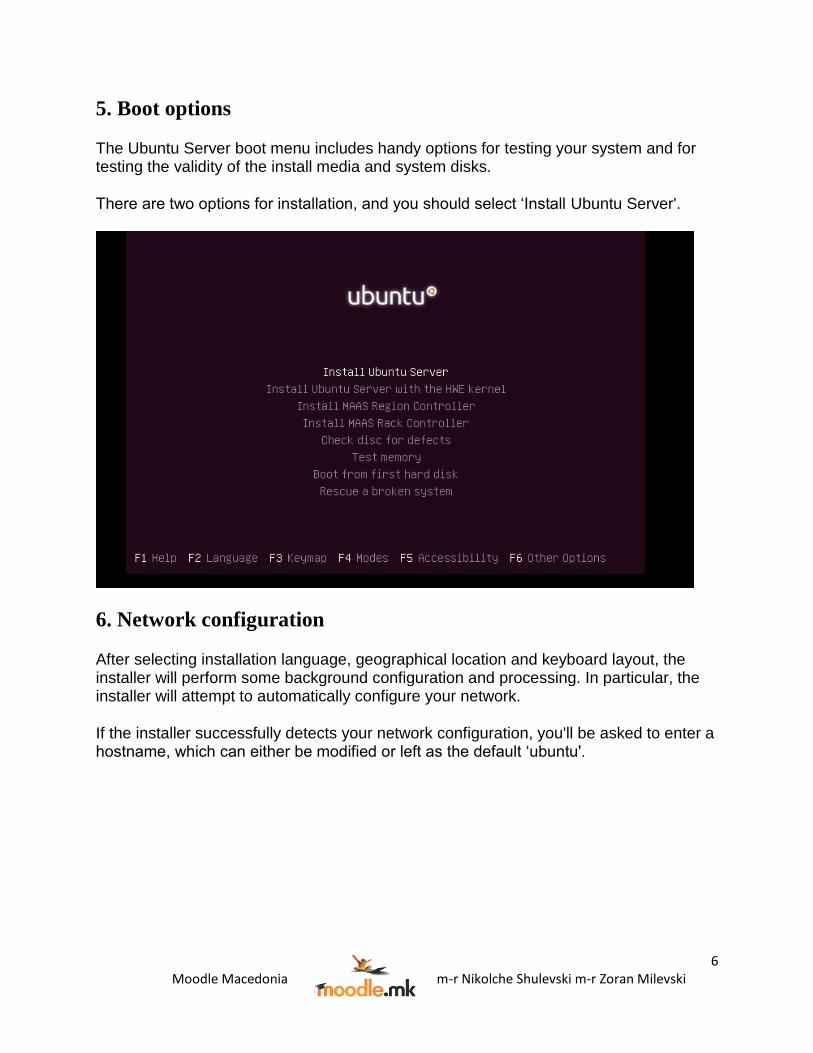
5. Boot options
The Ubuntu Server boot menu includes handy options for testing your system and for testing the validity of the install media and system disks.
There are two options for installation, and you should select ‘Install Ubuntu Server'.
6. Network configuration
After selecting installation language, geographical location and keyboard layout, the installer will perform some background configuration and processing. In particular, the installer will attempt to automatically configure your network.
If the installer successfully detects your network configuration, you'll be asked to enter a hostname, which can either be modified or left as the default ‘ubuntu'.

7
Moodle Macedonia m-r Nikolche Shulevski m-r Zoran Milevski
If network autodetection fails, this will mostly likely be because your network isn't using DHCP
or the DHCP server isn't accessible. You will see another menu offering you the option to
configure the network manually or rerun the autodetection routine.
8
Moodle Macedonia m-r Nikolche Shulevski m-r Zoran Milevski
If you don't get this menu, read the booting from the DVD guide for more information.
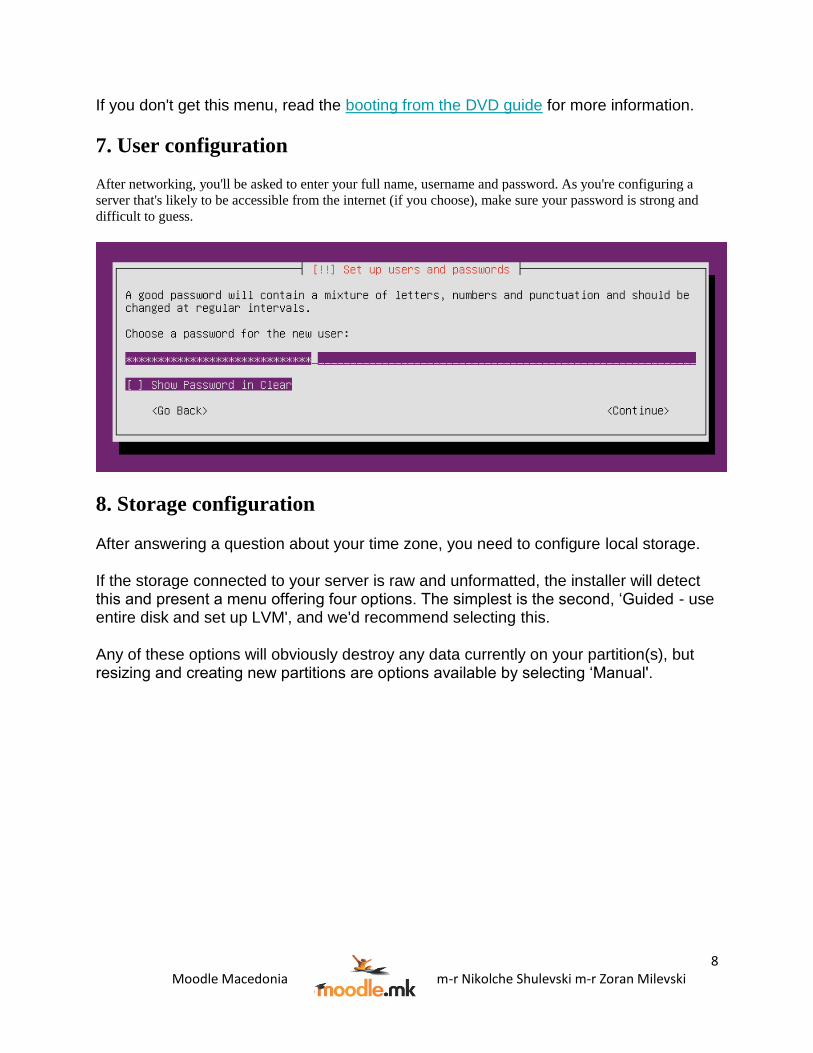
7. User configuration
After networking, you'll be asked to enter your full name, username and password. As you're configuring a
server that's likely to be accessible from the internet (if you choose), make sure your password is strong and
difficult to guess.
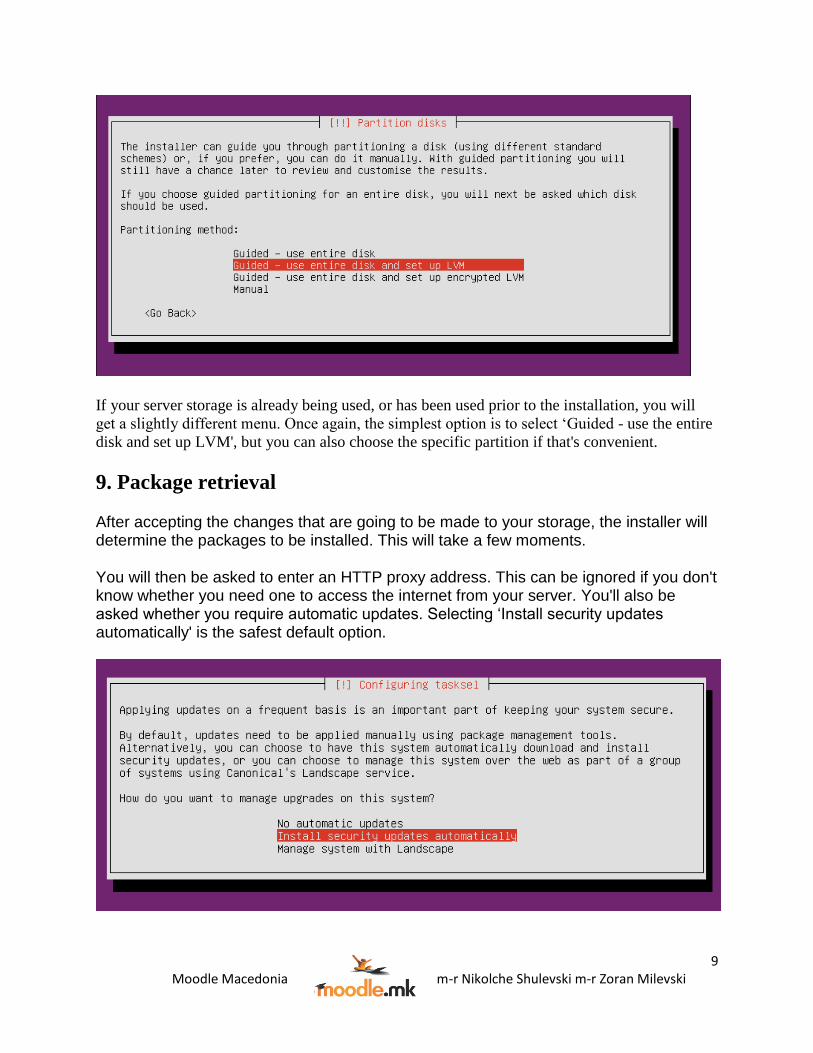
8. Storage configuration
After answering a question about your time zone, you need to configure local storage.
If the storage connected to your server is raw and unformatted, the installer will detect this and present a menu offering four options. The simplest is the second, ‘Guided - use entire disk and set up LVM', and we'd recommend selecting this.
Any of these options will obviously destroy any data currently on your partition(s), but resizing and creating new partitions are options available by selecting ‘Manual'.
9
Moodle Macedonia m-r Nikolche Shulevski m-r Zoran Milevski
If your server storage is already being used, or has been used prior to the installation, you will
get a slightly different menu. Once again, the simplest option is to select ‘Guided - use the entire
disk and set up LVM', but you can also choose the specific partition if that's convenient.
9. Package retrieval
After accepting the changes that are going to be made to your storage, the installer will determine the packages to be installed. This will take a few moments.
You will then be asked to enter an HTTP proxy address. This can be ignored if you don't know whether you need one to access the internet from your server. You'll also be asked whether you require automatic updates. Selecting ‘Install security updates automatically' is the safest default option.
10
Moodle Macedonia m-r Nikolche Shulevski m-r Zoran Milevski
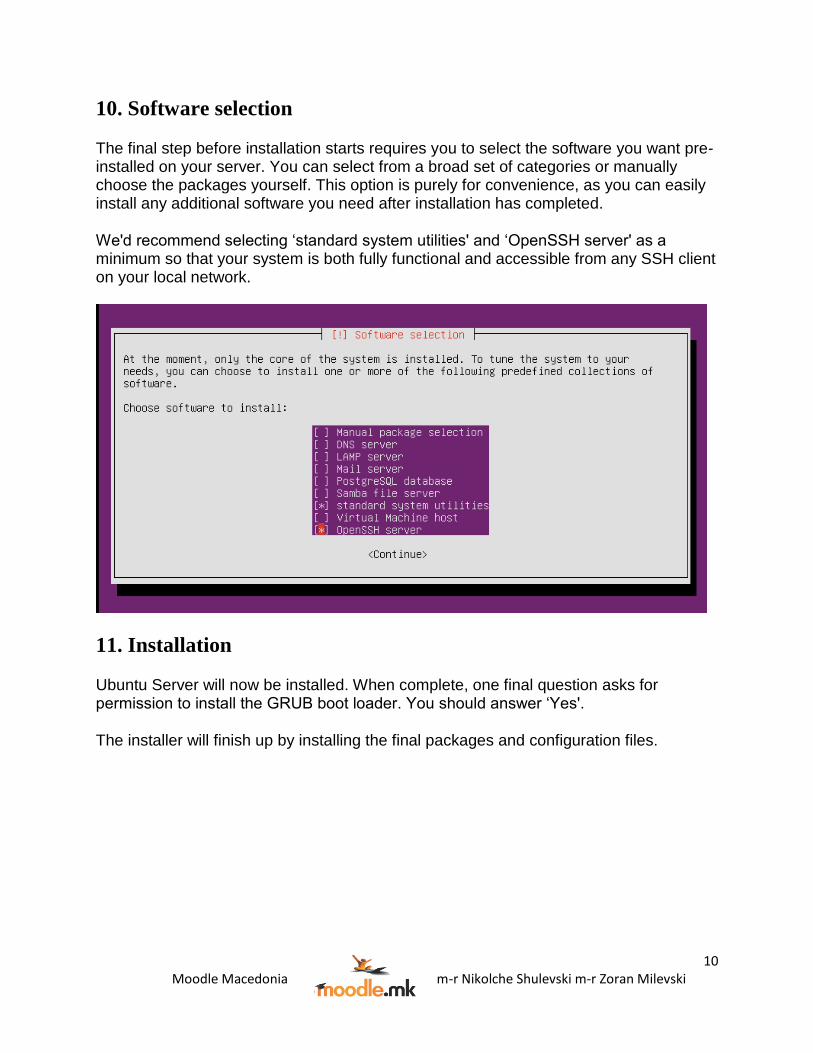
10. Software selection
The final step before installation starts requires you to select the software you want pre-installed on your server. You can select from a broad set of categories or manually choose the packages yourself. This option is purely for convenience, as you can easily install any additional software you need after installation has completed.
We'd recommend selecting ‘standard system utilities' and ‘OpenSSH server' as a minimum so that your system is both fully functional and accessible from any SSH client on your local network.
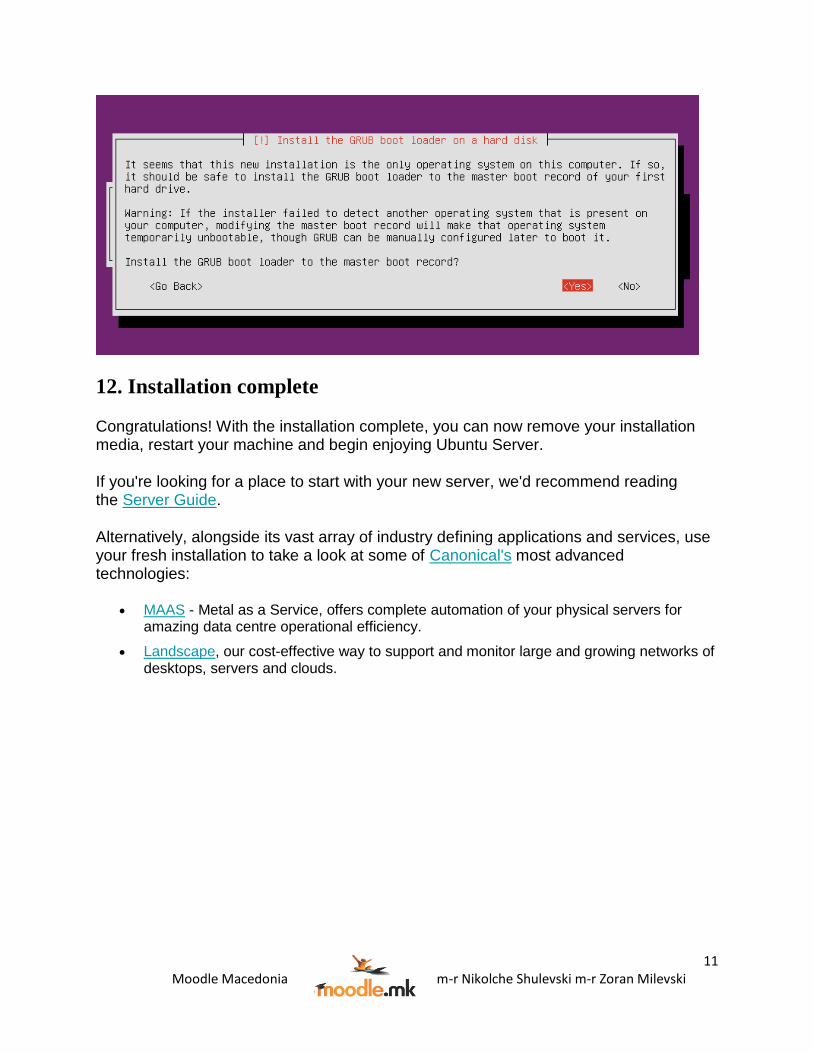
11. Installation
Ubuntu Server will now be installed. When complete, one final question asks for permission to install the GRUB boot loader. You should answer ‘Yes'.
The installer will finish up by installing the final packages and configuration files.
11
Moodle Macedonia m-r Nikolche Shulevski m-r Zoran Milevski
12. Installation complete
Congratulations! With the installation complete, you can now remove your installation media, restart your machine and begin enjoying Ubuntu Server.
If you're looking for a place to start with your new server, we'd recommend reading the Server Guide.
Alternatively, alongside its vast array of industry defining applications and services, use your fresh installation to take a look at some of Canonical's most advanced technologies:
• MAAS - Metal as a Service, offers complete automation of your physical servers for amazing data centre operational efficiency.
• Landscape, our cost-effective way to support and monitor large and growing networks of desktops, servers and clouds.

12
Moodle Macedonia m-r Nikolche Shulevski m-r Zoran Milevski
13. Finding help
The Ubuntu community, for both desktop and server, is one of the friendliest and most well populated you can find. That means if you get stuck, someone has most likely already been there and solved the same problem.
Try asking for help in one of the following:
• Ask Ubuntu
• Ubuntu Forums
• IRC-based support
Alternatively, if you need commercial support for your server deployments, take a look at Ubuntu Advantage.
Install Apache 2.4.x2
Install the latest stable release of Apache 2.4.x using the following command:
2 https://www.vultr.com/docs/how-to-install-apache-24-mariadb-10-and-php-7x-on-ubuntu-
16-04
13
Moodle Macedonia m-r Nikolche Shulevski m-r Zoran Milevski
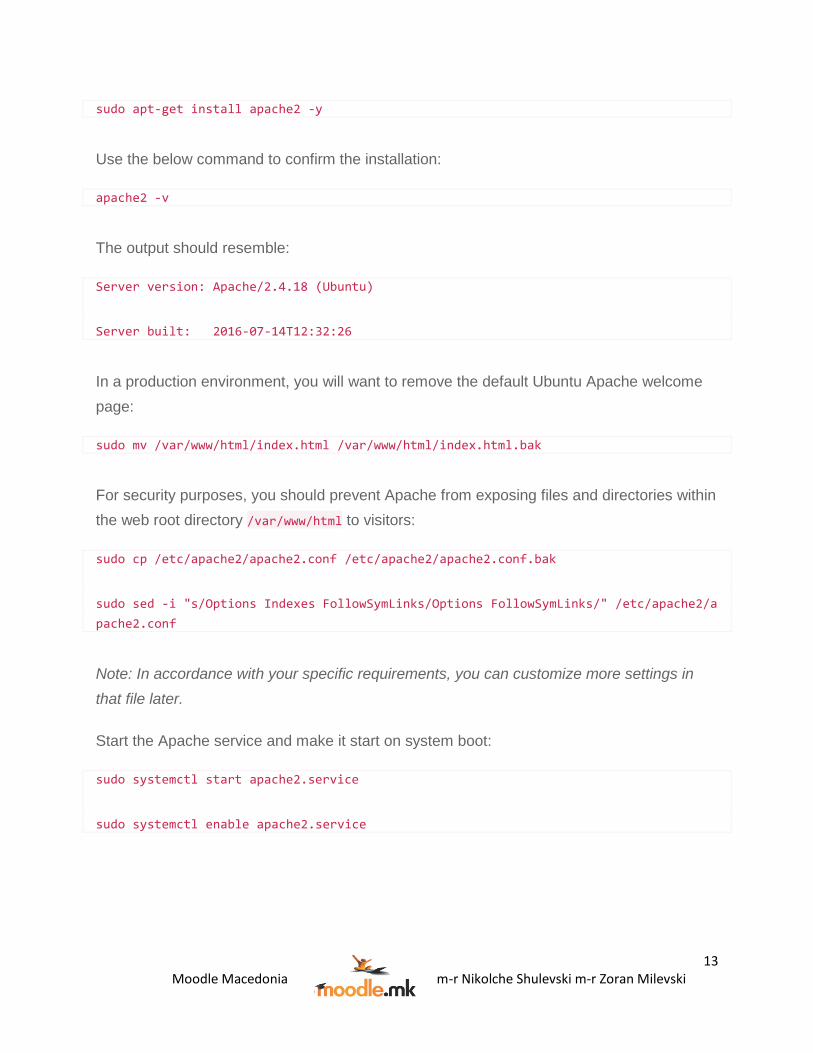
sudo apt-get install apache2 -y
Use the below command to confirm the installation:
apache2 -v
The output should resemble:
Server version: Apache/2.4.18 (Ubuntu)
Server built: 2016-07-14T12:32:26
In a production environment, you will want to remove the default Ubuntu Apache welcome
page:
sudo mv /var/www/html/index.html /var/www/html/index.html.bak
For security purposes, you should prevent Apache from exposing files and directories within
the web root directory /var/www/html to visitors:
sudo cp /etc/apache2/apache2.conf /etc/apache2/apache2.conf.bak
sudo sed -i "s/Options Indexes FollowSymLinks/Options FollowSymLinks/" /etc/apache2/a
pache2.conf
Note: In accordance with your specific requirements, you can customize more settings in
that file later.
Start the Apache service and make it start on system boot:
sudo systemctl start apache2.service
sudo systemctl enable apache2.service
14
Moodle Macedonia m-r Nikolche Shulevski m-r Zoran Milevski
Install the Latest MySQL 5.73
Introduction
MySQL is a prominent open source database management system used to store and retrieve data for a wide variety of popular applications. MySQL is the M in the LAMP stack, a commonly used set of open source software that also includes Linux, the Apache web server, and the PHP programming language.
In order to use newly released features, it's sometimes necessary to install a more up-to-date version of MySQL than that provided by your Linux distribution. Conveniently, the MySQL developers maintain their own software repository we can use to easily install the latest version and keep it up to date.
To install the latest version of MySQL, we'll add this repository, install the MySQL software itself, secure the install, and finally we'll test that MySQL is running and responding to commands.
Prerequisites
Before starting this tutorial, you will need:
• An Ubuntu 16.04 server with a non-root, sudo-enabled user, as described in this Ubuntu 16.04 server setup tutorial.
Step 1 — Adding the MySQL Software Repository
The MySQL developers provide a .deb package that handles configuring and installing
the official MySQL software repositories. Once the repositories are set up, we'll be able to use Ubuntu's standard apt-getcommand to install the software. We'll download
this .deb file with curl and then install it with the dpkgcommand.
First, load the MySQL download page in your web browser. Find the Download button in the lower-right corner and click through to the next page. This page will prompt you to log in or sign up for an Oracle web account. We can skip that and instead look for the link that says No thanks, just start my download. Right-click the link and select Copy Link Address (this option may be worded differently, depending on your browser).
Now we're going to download the file. On your server, move to a directory you can write to:
3 https://www.digitalocean.com/community/tutorials/how-to-install-the-latest-mysql-on-ubuntu-16-04
15
Moodle Macedonia m-r Nikolche Shulevski m-r Zoran Milevski
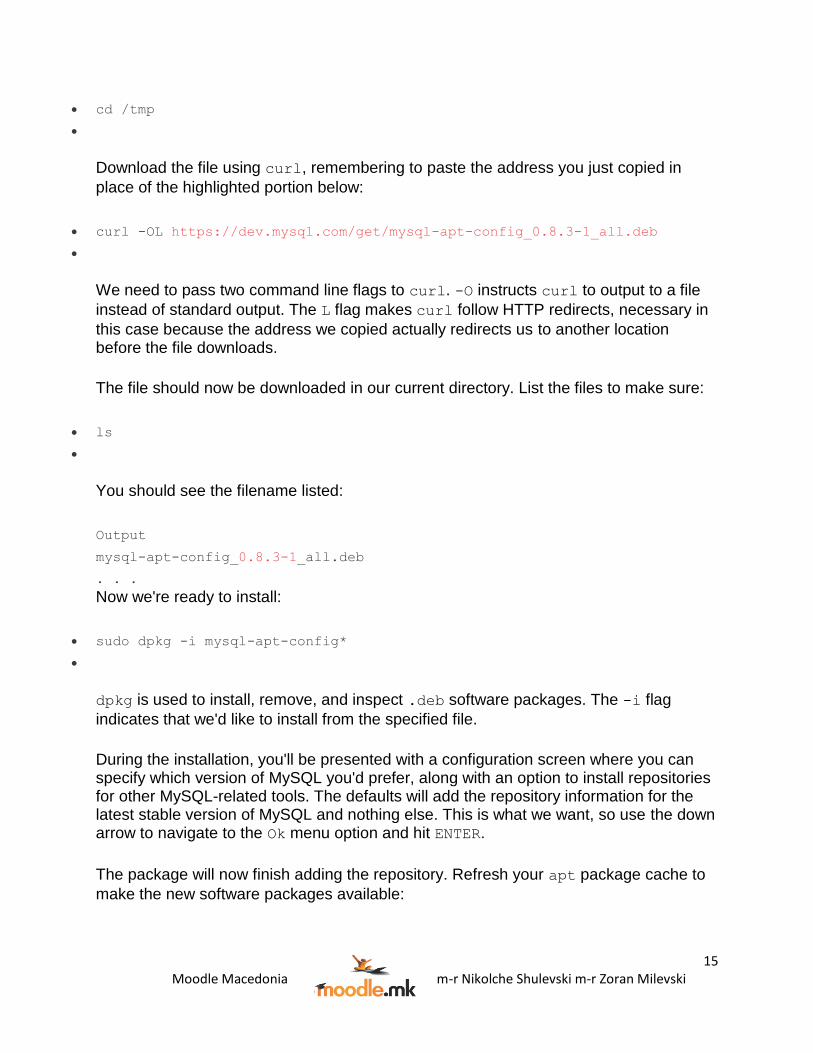
• cd /tmp
•
Download the file using curl, remembering to paste the address you just copied in
place of the highlighted portion below:
• curl -OL https://dev.mysql.com/get/mysql-apt-config_0.8.3-1_all.deb
•
We need to pass two command line flags to curl. -O instructs curl to output to a file
instead of standard output. The L flag makes curl follow HTTP redirects, necessary in
this case because the address we copied actually redirects us to another location before the file downloads.
The file should now be downloaded in our current directory. List the files to make sure:
• ls
•
You should see the filename listed:
Output
mysql-apt-config_0.8.3-1_all.deb
. . .
Now we're ready to install:
• sudo dpkg -i mysql-apt-config*
•
dpkg is used to install, remove, and inspect .deb software packages. The -i flag
indicates that we'd like to install from the specified file.
During the installation, you'll be presented with a configuration screen where you can specify which version of MySQL you'd prefer, along with an option to install repositories for other MySQL-related tools. The defaults will add the repository information for the latest stable version of MySQL and nothing else. This is what we want, so use the down arrow to navigate to the Ok menu option and hit ENTER.
The package will now finish adding the repository. Refresh your apt package cache to
make the new software packages available:

16
Moodle Macedonia m-r Nikolche Shulevski m-r Zoran Milevski
• sudo apt-get update
•
Let's also clean up after ourselves and delete the file we downloaded:
• rm mysql-apt-config*
•
Now that we've added the MySQL repositories, we're ready to install the actual MySQL server software. If you ever need to update the configuration of these repositories, just run sudo dpkg-reconfigure mysql-apt-config, select new options, and
then sudo apt-get update to refresh your package cache.
Step 2 — Installing MySQL
Having added the repository and with our package cache freshly updated, we can now use apt-get to install the latest MySQL server package:
• sudo apt-get install mysql-server
•
apt-get will look at all available mysql-server packages and determine that the
MySQL provided package is the newest and best candidate. It will then calculate package dependencies and ask you to approve the installation. Type y then ENTER. The
software will install. You will be asked to set a rootpassword during the configuration phase of the installation. Be sure to choose a secure password, enter it twice, and the process will complete.
MySQL should be installed and running now. Let's check using systemctl:
• systemctl status mysql
•
Output
● mysql.service - MySQL Community Server
Loaded: loaded (/lib/systemd/system/mysql.service; enabled; vendor
preset: enabled)
Active: active (running) since Wed 2017-04-05 19:28:37 UTC; 3min 42s
ago
Main PID: 8760 (mysqld)
CGroup: /system.slice/mysql.service

17
Moodle Macedonia m-r Nikolche Shulevski m-r Zoran Milevski
└─8760 /usr/sbin/mysqld --daemonize --pid-
file=/var/run/mysqld/mysqld.pid
The Active: active (running) line means MySQL is installed and running. Now
we'll make the installation a little more secure.
Step 3 — Securing MySQL
MySQL comes with a command we can use to perform a few security-related updates on our new install. Let's run it now:
• mysql_secure_installation
•
This will ask you for the MySQL root password that you set during installation. Type it in and press ENTER. Now we'll answer a series of yes or no prompts. Let's go through
them:
First, we are asked about the validate password plugin, a plugin that can automatically enforce certain password strength rules for your MySQL users. Enabling this is a decision you'll need to make based on your individual security needs. Type y and ENTER to enable it, or just hit ENTER to skip it. If enabled, you will also be
prompted to choose a level from 0–2 for how strict the password validation will be. Choose a number and hit ENTER to continue.
Next you'll be asked if you want to change the root password. Since we just created the password when we installed MySQL, we can safely skip this. Hit ENTER to continue
without updating the password.
The rest of the prompts can be answered yes. You will be asked about removing the anonymous MySQL user, disallowing remote root login, removing the test database, and reloading privilege tables to ensure the previous changes take effect properly. These are all a good idea. Type y and hit ENTER for each.
The script will exit after all the prompts are answered. Now our MySQL installation is reasonably secured. Let's test it again by running a client that connects to the server and returns some information.
Step 4 – Testing MySQL
mysqladmin is a command line administrative client for MySQL. We'll use it to connect
to the server and output some version and status information:
• mysqladmin -u root -p version
•

18
Moodle Macedonia m-r Nikolche Shulevski m-r Zoran Milevski
The -u root portion tells mysqladmin to log in as the MySQL root user, -p instructs
the client to ask for a password, and version is the actual command we want to run.
The output will let us know what version of the MySQL server is running, its uptime, and some other status information:
Output
mysqladmin Ver 8.42 Distrib 5.7.17, for Linux on x86_64
Copyright (c) 2000, 2016, Oracle and/or its affiliates. All rights
reserved.
Oracle is a registered trademark of Oracle Corporation and/or its
affiliates. Other names may be trademarks of their respective
owners.
Server version 5.7.17
Protocol version 10
Connection Localhost via UNIX socket
UNIX socket /var/run/mysqld/mysqld.sock
Uptime: 58 min 28 sec
Threads: 1 Questions: 10 Slow queries: 0 Opens: 113 Flush tables: 1
Open tables: 106 Queries per second avg: 0.002
If you received similar output, congrats! You've successfully installed the latest MySQL server and secured it.
INSTALLING PHP 7.0 OR 7.14
4 https://websiteforstudents.com/installing-php-7-0-7-1-ubuntu-17-04/

19
Moodle Macedonia m-r Nikolche Shulevski m-r Zoran Milevski
PHP and related packages are the most commonly used software to develop PHP
based websites and blogs online today. It mostly used with Linux, Apache2/Nginx and
MySQL or MariaDB to create dynamic websites and blogs.
PHP 7 has become the default version of Ubuntu since 16.04 was released. It replaced
PHP 5.x and provides better security and speed. If you’re going to be running blogs and
websites based on PHP, it’s recommended to that you upgrade to PHP 7.0 or 7.1.
This brief tutorial is going to show you how to install both PHP 7.0 and PHP 7.1 on
Ubuntu 17.04 if you haven’t done so. With PHP 7.0, it’s easy.
All one has to do to install PHP 7.0 is run the apt-get install php.7.0 commands since
it’s the default version that comes with Ubuntu. PHP 7.1 on the other hand isn’t readily
available on Ubuntu systems.
To install PHP 7.1 you must add a third-party repository to Ubuntu.
STEP1: INSTALLING PHP 7.0 ON UBUNTU
Since PHP 7.0 comes as the default version starting with Ubuntu 16.04, all one has to
do is run the commands below to install it.
sudo apt-get install php7.0
To install related PHP packages that are important to running dynamic PHP based
applications with Apache2 Webserver support, run the commands below

20
Moodle Macedonia m-r Nikolche Shulevski m-r Zoran Milevski
sudo apt-get install php7.0 libapache2-mod-php7.0 php7.0-cli php7.0-common
php7.0-mbstring php7.0-gd php7.0-intl php7.0-xml php7.0-mysql php7.0-mcrypt
php7.0-zip
Alternatively, run the commands below to install PHP 7.0 with Nginx Webserver support
sudo apt-get install php7.0 php7.0-fpm php7.0-cli php7.0-common php7.0-
mbstring php7.0-gd php7.0-intl php7.0-xml php7.0-mysql php7.0-mcrypt php7.0-
zip
After the installation, confirm PHP version by running the commands below.
php -v
Output:
PHP 7.0.18-0ubuntu0.17.04.1 (cli) (built: Apr 26 2017 23:59:48) ( NTS )
Copyright (c) 1997-2017 The PHP Group
Zend Engine v3.0.0, Copyright (c) 1998-2017 Zend Technologies
with Zend OPcache v7.0.18-0ubuntu0.17.04.1, Copyright (c) 1999-2017, by Zend
Technologies
STEP 2: INSTALLING PHP 7.1 ON UBUNTU

21
Moodle Macedonia m-r Nikolche Shulevski m-r Zoran Milevski
PHP 7.1 is not readily available on Ubuntu systems by default. To install it you must add
a third-party PPA repository. There might be other ways to installing it, but this is the
quickest and easiest way to install PHP 7.1 on Ubuntu.
To add the third-party PPA repository to Ubuntu, run the commands below.
sudo apt-get install python-software-properties
sudo add-apt-repository ppa:ondrej/php
After adding the repository to Ubuntu, run the commands below to search for all PHP
packages related to PHP 7.1
sudo apt-get update
sudo apt-cache pkgnames | grep php7.1
Output:
php7.1-xml php7.1-xsl php7.1-mbstring php7.1-readline php7.1-zip php7.1-mysql php7.1-phpdbg php7.1-interbase php7.1-sybase php7.1 php7.1-sqlite3 php7.1-tidy php7.1-opcache php7.1-pspell php7.1-json php7.1-xmlrpc

22
Moodle Macedonia m-r Nikolche Shulevski m-r Zoran Milevski
php7.1-curl php7.1-ldap php7.1-bz2 php7.1-cgi php7.1-imap php7.1-cli php7.1-dba php7.1-dev php7.1-intl php7.1-fpm php7.1-recode php7.1-odbc php7.1-gmp php7.1-common php7.1-pgsql php7.1-bcmath php7.1-snmp php7.1-soap php7.1-mcrypt php7.1-gd php7.1-enchant libapache2-mod-php7.1 libphp7.1-embed
Use the list to install all the PHP 7.1 packages on Ubuntu
SUMMARY:
PHP and related packages help developers build dynamic web applications. Majority of
the content management systems (CMS) available rely on PHP. This post shows you
how to easily install it on Ubuntu systems.
PHP main configuration file is stored at this location on Ubuntu with Apache2 support.
/etc/php/7.0/apache2/php.ini
and at this location with Nginx support
/etc/php/7.0/fpm/php.ini
Thi is how to install PHP on Ubuntu
23
Moodle Macedonia m-r Nikolche Shulevski m-r Zoran Milevski
Enjoy!
Install and Secure phpMyAdmin 4.7.45
Introduction
While many users need the functionality of a database management system like MySQL, they may not feel comfortable interacting with the system solely from the MySQL prompt.
phpMyAdmin was created so that users can interact with MySQL through a web interface. In this guide, we'll discuss how to install and secure phpMyAdmin so that you can safely use it to manage your databases from an Ubuntu 16.04 system.
Prerequisites
Before you get started with this guide, you need to have some basic steps completed.
First, we'll assume that you are using a non-root user with sudo privileges, as described in steps 1-4 in the initial server setup of Ubuntu 16.04.
We're also going to assume that you've completed a LAMP (Linux, Apache, MySQL, and PHP) installation on your Ubuntu 16.04 server. If this is not completed yet, you can follow this guide on installing a LAMP stack on Ubuntu 16.04.
Finally, there are important security considerations when using software like phpMyAdmin, since it:
• Communicates directly with your MySQL installation • Handles authentication using MySQL credentials • Executes and returns results for arbitrary SQL queries
For these reasons, and because it is a widely-deployed PHP application which is frequently targeted for attack, you should never run phpMyAdmin on remote systems over a plain HTTP connection. If you do not have an existing domain configured with an
5 https://www.digitalocean.com/community/tutorials/how-to-install-and-secure-
phpmyadmin-on-ubuntu-16-04
24
Moodle Macedonia m-r Nikolche Shulevski m-r Zoran Milevski
SSL/TLS certificate, you can follow this guide on securing Apache with Let's Encrypt on Ubuntu 16.04.
Once you are finished with these steps, you're ready to get started with this guide.
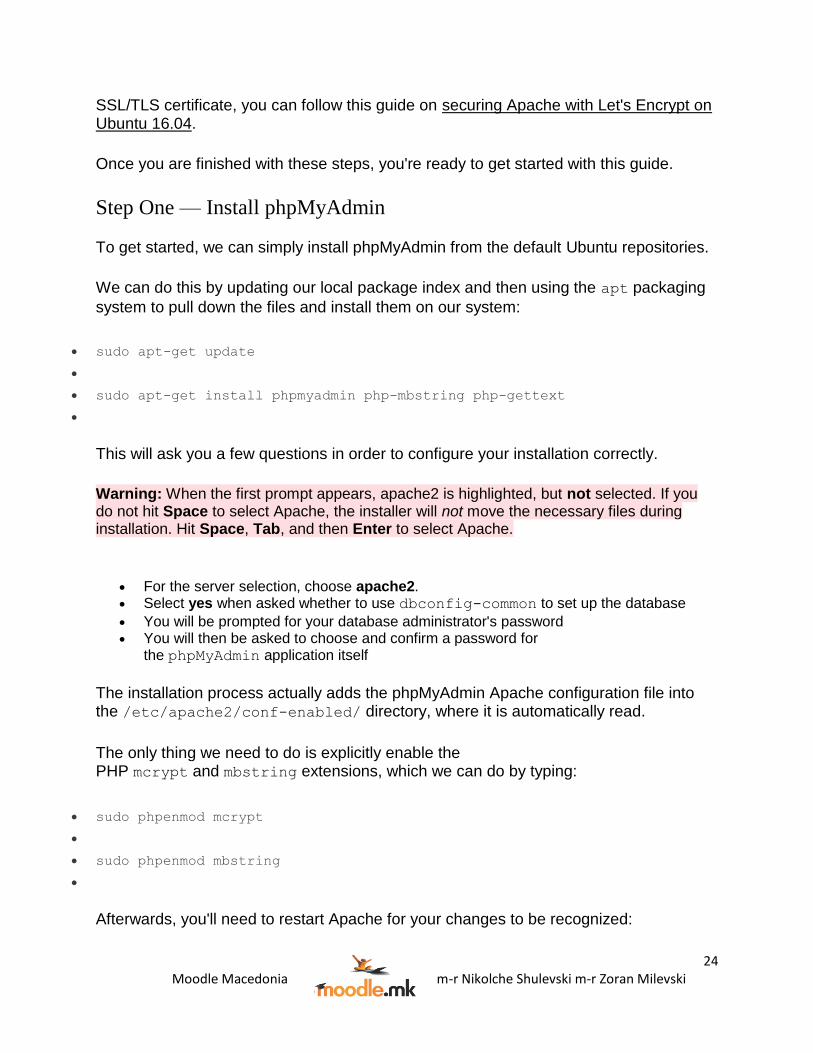
Step One — Install phpMyAdmin
To get started, we can simply install phpMyAdmin from the default Ubuntu repositories.
We can do this by updating our local package index and then using the apt packaging
system to pull down the files and install them on our system:
• sudo apt-get update
•
• sudo apt-get install phpmyadmin php-mbstring php-gettext
•
This will ask you a few questions in order to configure your installation correctly.
Warning: When the first prompt appears, apache2 is highlighted, but not selected. If you do not hit Space to select Apache, the installer will not move the necessary files during installation. Hit Space, Tab, and then Enter to select Apache.
• For the server selection, choose apache2. • Select yes when asked whether to use dbconfig-common to set up the database
• You will be prompted for your database administrator's password • You will then be asked to choose and confirm a password for
the phpMyAdmin application itself
The installation process actually adds the phpMyAdmin Apache configuration file into the /etc/apache2/conf-enabled/ directory, where it is automatically read.
The only thing we need to do is explicitly enable the PHP mcrypt and mbstring extensions, which we can do by typing:
• sudo phpenmod mcrypt
•
• sudo phpenmod mbstring
•
Afterwards, you'll need to restart Apache for your changes to be recognized:

25
Moodle Macedonia m-r Nikolche Shulevski m-r Zoran Milevski
• sudo systemctl restart apache2
•
You can now access the web interface by visiting your server's domain name or public IP address followed by /phpmyadmin:
https://domain_name_or_IP/phpmyadmin
You can now log into the interface using the root username and the administrative
password you set up during the MySQL installation.
When you log in, you'll see the user interface, which will look something like this:

26
Moodle Macedonia m-r Nikolche Shulevski m-r Zoran Milevski
Step Two — Secure your phpMyAdmin Instance
We were able to get our phpMyAdmin interface up and running fairly easily. However, we are not done yet. Because of its ubiquity, phpMyAdmin is a popular target for attackers. We should take extra steps to prevent unauthorized access.
One of the easiest way of doing this is to place a gateway in front of the entire application. We can do this using Apache's built-in .htaccess authentication and
authorization functionalities.
Configure Apache to Allow .htaccess Overrides
First, we need to enable the use of .htaccess file overrides by editing our Apache
configuration file.
We will edit the linked file that has been placed in our Apache configuration directory:
• sudo nano /etc/apache2/conf-available/phpmyadmin.conf
•
We need to add an AllowOverride All directive within the <Directory
/usr/share/phpmyadmin>section of the configuration file, like this:
/etc/apache2/conf-available/phpmyadmin.conf
<Directory /usr/share/phpmyadmin>
Options FollowSymLinks
27
Moodle Macedonia m-r Nikolche Shulevski m-r Zoran Milevski
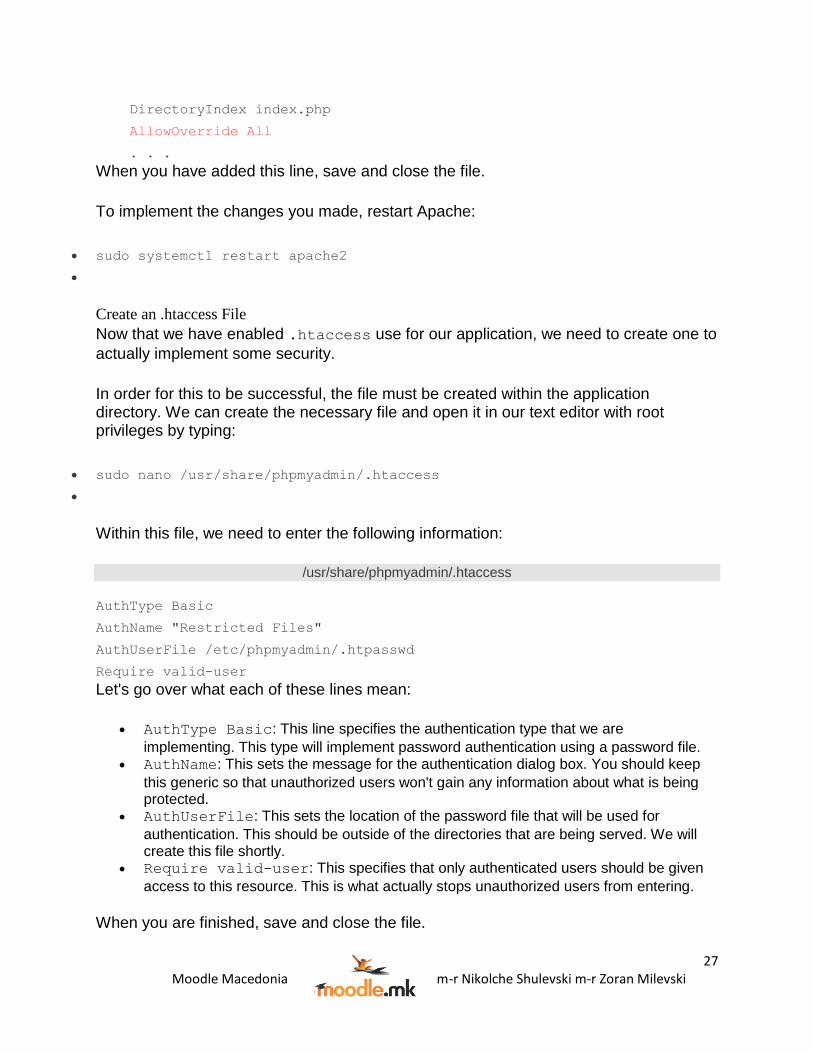
DirectoryIndex index.php
AllowOverride All
. . .
When you have added this line, save and close the file.
To implement the changes you made, restart Apache:
• sudo systemctl restart apache2
•
Create an .htaccess File
Now that we have enabled .htaccess use for our application, we need to create one to
actually implement some security.
In order for this to be successful, the file must be created within the application directory. We can create the necessary file and open it in our text editor with root privileges by typing:
• sudo nano /usr/share/phpmyadmin/.htaccess
•
Within this file, we need to enter the following information:
/usr/share/phpmyadmin/.htaccess
AuthType Basic
AuthName "Restricted Files"
AuthUserFile /etc/phpmyadmin/.htpasswd
Require valid-user
Let's go over what each of these lines mean:
• AuthType Basic: This line specifies the authentication type that we are
implementing. This type will implement password authentication using a password file. • AuthName: This sets the message for the authentication dialog box. You should keep
this generic so that unauthorized users won't gain any information about what is being protected.
• AuthUserFile: This sets the location of the password file that will be used for
authentication. This should be outside of the directories that are being served. We will create this file shortly.
• Require valid-user: This specifies that only authenticated users should be given
access to this resource. This is what actually stops unauthorized users from entering.
When you are finished, save and close the file.

28
Moodle Macedonia m-r Nikolche Shulevski m-r Zoran Milevski
Create the .htpasswd file for Authentication
Now that we have specified a location for our password file through the use of the AuthUserFiledirective within our .htaccess file, we need to create this file.
We actually need an additional package to complete this process. We can install it from our default repositories:
• sudo apt-get install apache2-utils
•
Afterward, we will have the htpasswd utility available.
The location that we selected for the password file was "/etc/phpmyadmin/.htpasswd". Let's create this file and pass it an initial user by
typing:
sudo htpasswd -c /etc/phpmyadmin/.htpasswd username
You will be prompted to select and confirm a password for the user you are creating. Afterwards, the file is created with the hashed password that you entered.
If you want to enter an additional user, you need to do so without the -c flag, like this:
sudo htpasswd /etc/phpmyadmin/.htpasswd additionaluser
Now, when you access your phpMyAdmin subdirectory, you will be prompted for the additional account name and password that you just configured:
https://domain_name_or_IP/phpmyadmin
After entering the Apache authentication, you'll be taken to the regular phpMyAdmin authentication page to enter your other credentials. This will add an additional layer of security since phpMyAdmin has suffered from vulnerabilities in the past.

29
Moodle Macedonia m-r Nikolche Shulevski m-r Zoran Milevski
Virtualmin with Webmin 1.8506
Introduction
Webmin is a web front-end that allows you to manage your server remotely through a browser. Virtualminis a plugin for Webmin that simplifies the management of multiple virtual hosts through a single interface, similar to cPanel or Plesk. With Virtualmin, you can manage user accounts, Apache virtual hosts, DNS entries, MySQL databases, mailboxes, and much more.
In this tutorial, you'll use a script to install the free edition, Virtualmin GPL. This script will install everything you need to use Virtualmin, including Webmin and the following prerequisites:
• A LAMP stack (Apache, PHP, and MySQL), for serving web sites and web applications. • BIND, a DNS server. • PostFix, a mail server.
Once you install Virtualmin and its components, you'll configure Webmin through its graphical interface and create a new virtual host with Virtualmin. Once you complete this tutorial you will be able to create any number of user accounts to host multiple domains on a single server through your browser.
Warning: Do not follow this tutorial on a live production server that is already running Apache, MySQL and PHP, as this can result in data loss. Use a new server and transfer your data over instead.
Prerequisites
To complete this tutorial, you will need:
• One new Ubuntu 16.04 server with at least 1GB of RAM set up by following the Ubuntu 16.04 initial server setup guide, including a sudo non-root user and a firewall.
• A Fully-Qualified Domain Name configured to point to your server. You can learn how to point domain names to DigitalOcean Droplets by following the How To Set Up a Host Name with DigitalOcean tutorial.
6 https://www.digitalocean.com/community/tutorials/how-to-install-virtualmin-with-webmin-lamp-
bind-and-postfix-on-ubuntu-16-04
30
Moodle Macedonia m-r Nikolche Shulevski m-r Zoran Milevski
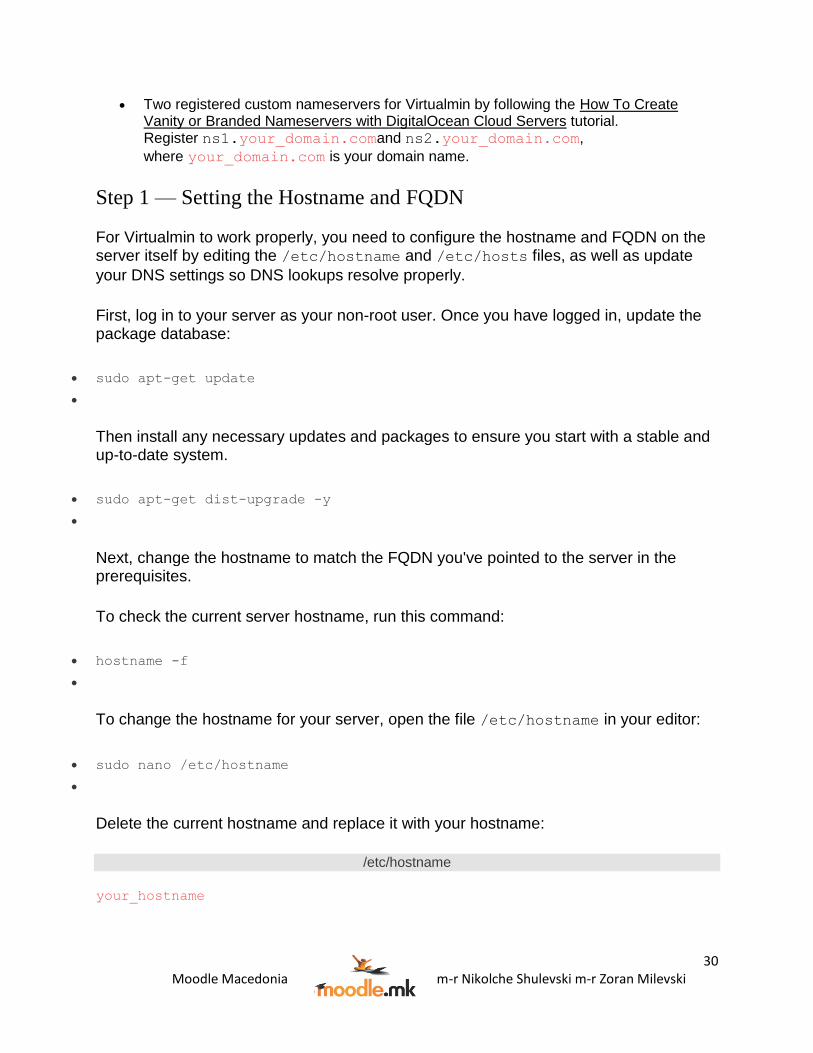
• Two registered custom nameservers for Virtualmin by following the How To Create Vanity or Branded Nameservers with DigitalOcean Cloud Servers tutorial. Register ns1.your_domain.comand ns2.your_domain.com,
where your_domain.com is your domain name.
Step 1 — Setting the Hostname and FQDN
For Virtualmin to work properly, you need to configure the hostname and FQDN on the server itself by editing the /etc/hostname and /etc/hosts files, as well as update
your DNS settings so DNS lookups resolve properly.
First, log in to your server as your non-root user. Once you have logged in, update the package database:
• sudo apt-get update
•
Then install any necessary updates and packages to ensure you start with a stable and up-to-date system.
• sudo apt-get dist-upgrade -y
•
Next, change the hostname to match the FQDN you've pointed to the server in the prerequisites.
To check the current server hostname, run this command:
• hostname -f
•
To change the hostname for your server, open the file /etc/hostname in your editor:
• sudo nano /etc/hostname
•
Delete the current hostname and replace it with your hostname:
/etc/hostname
your_hostname

31
Moodle Macedonia m-r Nikolche Shulevski m-r Zoran Milevski
Use just the hostname, not the entire FQDN, in this file. For example, if your FQDN is virtualmin.example.com, enter virtualmin in this file.
Save the file and exit the editor.
Next, add both the hostname and FQDN in the /etc/hosts file:
• sudo nano /etc/hosts
•
Modify the line that starts with 127.0.0.1 to use your FQDN and hostname, in that
order:
/etc/hosts
127.0.1.1 your_hostname.your_domain.com your_hostname
127.0.0.1 localhost
...
Remember to replace your_hostname and your_domain.com with your own
hostname and domain name. Save the file and exit the editor.
If this line doesn't exist in your file, add it to avoid some compatibility issues with other software on your Ubuntu system. You can learn more about this in the official Debian manual entry on setting up hostnames.
To check if the name has been changed correctly, reboot your server.
• sudo reboot
•
Then ssh into your server again. You should see the new hostname on your terminal prompt. For example:
your_user@your_hostname:~$
Use the hostname command to verify that the FQDN was set correctly:
• hostname -f
•
You'll see your FQDN in the output:

32
Moodle Macedonia m-r Nikolche Shulevski m-r Zoran Milevski
output
your_hostname.your_domain.com
If you don't, double-check the changes you made to your configuration, correct any errors, and reboot.
Next, edit the network configuration file so that it uses this server as one of the DNS servers to resolve domain names. Open the configuration file:
• sudo nano /etc/network/interfaces.d/50-cloud-init.cfg
•
Add the IP address 127.0.0.1 to the configuration file. Look for the following line:
/etc/network/interfaces.d/50-cloud-init.cfg
dns-nameservers 8.8.8.8 8.8.4.4
Change it to:
/etc/network/interfaces.d/50-cloud-init.cfg
dns-nameservers 8.8.8.8 8.8.4.4 127.0.0.1
Make sure there is a space before 127.0.0.1. Save the file and exit the editor.
You have prepared the server by setting the hostname, FQDN, and the network configuration. Let's install Virtualmin.
Step 2 — Installing Virtualmin
To install Virtualmin, download and run the official Virtualmin installation script, which will install Virtualmin, and Webmin, along with a LAMP stack, BIND, and Postfix.
Use wget to download the script:
• wget https://software.virtualmin.com/gpl/scripts/install.sh
•
While this script comes from the official Virtualmin website, you may want to open the script in your editor and review the contents before running it.
• sudo nano ./install.sh
•
33
Moodle Macedonia m-r Nikolche Shulevski m-r Zoran Milevski
Once you're comfortable with the contents of the script, use it to install Virtualmin and its prerequisites:
• sudo /bin/sh ./install.sh
•
The script will display a warning message about existing data and compatible operating systems. Press yto confirm that you want to continue the installation.
The script will take some time to complete all the steps as it installs various software packages and components.
Once the script completes, you can configure the root password.
Step 3 — Configuring Webmin's Root Password
Virtualmin is an add-on to Webmin, and by default, Webmin uses the system root user and password for the web interface login. If you log in to your server using an SSH key, you may not have the system root password, or may not feel comfortable using it to log in remotely through a browser. Let's tell Webmin to use a different password for its web interface. This process won't change the system root password; it'll just tell Webmin to use the password you specify for the login.
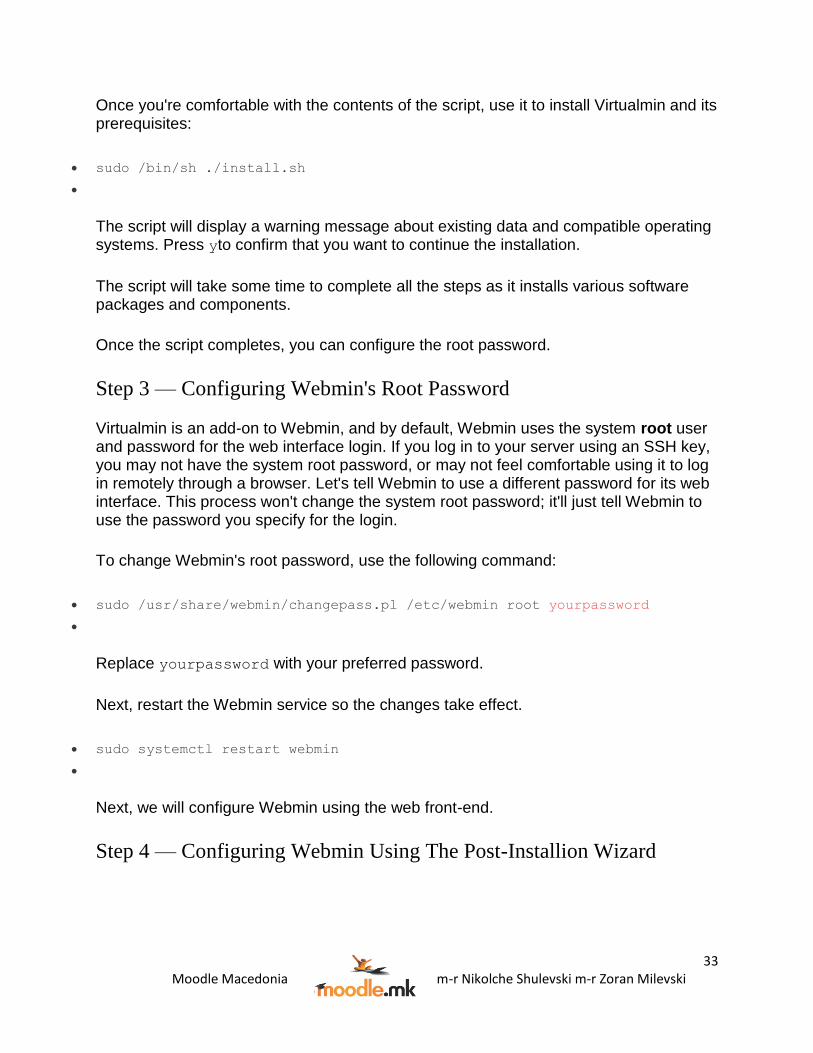
To change Webmin's root password, use the following command:
• sudo /usr/share/webmin/changepass.pl /etc/webmin root yourpassword
•
Replace yourpassword with your preferred password.
Next, restart the Webmin service so the changes take effect.
• sudo systemctl restart webmin
•
Next, we will configure Webmin using the web front-end.
Step 4 — Configuring Webmin Using The Post-Installion Wizard

34
Moodle Macedonia m-r Nikolche Shulevski m-r Zoran Milevski
To configure Webmin, we'll use its web-based Post-Installation Wizard. Open your web browser and navigate to https://your_server_ip:10000. You can also use your
fully-qualified domain name to access the site.
Note: Your browser may show a "Your connection is not secure" or "Your connection is not private" warning since Virtualmin uses a self-signed certificate. This warning is normal. You can add Let's Encrypt SSL certificate after you have completed this tutorial by following Step 2 of the How to Install Webmin on Ubuntu 16.04 tutorial.
Log in as the root user with the newly-changed password you set in the previous step.
Once you have logged in, you'll see the Introduction screen stating that you are going through the steps to configure Virtualmin. Press Next to continue.
On the Memory use screen, select No for Preload Virtualmin libraries, since you don't need to run the Virtualmin UI all the time. Select Yes for Run email domain lookup server to enable faster mail processing. Press Next to continue.
On the Virus scanning screen, select No for Run ClamAV server scanner so you'll use less RAM. Press Next to continue.
On the Spam filtering screen, select No for Run SpamAssassin server filter and press Next to continue.
The next three screens configure the database server:
• On the Database servers screen, select Yes to Run MySQL database server and no to Run PostgreSQL database server. Press Next to continue.
35
Moodle Macedonia m-r Nikolche Shulevski m-r Zoran Milevski
• On the MySQL password screen, enter your desired MySQL root password. It should be different from the root password you used to log in to Webmin.
• On the MySQL database size screen, select the RAM option that matches the amount of RAM your server has. For a 1GB server, select Large system (1G) on which MySQL is heavily used. Press Nextto continue.
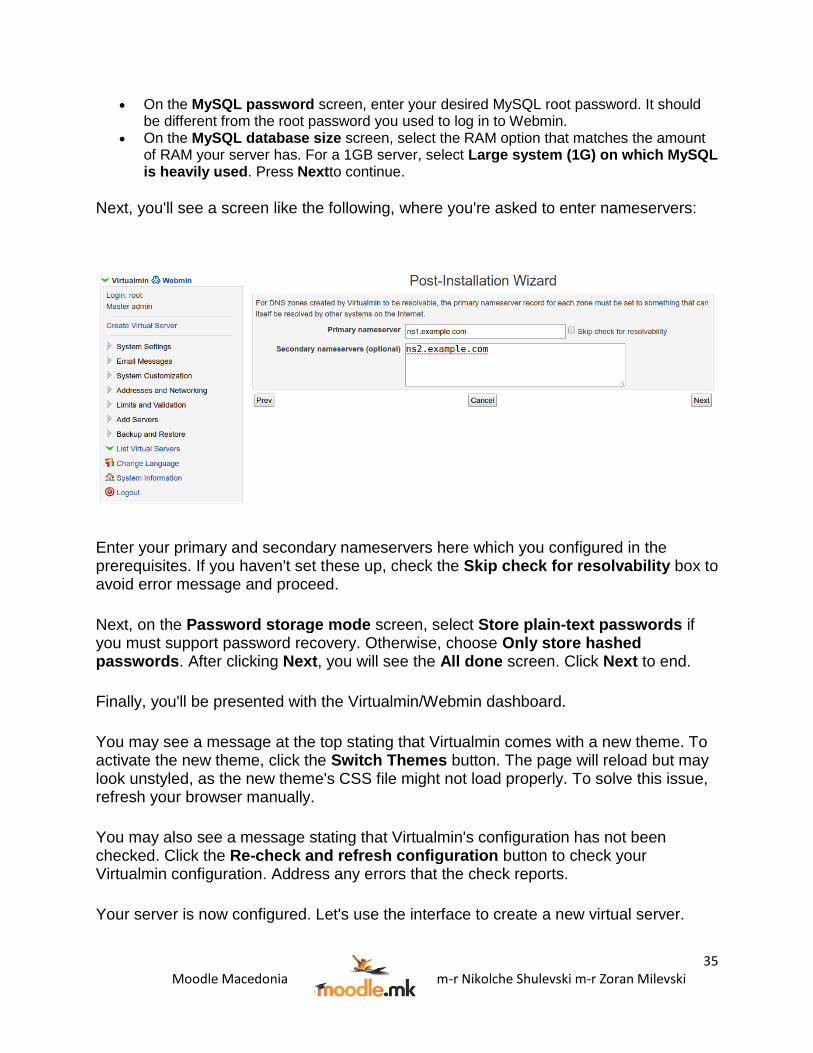
Next, you'll see a screen like the following, where you're asked to enter nameservers:
Enter your primary and secondary nameservers here which you configured in the prerequisites. If you haven't set these up, check the Skip check for resolvability box to avoid error message and proceed.
Next, on the Password storage mode screen, select Store plain-text passwords if you must support password recovery. Otherwise, choose Only store hashed passwords. After clicking Next, you will see the All done screen. Click Next to end.
Finally, you'll be presented with the Virtualmin/Webmin dashboard.
You may see a message at the top stating that Virtualmin comes with a new theme. To activate the new theme, click the Switch Themes button. The page will reload but may look unstyled, as the new theme's CSS file might not load properly. To solve this issue, refresh your browser manually.
You may also see a message stating that Virtualmin's configuration has not been checked. Click the Re-check and refresh configuration button to check your Virtualmin configuration. Address any errors that the check reports.
Your server is now configured. Let's use the interface to create a new virtual server.
36
Moodle Macedonia m-r Nikolche Shulevski m-r Zoran Milevski
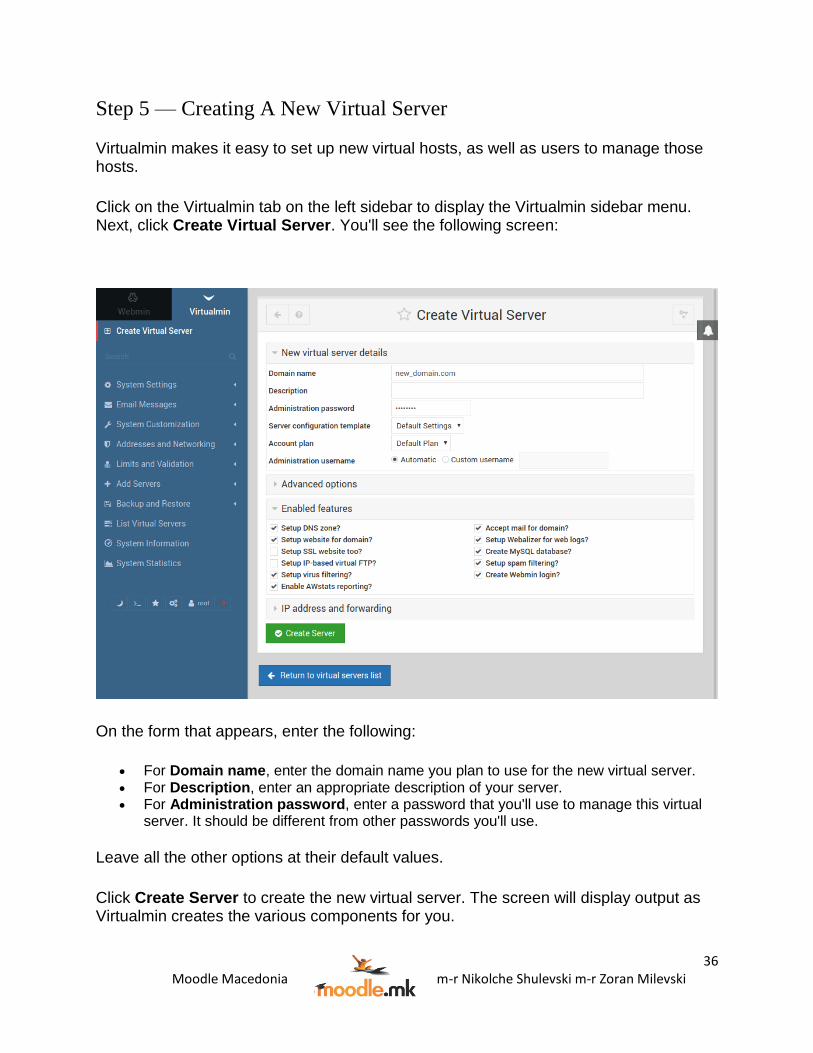
Step 5 — Creating A New Virtual Server
Virtualmin makes it easy to set up new virtual hosts, as well as users to manage those hosts.
Click on the Virtualmin tab on the left sidebar to display the Virtualmin sidebar menu. Next, click Create Virtual Server. You'll see the following screen:
On the form that appears, enter the following:
• For Domain name, enter the domain name you plan to use for the new virtual server. • For Description, enter an appropriate description of your server. • For Administration password, enter a password that you'll use to manage this virtual
server. It should be different from other passwords you'll use.
Leave all the other options at their default values.
Click Create Server to create the new virtual server. The screen will display output as Virtualmin creates the various components for you.
37
Moodle Macedonia m-r Nikolche Shulevski m-r Zoran Milevski
You have just created a new virtual server using Virtualmin, as well as a user that can manage the server. The username will be displayed in the output, and the password will be the password you set. You can provide that username and password to another user so they can manage the virtual server through Virtualmin themselves.
To log out of Virtualmin, click the red exit arrow icon at the bottom of the left sidebar.
Webmin & Virtualmin Docs
Webmin
http://www.webmin.com/index.html
module docs
https://doxfer.webmin.com/Webmin/Webmin_Modules
Virtualmin
http://www.webmin.com/virtualmin.html
Virtualmin Docs
https://www.virtualmin.com/documentation
MOODLE 3.3 Installation quick guide7 (Redirected from Installation Quickstart)
Basic Requirements
• You will need a working web server (e.g. Apache), a database (e.g. MySQL, MariaDB or PostgreSQL) and have PHP configured. See the release notes in the dev docs for software requirements.
• Moodle requires a number of PHP extensions. However, Moodle checks early in the installation process and you can fix the problem and re-start the install script if any are missing.
• If you want Moodle to send email (you probably do) you need a working Sendmail (Unix/Linux) on your server or access to an SMTP mail server.
7 https://docs.moodle.org/33/en/Installation_quick_guide

38
Moodle Macedonia m-r Nikolche Shulevski m-r Zoran Milevski
Getting Moodle
You have two basic options:
• Download your required version from http://moodle.org/downloads ... OR • Pull the code from the Git repository (recommended for developers and also makes upgrading
very simple):
git clone -b MOODLE_{{Version2}}_STABLE git://git.moodle.org/moodle.git
...this fetches a complete copy of the Moodle repository and then switches to the 3.3 Stable
branch.
See Git for Administrators for details on using Git to install Moodle code.
Note: Only download Moodle from one of the moodle.org sources. Other versions (e.g. control
panel based installers, Linux distribution repositories) cannot be guaranteed to work properly, be
upgradable or be supportable.
Create a database
• Using your chosen database server, create a new empty database. The default encoding must be UTF8. For example, using MySQL:
CREATE DATABASE moodle DEFAULT CHARACTER SET utf8mb4 COLLATE
utf8mb4_unicode_ci;
• Create a user/password combination with appropriate permissions for the database. For example (MySQL again):
mysql> GRANT SELECT,INSERT,UPDATE,DELETE,CREATE,CREATE TEMPORARY
TABLES,DROP,INDEX,ALTER ON moodle.* TO 'moodleuser'@'localhost' IDENTIFIED BY
'yourpassword';
Notes: It is important to GRANT ON moodle.* as the database name including the '.*' and not
just the bare database name. Save this password you use for the Moodle user, since you will need
it later in the install.
Create data directory
• Create an empty directory to hold Moodle files. It must not be in the area served by the web server and must have permissions so that the web server user can write to it. Other than that it can be located anywhere. Typically, either make it owned by the web server user or give it write permissions for 'everyone'. If it is on a shared/NFS drive then read Caching - Moodle caches to this disk area by default and a slow share will mean terrible performance.

39
Moodle Macedonia m-r Nikolche Shulevski m-r Zoran Milevski
Install Moodle code
• If you downloaded the zip or tgz file earlier, then unzip / untar / move / copy the Moodle code (obtained above) so that it will be served by your web server (e.g. on Debian based Linux, move to /var/www/html/moodle)
• Check the permissions and make sure that the web server does not have permissions to write to any of the files in the Moodle code directories (a very common root cause of sites being hacked).
• If you need to, configure your web server to serve the Moodle site with your chosen URL.
Configure Moodle
• In the Moodle code directory, find the file config-dist.php and copy it to a new file called config.php (but read next step, 'Install Moodle', first).
• Edit config.php with your favourite editor and change the appropriate settings to point to your site, directories and database. Note: the Moodle install script will create config.php for you if it does not exist but make sure you (re-)set permissions appropriately afterwards
Install Moodle
• Go to the URL for your moodle site in a browser (installation will complete automatically) or run the command line version at (requires cli version of PHP):
/usr/bin/php /path/to/moodle/admin/cli/install.php
The CLI creates the config.php for you and will not run if you created one in the previous step.
• After completing the install make sure your file permissions are ok for the Moodle program files (not writeable by web server) and the Moodle data files (writeable by web server).
Set up cron
You will need a cron job to run periodically. It is recommended that the cron is run every minute,
as required for asynchronous activity deletion when using the recycle bin. A typical Unix cron
entry will be as follows:
* * * * * /usr/bin/php /path/to/moodle/admin/cli/cron.php >/dev/null
Your site will not work properly unless cron is running regularly. It is very important you do
not skip this step. See Cron for details.
You are now ready to use your Moodle site.
If you run into problems, check the Installation FAQ and visit the Installation help forum.