ineos x5 records scanning - dentsply sirona · records scanning 2 ... vlc baseplates as custom...
TRANSCRIPT
inEos X5 Records Scanning software 16.1
All design services are produced and sold to the customer by AvaDent. © Copyright 2017 DENTSPLY Sirona Inc. All rights reserved.
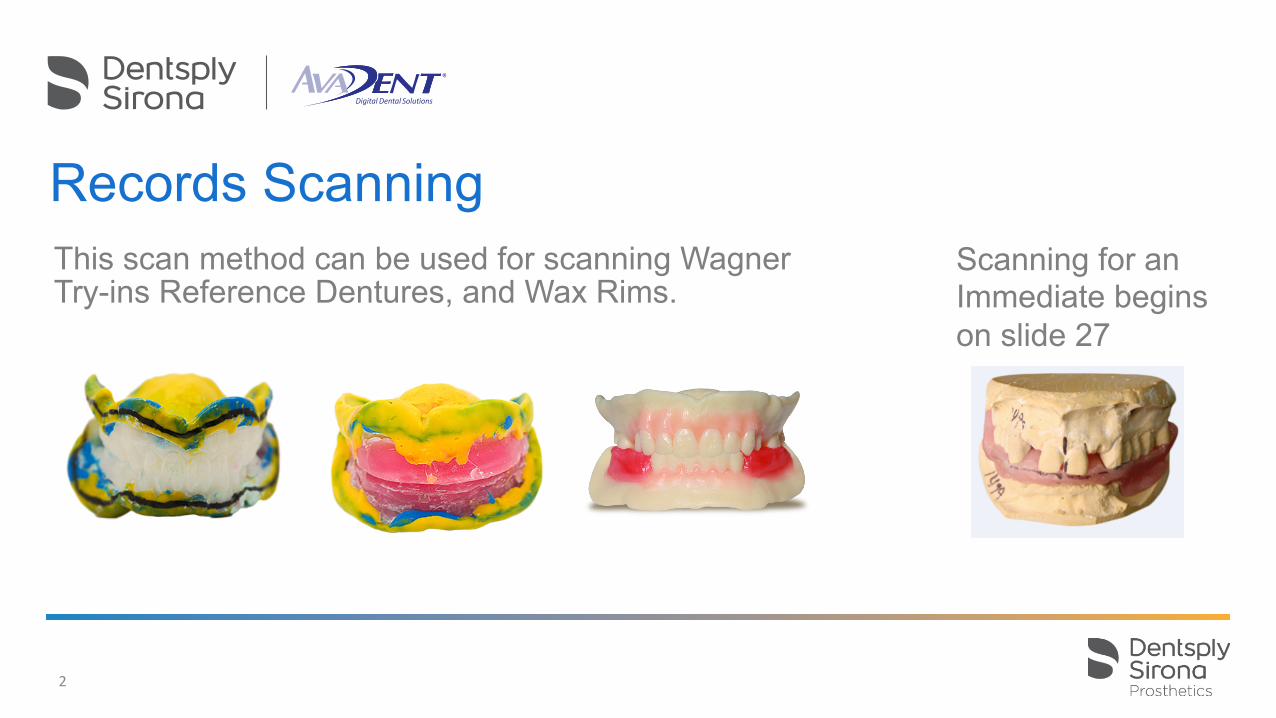
Records Scanning
2
This scan method can be used for scanning Wagner Try-ins Reference Dentures, and Wax Rims.
Scanning for an Immediate begins on slide 27

Note on Wax Rim Records ! If using wax occlusal rims from a thermal plastic base (vacuum formed) follow this workflow but
also perform the “Impression Scan” workflow to provide scans of the final impressions from custom trays.
! If using a stabilized base (ex. Triad Light Cured Denture Material) please ask the clinician to use VLC baseplates as custom trays by taking a wash final impression. This wash impression must be accomplished after maxillary and mandibular relationship record (VDO/CR) is established.
! A light or extra light body impression material should be used for the wash. Clinician must verify that Vertical Dimension of Occlusion has not been increased during this clinical process.
3
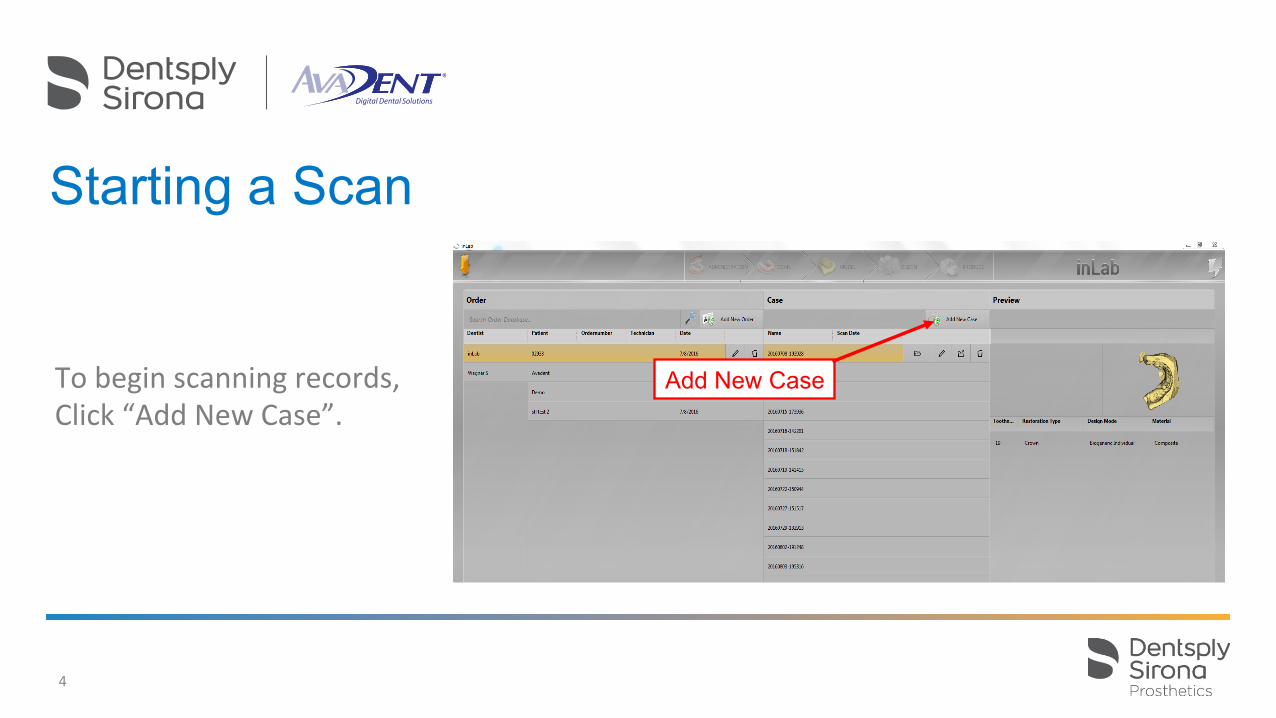
Starting a Scan
Add New Case Tobeginscanningrecords,Click“AddNewCase”.
4

Starting a Scan
Select Scan in top tool bar.
5

Start the Scan
6
! Camera motor arm will start moving.
! Click “OK”.

Place lower arch with occlusal surface facing up on scanning plate. Cover the surface with a light dusting of Dentsply Sirona Scan Spray (#9995158).
7

! Make sure that
8
! “Capture Reduced” ! “Single Exposure” ! “Complete
Reconstruction” are selected.
! Click “Start” to begin scan.

Once the scan has finished, double left click any areas that were not captured. Click “Continue” to go to next scan.
9

Add “BioRef Lower” catalog
10

! Make sure that
11
! Reduced”, ! “Single Exposure”,
and ! “Complete
Reconstruction” are selected.
! Click “Start” to begin scan.
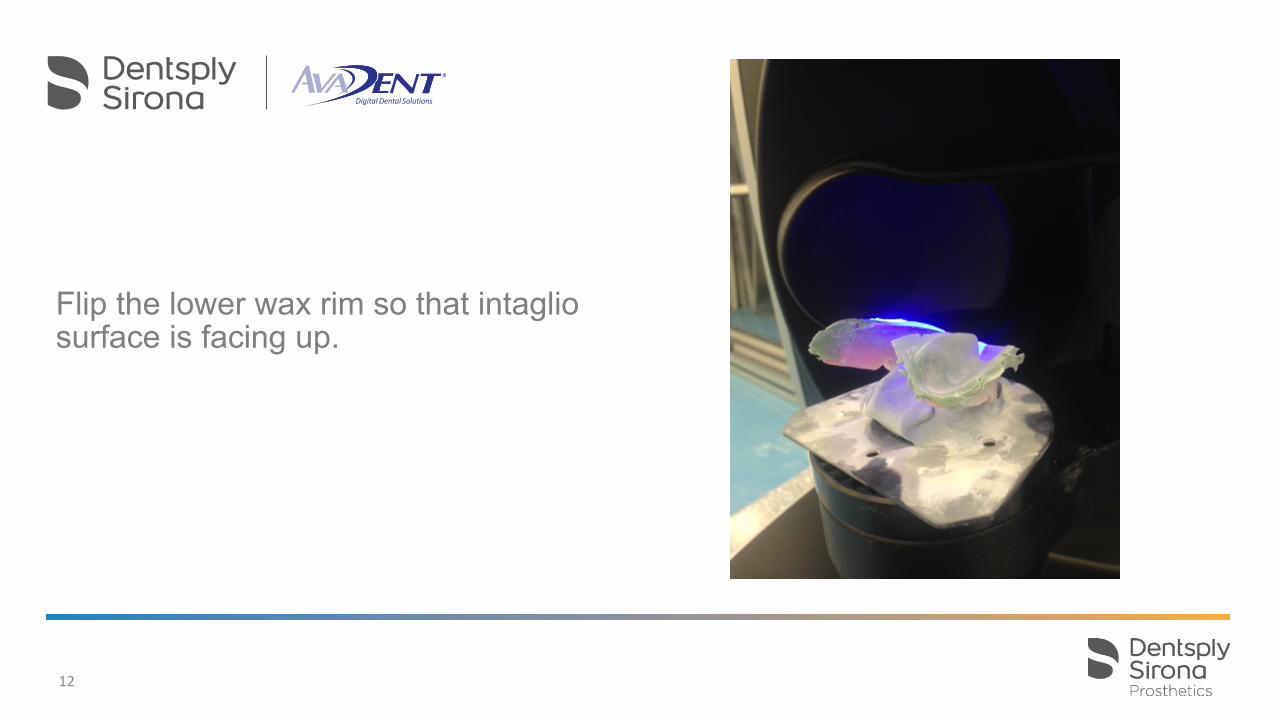
Flip the lower wax rim so that intaglio surface is facing up.
12

Once the scan has finished double left click any areas that were not captured.
13
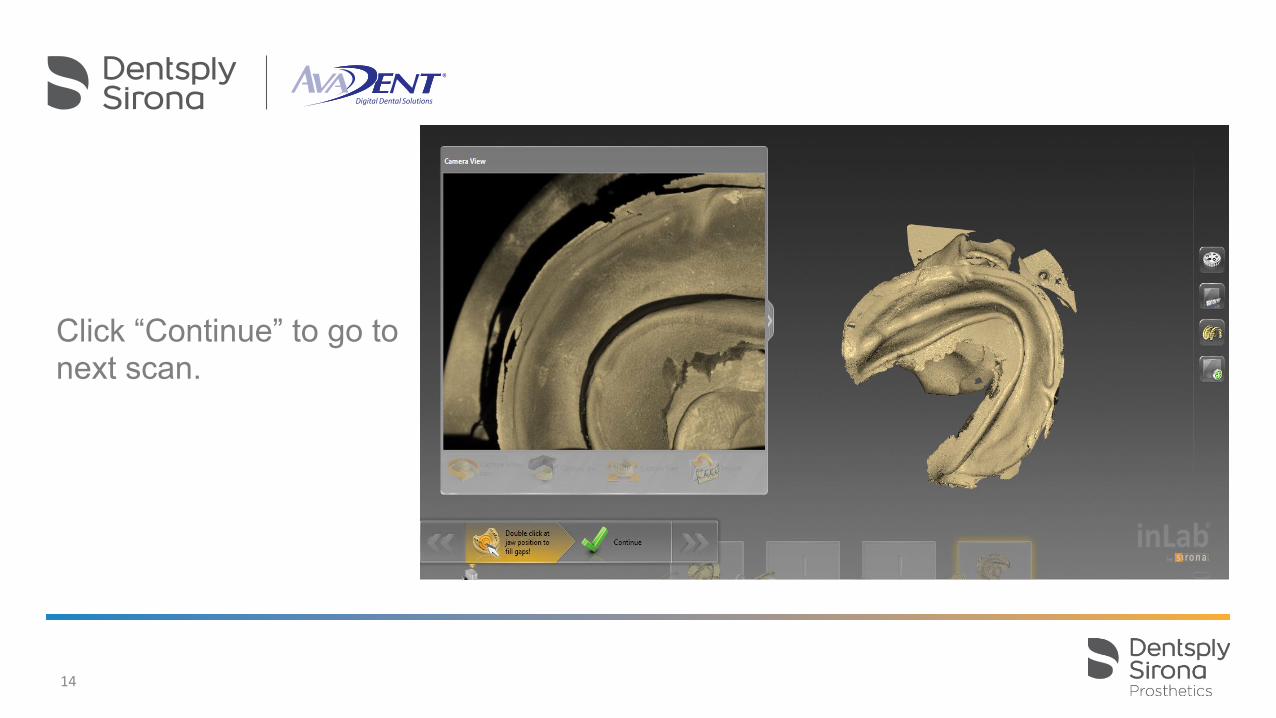
14
Click “Continue” to go to next scan.
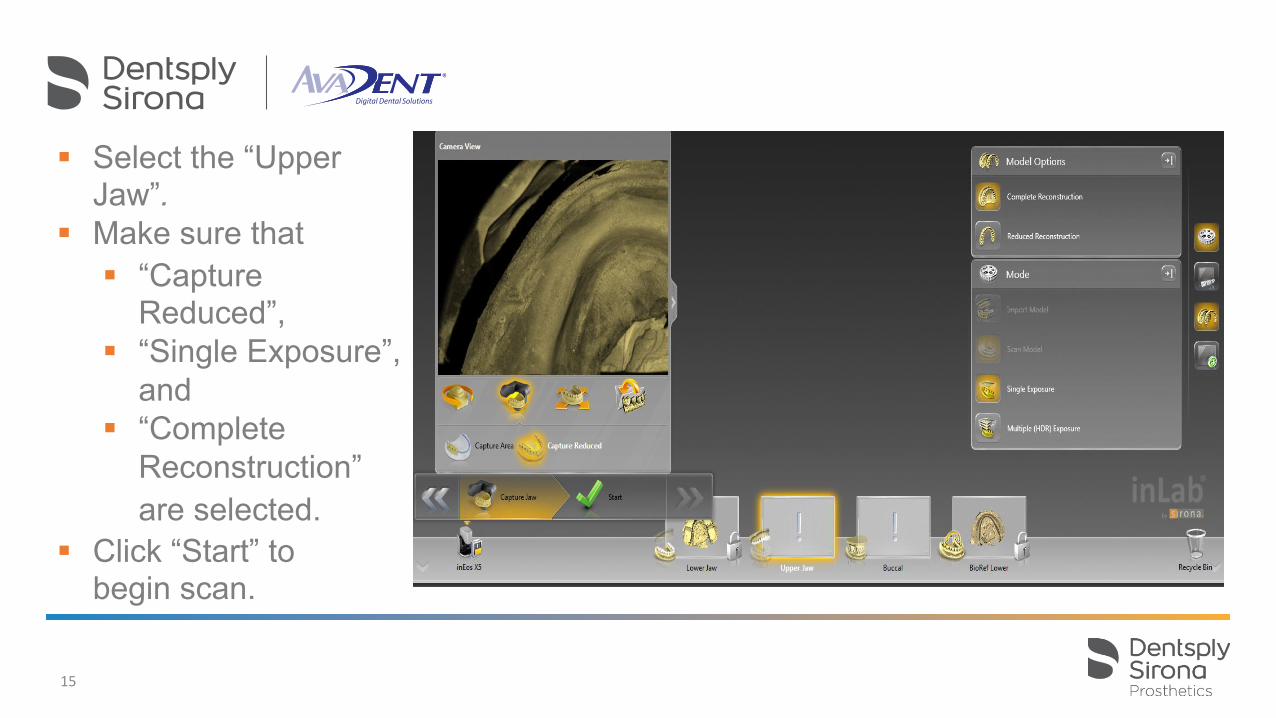
! Select the “Upper Jaw”.
! Make sure that
15
! “Capture Reduced”,
! “Single Exposure”, and
! “Complete Reconstruction” are selected.
! Click “Start” to begin scan.

Place the upper impression on the scan plate, occlusal surface facing up.
16

! Once the scan has finished double left click any areas that were not captured.
! Click “Continue” to go
to next scan.
17

Add “BioRef Upper” catalog.
18

Flip the impression so that the intaglio surface is facing up.
19

! Make sure that
20
! “Capture Reduced”, ! “Single Exposure”,
and ! “Complete
Reconstruction” are selected.
! Click “Start” to begin scan.

Select the “Buccal” scan. The scan plate will move to the side. The software will default to “Capture Manual”. Make sure “Single Exposure” is selected.
21
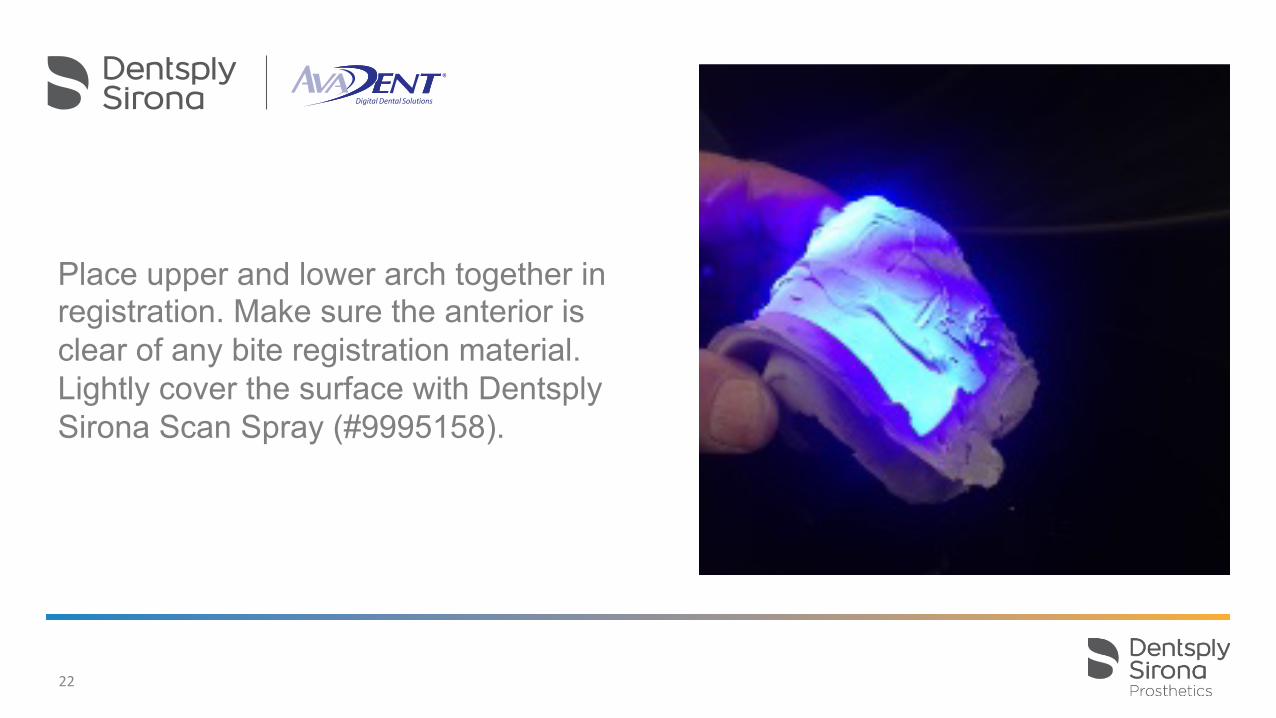
Place upper and lower arch together in registration. Make sure the anterior is clear of any bite registration material. Lightly cover the surface with Dentsply Sirona Scan Spray (#9995158).
22

Place arches in scan region and double click the button on the front of the scanner to take image. Once the scan has finished click “Next” to advance.
23
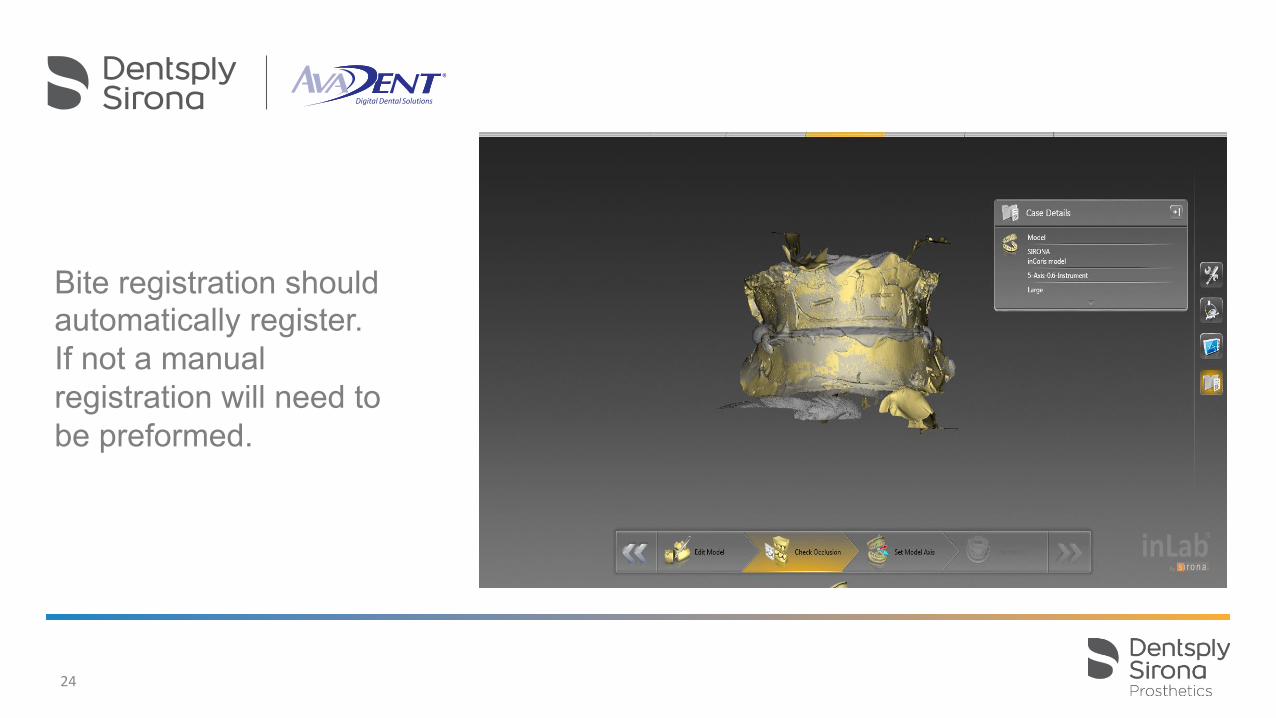
Bite registration should automatically register. If not a manual registration will need to be preformed.
24

Menu bar
! Once the registration is complete the scan data can now be exported.
! Click the menu bar to
access the applications menu and select “Export”.
25

Choose the “STL files standard”
26
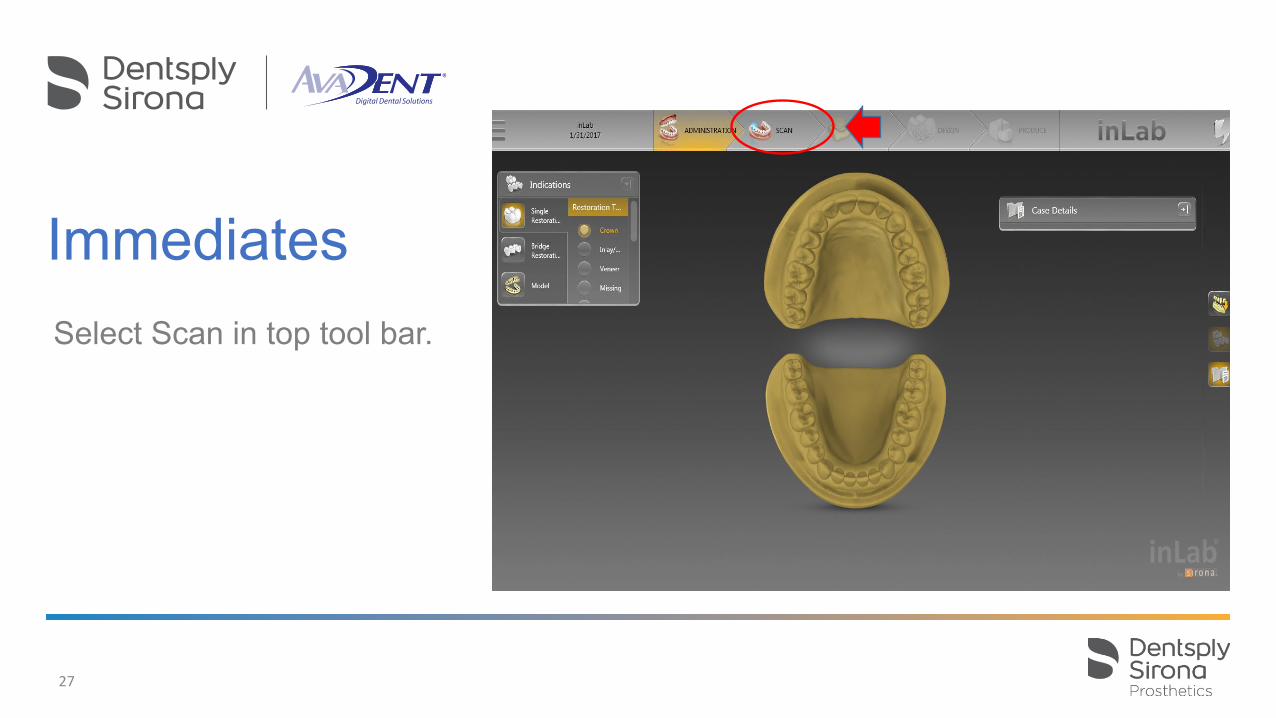
Immediates Select Scan in top tool bar.
27

28
! Make sure that
! “Capture Reduced”, ! “Single Exposure”, and ! “Complete Reconstruction” are selected.
! Click “Start” to begin scan.
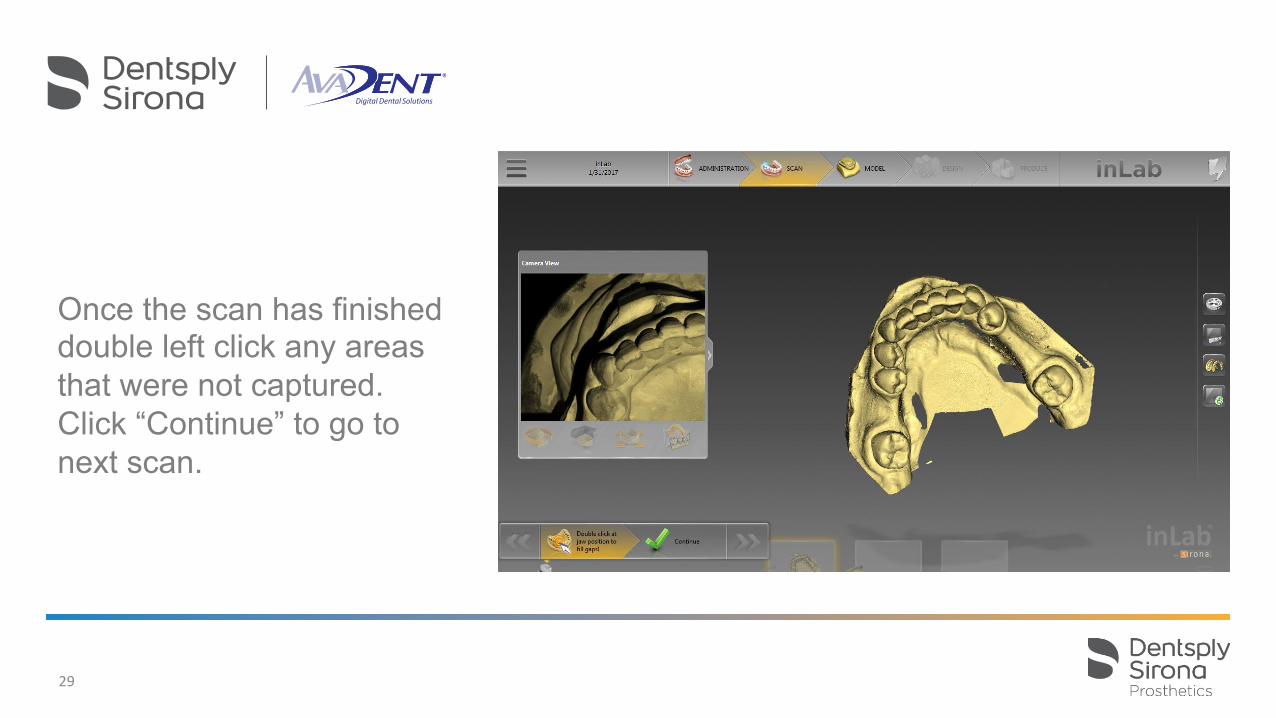
29
Once the scan has finished double left click any areas that were not captured. Click “Continue” to go to next scan.
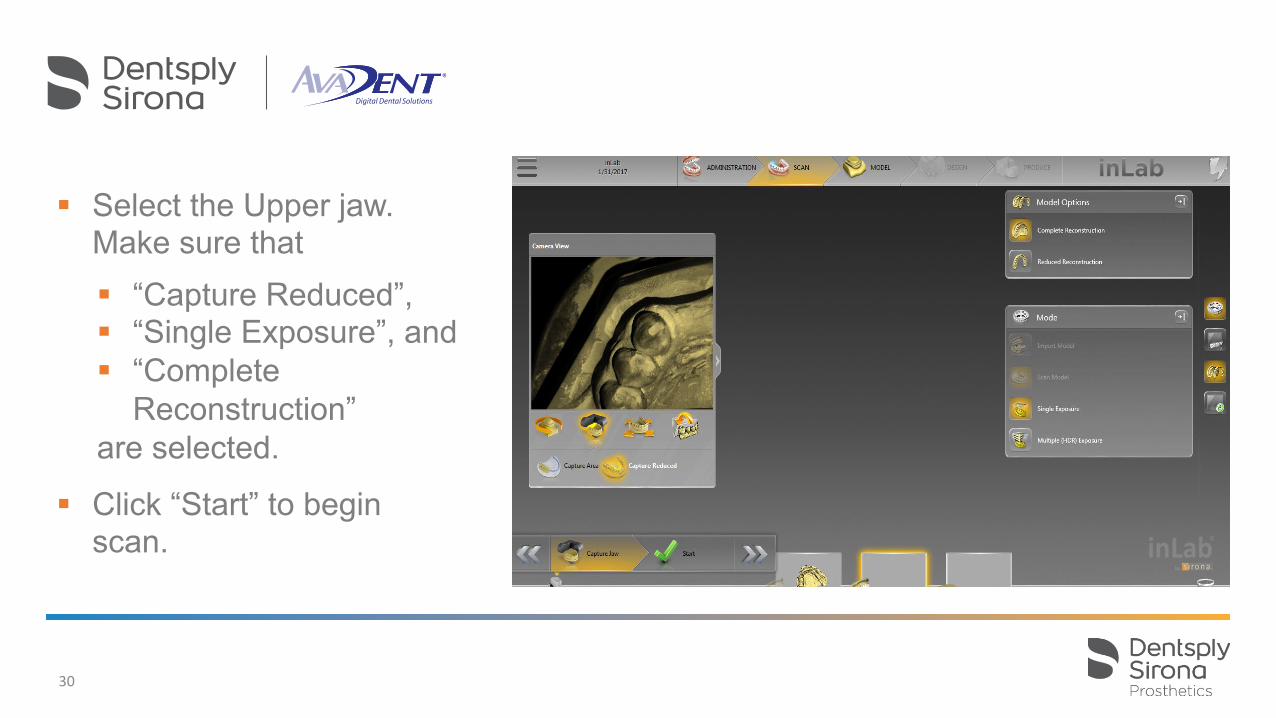
30
! Select the Upper jaw. Make sure that! “Capture Reduced”, ! “Single Exposure”, and ! “Complete
Reconstruction” are selected.
! Click “Start” to begin scan.
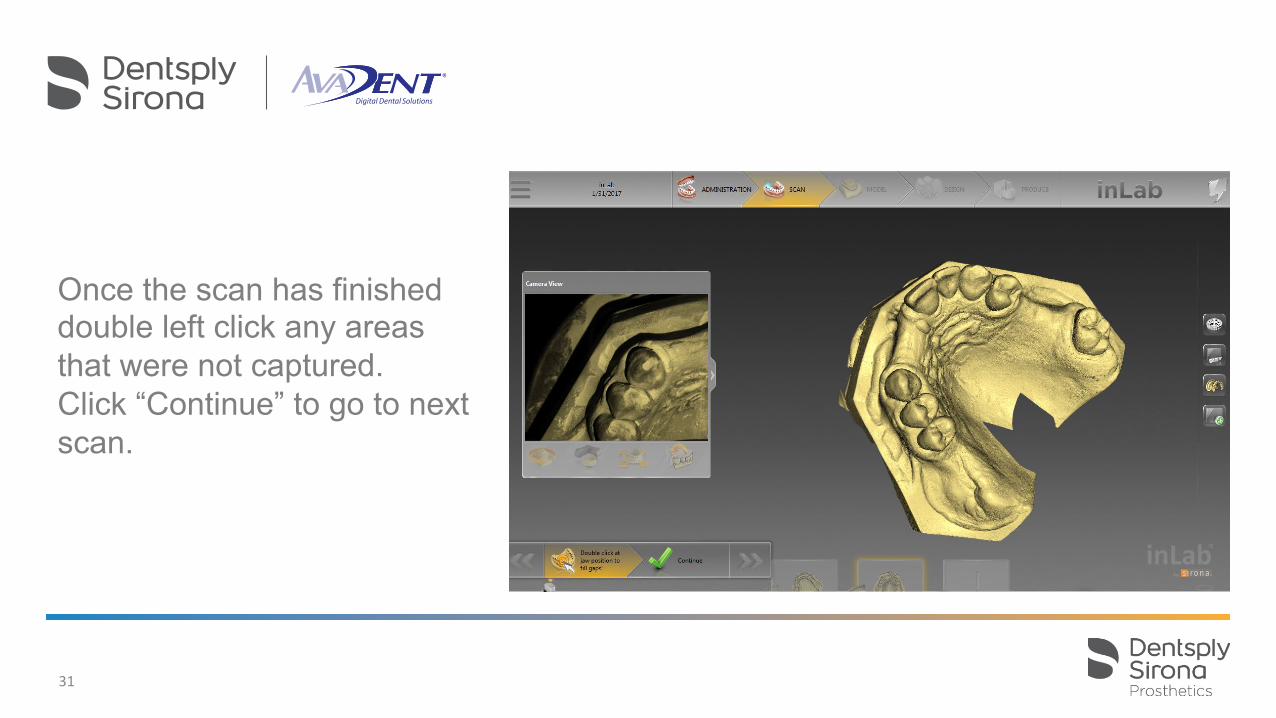
31
Once the scan has finished double left click any areas that were not captured. Click “Continue” to go to next scan.

32
Select the “Buccal” scan. The scan plate will move to the side. The software will default to “Capture Manual”, and make sure “Single Exposure” are selected.
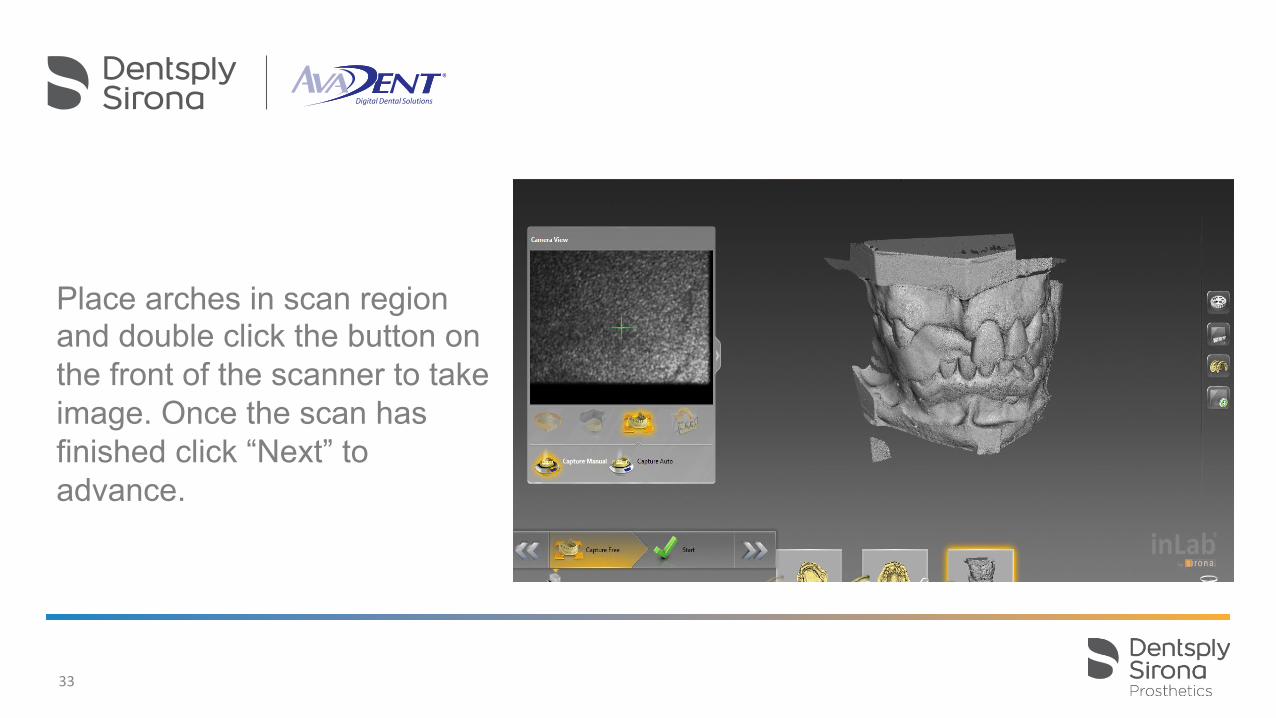
33
Place arches in scan region and double click the button on the front of the scanner to take image. Once the scan has finished click “Next” to advance.

34
Bite registration should automatically register, if not, a manual registration will need to be preformed.

35
Once the registration is complete the scan data can now be exported. Click the menu bar to access the applications menu and select “Export”. Choose the “STL files standard”.

inEos scans need to be converted to compress their size for upload
! The converter can be obtained through AvaDent customer service.
! The AvaDent team will utilize TeamViewer to download the converter to your PC
! It is a simple process, explained in the following screens
36

Step 1- open the AvaDentConverter application
Step 2- Select File(s) To Convert
Step 3- Select the STL files, and click on “open”
37

Step 4- the Converter will read “Done” when complete Step 5- log-in and place order on the Dentpsly Sirona Dashboard
Step 6- when order is complete you will be asked to submit the Records
38

The converted files save in the original folder Files are saved as APLY File type
39
Thank You
DP-0000227 Rev. 0 (04/2017) AvaDent and 3shape are not registered trademarks of DENTSPLY Sirona Inc.