improving your laboratory - ahrq.gov · improving your laboratory testing process ... they shifted...
TRANSCRIPT

c
IMPROVING YOUR LABORATORYTESTING PROCESS A Step-by-Step Guide for Rapid- Cycle Patient Safety and Quality Improvement
Agency for Healthcare Research and Quality Advancing Excellence in Health Care www.ahrq.gov
PATIENT SAFETY

IMPROVING YOUR LABORATORY
TESTING PROCESSA Step-by-Step Guide for Rapid-Cycle Patient Safety and Quality Improvement
This publication is in the public domain and may be used and reprinted without permission.
These materials were developed by the University of Colorado: Colorado ACTION Partnership under contract HHSP2332015000251 from the Agency for Healthcare Research and Quality. This step-by-step guide is a revision of the 2013 toolkit, Improving Your Office Testing Process, developed by Dr. Milton “Mickey” Eder and his team.
The opinions presented in this guide are those of the authors, who are responsible for its content, and do not necessarily reflect the position of the U.S. Department of Health and Human Services or the Agency for Healthcare Research and Quality.

CONTENTS
Introduction ..........................................................................................1
The Improvement Process.........................................................................3
ASSESS
Assess Your Testing Process......................................................................5
Assess Office Readiness..........................................................................9
Assess the Patient Experience..................................................................13
Assess Your Documentation....................................................................17
PLAN
Plan for Improvements............................................................................21
IMPLEMENT
Implement Your Change.........................................................................25
RE-ASSESS
Did We Improve?.................................................................................26
APPENDIX...........................................................................................27
The Patient Handout....................................................................28
Electronic Health Record Evaluation................................................31
Process Maps.............................................................................34
Standard Work...........................................................................36
i

INTRODUCTION Improving Your Lab Testing Process
Purpose
This step-by-step guide can help you increase the reliability of the testing process in your office. The tools will help you examine how tests are managed in your office, from the moment tests are ordered until the patient is notified of the test results and the appropriate follow up is determined.
About 40 percent of patient encounters in primary care offices involve some form of medical test. Studies of primary care offices consistently show that the process for managing tests is a significant source of error and patient harm. Maybe you have had experiences in your office similar to the vignette below.
A routine hemoglobin A1c, along with other tests, was ordered for a 55-year-old patient. The other tests came back, but the A1c test result (which was 9.7%) was much delayed and not attended to when it arrived. The clinician did not notice the previous A1c result when the patient returned six months later. A new A1c was ordered, and it returned at 10.5%, indicating poor glucose control that should have been addressed half a year earlier.
Errors in managing tests are more common than most of us realize. You and your staff can use materials from this guide to take manageable steps to improve office safety and quality.
Identify the team and a champion for this effort. We understand that the job titles of those leading a project can vary widely, so we will use the generic title of “project Leader” throughout this guide. The project leader can be a physician, a nurse, an administrator, or anyone else who has the skills and the desire to lead the project.
11
A video is available. The support of your staff is crucial to the success of the project. The 10-minute video “Testing, Testing, Testing” is available (http://youtu.be/PaZvalKtC-g) to introduce the lab testing process and quality improvement to your staff. It can provide a jumping-off point for staff discussion and action.
The testing process is a system. This guide will help you focus on your office system rather than on the performance of individual staff members.
Keep your project modest and manageable. Be realistic about what you can achieve in a busy office environment. Even a small change can take a lot of effort, but it also can make a big difference.
You donʼt have to use all the tools in the guide. These tools were designed for specific purposes. Some of the tools can help you identify error-prone aspects of your lab testing process, and others can help you measure your progress in improving the process. Choose the tool(s) you think will be most useful to help you achieve your goals.
You can adapt the tools to fit your pracitce.
Use the same tool to measure your performance before and after implementing a change. Use the same tool and the same method each time you collect information (e.g., how charts were selected to audit; how patients were selected to survey). Consistent data collection will allow an accurate before and after comparison and enable you to determine if the changes you have made are producing improvements.
No matter how small, celebrate your successes!
2

3
A Model of the Lab Testing Process Figure 1 presents an example of the lab testing process. It shows discrete steps that should occur in order for the correct test to be performed and the results acted upon. A mistake might occur during or between any of these steps.
Think about the testing process in your office. Any of these steps can be a source of error if the office system allows it. Addressing the system can reduce errors.
Figure 1. Example of a lab testing process
Test ordered
Test performed
Test results tracked
Test results returned to office and clinician
Test results reviewed by
clinician
Test results documented
and filed
Patient notified of test results
Patient monitored through follow up
THE IMPROVEMENTPROCESS IN YOUR OFFICE

4
Using the Plan-Do-Study-Act (PDSA) Method for Practice Improvement Plan-Do-Study-Act (PDSA) is a method for how to conduct quality improvement in a variety of environments. PDSA is cyclical process to test a change before adopting it in your practice. It begins with developing a plan to test a change (Plan), followed by the test (Do). Then you observe and learn from the results (Study), and decide on any modifications that should be made to the test (Act).
Figure 2. The plan-do-study-act approach to practice improvement
As shown in the figure, you repeat the PDSA cycle for each new change
Plan
Study
DoAct
Plan
Study
DoAct
Plan
Study
DoAct
you want to make. By carefully planning then implementing a change, while gathering data and reviewing the outcomes, you ensure that you are creating evidence-informed change.

ASSESSING YOUR TESTING PROCESS
When a large family medicine residency practice implementation team first saw this guide, they wanted to improve test ordering, because they had previously identified it as a problem for their practice. However, when they administered the “Assessing your Testing Process” tool to their full practice, the results showed that inconsistent communication of results to patients was rated as more harmful to patients than were problems with the test ordering process. Using the new data, they shifted the focus of their lab process improvement activities to focus on patient communication, specifically the process of ensuring all patients have received their results.
Purpose You will find the Assessing Your Testing Process Survey and Scoring Sheet on pages 6 and 7. The survey will help staff and physicians to share their perceptions about problems in your office system for managing tests. The survey also asks staff and physicians to consider the potential harm caused by problems with your lab testing system and errors related to the lab testing process.
When to Use the Tool This survey is used to collect staff estimates of the frequency of errors and their potential degree of harm. Use this survey as part of your planning for change. It will help you gather important data about what steps in the lab testing process are most problematic in your office.
Using the Tool • Everyone in your office should complete this survey anonymously. • Ask each person to circle the numbers that best indicate his/her view of the
frequency and severity of errors in your office.
Assessing Risk in Testing We know that:
• The risk of an event is related to its frequency and the likely severity of harm. • Balancing these two aspects of risk can be challenging.
o More common events with less severe harm are easier to overlook, as the risk to patients can be underestimated.
o The risk to patients of an uncommon event that may cause severe harm (a sentinel event) is often overestimated.
• It is important to stay focused on office systems in managing risk.
• Note that the Appendix at the end of this guide contains a Patient Handout to help you to ensure you are providing patients with information about what to do after having a test.
5

6
Assessing Your Testing Process Survey Date Survey No.
Describe your experience in the testing process:
• Circle the number that you feel most accurately describes the frequency of errors for each step.• Circle the number that you feel most accurately describes the harm associated with the error.
How often does this happen? What is the usual harm for patients?
Tasks where errors Rarely Occasionally Frequently None Mild Moderate Severe Don’t know/ Totalmay occur (Less than once (Once a month) (2 or more times Not applicable
a month) per month)
1. Ordered test not done 1 2 3 1 2 3 4 1
2. Test performed incorrectly 1 2 3 1 2 3 4 1
3. Test results not logged/tracked 1 2 3 1 2 3 4 1
4. 1 2 3 1 2 3 4 1Test results not returned to theclinician
5. 1 2 3 1 2 3 4 1Clinician does not review allresults
6. Test results not entered in 1 2 3 1 2 3 4 1patient’s chart
7. Patients not notified of all 1 2 3 1 2 3 4 1test results
8. 1 2 3 1 2 3 4 1Patients with abnormal resultsnot monitored through follow up
Test ordered
Test performed
Test results tracked
Test results returned to office and clinician
Test results reviewed by
clinician
Test results documented
and filed
Patient notified of
results
Patient monitored through follow up
Assessing Your Testing Process Survey Date Survey No.
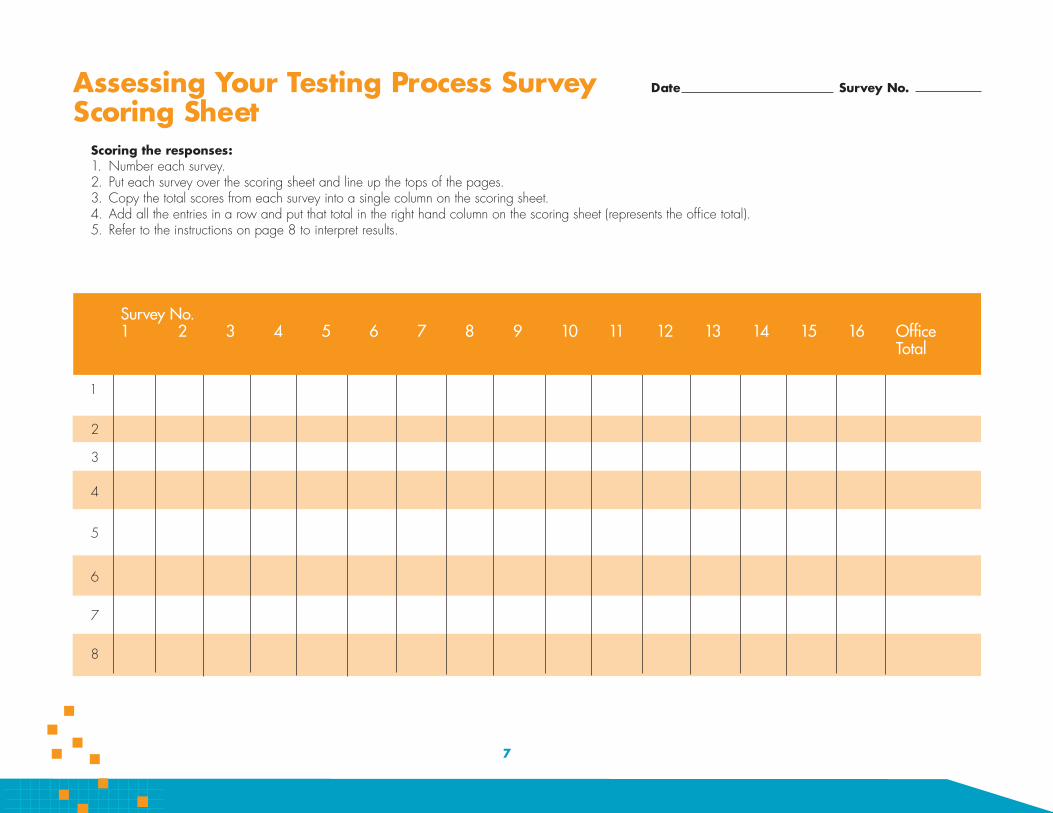
Scoring Sheet Scoring the responses: 1. Number each survey. 2. Put each survey over the scoring sheet and line up the tops of the pages. 3. Copy the total scores from each survey into a single column on the scoring sheet. 4. Add all the entries in a row and put that total in the right hand column on the scoring sheet (represents the office total). 5. Refer to the instructions on page 8 to interpret results.
Survey No. 1 2 3 4 5 6 7 8 9 10 11 12 13 14 15 16 Office
Total
1
2
3
4
5
6
7
8
7

Figure 3. Using the Assessing Your Testing Process Survey and Scoring Sheet
4446
6
66 5
16
4446
6
66 5
16
Scoring the Responses • Scoring can be done either by those completing the survey or by a member of
the leadership team. • To score each survey, multiply the “frequency” score by the “harm” score to get a
total score for each task. o If a respondent fails to indicate a frequency or harm score, substitute a
‘Don’t know/Not applicable’ score of 1 for the missing score. o If only ‘Don’t know/Not applicable’ is selected for a task, assign a total
score of 1. • Write the score in the total column on the far right of the survey.
Using the Scoring Sheet • Number each survey. • Put each survey over the scoring sheet and line up the tops of the pages (see
Figure 3). • Copy the total scores from each survey into a single column on the scoring sheet. • Add all the entries in a row and put that total in the right-hand column of the
scoring sheet to represent the office total.
Interpreting the Results
• The highest scores for “office total” show areas where staff have identified the greatest risks in your office.
• Many staff responses of “Don’t know/ Not applicable” for a specific task may indicate an area for further discussion.
• Share the results and discuss them during a staff meeting. • Use this information to identify an area that you and your office staff and
physicians will address. • After identifying a problem, you can use the Planning for Improvements tools
to design a change in your lab testing process.
8

Purpose
The Office Readiness Survey will help you assess staff and clinician attitudes about working together to improve the lab testing process. It will also show how well staff and clinicians recognize and use office policies and procedures for managing the testing process.
When to Use the Tool
Use this survey to assess changes in staff attitudes by comparing responses before and after implementing a change in your office. You will find the survey at the end ofASSESSING
OFFICE READINESS
this section. We recommend that offices with little or no quality improvement experience start with this survey.
Using the Survey
• You can administer the survey, rapidly score it, and present and discuss the results at an office meeting.
• You should have everyone in your office (e.g., clinician, case manager, receptionist, medical assistant, nurse) complete the survey anonymously.
• Be sure to set a deadline for staff to complete the survey. Give the scorer enough time to compile the responses and prepare the results, including a summary of any handwritten comments, for presentation at a staff meeting.
Office Readiness and Patient Safety We know that:
• Offices and systems vary, so there is no single “best” office system. Effective systems must function within each office’s environment.
• Offices with a team approach to patient care, good communication among all staff, mutual trust and support, and a commitment to patient safety are more likely to discuss mistakes and problems.
• Offices with fewer testing errors and greater patient safety have: o Written procedures that are readily available to all staff. o A process for updating and informing staff of changes in office procedures. o Office systems that focus on and support collaboration among staff rather
than individual performance.
9

Office Readiness Survey Date Survey No.
This tool can be used to assess your office’s readiness for quality and safety improvement. Circle the number between 1 and 5 that most accurately describes how you feel about your office.
Practice Improvement Strongly Disagree Disagree
Neither Agree nor Disagree Agree
Strongly Agree
1. The leadership (e.g.,medical director, office manager, head nurse, or other leader) at this office demonstrates a commitment to quality and patient safety.
2. Communication among staff, physicians, and leadership promotes mutual respect and trust.
3. All staff in this office work as a team.
4. All staff are asked to provide input on decisions about office processes.
5. Monthly meetings are held, and quality of care is a regular item on the agenda.
1
1
1
1
1
2
2
2
2
2
3
3
3
3
3
4
4
4
4
4
5
5
5
5
5
Comments:
Quality and Safety of the Testing Process
6. This office has written procedures describing how to handle testing and test results.
7. Everyone in this office has read and follows the testing procedures.
8. Medical testing errors in this office do not harm patients.
9. Providers and staff openly discuss causes and effects of errors.
10. This office has systems to prevent, catch, and/or correct problems in the testing process.
1
1
1
1
1
2
2
2
2
2
3
3
3
3
3
4
4
4
4
4
5
5
5
5
5
Comments:
10
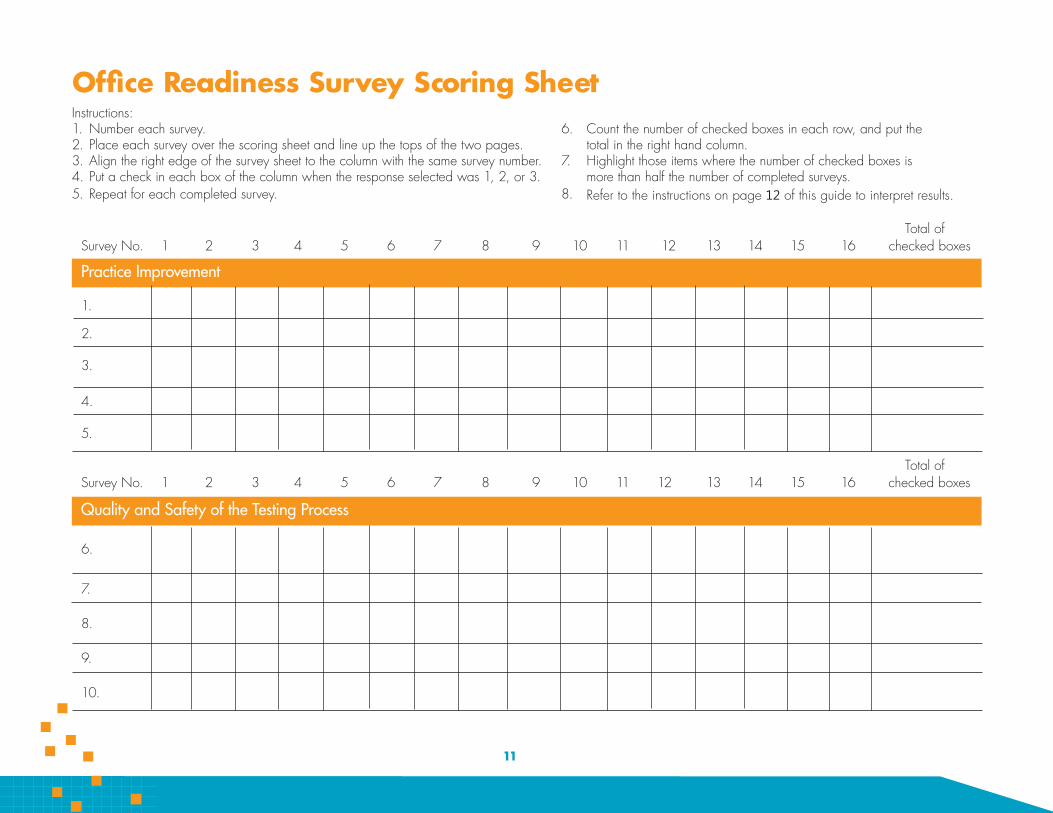
Office Readiness Survey Scoring Sheet Instructions: 1. Number each survey. 6. Count the number of checked boxes in each row, and put the 2. Place each survey over the scoring sheet and line up the tops of the two pages. total in the right hand column. 3. Align the right edge of the survey sheet to the column with the same survey number. 7. Highlight those items where the number of checked boxes is 4. Put a check in each box of the column when the response selected was 1, 2, or 3. more than half the number of completed surveys. 5. Repeat for each completed survey. 8. Refer to the instructions on page 12 of this guide to interpret results.
Total of Survey No. 1 2 3 4 5 6 7 8 9 10 11 12 13 14 15 16 checked boxes
Practice Improvement
1.
2.
3.
4.
5.
Total of Survey No. 1 2 3 4 5 6 7 8 9 10 11 12 13 14 15 16 checked boxes
Quality and Safety of the Testing Process
6.
7.
8.
9.
10.
11

163-28 20
Figure 4. Using the Office Readiness Survey and Scoring Sheet
- 13 163-28-2013
Scoring the Responses Number each completed survey.
1. Place each survey over the scoring sheet provided in this guide (see page 11) and line up the tops of the two pages.
2. Align the right edge of the survey sheet to the scoring sheet column with the matching survey number.
3. Put a check mark in each box in the column when the survey response is 1, 2, or 3 (see Figure 4).
4. Repeat for each survey. 5. Count the number of checked boxes in each row and put the total in the right
hand column. 6. Highlight those items where the number of checked boxes is more than half the
number of completed surveys. 7. Check for handwritten comments; compile comments and look for recurring
issues.
Interpreting the Results • Highlighted practice improvement items (items 1-5) point to areas where
staff have identified a problem in working together. • Highlighted quality and safety items (items 6-10) point to areas with a
potential quality or safety problem. • When responses indicate a problem for either practice improvement or quality
and safety, you should take the time to explore the issues as a group before undertaking a specific practice improvement project.
• To obtain a more detailed assessment of staff attitudes, consider using AHRQ’s Medical Office Survey on Patient Safety Culture at https://www.ahrq.gov/sops/quality-patient-safety/patientsafetyculture/ medical-office/index.html
12

PATIENT EXPERIENCE ASSESSMENT
A General Internal Medicine (GIM) practice’s use of the Patient Experience Survey in this guide helped them explore their patients’ level of understanding about the lab tests that were ordered. While most patients indicated on the survey that they did know why a test was ordered, the care teams observed that patients started asking more questions after completing the survey. This led the QI team to re-institute systematic use of patient education handouts for commonly ordered lab tests. The QI team also encourages care team members to engage patients in conversations about the reason for their tests, what results they should expect to receive, and when.
Purpose The Patient Experience Assessment on page 14 can help you to assess your patients' understanding of their tests and how your practice communicates with patients about their test results.
When to Use the Tool Use this tool to measure patient experience at baseline and again after changes have been implemented, especially if you are not already asking patients about their experience with lab tests.
Using the Survey You can administer this survey to assess patient understanding at one of two points in the testing process.
1. After a patient has a test ordered or performed, but before the results are back. 2. After a patient has been notified of their test results. An optional question
designed for offices where patient follow up is a problem can be used.
Follow these steps to use the survey: • Prepare a list of patients to survey. You can identify patients who had a test
ordered or those who were notified of test results in several ways, depending on how your office functions. For example, you can look at a lab log, review charts or the electronic health record at the end of a day, or ask staff or physicians to keep a list for a day or two.
• We recommend you collect at least 15-20 surveys to look for patterns in responses.
• You should survey patients within 1-2 days of their visit or notification of results. • Use a survey form for each patient. If a patient has had multiple tests, select the
answer you think best represents the patient’s understanding.
Patient Engagement and Patient Safety We know that:
• Patients often do not know what test has been ordered or why it has been ordered.
• Patients may not know when to expect test results. • Patients often assume or may be told that “no news is good news” and so may
not take the initiative to get their results. • Patients encounter challenges in following up on abnormal results and may
require additional support.
13
Patient Experience Assessment Date Survey No.
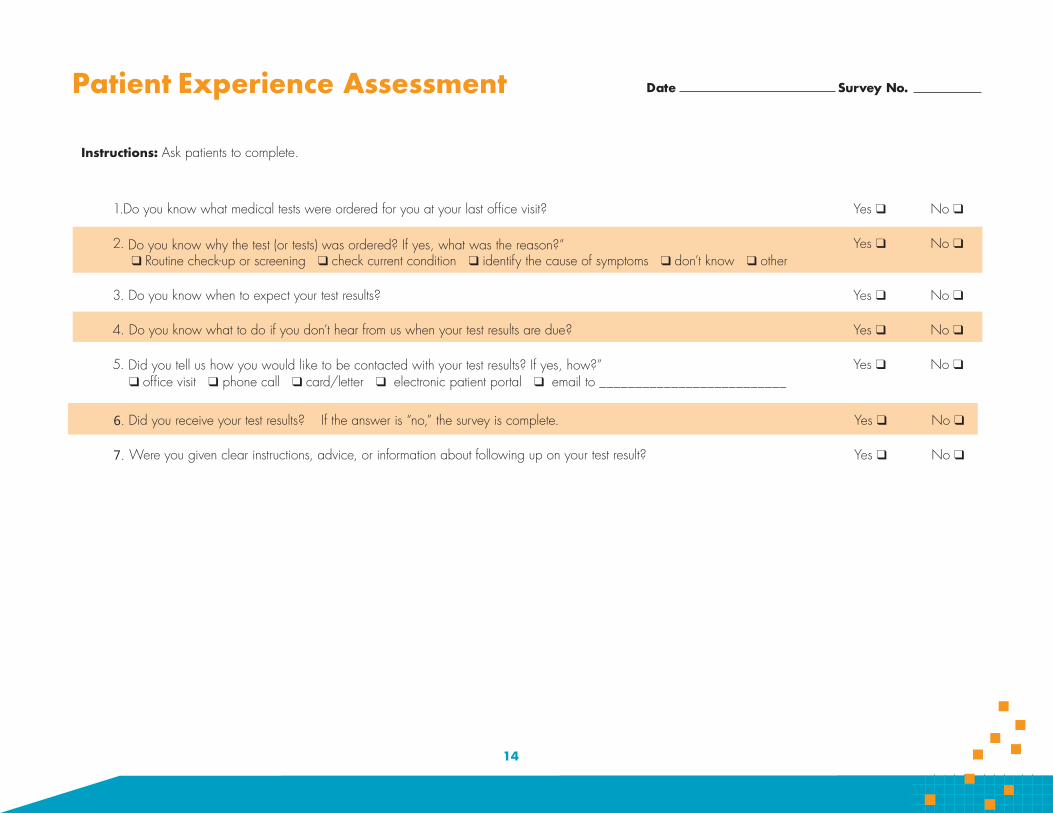
Instructions: Ask patients to complete.
1.Do you know what medical tests were ordered for you at your last office visit?
2. Do you know why the test (or tests) was ordered? If yes, what was the reason?” q Routine check-up or screening q check current condition q identify the cause of symptoms q don’t know q other
3. Do you know when to expect your test results?
4. Do you know what to do if you don’t hear from us when your test results are due?
5. Did you tell us how you would like to be contacted with your test results? If yes, how?” q office visit q phone call q card/letter q electronic patient portal q email to __________________________
Yes q
Yes q
Yes q
Yes q
Yes q
No q
No q
No q
No q
No q
6. Did you receive your test results? If the answer is “no,” the survey is complete.
7. Were you given clear instructions, advice, or information about following up on your test result?
Yes q
Yes q
No q
No q
14

Fecha Encuesta No. Encuesta sobre la experienciade pacientes
Instrucciones: Pida al paciente que complete.
1. ¿ Sabe usted qué exámenes médicos le ordenaron cuando visitó la clínica la última vez? Si q No q
2. ¿Sabe usted por qué le ordenaron los exámenes médicos? Si respondió que sí, ¿cuál fue la razón? Si q No q q examen de rutina o de detección q examinar por una condición actual q encontrar la causa de síntomas q no sé q otro
3. ¿Sabe usted cuándo estarán listos los resultados de sus exámenes Si q No q
4 ¿Sabe lo que debe hacer si no le llamamos con los resultados de sus exámenes en la fecha en que deben estar listos? Si q No q
5. ¿Nos informó cómo prefiere que nos comuniquemos con usted para darle los resultados de sus exámenes? Si respondió que sí, Si q No q ¿cómo?
q visita a la clínica q por teléfono q una carta q portal electrónico para pacientes q correo electrónico a_________________________________
6. ¿Recibió usted el resultado de sus exámenes? Si la respuesta es “no”, termine la encuesta. Si q No q
7. ¿Le dieron instrucciones, consejos e información clara acerca de cómo dar seguimiento con los resultados de sus exámenes? Si q No q
15

Scoring the Responses • Add up the responses for each question. • Identify the questions with the highest proportion of ‘no’ responses. • Optional Question: Compare responses to information in the patient record to
determine the accuracy of communication with the patient.
Interpreting the Results Any “no” responses to a question indicate:
• An area where errors may occur. • An area to improve your patients’ knowledge about their tests.
Sample another group of patients after you implement a change to assess whether your change improved their understanding of the role they play in the testing process.
16

Purpose
ASSESS YOUR DOCUMENTATION
The Chart Review Tool on page 20 can help you assess how well your office enters information about tests and test results in the patient’s medical record. Good documentation makes information readily available.
When to Use the Tool Use this tool to collect data to track different tasks throughout the testing process, including how well abnormal results are managed.
Using the Tool You should be selective in how you use this tool. The way you use the Chart Audit Tool will depend on the information you need to collect for your project. This tool will help you collect data on:
o Documentation.o The time it takes to move through tasks in the testing process.o Reporting normal and abnormal results to patients.
• You need to identify the problem you want to investigate and adapt the audittool to suit your needs.
• Staff may choose to focus on a particular type of test or the performance of aparticular laboratory.
• The number of charts you audit will depend on:o How easy it is to identify patients with tests and/or critical abnormal results.o How much time your staff can devote to identifying charts, auditing charts, and
compiling and interpreting results.• A minimum of 10 audits is recommended for both before and after testing; 20
audits will provide a more reliable measurement.• You will complete the appropriate sections of the audit form for each patient’s
medical record.• It is important to record the patient’s name/ID number and the type of test, as this
information may be needed if you discover a patient safety problem.• You may find it useful to know the type of test performed, particularly if your
office uses different labs.
17
18
For projects about documentation of tests: Check the “yes” and “no” options to indicate whether information is recorded in the patient record. If you are uncertain, the accepted practice is to check the “no” option.
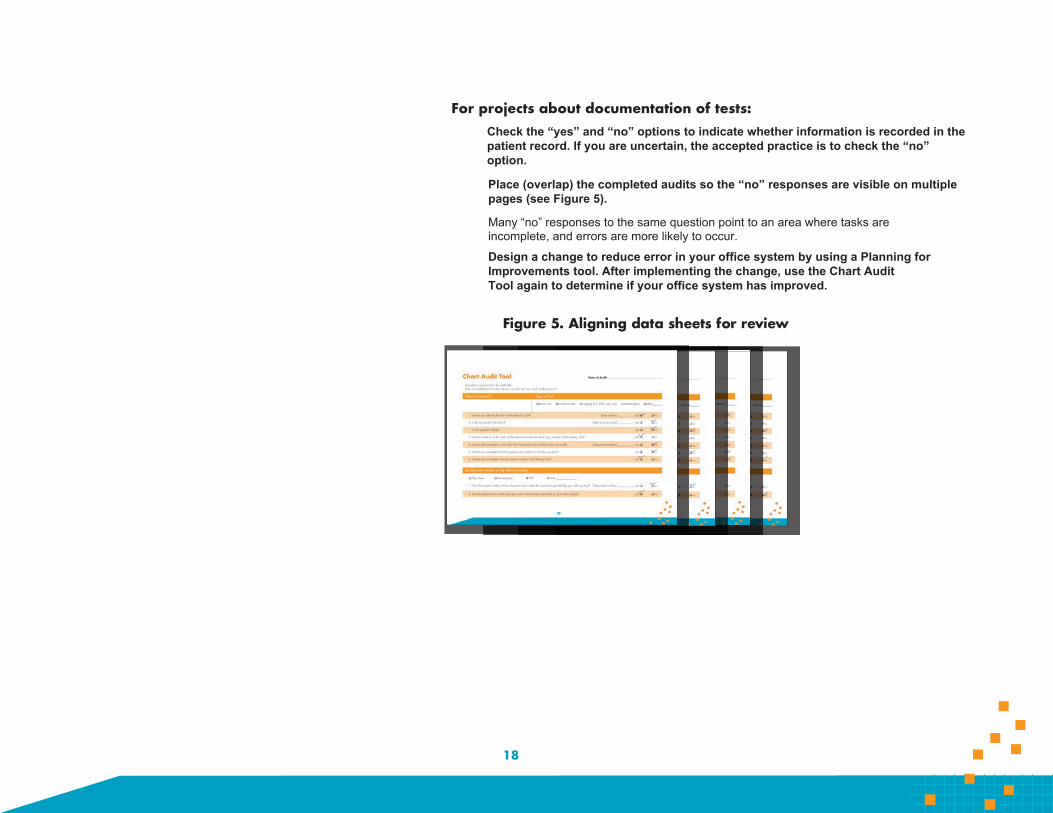
Place (overlap) the completed audits so the “no” responses are visible on multiplepages (see Figure 5).
Many “no” responses to the same question point to an area where tasks areincomplete, and errors are more likely to occur.
Design a change to reduce error in your office system by using a Planning forImprovements tool. After implementing the change, use the Chart AuditTool again to determine if your office system has improved.
it tption” onod “n” a“yesate herte uainar k thchec “no
rrord einncom, aplete
Figure 5. Aligning data sheets for review

For projects concerned with time intervals within the testing process: • Fill in the appropriate dates as recorded in the medical record.• Be consistent in how you count the number of days. Decide whether or not to
include weekends in the total number of days.• For each review form:
o Calculate the number of days between the date of test order and the date theresult was recorded in the chart.
o Calculate the number of days between the date the result was recorded in thechart and the date the patient was notified.
• Compile the intervals from all forms and calculate the averages.• Identify any specific results within an interval that are greater than the average.• Discuss these results with your staff, and determine if they are acceptable or
whether the variation reflects a problem with the office system.• Design a change to reduce error in your office system by using the Planning
for Improvements Tool. After implementing the change, use the Chart ReviewTool again to determine if your office system has improved.
• Results from different tests may arrive on different days, so you may want to focuson a specific test.
Chart Review and Patient SafetyWe know that:
• Chart reviews are widely used to provide information about office systems.• Chart reviews rely on documentation, which may not accurately reflect actual
care or practice.• Electronic health records automate many processes but do not eliminate all errors.• A failure to monitor automated processes may introduce patient safety risks.
19

Date of ReviewChart Review for Baseline and Follow Up Instructions: Use one form for each test. Enter all available information about a specific test from each medical record.
Patient Name & ID Type of Test
q blood test q non-blood test q imaging (CT, MRI, x-ray, etc) q mammogram q other______
1. Is there an order for this test in the patient’s chart? Date ordered __________ yes q q no
2. Is the test result in the chart? Date result recorded __________ yes q q no
Is the signature dated? yes q q no
3. Is there evidence in the chart of the response to the test result (e.g., normal, further testing, etc)? yes q q no
4. Is there documentation in the chart that the patient was notified of the test result? Date patient notified __________ yes q q no
5. Is there documentation that the patient was notified of the follow-up plan? yes q q no
6. Is there documentation that the patient acted on the follow-up plan? yes q q no
For abnormal results on the following test(s):
q Pap smear q mammogram q INR q other _____________
1. Was the patient notified of the abnormal result within the timeframe specified by your office policy? Date patient notified __________ yes q q no
2. Did the patient receive follow-up care within the timeframe specified by your office policy? yes q q no
20

Purpose The Process Mapping tool will help you and your staff to document your "current state" for your lab testing process.
When to Use the Tool Use the Process Mapping tool to document your current office system for managing lab test ordering, tracking, and follow-up on results and referrals.
Using the Tool
• Meet with critical staff relevant to the laboratory testingPLANNING FOR IMPROVEMENTSPROCESS MAPPING
process and your quality improvement team (if applicable).
• Follow the steps on the left side of page 22 to create a "currentstate" process map.
• Brainstorm solutions. • Map the "ideal state" for laboratory testing process within yourpractice. That is, if it's working well, what should or shouldn't behappening.
Tips For Creating Maps • Don't worry about getting everything exactly right the first time through.
• Each box should contain an ACTOR (who does this) and an ACTION (whatthey do).
• Avoid putting more than one action in a box; it might be easier to break it intomore than one step.
• While mapping, if ideas come up for fixes or there are questions that can't beanswered, have the note taker keep track of these on a separate sheet of paperso you can come back to them later without slowing down the mappingprocess.
21

1 Lab Testing Process—ordering through notification
Provider decides to order lab test(s)
Provider types order directly into EHR
2
3 4
5
6
7
PROV
IDER
SM
AsLA
BORA
TORY
Lab reconciles specimen with order
EHR transmits order to laboratory
MA types order into EHR
Provider writes order on billing sheet; hands to MA
Step by Step:
1. Write down the name of the processat the top.
2. Ask the team, “What happens first inthe process?” and write it down on thefar left, in that role’s “swim lane.”
3. Draw a box around it.
4. Ask the team what usually happensnext in the process; write it downbelow or to the right of first box; drawa box around it.
5. Draw an arrow linking the two boxes.
6. Ask the team if there are alternativeways to achieve the next step in theprocess.
7. Keep going, asking the team, “Whathappens next?”
8. Review the map and revise.
PLANNING FORIMPROVEMENTSACTION PLANNING
Purpose The Action Planning tool will help you and your staff to develop a plan to make your lab testing process safer.
When to Use the Tool Use the Action Planning tool to document the changes you will make.
Using the Tool Develop an action plan and include the following elements:
• List all who will be involved in performing and managing the change, includingstaff and leaders.
• Be absolutely certain that the people who will be involved in the change helpto develop the action plan, or they may not be fully invested, understandwhat is happening, or believe that the change is doable or meaningful!
• Decide if this should be "standard work" (see Appendix).
Preparing to Implement a Change • Select another tool from this guide to measure the changes you plan to
implement. • Collect baseline data and, using that information, specify a goal for reducing
errors. • Implement the office system changes you have identified.• Use the same tool to collect data after you make a change so you can assess
any differences your change has made.
2233

Administrator?
______________________________________ ______________________________________ ______________________________________ ______________________________________
____________________________________________ ____________________________________________ ____________________________________________ ____________________________________________
Make the timeline visible to all in the practice to maintain focus!
______________________________________ ______________________________________ ______________________________________ ______________________________________
____________________________________________ ____________________________________________ ____________________________________________ ____________________________________________
What will be changed? Task? Hand-off? Combination? Flow or pathway?
Who will make the change in the practice? Nurse? Assistant? Physician?
How will the change be made? Define the specifics of what will take place: ________________________________________________________________________________
________________________________________________________________________________ ________________________________________________________________________________ ________________________________________________________________________________ ________________________________________________________________________________ ________________________________________________________________________________ ________________________________________________________________________________
Where in the practice will the change be made? Describe the details of the physical
location where the change will take place
When will it be made? Pick a specific start date and time Pick a specific end date (when we can determine
if the change was successful)
Action Planning Tool
24

IMPLEMENT YOUR CHANGE
Get ready to make the planned improvementNow that you know what you want to change to improve your lab testing process, it's time to try it!
Before you start...
• Remind everyone about the planned change.
• Hold a meeting to discuss the implementation details. Besure key people are included.
• Agree on a start date and end date.
• Plan to meet regularly to ask for feedback about how the changeis going and see if you need to make small changes to the plan.
• Plan to meet at the end of the implementation period to get ready toreassess your testing process, office readiness, patient experience, ordocumentation.
• Prepare and communicate standard work.
Helpful Hints for Leaders
• Express a sense of importance or ugency that you want to fix thisproblem.
• Develop and communicate a vision of how the change may help.
• Empower the team to act.
25
REASSESS YOURTESTING PROCESS
Did We Improve? Reassessing Your Process After you have implemented the new process, use the same assessment tool (or tools) to gather data to measure what changed.
Interpreting the Results At a staff meeting, encourage your staff to discuss the implementation. Present the data from before and after you implemented the change.
• If your performance improved and you reached your goal:o Make the change permanent and write the change(s) into your office
procedures and policy.• If you improved but expected to do better:
o Decide on how to further modify the testing process. Revise the ActionPlanning Tool.
• If your error rates did not change or got worse:o Review the changes that were planned.o If planned changes did not occur, consider whether the changes are practical.
u If practical: Consider trying again; collect additional data. u If impractical: Revise the Action Planning Improvements Tool.
o If planned changes did occur:u Continue and collect additional data. u Or: Develop a new change to test and measure.
Remember, it often takes a few tries to create real, measurable improvement!
26

APPENDIX
The materials in the appendix include:
• The Patient Handout: This handout can help to engage patients in the testingprocess by providing them with information about what to do after having a test.
• Electronic Health Record Evaluation: This tool can identify how your electronic healthrecord (EHR) can support you and your office staff in monitoring the safety of your testingprocess.
• Process Maps: These exerpts of process maps are from a primary care practice thatused this step-by-step guide. The first shows the "current state" of the practice, followedby the "ideal state" map they developed to guide their practice changes.
• Standard Work (Blank and Completed Example): This form shows how a practice candocument standard work. It is followed by a completed example of the form.
27
THE PATIENT HANDOUT
Purpose
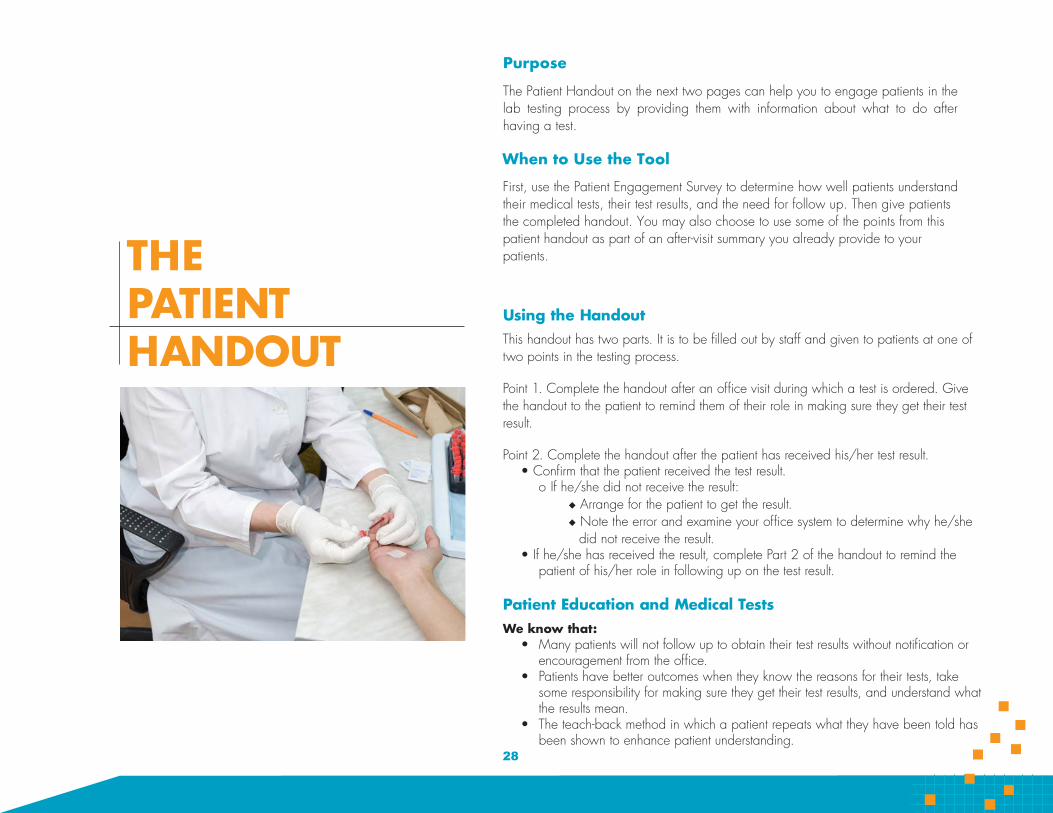
The Patient Handout on the next two pages can help you to engage patients in the lab testing process by providing them with information about what to do after having a test.
When to Use the Tool
First, use the Patient Engagement Survey to determine how well patients understand their medical tests, their test results, and the need for follow up. Then give patients the completed handout. You may also choose to use some of the points from this patient handout as part of an after-visit summary you already provide to your patients.
Using the Handout This handout has two parts. It is to be filled out by staff and given to patients at one of two points in the testing process.
Point 1. Complete the handout after an office visit during which a test is ordered. Give the handout to the patient to remind them of their role in making sure they get their test result.
Point 2. Complete the handout after the patient has received his/her test result. • Confirm that the patient received the test result.
o If he/she did not receive the result:u Arrange for the patient to get the result. u Note the error and examine your office system to determine why he/she
did not receive the result. • If he/she has received the result, complete Part 2 of the handout to remind the
patient of his/her role in following up on the test result.
Patient Education and Medical Tests We know that:
• Many patients will not follow up to obtain their test results without notification orencouragement from the office.
• Patients have better outcomes when they know the reasons for their tests, takesome responsibility for making sure they get their test results, and understand what the results mean.
• The teach-back method in which a patient repeats what they have been told hasbeen shown to enhance patient understanding.
28

Patient NameWhat to Expect After Your Lab Test Instructions: Complete the appropriate section of this form and give it to the patient.
q check-up q manage my health q understand the cause of my symptoms
1. After having a test:
I will hear from the office with my results by ___________________________________________________________________________________________ (date)
If I don’t hear back, I should call _____________________________ and ask for _____________________________________________________________ (phone number) (office contact person)
2. After getting a test result:
When I got my result(s), I was told (please check all that apply): q Do nothing q The result was normal q Continue my same medication or treatment q Change my medication or treatment q Return to the office for more tests ________________________________________________________________________________________________
(date and time) q See a specialist or go to another facility___________________________________________________________________________________________
(name/address/phone)
____________________________________________________________________________________________
If I have questions and the situation is not an emergency, I should call:______________________________________________________________________ (office contact person and phone number)
Reason for Medical Test(s)
29

Formulario para el Paciente Nombre del paciente
Instrucciones: Complete la sección apropriada de esta formulario y entréguelo al paciente.
Razón del examen médico
q examen de rutina q control de mi salud q entender la causa de mis síntomas
1. Después de hacerme el exámen médico:
La clínica me va a contactar con el resultado el ________________________________________________________________________________________ (fecha)
Si no me contactan, debo llamar al ____________________ y preguntar por ________________________________________________________________ (teléfono) (persona de contacto en la clínica)
2. Después de recibir el resultado de un examen:
Cuando recibí mi resultado me dijeron (marque todas las respuestas que aplican):
q No hacer nada q El resultado fue normal q Continuar el mismo medicamento o tratamiento q Cambiar mi medicamento o tratamiento q Regresar a la clínica para más exámenes médicos ___________________________________________________________________________________
(fecha y hora) q Ver a un especialista o ir a otra clínica ____________________________________________________________________________________________
(nombre/dirección/teléfono)
Si tengo preguntas y la situación no es una emergencia, debo llamar a: _______________________ _____________________________________ (teléfono) (persona de contacto en la clínica)
30
ELECTRONIC HEALTH RECORDEVALUATION
Purpose The Electronic Health Record Evaluation Tool can help you identify how your electronic health record (EHR) can support you and your office staff in monitoring the safety of your lab testing process.
When to Use the Tool Use the Electronic Health Record Evaluation Tool to evaluate the capabilities of your current EHR or to evaluate potential systems when shopping for a new EHR.
Using the Tool • Identify the individuals who prepare or use reports and ask them to complete the
tool. • A “No” answer to any shaded question indicates either:
o Your EHR cannot provide data on this aspect of patient safety and the testingprocess.
o Or, staff are not aware of the EHR’s capacity to provide these data.• A “Yes” answer to a shaded question followed by “No” answers to the
subsidiary questions indicates that the EHR can provide limited support in thatarea.
Using EHR Reports for Quality Improvement • Identify the report(s) that will provide the most helpful information for your project.• Be sure to consider staff resources needed to generate and review a report.• Generate the report(s) before a change has been implemented and then a few
weeks after the change.• Note that a reduction in the proportion of problematic results will indicate that the
testing process was improved.
Using EHR Reports to Monitor Your Office System You should generate the same report regularly to monitor performance and identify any positive or negative trends.
31
EHRs and Patient Safety We know that:
• Introducing EHRs into primary care offices can make locating patient recordsmuch easier.
• Offices may not document staff responsibilities for using EHR reports to monitorthe testing process.
• Offices often struggle with a new system that may not address their specificneeds and processes.
• EHRs automatically complete some tasks in the testing process. However, officeswith EHRs that automatically document steps in the testing process do noteliminate all errors.
• Most EHRs do not automatically document these tasks:o Interpretation of test results by providers.o Notification of patients about their results.o Follow up on abnormal tests.
32

Electronic Health Record (EHR) Evaluation ToolFor these questions, a “test” is defined as any type of laboratory or imaging test.
Which reports are you able to obtain from your EHR?
1. A report that identifies all tests ordered during a specific time period? yes q q no If yes:Are you able to organize the report by test type? yes q q no
2. A report that identifies all outstanding test orders? yes q q no If yes:Are you able to organize the report by test type? yes q q no Are you able to organize the report by lab/imaging center? yes q q no Does your EHR automatically notify you if test results are not returned within a predetermined timeframe? yes q q no
3. A report that identifies the time it takes for results to be returned to your practice? yes q q no If yes:Are you able to organize the report by test type? yes q q no Are you able to organize the report by lab/imaging center? yes q q no
4. A report that indicates how long it takes to review results after they are available in the EHR? yes q q no
5. A report that identifies those patients who did not receive their results? yes q q no
6. A report that identifies all abnormal results for a specific time period? yes q q no If yes:Are you able to determine how long it took to notify the patient after the result was received by the office? yes q q no Are you able to determine whether the patient has followed up appropriately? yes q q no
33

Current State Process Map
34

Ideal State Process Map
35

STEP WHO ACTION DETAILS WHY
1
2
3
4
Standard Work
36

Provider Review non-critical lab results within 24 hours.
Critical lab results called by lab immediately to triage RN (day) or senior resident (night).
Reduce errors in delayed notification of lab results. Improve patient care and satisfaction.
1
STEP WHO ACTION DETAILS WHY
2 Provider Determine how lab results should be communicated to patient, based on clinical judgment.
Recommendations: If result is abnormal and requires medical explanation, then provider should call patients. Other options include letters, portal, follow-up visits, etc. Factors to consider include abnormality/complexity of the result, patient health literacy, patient language literacy, etc.
Different results require different levels of urgency and medical understanding to address patient concerns and ensure timely follow-up.
3 Provider
If decision involves action needed by MA (e.g. send result letter or call patient for uncomplicated result communication) then route result note to MA pool.
All MAs are attached to the overall pool.
Routed messages should be clear in action items needed.
Do not send to individual MA because he/she may not be in clinic at the time, and this could result in delays.
4 Medical Assistant (MA)
Routinely review pool for lab results that require communication to patients.
If MA speak a language other than English, some MA pay particular attention for results that require communication in that language.
MA calling patients in their languages permits the patients to ask medical questions. The patients have an opportunity to confirm understanding of the message.
5 MA
If MA needs to call patients in a language that the MA does not speak, then interpreter or language line to be used.
Refer to nursing notes for name of interpreter used in the visit and language spoken. Attempts should be made to
communicate the results in a language that a patient understands/prefers.
6 MA Determine how lab results should be communicated to patient, based on clinical judgment.
2-3 failed phone attempts should be made first.
7 MA Document in result note that patient was notified of results and by what method.
Route back to ordering provider. Closed-loop communication.
Standard WorkLab result communication process
37

Project Team
Revised Guide John M. Westfall, MD Department of Family Medicine University of Colorado School of Medicine
Douglas H. Fernald, MA Department of Family Medicine University of Colorado School of Medicine
Peter Ferrarone, MA, MSW Division of Health Care Policy & Research University of Colorado Anschutz Medical Campus
R. Mark Gritz, PhD Associate Director of Business Development Division of Health Care Policy & Research University of Colorado Anschutz Medical Campus
Jodi Summers Holtrop, PhD, MCHES Department of Family Medicine University of Colorado School of Medicine
Bethany M. Kwan, PhD, MSPH Department of Family Medicine University of Colorado School of Medicine
Natalia Loskutova, MD, PhD American Academy of Family Physicians National Research Network
38
Donald E. Nease, Jr., MD Department of Family Medicine University of Colorado School of Medicine
Elizabeth W. Staton, MSTC Department of Family Medicine University of Colorado School of Medicine
First Version Milton “Mickey” Eder, PhD Director of Research & Evaluation Access Community Health Network Chicago, IL
Sandy G. Smith, PhD University of Chicago Access Community Health Network
James Cappleman, MSW Access Community Health Network
John Hickner, MD, MSc Chair, Department of Family Medicine Cleveland Clinic
Nancy Elder, MD Associate Professor, Department of Family Medicine University of Cincinnati
Gurdev Singh, MScEng, PhD Director, University of Buffalo Patient Safety Research Center SUNY University at Buffalo

Consultants
Revised Guide John Hickner, MD Chair, Department of Family Medicine University of Illinois-Chicago
Nancy Elder, MD Research Director, University of Cincinnati
Ranjit Singh, MB BChir, MBA
Vice Chair for Research, Director, Primary Care Research Institute, SUNY-Buffalo
Milton “Mickey” Eder, PhD Assistant Professor, Department of Family Medicine and Community Health University of Minnesota
First Version Bruce Bagley, MD American Academy of Family Physicians
Terry McGeeney, MD TransforMED
James Meisel, MD, FACP Boston University
John Orzano, MD, MPH Concord Hospital
Eric Poon, MD, MPH Brigham and Women’s Hospital Harvard Medical School
Glen Seils, BE GSeils Consulting
Leif Solberg, MD HealthPartners Research Foundation
39

29
U.S. Department of Health and Human Services Agency for Healthcare Research and Quality 540 Gaither Road Rockville, MD 20850
AHRQ Publication No. 18-0005-1-EF December 2017