implementing 802.1x security for wireless authentication · pdf file · 2013-07-316...
TRANSCRIPT

1 Implementing 802.1X security for wireless authentication
This deployment will use Server 2008 as well as a Linksys WRT320N. In my deployment I also used a
3com switch and Firebox Edge firewall. The client was a machine running Windows 8 and was not joined
to a domain. The firewall was put into place to prevent any part of my lab from affecting the rest of the
network.
Microsoft uses a Network Policy Server to act as a RADIUS server, and also depends on AD DS as well.
Even if you are not planning to use a domain, you’ll need AD DS installed in order to contain the
authentication information used by NPS. I decided that I would add a DHCP server in order to eliminate
the need for network devices to perform IP addressing.
The first step was to add the new roles of DHCP and Network Policy and Access Services

2 Implementing 802.1X security for wireless authentication
The configuration for Network Policy and Access Services is straight forward:

3 Implementing 802.1X security for wireless authentication
The next step was to configure the Network Connection Bindings for DHCP. This is the interface that
DHCP will be pushed through. This machine has been configured with a static IP of 192.168.0.12.
4 Implementing 802.1X security for wireless authentication
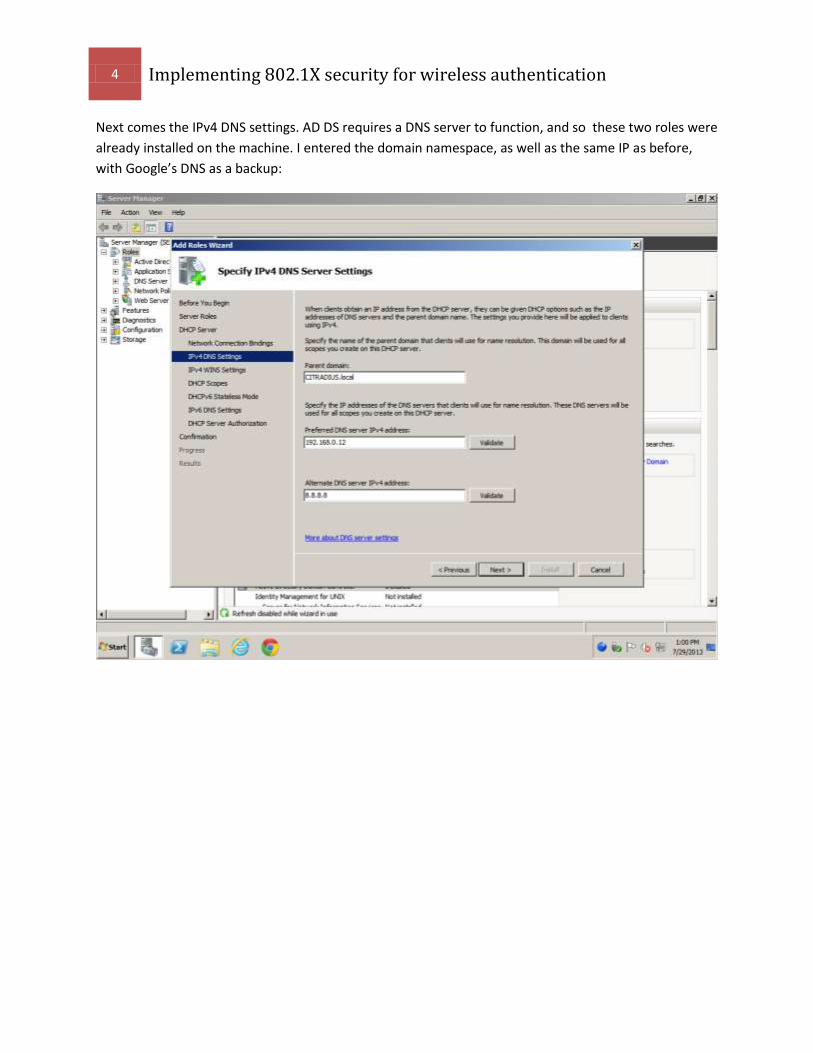
Next comes the IPv4 DNS settings. AD DS requires a DNS server to function, and so these two roles were
already installed on the machine. I entered the domain namespace, as well as the same IP as before,
with Google’s DNS as a backup:

5 Implementing 802.1X security for wireless authentication
WINS is not needed, so leave it turned off:

6 Implementing 802.1X security for wireless authentication
Configure the DHCP scopes next. This is the range of IP addresses that will be handed out. I set up a
group for wireless devices of 192.168.0.51 to .59 to allow for a total of 9 devices. As I will only be using
one client for this experiment, this is an acceptable range. Leave Wired as the subnet type, and be sure
Activate this scope is checked. The subnet mask is a standard 255.255.255.0.
7 Implementing 802.1X security for wireless authentication
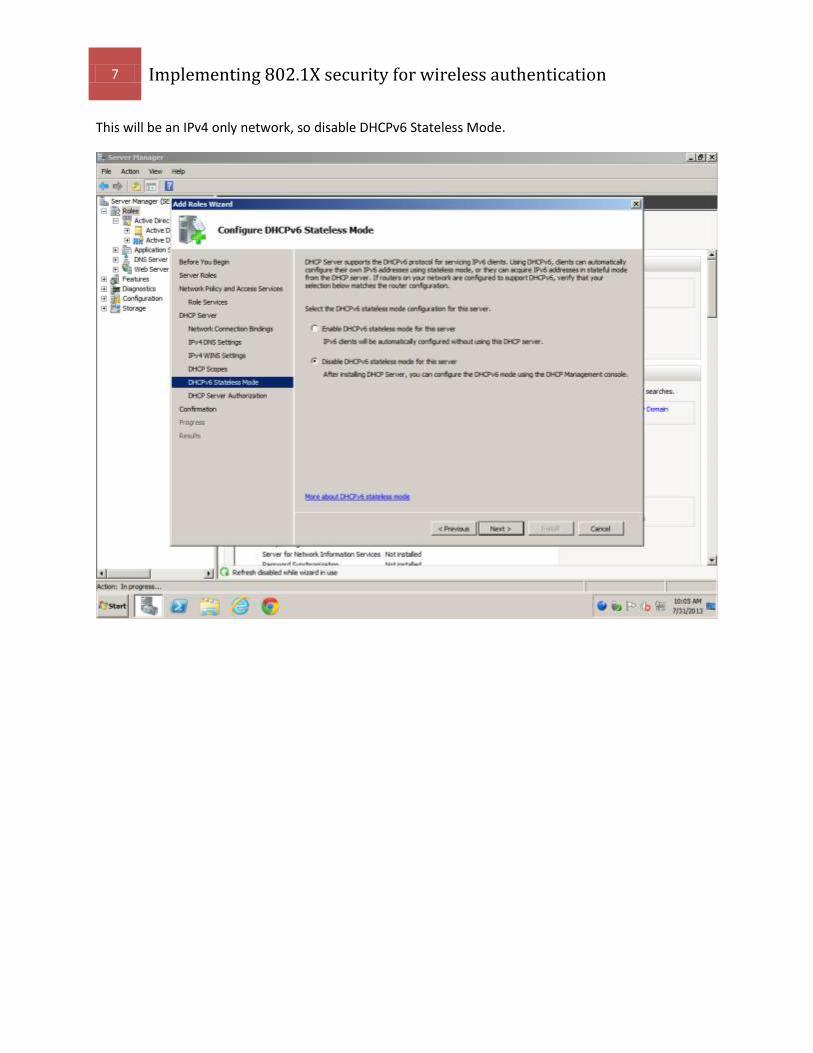
This will be an IPv4 only network, so disable DHCPv6 Stateless Mode.

8 Implementing 802.1X security for wireless authentication
Lastly configure the DHCP Server Authorization. This prevents unauthorized DHCP servers from handing
out IP addresses on the network. Use the current credentials as the user is an administrator:

9 Implementing 802.1X security for wireless authentication
The final screen is to confirm your settings. Make certain the are correct, and then click Install.

10 Implementing 802.1X security for wireless authentication
Ensure the installation was successful. Ignore the error in my screenshot, I had already configured the
DHCP scope previously:
11 Implementing 802.1X security for wireless authentication
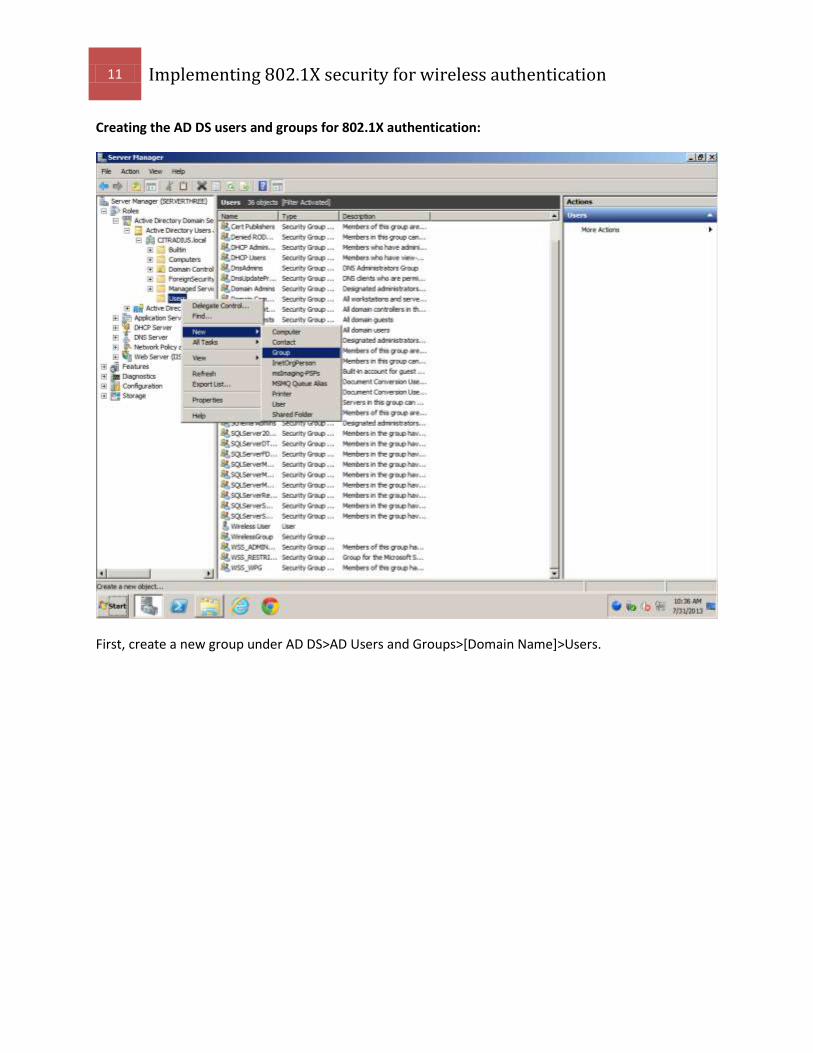
Creating the AD DS users and groups for 802.1X authentication:
First, create a new group under AD DS>AD Users and Groups>[Domain Name]>Users.

12 Implementing 802.1X security for wireless authentication
I made one called WirelessGroup for the purposes of this experiment, and set the Group scope to
Universal.:
13 Implementing 802.1X security for wireless authentication
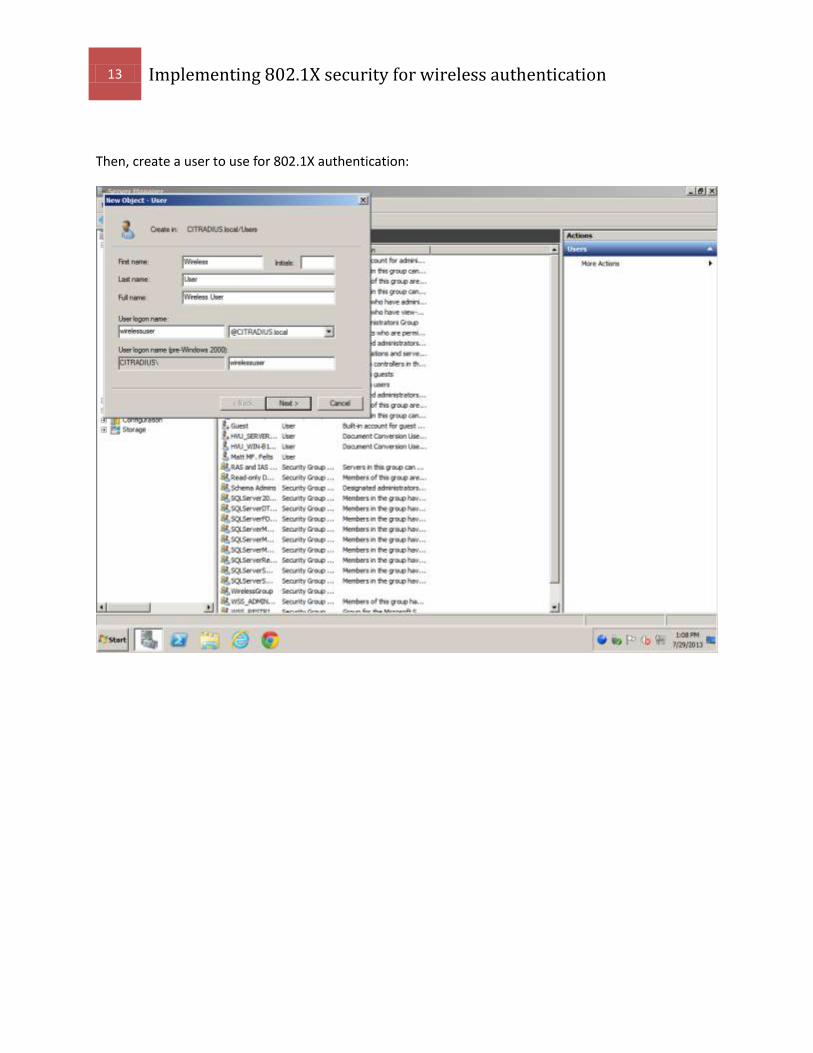
Then, create a user to use for 802.1X authentication:

14 Implementing 802.1X security for wireless authentication
Add them to the group:
15 Implementing 802.1X security for wireless authentication
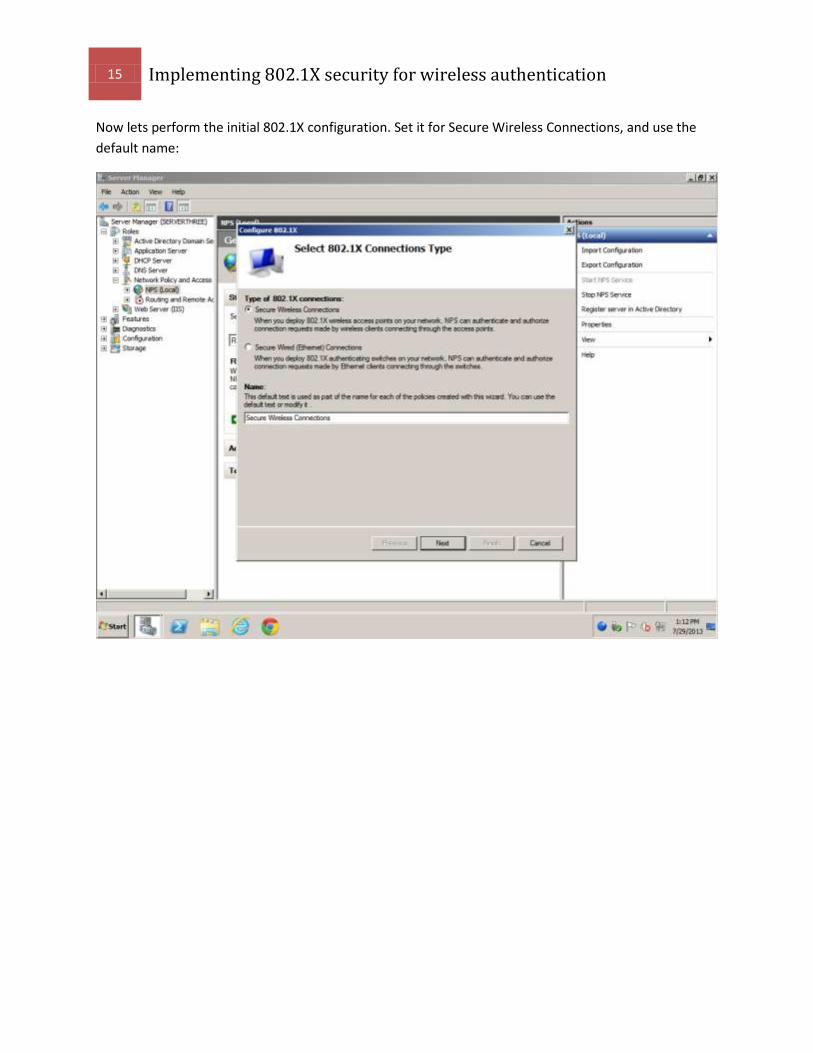
Now lets perform the initial 802.1X configuration. Set it for Secure Wireless Connections, and use the
default name:
16 Implementing 802.1X security for wireless authentication
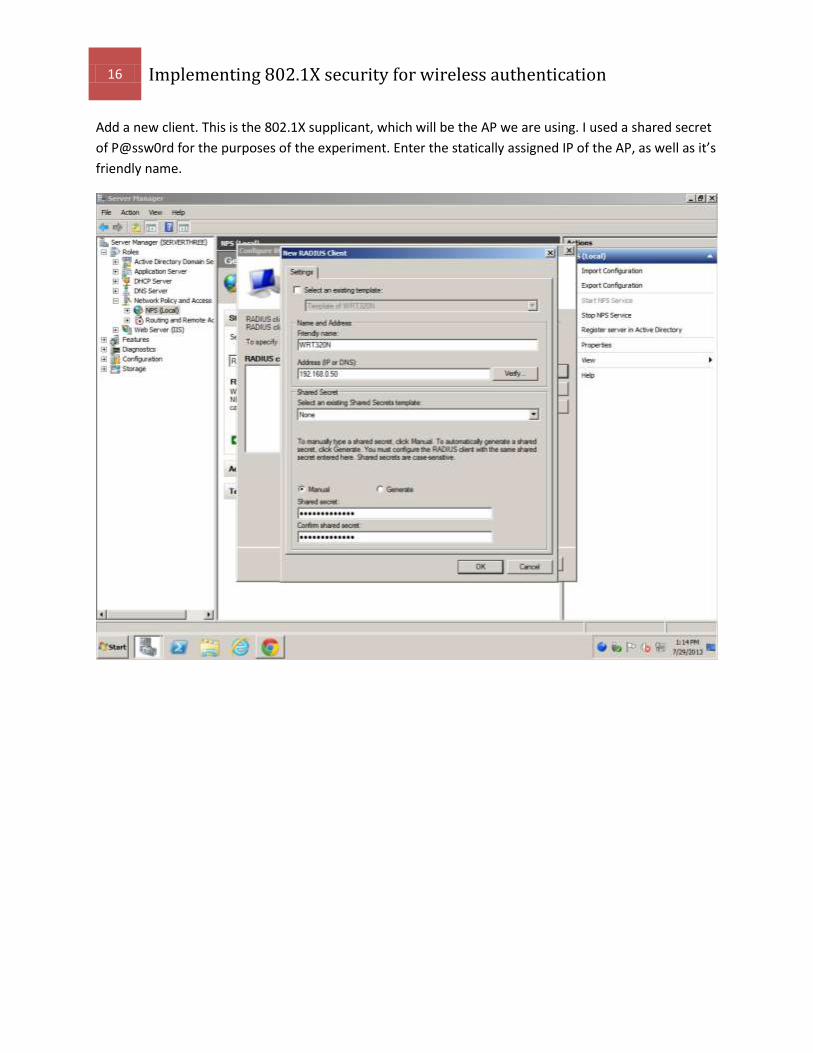
Add a new client. This is the 802.1X supplicant, which will be the AP we are using. I used a shared secret
of P@ssw0rd for the purposes of the experiment. Enter the statically assigned IP of the AP, as well as it’s
friendly name.

17 Implementing 802.1X security for wireless authentication
Use EAP-MSCHAPv2 as the EAP type.

18 Implementing 802.1X security for wireless authentication
Add the group “wirelessgroup” to the list of allowed users.

19 Implementing 802.1X security for wireless authentication
We will not configure traffic controls at this time., so click next. You will see the summary screen so you
can review your settings.
20 Implementing 802.1X security for wireless authentication
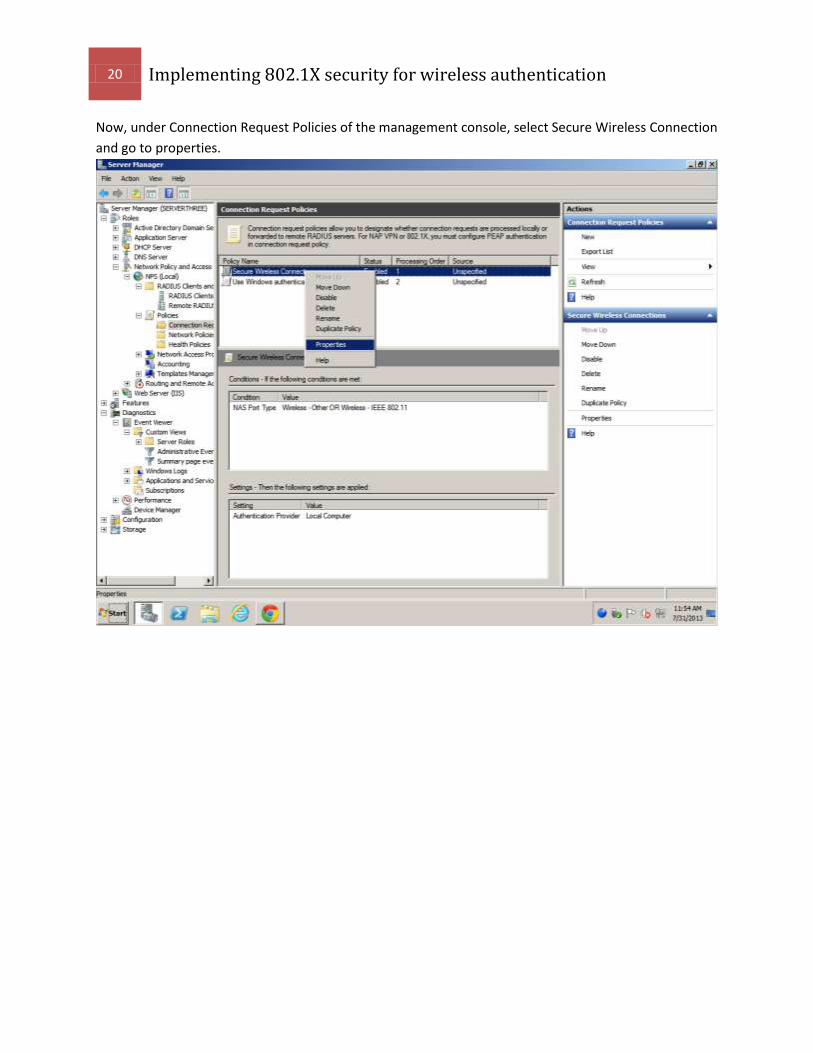
Now, under Connection Request Policies of the management console, select Secure Wireless Connection
and go to properties.

21 Implementing 802.1X security for wireless authentication
Be sure to enable the policy, leaving the type of network access server as unspecified:

22 Implementing 802.1X security for wireless authentication
23 Implementing 802.1X security for wireless authentication
Configuring the Router:
By default, the router has an IP of 198.162.1.1, with a username and password of admin/admin.

24 Implementing 802.1X security for wireless authentication
Set the Router IP to what you would like to use, in my case 192.168.0.50. Be sure it matches what you
set as the RADIUS client on the server. Disable DHCP as we already have a DHCP server in place. Be sure
the time settings are correct for your time zone. Click Save Settings.

25 Implementing 802.1X security for wireless authentication
You’ll now have to manually set your IP settings so you can communicate with the router on it’s new IP. I
used 192.168.0.51 with subnet of 255.255.255.0

26 Implementing 802.1X security for wireless authentication
Switch to manual configuration in basic wireless settings. Name the SSID what you would like.
27 Implementing 802.1X security for wireless authentication
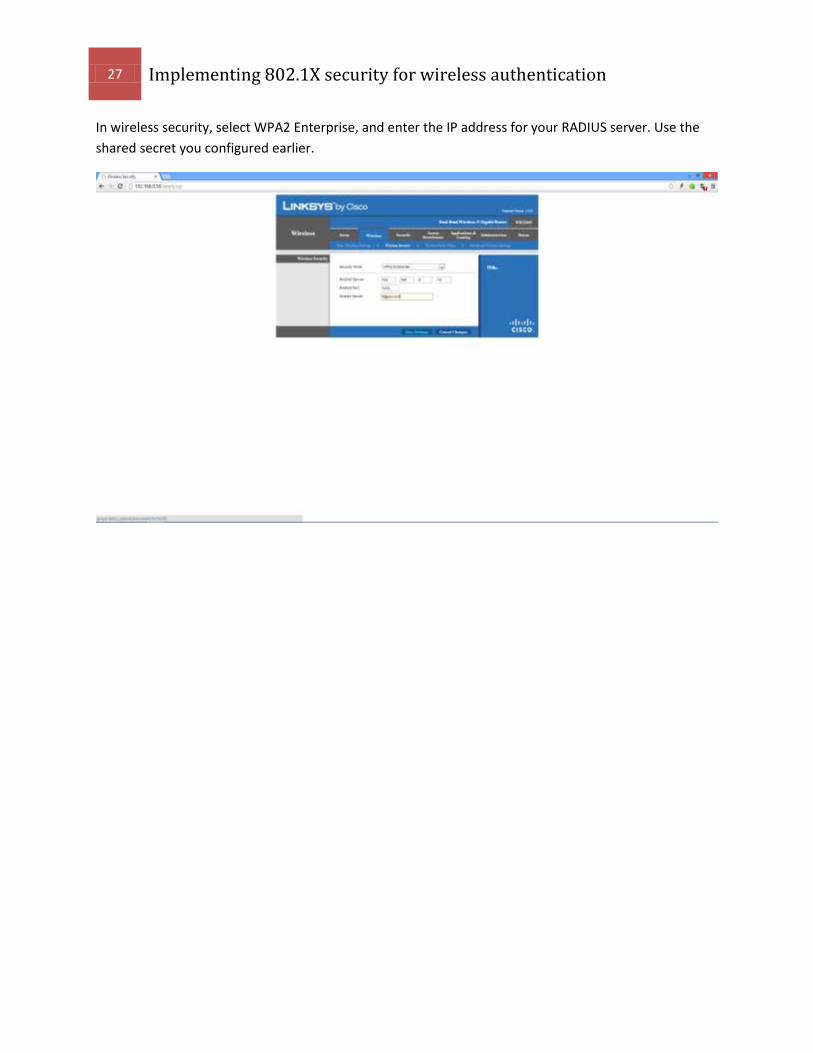
In wireless security, select WPA2 Enterprise, and enter the IP address for your RADIUS server. Use the
shared secret you configured earlier.
28 Implementing 802.1X security for wireless authentication
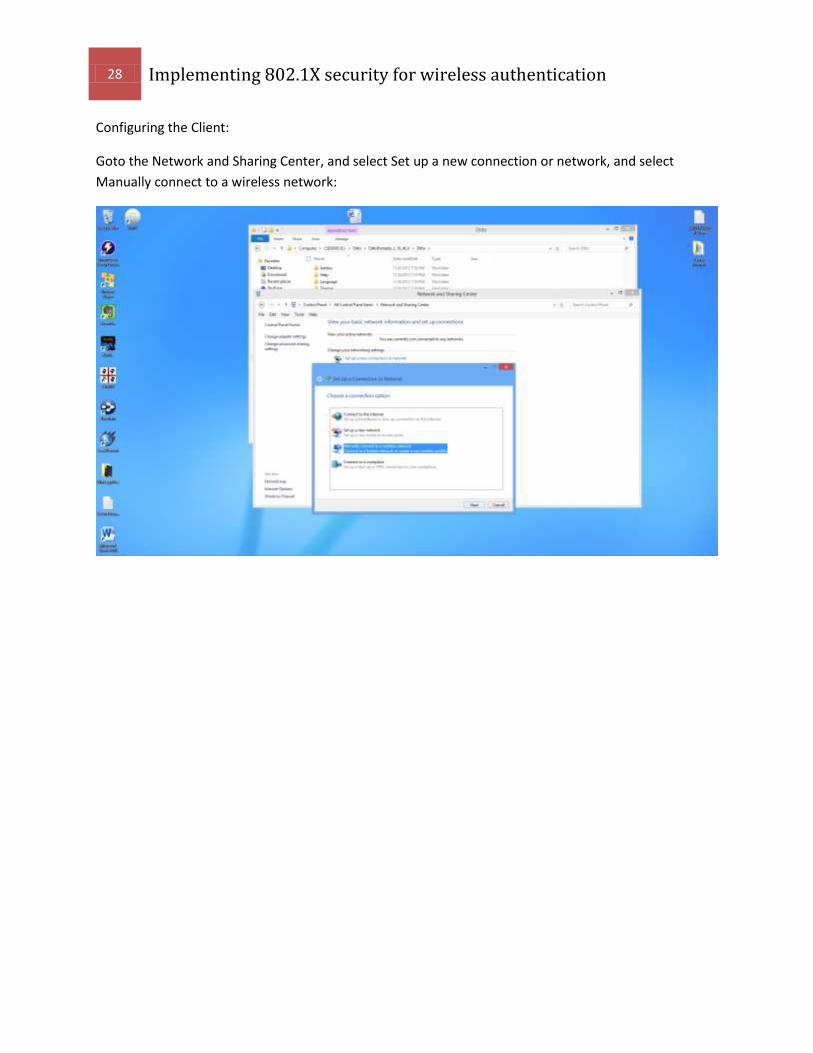
Configuring the Client:
Goto the Network and Sharing Center, and select Set up a new connection or network, and select
Manually connect to a wireless network:

29 Implementing 802.1X security for wireless authentication
Enter the SSID of the network, select 802.1X for Security type:
30 Implementing 802.1X security for wireless authentication
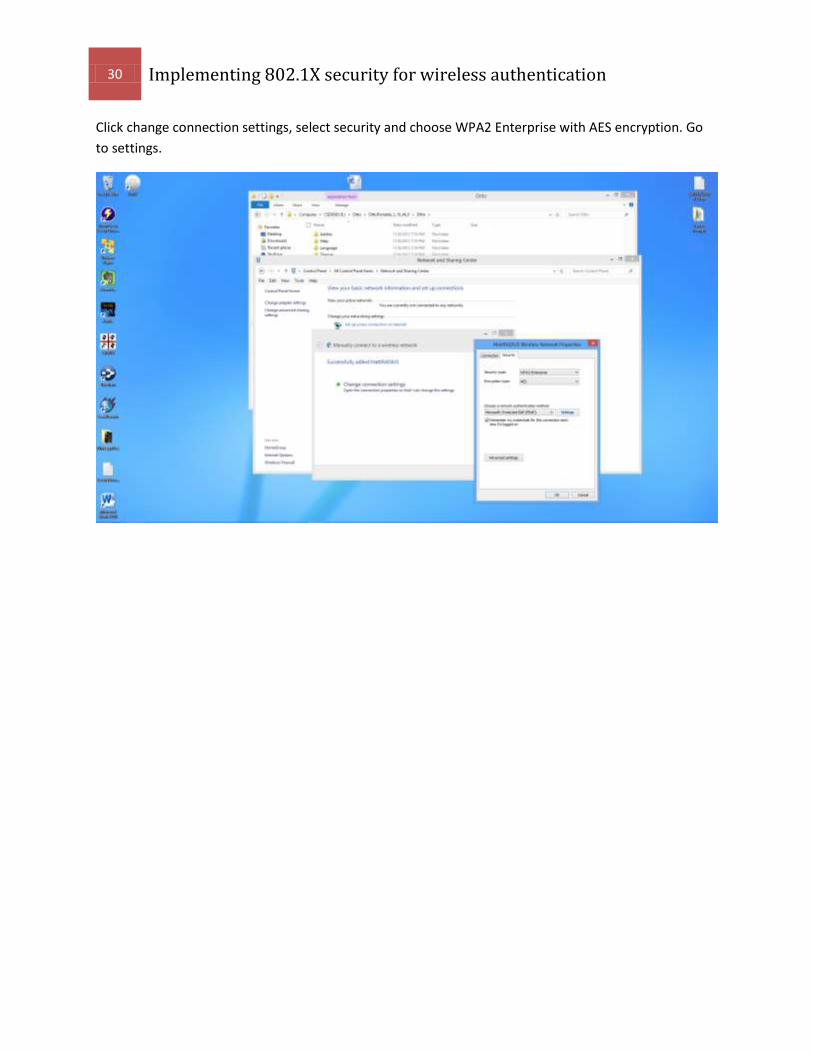
Click change connection settings, select security and choose WPA2 Enterprise with AES encryption. Go
to settings.

31 Implementing 802.1X security for wireless authentication
Uncheck verify the server’s identity, as we will not be using certificates. Click OK.

32 Implementing 802.1X security for wireless authentication
Click Advanced, check specify authentication mode, select user authentication. Click Save credentials,
type the username and password you set for the wireless user earlier.
Congratulations!! You’ve deployed a RADIUS server!