image processing pro forma
TRANSCRIPT

Photography and Digital Manipulation
Nicole Tunningley
1
Image Processing and Techniques

PixelationOriginal
Cropped

What could cause this to occur?Pixelation occurs when using a variety of image capture methods, it could be due to an image being created with a low amount of DPI (Dots per inch), it can also happen if a digital graphic is created in a file that doesn’t have a high resolution.
A pixel is the name for a single dot of light on a digital graphic, these small dots are what make up the images seen on computer screens or televisions. "Resolution” is the name given by a large quantity of pixels that make up a display, or the size of an image.
Pixelation could also occur if the incorrect setting or low megapixel device is used.
What preventable measures are there?Taking photos with a higher resolution can prevent the image from pixelating when cropped as there isn’t a limitation of pixels, this will also keep the quality at a higher rate. Preventing cropping too much can retain image quality, and using a long focal length lens to zoom on the subject.
Finally, how could you fix it?To fix it you can crop the image using a bi-cubic smoother and then when the image is enlarged the quality should appear better and with less pixelation.

Colour CastsBefore
After

What could cause this to occur?Colour casts are unwanted colours that are seen within an image. This could be because of an incorrect white balance setting used on the camera, or lighting conditions in the environment in which the image was captured.
What preventable measures are there?when you take the image make sure to check the lighting that will be seen in the image and consider the white balance setting on the camera that you are using.
Finally, how could you fix it?A simple method of fixing colour casts can be applying a photo filter as an adjustment layer.
You can fix this slight problem by editing the image in Photoshop, you simply change the filter in image adjustments to make the lighting warmer or cooler.

Picture DamageBefore
After

Picture Damage 2Before
After

What could cause this to occur?Picture damage can occur to a picture if the image sensor is dirty/dusty or if the camera lens is cracked.
If the image is printed it could be physically damaged if on photographic paper by being scratched, torn or they aged.
What preventable measures are there?Basically to be quite cautious when it comes to your equipment, you can have a camera strap attached to your camera and keep it around your neck so that if it were to slip from your hands it wouldn’t fall and break or crack the lens.
You can also check your image sensor occasionally to make sure that it doesn’t get dirty, dusty or unclean.
Finally, how could you fix it?There are many different techniques depending on what the fault is, the camera lens can be replaced or fixed if it were to crack and the image sensor can be cleaned if it were dusty or unclean

Over or Underexposed Images
Underexposed
Overexposed

Over or Underexposed Images
Before
After

What could cause this to occur?You may discover that an image is either under (dark) or over (light) exposed. This can be due to a lack of light or wrong camera settings when capturing the image.
What preventable measures are there?You can potentially check the lighting settings you have on your camera before you take the image to ensure that you are using the right ones, you could also prevent this by checking the exposure setting is on the one you want it to be on before taking the shot
Finally, how could you fix it?There are a few options on Photoshop which allow you to edit the lighting in an image such as, levels this allows you to change the white, grey and black of an image, smart adjustments in the layers file also allow you to change these at any time

Panorama
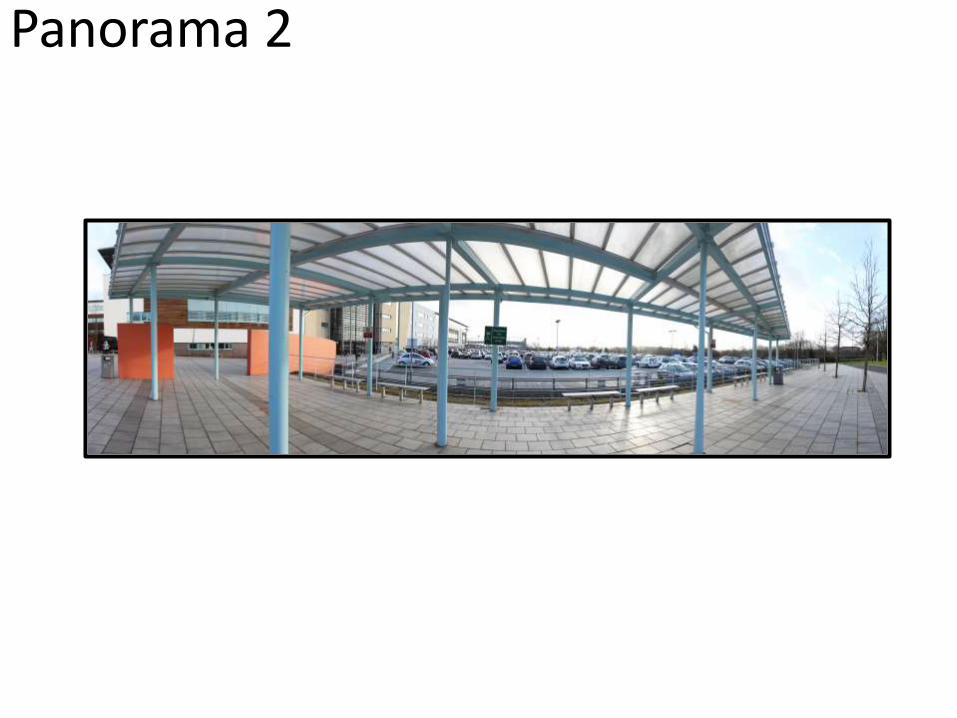
Panorama 2

Evaluation
How did you create your image?Using manual mode on the SLR I changed the features to suit the image I was taking and began taking several images in portrait. Then after I took the images, I wired the camera up to a computer and opened up the images in Photoshop using file-Automate and then photo merge and Photoshop deciphered the structure of the images into what it thinks is the right order and then I cropped the rough edges of the images off.
What would you improve if you did it again?If I did it again I would probable take a larger amount of images so that when I crop the rough edges of the images it doesn’t seem as small as it does there

Hockney Joiner

Hockney Joiner 2

Evaluation
How did you create your image?I set the SLR to the correct settings and went out and took between 10-30 pictures of a subject I was considerably close to, this in sense captured the entire scene. So, when I put my images into Photoshop the same way I did with my panorama images (except removing the ‘blend’ option) the images arranged themselves into the correct order so that the scene was captured in many different layers to edit the contrast and saturation of.
What would you improve if you did it again?I would if I were to do this again, improve by becoming even closer to my subject so that the camera captures the detail and different aspects of the images rather than everything from a distance

Photo MontageBefore
After

Photo MontageBefore
After

Photo Montage 2Before
After

Evaluation
How did you create your image?By using one original photograph, cutting then adding sections of two or more photographs to that original image to change the scene.
What would you improve if you did it again?If I were to do it again I would probable change/edit more of the scene then just the sky, I could do this by adding additional features from other photographs such as boats, plane or even people to the scene just to make it appear more eccentric and interesting than the original image that I started on.
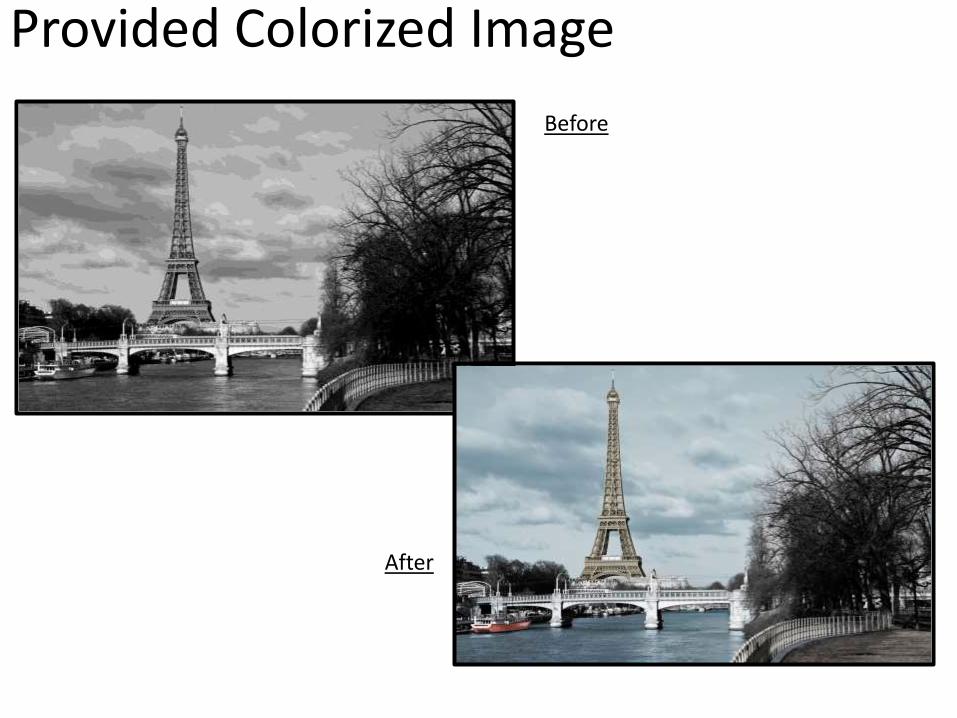
Provided Colorized Image
Before
After

Fully Colourised Image
http://wallalay.com/black-and-white-photos-43-376958-desktop-background.html
Before
After

Partially Colorized Image (Splash)
Before
After
http://www.123inspiration.com/beautiful-black-and-white-photography-by-benoit-courti/black-and-white-photography-by-benoit-courti-5/
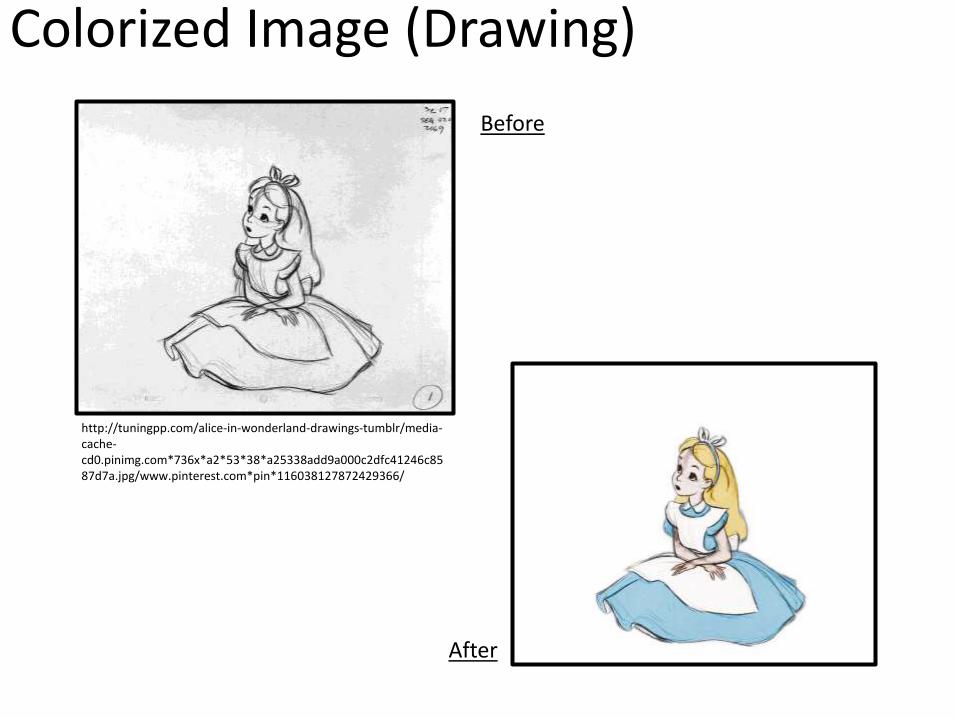
Colorized Image (Drawing)
Before
After
http://tuningpp.com/alice-in-wonderland-drawings-tumblr/media-cache-cd0.pinimg.com*736x*a2*53*38*a25338add9a000c2dfc41246c8587d7a.jpg/www.pinterest.com*pin*116038127872429366/

Evaluation
What tools did you use to create your images?I used adobe Photoshop CS6, and after setting the image to RGB colour I used tools such as magnetic lasso, polygonal lasso, quick selection, magic wand and the normal lasso tool to select certain areas of the image.
After I selected and used these tools I adjusted each sections hue/saturation to get the colour I wanted for each segment.
How did you utilise file formats?I used JPEG for each of my images and therefore did not need to keep the PSD file format but I would if I wished to retain the layers on my file to return to it and continue any colourisation that I could not if I were to convert it to a JPEG file.

Overall Evaluation
Was there any ethical issues?There were no ethical issues as I decided to used landscape or architecture images for my colourisation to give the images back a more natural look and to estimated how the scene would have appeared in the actual environment in which it was taken.
What would you improve if you did it again?I would go into more detail with my colourisation, for example on the Paris image the detail with the tree branches and on the pathway beneath are very bland as I didn’t quite understand what tools to use for each particular area.