illustrated fluteplaying e-book taster edition this is a...
TRANSCRIPT

Notice before you start
Illustrated Fluteplaying e-book Taster edition
This is a PDF file. If you have opened it in abrowser, you can read it in the browser orsave it. When saved you can email it toanother device etc.
Different browsers have different methods ofsaving. Most browsers make it reasonablyobvious with a menu bar (for Edge you haveto move your cursor to the bottom of hescreen to get the menu bar to display) butsadly there are too many browsers to list hereso if you don’t know or can’t guess you willhave to google for the answer.
Aplogies. Nick Mellersh
Techie for Illustrated Fluteplaying
Book starts on next page.

Taster Edition

About this “Taster” edition
This taster edition of Illustrated Fluteplayingcontains about one third of the pages of the bookand should let you get the feel of the clear text,the accurate anatomical drawings and thehumourous and memorable analogies that makeit such a great book. Part 1 is the basics Part 2advanced stuff.
Feel free to share the file with colleagues andfriends.
Oh yes, and buy the complete ebook currently(July 2017) a £10 ($13) download. Click here.

Book page: Illustrated Fluteplaying
Contents
1
5
16
20
26
34
36
42
54
62
66
Introduction
Use this book to help you play better
Part IGetting Started
Starting to blow
Holding the flute
Posture
Hand positions
Shoulders and elbows
Tonguing
Part IIBreathing
Dynamics and tuning
Vibrato
Blowing problems
Index and back matter
Endorsements
Buy the complete book fromIllustrated-fluteplayi.com
77

IntroductionThis book is intended for flute players of all ages andstandards who want a clear guide to the basics of tone andtechnique, and who are keen to improve their sound. It canbe used as a companion to good flute lessons and methods,helping to prevent those all-too-common bad habits ofblowing, breathing and technique which are often verydifficult to eradicate later on.
The most important message to any wind player, but perhapsparticularly to flute players, is that 95% of the sound,resonance, expression, nuances and general techniquecome from the player - his or her entire body is used in trulysuccessful playing. The flute itself is merely an additional aidto musicianship, with its own very distinct character, to bemastered in a particular way. Unless this fact is clearlyappreciated, no amount of experimenting with more andmore expensive flutes and headjoints will make the slightestdifference to a player’s sound. The subtle difference betweeninstruments will begin to become apparent once all thephysical controls of playing from the whole body are correct.
The text is copiously illustrated with detailed drawings,making each point in the simplest and clearest way. All basictopics are covered, including tone production, breathing,tonguing, posture, hand positions, vibrato, playing in tune,dynamics etc., and a section on “blowing problems” dealswith some of the most frequent causes of poor tone quality.The drawings are designed so that young children can grasp

Use this book to help you play betterThis book will help you make beautiful music with your flute.Playing the flute well means you have to control all of yourbody – your hands, your arms, your mouth muscles, yourbreathing, how you sit or stand. This book is dedicated toshowing you how through clear text from one of Britain's mostsuccessful flute teachers and through brilliant illustrations by anartistic and tenacious illustrator who spent years researchingthe science and art of flute playing. This book is not aconventional flute tutor with fingering charts and tunes - youwill need one of those if you are a beginner, but if your aim is tomake beautiful music this book is the one you will come to love.
For the Beginner: If you are just starting the flute, this bookstarts from the beginning and ensures that you get things rightfrom the start. There will be no painful eradication of bad habitsas you progress. Starting correctly means you can move as faras you want to in as smooth a way as is possible.
For the improver: If you’re stuck and want to improve yourplaying, the illustrations and text will let you discover the causeof any problems that hold you back and find a solution.
For the professional and serious player: The illustrations inPart I of the book give you a quick way to check basictechnique. Part II of this book goes deeply into technicalmatters such as breathing, tonguing and vibrato. Theillustrations and text will let you check your technique andunderstand how and where it could be improved. Atarah BenTovim, sometime president of the British Flute Society

describes the book as her “flute bible.” It could be yours too.
For the teacher: The teacher can go to the correct page inthe book, show the pupil a picture and say “Look, this is theway!” There is a section, in Part II of the book, that analysescommon faults and shows how to cure them. Teachershave always found this book incredibly helpful, and nowpupils can be encouraged to get the e-book version andkeep it on their phone or tablet. Teachers who tutor on avariety of instruments have always found this book a boon.

Book page: 1(1) Illustrated Fluteplaying Getting Started
Getting Started
Before we start, here are some names you needto know
The flute1. crown2. head3. barrel, tenon joint4. body5. tone hole6. foot7. headjoint8. blowhole9. blowing wall10. Lip plate 10

Getting StartedBook page: 1(2) Illustrated Fluteplaying
The embouchure (or shaping of the lip gap)
Over the page you will learn how to assemble the flute.
13. lip-gap14. lip plate
11. top lip
12. bottom lip

Book page: 2(1) Illustrated Fluteplaying Getting Started
1. Putting the headjoint onFirst make sure the surfaces of the joint are clean and free fromgrease — wipe any dirt or grease off with a cloth.
Assembling the flute
Grip the headjoint with your lefthand and hold the body with yourright hand round the barrel, not thekeys. Use a twisting action, don'twaggle or force it on.
Push it right home as far as it will go. (You may need to pull outslightly for tuning — this is explained later.)
Don’t grip the lip-plate — it could come off or bend out of shape.
body
head joint
foot cleaning rod
barrel

Book page: 2(2) Illustrated Fluteplaying
2. Lining up the headjointGet into the habit of lining up every timeyou put the flute together, in exactly thesame position to suit you; you can onlyfind the perfect position for your bestsound after some experience. So at firstline up the middle of the blow-hole withthe middle of the first large hole on top ofthe body — not with the small hole.
First large hole

Book page: 3 Illustrated Fluteplaying Getting Started
3. Putting the foot-joint onHold the body in the left hand,avoiding the keys, by the barrel,and twist the foot-joint on, holdingit firmly round the long rod withthumb of the right hand.
Line up the long rod on the footwith the middle of the last key inthe body.
Assembling the flute
Remember to twist and push —never use a waggling movement,A close air-tight fit is essential —not only will a loose fit meanweak notes, but if the foot-jointworks loose and drops off itcould be badly damaged,needing expensive repairs.
No:
Yes:
Long rod

Book page: 4(1) Illustrated Fluteplaying Getting Started
Keep the joints clean,and never grease themetal — grease attractsdust and dirt, which actas abrasives.
Keep the outside clean with a soft cloth, and occasionallypolish with a cloth impregnated with silver polish, not withliquid polish that might clog up the mechanism.
Always dry the inside of the flute after use to preventmoisture from making the pads spongy or sticky. Use acleaning-rod, not a mop (which has fibres that come off).
Thread a piece of silk or cotton material through the eye ofthe rod and pass it up the headjoint and through theseparated sections of the flute before replacing the flute inits case.
Cleaning the flute

Book page: 4(2) Illustrated Fluteplaying Getting Started
The cleaning-rod should have a notchat one end for checking the corkposition — a wrong cork positionaffects tone and tuning quitedrastically.
Place the rod inside the headjoint tillit touches the cork — the notchshould appear half-way along theblow-hole.
The cork is out of sight between thecrown and the lip-plate. It has a metal
Cleaning the flute (continued)
crown
cork
washer
rod notchlip plate
rod
washer attached at both ends.

Book page: 5.1 Illustrated Fluteplaying Starting to blow
Starting to blowLip work
There are three stages to thisexercise. Sit facing yourmirror:
1. Finger is substituted forflute. Press index finger firmlyagainst soft underside ofbottom lip.
Keep finger STRAIGHT.
2. Feel that your bottom lip isstraight along the length of yourfinger, drooping over it, quitefloppy, and then very slightlystretch your bottom lip at eachend, as in saying “EE”, firmingit slightly.

Book page: 12(1) Illustrated Fluteplaying Starting to blow
Practise blocking the endof the headjoint with yourhand as you play a clearnote, then play with theend open. You may feel aslight muscle change inyour embouchurebetween the two notes.
Experiments with headjoint sounds
Also try making high andlow notes by sliding afinger in and out of theheadjoint as you blow,and allowing yourembouchure to get usedto the tiny adjustmentsnecessary on eachnote.
Remainder of section removed from the
Taster edition ……

Remainder of section removed from theTaster edition ……

Book page: 16 Illustrated Fluteplaying Holding the flute
To hold the flute at the correctangles, and to prevent it fromwobbling about while playing(which would ruin any chanceof controlling the sound), weneed to use the three pressurepoints (shown in the picture byarrows).
Think of the pressures like a see-saw
The pressure points
1. Right thumb2. Left-hand index finger3. Jaws and gums
Push the flute firmly towards youwith the fleshy part of the firstjoint of the left index finger:
You will find that your finger goesa bit red and gets flattened bythe pressure.
Holding the flute
1
2
3

Book page: 17(1) Illustrated Fluteplaying Holding the flute
The jaw keeps a forward pressureagainst the push of the index finger,and the flesh below your bottom lipsquashes against your gums (whichmay ache a bit after playing).
The pressure points (continued)
Using these pressure pointscorrectly allows you to move all theplaying fingers easily and fluentlywithout the flute feeling insecure -there should never be even theslightest unintentional wobble ofthe flute on your lips!
The balanced pressure of jaw against index finger makesit possible to control the delicate lip and jaw movementsneeded for fine tuning and focusing of the sound.

Book page: 17(2) Illustrated Fluteplaying Holding the flute
Furthermore, a strong pressure-hold will improve yoursound - the flute will feel PART of you: when everythingis going right, you’ll get a real sense of being part of thesound, creating it with your whole body.
The pressure points (continued)
The right thumb is placedon the flute so that it canpush away from your rightshoulder, against thepressure of the left indexfinger.
After a lot of playing the thumb may get a bit sore as well, andthe skin might become hardened.
With some fingerings, you might feel that the flute is feelinginsecure unless the pressure- points are being used forexample when playing C-D-E-D-C-D-E-D.

Book page: 18(1) Illustrated Fluteplaying Holding the flute
The best, most focused sound is more easily obtained whenall the holding angles are correct, so that there is noimbalance in the muscles of the embouchure, arms or body,and the blowing can be finely controlled without any strain.
Getting the angles right
1. Flute and body angleThe flute should be pushed away from the right shoulder,the head turned towards the left, with the torso slightlypivoted, again towards the left, at the waist.
There is an angle of about 40° between the line of theshoulders and the line of the flute.
If the flute is held parallel to the shoulders, head heldto the front, neck and shoulder aches will develop andtone will suffer because breathing is affected. (Seepage 51.)

Book page: 18(2) Illustrated Fluteplaying Holding the flute
Don’t get trapped in the sardine tin!
Most players hold the flute at an angledipping slightly downwards rather thanhorizontal, parallel to the floor.
This dipping angle stops the arms fromgetting tired, and keeps the shoulderslow and relaxed (best for goodbreathing).
With the flute up, horizontal, you mayfind your arms, neck and shouldersbegin to ache. tensions develop,breathing is less effective so yourtone suffers.
Yes
No
Getting the angles right (continued)
1. Flute and head angle

Book page: 19(1) Illustrated Fluteplaying Holding the flute
Remainder of section removed from theTaster edition ……

Book page: 20(1) Illustrated Fluteplaying Posture
Posture — the position you playin, either standing or sitting —makes a vital difference tobreathing, tone, and technique.The posture of the whole body isimportant, not just the position ofthe head and arms.
Posture
The flute is designed to beplayed at an angle; for comfortand ease the instrument mustbe held well away from theright shoulder, the head turnedtowards the left, the trunk andlegs adjusting to accommodatethis position.
Good posture standing

PostureBook page: 20(2) Illustrated Fluteplaying
To practise holding the flutecorrectly, stand in a relaxedposition.(1) Imagine the flute is arecorder or clarinet, hold itpointing straight in front like aclarinettist, and bring the fluteup to you (don’t go to IT).
(2) Put it further up, by yourleft ear.
(3) THEN turn your head to theflute, and pull the flute slightlytowards your right arm, andTILT YOUR HEAD WITH THEFLUTE. It may help to leanback, putting your weightslightly more on the right legthan the left.

Remaining contents of this sectionremoved from the Taster edition.

Book page: 26(1) Illustrated Fluteplaying Hand Positions
Hand positions
Some drawings to show hand positions fromdifferent angles
Notice that the hands are held below the flute.
This means that the wrists may be slightly bent at an angleto the arms (players vary in the amount of wrist bending;in this book we illustrate quite a steep angle.)
After an engravingillustratingHotteterre’sPrincipes de laflûte traversière1707 .

Book page: 26(2) Illustrated Fluteplaying Hand Positions
Good hand positions may seem a bit strange at first, butthey will soon become natural, and allow for rapid andrelaxed finger work.
Some drawings to show hand positions fromdifferent angles (continued)

Remaining contents of this sectionremoved from the Taster edition.

Shoulders & ElbowsBook page: 34 Illustrated Fluteplaying
Raised shoulders are often the result of startingto play the flute very young (under 10), when thelength and the weight of the instrument causesthe child to rest the flute on the left shoulder.This can become a habit that causes a lot ofproblems later on. There are flutes with a curvedheadjoint, designed for very young flute players,
which help to eliminate this problem. (See page 74.) Manyyoung players now start on inexpensive plastic fifes which areshort, light, and easy to learn to blow.
No
Always drop the shoulders whenyou play. Dropped shoulders usuallyindicate correct breathing and gowith a good posture.
Shouldersraised, headcraningforward, neckaches, and badtuning results!
Yes
Shoulders and elbows
No

Shoulders & ElbowsBook page: 35 Illustrated Fluteplaying
Keep your elbows away from yourbody (to allow correct breathing andhand positions), but not too high orthe angle of the flute on the mouthwill alter and affect tone and tuning.
A relaxed shoulder position
Try not to be an elbowwaggler. Keep yourelbows still while youplay. If you move yourelbows up (especially theleft one) as you go upthe register; you createmore tuning problems(see page 71(2)) andyou are likely to play witha thinner tone at the top.
Elbows too high
Elbows too close to body
Yes

Remaining contents of this sectionremoved from the Taster edition.

Book page: 36 Illustrated Fluteplaying Tonguing
Tonguing
Every time you blow a note on the flute (when you are learningto make a good sound), you should first take a good breath (asdescribed on page 46, 47), and feel all the exhaling musclespushing a strong air stream against the resistance created
Think of the tongue actionas a bit like a flag waving inthe breeze…
…and not as a series ofshort bursts, as in morsecode.
by the embouchure. Practise short repeatednotes making a firm attack on each note, asin saying "Huh, huh, huh", making adeliberately violent inward tummy movementfor each note. This action (less violentusually) is really 90% of the work involvedin tonguing! The tonguing movementdescribed on page 37 is merely a finaladdition to this attack from the breath.

Remaining contents of this sectionremoved from the Taster edition.

Book page: 40 Illustrated Fluteplaying

Book page: 41 Illustrated Fluteplaying
Part IIBreathing, dynamics and tuning,vibrato and blowing problems in
greater detail.

Book page: 42(1) Illustrated Fluteplaying Breathing
Breathing
Breathing properly is the most important part of playing any windinstrument, and this is particularly so with the flute. Unlike itsneighbours in the orchestra (the oboe, clarinet, and bassoon), theflute has no reed, nor has it a small aperture or mouthpiece toblow through. In reed instruments the very small opening betweenthe reed and mouthpiece as in the clarinet, or between the doublereeds in the oboe and bassoon, creates a built-in resistance.Players of this kind of instrument can sustain their playing for longperiods, often having to get rid of unused “stale” air in their lungsbefore taking another breath. It would be difficult for a flute playerto play for equally long periods in one breath because theinstrument itself doesn’t provide much resistance at all; there is noreed to vibrate, only a fixed edge to blow against. A player has tocontrol the flow of air and its strength andspeed entirely with the muscles of hisembouchure and breathing apparatus. Mostbeginners find themselves running out ofbreath after a few moments because theycan’t yet control these muscles properly —the air comes rushing out all over the place.Very often they tend to blow too hard, andthe lack of control makes them feel dizzy,and the sound produced (if any!) is weak,woolly and unfocused.

Book page: 42(2) Illustrated Fluteplaying Breathing
It is most important to understand that you never need toblow really hard to get the flute to "speak" either for verysoft or very loud playing.
What happens when you blow a note is that themolecules of air already in the flute get "excited" by theturbulence caused by the activity of the air-jet and theybump into each other in a particular way so that thewhole column of air in the instrument vibrates. Most ofthe air comes out of the blow hole, hardly any of the aircomes out of the tone holes or the foot end (in fact,the amount is so small it can be ignored). Blowing theflute is not like blowing a pea-shooter: you don’t blowthrough the instrument, you "drive" it by the fine controlof the air-jet, which acts as the "motor". In an oboe thedouble reed is the motor; in a flute it is the air-jet.
A good player shows that it’s not the amount of air youblow that makes a beautiful sound, but the control of thesize, speed and direction of the air-jet. This control isclosely linked to correct breathing.

Book page: 43(1) Illustrated Fluteplaying Breathing
Most people only use a very small fractionof their total lung capacity for ordinary,everyday breathing — we breathe in asmooth, quiet, effortless way thatobviously requires no conscious thought.When we need to burn more oxygenduring some strenuous physical activitywe instinctively use the appropriatemuscles to inflate the lungs more fully,and this again is a natural, built-inprocess.
If you go for a quick run and then stand still,out of breath, consider what’s happening:you pant heavily, mouth open, with a heavingchest and expanding tummy and lower backarea, drawing as much air in as possible toadjust to the body’s needs.

Book page: 43(2) Illustrated Fluteplaying Breathing
Flute-playing is not usually regarded as a strenuousphysical activity, but correct blowing requires so muchbreath control that the same areas of muscle that cometo the rescue automatically after a run must be calledon to support the air supply.
At first this must be learned, and done in a consciousway. You may see a good player looking completelyrelaxed and playing with hardly any apparent effort, buthe will nevertheless be using the whole range ofbreathing muscles (without thinking about them) to makethe flute respond. Only after a while does this deeperbreathing become as natural as everyday breathing,letting you switch to “automatic pilot” for breathing, toconcentrate on the music.
At first you must also concentrate on what is happening toeach bit of your body as you breathe, to check that it’sdoing the proper job with the whole body involved inbreathing, not just the lungs.

Book page: 44(1) Illustrated Fluteplaying Breathing
lungs
diaphragmraised
Afterbreathingout
diaphragmlowered
Afterbreathingin
Notice the position of thediaphragm. The diaphragm is,roughly speaking, a muscularsheet separating the thorax(which contains the rib-cageand lungs) from the abdomenor belly. The thorax andabdomen are two sealedcompartments; there is noconnection between them, thediaphragm being the seal. Indeep breathing the diaphragmcan be moved down so that itacts like a piston or plungerinside the body.
This simplified diagram showsthe most important parts of thebody that control breathing:

Book page: 44(2) Illustrated Fluteplaying Breathing
When breathing in deeply, the downward movement ofthe diaphragm creates a partial vacuum in the thorax,which causes the lungs to expand, pulling air into themdown the windpipe. The lungs are like balloons or rubbersponges that can be inflated fully (but which prefer to bedeflated under their own elastic power).
When breathing out, the diaphragm returns to its usualposition, and there is no longer any vacuum in the cavityof the thorax, so the lungs deflate under their ownelasticity, and air is expelled through the windpipe.
diaphragm
Plunger movesup as air isexhaled.
Plunger movesdown as air isinhaled.

Book page: 45(1) Illustrated Fluteplaying Breathing
Although we also use many othermuscles to control breathing, thisplunger-like movement of thediaphragm is by far the most importantfactor. The trouble is, you can’t seethe diaphragm like you can see yourbelly or chest muscles — you onlyknow you’re using it properly by theway in which it affects other areas.Sneezing, coughing, laughing orcrying are activities that call on helpfrom the diaphragm. You can also feelyourself breathing with the diaphragmif you go for a run and then, standingstill and straight, concentrate onbreathing while keeping everything inyour body completely still, includingyour belly and chest: the diaphragmwill be working hard to keep the airflowgoing. (If it didn’t, you would be dead).

Book page: 45(2) Illustrated Fluteplaying Breathing
You can also try lying down, holding the chest still, andwatch your abdomen rise and fall with each breath. Asthe diaphragm descends for the intake of air it pushesthe contents of the abdomen out of the way (things likethe liver, stomach, gall bladder), and this causes theelasticated walls around your midriff to push outwards.When you breathe out, the upward movement of thediaphragm allows the abdomen to return to its previousposition and the tummy-area moves inwards.
So it is important to let the abdominal muscles remainrelaxed while you breathe in, to allow the diaphragm topush the abdomen contents out of the way. If you try tobreathe in using the “tummy muscles” (the musclesused in sit-up exercises), you constrict the movementof the diaphragm and so prevent enough air fromentering the lungs. Of course, the muscles round thetummy, midriff and back area are used to help supportthe expansion of your body as you breathe in, and thechest muscles and the muscles between the ribs arealso important, but secondary to the main control, theaction of the diaphragm, so abdomen muscles aresupportive but not rock-hard.

Book page: 46(1) Illustrated Fluteplaying Breathing
More detail about the breathingprocess
To breathe in, breathe through themouth, not the nose (unless you areadvanced enough to practise “circularbreathing”), keeping a relaxed, openthroat, as in yawning, or in saying asilent “aahh”, but not as in gargling.
There are really three stages to breathing in, each onefollowing rapidly after the one before. Start the intake ofair from the tummy area, and build it up from there.
Open
(as in yawning…
but not as in gargling)
Breathing IN

Remaining contents of this sectionremoved from the Taster edition.
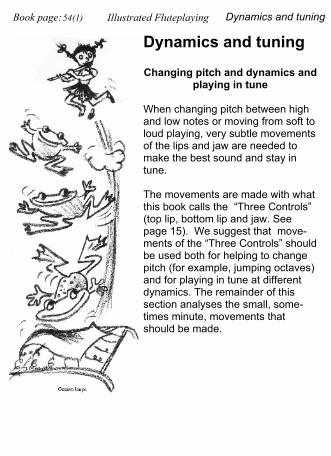
Book page: 54(1) Illustrated Fluteplaying Dynamics and tuning
Dynamics and tuning
Changing pitch and dynamics andplaying in tune
When changing pitch between highand low notes or moving from soft toloud playing, very subtle movementsof the lips and jaw are needed tomake the best sound and stay intune.
The movements are made with whatthis book calls the “Three Controls”(top lip, bottom lip and jaw. Seepage 15). We suggest that move-ments of the “Three Controls” shouldbe used both for helping to changepitch (for example, jumping octaves)and for playing in tune at differentdynamics. The remainder of thissection analyses the small, some-times minute, movements thatshould be made.

Book page: 61(2) Illustrated Fluteplaying Dynamics and tuning
Remaining contents of this sectionremoved from the Taster edition.

Book page: 62(1) Illustrated Fluteplaying Vibrato
VibratoWhen the correct method of breathing forplaying the flute has been learned andbecome natural, controlling a beautifulvibrato becomes comparatively easy tomaster. (It is also true that people whohave difficulty in taking sufficient breaths ina short moment usually find their breath-control improves once they start learninghow to produce a good vibrato.)
Vibrato is the wave-like singing orthrobbing of sound around the central coreof each note, heard in practically allcontemporary string-playing and in mostflute-playing (although music up to thebeginning of the 19th Century seldom callsfor vibrato of the kind described here).

Remaining contents of this sectionremoved from the Taster edition.

Book page: 66(1) Illustrated Fluteplaying Blowing Problems
Blowing problems
Almost all tone problems areconnected in some way to faultsin breathing, embouchurecontrol, or posture, and only afew are caused entirely bysome anatomical or physicalirregularity in the muscles roundthe mouth, in the lips, teeth, orjaw. It is nearly always possibleto improve one’s sound, if thecause of the problem has beenidentified.
You canimprove yoursound whenyou have foundthe cause ofyour problem.
Don’t sound like a magnified mosquito

Book page: 66(2) Illustrated Fluteplaying Blowing Problems
Remaining contents of this sectionremoved from the Taster edition.

Book page: 76 Illustrated Fluteplaying Blowing Problems
Conclusion
We hope that you have found this book a usefulcompanion to your flute playing, helping to giveyou a firm foundation for a good technique andan expressive sound ― a sound that is uniquelyyour sound. All the hard work involved inregular and concentrated practise of toneexercises, scales, studies and so on will pay offin the end, provided you are fully aware of howand why the breathing, posture, fingers, vibratoetc. must be in complete control.
This book is both an introduction to thesematters, and a guide which can be used forreference even at quite an advanced stage: fluteplayers are always aiming to improve theirsound, which is one of the most enjoyable (andoften frustrating!) challenges of learning theinstrument.

Book page: 77 Illustrated Fluteplaying Index
IndexThis index lists page numbers that are shown on the top left ofevery page. These page numbers are the same in the e-book andthe printed versions of the book. However, as the pages aresmaller in the e-book, some pages are split into parts. These arenumbered with a suffix one, two and so on thus 70(1), 70(2) andso on. This index leads you only to the main page number not thesecondary pages so you may have to turn a few pages to find thecorrect passage.
Aabdomen, twisting 52abdominal breathing 49abdominal muscle control63,64, 71,45, 47aching
muscles 24neck 21, 33shoulder 18
air jetsize 6, 7strength 59speed of 15, 54, 55, 58,60angle 66, 69angle and tuning 57control 36-39, 73experiments 5shaping 56under pressure 54
air noise 68
air, passing down windpipe 47altering pitch 59anatomical reasons for poor tone72angles for playing
body angles 18chair and stand angles,
when sitting 24elbow angle 35flute and body angle 18flute and lip angle 19flute to mouth angle 35head angle 18, 67trunk angle 24under arm angle 33wrist and arm angle 31
angle of air-jet 59, 67, 69apple (imaginary) in left hand27, 30armhooker 25arms 25, 34, 35arpeggio exercises 72assembly of flute 2,3

Remaining contents of thissection removed from the Taster

Book page: Illustrated Fluteplaying
Robin SoldanRobin Soldan is one of Britain’s leading flute teachers. Afterstudying at the Guildhall School of Music in London, heworked as a flute teacher and performer for several educationauthorities in the UK. He is now a freelance player andteacher, travelling extensively to take master classes, giverecitals and organize flute events. He has been the senior fluteteacher at four specialist music courses including the Wells
The authors - Robin Soldan & JeanieMellersh

Book page: Illustrated Fluteplaying
Cathedral School and Peter Symonds College inWinchester, and he was the Head of Woodwind atSouthampton University.He organized the annual Flute Teachers’ Course for manyyears on behalf of the British Flute Society, and he is theauthor of a number of other recent books on flute technique- Flute Fingers (PEM) and Fit Fluteplaying. His 60- strongflute orchestra “Flautissimo”, as well as a number of otherflute ensembles, have regularly appeared at the SchoolProms on TV and have collected many awards.
Jeanie MellershJeanie Mellersh studied at Liverpool College of Art whereshe was noted for her brilliant drawing and won ascholarship to study in Italy. Her talent for flute illustrationswas discovered when James Galway was shown hersketchbook, and she went on to provide the instructionalillustrations for his book “Flute”.In Illustrated Fluteplaying she has gone very much further.Together with her flute teacher Robin Soldan, she hassucceeded in illustrating aspects of flute playing that havenever before appeared in print.Jeanie has recently illustrated two books for parents ofspecial needs children, Stepping Out, and Small StepsForward. Her illustrations, and other work, can be seen atwww.mellersh.org
The authors can be contacted via the website atwww.illustrated-fluteplaying.com

Latest endorsements for the e-bookedition
Andrew Nicholson: Principal Flute West AustraliaOrchestra, Hallé Orchestra, Royal Philharmonic Orchestraand player on our video. (Listen again.)
“Illustrated Fluteplaying e-book... what a great idea!!…....the book is fantastic, and I have got most of mystudents over the years to purchase it. It is aninvaluable tool”
GarethMcLearnon: International flute soloist
“What a wonderful resource for flute players andteachers all over the world! I have always regarded“Illustrated Flute-Playing" as such a charming andinformative book - using beautiful diagrams, helpful,imaginative analogies complimented by clear,explanatory text - but now that it has been released indigital format it is easily available all around the worldin seconds! Bravo to all involved!"
Dr September Payne: Flute Professor, San Diego State,Emeritus
"Illustrated Fluteplaying is fantastic and valuablebook.…the new, easy to use e-book version make thisalready wonderful learning tool handy for the practiceroom and one’s gig bag. ”

Book page: Illustrated Fluteplaying
Endorsements and reviews from print edition
James GalwayThis book is wonderful. I think it is one of the most originaland interesting books on the flute. It is very instructive andwill be an invaluable aid to all fluteplayers.This book by Robin Soldan and Jeanie Mellersh is a mostoriginal treatise on the use of the body in the art of playing theflute. Jeanie Mellersh’s illustrations are informative andamusing with very good accompanying text. Robin Soldanhas certainly employed all his wide experience andknowledge in producing a very accurate and readable book. Iwould say that this book would find a very important place inthe library of every flutist, young, old, amateur or professional.It is a manual no one who is serious about the flute should bewithout, and a boon to teachers world-wide.
Atarah Ben TovimSince it was first published this book has always been myflute bible.
Robin De Smet, Music Business (UK)The authors have a knack of getting to the heart of a problemand prescribing a remedy that is so obvious and simple thatone wonders why on earth no one has thought of putting itthat way before. Whether you are a beginner or a teacher thisbook will he sure to have something for you. It is a uniqueand valuable publication .... Heartily recommended.

Book page: Illustrated Fluteplaying
Wally Horwood, Journal of the British Association ofSymphonic Bands and Wind Ensembles (UK) JeanieMellersh’s pencil drawings are superb in illustrating lip, finger,tongue and diaphragm positions together with all aspectsinvolved in handling the flute. Clarity is such that this is surelythe next best thing to a personal demonstration from anexpert teacher ... An ideal companion whether working with ateacher or alone.
Mark Underwood, Times Educational Supplement (UK)Seldom have I seen a more clearly, copiously andimaginatively illustrated book. As a flute player and teachermyself, I can scarcely think of a better companion book toregular tuition or a more welcome substitute in its absence.The publishers claim that it is for everyone who has a flute ishardly overstated.
William Dyer, Journal of the Finnish Flute Society(Finland)... Marcel Moyse ... investigations and discoveries ... FransVester Catalogue ... Now another book has been publishedthat stands, in originality, a comparison to the above works ...it is a book which is intended to explain to the beginner thephysical side of playing the flute. There are over 350illustrations, which almost without exception, clearly explainwhat they intend to do ... The text is simple, but notchildish ...Too many flute methods simply present exercisesand pieces, but this book teaches the beginner to think forhimself ... So the beginner shows up for his first lessons.Under one arm is, of course, his flute, and under the other,his first flute school, a collection of little pieces, and

Book page: Illustrated Fluteplaying
Illustrated Fluteplaying.
Trevor Wye, Pan - Journal of the British Flute Society (UK)A wealth of good advice is contained here ... the book answersmany of the basic questions in a practical and helpful way.
Lis Lewis, Pan 2006This beautifully-produced book is an essential tool andcompanion for flute players (of all standards).
Dr Mary Jean Simpson, New Flute Review (USA)A completely different approach, presenting solid informationon basics and more advanced techniques with delightfulartistically done illustrations. Covers everything from basicplaying position to minute lip movements ... Lots of humourthrown in, making the book entertaining as well as informative.This 81-page text is an excellent teaching and learning aid.

Visit Illustrated-fluteplaying.com for moreInformation.