ii 2g t4 ii c d110ºc model no. rd130c - welcome to the ... 8 original version june 2011 1 pneumatic...
TRANSCRIPT

Issue 8 Original version June 2011
1
PNEUMATIC MAGNETIC DRILLING MACHINE MODEL
II 2G T4 II C D110ºC
Model No. RD130C
This machine (Serial No ) is CE approved.
Rotabroach Ltd Imperial Works, Sheffield Road
Sheffield, South Yorkshire United Kingdom
S9 2YL Tel: +44 (0) 114 2212 510 Fax: +44 (0) 114 2212 563
Email: [email protected] Web site: www.rotabroach.co.uk
Issue 8 Original Version June 2011
2
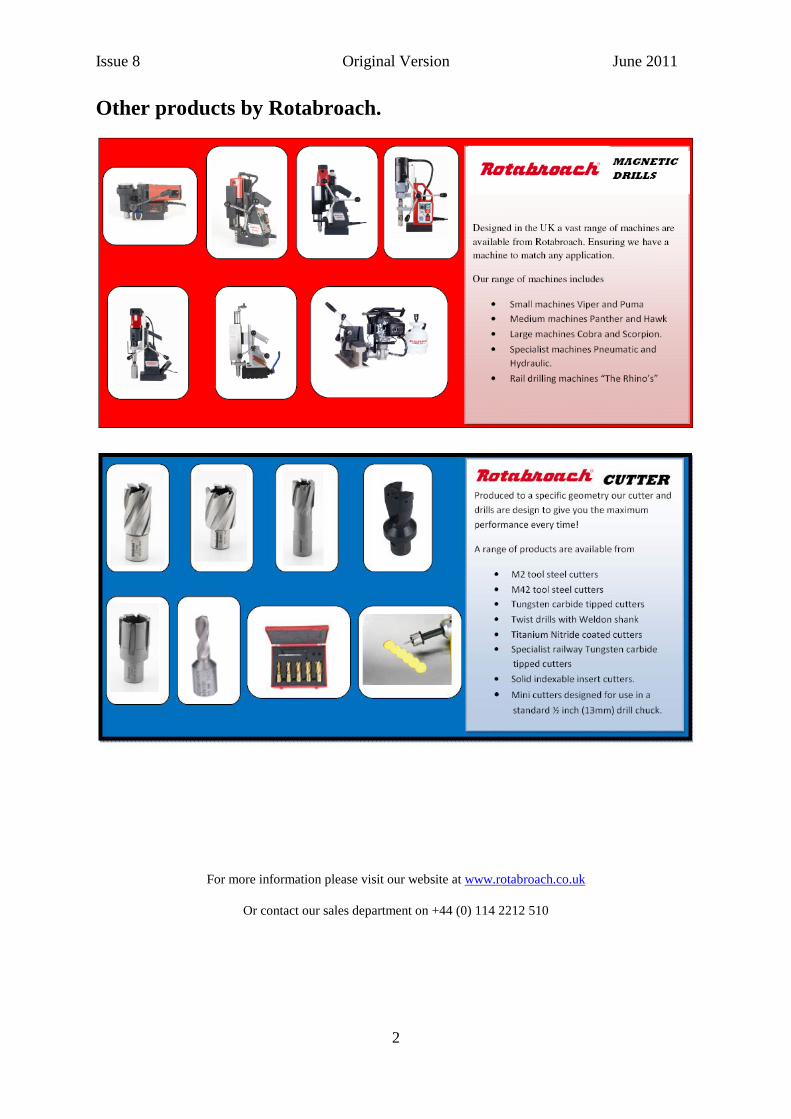
Other products by Rotabroach.
For more information please visit our website at www.rotabroach.co.uk
Or contact our sales department on +44 (0) 114 2212 510

Issue 8 Original Version June 2011
3
CONTENTS OF THE MANUAL
[1] Specification of machine [2] General procedure and safety measures [3] Operating instructions [4] Mounting of cutters [5] Remedies for hole making problems [6] Component parts of complete machine [7] Exploded view [8] Atlas-Copco Motor [9] [10] [11] [12]
Optional Extras Maintenance (general) Pipe Adaptor Kit Warranty
List of contents with drill unit Check List
RD4329 Safety strap YES/NO RD4088 4mm A/F Tee handled hex key YES/NO RD4367 Pipe Adaptor Fixing Strap YES/NO

Issue 8 Original Version June 2011
4

Issue 8 Original Version June 2011
5
[1] SPECIFICATION ROTABROACH PNEUMATIC/MAGNETIC DRILLING MACHINE MODEL NO. RD130C - MICRO-AIR
II 2G T4 II C D110ºC Maximum hole cutting capacity in .2/.3C steel 52mm dia., 52mm deep. Arbor bore 19.05mm dia. (3/4" dia.) Motor Unit: ATLAS COPCO Speed 160 rpm Magnet: Manually operated
Tractive force at 20°C (25mm minimum plate thickness)
700kgs
Overall dimensions: Height (max. extended) Width (inc. capstan arms) Overall length (inc. guard and magnet handle)
540mm 175mm 370mm
Nett weight: 20.6.00kgs Air supply required: Pressure
Minimum volume:
5.5 Bar (80 psi) min. 6.9 Bar (100 psi) max.
13 litres/sec 28 cu/ft/min
0.8 cu.m/min Sound pressure level (Ear protectors must be worn). 78 dB(A)
3/8" B.S.P. Male Connection Point Note: This machine contains aluminium, and should not be used in any environment where the use of aluminium is prohibited, or may constitute a hazard, without the specific approval of an authorised person. An in-line filter and lubricator must be used prior to the drilling unit and at a distance not greater than 5m. To achieve optimum service life and performance, lubrication should be applied at a rate of 50 cubic mm. of oil for each cubic metre of air consumed. Depending upon the type of supply fittings used, it may be necessary to vent the supply to be able to disconnect the drill unit from the supply. The motor should be purged with light lubricating oil after use.
NB: ANY MODIFICATIONS TO THIS MACHINE WILL INVALIDATE THE GUARANTEE

Issue 8 Original Version June 2011
6
[2] SAFETY PROCEDURES READ BEFORE USING THE MACHINE Always secure the machine with the safety strap RD4329 before starting to operate - for the user's protection in case the magnetic base breaks loose whilst in use. Failure to do so may result in personal injury.
Always wear approved eye and ear protection when the equipment is in operation. .Failure to do so may result in personal injury.
Disconnect from pneumatic supply source when changing cutters or working on the machine. Ensure that the Air supply is connected after positioning the machine.
Never pick the machine up by the cutter as this is sharp and may injure you.
Always ensure cutter retaining screws are secure.
Regularly clear the work area and machine of swarf and dirt, paying particular attention to the underside of the magnet base.
With a gloved hand, and after switching off, remove any swarf, which might have gathered around the cutter and arbor before proceeding with the next hole.
Before operating the machine, remove tie, rings, watches and any loose adornments, which might entangle with the rotating machinery.
Ensure that the magnet is fully activated before attempting to cut a hole.
Should the cutter become ‘fast’ in the work piece, switch off the motor immediately to prevent personal injury. Disconnect from the pneumatic supply and turn arbor to and fro. Do not attempt to free the cutter by switching the motor on and off.
If the machine is accidentally dropped, always thoroughly examine the machine for signs of damage and check that it functions correctly before trying to drill a hole.
Regularly inspect the machine and check that all nuts and screws are tight.
Cutting tools may shatter always extended the guard over the cutter during the drilling operation. Failure to do so may result in personal injury. When moving the machine ensure the guard is over the cutter failure to do so may cause injury.
On completion of the cut, a slug will be ejected. DO NOT operate the machine if the ejected slug may cause injury.
Ensure an adequate supply of coolant is supplied to the cutter during the cutting cycle.
Manual handling
When moving the machine always ensure that you use the carry handle on the machine failure to do so may cause damage to the machine. Never pick the machine up by the cutter as this may cause injury.
Caution this machine is heavy and may require help manoeuvring especially when working overhead.

Issue 8 Original Version June 2011
7
[3] OPERATING INSTRUCTIONS Before connecting the pneumatic supply ensure the motor switch is in the OFF position.
Locate the machine in the required position for cutting the hole and activate the magnet by means of the ratchet handle (clockwise viewed from rear). Ensure that magnet rod is fully screwed home.
Keep the inside of the cutter clear of swarf - it restricts the operating depth of the cutter.
Apply the cutting fluid to the reservoir via the inducement slots in the arbor. It is then «metered» out by the pilot and is applied directly to the cutting edge. (Alternatively, fluid can be applied directly on to the work piece making certain that it floods into the groove formed by the cutter.)
Depress the pilot to ensure cutting fluid is being correctly metered.
Start the motor by turning the rotary valve to ON position see below
Apply light pressure when commencing to cut a hole until the cutter is introduced into the work surface. Pressure can then be increased sufficiently to load the motor. Excessive pressure is undesirable when using the Rotabroach Micro-Air machine, it does not increase the speed of penetration and may cause the motor to stall. The motor will restart when the excessive pressure is released.
Always ensure that the slug has been ejected from the previous hole before commencing to cut the next.
If the slug sticks in the cutter, move the machine to a flat surface, switch on the magnet and gently bring the cutter down to make contact with the surface. This will usually straighten a cocked slug and allow it to eject normally.
Apply a small amount of light oil lubricant regularly to slide and arbor support bearing. Cutter breakage is usually caused by insecure anchorage, a loosely fitting slide or a worn bearing in the arbor support.
On Position Off
Position

Issue 8 Original Version June 2011
8
If the slug sticks in the cutter, move the machine to a flat surface, switch on the magnet and gently bring the cutter down to make contact with the surface. This will usually straighten a cocked slug and allow it to eject normally.
Apply a small amount of light oil lubricant regularly to slide and arbor support bearing. Cutter breakage is usually caused by insecure anchorage, a loosely fitting slide or a worn bearing in the arbor support. (Refer to routine maintenance instructions.)
[4] MOUNTING OF CUTTERS The following procedure is to be used when mounting cutters.
ALWAYS DISCONNECT MACHINE FROM PNEUMATIC SUPPLY Lay the machine on its side with feed handles uppermost, ensuring arbor is wound down to its lowest point to enable access to socket screws RD4066. Take the appropriate pilot and place through hole in shank of cutter. Insert shank of cutter into arbor ensuring alignment of two drive flats with socket screws RD4066. Tighten both screws securely using hexagon key RD4088.
[5] REMEDIES FOR HOLE MAKING PROBLEMS
Problem Cause Remedy Magnetic base won't hold effectively
Material being cut may be too thin for efficient holding Swarf or dirt under magnet Irregularity on contact between magnet and work piece
Attach an additional piece of metal under work piece where magnet will be located, or mechanically clamp magnetic base to work piece Clean magnet Use extreme care, file only imperfections flush on to surface
Hole not cut at intended centre of cut
Magnetic base is not holding effectively Worn arbor bushing and/or ejector collar Too much feed pressure at start of cut Cutter is dull, worn, chipped or incorrectly sharpened Worn or bent pilot, worn pilot hole Loose bolts on motor bushing support bracket, main casting or loose gib adjusting set screws
See causes and remedies above Replace! Only a few thousandths wear permissible. New arbor bushing is needed Light pressure until a groove is cut. The groove then serves as a stabilizer Replace or re-sharpen. Sharpening service is available Replace part or parts Adjust where necessary

Issue 8 Original Version June 2011
9
Poor hole quality, cutter not cutting, motor stops
Incorrectly re-sharpened, worn or chipped cutter Coming down on swarf lying on surface of work piece Insufficient air pressure/volume Gibs out of adjustment or lack of lubrication Swarf accumulated (packed) inside cutter
Re-sharpen or replace Take care not to start a cut on swarf Check air supply Adjust set screws Clear cutter
Excessive cutter breakage Steel swarf or dirt under cutter Incorrectly re-sharpened or worn cutter Cutter skipping Slideway needs adjustment Cutter not attached tightly to arbor Insufficient use of cutting oil or unsuitable type of oil
Remove cutter, clean part thoroughly and replace Always have a new cutter on hand to refer to for correct tooth geometry, along with instruction sheet See cause and remedy above Adjust gibs Retighten Inject oil of light viscosity into he slot in the arbor and confirm oil is being metered into cutter when pilot is depressed. Check pilot groove and arbor internally for dirt or apply oil externally.
Excessive cutter wear See cause and remedy above Incorrectly re-sharpened cutter Insufficient or spasmodic cutting pressure
Refer to instructions and a new cutter for proper tooth geometry Use sufficient steady pressure to slow the drill down. This will result in optimum cutting speed and chip load
Motor will not start Insufficient air pressure/volume Check air supply, spindle free to rotate

Issue 8 Original Version June 2011
[6] PARTS LIST - RD130C
Item Component Part No QTY Item Component Part No QTY
1 Motor Packing RD3388 1 33 M6 Spring Washer RD4207 1
2 Magnet RD43100 1 34 M6 Socket Head Screw RD4098
1
3 Motor RD43105 1 35 Capstan Arm RD33089 3
4 Housing RD3380 1 36 Plastic Knob RD43091 3
5 Slide RD3381 1 37 M6 Socket Screw RD4312 4
6 Motor Bracket RD3357 1 38 Tension Pin RD4102 2
7 Rack RD3350 1 39 Name Plate RD33142 1
8 Fixed Gib Strip RD33103 1 40 Information Plate RD4362 1
9 Adjustable Gib Strip RD33104 1 41 Identity Plate RD33135 1
10 Gib Support Strip RD33105 1 42 Guard RD3397 1
11 Spirol Pin RA353 1 43 Guard Bracket RD33000 1
12 Thrust Washer RA401 2 44 M3 Socket Head Screw RD4103 2
13 Nylon Bearing RD350 1 45 Spring Plunger RD4346 2
14 Arbor Sleeve RD3396 1 46 3/8" BSP M & F Elbow RD43020 1
15 Bearing Bracket RD3389 1 47 3/8" BSP Ball Valve RD43021 1
16 External Circlip RD4320 1 48 Silencer RD4355 1
17 Key RD3355 2 49 Hex Adaptor RD4389 1
18 M5 Shakeproof
Washer RD4092 2 50 Ratchet Handle * RD43104
19 M6 Shakeproof
Washer RD4096 8 51 M6 Socket Head Cap Screw RD4156
20 M5 Socket Head
Screw RD4325 2 52 M6 Washer RD33030
21 M6 x 55 Socket
Head Screw RD4394 4 53 Adaptor RD33025 1
22 M6 Stud RD4340 4 54 Button RA354 1
23 M4 Shakeproof
Washer RD4069 8 55 Spring RA355 1
24 M4 Panhead Screw RD4077 8 56 Arbor RD33021 1
25 M8 Washer RD4078 2 57 Circlip RD4056 1
26 M8 Shakeproof
Washer RD4079 2 58 M8 Socket Screw RD4066 2
27 M6 Nut RD4087 4 59 Pole Piece Set RD43047
28 M6 Washer RD4095 4 60 M5 x 15 Countersink Socket Screw RD4347
29 M8 Socket Head
Set Screw RD4402 2 61 M8 Dog point RD43135 2
30 Capstan Pinion
Shaft RD33088 1 62 Washer RD43136 1
31 Pinion Shaft Sleeve RD33090 1 63 Bearing Bracket Spacer RD3248 1
32 Nyliner Bearing RD4313 2 64 M5 countersink RD4347 2
65 Magnet Washer RD33030

Issue 8 Original Version June 2011
[7] EXPLODED VIEW – RD130C

Issue 8 Original version June 2011
13
[8] ATLAS-COPCO MOTOR Three-stage gear unit - for A0030

Issue 8 Original Version June 2011
Ref No. Part No Qty Description
39 (40-42) 40 41 42 43 44 45 46 47 48 (49-50) 49 50 67 68 69 113(114-120) 114 117 118 119 120 121 122 123 (124-127) 124 125 126 127 128 129 96 (97-98) 97 98 106 107 111 112
4430 0563 80 -
4090 0704 00 0335 3508 01 4430 0559 00 0666 8003 05 0337 2622 00 0502 3304 00 4430 0562 00 4430 0492 80
- 4090 0588 00 4430 0554 00 4170 0505 00 0663 9026 00 4430 0547 80
- 4210 2214 00 0517 0100 05 4210 2213 00 4210 2215 00 0502 1504 00 4210 2220 00 4430 0549 80
- 4430 0467 00 0515 1103 01 0517 0100 11 0502 1103 00 4430 0557 00 4430 0484 80
- 0517 0100 13 0515 0100 13 4430 0475 00 4430 0556 00 4430 0474 00
1 1 1 1 1 1 1 1 1 1 1 1 1 1 1 1 1 1
48 6 3 1 1 1 1 3 3 3 1 1 1 1 3 3 3 1
1
Gear rim complete Gear rim (z = 47) Lubricating nipple Circlip (SB45) Front part Seal ring (G30 x 37 x 4) Key (R6 x 6 x 30) Ball bearing (6304-Z) Nut Gear rim complete Gear rim (z = 45) Circlip (BR35) Washer Cup spring O Ring (40 x 1.78) Planetary gear complete (i = 4.62) Planet shaft (Ø19mm) Gear wheel (z = 15) Bearing needle (1.5 x 13.8) Washer (6.3/9.1 x 0.5) Axle pin (6.22h6 x 23.5) Ball bearing (16004) Bushing Planetary gear complete (i = 4.46) Planet shaft (z = 13) Gear wheel (z = 15) Needle bearing (K5 x 8 x 10 TN) Bearing roller (NRB 5.0 x 19.8) Ball bearing (6003) Washer Planet shaft complete (i = 3.25) Planet shaft (z = 13) Bearing roller (NRB 3.0 x 17.8) Needle bearing (K3 x 5 x 9 TN) Gear wheel (z = 12) Washer Gear wheel (z = 11/20)

Issue 8 Original Version June 2011
[9] OPTIONAL EXTRAS ROTABROACH CUTTING FLUID ROTABROACH CUTTING FLUID has been Formulated to give maximum life to your ROTABROACH CUTTERS RD208 Available in three sizes: RD208 1 litre RD229 5 litres RD220 25 litres
CHUCK RD4189 1/2” capacity chuck + key RD4190 Chuck key RD324 Chuck spacer This chuck can only be fitted to drill units having a 5/8”-16 UNS output spindle nose. Remove the bearing bracket, sleeve and arbor or any Other fittings. Place spacer RD324 onto the spindle, screw the chuck tightly against the spacer and lock into position. When refitting the arbor assembly, care must be taken to ensure correct alignment to the vertical axis and that it is running concentric.

Issue 8 Original Version June 2011
[10] Tips for keeping your machine in correct working order. In order to ‘get the best life’ out of your Rotabroach machine always keep in good working order. A well maintained machine is a happy machine. A number of items must always be checked on Rotabroach machines. Always before starting any job make sure the machine is in good working order and that there are no damaged or loose parts. Any loose parts must be tightened. Before proceeding with any maintenance work be certain that the Pneumatic supply is disconnected Description Every operation 1 week 1 Month Visual check of machine for damage
X
Operation of machine
X
Check magnetic base
X
Check alignment of the machine
X
Visually check the machine for damage. Machine must be checked before operation for any signs of damage that will affect the operation of the machine. Particular notice must be taken of the mains cable, if the machine appears to be damaged it should not be used failure to do so may cause injury or death. Check operation of the machine. The machines operation must be checked to ensure that all components are working correctly. Magnetic base – before every operation the magnetic base should be checked to make sure that the base is flat and there is no damage present. An uneven magnet base will cause the magnet not to hold as efficiently and may cause injury to the operator.

Issue 8 Original Version June 2011
Adjustment of slide and bearing bracket Alignment. An essential requirement of the machine is that the slide can move in a smooth and controlled manner, free of lateral movement and vibration. This situation can be maintained by periodic adjustment of the slide and is accomplished in the following manner:
1. Place the machine in an upright position and, by means of the capstan, raise the slide to its highest position. Clean the brass gib strips and apply a small amount of light machine oil to the wear surfaces.
2. Now lower the slide back to its lowest position. Bring the slide into the centre of the dovetail slide housing and loosen screws thus allowing free movement of the arbor support bracket.
3. Commencing with the middle screws, gently feed in all the screws until slight resistance is encountered.
4. Operate the slide up and down a few times to test the movement and make any further necessary adjustments. Try to ensure that all the screws are exerting a uniform pressure on the slide from top to bottom. A perfectly adjusted slide will operate freely up and down without any sideways movement.
5. Now raise the slide to its highest position. Slightly undo the arbor bearing bracket and, using fingers only, tighten the screws.
6. Place the machine on a steel plate, connect to supply and switch on magnet. Start up the motor. If the arbor is incorrectly aligned, the arbor support bracket will be seen to oscillate. Make any necessary further adjustments to the bracket to ensure correct alignment of the spindle and finally tighten the screws using a spanner. Lastly tighten the arbor bearing bracket.

Issue 8 Original Version June 2011
[11] PIPE ADAPTOR KIT RD2311
FITTING INSTRUCTIONS • Dependent upon the size of the pipe to be cut (see illustrations) attach adjustable angle plates
RD3328 with cap screws RD4325 and washers RD4205 (4 off each) to the magnet sides. Do not tighten.
• Locate the machine on the centreline pipe taking care that the magnet is in line with the
longitudinal axis of the pipe. • Switch on the magnet and move the sliding plates down to the outside diameter of the pipe.
Tighten the screws on both sides by hand then check once again that the full length of the moving plates is touching the pipe at the front and back, fasten the plate securely. Feed the safety strap through the lugs at the front of the housing, around the pipe and pull tight.
• When cutting the hole DO NOT use excessive pressure but rather let the cutter ease into the
cutting surface.

Issue 8 Original Version June 2011
Notes:

Issue 8 Original Version June 2011
Issue 8 Original Version June 2011
WARRANTY STATEMENT Rotabroach® warrants its machines to be free from faulty materials, or workmanship under normal use for a period of 6 months from initial date of purchase and 90 days for all other parts (excluding cutters), provided that the warranty registration card (or online registration) has been completed and returned to Rotabroach®, or its designated distributor within a period of (30) days from the purchase date, failure to do so will void the warranty. If the stated is adhered to Rotabroach® will repair or replace (at its option) without charge any faulty items returned. This Warranty does not cover: 1. Components that are subject to natural wear and tear caused by the use in accordance with the operators instructions 2. Defects in the tool caused by non-compliance with the operating instructions, improper use, abnormal environment conditions, inappropriate operating conditions overload or
insufficient servicing or maintenance. 3. Defects caused by using accessories, components or spare parts other than original Rotabroach® parts. 4. Tools to which changes or additions have been made. 5. Electrical components are subject to manufacturer’s warranty.
Your online registration can be submitted on www.rotabroach.co.uk The warranty claim must be lodged within the warranty period. This requires the submission or sending of the complete tool in question with the original sales receipt which must indicate the purchase date of the product. A complaint form must also be submitted prior to the return. This can be found online at www.rotabroach.co.uk Failure to complete this form will result in the delay of your claim. All goods returned defective must be returned pre-paid to Rotabroach®, in no event shall Rotabroach® be liable for subsequent direct, or indirect loss or damage.
THIS WARRANTY IS IN LIEU OF ANY OTHER WARRANTY, (EXPRESSED OR IMPLIED) INCLUDING ANY WARRANTY OF MECHANTABLITY OR FITNESS FOR A PARTICULAR PURPOSE. ROTABROACH® RESERVE THE RIGHT TO MAKE IMPROVEMENTS AND MODIFICATIONS TO DESIGN WITHOUT PRIOR NOTICE