iform account maintenance ict4d session 4. iformbuilder website requirements to access the...
TRANSCRIPT
IFORM ACCOUNT MAINTENANCE
ICT4D SESSION 4
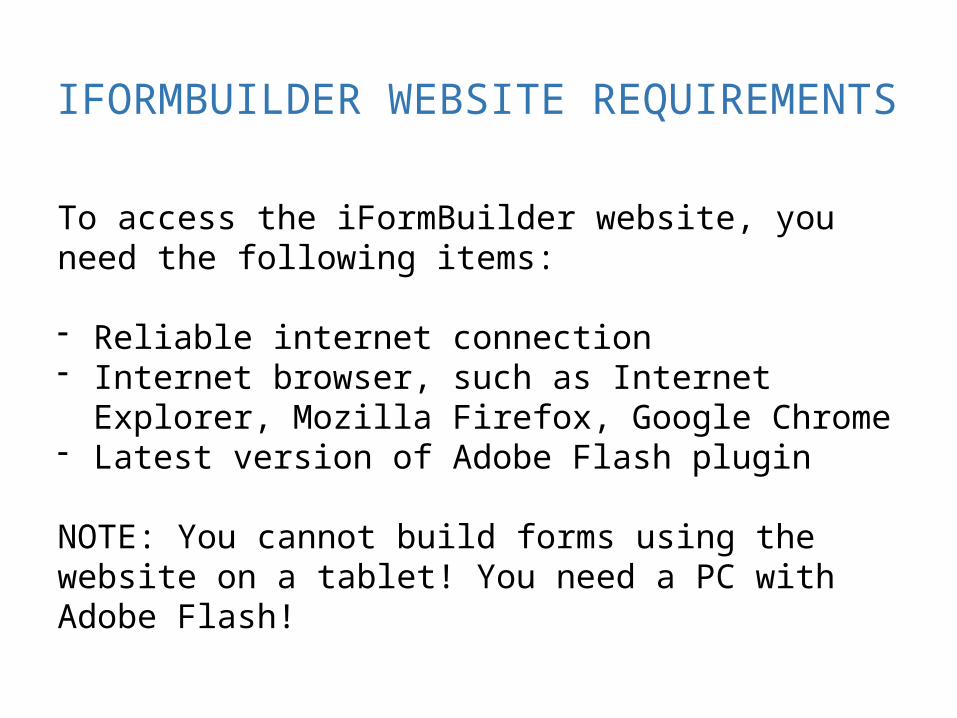
IFORMBUILDER WEBSITE REQUIREMENTS
To access the iFormBuilder website, you need the following items:
- Reliable internet connection- Internet browser, such as Internet Explorer,
Mozilla Firefox, Google Chrome- Latest version of Adobe Flash plugin
NOTE: You cannot build forms using the website on a tablet! You need a PC with Adobe Flash!
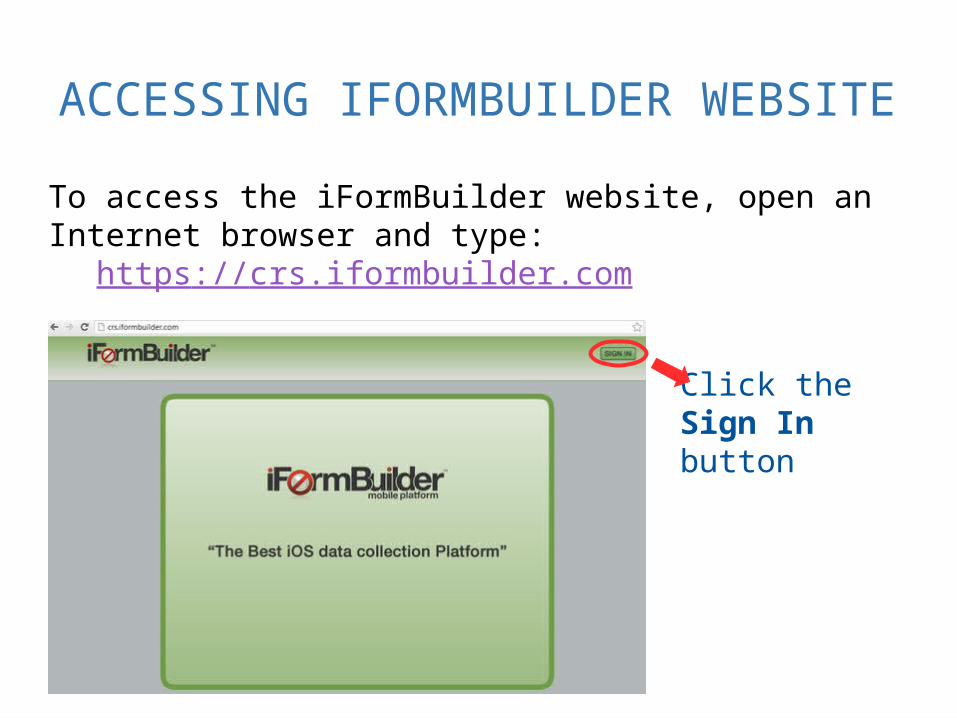
ACCESSING IFORMBUILDER WEBSITE
To access the iFormBuilder website, open an Internet browser and type:
https://crs.iformbuilder.com
Click the Sign In button
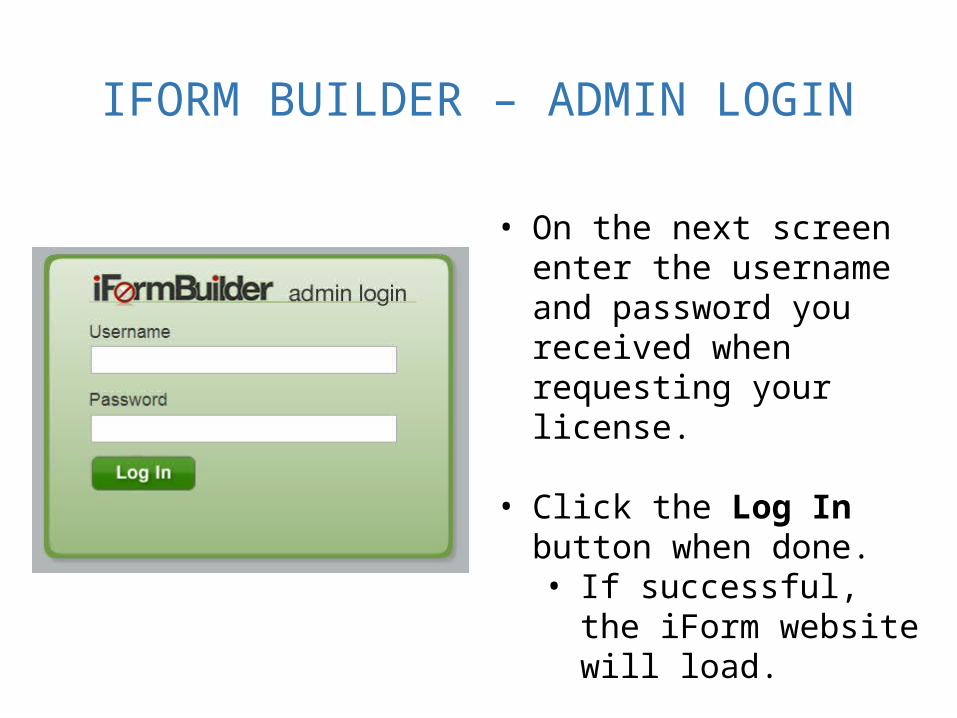
IFORM BUILDER – ADMIN LOGIN
• On the next screen enter the username and password you received when requesting your license.
• Click the Log In button when done.• If successful, the
iForm website will load.
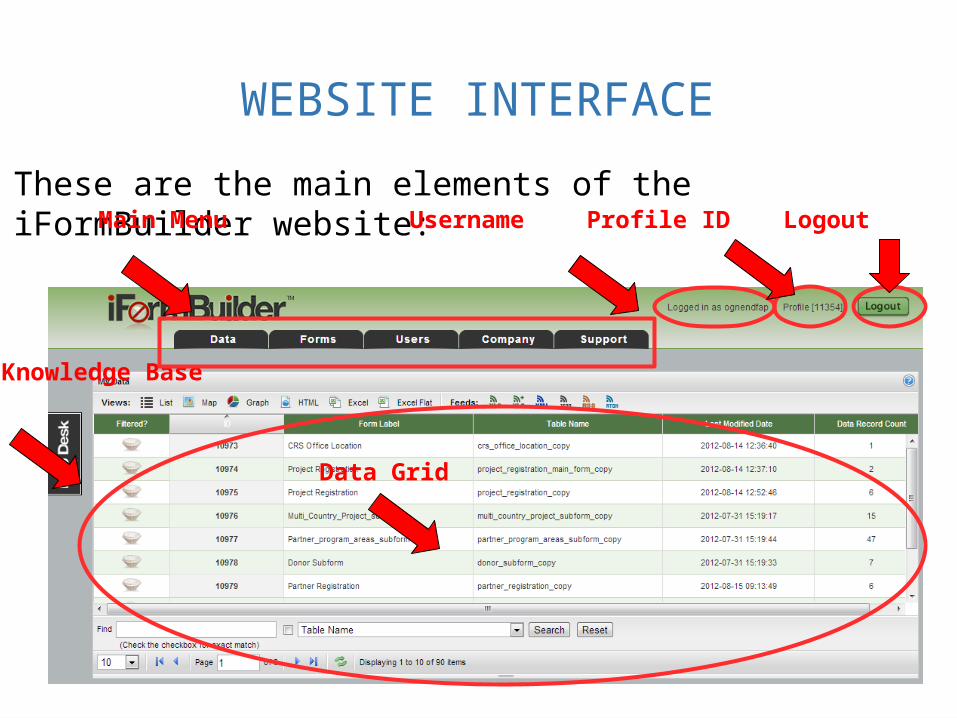
WEBSITE INTERFACE
These are the main elements of the iFormBuilder website:Main Menu Username Profile ID Logout
Data Grid
Knowledge Base
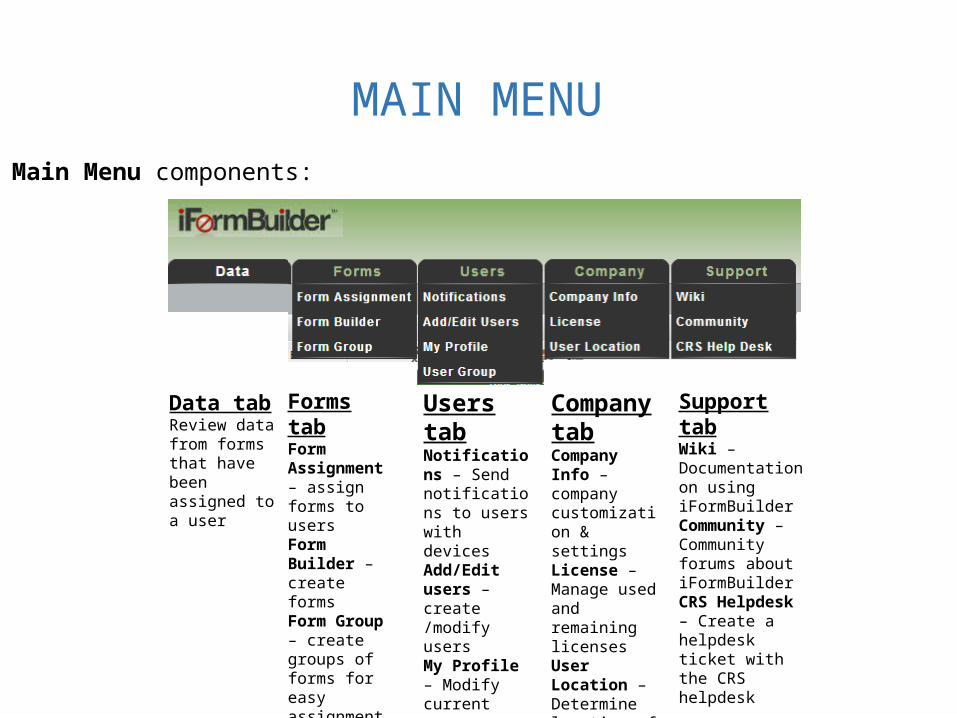
MAIN MENUMain Menu components:
Data tabReview data from forms that have been assigned to a user
Forms tabForm Assignment – assign forms to usersForm Builder – create formsForm Group – create groups of forms for easy assignment
Users tabNotifications – Send notifications to users with devicesAdd/Edit users – create /modify usersMy Profile – Modify current userUser Group – create groups of users for easy administration
Company tabCompany Info – company customization & settingsLicense – Manage used and remaining licensesUser Location – Determine location of each field agent (if GPS enabled)
Support tabWiki – Documentation on using iFormBuilderCommunity – Community forums about iFormBuilderCRS Helpdesk – Create a helpdesk ticket with the CRS helpdesk

ADDING USERS
• Under the Users Menu select Add/Edit Users
• To add a user click the + New button
VIEWING & UPDATING DATA
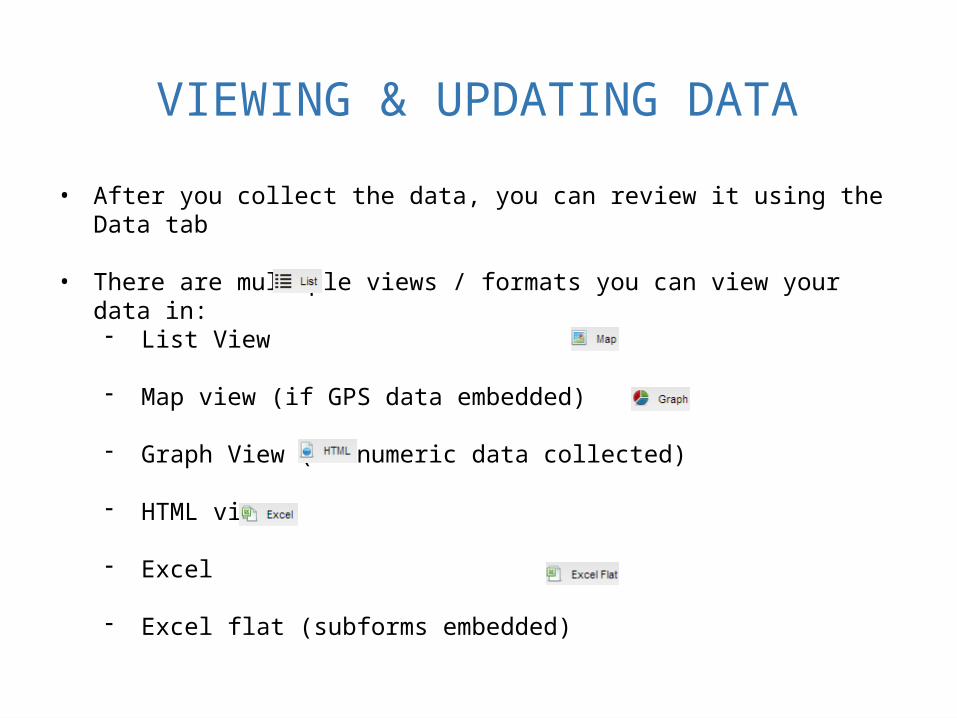
• After you collect the data, you can review it using the Data tab
• There are multiple views / formats you can view your data in:- List View
- Map view (if GPS data embedded)
- Graph View (if numeric data collected)
- HTML view
- Excel
- Excel flat (subforms embedded)

VIEWING & UPDATING DATA
• iForm also allows for data feeds, which you can tap into using development tools to get data on regular intervals
- Excel- Excel +- XML- JSON- RSS - Atom
• If you want to get data using the feeds, select the data format that your development tools support. There is no best way or best data feeds. It depends on the tools you use or the method the developer knows

VIEWING & UPDATING DATA
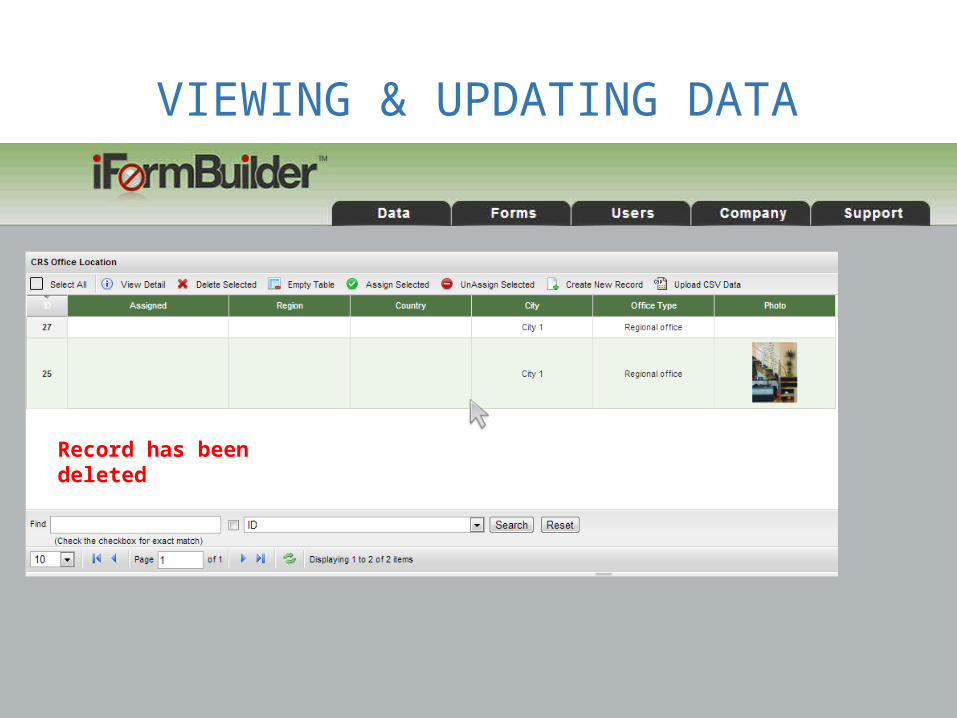
List View
Click a row to select it
Click View Detail to view the full record details
Click Delete Selected to delete the current record
Emty table will delete all data
Click Assign Selected to assign this record back to a person
Revert an assigned recordCreate a new record using the web intefrace
Upload CSV (excel) data

VIEWING & UPDATING DATA
Click Edit to modify the record
Click Duplicate Record, to create a copy of this record
VIEWING & UPDATING DATA
Record has been deleted

VIEWING & UPDATING DATA
All data in the table has been deleted
VIEWING & UPDATING DATA
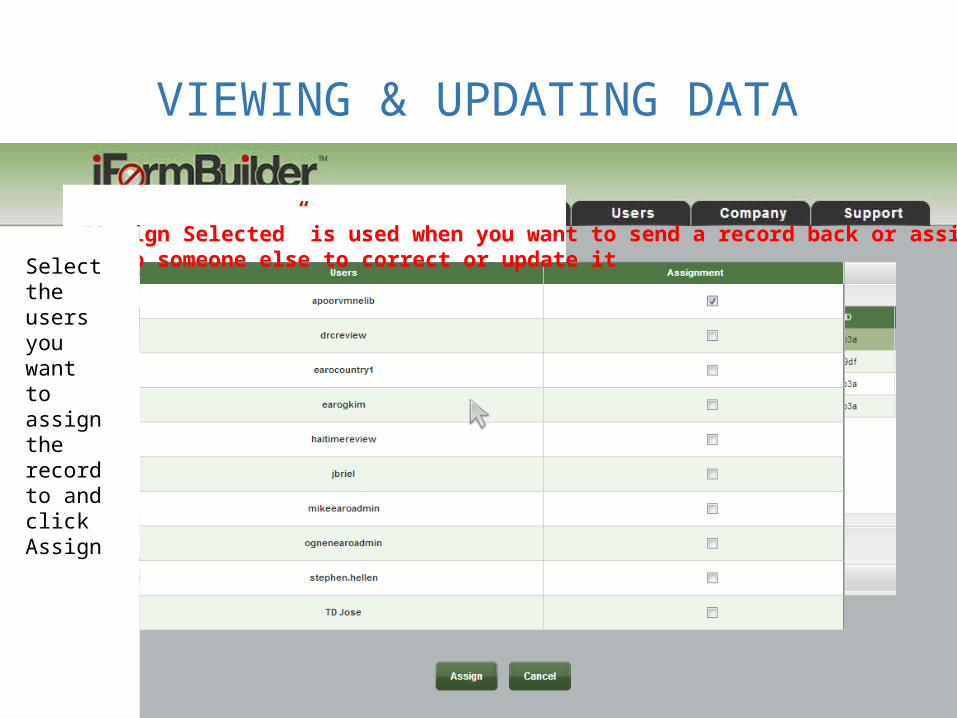
“Assign Selected” is used when you want to send a record back or assign it to someone else to correct or update itSelect
the users you want to assign the record to and click Assign

VIEWING & UPDATING DATA
Create New Record
Fill out the data and click Save

VIEWING & UPDATING DATA
Graph View
VIEWING & UPDATING DATA
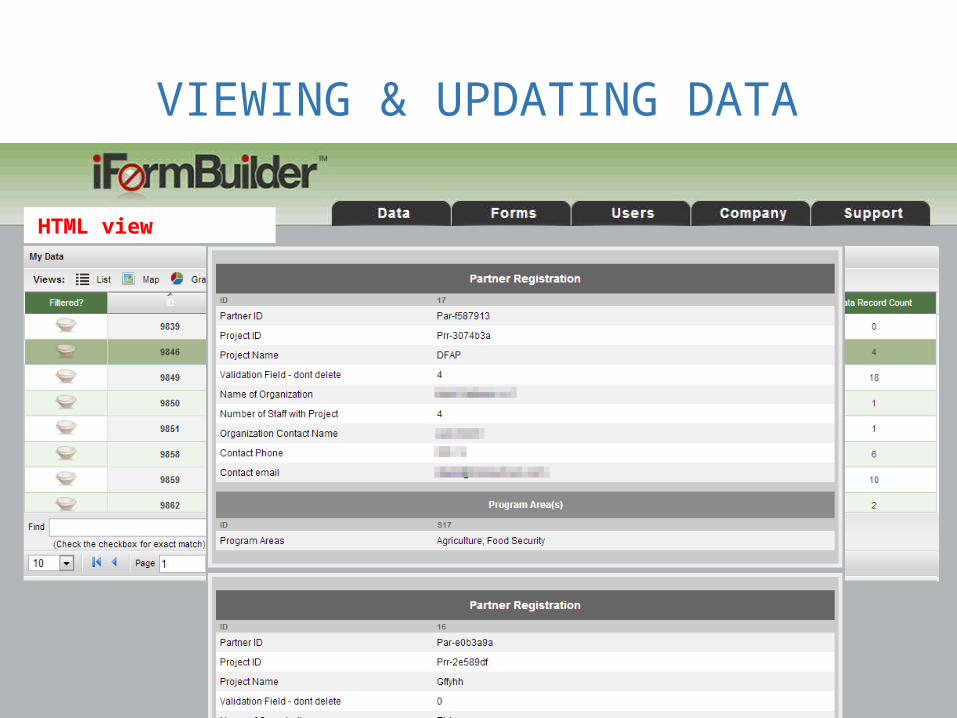
HTML view
VIEWING & UPDATING DATA
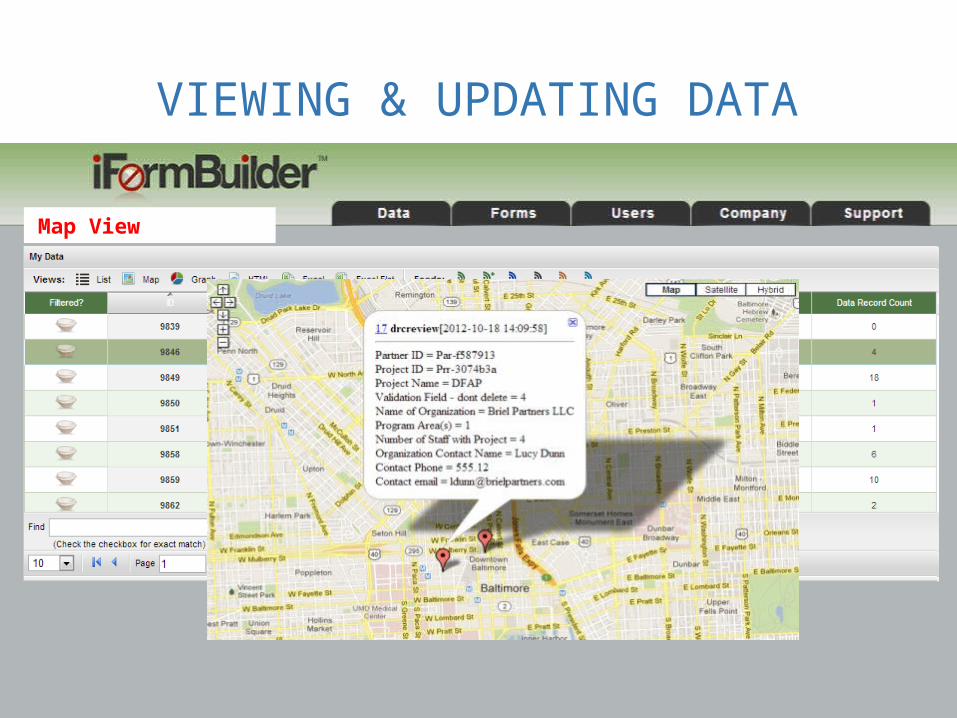
Map View
VIEWING & UPDATING DATA
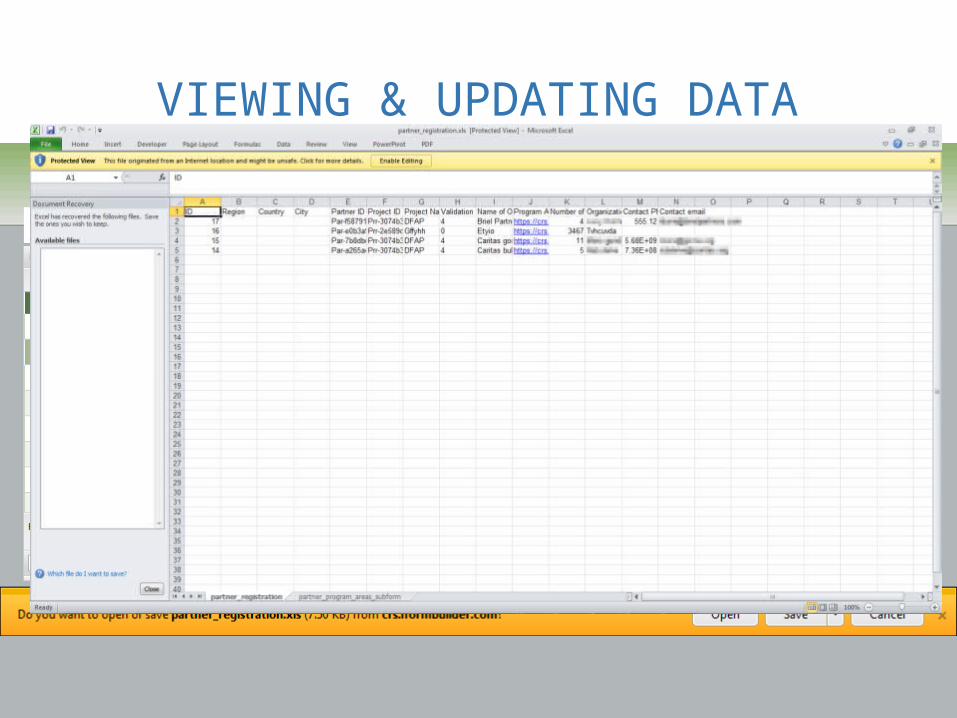
Excel view
VIEWING & UPDATING DATA
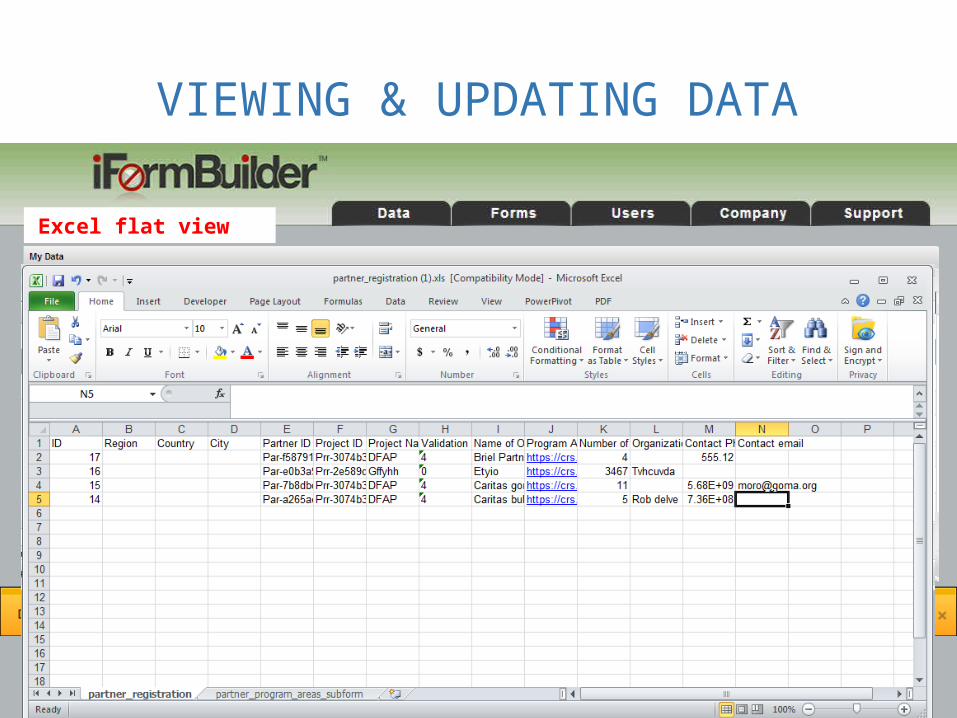
Excel flat view

VIEWING & UPDATING DATA
Exporting data to Access Save the file
Open Access, create or open your database
Locate the file and click Ok
Click OkData is imported

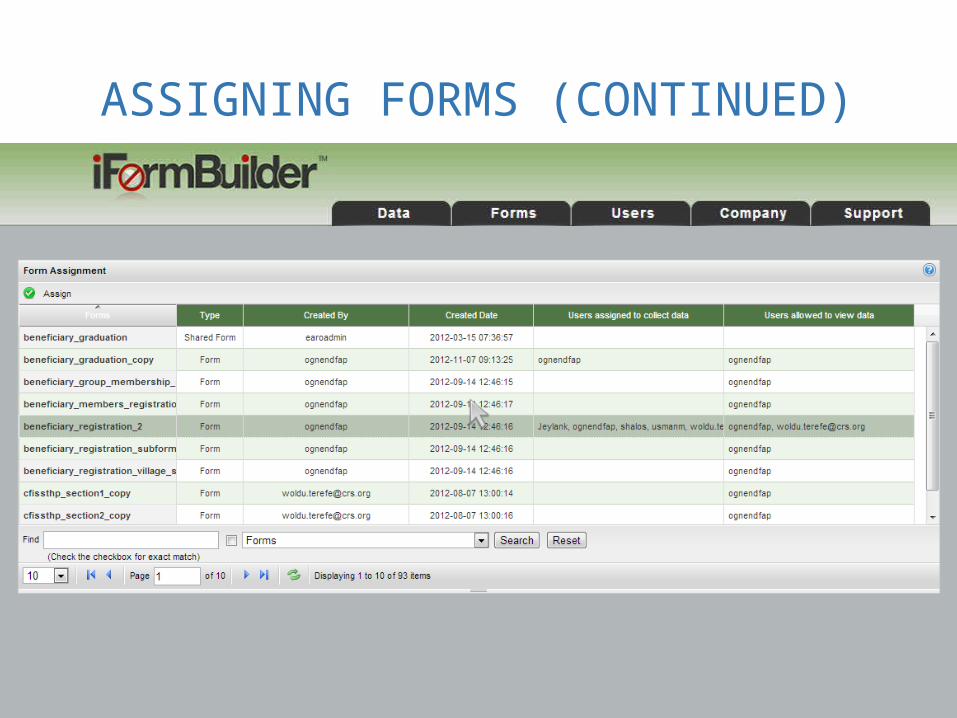
ASSIGNING FORMS
• There can be many forms under one profile
• The Administrator can choose which user can view or collect data for each form
• You can have one set of users that can collect data for form1, another set of users that collects data for form2, etc.
• All of this is done in the form assignment link
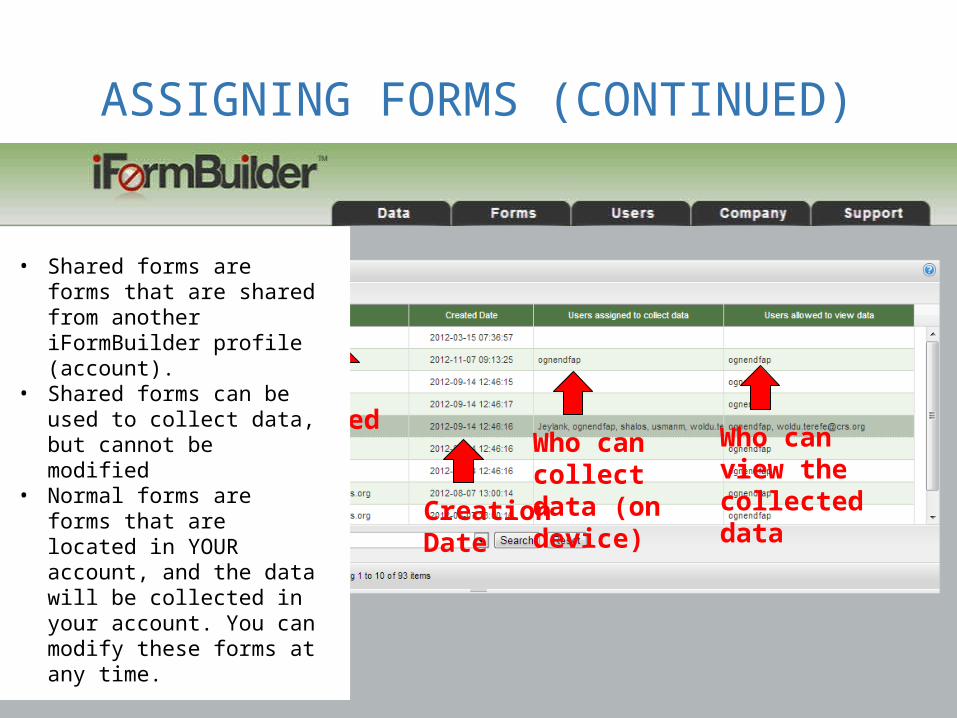
ASSIGNING FORMS (CONTINUED)
Form name Form type
(shared or normal)
Created by
Creation Date
Who can collect data (on device)
Who can view the collected data
• Shared forms are forms that are shared from another iFormBuilder profile (account).
• Shared forms can be used to collect data, but cannot be modified
• Normal forms are forms that are located in YOUR account, and the data will be collected in your account. You can modify these forms at any time.
ASSIGNING FORMS (CONTINUED)
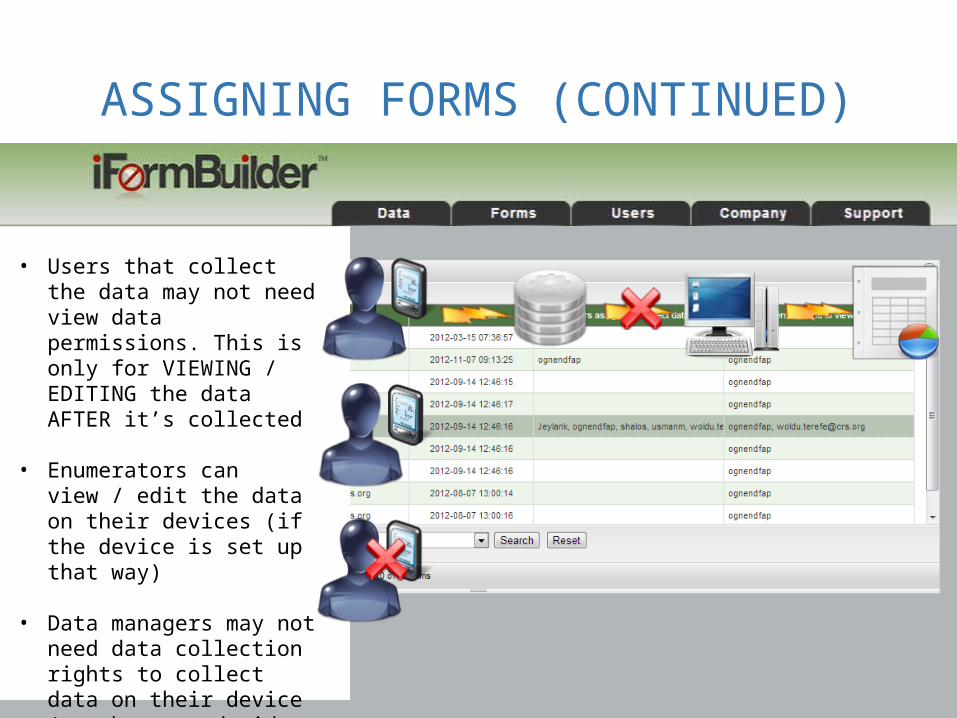
• Users that collect the data may not need view data permissions. This is only for VIEWING / EDITING the data AFTER it’s collected
• Enumerators can view / edit the data on their devices (if the device is set up that way)
• Data managers may not need data collection rights to collect data on their device (you have to decide this per project level, each project is different)
ASSIGNING FORMS (CONTINUED)
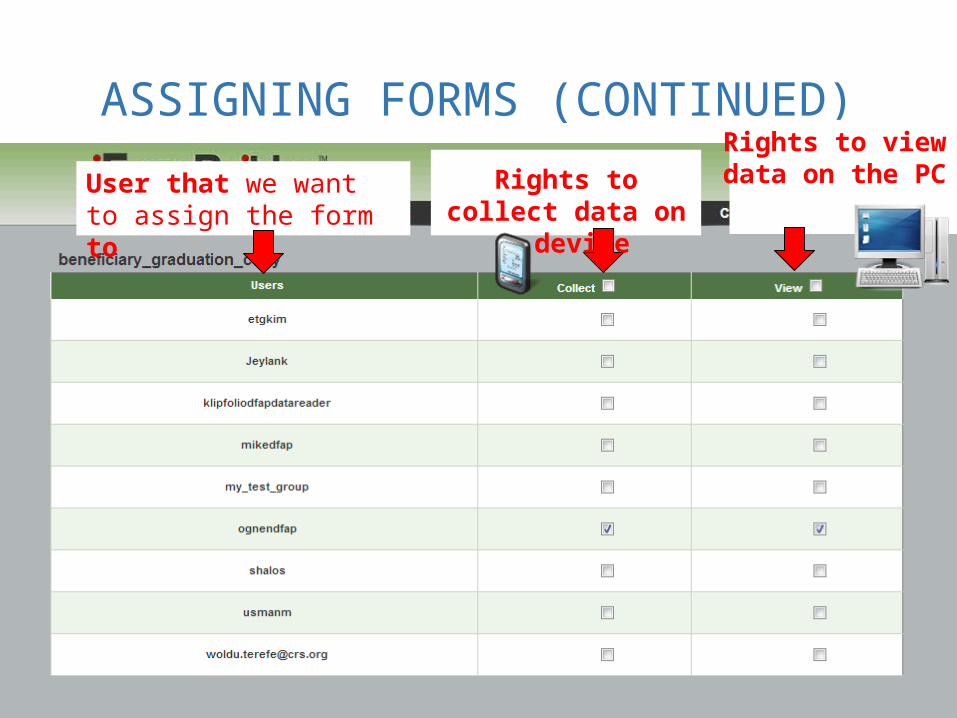
ASSIGNING FORMS (CONTINUED)
User that we want to assign the form to
Rights to collect data on a device
Rights to view data on the PC

ASSIGNING FORMS - TIPS
• Define your users early:o Who need to collects the data,o Who will view / edit the collected data
• M&E Managers should be in charge of viewing the data
• Assign main forms ONLY to data collectors
• Remove sub-forms (do not assign collect to data collectors) to avoid confusion
• Create Form Groups to facilitate and expedite the assignment of forms
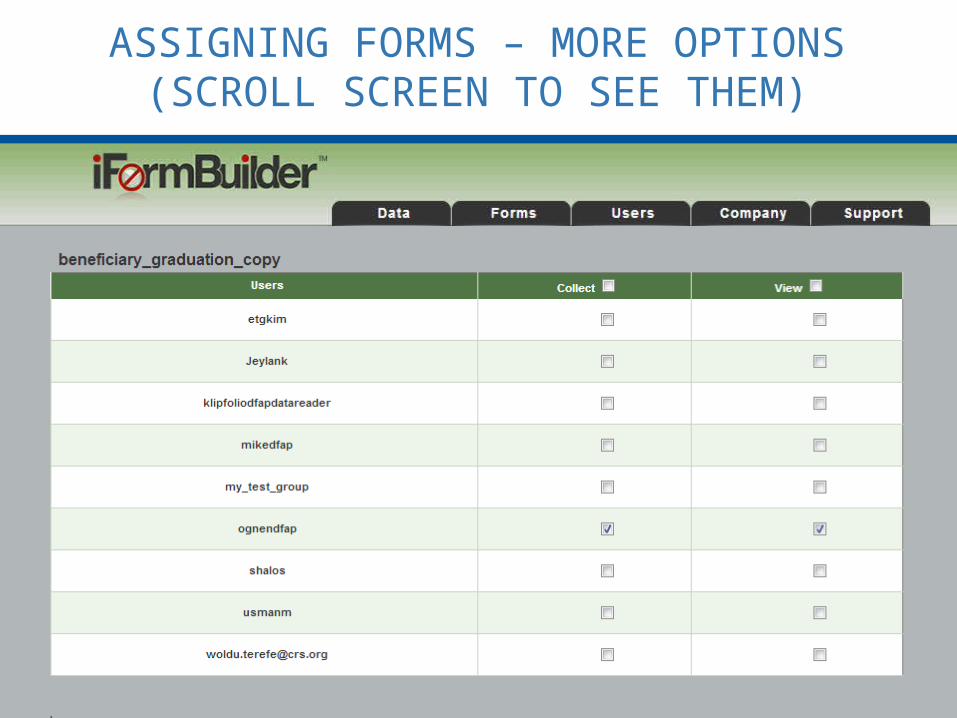
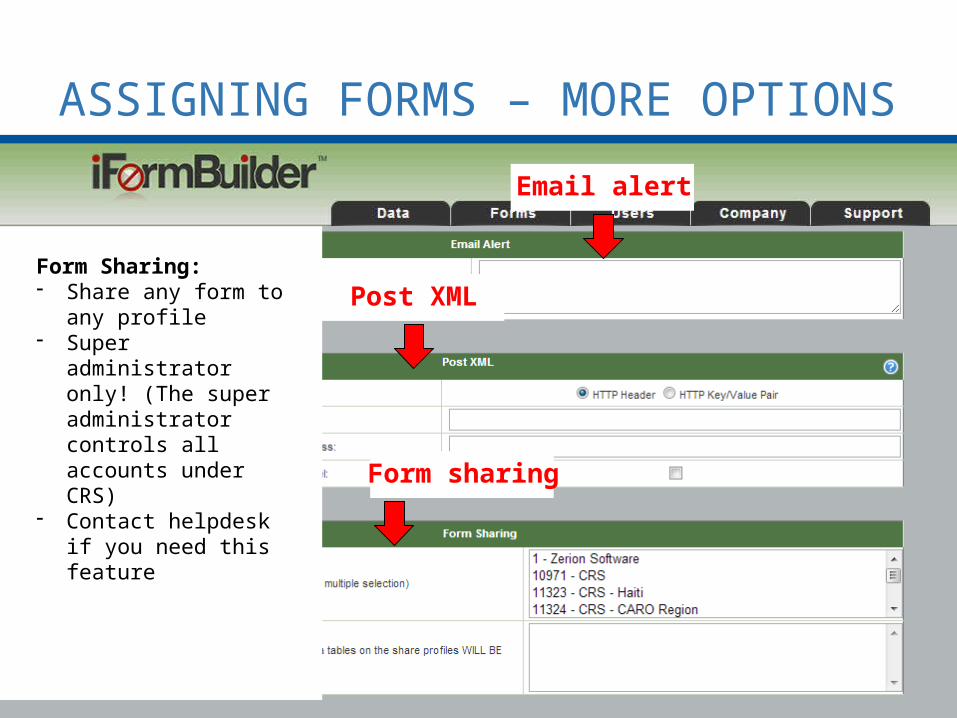
ASSIGNING FORMS – MORE OPTIONS (SCROLL SCREEN TO SEE THEM)
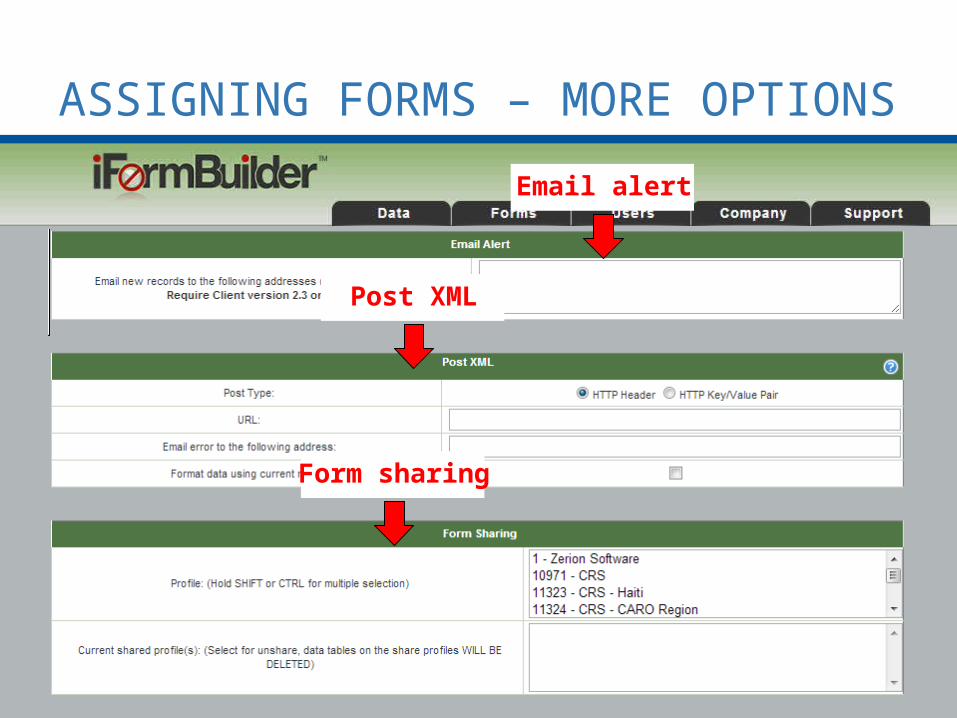
ASSIGNING FORMS – MORE OPTIONS
Email alert
Post XML
Form sharing
ASSIGNING FORMS – MORE OPTIONS
Email alert
Post XML
Form sharing
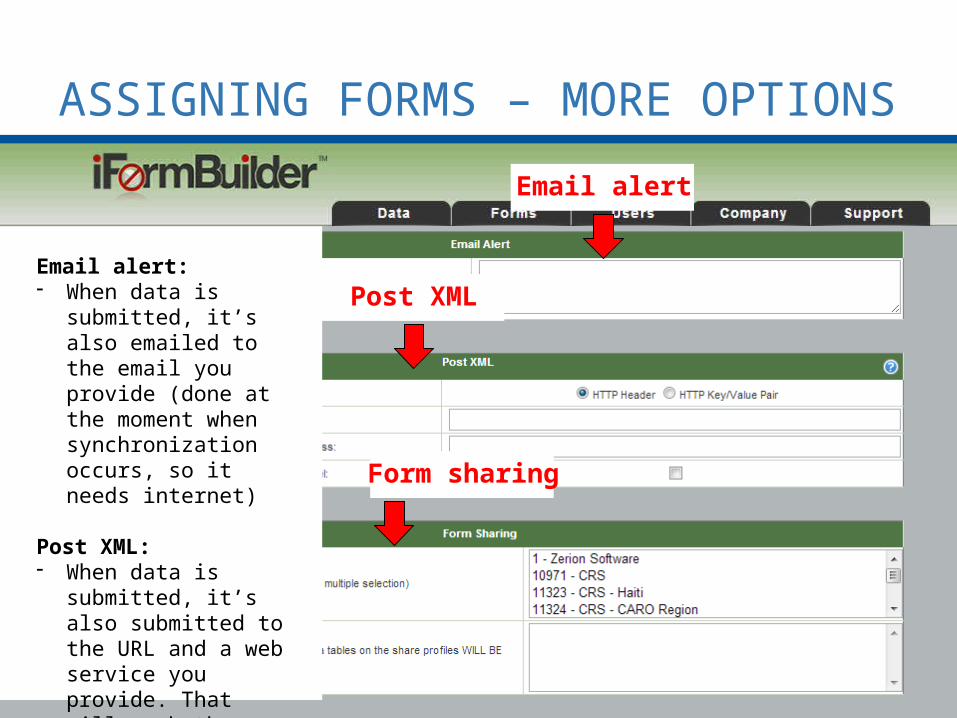
Email alert:- When data is
submitted, it’s also emailed to the email you provide (done at the moment when synchronization occurs, so it needs internet)
Post XML:- When data is
submitted, it’s also submitted to the URL and a web service you provide. That will push the data to a service you control to capture the data
ASSIGNING FORMS – MORE OPTIONS
Email alert
Post XML
Form sharing
Form Sharing:- Share any form to
any profile- Super administrator
only! (The super administrator controls all accounts under CRS)
- Contact helpdesk if you need this feature
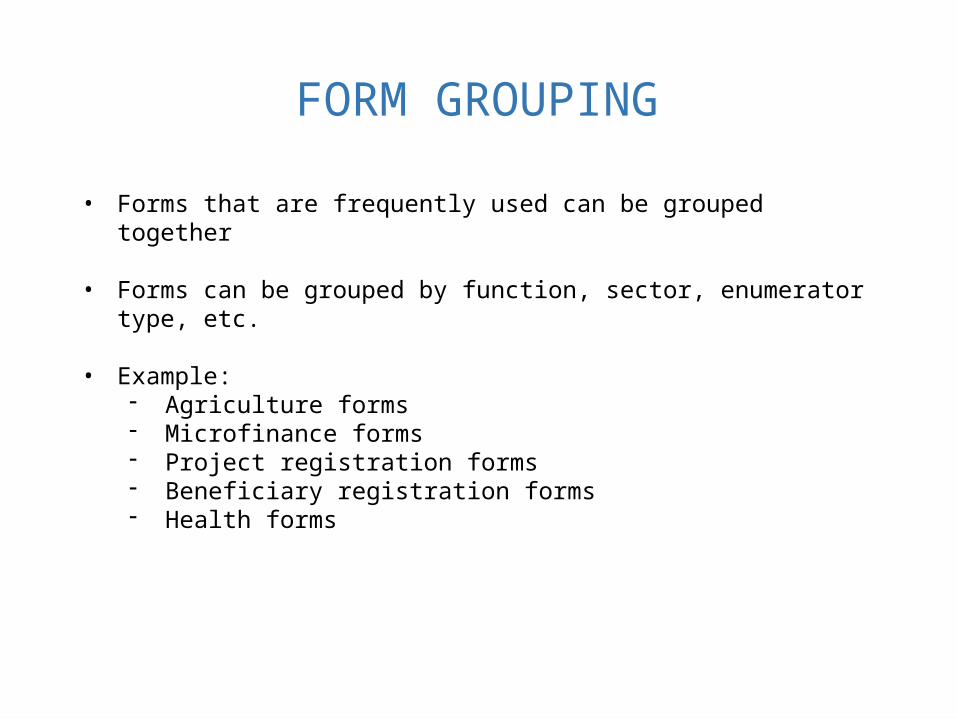
FORM GROUPING
• Forms that are frequently used can be grouped together
• Forms can be grouped by function, sector, enumerator type, etc.
• Example:- Agriculture forms- Microfinance forms- Project registration forms- Beneficiary registration forms- Health forms

FORM GROUPING
Click new to add group
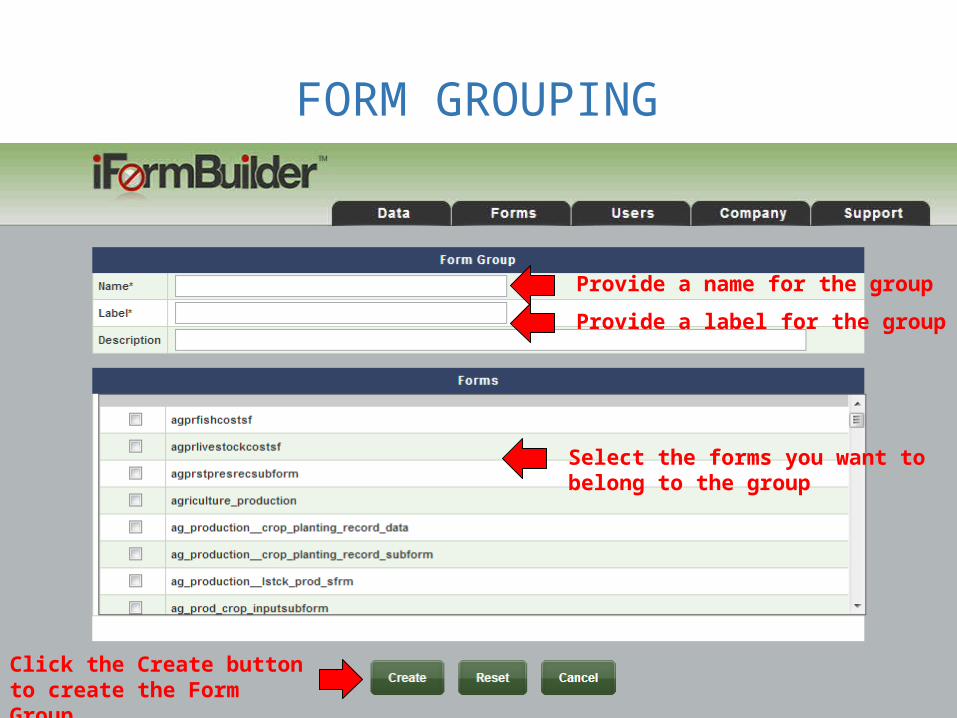
FORM GROUPING
Provide a name for the group
Provide a label for the group
Select the forms you want to belong to the group
Click the Create button to create the Form Group
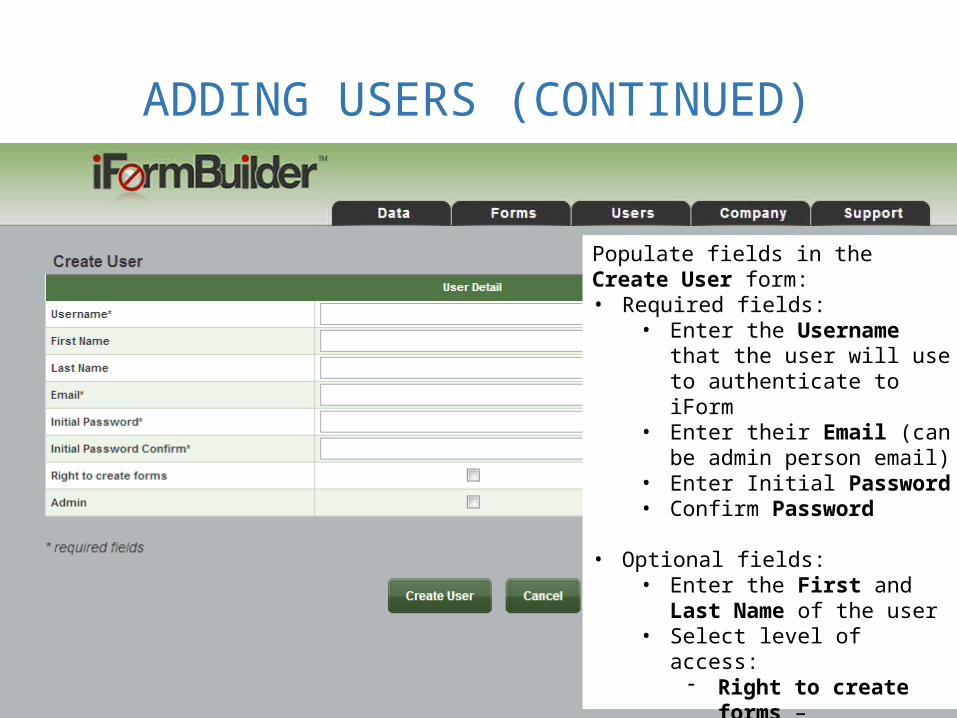
ADDING USERS (CONTINUED)
Populate fields in the Create User form: • Required fields:
• Enter the Username that the user will use to authenticate to iForm
• Enter their Email (can be admin person email)
• Enter Initial Password• Confirm Password
• Optional fields: • Enter the First and Last
Name of the user• Select level of access:
- Right to create forms – create/delete forms
- Admin - add / delete / edit users
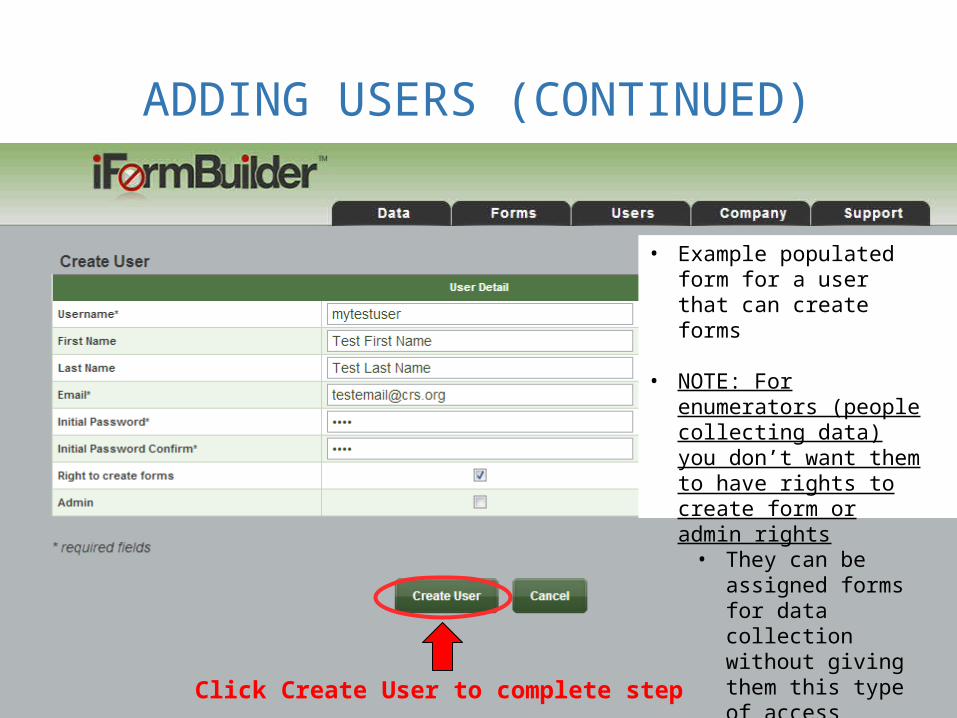
ADDING USERS (CONTINUED)
Click Create User to complete step
• Example populated form for a user that can create forms
• NOTE: For enumerators (people collecting data) you don’t want them to have rights to create form or admin rights
• They can be assigned forms for data collection without giving them this type of access

FINDING USERS - NAVIGATION
User can create forms
User is an Admin
Search by criteria
• To navigate through existing users you can either:
• Use the scroll bar on the right to find the name
• Enter a key word in the Find field on the Search button

FINDING USERS - NAVIGATION
Number of records per page
Change the current page
Move to next page
Move to last pageMove to first / previous
pageAdditional navigation buttons
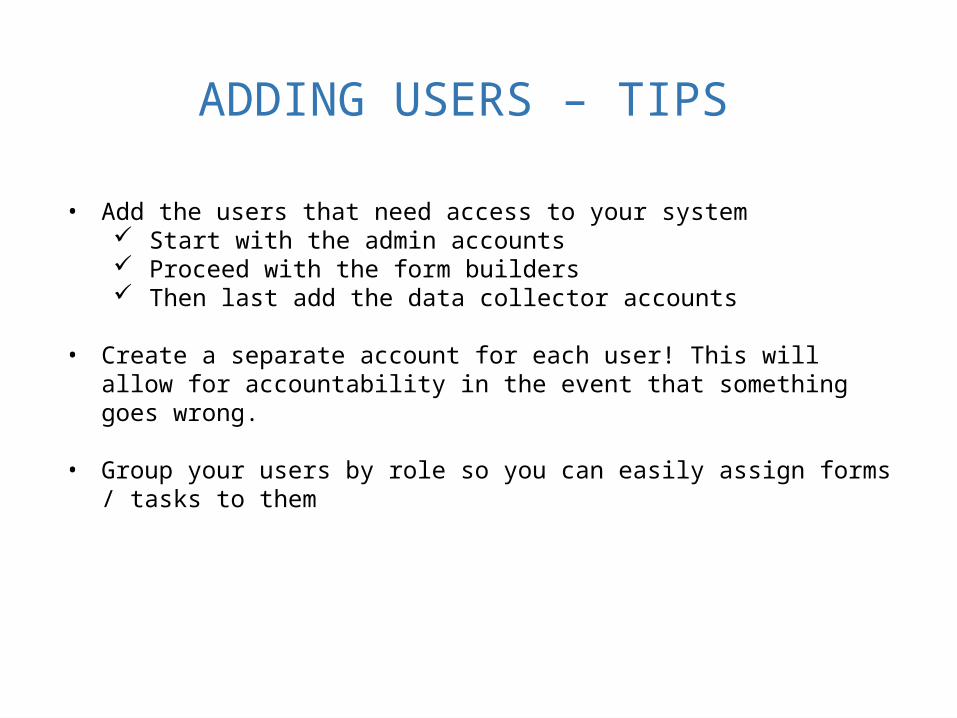
ADDING USERS – TIPS
• Add the users that need access to your system Start with the admin accounts Proceed with the form builders Then last add the data collector accounts
• Create a separate account for each user! This will allow for accountability in the event that something goes wrong.
• Group your users by role so you can easily assign forms / tasks to them

ADDING USER GROUPS
Click + New to create a new user group
The data grid is empty, meaning there are no groups defined yet
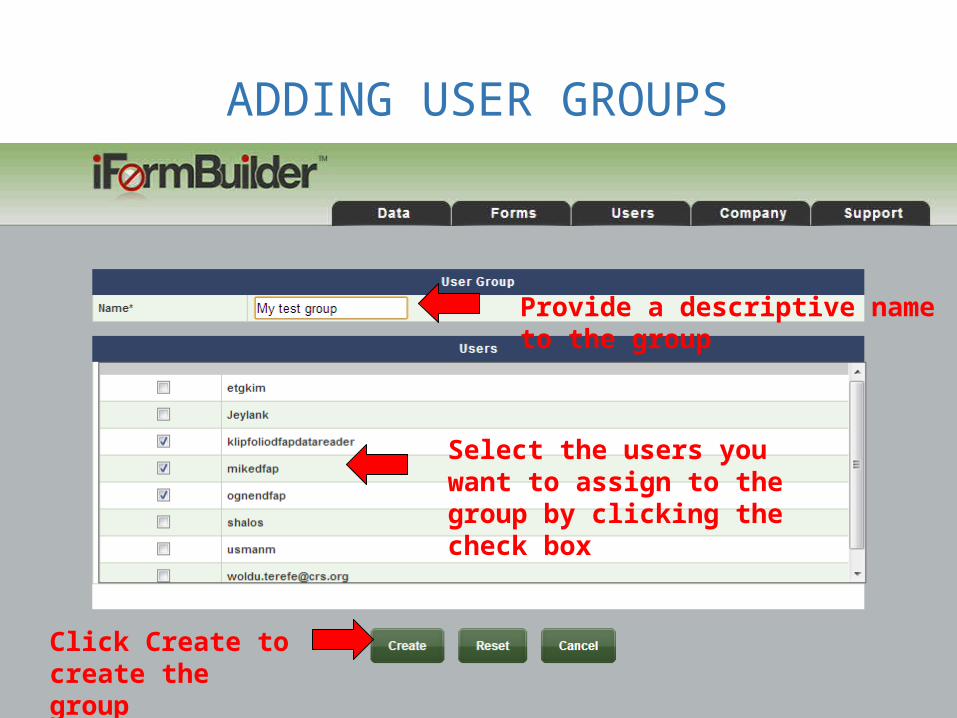
ADDING USER GROUPS
Click Create to create the group
Select the users you want to assign to the group by clicking the check box
Provide a descriptive name to the group
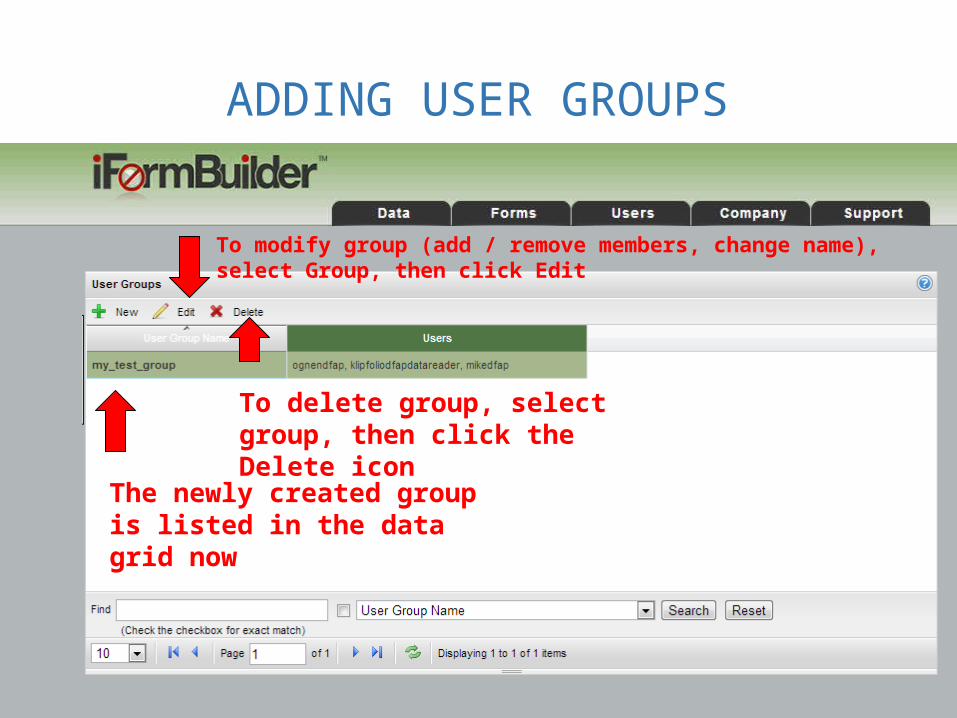
ADDING USER GROUPS
The newly created group is listed in the data grid now
To modify group (add / remove members, change name), select Group, then click Edit
To delete group, select group, then click the Delete icon
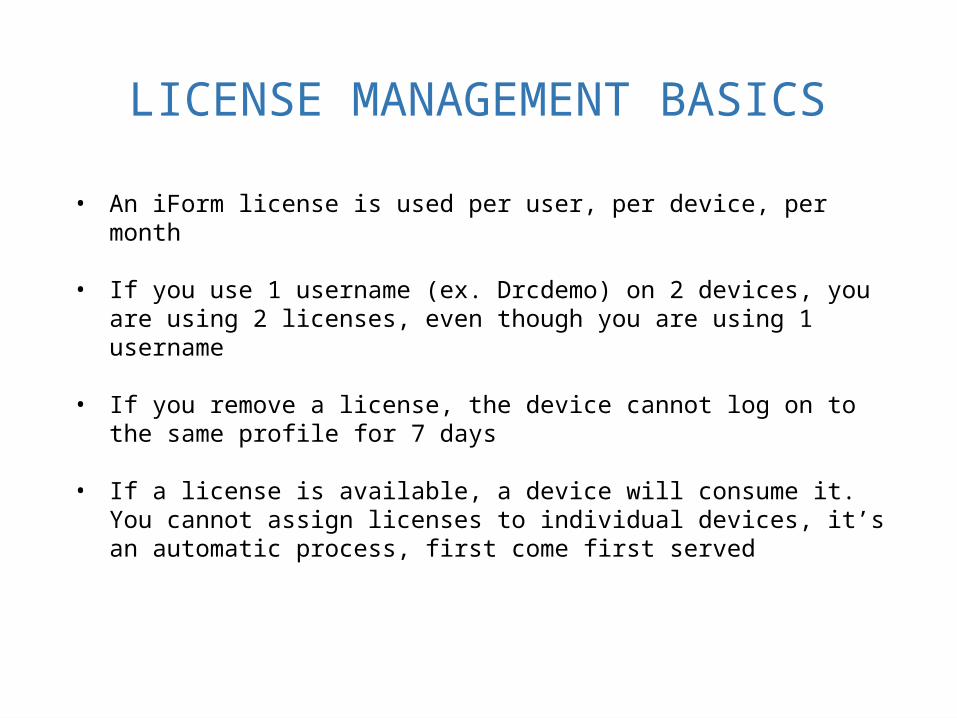
LICENSE MANAGEMENT BASICS
• An iForm license is used per user, per device, per month
• If you use 1 username (ex. Drcdemo) on 2 devices, you are using 2 licenses, even though you are using 1 username
• If you remove a license, the device cannot log on to the same profile for 7 days
• If a license is available, a device will consume it. You cannot assign licenses to individual devices, it’s an automatic process, first come first served

LICENSE MANAGEMENT BASICS
• If you are not using a license, or a license has been inactive for some period of time, delete it to free licenses for other devices
• You can check the status of licenses in the License Manager
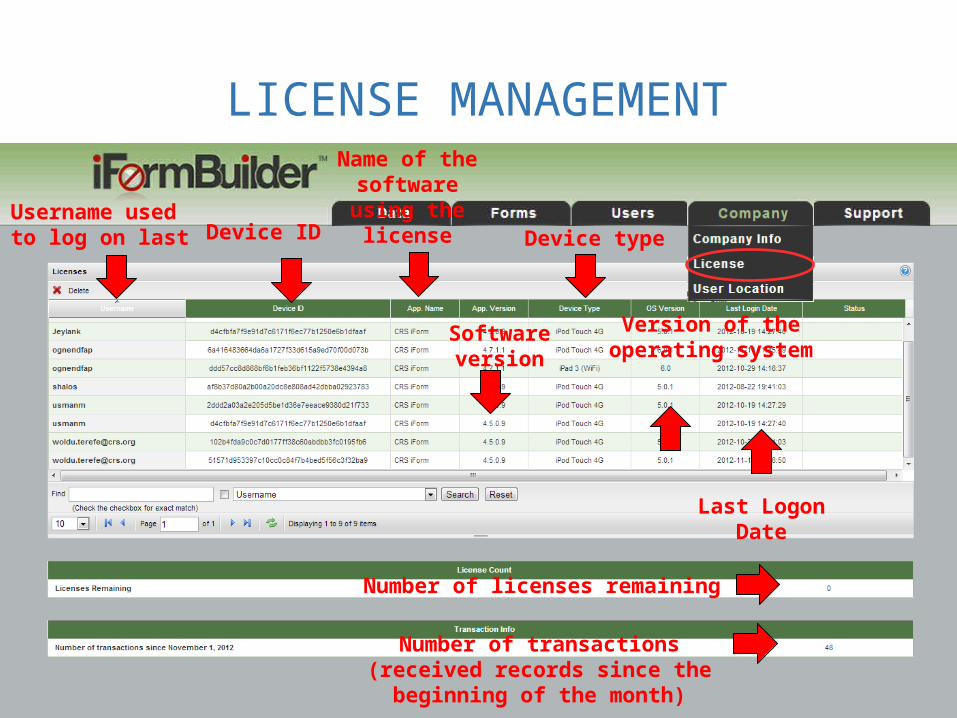
LICENSE MANAGEMENT
Username used to log on last
Device ID
Name of the software using the license
Software version
Device type
Version of the operating system
Last Logon Date
Number of licenses remaining
Number of transactions (received records since the
beginning of the month)
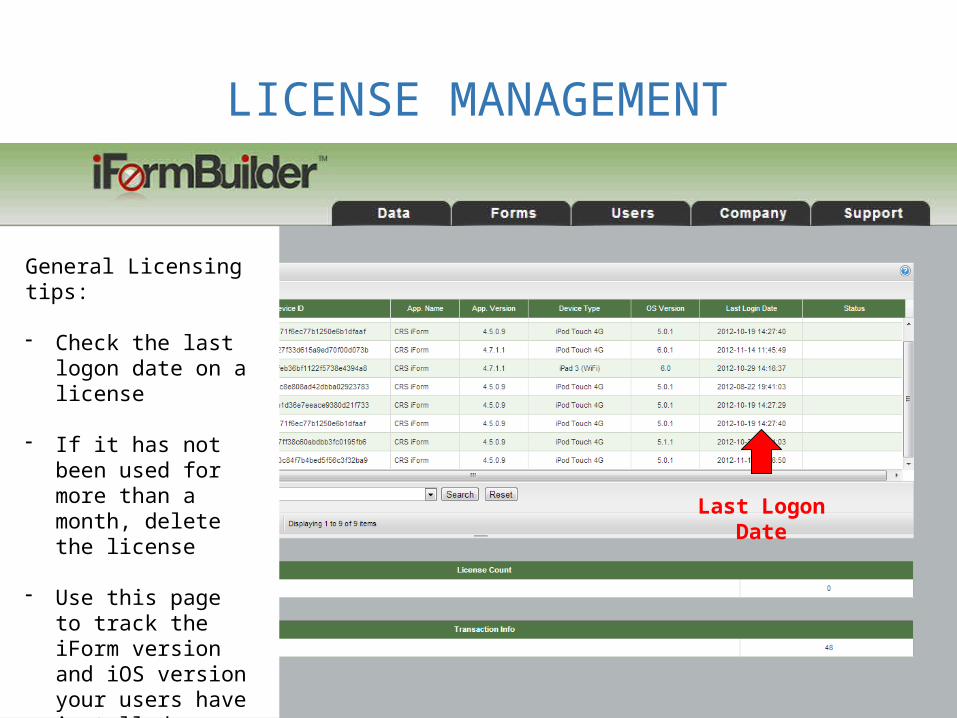
LICENSE MANAGEMENT
Last Logon Date
General Licensing tips:
- Check the last logon date on a license
- If it has not been used for more than a month, delete the license
- Use this page to track the iForm version and iOS version your users have installed
LICENSE MANAGEMENT
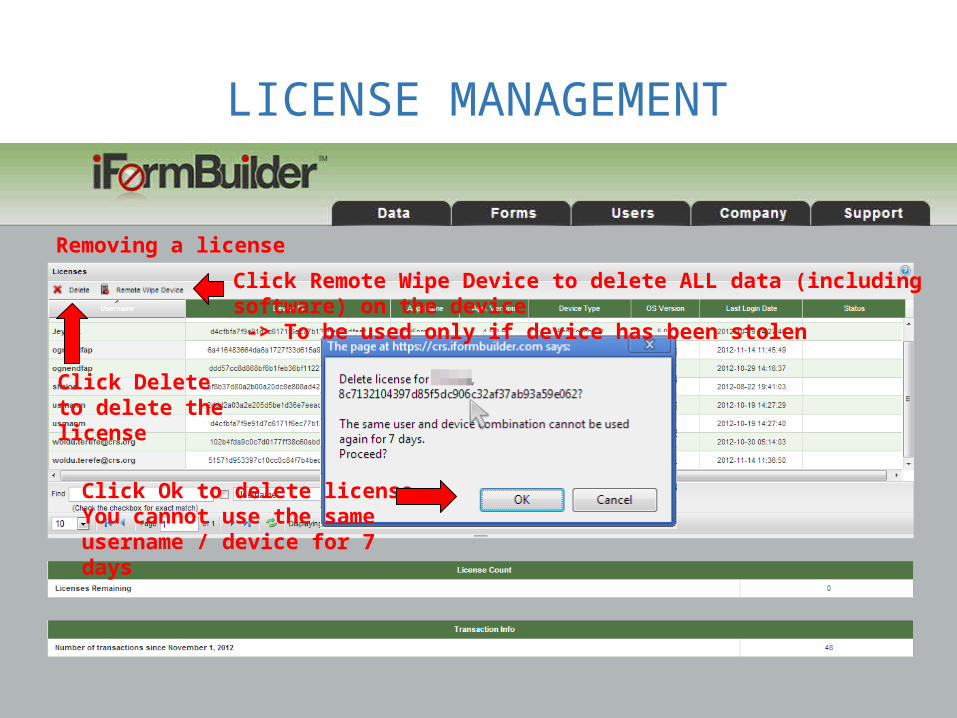
Removing a license
Click Delete to delete the license
Click Remote Wipe Device to delete ALL data (including software) on the device -> To be used only if device has been stolen
Click Ok to delete licenseYou cannot use the same username / device for 7 days

LICENSE MANAGEMENT
Wiping a device
Click Ok to Wipe the device
-> To be used only if device has been stolen

QUESTIONS OR COMMENTS?
THEN…
BUILDING SIMPLE FORMSDAY 1 – SESSION 4.1