ican! 10 user manual -...
TRANSCRIPT

ICAN! 10”
User manual

Safety
This manual contains important safety precautions and
information for correct use. Please be sure to read this
manual carefully before using so as to avoid any accidents.
Please do not place the product in hot, wet or dusty
environment.
Please do not place the product in hot environment, especially in summer. Do not place it in a car with all windows closed.
Avoid dropping or clashing the product and do not shake
the TFT screen violently, or it may cause damage or abnormal display to the screen.
Please select a suitable volume and avoid loud sound
while using earphones. Please turn down the volume or stop using if you get a roaring in your ears.
For following situations, please charge the product.
A. The icon of the battery shows without power B. System automatically shut down, and it turns off soon after restart. C. Operation key shows no reaction. D. The device shows on the top right corner.

1. Device Hardware:
Super slim thickness, zinc alloy casing on front + silver casing on back
Unit size: 10.25” X 6.5” X .5”
Unit weight: 22.0 oz.
Screen: 10.2” resistive Touch screen
Nand Flash built-in:16GB
Memory: 256 DDR2
Wireless Internet: WIFI 802.11B/G
(2) Card slot: Micro SD card slot
Webcam 1.3mb
Resolution: 800 * 480 pixels
Battery type: Polymer Rechargeable lithium battery
Battery capacity:3400mAH
(2) USB port
HDMI port
3 speaker built-in
G-Sensor support
3.5mm earphone jack

Device Software:
OS:Android 2.1
Browser: Google Browser
Video: support AVI, RM/ RMVB,FLV,MPG4 – 1, MPEG – 2 etc.
Audio: support MP3, WMA, AAC, AC3, WAV, etc.
Photo: support JPEG, BMP, GIF, PNG, TIFF, etc.
3D accelerator to play thousands of popular 3D games 1080P high definition video play MPEG-2, MPEG-4, AVS, H.264, WMV, AVI, MP4, RMVB, FLV, MKV, VOB High precision 16 bits G-sensor, realize screen direction rotate 360 degree. 5V DC power supply, can keep the device fully charged in 3hrs Network WIFI: SDIO 802.11b/g Speaker: 3*1W /8Ω Ebook: PDF/TXT/CHM/DOC/EXCEL Photo: JPEG/BMP/GIF/PNG/TIFF

Quick Instruction:
1. Power On
Long press top left button “On/off sleep/wake” button to turn on the device.
2. Desktop
After device is turned on, enter to user desktop, display simple operation menu and shortcut icon.
3.Lock screen / unlock screen
Lock screen: On standby, short press top left button “POWER” button, the screen becomes dark and enters to lock status.

Unlock:
Press any keys, display following status, slide the lock icon across the screen to the right side. Screen will unlock.
4. Power off
On standby, long press the top left “POWER” button to enter power off mode, click OK, device will power off.

5. System settings
On standby, press menu button, select Settings and

Settings menu will display

1.Wireless & Network
Click Wireless & Network menu, click WIFI option to turn on or turn off.
Click WIFI setting menu, select WIFI notify, device will search the available WIFI automatically. Select the network you need and connect.
2.Sound & display settings
Under system settings menu, select sound & display settings. You may select the sound and display setting to suit your preference.

3.Application settings
Under Settings menu, select Application settings
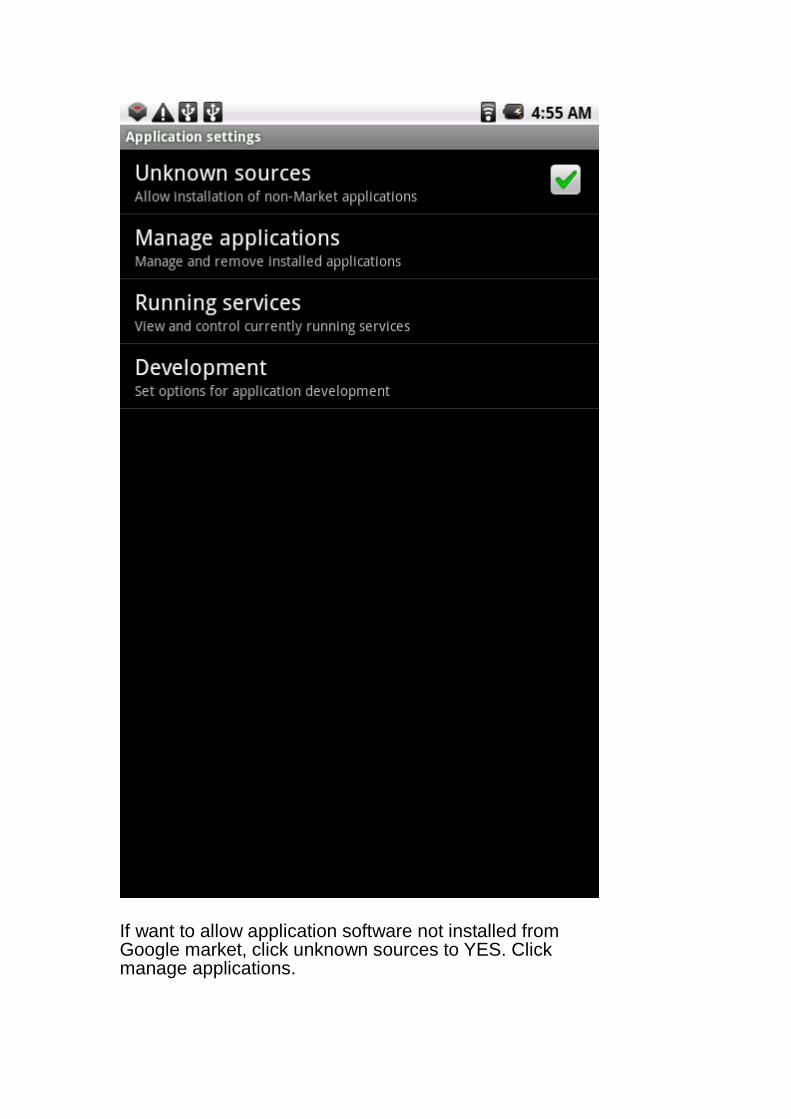
If want to allow application software not installed from Google market, click unknown sources to YES. Click manage applications.

Appears all installed application software list, select your related APK to manage.
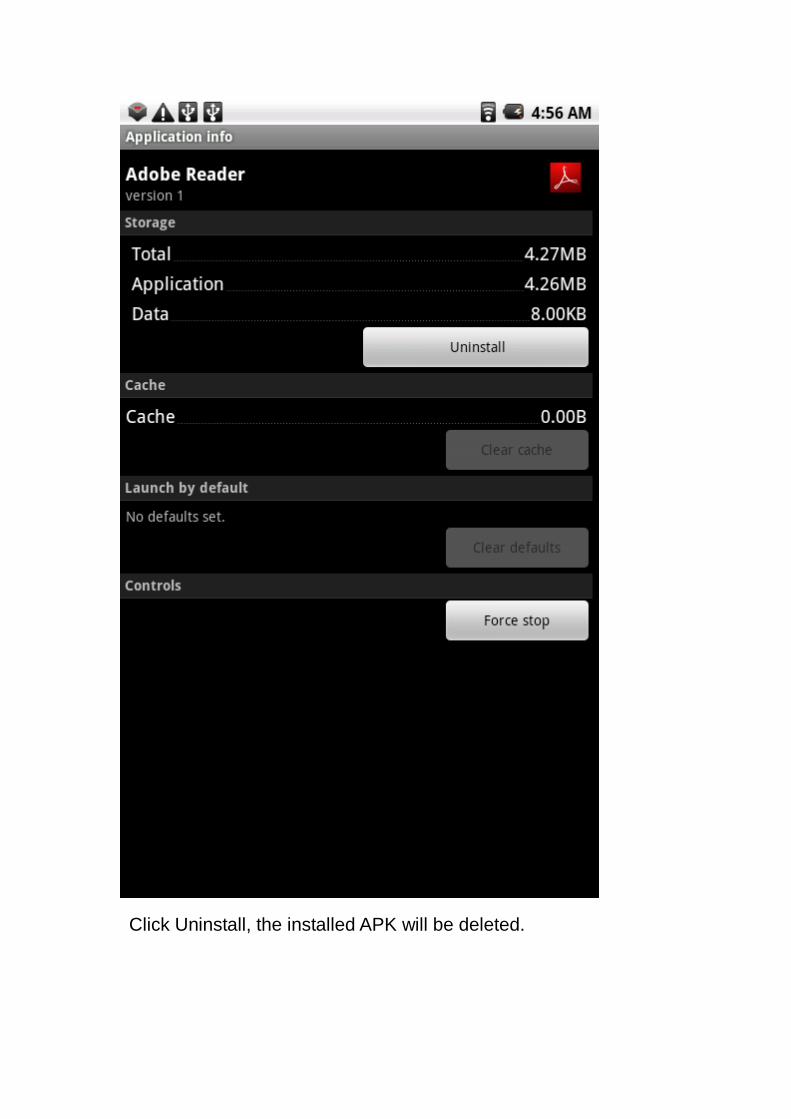
Click Uninstall, the installed APK will be deleted.
4.Account and synchronization
Manage user’s Gmail account, after connecting to WIFI network, system synchronizes user’s Gmail connect and emails to device automatically.
5. Privacy
Allows you to reset the device to factory setting.
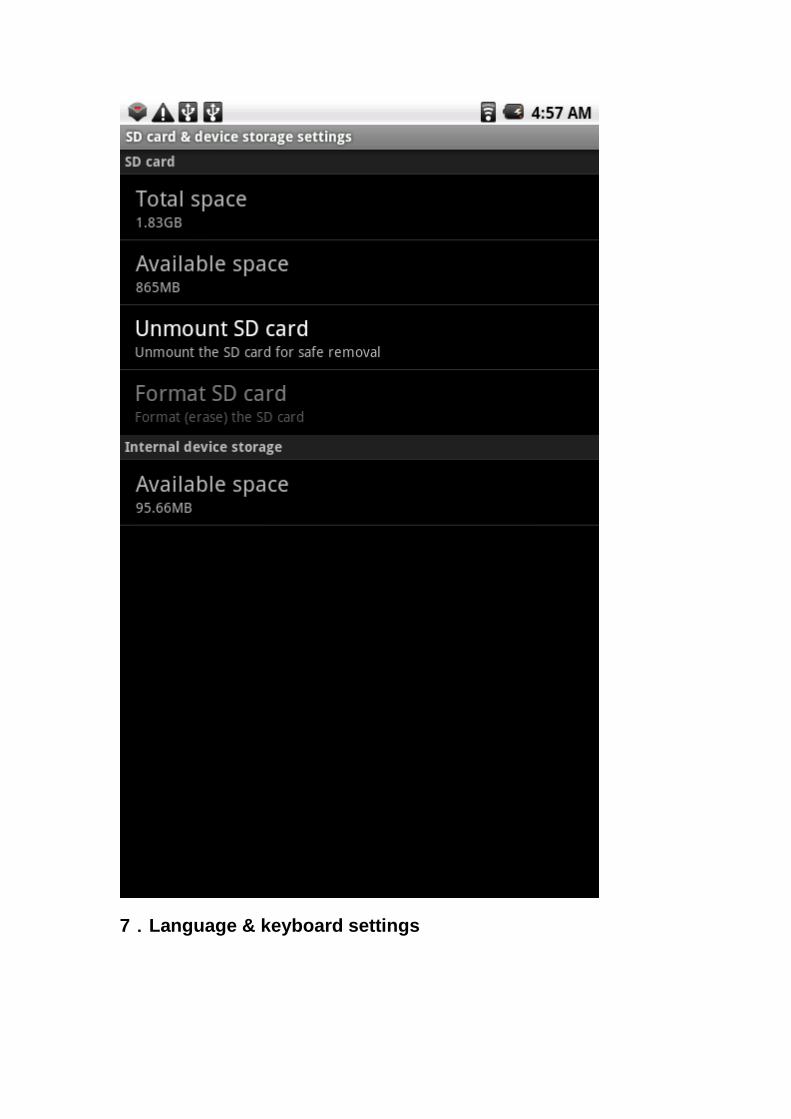
6.SD card & device storage settings
Check device memory and Micro SD card status, Unmount the SD card safely.
7.Language & keyboard settings

Click Select locale, you can select different languages as default languages on system menu.
On Text settings, select Input method and keyboard type.

If need others languages besides English on keyboard, click AnySoftKeyboard, then enter to AnySoftKeyboard settings, select Keyboards, click the languages needed, they already added on keyboard input method.
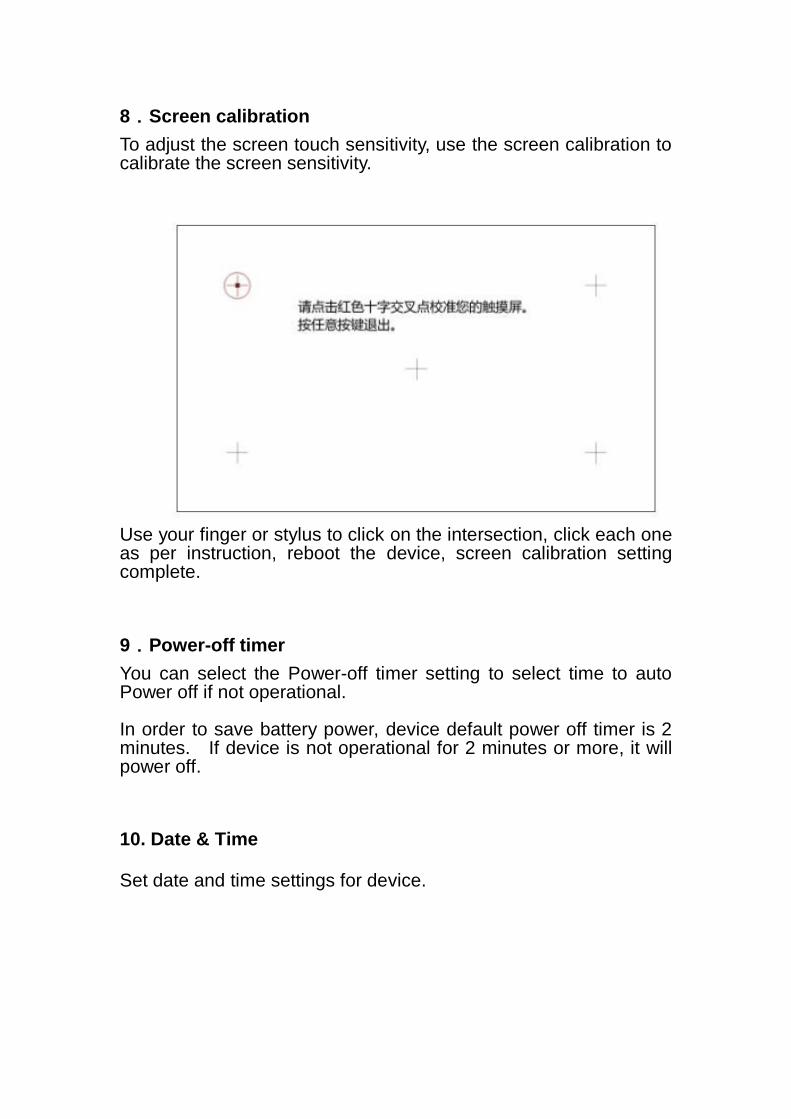
8.Screen calibration
To adjust the screen touch sensitivity, use the screen calibration to calibrate the screen sensitivity.
Use your finger or stylus to click on the intersection, click each one as per instruction, reboot the device, screen calibration setting complete.
9.Power-off timer
You can select the Power-off timer setting to select time to auto Power off if not operational. In order to save battery power, device default power off timer is 2 minutes. If device is not operational for 2 minutes or more, it will power off.
10. Date & Time
Set date and time settings for device.

11.About device
Supplies device software version and battery status.
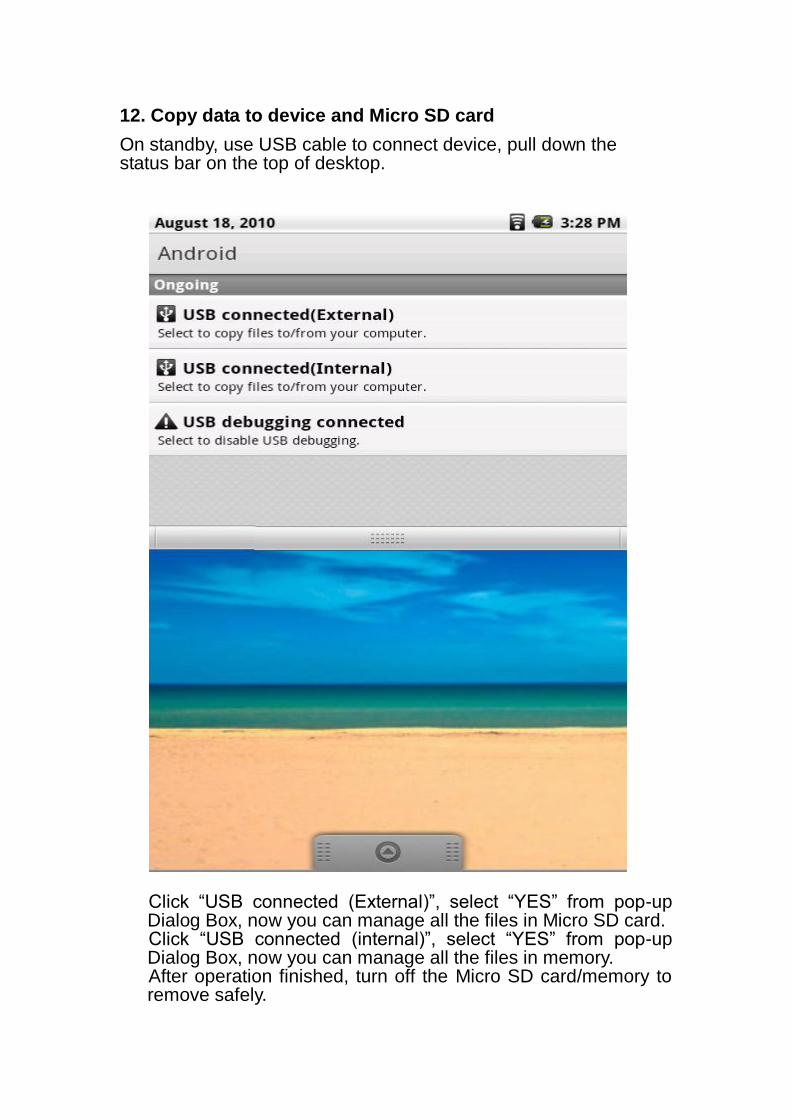
12. Copy data to device and Micro SD card
On standby, use USB cable to connect device, pull down the status bar on the top of desktop.
Click “USB connected (External)”, select “YES” from pop-up Dialog Box, now you can manage all the files in Micro SD card. Click “USB connected (internal)”, select “YES” from pop-up Dialog Box, now you can manage all the files in memory. After operation finished, turn off the Micro SD card/memory to remove safely.

13. Install Application software from Micro SD card
Copy all the APK you would like to install from your Micro SD card, insert your card into the device, turn off your card. On home screen, click “App Installer” icon, system will scan all available APK for installation from your card.

When finish scanning folder, select the install/uninstall APK, click “ MENU”, select install, wait until it finishes installation.
14. Desktop application
On standby, long press blank part of desktop, will appear
Select Shortcuts, can put the APK icons to desktop from home screen.
Select Widgets, can put some APK to desktop, manage APK easily and conveniently.
Select Wallpapers, can change the current desktop background.
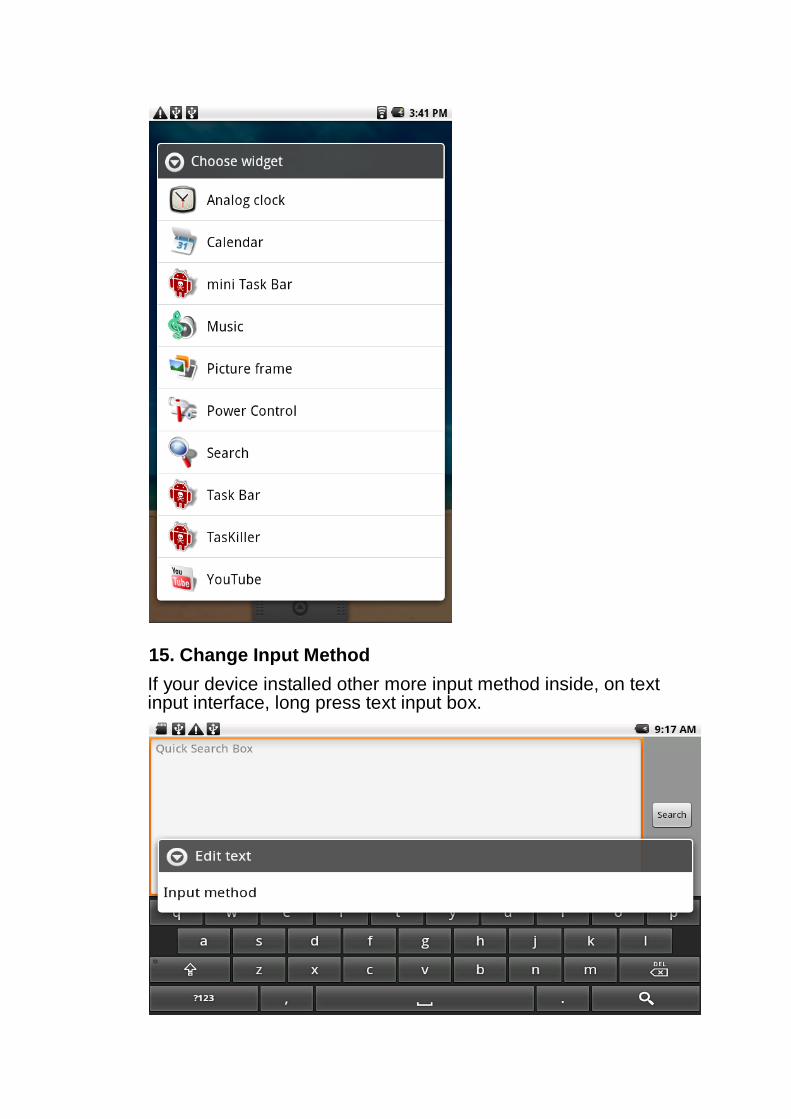
15. Change Input Method
If your device installed other more input method inside, on text input interface, long press text input box.

Select Input method, change to AnySoftKeyboard, keyboard will appear the language you install to type on Search Box.
16. ASTRO File management
Is a very powerful and easy resource management software that helps you to copy/paste files easily. Meanwhile, the software has powerful ability to manage APK and can copy the 3
rd party APK to a Micro SD card.