hst expert model (exterior)
TRANSCRIPT
8/14/2019 HST Expert Model (Exterior)
http://slidepdf.com/reader/full/hst-expert-model-exterior 1/13
www.hubblesite.org/go/model
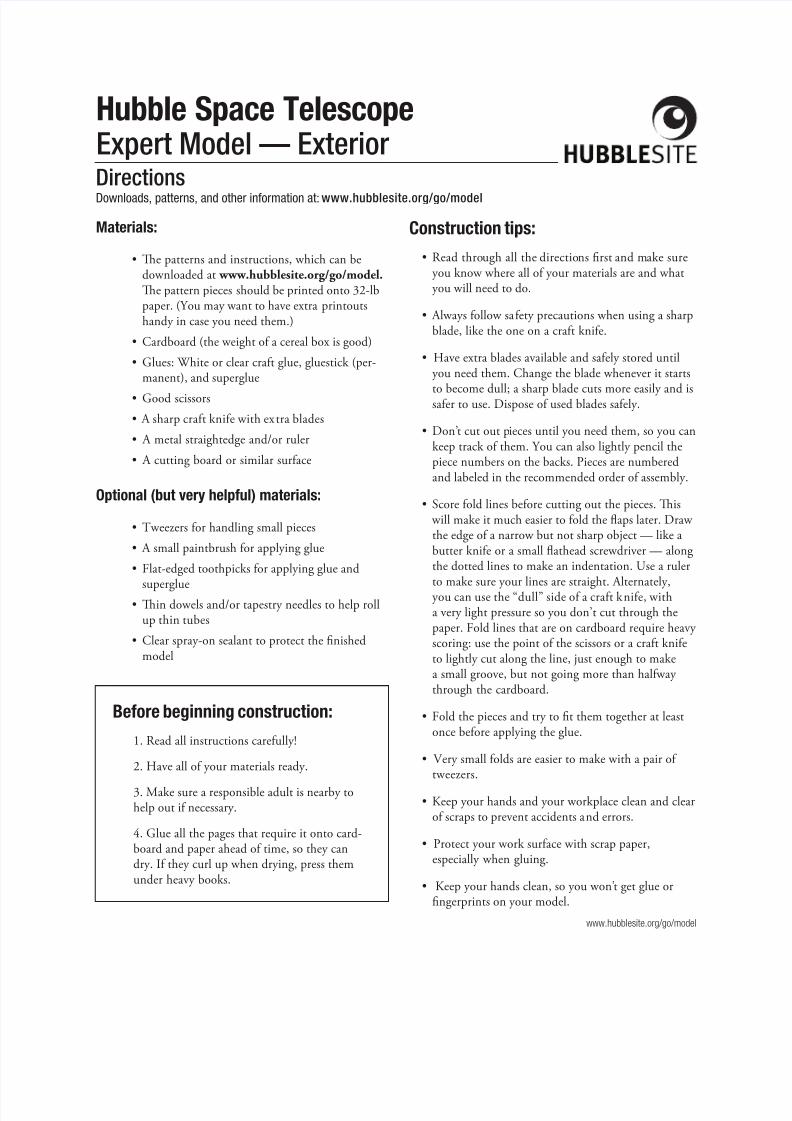
Materials:
Te patterns and instructions, which can be•downloaded at www.hubblesite.org/go/model. Te pattern pieces should be printed onto 32-lbpaper. (You may want to have extra printoutshandy in case you need them.)
Cardboard (the weight o a cereal box is good)•
Glues: White or clear crat glue, gluestick (per-•manent), and superglue
Good scissors•
A sharp crat knie with extra blades•
A metal straightedge and/or ruler•
A cutting board or similar surace•
Optional (but very helpful) materials:
weezers or handling small pieces•
A small paintbrush or applying glue•
Flat-edged toothpicks or applying glue and•
superglueTin dowels and/or tapestry needles to help roll•up thin tubes
Clear spray-on sealant to protect the nished•model
Construction tips:
•Readthroughallthedirectionsrstandmakesureyou know where all o your materials are and whatyou will need to do.
• Alwaysfollowsafetyprecautionswhenusingasharpblade, like the one on a crat knie.
•Haveextrabladesavailableandsafelystoreduntilyou need them. Change the blade whenever it starts
to become dull; a sharp blade cuts more easily and issaer to use. Dispose o used blades saely.
•Don’tcutoutpiecesuntilyouneedthem,soyoucankeep track o them. You can also lightly pencil thepiece numbers on the backs. Pieces are numberedand labeled in the recommended order o assembly.
• Scorefoldlinesbeforecuttingoutthepieces.is will make it much easier to old the aps later. Draw the edge o a narrow but not sharp object — like abutter knie or a small athead screwdriver — alongthe dotted lines to make an indentation. Use a rulerto make sure your lines are straight. Alternately,you can use the “dull” side o a crat knie, withaverylightpressuresoyoudon’tcutthroughthepaper. Fold lines that are on cardboard require heavy scoring: use the point o the scissors or a crat knieto lightly cut along the line, just enough to makea small groove, but not going more than halway through the cardboard.
• Foldthepiecesandtrytotthemtogetheratleastonce beore applying the glue.
•Verysmallfoldsareeasiertomakewithapairoftweezers.
• Keepyourhandsandyourworkplacecleanandclearo scraps to prevent accidents and errors.
•Protectyourworksurfacewithscrappaper,especially when gluing.
• Keepyourhandsclean,soyouwon’tgetglueorngerprints on your model.
Hubble Space TelescopeExpert Model — ExteriorDirectionsDownloads, patterns, and other information at: www.hubblesite.org/go/model
Before beginning construction:
1.Readallinstructionscarefully!
2.Haveallofyourmaterialsready.
3. Make sure a responsible adult is nearby tohelp out i necessary.
4. Glue all the pages that require it onto card-board and paper ahead o time, so they candry. I they curl up when drying, press themunder heavy books.

8/14/2019 HST Expert Model (Exterior)
http://slidepdf.com/reader/full/hst-expert-model-exterior 2/13
www.hubblesite.org/go/model
Hubble Space Telescope Advanced Paper Model Instructions — Exterior
•Whenusingwhiteglue,applyinathincoatwithaat toothpick or a small paintbrush. I you wait a ew seconds or it to become “tacky” it will stick moreeasily.
•Whenusingsuperglue,followallthesafetyprecautionsonthelabel.BeVERYcarefulnottogetany on your hands or skin, and do not touch piecesthat have had superglue applied or several minutes,to be sure it is dry.
•Onlyuseasmuchglueasisneededtocoverthesurfacesyou’reconnectingwithathinlayer.Toomuch glue may end up on your hands or on thesurace o your model.
• Becarefulusingsharpscissorsandblades.Havea responsible adult nearby to help you i you needassistance.
•Whengluingtwoatpiecesofpapertogether,use
as little glue as possible. Te glue stick is very helpulor this.
•Unlessotherwiseindicated,allowthegluetodrybeore going on to the next step.
• Takeyourtimeandbepatient!
on Noteboom describes himsel as a “space age kid.”Growing up in the Netherlands, he ollowed the progressofthespaceprogram,hearingaboutSputnikontheradio,and watching Neil Armstrong take his rst steps on theMoon. But what really ascinated him was the technol-ogy – the technology that got the astronauts to the Moon,the technology that brought the journey back to peoplearound the world.
“Te orce o the rockets, the hardware part – that was what interested me,” he said. “It was amazing to see pic-tures on the television screen, especially in that time, thatcame all the way rom the Moon.”
Hegothisrstcardboardmodelofaboatwhenhewas11yearsold,asapresentfromSinterklaas,theDutchversionofSantaClaus.emodeljoinedhisalreadyextensivecollection o plastic models, but ater a short time thatphase gave way to a period o model-train building thathe shared with his ather. And that was it until the day about ve years ago, surng the Web, that he started nd-ing plans or elaborate paper models online.
Lured by nostalgia, and with both training in silversmith-ing and job experience in construction engineering underhisbelt,Noteboomthoughthe’dgivethepapermodels
anothershot.“Isaid,‘Well,let’stryit,’anditstuck,”hesaid.Whenhecouldn’tndamodeloftheSaturnVrocket,hedecidedtodesignhisown.“Ididn’tstartwithan easy one,” he noted wryly. “You just put your teethtogether and go. It took a lot o patience, paper , ink andtime.It’sfascinatingtoseeamodeltakingshape.”
Hisloveoftechnologyandengineeringisevidentinboth the level o detail and the painstaking attention tostructure and precise construction in the 35 paper models
Noteboom has designed and shared online with the world.Oneofthegreatestcomplimentshe’sreceived,hesays, is rom a model builder that praised the way every-thing about his models “t together.”
Te allure lies in constructing something three-dimen-sionaloutofaatpieceofpaper,Noteboomsaid.“It’sintriguing to make something very sturdy out o some-thingthatisn’t.Itreatthepieceofpaperasapieceofmetal, though metal is easier because you can shape itintointricateforms.Withpaperyoucan’t.”
In addition to designing paper models, Noteboom is a
licensed radio amateur hobbyist specializing in televisiontransmissions.HelivesinthesmallvillageofRozenburg,nearRotterdam,withthreecats,andhandlesfacilityoperations at a local school.
MoreofTon’smodelscanbefoundat http://jleslie48.com
About Hubble Space Telescope
ishighly-detailedmodeloftheHubbleSpaceTele-scope(HST)isintendedforexperiencedmodel-builders.
You may build only the exterior part o the model whichshowsalloftheHST’ssurfacefeatures,oryouhavetheoption o also making the removable internal structure
which includes the mirrors and instruments. All o the les you need can be downloaded rom www.hubblesite.org/go/model
edetailsofthismodelarebasedonthetelescope’scongurationafterServicingMission3Bin2002.
Construction tips continued:
About the designer

8/14/2019 HST Expert Model (Exterior)
http://slidepdf.com/reader/full/hst-expert-model-exterior 3/13
Hubble Space Telescope Expert Model — Exterior Directions Page 1
www.hubblesite.org/go/model
Assembly instructions
At shroud
1. Glue tabs 3 and 4 to the back o piece 1 along the opposingshorter sides (g. 1).
2. Ten glue the ree ends o the tabs behind piece 2 so thatit orms a short tube, making sure that the row o bays onpieces 1 and 2 line up together, orming a ring around the topo the tube. Be sure the edges o the pieces 1 and 2 meet very tightly (g. 2). Tis is the at shroud: the three black circlesare on the ront side and the row o bays goes around the top.
3. At shroud supports: First, turn the at shroud upside-downand test-t ring 5 into the bottom. It should t snugly justinside the edge o the tube. Apply a small amount o glue allthe way around the outside edge o the ring. Careully insertthe ring just inside the bottom edge o the tube and make
sure the paper edges are securely glued all the way around.Let it dry (g. 3).
4. Rollstrip6intoaloopandinsertitinsidetheaftshroudsoitis up against the glued ring (g. 4). Use very little glue to glue
down the ends i necessary.
5. Insert ring 7 into the tube so that it snug against the edge o the spacer strips. Alternate spacers and rings until you get toring 15 (g. 5).
6. Glue ring 15 just inside the top edge o the at shroud, justas you did with the rst ring, by applying a little glue aroundtheoutsideedge(g.6).
7. Baydoors:esheetwiththeinstrumentcovers(16-19)andthebaydoors(20-29)shouldbefoldedinhalfandgluedtogether or extra thickness beore you cut out the pieces.
IP: a glue stick works very well or this (g. 7).
8. Cut them out and apply the covers and doors where indicatedon the at shroud (g. 8). I you gently bend them into acurved shape to match the at shroud cylinder beore glueing,they will be much easier to apply.
g. 1
g. 3
g. 5
g. 2
a.
b.
g. 4a.
b.
a.b.
g. 6
g. 7
g. 8

8/14/2019 HST Expert Model (Exterior)
http://slidepdf.com/reader/full/hst-expert-model-exterior 4/13
Hubble Space Telescope Expert Model — Exterior Directions Page 2
www.hubblesite.org/go/model
9. Gentlybendpiece30intoacurvedshapeandglueintoplaceonpiece28(bay10)(g.9).
10. Careully old pieces 31 and 32 and gluethemintoshapeasshallowboxes(g.10a-
c). When dry, glue the boxes into positionon pieces 21 and 22 (bays 2 and 3) (g.10d).
11.NICMOScryocooler:Gluepieces34and35whereindicatedontopiece33,theNICMOScryocooler(g.11a).Scorethetabonthecryocoolerdeeplyandbendinwardata90°angle(g.11b).Using this tab at the top end, and the back o thecryocooler at the bottom, glue onto the at shroud cylinder
where indicated. It will stick out at a slight angle rom the atshroud (g. 11c)
12.Aftscuplates:Assemblepieces36and37asshowntomakethe scuf plates, gluing the tabs underneath the thin curvedstrip. Make sure that the ends o the thin strip line up withthe edges o the outer glue tabs (g. 12).
13.Foldpieces36aand37aintosmallboxesasshown,withthetopapsopenedout.[NOTE:Withsmallboxeslikethese,itis extra important to score careully beore cutting the piecesout. Use tweezers to bend the aps, and to help atten themdown when gluing.] Glue the nished boxes open-side-downto the underside o the scuf plates (g. 13).
14.Rollthestrips38and39astightlyaspossibleandgluetheends down so you have a very small cylinder; it may be easierto roll them around a piece o thick wire or a tapestry needlei you have such items (g. 14).
15. Glue these small cylinders on top o the scuf plates at thecross mark. Glue the assembled scuf plates where indicatedon the at shroud body, so that the at side o the plate acesthe “ront” o the at shroud, where the three circles are (g.15).
g. 9 g. 10
a.g. 11
d.
b.
c.view from front view from side
view from bottom view from top
g. 12
g. 13
g. 14g. 15

8/14/2019 HST Expert Model (Exterior)
http://slidepdf.com/reader/full/hst-expert-model-exterior 5/13
Hubble Space Telescope Expert Model — Exterior Directions Page 3
www.hubblesite.org/go/model
16.OPTIONAL:Addtheyellowhandrails(piece40)whereveryou see them on the model. Cut the strips out very careully,and run a little glue along the cut sides to keep the yellow decalattachedtothecardboard.Holdthestripsuptothemodel to see how long each rail should be and trim them oneat a time. As you go along, glue them into place with very
littleglue,orwithadabofsuperglueattheends(g.16).UsethewhiterailstripforthehandrailsontheNICMOScryocooler.Setanyextrahandrailsasideforuseonotherpieces o the model.
Base
17. Glue pieces 42 and 43 where marked onto the telescope base,piece41(g.17).OPTIONAL:Addyellowhandrailsasyoudid on the at shroud.
18. Glue one o the pieces labeled 44 underneath one o thepieceslabeled45,tomakeasmallvent(g.18a-b).Repeatso
that you have our completed vents. Glue each o the ventsonto the telescope base where marked (g. 18c).
NOE: Tis model can be made with the optional“Internal” section, which nests inside o it. I you aregoing to make the Internal parts, you will need to makethe base removable. Otherwise, you can permanently gluethe base shut.
I you need to keep the telescope base removable:
19A. Gluepieces46and47tothebackofthetelescopebase(g.19A).
20A. Gluepieces48and49aroundtheedgeofpiece47sotheymakearing.Gluepieces50and51totheoutsideoftheringtoreinforceit(g.20A).
21A. est-t the base into the bottom o the at shroud: itshould t easily, like a lid (g. 21A).
I you don’t need to keep the telescope base removable:
19B. Glue the telescope baseonto the bottom o theat shroud so that the
two yellow “L” shapedpieces ace the ront o thetelescope, where the threeblack circles are on the atshroud(g.19B).
g. 16(optional)
c.g. 18
g. 17
g. 19B
g. 19A
g. 20A
g. 21A

8/14/2019 HST Expert Model (Exterior)
http://slidepdf.com/reader/full/hst-expert-model-exterior 6/13
Hubble Space Telescope Expert Model — Exterior Directions Page 4
www.hubblesite.org/go/model
Forward shroud
22. Glue one hal o glue tab 53 to the back o piece 52 alongoneoftheshorterends.engluetheotherendofpiece49to the ree end o the tab, making sure to line up the edgesclosely ( g. 22). You may nd this easier i you rst roll
piece 52 around a smaller tube or cylinder so that it is already curled into shape beore gluing. Tis cylinder is the orwardshroud:theNASA/ESAlogosareonthefrontsidenearthetop.
23. Glue piece 54 around the top o the orward shroud wheremarked.Startatthepointmarked“S”tobesuretheguideson this piece match up with the guides underneath it (g.23).
24. Just like the at shroud, the orward shroud has a series o reinforcingringsandspacers(55-69).Aftercuttingouttherings, color the backs and inside edges with black paint or a
black marker.
25. Apply glue lightly around the edges o ring 55 and careully insert it just inside the top edge o the orward shroud,holding in place until the glue is dry (g. 25).
26. urn the tube over and insert one o the rolled spacers into itso it is up against the ring and the black side is showing (g.26).Itmaybeeasierifyoucurlthespacersrst,asabovewiththe orward shroud. Without gluing, alternate spacers and
rings until you get to the last ring. You willhave lled the orward shroud a little morethan halway.
27. Glue the last ring in place with a little glue
around the edges, as you did with the rstring, so that it is snug against the last spacerin the tube (g. 27).
28.Curlandinsertpiece70snugagainstthelastring,asyoudid with the other spacers, using a little glue to secure it (g. 28).
29. Glue piece 71, the at shroud connector, around the insideo the bottom edge o the orward shroud, using the printedcenterlineasaguide(g.29).
g. 22
g. 23 g. 25
g. 26d.
g. 27 g. 28
g. 29

8/14/2019 HST Expert Model (Exterior)
http://slidepdf.com/reader/full/hst-expert-model-exterior 7/13
Hubble Space Telescope Expert Model — Exterior Directions Page 5
www.hubblesite.org/go/model
30.Gluepieces72and73together,back-to-back(g.30).
31.OPTIONAL:ifyouareusingtheyellowhandrailsonotherparts o the model, careully cut and seal rails 74 as youdid with the previous set in step16.Withadropofgluehereand
there, careully bend the rails toglue them into the curved shapesprintedonpiece73(g.30).ere
will be a ew extra pieces or thetopsoftheOTAbayslaterwhich
will need to be applied the same way.
32.Slidepiece73overtheaftshroudconnectorlikeacollar, with the bay placement guides acing up. Glue into place atthe base o the orward shroud, being careul to align the redarrows/bay placement guides on both pieces (g. 32).
33.AssembletheOTAbays,pieces75-83(g.33).
34. Glue the bays where marked onto the orward shroud and toeach other (g. 34).
35.Gluepieces84-86wheremarkedontopofthebays(g.35).OPTIONAL:Addtheyellowhandrailstothesethreepieces,as described in step 31.
36.OPTIONAL:Ifyouwanttoaddthebaydoorsforextradimension, as with the larger bay doors on the at shroud,gluepieces75x-83xontothefacesoftheOTAbays.Becareul to line up the hinge markings around the edges (g.
39).
37. Gluepieces87-95wheremarkedontheforwardshroud.Itmaybeeasierifyougentlybendpiece95intothepropershape beore gluing (g. 37).
38.Gluepiece96intoplaceontheforwardshroud,bendingslightlybeforegluing.Gluepiece97tocontinue96;itwillarchslightlywhengoingoverthetopofpiece95(g.38).
g. 30
g. 31
g. 32
g. 33
g. 34
g. 35
g. 36(optional)
g. 37
g. 38
piece 75
other OTA bays

8/14/2019 HST Expert Model (Exterior)
http://slidepdf.com/reader/full/hst-expert-model-exterior 8/13
Hubble Space Telescope Expert Model — Exterior Directions Page 6
www.hubblesite.org/go/model
39.OPTIONAL:ifyouareusingtheyellowhandrails,applythem now to the orward shroud as you did on the at shroudinstep16.
40.Assemblepieces99-101,thehigh-gainantennaclamps(HGAclamps)(g.40).[NOTE:Withsmallboxeslikethese,itis
extra important to score careully beore cutting the pieceout. Use tweezers to bend the aps, and to help atten theaps down when gluing.]
41.GluetheassembledHGAclampswheremarkedontheorward shroud, so that the curved side is acing the top o the tube (g. 41).
42.Assemblethesolararrayclamp102,whichisverysimilartotheHGAclampsabove.Gluepiece103toitwhereindicated(g.42).Assemblepieces104-105thesameway.
43. Glue completed solar array clamps to the orward shroud
where marked, so that the curved side is acing the top o thetube and the yellow brackets ace the bottom (g. 43).
44. o make the base or the solar panel connector, old piece106intoashallowboxandgluepiece107insideforsupport. Applyalittlegluearoundtheedgesofpiece107sotheapson the box will stick (g. 44).
45. Glue the solar panel base onto the orward shroud where marked,so that the circle is closer to the top o the model (g. 45).
46.Repeatthelasttwostepswithpieces108-109tomaketheconnectoron the other side. Tis is where the solar arrays will attach.
47. Assemblepieces110and111(g.47).
48.GluewheremarkednexttotheOTAbays(g.48).
49.TomakethebasesfortheHGAhinge,rstfoldpieces113and 115 in hal along the dotted line and glue them togetherto make them double-thick. Assemble pieces 112-115 thesame way you made the solar array connector base in step 44.
50.Deeplyscorepiece116onthereversesideandbendforwardatapproximatelya45°angle.Gluepiece117behindpiece116(g.50).Repeatwithpieces118-123tomakefouridenticalbrackets.
51. When all parts are dry, glue two o the brackets onto eachbasewheretheguidelinesare(g.51).Ifwhitegluedoesn’thold securely, use superglue.
52.GluethecompletedHGAhingeassembliesoneithersideofthe orward shroud where marked, making sure the bracketsare acing in the direction shown (g. 52). Tese will hold thehigh-gain antenna later.
g. 40
g. 41
g. 42
g. 43
g. 44
g. 45
g. 47
g. 48
g. 52
g. 50
g. 51
e.

8/14/2019 HST Expert Model (Exterior)
http://slidepdf.com/reader/full/hst-expert-model-exterior 9/13
Hubble Space Telescope Expert Model — Exterior Directions Page 7
53. Tere are our identical magnetic torquers, each using oneset o the identical piecesprovided. o make one, rstglue piece 124 where markedon the orward shroud, makingsure the darker end is toward
the bottom o the tube andthe lighter end toward the top.Scoredeeplyandfoldthetwobrackets,125and126,andholdthem up to the model to test-tthem against the guidelines.Bracket125isclosertothetop,and126isclosertothebottom(g.53).Whenyou’resurewheretheygo,gluetheminto place with a dab o superglue or tacky white glue alongthe edge, and hold in place until they set.
54. Glue piece 127 diagonally across the two brackets, centeredacross the cross mark as shown (g. 54).
55.Repeatthelastthreestepstomaketheotherthreetorquers. We have provided extras o piece 127, in case you need them.
56.Grapplexture:Scorepiece128deeply.TesttthisbracketontotheforwardshroudabovetheleftsideoftheOTAbays,usingthemarkedguidesforplacementasshown.Securewithafewdropsofglue(g.56).
57. Gluepiece129onthesideofthebrackettobraceit(g.57).
58.Repeatthelasttwostepswithpieces130-131abovetherightsideoftheOTAbays,makingamirror-imageoftherst
bracket (g. 58).
59. Glue pieces 132 and 133 on top o the brackets, positioned sothe small white cross is toward the top o the orward shroud(g.59).
60. Forward scuf plates: Glue pieces 134 (x4) and 135 (x4) to theorward shroud where marked, to make two sets o bracketbases(g.60).
61.Deeplyscoreandfoldpiece136andtest-tontheforwardshroudtotheleftoftheNASA/ESAlogos,sothefeetofthebracket are centered on top o the bases you applied in the
previous step. Te wider side o the center platorm shouldfacethelogos.Glueintoplace(g.61).
62. est-t and glue piece 137 across the top o the bracket, and139acrossthebottom,asshown(g.62).
63.Repeatthelasttwostepswithpieces139-141,ontherightside o the logos. Tis should be a mirror o the rst bracket,also with the wide side o the platorm acing the logos (g.63).
g. 53
g. 57
g. 58
g. 59
view from front
view from top
view from top
view from front
g. 60
g. 61
g. 54
g. 56
g. 62
g. 63
view from top
view from top
www.hubblesite.org/go/model

8/14/2019 HST Expert Model (Exterior)
http://slidepdf.com/reader/full/hst-expert-model-exterior 10/13
Hubble Space Telescope Expert Model — Exterior Directions Page 8
www.hubblesite.org/go/model
64. Assemble scuf plates 142 and 143 the same as the at scuf plates in step 11, being sure that the edges o the curved stripline up with the glue tabs (g. 12).
65. Attach each to the top o one bracket, so that the at edge o theplatefacestowardthelogos(g.65.)
Aperture door
66. Glue piece 144 on top o piece 145 to make the door lock andglueintoplaceonthefrontoftheforwardshroud(g.66).
67. Gluepieces146and147tothebackoftheforwardshroud wheremarked(g.67).
68.Assembledoorhinges148and149.Gluethemtotheorward shroud where marked, so that the shorter sides aceeachother(g.68).einsideedgesoftheboxesshouldlineup with the pieces you just glued to the tube.
69.Gluepieces150and151totheinnersidesofthehinges,being sure that the wedge shape sticks up over the box asshown(g.69).
70. Glue piece 152b to the back o the aperture door piece 152beore cutting it out. Glue details 153-155 to the ront o 152 whereindicated(g.70).
71.Assemblepiece156(g.71).Gluewheremarkedontotheaperture door (piece 152), being sure to line up the smallyellow boxes.
72. When all parts are dry, attach the aperture door to thehinges by gluing the small wedges to the guide marks onpiece156(g.72).edoorwillbeproppedopenata16°angle.
Solar panels
73. Cut out pieces 157 and 158, including all the interior pieces.Reinforcethesescaoldswithsuperglue:Carefullyapplyaew drops o superglue along the back and/or cut edges o the scafolds, using the glue applicator tip or a toothpick tospread it quickly and evenly (g. 73). Be very careul not to
view from bottom view from top
g. 65
g. 64
g. 66
g. 67
g. 68 d. g. 69
g. 70
g. 71
g. 72
g. 73

8/14/2019 HST Expert Model (Exterior)
http://slidepdf.com/reader/full/hst-expert-model-exterior 11/13
Hubble Space Telescope Expert Model — Exterior Directions Page 9
www.hubblesite.org/go/model
touch the glued suraces or several minutes, set them aside ina sae, well-ventilated place to dry.
74.erearefourcopiesofpiece159andfourcopiesofpiece160;thetwovariationshaveaslightlydierentpatternonthe yellow side. Fold them all in hal and glue shut so that the
patternsareontheoutside.Keepthepiecesseparate(g.74).
75.Whenthescaoldsarecompletelydry,gluepieces161and162totheirreversesides.Besuretomatchuptheendsproperly with the other side (g. 75).
76. Using the marked guidelines on the yellow panels, glue thepanelsectionstothescaoldsasshown(g.76).eyellowside should ace and peek through the scafold, the black side ace out, and the triangular tabs point toward the centerbeam o the scafold, with a very small gap in between thelet and right panels.
77.Gluepieces162and163togetherback-to-backto make the solar panel connector. Do thesamewithpieces164and165(g.77).
78.Rollpiece166intoathincylinder,rollingittightenoughtoglue down the ree end at the marked line, making a narrow tube with an outer diameter o about 4mm. You only needto apply glue to the last ree inch or o the paper (g. 78).Repeatwith167.TIPS:Pieces166-170maybeeasiertomake i printed/photocopied onto a piece o thinner paper,like standard typing paper, instead o the heavier paper usedintherestofthemodel.Tryrollingpieces166and167uparound a small dowel, with a diameter or no more than 2mm,
removing the dowel ater the cylinder is glued.
79. Glue the solar panel connector disk to one end o yourcylinder to make the solar panel arm, leaving the other endree. I one end o they cylinder is smoother than the other,gluethedisktotheless-smoothend(g.79).
80.Rollpiece168verytightlyaroundthefreeendofthecylinderintoanothershorttube,sothegreysidefacesout.It’simportantthatit’sasnugt.Gluedownthefreeendofthestrip, being careul not to accidentally glue it to the longercylinder.Whenit’ssecure,slideitothelargercylinder(g.80).Younowhaveashorttubethattsexactlyovertheend
ofthesolarpanelarm.Repeatwithpiece169andtheothercylinder.
81.Oneatatime,glueoneendofthesmallcylindertothecirclemarkedonthesolararrayconnector(pieces106and108)onthe orward shroud and let dry thoroughly (g. 81).
82. Complete the solar panel array by gluing the scafold to thearm via the connector disk. Te at end o the center beamo the scafold is glued where marked on the disk (g. 82).
g. 74
g. 75
g. 76
g. 77
g. 78
g. 79
g. 80
g. 81
g. 82

8/14/2019 HST Expert Model (Exterior)
http://slidepdf.com/reader/full/hst-expert-model-exterior 12/13
Hubble Space Telescope Expert Model — Exterior Directions Page 10
www.hubblesite.org/go/model
When your model is complete, the ree end o the solarpanel arm should t exactly into the “socket” on the orwardshroud(g.97).
Te model’s solar panels can rotate into position just likethose on the real Hubble Space elescope. In orbit, the
solar panels are aimed towards the sun, while the openend o the telescope is usually points away rom the sun.
High-gain antennas (HGA)
83.Gluethebeamspieces170and171togetherback-to-back(g. 83).
84.Reinforcethebeamsalongthecutedgewithsuperglue,asyou did with the solar array scafold, being very careul not totouch the glue or the glued surace until dry (g. 84).
85.Repeatthelasttwostepswithpieces172and173,andsetboth aside to dry.
86.Gluepieces174and175back-to-back.Gluepiece176toonesideand177totheother(g.86).Repeatwithpieces178-181.
87. When all parts are completely dry, glue the round end o onebeamtothestaronthesmallerassembly(g.87).Repeat
with the other two pieces and let dry thoroughly.
88.Colorthebacksideofpieces182-183and185-186withablack marker. Cut out the outer dish 182 without scoring any o the glue tabs. I you have a thick marker, especially one
with a pointed cap, wrap the piece around it lightly to curlthe paper into shape (g. 88).
89. Careully glue the long tab underneath the ree end o piece182 so it orms a shallow “cone” with a hole in the middle(g.89).
90. Do the same with piece 183. Use the glue tabs on the largerdish to glue the two sections together into a small bowl-likeshape(g.90)
91. Fold piece 184 in hal and glue shut beore cutting out thecircle,forextrareinforcement(g.91).
92. Use the glue tabs on the dish to attach the circle in the center(g.92).
93. Glue the completed dish onto beam assembly as shown(g.93).Setitasideandletitdrythoroughly.
94.Repeatsteps81-85withpieces185-187.
g. 83
g. 84
g. 86g. 87
g. 88
g. 89
g. 90 g. 91
g. 92
g. 93

8/14/2019 HST Expert Model (Exterior)
http://slidepdf.com/reader/full/hst-expert-model-exterior 13/13
Hubble Space Telescope Expert Model — Exterior Directions Page 11
www.hubblesite.org/go/model
95.OPTIONAL:ifyoucanndround-headed sewing pins, you may wantto add them to the radio dishes asan extra detail. I the pins are longerthan 1˝ careully use sharp scissorsor wire cutters to trim them down.
Color the pin black (or at least thehead o the pin) and glue the pointo the pin into the center o the dish(g.95).
96. est-t and then glue the antenna into place on the orwardshroud one at a time: Insert the ree end o the antenna beaminbetweenthebracketsoftheHGAhingeontheforwardshroud (pieces 112 and 114). For a good hold, apply glue tothe end o the beam and to the inside o the brackets, andpinch the brackets together until everything dries. Make sureone o the dishes is pointing up and the other is pointingdown(g.96).
On the real Hubble, the dishes are usually pointing indiferent directions, in order to better stay in contact withdiferent communications satellites.
97. Connect the orward shroud to the at shroud, using the atshroud connector as a guide. Glue the two halves together sothattheNASA/ESAlogoisinastraightlinewiththethreeblackcirclesontheaftshroud(g.97).
98. Insert the solar panels into their sockets and rotate into apositionyoulike(g.98).TIP:eblacksurfaceofthepanels has the solar receptors, and is usually acing away rom
the open end o the telescope.
99. When all glue is completely dry, you can add a protectivevarnish to protect your model rom ngerprints. In a well-ventilated area and ollowing all instructions on the can,spray the model all over with a clear matte aerosol varnishand let it dry thoroughly.
Te exterior o the model is now complete!
I you want to make the internal parts o the telescope,continue on to the next section. Otherwise, your model isnow ready or display.
g. 95g. 96
g. 97
g. 98
We want to hear rom YOU!
Ifyou’venishedamodel,whynotshareit with the world? ake a picture and senditin;wemaypostitonHubbleSite.Pleasevisit the model gallery or details and to see
what other people have made
www.hubblesite.org/go/model